Dual Nikon, Canon, Panasonic & Minolta Battery Charger

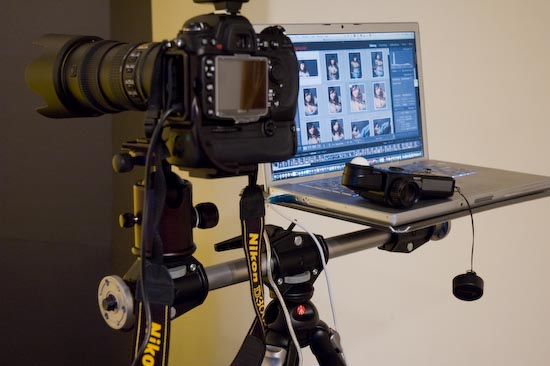
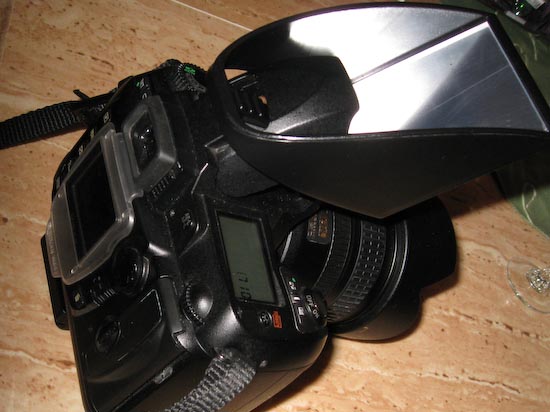
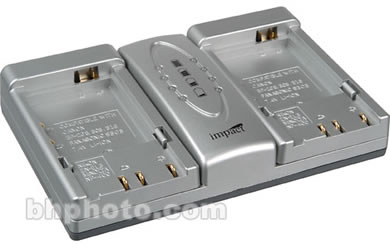
One of the major keys to digital photography is being able to take the shot. Sounds like a "duh" statement I know, but what I’m referring to is having a charged battery. Nothing is more frustrating than running out of power in the middle of a shoot. So as digital photographers we’ve learned to carry extra batteries. I use a battery grip with my Nikon D300 (and my Nikon D80 before that) which allows me to put two batteries in my camera at once. This does a great job at practically doubling my shooting time, however, there are still times where shooting a lot will drain the batteries. Therefore I carry at least two extra batteries at all times. However, when it’s time to swap out batteries, I don’t want to charge them one at a time. That’s where the Impact Dual Battery Charger comes in.

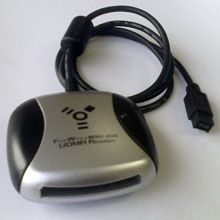
I’ve used the Impact Dual Battery Charger for over a year now. It’s been working out great. I found out about it when I bought a couple of their (Impact) batteries for my D80. While the charger has been working great, one of the two batteries no longer works (there goes my $10 savings). So I don’t recommend their batteries, but the charger will charge your original batteries so you’re good to go. Now keep in mind that most companies will recommend that you only charge their batteries with their chargers. So if you have warranty concerns, then I guess you can stop reading here. However, like I said, I’ve charged my Nikon brand batteries for over a year with the charger with no issues.

It charges the following battery types:

Canon: BP-208, BP-308, BP-315
Minolta: NP-400
Nikon: EN-EL3, EN-EL3a, EN-EL3e
Panasonic: CGA-S303

The Impact Dual Charger goes for $69.95 at B&H Photo & Video

Shooting tethered just got easier

I’ve been doing a lot more studio shooting lately and the one thing I’m addicted to (besides pretty models) is shooting tethered into Adobe Photoshop Lightroom. Although my new Nikon D300 has a nice big LCD screen on the back, it pales by comparison to the 15" display on my MacBook Pro. So I like to see the shots as I take them on the laptop screen so that I can make adjustments to lighting, exposure, etc. as I go. This way my shots bypass the camera’s memory card and download right to my hard drive of choice. My setup involves the D300, a long amplified USB2 cable, Nikon’s Camera Control Pro 2 software, which by the way supports the new Live View feature of the D300/D3. However, I think this app is still way overpriced! (Canon shooters, just use the software that came with your camera – It’s free) and of course Adobe Photoshop Lightroom. This setup has been working just fine.

However, what I got (after reading Joe McNally’s blog) was this Bogen-Manfrotto Double Head Accessory Arm and Gitzo Laptop tray that sits right on my tripod. I had been using a somewhat flimsy portable stand or whatever surface was nearby for the laptop to sit on. The problem was that I was always having to stoop down to see the screen. This NEW setup on top of my tripod puts everything at eye level. The difference is night and day in my productivity and speed. So I want to thank Joe for turning me on to this solution. It’s been working great.

Back to editing…


Have tripod will travel

Although I travel with a digital camera almost everywhere I go, I almost never traveled with my tripod. Don’t get me wrong, I recognize the value of having a tripod in various situations, but the problem is that my tripod (a professional level Bogen-Monfrotto) was always too big to fit in my luggage. I also never check my photo gear for fear of theft/damage. So I would forego the tripod and in many cases miss certain shots that you just can’t get handheld.

Well that all changed over the holidays when I got the Gitzo Traveler 1540T  super lightweight and small tripod. Gitzo’s unique patented 180º folding mechanism accommodates the head inside the folded tripod legs and makes this the smallest folded tripod for its open size and number of sections. I was amazed at how small and lightweight it was. It weighs just two pounds! (one pound lighter than a MacBook Air) Yet it still accommodates up to 9.9 lbs. I weighed my Nikon D300 with battery grip and L-Bracket and I still had a few pounds to spare. The Gitzo Traveler 1540T doesn’t come with a ballhead and since I’m using the Kirk BH-1 ballhead on my Bogen tripod, I went with the Kirk BH-3 ballhead to go with the with Gitzo. The BH-3 weighs a mere 19 ounces. This combination works perfectly and I now have no problem flying with a tripod. As a matter of fact I gave it its first workout in San Francisco when I shot from Coit Tower during Macworld Expo. I was able to do the long exposures that you can only do with a tripod.

Any professional photographer will tell you that tripods and ballheads are expensive. The rational is "Do you think it’s wise to use a $20 tripod to hold a $1,800 DSLR + the $1,600 piece of glass you have on it?" Using that logic, I have to agree. However, professional tripods are outrageously expensive (IMHO). Carbon fiber lightweight ones are even more expensive. Good ballheads aren’t cheap either. The Gitzo Traveler 1540T goes for $560 at Amazon.com ($559.95 at B&H Photo). The one thing that keeps me from thinking about the price so much is that unlike digital cameras, once you get a good tripod, it will last you for years and years and years without the temptation or need to "upgrade."

If you think $560 is a lot of money for a tripod (and it is!), check out the Gitzo GT90TT 90th Anniversary Limited Edition Titanium Traveler Tripod. They only made 390 of this collectors item, so you might be a little stunned by the price 🙂

If you’re looking for the lightest, smallest professional level tripod, the Gitzo 1540T is the best in its class! I hope to be using this tripod for many years to come.

Great book for the weekend

I heard others rave about this book and after reading this review, I couldn’t wait to get my copy which was already on order. The Moment It Clicks by world famous photography Joe McNally is PHENOMENAL. I’ve only just started reading it and I can’t really get into reading it just yet because I’m totally distracted by the amazing photography throughout the book. I find myself wanting to thumb through the book again and again just to see the pictures.

I hope to one day be 1/10th as good as Joe. This book has inspired me on many levels to be more creative and not be afraid to try new techniques. I highly recommend it. I do warn you that you may not get much else done for wanting to stare at the imagery throughout this book.

Amazon has it for $32.99 ($54.99 USA list) and it’s already one of their best sellers. Also check out Joe’s new blog which is in "My Favorite Blogs" down below on this page.

Recommended reading for the weekend

I had a blast reading Scott Kelby’s "The Digital Photography Book" volume one. I learned a ton of great tips that have greatly improved my photography. Well, he’s written a follow up book and yes you’ve guessed the title "The Digital Photography Book" volume two. This one picks right up where volume one left off.

I found both titles to be easy reads and not biased towards one brand of camera or another (provided you’re shooting with Canon or Nikon 🙂 ), all kidding aside, there are tips that can be used by digital photographers at all levels. The new book is the same format as the last one where there is one photo and one tip per page. The 217 page book is a must read for those of you looking to improve your skills behind the camera. There is very little mention of Photoshop, so it’s not a Photoshop how-to book. Instead Scott aims to have you get it right in the camera so that you don’t have to do a lot of work in Photoshop. Scott wrote this book as if you and he were on a shoot together and you asked, "how would I shoot this?" Rather than give you a lot of technical jargon and the history of photography, he would just tell you what to set your camera and how to compose the shot. I devoured the first volume in a couple of days and couldn’t put it down. However, due to time constraints I’m only half way through this one so far. I have already learned a lot, but what I’m realizing is that this stuff is starting to sink in. The reason I say this is that while the book is packed with all NEW tips and techniques, there aren’t nearly as many "aha" moments for me this time around. This means that I’ve learned a lot since the first volume and it’s sticking. I can’t wait until my next shoot to put some of these new techniques to use. This book is another winner!

The weekend is here and hey, you need a new book to read anyway. So check out The Digital Photography Book volume two. Amazon has it for $14.99. There’s probably a copy available at your local book store as well.

Super fast CF reader for your desktop

As a digital photographer there is one part of the process that I find to be the most boring and that is waiting to see my shots. You may remember that I did a series of tests using the Synchrotech ExpressCard CF Reader. That also led me to do a series of tests on different brands of CompactFlash cards to see which ones were the fastest. I’m still quite pleased with my ExpressCard reader and my choice in cards (SanDisk, PNY and Lexar), but it begs the question, "What about desktop computer users?"

If you use a desktop Mac or PC as your post processing computer, then chances are you don’t have an ExpressCard slot. ExpressCard slots are common on modern day notebook computers. So what options do you have? Well up until recently I was using a rather slow SanDisk USB card reader (only slow because USB is slow by comparison). That all changed when the good folks at Synchrotech sent me a new FireWire 800 UDMA Reader! Not only is this puppy FireWire, it’s FireWire 800! That’s right, there’s a FireWire 800 cable built right in. If you only have FireWire 400, they will sell you a 800 to 400 adapter cable. However, keep in mind that you will only be operating at FireWire 400 speeds which are comparable to USB if you go that route.

The beauty of this reader was that I took it out of the box and plugged it in to my Mac Pro tower and there was nothing else to do. No drivers to mess with. It just works.


How fast is it?

Of course the thing you’re really interested in is, "how fast is it?" So I did some tests using the same cards and the same 1GB folder of test images as before (yep, that stuff was still on my desktop from before). I was very pleasantly surprised to see that the results were on par with my ExpressCard PCIe reader:


Card Read 1.1GB Write 1.1GB
Lexar Pro UDMA 300x 2GB card 1:00.4 43.2
PNY Optima Pro UDMA 4GB card 46.7 42.1
SanDisk Extreme IV 2GB card 37.4 57.6
Using a USB Card Reader (best time) 2:22  


Once again SanDisk came out ahead on the Reads with PNY coming in fastest on the writes. Granted your writes will happen in the camera and not in a card reader, but this should give you some idea of what to expect. Also to get the best speeds you will need the later generation cards that use UDMA like the ones in my test suite. If your camera supports these cards, you’ll also be able to take shots at your camera’s faster fps speeds. While this card reader is nice and speedy, I still prefer the ExpressCard reader for my MacBook Pro. My MacBook Pro does have a FireWire 800 port, but it’s so much nicer not having to have a cable.

The Synchrotech CFFire 800 Pro FireWire 800 to CompactFlash Drive Read-Writer goes for $59. If you have a FireWire 800 port and speed is important to you, then you can’t go wrong with this purchase.

Adobe Photoshop Elements 6 for Mac

Adobe has officially announced Photoshop Elements 6 for Macintosh. This new version is the Universal Binary version (native to both Intel and Power PC based Macs) that Mac users have been waiting for. I’ll be showing this new version at Macworld Expo next week and who knows, if time permits I may even record a sneak peek podcast before then on my Adobe Creative Suite Podcast. So stay tuned. In the meantime, check out all that’s new here.

This new version is slated to ship early in the second quarter of 2008 and will sell for $90 ($70 upgrades).

Wacom Cintiq 12WX rocks!

I really took vacation over the past couple of weeks and just really shut down to recharge. However, I did pursue one of my passions and that was digital photography. I worked in a couple of model shoots and of course that meant that I had some retouching to do. Right before the holidays the great folks at Wacom were kind enough to ship me a New Cintiq 12WX to play with and demonstrate at my upcoming Macworld Expo sessions. I was already a big fan of the Wacom Cintiq 21UX and the Intuos line of tablets. However, as much as I love the 21UX, I just don’t find myself at my desk as much as I’d like to be. I’m on my MacBook Pro in different rooms depending on my mood. So until now I would mostly use my Intuos 4×6 which is also a great size to travel with. However, that all changed for me on Friday. I fell in love with the new Cintiq 12WX. It’s just the right size and the built-in LCD is gorgeous! The best way to describe it is to take a Intuos 6×11 and replace the tablet area with an LCD display that is also a pressure senstive tablet and you have the Cintiq 12WX.

I spent all day (and I mean ALL DAY) with it Friday retouching photos in Adobe Photoshop CS3. I had the Cintiq connected to my MacBook Pro via DVI and USB (for the tablet functions). I used it as my main display and the display on my MacBook Pro as the secondary display (yes it also supports mirroring). I kept Adobe Photoshop Lightroom open on the MacBook Pro display and Adobe Photoshop CS3 open on the Cintiq. Although it comes with an easel type stand, I found it most comfortable to just hold it in my left arm while I used the pen in my right hand. There were times also where I just laid it flat on the table and worked.

As with all the latest professional tablets from Wacom, I found the touch strips and side buttons to be indispensable. I configured the left touch strip to change brush size and the right one for zooming in and out. I configured the left buttons to the Brush Tool, Healing Brush, Clone Stamp, Space bar (for quick panning) and Undo. I configured the pen rocker switch for Option-Click. This setup meant that I rarely had to touch the keyboard and NEVER had to touch the trackpad.

The Cintiq performed FLAWELESSLY throughout the day. It did get a little warm, but nothing alarming and no where near hot. My only minor criticism (c’mon you know me. There would have to be at least one, otherwise you wouldn’t think I was doing an honest review) is that the breakout box seems a little cluttered. I don’t necessarily have a better design in mind and I do appreciate the fact that there is only one cable attached to the display itself, but when I looked at the box laying on my table it looked like an octopus. The breakout box is where you connect power, the display, the DVI/VGA cable and the USB cable. These are all necessary, so like I said, I don’t know of a better way to do it. OK, I lied there is one other small thing. I would like to see a way to connect this to a projector at the same time. I have to call the folks at Wacom and see if there is a way to be connected to the Cintiq AND a projector at the same time. Otherwise, I won’t have any way of demoing it to the masses. The breakout box connects to the video out on your Mac or PC, but doesn’t provide a pass-through or video out to go out to a another display or projector. Other than those two minor things (and the second one really won’t affect most), this new Cintiq is PERFECT!


The Bottom Line

If you need (OK, want) an integrated display and tablet, there simply isn’t a better choice! I love the Intuos line and the bigger Cintiq, but this new Cintiq 12WX hits the sweet spot on portability AND price. Amazon has it for $985.70 (list is $999). I couldn’t imaging retouching another image without it!

Your popup flash doesn’t have to suck

One thing I learned quickly in this digital photography game is that the popup flash on most digital cameras is for emergency use only. Ask any professional how often do they use the built-in flash on their digital SLRs and they will look at you as if you’ve just grown a thumb in the middle of your forehead. There are several problems with the popup flash, two of which are it’s location (on top of the camera near the forehead) and it’s too much of a harsh spotlight.

The folks at Lightscoop.com hope to change all that with their $30 Lightscoop. I ordered this after a recommendation from Lesa King. When it arrived, I was thinking "this is never going to work." So of course I fired off a couple test shots (before and after) and I was stunned by the difference. Yes, it does work!


How does it work?

It works by sitting in your hot shoe in front of your flash. There is a mirror in the front that bounces your on camera flash off the ceiling/wall up and behind you back down onto your subject.


As with most things there are a couple of caveats. For one, it’s not as compact as I wished is was. Yes, it’s small and very light weight, but it doesn’t fold down. Not big enough to fit over a lens (for storage in your camera bag) and a little too big to fit in a pocket. It takes up a lot less space than an external flash, but I’m hoping the next version could fold down flat. The second caveat is that they recommend very specific settings: Manual mode, ISO 800, Spot Metering, widest lens aperture (f2.8, f3.5, or f4.0 depending on your lens), shutter speed of 1/200th, Exposure Compensation set to +1, no curtain sync, slow sync, or red-eye reduction. Some of these settings are a no-brainer, but others seem a little restrictive. However, they are suggestions and not the law. You can experiment and see which settings you like best. Also since it bounces the light off the ceiling/wall it won’t work in all settings such as outside, cathedral ceilings, gymnasiums, churches, etc. All-in-all, it performs as advertised and is a great solution for $30. They models for Nikon, Canon and Pentax as well as a Standard version and a Warming version (I’m using the Standard version). It’s also smaller than most other types of on camera flash workarounds. On camera flashes still suck, but this makes them suck a whole lot less. I took a few test shots with my Nikon D70 (yes, I could have used the D300, but the D70 was closer – lazy, I know).


with the built-in flash on a Nikon D70 shot in RAW (hot spots and some blown out highlights)

with the built-in flash on a Nikon D70 shot in RAW and the Lightscoop

with the built-in flash on a Nikon D70 shot in RAW and the Lightscoop and a simple exposure adjustment in Adobe Camera RAW

Scott’s D300 Review

Hey, I’ve been on the road this week and in all day meetings all week long. So I haven’t had any time to play with new tech toys. However, my buddy Scott Kelby is back from vacation and posted a really good review of the D300. This is from his perspective of what he liked and what he didn’t like and is a must read for any D200 user thinking of making the leap (or anyone else clamoring for more info on the Nikon D300).

I absolutely love my D300 and have been having an ABSOLUTE BLAST shooting with it. I know some have been having issues with some of the early units and it looks like I’m one of the lucky ones who got one that works as advertised. It is by far the best camera I’ve ever owned or shot with.