Epson P6000 Multimedia Viewer/Backup Review

One of the things that photographers are constantly concerned about is backing up their photos. While it's pretty easy to do if you're in the studio, it's more challenging when you're out on location. For this reason I have been using Epson Multimedia viewers for the last couple of years. These devices are pretty cool because they are small enough to fit in just about any camera bag and have just about all the functions you would want.


What's built in?

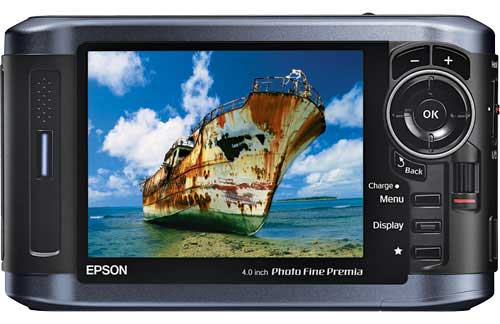
First of all they have a built-in hard drive. The current models come in either 80GB or 160GB capacities. They have a high quality 4 inch LCD screen and both Compact Flash and SD slots built-in. After a shoot you simply take the card out of your camera and put it in the Epson Multimedia Viewer.


Execute the Backup command and it will copy the photos from your card onto its built-in hard drive. Put the card away, don't erase it! The whole point of a backup is to have your data in two or more places. If you erase the card, then you are still vulnerable because the photos will only be in one place.


What other features does it have?

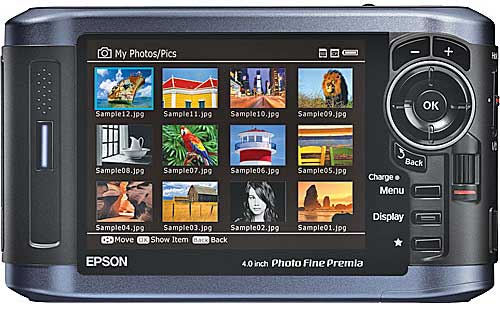
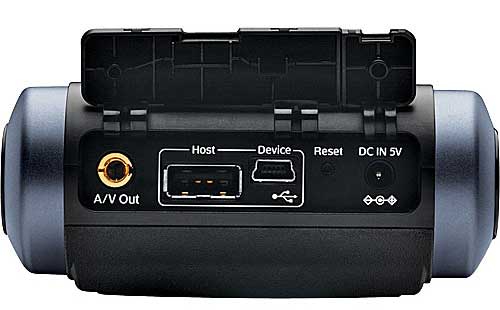
The Epson Multimedia Devices can also play music which is handy for doing impromptu slideshows. You can have your MP3 files already on the device and be ready to play them. The other more important feature is that these devices support Camera RAW files (yes, of course it supports JPGs too) from the most popular cameras today. This means that you can not only backup your cards, but you can use its 4 inch screen to display your pictures. Both the P6000 and P7000 now support 94% of the Adobe RGB color space which means you'll be seeing your photos more true to the way they will actually print instead of the striped down sRGB color space. Lastly there is also video/audio out jacks so that you could hook up your P6000 or P7000 to a TV or projector to show your work on the big screen.
 

How well does this device perform?

I've had my new one for a few weeks now and I have no real complaints. The backup speed is acceptable and I haven't had any card/image compatibility problems. It seems that with my P3000 there were certain CF and SD cards that couldn't be read (mostly the cheaper off brand cards from friends). Navigating the images is done via a jog wheel, which after working with an iPhone for the past year seems kind of archaic now. I would love to be able to "flick" my images by. Speaking of the interface, it has improved a little since the P3000, but it's time for an over-hall. There are still too many screens, menu options to get to what you want at times.


What about the price?

Here's the biggest problem of them all. These devices are best in class and you'll pay a premium because of that. They are, in my opinion over priced. The 80GB Epson P6000 lists for $599.99 (yes $600 bucks). The 160GB Epson P7000 lists for $799.99 (nope, it's not a typo, $800!). Considering the cost of storage these days and the fact that I don't imagine that there was a ton of RD that went into these latest models, they are easily $200 over priced. Now I have no idea what these cost to manufacture and it's quite possible that I'm missing something here. I admit that. However, there are full blown PC laptops on the market that cost less. For example, here's a Gateway/eMachines laptop that comes with a 160GB hard drive, 15.4 inch LCD, 3GB of RAM, Keyboard, DVD burner, and wireless networking for $599.99. Is this a quality laptop? Probably not, but the fact is it has more components and costs less. It seems that Epson keeps increasing the storage, but never lowers the price. 


The Bottom Line

Although these things are pricy, I do LOVE my P6000 and would never think of going on location for a shoot without it. Once I get back home, I can either copy the cards again to my computer or I can simply plug in my Epson P6000 via the USB cable and copy all the shots that way. Since it does mount on the desktop as a hard drive, I can easily copy my portfolio to it to show perspective clients. Do I recommend them? Yes, if you have the budget for it. They work as advertised and have never let me down. Battery life is decent too and the rechargeable battery is removable and user replaceable. As far as which model to get, I can't really see much of a reason at all to get the P7000. Granted you do get double the hard drive space, but it will also cost you $200 MORE! Seeing how I doubt that I would ever shoot 10 8GB cards worth of shots in one setting, the 80GB model is plenty. I'm also remind that the model I upgraded from only had a 40GB drive and that was never too limiting for me either. So 80GB is more than enough. As for as room for improvement goes, for the prices that these are going for I would at least like to see some wireless/Wi-Fi transfer options. Even an EVDO 3g card slot would be nice too. That way I could not only back up my photos, but I could email them directly from the device to someone. Amazon has the Epson P6000 for $579.20 (or less) and B&H has the Epson P7000 for $799.95.

Adobe updates Photoshop Lightroom to 2.2

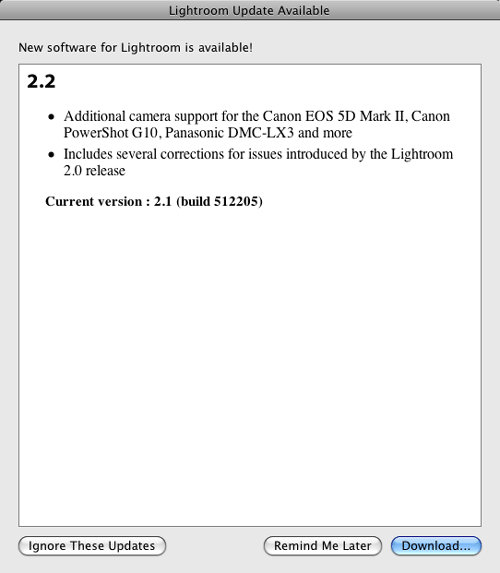
Adobe has released an update to Lightroom! Now you can download the update to Lightroom 2.2 (Mac/Win). This update addresses bugs and provides RAW support for the following cameras:

  • Canon EOS 5D Mark II 
  • Canon PowerShot G10 
  • Panasonic DMC-G1
  • Panasonic DMC-FX150
  • Panasonic DMC-FZ28
  • Panasonic DMC-LX3
  • Leica D-LUX 4

This update also includes the final versions of the very popular Camera Profiles used in the Calibration section of the Develop Module. If you were a beta tester of these profiles, you can delete your old/beta profiles from these locations (thanks to Tom Hogarty and John Nack for this info):

  • Mac: /Library/Application Support/Adobe/CameraRaw/CameraProfiles/
  • XP: C:\Documents and Settings\All Users\Application Data\Adobe\CameraRaw\CameraProfiles 
  • Vista: C:\Users\All Users\AppData\Local\Adobe\CameraRaw\CameraProfiles ] 

Reading SDHC cards via the ExpressCard slot

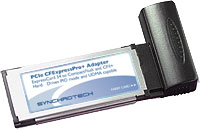
I’ve been using ExpressCard media readers for about as long as I’ve been using a MacBook Pro (years). I’ve used ones from SanDisk, Griffin Technologies, Synchrotech and now Belkin. Hands down my favorite Compact Flash reader/writer is the Synchrotech CF Express Card Reader. This is one of the only ones that takes true advantage of the ExpressCard slot’s speed when reading high-speed UDMA enabled Compact Flash cards. Read my earlier reviews of this card here and here.


What about reading SD cards?

My point and shoot still camera and consumer HD camcorder both use SD cards. So what about those? Although I love my San Disk 12-in-1 memory card reader, it’s really overkill since I’m only dealing CF and SD cards these days. Also since I don’t want to read CF cards at USB speeds, then I would only be using that reader for SD cards. So my answer is a very small ExpressCard Media Reader. I actually have a couple of these. However, I recently realized that the ones I have are older models that don’t read the high capacity SD (SDHC) cards. I ran into this problem just last weekend while doing an Adobe Premiere Pro CS4 demo. I needed the read the 8GB SDHC card from my Canon HF10 HD camcorder. My old Belkin ExpressCard reader wouldn’t mount the card. Luckily there was someone in the audience with a newer model and he let me use his.

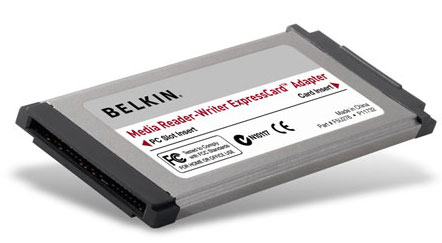
Knowing that I was going to need to use one from here on out (SD cards continue to grow in capacity), I stopped by the Apple Store while I was in San Francisco for Adobe MAX. I was looking for the same brand that he had let me borrow (SanDisk). Unfortunately, I could only find ONE model and it was the Belkin. As a matter of fact it was the last one left and it looked just like the one I was using already. However, on the side of the packaging it did specifically show the SDHC logo, so I took a chance and bought it. When I got back to my hotel room, I compared the two and there was a difference in part number. So apparently Belkin had upgraded it. It worked like a charm!

Although these ExpressCard readers from Belkin and others (not counting the Syncrotech CF reader), go in the ExpressCard slot, they operate at USB speeds. So you really don’t gain anything speed wise (until someone develops a native ExpressCard slot one for SD), however, you do gain on compactness. When this Belkin reader is in the ExpressCard slot it’s flush with the side of my MacBook Pro. So nothing sticks out. You could even leave it in all the time if you don’t use your ExpressCard slot for other cards.

These readers read/write: SD/SDHC, MMC, MMCplus, MemoryStick, MemoryStick Pro, and xD-Picture Card without the need for an adapter. There really is no functional difference between the Belkin, SanDisk and Griffin Technology (although the Griffin reader doesn’t specially call out SDHC. It may not be updated yet!) readers. However, since they they all do the same thing and both the Belkin and SanDisk readers specifically list SDHC, you’re probably better off going with the SanDisk. Why? Because it lists for only $17.29, while the Belkin reader lists for $29.99. Had the Apple Store had the SanDisk model for that price, I would have gotten it.

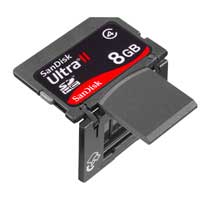
If your Mac or PC notebook has an ExpressCard slot, then having one of these adapters is a must. They will fit in just about any pocket in your laptop bag. If you need Compact Flash support and you have an ExpressCard slot, then go with the Syncrotech. It will be way faster than your USB reader. If all you’re going to use is SD/SDHC cards, then you might be better off going with SanDisk’s very clever Ultra II SD/SDHC Plus Cards. These cards fold in half to expose a USB plug that goes right into your computer. No card reader necessary. They are my FAVORITE SD cards hands down!

Why no 8″x12″ photo paper?

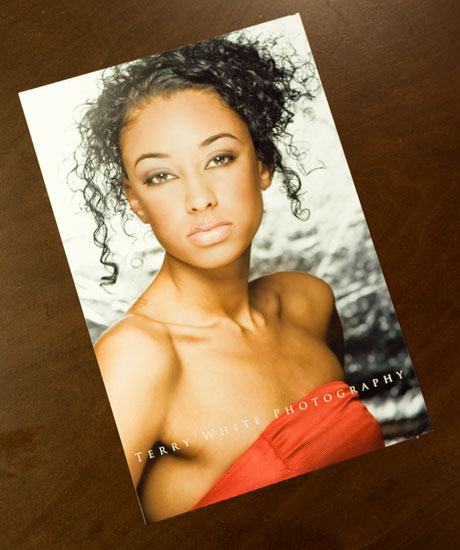
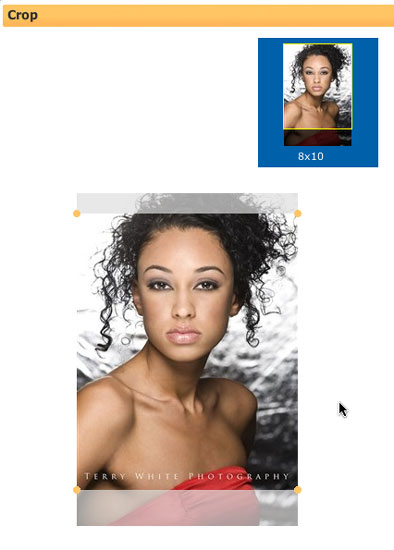
Everyone I know shoots digitally now! While I’m sure there are some folks out there that are perfectly content using film, I would dare say that there are more people shooting with digital cameras these days. I don’t do much photo printing, but when I do I always wonder why I end up having to crop my photo to fit the “traditional” sizes of 5×7, 8×10, etc. While visiting another photographer friend of mine, I happen to notice that she had tons of prints that were slightly larger than 8″x10″, they were 8″x12″. The beauty of this size is that your digital file will need little to no cropping. When I asked her where she got them printed, her response was Costco! I was stunned! While I had heard that lots of photographers use Costco with much success, I just didn’t believe it. 


Putting Costco to the test

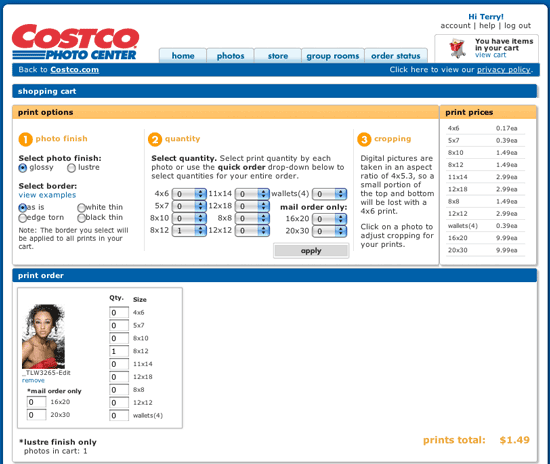
I decided to give it a try. I took one of my recent shots and exported it from Lightroom 2.1 as a high res JPEG and uploaded it to the Costco Photo Center site. A few days later, the print came back and I was very impressed with the quality. The color seemed dead on (I’m not a color fanatic, so Y.M.M.V.) and there was very little if any cropping. At $1.49 for an 8″x12″ print (membership required), I also couldn’t complain about the price! Most services charge roughly $3 for an 8″x10″. The shipping prices were also very reasonable (there is a pickup option too, but I don’t have time for that). By the way, the 8×12 print was on Kodak paper!


Same photo with an 8x10 crop

Same photo with an 8×10 crop


So why can’t I do it myself?

After my very positive experience with Costco, I wondered if I could just order some 8″x12″ inch paper for my Epson printer? Like I said, I don’t do very many prints, but it’s always nice to be able to print a photo on the spot in a pinch. Nope! Nada! The Epson store doesn’t carry this size. Then I just did a quick Google search for 8″x12″ photo paper and basically got nothing!!! I was shocked. I read a few stories about how paper is made and that “odd” sizes are more costly to produce. While that may be true, it would seem that there would be a market for this size even if the price was more. Yes, I’m sure that there is a company out there that either sells this size or will custom cut it for you, but the point is why isn’t it more main stream?


What about frames?

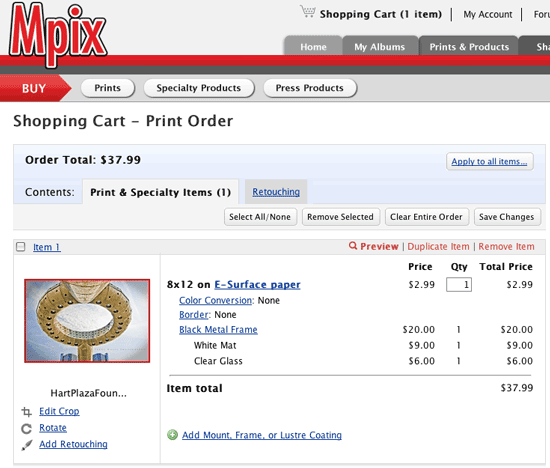
Of course this also begs the question, “what about picture frames?” Sure, there are some 8″x12″ frames out there, but the selection is slim. I also doubt that the average store is going to carry them on the shelf. Why would they if no one really carries the paper? Costco isn’t the only one that prints in this size. I also noticed that Mpix also does 8″x12″s ($2.99). They will also frame them for you and ship them ready to hang. It’s not cheap, but it is very good quality. I recently got some 20″x30″ images done by them, framed and I was very pleased with the results.


When will the industry change?

Why is the industry still stuck on these “old” formats (8×10, 5×7, 4×6, etc.)? When will we see it change? Your guess is as good as mine. However, I’m not going to wait for it to happen. When I need a print from now on it will be with a service that prints the sizes I want without losing part of my image. Perhaps Epson, Canon, HP, etc. will read this and start offering paper/print drivers in digital friendly sizes.

I can dream, can’t I?

Last day to vote!

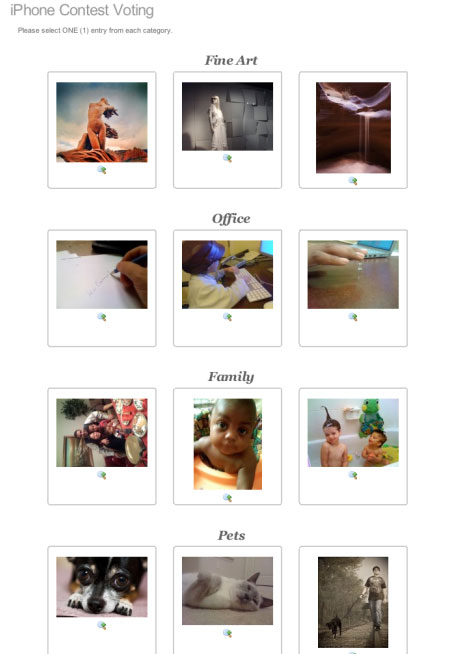
No, I’m not talking about the election for those two guys (although you should be getting ready to vote for one of them too!), I’m talking about the finalists in the iPhone Photo Contest.

We received an overwhelming number of entries and Scott and I have made our picks for the finalists. It’s now up to you to cast your vote for the winner in each category and from those winners Scott and I will pick the grand prize winner! Today is the last day to vote, so head over to the iPhone Photo Contest page and cast your vote right now! We will announce the grand prize winner on November 3rd! Also if you haven’t gotten your copy of The iPhone Book 2nd Edition you can order that today as well.


AT&T Now offers FREE Wi-Fi to iPhone Users

In other iPhone news, AT&T now offers FREE Wi-Fi internet access in thousands of locations such as Starbucks, Airports, Hotels, Convention Centers, Bookstores, etc. See details here.

iPhone App of the Week – PhotoBuddy

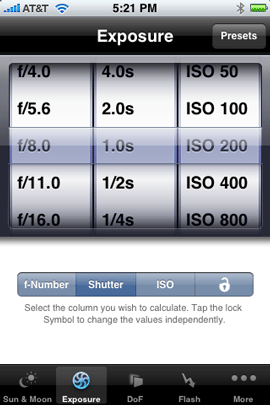
While I didn’t make it the PhotoPlus East tradeshow in NYC this week, I have been spending some time with one of my new iPhone apps. PhotoBuddy aims to be your Photographer Assistant. The main purpose of this app is to help you calculate things like Exposure changes, Flash timing, DOF (Depth of Field) and can even measure the distance of objects (this feature only works on the 1st gen iPhones).

However, it has other useful features too. For example, when I captured the shot below in Spain, the one thing I didn’t know at the time was what time sunrise occurs for the area I was in. The hotel staff looked it for me on the internet.

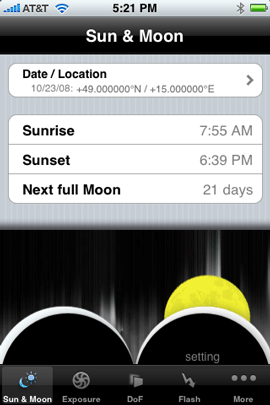
However, had I had PhotoBuddy back then, I would have simply been able to use the built-in Sunrise calculator. The Sunrise calculator is location based and tells you the sunrise, sunset and next full moon. I used to use a separate “Sunrise” app for this. It even displays your current longitude and latitude which is handy for noting and geotagging your photos later in post production. You can also advance to a date in the future to see what time the Sunrise/Sunset will be on a specific day.

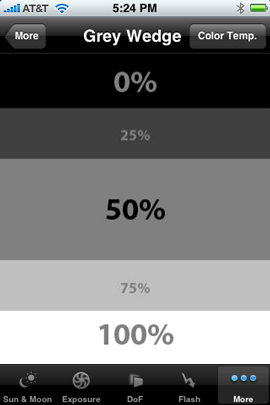
One of the other features I was happy to see is the “grey wedge” to help white balance your shots. Now you have to keep in mind that this feature is not totally accurate because your iPhone’s screen is not color calibrated. So the displayed tones are not neutral. However, they are off by a constant value, so you can use it to color calibrate images.

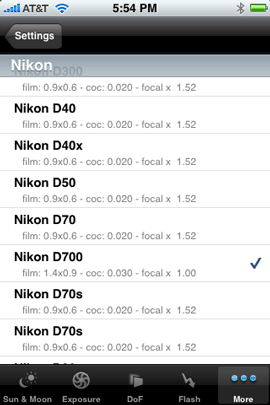
There are a ton of settings. One of the things that helps you quite a bit is that you start off by telling PhotoBuddy which camera model you have. This gives PhotoBuddy the important information that it needs about your sensor. If your camera is not listed, you can choose an “undefined setting” or choose the film equivalent. 


The Bottom Line

There are a few apps with similar features on the App Store. I’ve tried a couple of them so far and I like PhotoBuddy best (a close second would be PhotoCalc, which has a better Sunrise/Sunset calculator). Most of these apps do the same things. However, PhotoBuddy offers a couple of nice little extras and fit and finish. Also PhotoBuddy is only $1.99 so it’s hard to go wrong. You can download PhotoBuddy here for your iPhone or iPod touch.

iPhone Photo Contest – DEADLINE is TODAY!

Today is the last day to submit your iPhone photos for the iPhone Photo contest!

In celebration of my new book,  The iPhone Book 2nd Edition we’re kicking off an iPhone Photo Contest! That’s right, you could win valuable prizes by submitting your best photos taken with your iPhone’s built-in camera.

  1. You can enter up to three photos (total) taken with your iPhone (doesn’t matter if it’s the original model, or the new 3G).
  2. There are five different categories; Friends, Pets, Family, Fine Art, and Office. The winner in each category gets a $100 iTunes Gift card and a copy of “The iPhone Book” 2nd edition.
  3. The Grand prize winner gets a $500 Apple Store Gift Card, and a copy of “The iPhone Book” 2nd edition.
  4. From the photos submitted by the deadline of Oct. 24, 2008, Scott and I will choose three finalists in each category, and then the public gets to vote for the winner in each category (the one getting the most votes wins). Then, from those Winners Scott and I will choose a Grand Prize Winner on November 3, 2008.
  5. This may seem obvious, but of course, the photo has to be taken with your iPhone’s built-in camera.
  6. You can edit your photos using any iPhone application available from the iTunes Apps Store, or any other image editing application, but no other non-iPhone photos may be included in your entry (so you can’t take your iPhone photo and composite it with a photo taken with your DSLR, point-and-shoot, or a stock photo).
  7. You may not give your iPhone to Jay Maisel, Joe McNally, or Moose Peterson. Not even to make a phone call.
  8. There is no entry fee, and the contest is open to everyone; You do not have to buy “The iPhone Book” to enter, but it certainly wouldn’t hurt. 😉
  9. Whining of any kind, about anything, is strictly prohibited.
  10. You can submit your photos, and learn more about the contest at the official contest site (here’s the link).

I can’t wait to see all of your cool shots. Good luck and happy shooting!

Use SD cards in your Compact Flash gear

Chances are that if you’re using an DSLR camera that uses Compact Flash cards, you’re pretty happy with the cards you’re using. However, there are times that it would be nice to be able use the SD card format in my Compact Flash (CF) gear. Don’t get me wrong, I can’t think of too many times (like never) that I would want to stick an SD card into my Nikon D300 or D700. However, there are times that someone will hand me an SD card with pictures on it and I only have either my Firewire 800 CF reader or my ExpressCard slot CF Reader with me. As a matter of fact that very thing just happened to me this past Sunday. I was at my users group meeting and there was a member there taking pictures and at the end of the meeting he handed me his SDHC SD card. I didn’t have my multi-format card reader with me. All I had was my FW800 CF Reader. Luckily I had a USB cable and we just connected his camera to my computer directly to transfer the pics.


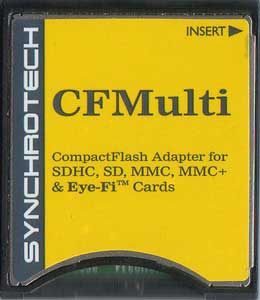
The CFMulti

Actually the CFMulti by Synchrotech is designed and promoted to allow the use of EyeFi SD Wi-Fi cards in CF based cameras (like many of the popular DSLRs out there today). There’s no software to install. You simply insert your SD card in the bottom of this adapter and then put the adapter (SD card and all) in your Compact Flash based device. As I’ve written in the past, I’m not a fan of the EyeFi card. I think it’s cool technology, but just not very usable (at least for me.) So if all this thing did was support the EyeFi card in CF based cameras, then I could really care less.

The picture I painted above is really the situation that I use the CFMulti in. With the CFMulti I can now just carry my favorite, fastest card reader(s) and not have to worry about not being able to read the occasional SD cards.

The CFMulti is going for $28 on the Synchrotech website.

Adobe TV 2.0 is here!

With all the buzz around Adobe Creative Suite 4, you may have missed the roll out of Adobe TV 2.0. Adobe TV is a FREE resource that features all kinds of content from experts all over the globe. When Adobe announced CS4, over 10 hours of tutorial and demo content also went online via Adobe TV. For example, here’s a CS4 Design Premium overview:


Some of the highlights of the new user interface include:

  • Improved site load time
  • Improved site navigation (deep linking to any page via the address bar, all pages can be bookmarked, browser behavior such as back and forward buttons functional, ability to sort clips alphabetically)
  • “Products” menu on homepage enables users to to navigate to content based on which product/suite they’re interested in
  • Users can filter videos based on product, version, skill level, and topic. When you click to a Channel or Product from the homepage, you will see a pick-list on the right of the UI where these selections can be made
  • Closed captioning (not yet available on all videos)
  • Ability to download associated tutorial assets (when available)
  • TRT of clips appear in thumbnails – a widely requested feature from users that have a limited amount of time available and want to find content that they can watch in that time period
  • Ability to present content up to 880 pixels wide at native size – makes presentation of tutorial content much higher in quality

You can can check out Adobe TV here. Adobe also launched French and German versions.

You can also catch the CS4 Launch Event if you missed the web cast, now on Adobe TV:

You can also catch Adobe TV (and a ton of other cool content) via the FREE Adobe Media Player.