Join me for my “Master The Shoot” Digital Photography Workflow Workshop

TWPworkshopSQUARE

By popular demand I’m doing a digital photography workflow workshop. The 1st one will take place Saturday, August 24th, 2013 from 10 AM – 3 PM in my Troy Michigan photography studio. After that I’ll head to Cincinnati Ohio for another one on September 14th.

I’ll walk you through my complete end-to-end digital photography workflow. You’ll get a chance to see how to work with models, how to light for beauty and fashion photography as well as the secrets to my workflow for bringing images into Lightroom 5, organizing, picking the best shots, delivering client galleries and retouching the final selections in Adobe Photoshop.

Seating is LIMITED! So Register Today!

Register for August 24th, Troy MI

Register for September 14th, Cincinnati OH

Why attend this Master the Shoot workshop?

There are several great workshops that concentrate on lighting or photography techniques, what makes this workshop different is that I will take you through the entire process from start to finish. You’ll learn tips and tricks to speed up your entire workflow including image management and retouching techniques that will help you deliver the best shot.

What should I bring?

If you want to participate in the portrait shoot bring your camera.

If you want to follow along with the workflow bring your laptop with Adobe Photoshop Lightroom 4 or 5 and Photoshop CS6 or higher. While this will be mostly a lecture on the workflow and retouching techniques that  I use, you should be able to follow along with many of the tips and best practices. Please note: Everyone is going to have different configurations and shoot slightly different images and therefore it will NOT be a hands on class step-by-step session. If you bring your laptop you’re bringing it as a convenience to you, as there will not be time for me to work with everyone one on one. With that said, you will walk away with my notes/workbook so that you can go back and practice the main points of the day.

Adobe Bridge CC vs. Lightroom 5

brvslr

I have gotten the question “Which one is better, Bridge or Lightroom?” more times than I can remember. In this episode of Adobe Creative Cloud TV the gloves come off for the ultimate smack down. Well actually no, they don’t. The gloves stay on because it’s not really a competition although there are those out there that feel that there needs to be a winner. Actually like many tools, both Bridge and Lightroom have their strengths and weaknesses. In this video I show you how each one works and more importantly which one might be best for you depending on the work you do. Also if you use Bridge or Lightroom I’ve included a few tips that you may not have known about each app.


Are you missing out on my Bonus Content?

See more of my Adobe Creative Suite Videos on my Adobe Creative Cloud TV and get the App below. It features EXCLUSIVE CONTENT that no one else gets to see. This episode has a BONUS CLIP that is available only in the App! My iOS App is a Universal App for iPhone, iPad and iPod touch. I also have an Android version on the Amazon App Store:

Learn Adobe Creative Suite with Terry White - Wizzard Media


Review: Westcott Skylux LED Studio Light

Skylux

I use both standard studio strobes AND continuous lighting. I pick and choose between the two depending on what I’m lighting and what I think will do a better job. For my continuous lighting I have relied on the Westcott’s Spiderlite TD5 and TD6. The TD6 has really served me well with a better overall design over its predecessor. As nice as the Spiderlites are the one thing you’ll never hear anyone say is that they are “easy” to travel with! With the TD6 you have a fairly large head and 6 individual bulbs that need to be unscrewed and packed in a way that they won’t break. Clearly studio strobes and speedlights have the advantage here. So Westcott thought outside the box and combined the two

The NEW Westcott Skylux

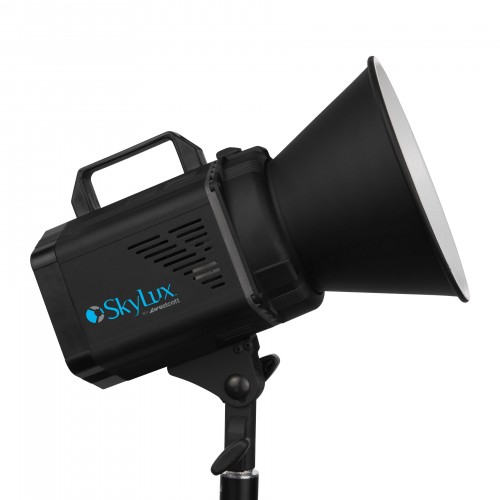
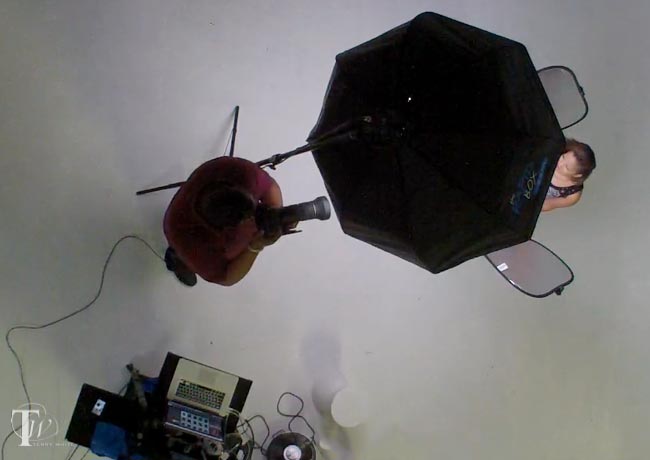
The Skylux is an LED continuous light in the form factor of a regular studio strobe. This is smart for a few reasons. First off they are smaller and MUCH EASIER to travel with. Set up is also faster as it’s just a matter of putting the light on a light stand and attaching whichever modifier you prefer. Speaking of modifiers, that’s the next advantage. You can use virtually ANY light modifier you want. There’s a built-in umbrella mount and you can use a Bowens S-Type Mount Speedring to adapt any of your existing softboxes.

wpid12532-Zahava7-0012-Edit_sm.jpg

The Skylux puts out a 1,000 watt equivalent of soft beautiful light. This puts it on par with the TD6. It also has a dimmer on the back to dial it up or down to give you a 30%-100% range.

wpid12549-skylux-overhead_sm.jpg

The Skylux is 5,500K daylight balanced just like the Spiderlites. This is something that a lot of people take for granted and sometimes go with cheaper solutions only to find out that the color temperature of some of those cheaper products can vary over time.

wpid12538-Zahava7-0096_sm.jpg

You can buy the Skylux as a standalone light or in a complete kit with a stand and either a 36″ or 48″ deep octa softbox as pictured above.

The Good

wpid12536-Zahava7-0052-Edit_sm.jpg

OK so what do I like about the Skylux?

  • Small compact design that fits right in with my strobes
  • Lightweight and easy to travel with if need be.
  • LED light is cool (low heat)
  • Great for both still photography AND video
  • Low fan noise which is crucial for video
  • Easily adaptable to various modifiers
  • Great catchlights


The “Could Be Better”

wpid12534-Zahava7-0033-Edit_sm.jpg

Like any product the Skylux is not perfect and many of you know that I try to do fair and balanced reviews so here’s the areas where the Skylux could be better:

  • Like the Spiderlites, the light output is good, bright and soft, but strobes will give you more light. This means that in certain situations you’ll either need to lower your F-stop, slow your shutter speed or increase your ISO to expose the shot the way you want. With most modern day DSLRs you can usually go up to 800 ISO without batting an eye, but I like to stay at 200-400 ISO as much as I can.
  • There is a power switch on the back of the Skylux head AND on the power brick. However the dimmer is only on the back of the Skylux head. I’d love to see one on the power brick as well.
  • Speaking of the power brick, it is a BRICK and large. In studio this is no big deal at all, but on the go it does add weight and little more bulk.

The Bottom Line

Westcott is no stranger to LED continuous lighting solutions. See the Ice Light below. The products are great and provide great professional results. I have no problem recommending. However, like most newer technologies there is a price to pay and the cost of LED continuous lighting may be price prohibitive to some. What helps me justify the cost in my head is knowing that these solutions can not only be used for still photography, but also for video work. Since every DSLR being made today does both still photos AND video, video lighting is something that more and more people will want to have. I welcome the Skylux to my arsenal.

Skylux Head

Skylux XL kit with Rapid Box 36″ Softbox

Skylux XXL kit with Rapid Box 48″ Softbox


See my original Ice Light Review here.

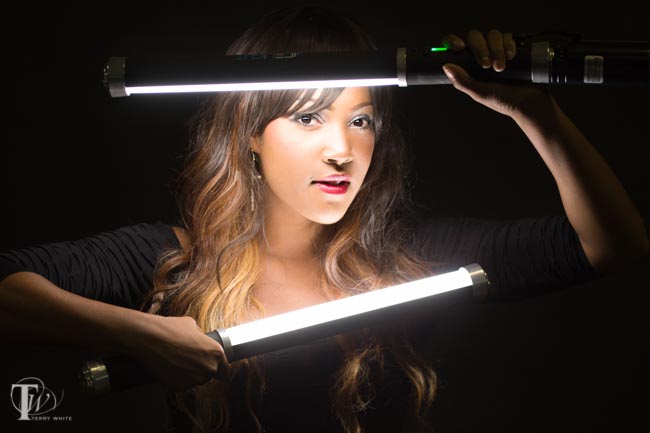
wpid12530-KandiceLynn21-0008-Edit_sm.jpg

I’m still trying to figure out if I like the Ice Light so much because of being a Star Wars fan 🙂

Continue reading “Review: Westcott Skylux LED Studio Light”

How To Use Adobe Camera RAW as a Filter in Photoshop CC

PS_CC_totem

The beauty of Adobe Camera RAW (ACR) is that it provides you with a non-destructive way of making several adjustments to your images easily. However, the problem has always been that once you were in Photoshop and you had an image open, if you wanted to edit that image in ACR you would have to close it first and reopen it in ACR. Now with Photoshop CC you can use ACR with ANY layer on any image without having to close it first. In this new episode of Creative Cloud TV I show how to use the new Camera RAW Filter in Photoshop CC.


Are you missing out on my Bonus Content?

See more of my Adobe Creative Suite Videos on my Adobe Creative Cloud TV and get the App below. It features EXCLUSIVE CONTENT that no one else gets to see. This episode has a BONUS CLIP that is available only in the App! My iOS App is a Universal App for iPhone, iPad and iPod touch. I also have an Android version on the Amazon App Store:

Learn Adobe Creative Suite with Terry White - Wizzard Media


One of my NEW photo sharing workflows is powered by Adobe Revel

iPad_with_DSLR

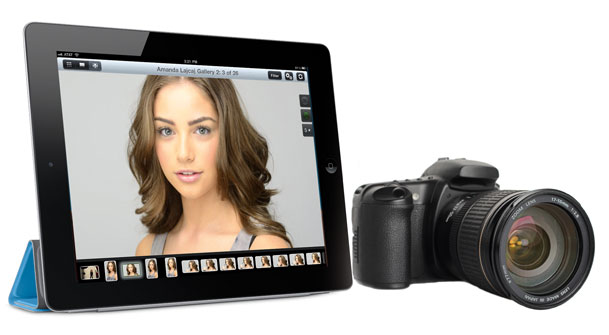
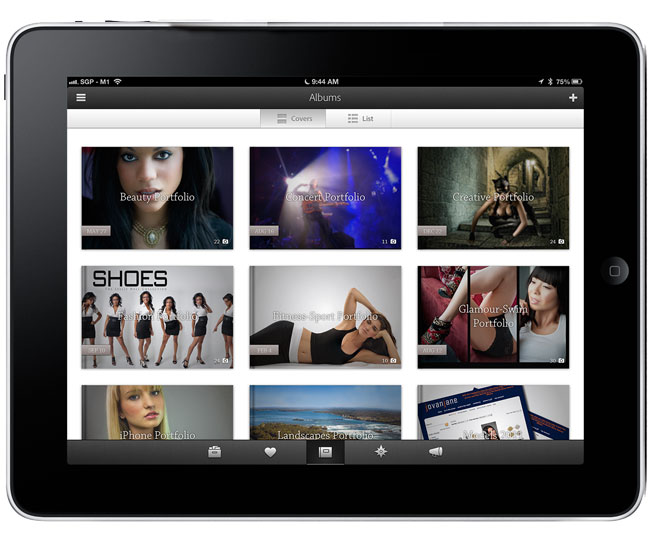
Sometimes you can be so focused on what you do professionally that you totally overlook what’s out there for fun. Both Adobe Photoshop Lightroom 5 and Photoshop CC are at the heart of my day-to-day photography workflows. Many of you have heard me talk about Adobe Revel in the past. I had begun using it as my portfolio App on iPad. I loved that it sync’d my photos from Lightroom to the cloud and instantly to my iPhone and iPads. However, the one BIG THING that was missing from the iOS apps was a “slideshow” feature. Sure you could swipe the images, but you couldn’t simply hit play and let them run. The beautiful new redesign of Revel 2.0 changed all that. The app is gorgeous and has many new features that has me using it as my Portfolio app again. Let me share some of the other updates with you that you may have missed…
adobe-revel2-ipad


What’s Adobe Revel?

adobe-revel-mac

Adobe Revel is Adobe’s “consumer” based photo sharing service. It’s FREE to use for those with modest needs. With the FREE account you can upload an unlimited number of photos in the 1st 30 days after setting up your account and then 50 photos a month after that. If you “need” more than that you can go UNLIMITED for $5.99/month. Yes, that’s unlimited imports, no limits ever. Once you upload your images to Revel they are instantly available on your Mac, iPhone, iPad and iPod touch (Windows and Android is in the works, but no timeline for when they will be available). As with other services like Flickr. com, most will only need the FREE account, but if you want to handle a lot of photos each month you can go unlimited whenever you want.

Download Adobe Revel for Mac here:

Adobe Revel - Adobe

Download Adobe Revel for iPhone, iPad and IPod touch here:

Adobe Revel - Adobe

Why isn’t this a part of Creative Cloud?

Adobe Revel is on the consumer side of the house and the consumer offerings from Adobe (like Photoshop Elements) will remain separate from the professional offerings in Creative Cloud.


What do the Mac and iOS Apps let you do?
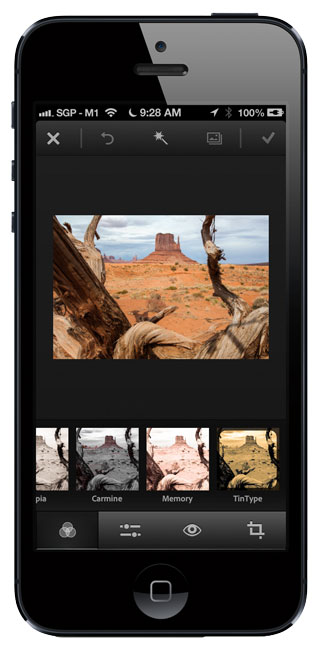
adobe-revel-iPhone5-editing

In addition to uploading your photos, the Mac and iOS Revel Apps allow you to do non-destructive edits to your photos. Think of it as a Light version of the Lightroom develop module for consumers. It’s all slider based and like I said, 100% non-destructive. Once you make edits on one device those edits are automatically sync’d to all your other devices. This means that you always have the most up to date photos with you. You can also use the App to display your photos on screen or via AirPlay to say an Apple TV.


How does this work with Lightroom 4 and 5?
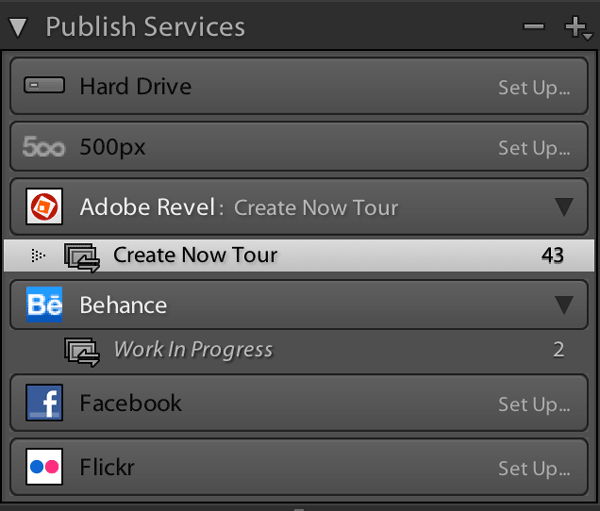
adobe-revel-LR

Lightroom 4 had a Revel Publish Service built-in and Lightroom 5 has a plug-in that you can download for free that does the same thing. Get it here. When I sign in to the Revel Publish Service I see my Revel libraries and I can create collections (or better yet, Smart Collections) that represent my portfolios. This means that I can publish my best/favorite images from Lightroom directly to Adobe Revel. I have created a Smart Collection in the Revel Publish service for each of my portfolios. When I update the regular Lightroom collection with new images, all I have to do is hit the Publish button in the corresponding Revel Publish Service Collection and my images are uploaded and my iPhone, iPad and Mac are updated. This has been the easiest way for me to carry my “CURRENT” portfolios around with me on my various devices. Yes the images can be viewed offline too. Actually if it weren’t for the Lightroom tie in I wouldn’t be half as excited about Revel. Since all my photos live in Lightroom it’s the hub of all my photographic workflows.


You mentioned a NEW photo sharing workflow. What’s NEW?

adobe_grouppix_iphone5

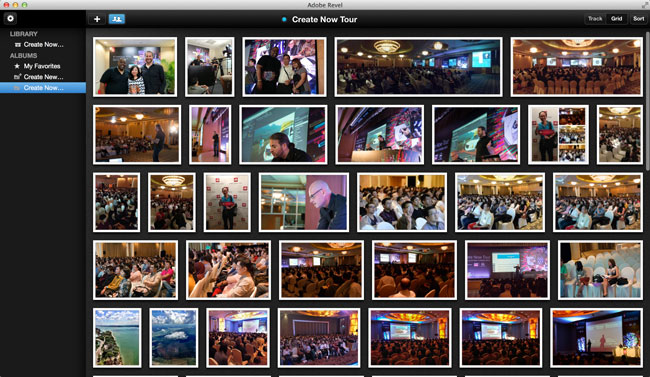
Everything I mentioned above is pretty much old news to Revel. The 2.0 iOS Apps and rate plan changes have been out for a while. What’s new is a couple NEW iPhone Apps. The 1st one is called Grouppix. I reviewed it here last week. When you and your friends download this FREE App, one of you can create a “shared” Album and invite the other to it. At that point anyone that has access to the album can upload pics to it and you all see them. This is GREAT for events such as parties, weddings, conferences, etc. Now everyone will have access to all the photos. That’s pretty cool, but what I didn’t realize right away is that those albums are powered by Revel! If you’re a Revel user those Grouppix shared albums show up in your Revel account. This also means that they show up in the Lightroom Publish Service. This makes it really really really easy for me to not only share photos I’ve taken with my iPhone, but also the ones I’ve taken with my DSLR. I can import my DSLR photos into Lightroom 5, select my picks, Develop them and add them to a Revel collection (Grouppix album), hit Publish and everyone that’s on the shared Grouppix album now has access to them. I did this last week during the Adobe Create Now Tour in APAC and it worked GREAT! If you’re into video there’s also a consumer based video editing app for iPhone called Video Bite. Yep it’s free too. It’s basic, but hey it lets you put clips together quickly and output a final movie right on your iPhone. Also did I mention that it’s free?

Get Adobe Grouppix for iPhone here:

Adobe Grouppix - Adobe

Get Adobe VideoBite for iPhone here:

Adobe® VideoBite - Adobe


Learn more about what Adobe Revel has to offer here.

15 New Creative Cloud Apps Are Here

cc_apps_up_to_date

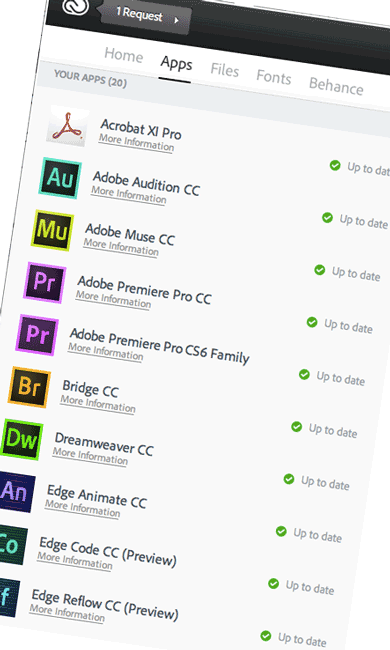
Today’s the day! The long awaited Creative Cloud apps are now available for you to download, install and use. There are new versions of Photoshop, Illustrator, InDesign, Muse, Dreamweaver, Bridge, Premiere Pro, After Effects, InCopy, Flash Pro, Audition, Prelude, Speedgrade, Edge Animate and Edge Inspect, as well as Adobe Scout CC, Edge Code CC Preview and Edge Reflow CC Preview. As a Creative Cloud Member you can download any or all of these applications.

To get started head over to creative.adobe.com, login with your Adobe ID and choose which app you want to download first. You’ll then be prompted to download the new Creative Cloud Desktop (this replaces the old Adobe Application Manager – R.I.P.). Once signed in you can choose which apps you want as well as log in to your Behance account to get activity updates as well.


What else is new?

LR-IC

Beside the CC Apps themselves, there’s a brand new Learning Center where you can view several new getting started videos. There will be content added here on a regular basis. Of course Lightroom 5 is available to Creative Cloud members as well as Adobe InCopy CC. InCopy was never part of the suites and was always a separate purchase just like Lightroom. It’s great to have both of these applications be a part of the Creative Cloud.


See my Creative Cloud Learning Center as well

If you want to see my videos on Creative Cloud, head over to this special playlist I’ve created on YouTube. You can get a taste of it below as well:


What didn’t make it?

While all the CC Apps shipped as planned, two of the services unfortunately aren’t ready yet. The Desktop Sync feature of the New Creative Cloud Desktop app is currently disabled until the back-end performance is where we (and you) want it to be. Also since the Typekit Desktop Fonts rely on the desktop sync features to work, it’s also turned off at this time. As soon as these features are ready they will be enabled in your Creative Cloud Desktop app.

You can still use your 20GB of storage space via your web browser and the mobile apps that sync with it like Photoshop Touch and Adobe Ideas.


How Do I sign up for Creative Cloud and is there a deal?

cctotems

There are several different levels of membership for Adobe Creative Cloud. Everything from individual full memberships to single app memberships to student/teacher memberships and of course team, enterprise and government. There are also special deals for existing Creative Suite users from as far back as CS3.

See the membership options here.

See the special deals for CS3-CS6 users here.

Buy a full year of Creative Cloud at once here.

Buy a full year of Creative Cloud for student/teacher here.
Continue reading “15 New Creative Cloud Apps Are Here”

Lightroom 5 has Shipped!

Lr5_splash

Today Adobe has shipped Lightroom 5! With over 400 bugs fixed since the Public Beta and a NEW Publish to Behance feature, Adobe Photoshop Lightroom 5 is now shipping. The retail price of $149 remains in effect as well as an upgrade/student price of $79. Of course Lightroom 5 is also available to Creative Cloud members to download and install at no additional cost.

Key New Features Include:

  • Smart Previews
  • PNG support
  • A new Full Screen Mode
  • User Configurable Grid Overlays
  • Windows HiDPI support
  • New Smart Collection Criteria
  • Behance Publish Service
  • Advance Healing Brush
  • Radial Filter
  • Upright Image Straightening and Perspective Correction
  • LAB Color Readout
  • Book Page Numbers, Improved Text Creation and User Pages
  • Videos in Slideshows
  • Tethering support for Nikon D600
  • Several JDI enhancements


How To Do a Complete Portrait Retouch In Lightroom 5

The Develop module has come a long way in Lightroom 5 and with the addition of the Radial Filter and non-circular Spot Removal Tool I now feel comfortable enough to do a complete portrait retouch in Lightroom. Since all of the adjustments are in the Develop Module the entire process is completely non-destructive.


I’m honored…

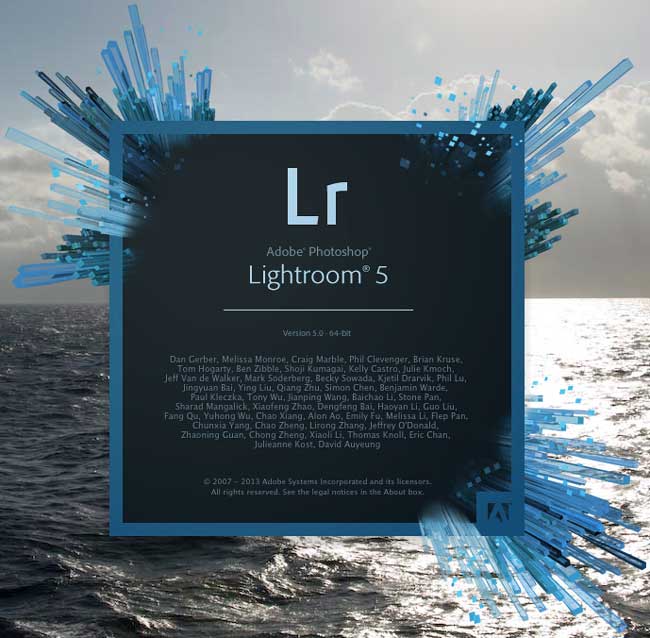
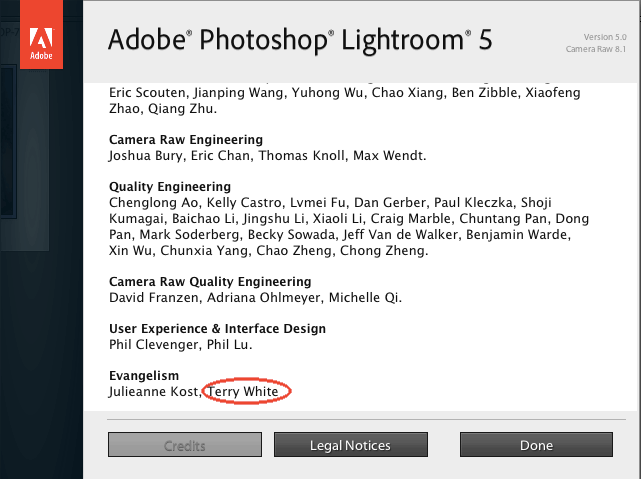
I’m also very honored to have made it into the About Lightroom credits screen. It’s an honor to have my name on such a fantastic product!

about_Lightroom_5


In case you missed it, see Lightroom 5 in action and my Top 5 Favorite Features:


Camera RAW 8.1 and DNG Converter 8.1 Now Available Too

See the details here.


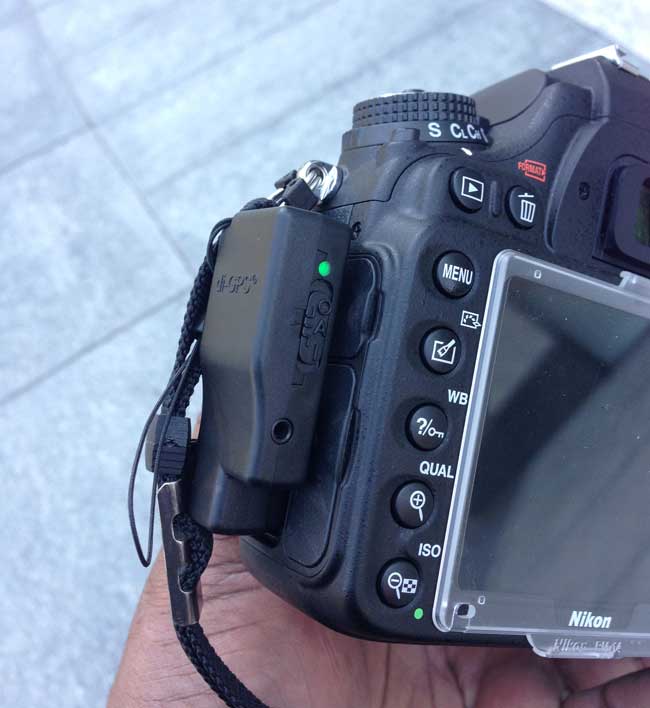
di-GPS Eco ProSumer GPS for Nikon

di-gps-eco-prosumer
di-GPS Eco ProSumer GPS on a Nikon D600

It’s been a while since I’ve done a review of a GPS device for Nikon DSLR cameras. The main reason is that I haven’t seen much movement or innovation in this space. The second reason is that I had kinda moved on to using my iPhone 5 as my GPS and creating .GPX log files that can be read by Lightroom 4/5. Since I always have my iPhone with me I could always just fire up the Geotag Photos Pro App and start recording my movements to a log file. With that said, there are some definite advantages to having a physical GPS device on the camera itself. First of all a physical GPS device will be more accurate. Logging apps only update based on a predefined interval. The next advantage is that a physical GPS just needs to be turned on. In a matter of seconds it locks on to satellites and away you go. Lastly, the logging apps on your smartphone will drain your smartphone’s battery sooner. Not to mention that there is no post-processing with a physical GPS. The longitude and latitude are written to the metadata of the images as you capture them. Yet, I was still using my iPhone more than the physical GPS devices I had. I think the biggest reason for this was the design of the GPS units I’ve used to date. Nikon DSLRs have direct support for external GPS units. On the more recent models like my D600 there’s a dedicated GPS port. Almost all of the GPS units I’ve used to date attached via a cable. This short cable plugs into the Nikon DSLR and the other end attaches to the GPS itself. This is what I never really liked. You either had to attach the GPS to your hotshoe or to your camera strap. The cable was always in my way. I was either constantly knocking the GPS out of the hotshoe or putting stress on the port that the cable was plugged into.

The Eco ProSumer GPS (pro-s)

The Eco ProSumer GPS is one of the latest models from Dawn Technology. First off the thing that attracted me to this model was the fact that there is NO CABLE. It’s small and plugs right into the side of my camera. It’s not in the way! Like the previous Dawn models it allows you to use it in auto mode or always on. In auto mode it will turn on/off with the camera. So then what else is new besides the design? It’s lightweight at only 16g. It’s very power efficient at 19mA (1/3rd of the aging Nikon GP1). It’s also faster at acquiring a GPS lock. Basically it’s better in every way. There is a port on it that allows you to connect a cable release, and of course Dawn Technology sells those too.

wpid12278-TLW6133_sm.jpg

Continue reading “di-GPS Eco ProSumer GPS for Nikon”

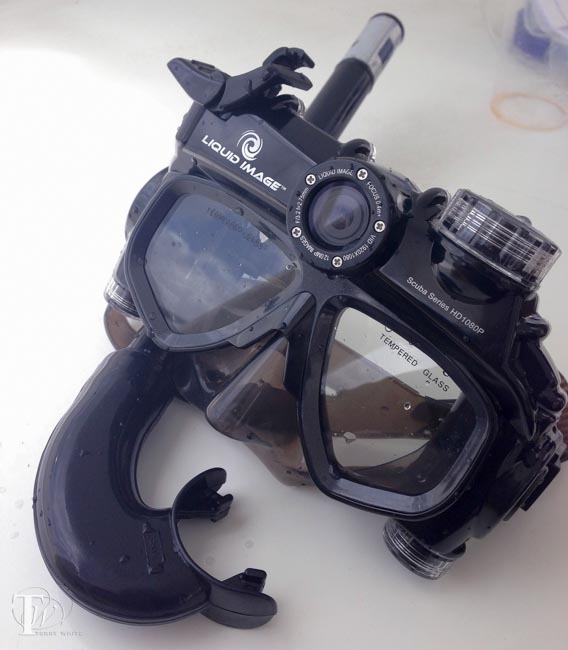
Review: Liquid Image Scuba Mask HD


wpid12253-jamaica2013-0300_sm.jpg

I’m a fan of water and water sports. I love to swim and I love to snorkel. One of these days I’ll take the time to get certified for scuba. Last year I got a chance to do some snorkeling in the Virgin Islands and I remember feeling so unprepared to capture all the underwater beauty that I was seeing. I had no underwater camera of any kind with me. I remember my colleague at the time Greg Rewis telling me about his recent sailing experience and once I spotted the Liquid Image Scuba Mask Series, I knew that it would be on my list for the next time I headed out to a nice area to dive/snorkel. I got the mask and couldn’t wait to try it. The obvious advantage is that this mask has an HD camera in it that records to a micro-SD card (4GB supplied, supports up to 32GB). You can shoot video or stills. This means that your hands are mostly free and where ever you look that’s what you’re shooting. (1080p @ 30fps, 720p @ 60fps, 5MP Still sensor/ 12MP interpolated)

wpid12261-jamaica2013-0253_sm.jpg

How does it work?

I really wish I had taken the time to familiarize myself with the mask more than just a few minutes the night before. I set it up, loaded the memory card and batteries and then took it out for a try the next morning. While I understood the basic operation of the mask, a little more testing up front would have made me feel more comfortable with it. The mask runs on 4 AAA batteries and depending on which model you get you’ll either get 4 rechargeable batteries or 4 Energizers. The memory card is a 4GB card, which is rated at being able to capture up to 2 hours of video. Going in I had no idea how much recording time I had or how long the batteries would last. Again, I could have read all this before hand, but I didn’t. Totally my fault. This made me a little anxious since I was going out with a group, I wouldn’t get a second shot at this (at least not on this trip). I was more interested in capturing video than stills, but wanted to try both. Overall the mask performed as advertised. I was actually very impressed with the quality of both video and stills.  I bought and used their optional red and blue filters. The shots here were with the red filter. I meant to use the blue one, but grabbed the wrong one.

Continue reading “Review: Liquid Image Scuba Mask HD”

How To Remove Hard-To-Find Dust Spots in Lightroom 5

Lightroom_5_splash

Lightroom 5 has a great new non-circular spot removing/healing brush. However, there’s a feature that many will overlook for using the tool for what it was originally intended for. It’s always been great at removing dust spots from dirt on your lens or sensor dust as long as you could see the spots in your images. Now with the new Visualize Spots feature you can find them much easier.


Are you missing out on my Bonus Content?

See more of my Adobe Creative Suite Videos on my Adobe Creative Cloud TV and get the App below. It features EXCLUSIVE CONTENT that no one else gets to see. This episode has a BONUS CLIP that is available only in the App! My iOS App is a Universal App for iPhone, iPad and iPod touch. I also have an Android version on the Amazon App Store:

Learn Adobe Creative Suite with Terry White - Wizzard Media

You can get the Lightroom 5 Public Beta here.