The Westcott Illuminator Reflector 6-in-1 Kit

wpid13335-IMG_1253_sm.jpg

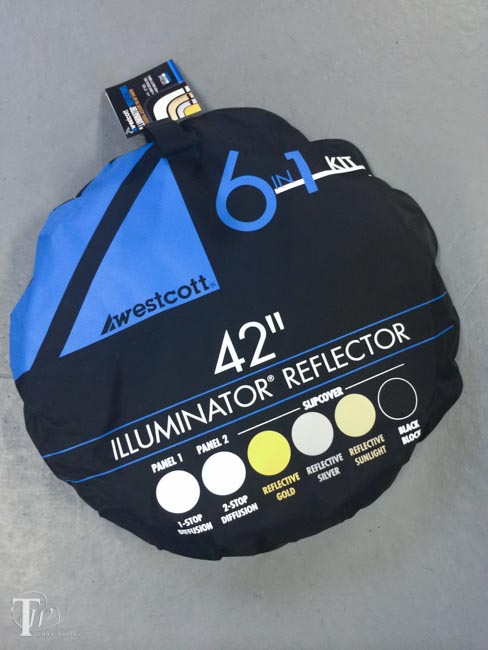
Photographers use reflectors to add light and defusers to soften light all the time. I was in need of a new reflector kit that I could take on the road. There are lots of reflector kits out there that come with reversible covers. Usually you’ll get white, silver, gold and perhaps black. The one thing that intrigued me the most about the Westcott Illuminator Reflector 6-in-1 Kit is that unlike most kits, they actually include TWO collapsible diffusers. One is a full-stop of diffusion and the other one is a two-stop diffuser. They include a reversible cover that has silver, gold, sunlight and black.

wpid13339-IMG_1259_sm.jpg

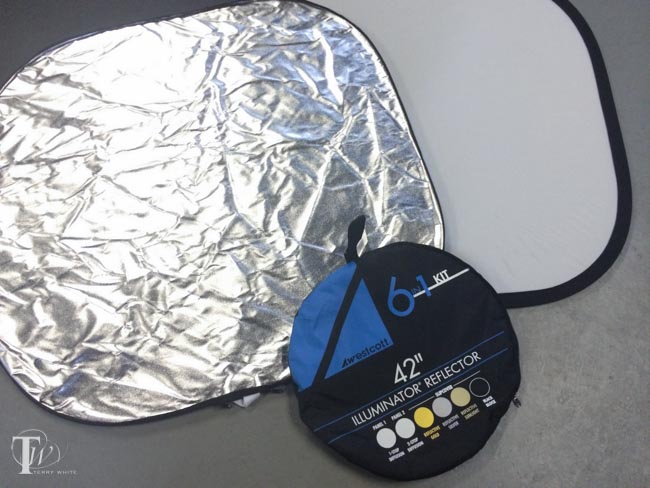
With this one kit you can either have two separate diffusers or one diffuser and one reflector or one diffuser and one black/flag. That pretty much gives you everything you could want in the field.

wpid13337-IMG_1254_sm.jpg

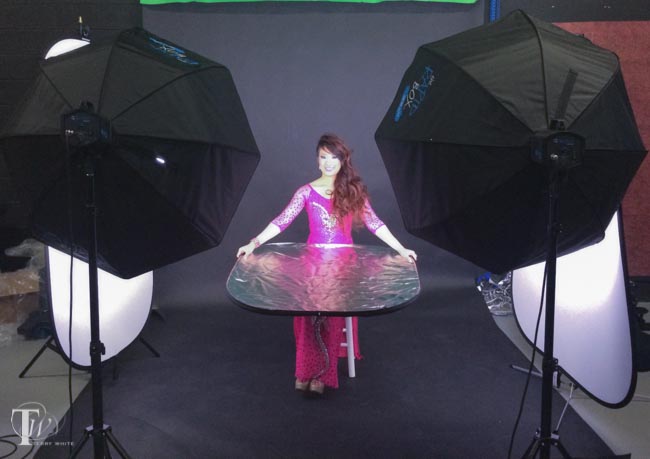
The nice big 42″ size is also a bonus because it can either diffuse a large area or bounce a larger amount of light therefore make it softer.

wpid13361-Liz_Group_Shoot-0471-Edit_sm.jpg


You can get the Westcott Illuminator Reflector 6-in-1 Kit 42″ size here.

If you want one with an arm and stand, check out this kit.


Yes, you can buy prints of my work

order-my-prints

I’ve been shooting seriously/professionally since late 2006. Throughout the years people have occasionally asked me if they could buy particular images that I have captured. I never really had an answer to that question because I was never really set up to make it happen. Although I’ve owned Epson photo printers in the past, I’ve always found that the maintenance and upkeep of the printer was not worth it. It seemed that every time I wanted to make a print it would take more time than it was worth to get the printer “going again”. This meant unclogging the heads or discovering that I had run out of a particular color right at that crucial moment. Because of this and simply not having the time to deal with it, I have avoided making my work available for sale. Well, that was until recently. The question came up again and during Photoshop World, I was inspired by the various works being displayed by many of my fellow instructors. That fueled my passion once again and I decided that it was time to figure out a way to do this. I settled on smugmug.com for now to be the back end for my print sales. As a pro member they allowed me to easily set up a gallery and make my prints available in the sizes that I wanted to sell them at as well as the prices I wanted to sell them for. The beauty of it is that they do the printing and shipping.

You can check out the gallery here.

See more of my photography here.

Photographers: iMac or Mac Pro?

macpro-imac

Rather than just do a review of the new Mac Pro and tell you how fast it is vs. any other Mac that Apple has made, I decided to approach this review from a different angle. There was a time when I bought Mac Pro towers because I wanted the fastest Mac available. However, I soon realized that as much as I didn’t want to admit it, the Mac Pro is “overkill” for what I do on a day-to-day basis. Sure, faster is always nicer than slower when it comes to waiting for a process to complete, but honestly I’m rarely waiting for a process to complete these days. Sure, I render video on a weekly basis and it would always be nicer to have those videos render faster, but is the faster render worth the money for a Mac Pro? The answer will of course depend on how much you find yourself waiting on your computer and not being able to do anything else while you’re waiting.

Let’s get some ground rules out of the way first

If you don’t like Macs or don’t want a Mac for whatever your reasons are, you can pretty much stop here and find something else to do with your time. I find it entertaining when people feel compelled to tell you/me how much they don’t want the thing you’re reviewing or writing about because they use something else. This is not a Mac vs. _______ post. If you’re happy with a Windows PC or Linux, or anything else, I’m happy for you. If you’re reading the rest of this post then I’ll assume that you’re a Mac user or thinking of becoming one.

The next thing I’d like to get out of the way is that if you’re looking for a Mac Pro review that tells you this new Mac Pro is better than the previous Mac Pro with all the benchmarks to back it up, then you’d probably be better served by other reviewers who have targeted the performance of the new model vs. the older model. I’m doing this review/comparison simply to answer the question, “as a photographer would I be better off spending my money on an iMac/MacBook Pro or a Mac Pro?” If you’re a videographer and you’re a Mac user then you probably already have the new Mac Pro because you demanded the fastest Mac you could get to render your videos.


Introduction

When I saw the rumors that Apple was going to release a radically different design for the Mac Pro, to be quite honest I was only mildly interested. As I stated above, I realized with my last Mac Pro that I wasn’t really a Mac Pro customer. Sure I appreciate the faster performance, but I found myself only using my Mac Pro when I knew a process was going to take a long time to complete. Otherwise I was quite happy just using my MacBook Pro simply because I could use it in any room at any time. I could take it with me on the road. However, I said to myself perhaps if the performance (for what I do) is significantly better and the price point for an entry model was $2,500 or less, I’d consider getting one. Well we know the latter didn’t happen, so now it was time to test the performance. I got the opportunity to test a Mac Pro standard configuration in my studio for a few weeks. I loaded the latest version of my Adobe Creative Cloud applications on it as well as a few utilities that I use such as ScreenFlow. Next, I began running side-by-side tests of the things that I do daily that take more than a few seconds. My assumption was that the Mac Pro would certainly be at least twice as fast at everything I threw at it than my 2012 MacBook Pro Retina Display Mac. Actually I was wrong!
MacPro-back

When will a Mac Pro significantly outperform any other Mac?

As I said above, I was wrong in my assumption that the Mac Pro would be at least twice as fast at everything. Actually it is faster at everything! Just not by a margin of two. On every test I threw at it the Mac Pro outperformed my now two-year-old MacBook Pro, but in some cases it was only slightly faster. This is when I realized that in order to see significant speed improvements the software you’re testing not only needs to be optimized for the faster processors, but also it would need to take advantage of the multiple cores. Even then, the MacBook Pro is no slouch. It’s got multiple cores too. Where I saw the biggest differences was in (no surprise) video rendering and processes that take longer than a minute or so anyway.


What I do as a photographer

As a photographer I spend most of my time in Adobe Lightroom 5 and Adobe Photoshop CC. Photoshop CC definitely takes advantage of multiple cores and now has Open CL support. So filters will run faster on the new Mac Pro. All of these applications are 64bit native and that means that they’ll take advantage of additional RAM.

My first test was one of the things I do after every shoot. I convert my RAW files into .DNG (Digital Negative) format. This is one of the few times that I see a progress bar in Lightroom because it does take time to do it. I converted 435 16MP Nikon .NEF RAW files into DNG format.

First on the MacBook Pro it took 14 minutes 35 seconds

On the Mac Pro the same conversion took 12 minutes 12 seconds.

Yes it was faster! However, it was only about 2 minutes faster. I must say that I was a little disappointed. However, I moved on to the next test.

The next test was using the Web module in Lightroom to export a web gallery using the Client Response Gallery Template from The Turning Gate.

MBP-7

On the MacBook Pro this export took 7 minutes 41 seconds

MP-4

On the NEW Mac Pro it took 4 minutes 9 seconds.

Ahhhh, much better. Almost half the time.

The next test was a simple HDR (High Dynamic Range) conversion in Photoshop CC using three RAW files. This is a two-part process. The first part is simply combining the three (or more) images together and aligning them. Then the second part of the process is applying whatever settings you want to control how your HDR looks.

The first part on the MacBook Pro took 12.70 seconds and on the Mac Pro it took 9.10 seconds

The second part on the MacBook Pro took 13.00 seconds and on the Mac Pro it took 11.13 seconds.

The next test was stitching a Panorama together using Photoshop CC and 10 RAW files

On the MacBook Pro this process took 1 minute 12 seconds

On the Mac Pro this process took 51 seconds.

I could have gone on running other tests and other filters, but these are the things I do on a regular basis. If it was faster at something that I rarely do, then I really don’t care as much. As you can see from the results above, the Mac Pro wins on every test as you would expect it to, but the results (even if it was twice as fast in every case) may not justify the difference in cost. We’ll get to that at the end.

Next it was time to look at what I do as a Photographer when it comes to video

I use video in a couple of different ways. The first as a photographer is to tell my story. This means capturing video with my DLSR, GoPro, iPhone, etc. I use Adobe Premiere Pro CC to assemble those videos and then output them to share (usually on YouTube). The next way that I use video and probably the way that I use video the most often is to record my Creative Cloud TV video podcasts. These screen recordings are done with ScreenFlow and since the editing I do is pretty simple I can edit these right in ScreenFlow. Of course I need to export those videos out and this can take a while depending on the length of the video. I had no doubts that this is where the Mac Pro would really shine. After all these are the kind of processor and resource intensive tasks that the Mac Pro was built for. I was not disappointed.

The first test I ran was an export of an hour-long edited video out of ScreenFlow.

On the MacBook Pro this export took 60 minutes

On the Mac Pro this export took 33 minutes.

It gets better in Adobe Premiere Pro CC and the Adobe Media Encoder CC. I needed to convert this video into a different format using the Adobe Media Encoder CC.

MBP-34

On the MacBook Pro this conversion/export took 34 minutes 36 seconds

MP-12

On the Mac Pro this conversion/export took only 12 minutes 36 seconds


The Bottom Line

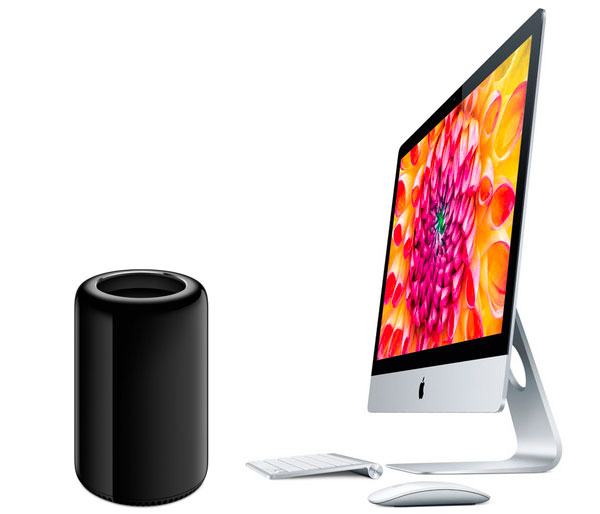
The NEW Mac Pro is the fastest Mac that Apple has ever created. The question you have to ask yourself is, “Is the speed difference worth the difference in price?” For me the answer is no. Sure if I spent my days rendering video all day every day, I’d already have the Mac Pro. There would be no question. However, as a photographer I can’t justify the difference in price. Hey! Wait a minute, you said in the title of this post “iMac or Mac Pro?”, yet all you’ve talked about is the MacBook Pro vs. the Mac Pro. This is true. I didn’t have a new iMac to compare it with. However, if you’re looking for a “desktop” Mac as a photographer, I’d seriously consider the current iMac. The current iMac will be as fast or faster than my 2012 MacBook Pro in every case. So here are some prices and specs to look at:

The Mac Pro model and configuration that I tested above is here. (Now keep in mind that if I was going to buy one I’d start with this configuration and I’d go with a bigger internal drive and more RAM)

The base configuration 4th gen 21.5″ iMac is here. However, this model is not a fair comparison. It’s probably a little slower than my MacBook Pro as it has a slower processor, less RAM, and no Flash Drive.

This would be the configuration that I would recommend and would be more of a fair comparison: 27″ iMac here.

If you’re interested in a similar configuration (using the current model) to my MacBook Pro 15″ Retina, it would be this one.

Why an iMac? Although I don’t use one, an iMac makes sense because you’re getting a fast Mac with a nice big 27″ display all in one.
Wacom_cintiq-24hd

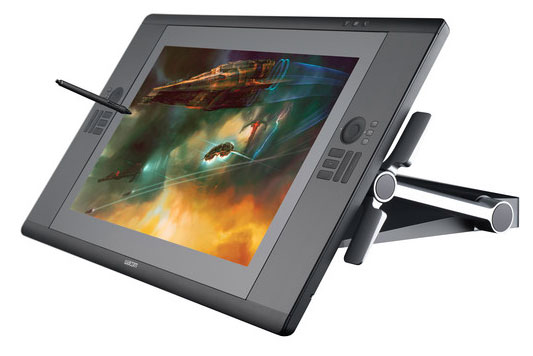
Why a MacBook Pro? For me the MacBook Pro makes the most sense because when I’m at my desk I have connected to a nice 24″ HD Wacom Cintiq display/tablet. When i get ready to go I disconnect it and go. I have a computer with a nice 15″ Retina display when I’m on the road. If I didn’t travel for a living then I’d probably have an iMac. Since I travel a lot, a MacBook Pro makes more sense.

If you want the fastest Mac and you don’t mind spending $3,000-$4,000 (or more) on it, then definitely go with a Mac Pro. Everything you do will likely be faster than the Mac you’re currently using. Keep in mind that you’ll also need to buy a display, keyboard and mouse/tablet to go with it. At the end of the day I realize that computers have become “fast enough” and that I don’t spend a lot of time waiting these days. Even when a process such as a video render/export is going to take a few minutes I can toss it to the background and work on other things in the foreground. My last Mac Pro once configured set me back over $5,000 and while it was a beast, I found that I wasn’t really using it as much as I had hoped I would, so I sold it. The new Mac Pro is faster, but is it $4,000 faster? For me it’s not.


UPDATE: Now that the iMac Retina 5K is out I got my hands on one and did a comparison here.


5 Hidden Gems in Adobe Lightroom 5

Lightroom_totem


In this episode of Adobe Creative Cloud TV, I’ll show you 5 or more hidden gems in Adobe Lightroom 5. See these little known features and tips and tricks that will speed up your Lightroom workflow.

Are you missing out on my Bonus Content?

See more of my Adobe Creative Cloud Videos on my Adobe Creative Cloud TV and get the App below. It features EXCLUSIVE CONTENT that no one else gets to see. This episode has a BONUS CLIP that is available only in the App! My iOS App is a Universal App for iPhone, iPad and iPod touch. I also have an Android version on the Amazon App Store:

.


Lightroom Mobile on iPad is Here! Let’s take a first look…

LRm-LR5


The long awaited Lightroom mobile is here and I couldn’t be happier to give you your first look:

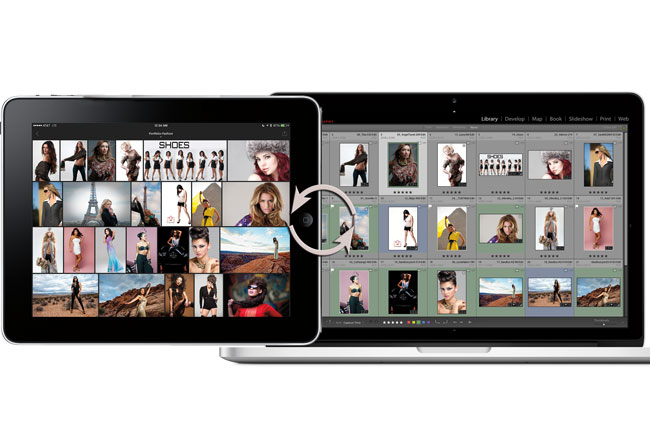
Today we’re announcing the immediate availability of Lightroom mobile. Lightroom mobile extends your existing workflows beyond the desktop. Lightroom mobile allows you to utilize your iPad to do all sorts of great things and have the changes sync back to your Lightroom catalog at home, including:

  • Access images in your Lightroom catalog
  • Make selects, reject unworthy photos
  • Apply a preset
  • Refine your adjustments using all your favorites from the Basic panel, including Highlights, Shadows, and Clarity
  • Import new photos directly from the camera roll

Lightroom mobile utilizes Smart Previews to provide raw editing functionality on your iPad. First introduced in Lightroom 5 beta, Smart Previews are:

  • Based on the DNG file format
  • Limited to 2560 pixels on the long edge
  • Smaller version original raw files
  • Can be used to make adjustments even when the original files aren’t available locally
  • Adjustments made to Smart Previews are applied to the original when the original files are available

How to get started:

1. Download Lightroom 5.4

Lightroom mobile is a companion to Lightroom desktop. Lightroom 5.4 is the first version of Lightroom desktop that includes the ability to sync images to Lightroom mobile. Please update to the latest version of Lightroom 5 using either the Creative Cloud app or by clicking on the “Help-> Check for Updates” menu option.

2. Sign In

Lightroom mobile utilizes cloud services to sync Smart Previews and changes between Lightroom desktop and Lightroom mobile. Lightroom mobile requires a qualifying Creative Cloud or Photoshop Photography Plan subscription:

  • Photoshop Photography Program (Get Photoshop CC, Lightroom 5 (including Lightroom mobile), 20GB of online storage for files (optional use), and a Behance Prosite for only $9.99/month.)
  • Creative Cloud complete plan
  • Creative Cloud Student and Teacher Edition
  • Creative Cloud for teams complete plan

A free 30-day trial of Lightroom mobile is available.

3. Sync a collection

Lightroom mobile is organized around Collections. Images within Collections will be synced and be available in Lightroom mobile.

4. Download Lightroom mobile for iPad

Visit the App Store on your iPad and download Lightroom mobile. Once you login with the same Creative Cloud account, you’ll see all of your synced Collections.
iTunes.

5. Check out your photos at lightroom.adobe.com

In addition to Lightroom mobile, we’ve also launched Lightroom web, a new way to view and share your images from any web browser. Available at http://lightroom.adobe.com.

System Requirements

Lightroom mobile is available now on iPad 2 or later, and works on iOS7 or later.

Thanks!

Are you missing out on my Bonus Content?

See more of my Adobe Creative Cloud Videos on my Adobe Creative Cloud TV and get the App below. It features EXCLUSIVE CONTENT that no one else gets to see. This episode has a BONUS CLIP that is available only in the App! My iOS App is a Universal App for iPhone, iPad and iPod touch. I also have an Android version on the Amazon App Store:

.


What I’m Teaching At Photoshop World Atlanta Next Week

photo by Jason Lykins

It’s almost time for my favorite conference, Photoshop World! This will be the first Photoshop World held in Atlanta and I’m really looking forward to it. Not only do I get to see so many of you, but I’m psyched about teaching some new classes.

Photoshop_World_ATL_classes1

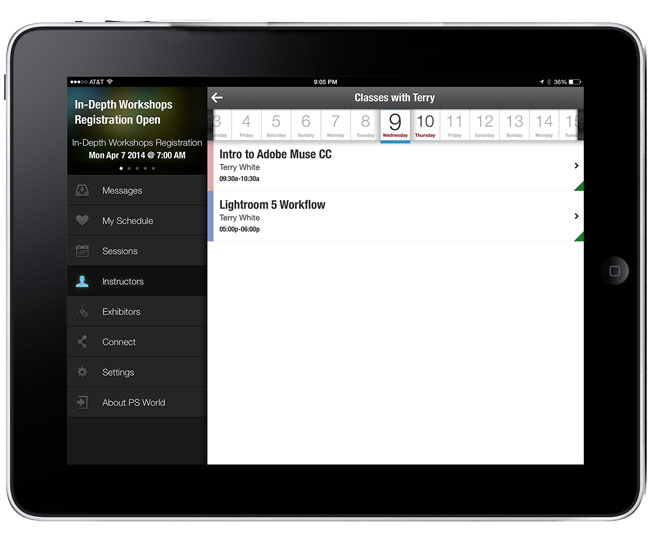
First up I’m teaching a new “Intro to Adobe Muse CC” class. I did a session on the show floor last year for Adobe Muse and it went over great. I’m happy that this class got added to the conference track and that I can go more in-depth.

Photoshop_World_ATL_classes2

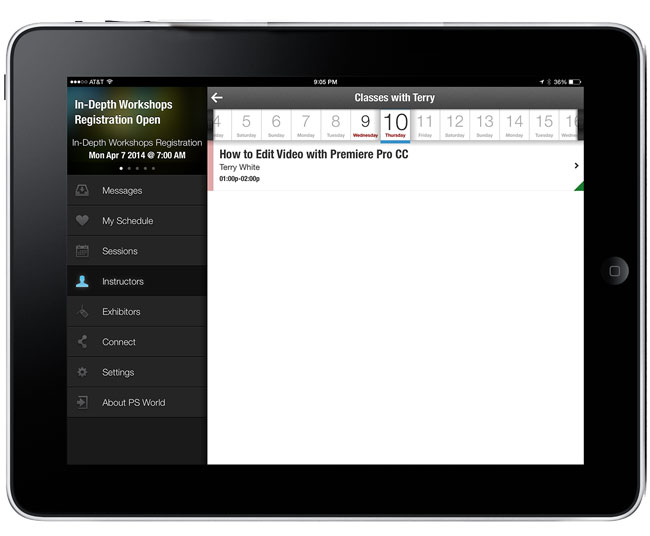
I’m also teaching a brand new “How to Edit Video with Adobe Premiere Pro CC”. This class is aimed at Photographers rather than videographers. I aim to cut through all the jargon and the interface to get right to the basics of how to edit video from your DSLR or other video cameras, smartphones, etc.

I’m also going to be doing short presentations in the Adobe booth on the trade show floor.  I’ll be showing “New Tools for Designers” and “Photoshop CC Tips”.

Be sure to stop by and say hello, you never know what small giveaways I may have in my pocket. 😉

Get the Photoshop World App here:

.

If you haven’t registered for Photoshop World Atlanta yet, you can save $50 by using my discount code: TWHPSW414. Register here.


Quick Tip: How To Extend a Background In Photoshop CC – Instagram Style

PS_CC_totem


In this episode of Adobe Creative Cloud TV, I’ll show you a quick tip on how to change the aspect ratio of your portrait image to a square by extending the background in Photoshop CC.

Are you missing out on my Bonus Content?

See more of my Adobe Creative Cloud Videos on my Adobe Creative Cloud TV and get the App below. It features EXCLUSIVE CONTENT that no one else gets to see. This episode has a BONUS CLIP that is available only in the App! My iOS App is a Universal App for iPhone, iPad and iPod touch. I also have an Android version on the Amazon App Store:

.


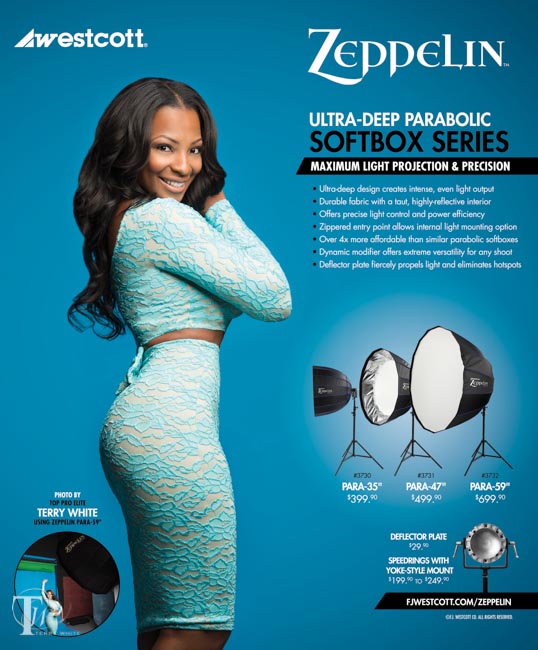
A Big Beautiful Light for Photographers – Westcott Zeppelin Para-59″

wpid13210-Delvis-Zeppelin-1-Edit_sm.jpg

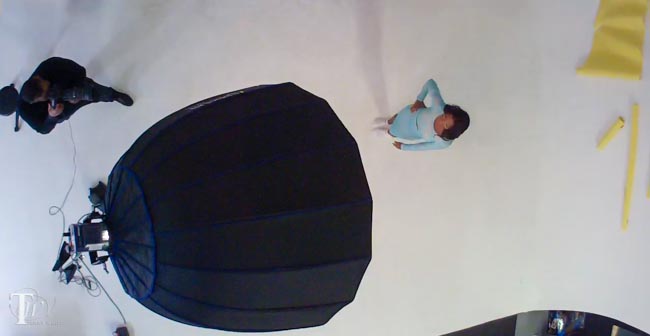
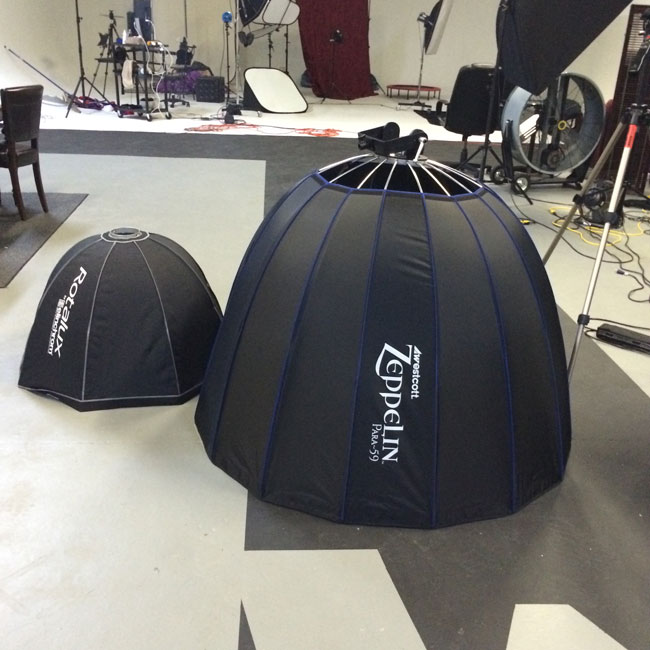
The bigger the light and the closer to your subject, the softer it will be. I’ve always been a fan of BIG softboxes. So when I saw that Westcott had just introduced three new Zeppelin deep parabolic softboxes and the largest one being 59″ I was delighted to take it for a spin. First off, I already had an Elinchrom deep octa softbox, but as you can see below the Westcott Zeppelin dwarfs it!

zeppelin-next-to-elinchrom

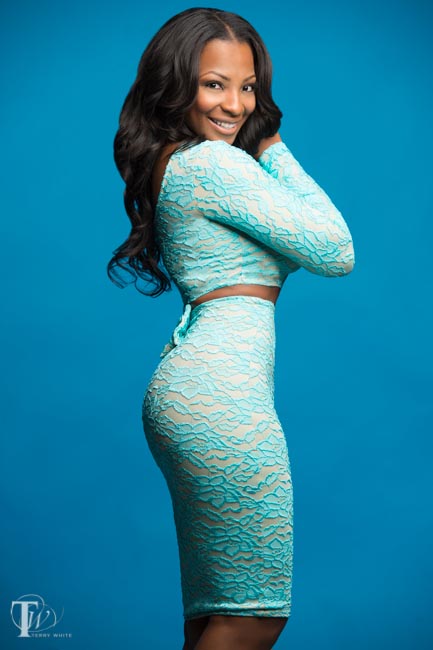
This is a beast and that means big beautiful quality light wrapping around my subject. I do mostly beauty, portrait and fashion work and the nice thing about deep softboxes is that you get a nice fall off of the light.  Having the new larger 59″ size means that I can light more of my subject easily as well as multiple subjects more easily. I took it for a spin and really liked the results:

wpid13208-Delvis-Zeppelin-0053-Edit_sm.jpg

It’s really hard to argue with the results. While you can get these in two smaller sizes, I immediately opted for the largest one because I already have smaller sized modifiers.


wpid13206-Delvis-Zeppelin-0318-Edit_sm.jpg

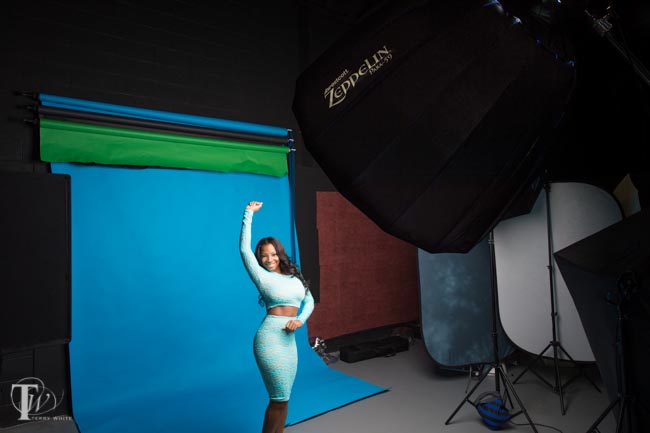
It’s almost a little intimidating when you take this thing out of the box. Luckily the design of the mount/speed ring was well thought out. Since this thing is so big it could easily be a strain on your strobe. So the bracket/mount is designed to hold your strobe instead of the other way around.

wpid13204-Delvis-Zeppelin-0298-Edit_sm.jpg

This design also helps balance it better on your light stand. Once I got it all set up it was quite easy to mount my Elinchrom strobe to it and put the whole thing on my stand, which I weighted down with sandbags. There is an optional deflector plate that you can get for it and although I had it, I actually forgot to install it. The purpose of it is to deflect the light away from the center point creating a more even lighting pattern and therefore reducing potential hotspots. I’ll be using it from now on for sure. Westcott liked my results so much they requested the use of my images for one of their new ads.

wpid13214-Westcott-Zeppelin-PDN-May2014-Trim-Proof_sm.jpg

The Bottom Line

These new Zeppelins are sure to be a hit! They are well constructed and the light is gorgeous. Having the mount bear all the weight of the Zeppelin AND the strobe makes me feel a lot better about using it as I know there will be no additional stress on my strobes themselves. This will undoubtedly be my new go-to softbox for the majority of my studio work.

You can get the Westcott Zeppelin Deep Parabolic Softboxes here:

Westcott Zeppelin Para-59″

Westcott Zeppelin Para-47″

Westcott Zeppelin Para-35″

Westcott Zeppelin Deflector Plate

You will also need a speed ring & bracket adapter for your brand of strobe. Here are the ones they make:

Adapter/Speed ring for Bowens

Adapter/Speed ring for Elinchrom

Adapter/Speed ring for Profoto

Adapter/Speed ring for Balcar


ExpoDisc 2.0 Review

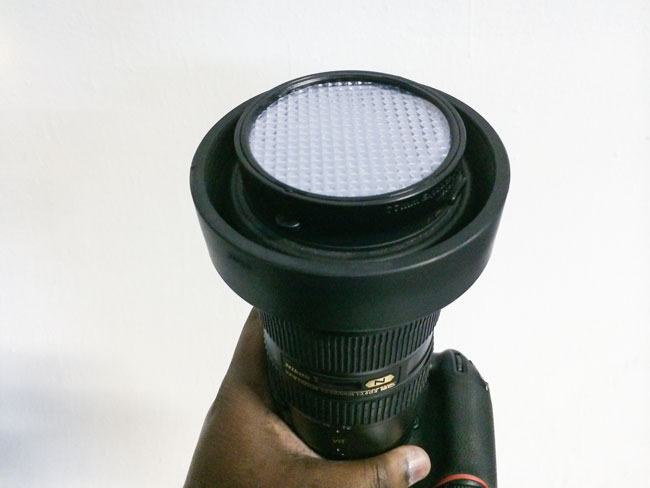
expodisc_2.0_Nikon-70-200mm

Having proper white balance in your photos can help make the difference between a good shot and a great shot. If you’re shooting RAW or in studio with a gray card or color passport, it’s pretty easy to adjust the white balance in post. However, if you’re shooting JPEG or shooting scenes where you can’t place a grey card then it’s probably best to get the proper white balance before you even start shooting. One of the best ways that I know to do this is with an Expoimaging ExpoDisc. I’ve used this product for years. I was pleased to see that they came out with a new version. The ExpoDisc 2.0 has been redesigned to make a good thing even better. The first thing I noticed and fell in love with is that it now clips on to your lens. There are two buttons on the outside that when depressed with your thumb and index finger retract the clips that hold it in place on your lens. This means that it’s very quick to put on and keep in place and take off. The older model didn’t have this feature and I would just lay it on my lens to set the white balance and of course it could fall off very easily. The other nice enhancement is that it comes with a set of warming filters too. This is great if you’re doing portraits. When photographing people you tend to want your subjects a little warmer than “standard/proper” white balance. These filters simply slide right on to the front of the ExpoDisc 2.0.

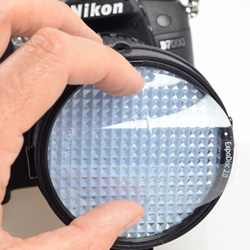
installing_warming_filter
Installing the warming filter

Once you have the ExpoDisc 2.0 in place with or without the included warming filter all you have to do is (depending on your camera model) put it in the mode for capturing a custom white balance. On the Nikon DSLRs you do this by putting the white balance selector on “Pre” and then holding down the white balance button until “Pre” starts blinking. You’ll have a few moments to take a shot. Now aim the camera at the light source and press the shutter. If all is well the display will now flash “Good” if not it will flash “No Good”, which means you’ll need to simply point at a different spot and try again. A couple of nights ago I did a portrait session in studio and used only the ExpoDisc 2.0 for my white balance. No adjustments to white balance in Lightroom. The results are below:

wpid13194-Delvis-Zeppelin-0068-Edit_sm.jpg
The shot above was captured with Auto White Balance and as you can see the skin tone is a little cooler and the wall behind is a little bluer.


wpid13192-Delvis-Zeppelin-0075-Edit_sm.jpg
The shot above was captured after using the ExpoDisc 2.0 and using one of the warming filters. This makes the skin more natural looking.


The Bottom Line

Professional photographers will tell you that it’s usually better to get things right in the camera rather than relying on post processing. I agree! If we are to agree on that then it makes sense to get white balance right in the camera as well. The ExpoDisc 2.0 is one of the best if not the best way of doing this. ExpoDisc 2.0 – Get one below:

ExpoDisc 2.0 77mm – B&H Photo

ExpoDisc 2.0 77mm – Amazon

Yongnuo YN-565EX ETTL Speedlite Flash for Nikon Review

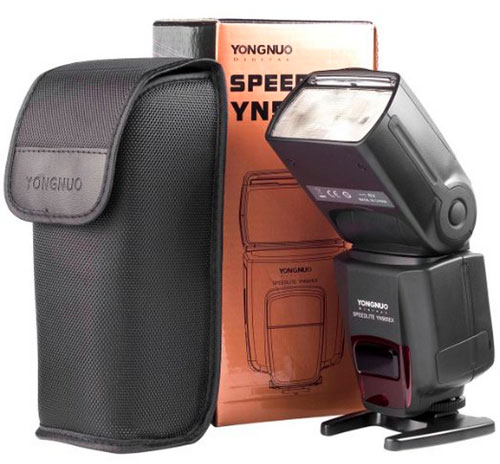
yongnuo-speedlite

If you’re a photographer and you shoot on location chances are you’re going to have the opportunity to use a speedlight flash from time to time. My first speedlight was a Nikon SB600, and then I bought the SB800 and finally an SB 900/910. The latter currently goes for $546.95! That’s a lot of money for a small battery operated flash. As a matter of fact you can get this Elinchrom BRX 250 Studio Strobe for only $524.99. I know that smaller electronics usually cost more than larger ones, but the cost of speedlights has always been a mystery to me. With that said I have a lot of new up and coming photographers following me that are making their first equipment purchases. I really like my Nikon SB 800 (discontinued) and my SB 910. They’ve never failed me. The only problem is they may easily be out of the reach of new photographers because of the cost. So I figured I would give the Yongnuo YN-565EX Speedlite a try as an alternative. I would love to have 3 SB 910s but I can’t justify the expense. Yes both Nikon and Canon make lower cost models, but those models typically have fewer features and lower output. Even with those limitations the lower cost models easily go for $300 or more. The Yongnuo YN-565EX ETTL Speedlite Flash for Nikon goes for a mere $143.99 (Canon version here). So basically I could get almost four of the Yongnuo speedlites for the price of one Nikon SB910. However, let’s keep one thing in mind…you get what you pay for.

Initial Impressions

For almost a quarter of the price of my professional speedlight I really wasn’t expecting very much in terms of quality. I also have read the reviews and heard from others both good and bad experiences with Yongnuo flashes in general. However, I remained optimistic that this unit should at least work, but the question is for how long? It’s too early for me to tell if this flash will last me for the months/years to come, but at least initially I’m pleased. When I took it out of the box my first thought was “low cost plastic”. I don’t like to use the word “cheap”, but it definitely has a “low cost” feel to it. However, it did have all the things on it that I wanted and would expect. It has a diffuser and bounce card in the head just like my SB910. The head swivels just like my SB910. It also has a sync port on it for external triggers just like my SB910 and most importantly this model supports Nikon’s TTL protocols. The controls on the back are very easy to operate and from what I can tell they pretty much copied the button layout from one of the Canon speedlites. I put my four AA batteries in, fired it up, and took some test shots. It worked perfectly. I tried both TTL and Manual modes. I also like the recycle beep (which you can disable). It’s very distinctive. While I’ve only tested this flash for a couple of days now I have had no problems with it. Recycle time is about 5 seconds.

The Bottom Line

My only concerns are those that have been voiced by others that have used Yongnuo speedlites. The main concerns I hear are that they drain the batteries faster than the manufacturer’s models and that eventually they simply die. Only time will tell on the latter and so far I haven’t exhausted a set of batteries yet and don’t feel that, at least at this point, that they drain that much faster than my Nikon SB910 does. Another thing to consider is that these won’t do high speed sync. Now on the plus side there are others that have sworn by these speedlites including Scott Kelby, who uses them on his tours. The other thing I like about them is that I’d be a lot less concerned if something happened to it in the field. For example, if it were stolen it would be a lot easier to swallow a $144 loss than a $547 loss. This is also the case if I were going to use it in less than ideal conditions such as wading out in a lake or the ocean to get a shot. If it fell in the water or off a cliff it would be a lot less traumatic. While they’re not quite disposable, they are a lot less to have to “worry” about.

The question you’re asking right now is, “should I get one?”

The answer to that is probably yes. You have a lot less to lose and if it works for longer than a year then you can probably feel like you got your money’s worth. Also even if you want a better quality more expensive speedlite as your main speedlite then the Yongnuo’s can be used as your second or third speedlite. That’s exactly how I plan to use them.

You can get the Yongnuo YN-565EX ETTL Speedlite Flash here for Nikon and here for Canon.


Need a light modifier?

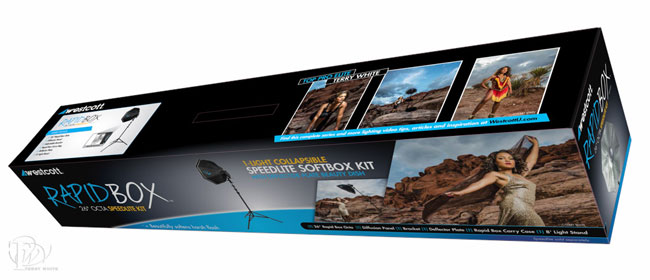
Speedlites are great, but you’ll get much better results using good modifiers. I recommend the Westcott Rapidbox Octa 26″ here and the Impact Quikbox here. Also check out my Westcott Terry White Travel Portrait Kit here.