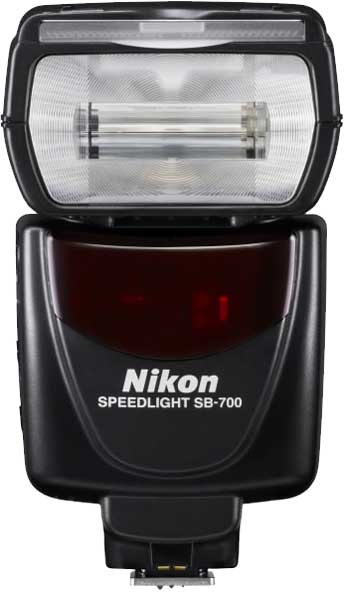
Nikon SB-700: Guest Review by Jason Lykins


I love the Nikon CLS flash system. For me, it is THE reason to choose Nikon over any other brand. Their R&D, fit and finish, and performance are second to none in the small flash arena. For a few years the SB-800 was the go to flash for me, offering the control, and power needed for a working professional. Recently Nikon updated it’s flash line; first with the flagship SB-900 replacing the SB-800, and more recently the SB-700 replacing the SB-600. I am currently using SB-900’s as my go to main flash units, but when my last SB-800 died I decided to take a look at the new SB-700 as an alternative. After reading David Hobby’s (aka the Strobist) initial review of the flash I decided to give it a go. After a couple of weeks with it, I’m not only impressed, but sold on this unit. I’ll be buying more.
 

What it had to have

There were a few things that this flash had to have to make it useful for me. The first and most important thing that I need is power. I often double, and triple diffusing my flashes to increase the quality of light. This requires a lot power to shoot through all of these layers of diffusion and still have enough “oomph” to light the subject. The SB-700 has power to spare. After shooting it side by side with a SB-800 I’m pretty sure that the power output is on par with that unit. Of course I didn’t do a scientific comparison to measure this, but just the light output, the coverage, and the recycle times make me think that this flash is right there with the 800. Nikon claims not, but I have to think that the low power rating by Nikon is to drive pros to the SB-900 over the 700. Suffice to say that this flash meets my power and output needs without a problem.


The next thing on my list of must have’s is control. I need to be able to control wireless flash systems just as I would with the SB-800 if I’m going to be using these flashes as replacements. The SB-700 gets part of the way there. Let me explain. Nikon did a great job by putting a lot of the controls on the outside of the flash similar to the SB-900. They placed a rotating switch similar to the 900 for TTL, remote, and Master selection for the wireless CLS system. While we’re on this subject, the 700 can act as a Master flash for the CLS system, but only offers two groups. For me this isn’t a big deal because I use them with the Pocket Wizard Flex units, which allow me to add that control externally anyway. The 700 also adds a physical switch to the back of the unit to select your mode. With the option of TTL, Manual, and guide number, it has every option that I would want. Another Physical switch added to the back of the flash is the light output type (standard, even, and center weighted). The FEC (flash exposure compensation) for your main unit, and the remote units when in master mode is controlled just like the SB-900 with a quick button push and a spin of the wheel. If you’re already accustomed to the SB-900 controls, you will feel right at home.

The reason that I said Nikon only get’s part of the way there on the control has to do with the way it handles it’s wireless flash units. With the 700 in master mode, the remote flash units are set to the same flash exposure mode as the 700. This means that if you are using TTL for the main on camera flash, you can’t set the remote units to anything else. For most this probably won’t cause a problem. For me I want to make my remote flashes different exposure control than my master sometimes. Sometimes my subject is being lit with TTL, but in the background I want to add a small amount of kicker light with a gel. The SB-900 allows for this independent control of the wireless flashes, but for whatever reason they excluded it from the SB-700. To work around this, I use the SU-4 mode to trigger the background lights instead. Speaking of SU-4 mode, it works remarkably well on the 700. Nikon flush mounted the light sensor for triggering making this thing super sensitive. When I say sensitive, I mean SENSITIVE. It picks up any little glint of flash and triggers it.
Continue reading “Nikon SB-700: Guest Review by Jason Lykins”
How To Get Started With Adobe Photoshop Lightroom 3

httpv://www.youtube.com/watch?v=-5SA-uluPns


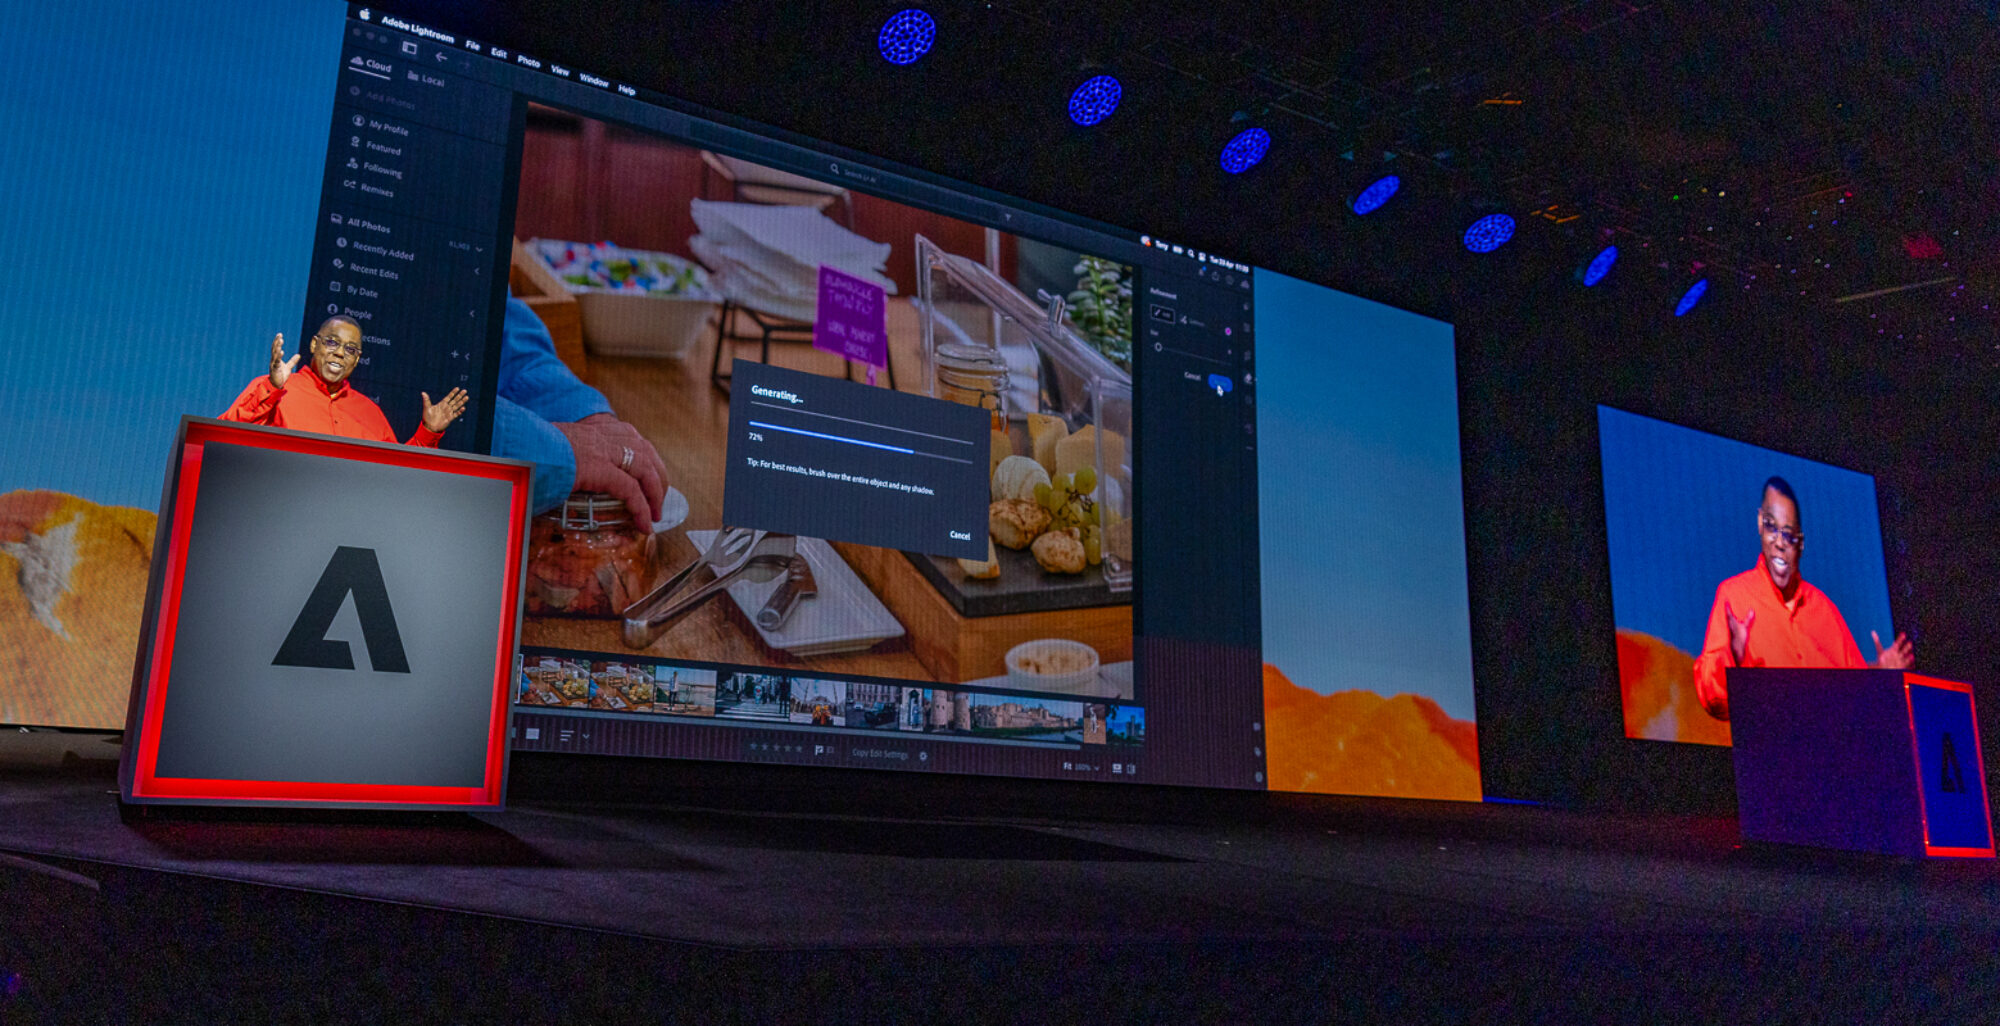
In this episode I show you how to get started with Adobe Photoshop Lightroom 3. Sure there are tons of videos and sites dedicated to Lightroom and showing tips and tricks, but this time I'm specifically aiming at Lightroom beginners. Learn how to get started the right way with Lightroom 3 no matter where you're coming from in terms of image management.


See more of my Adobe Creative Suite Videos on my Adobe Creative Suite Podcast and get the App here. It features EXCLUSIVE CONTENT that no one else gets to see. This episode has a BONUS CLIP that is available on in the App!:

Learn Adobe Creative Suite with Terry White - Wizzard Media


5 Ways To Take Advantage of Dropbox

I started out using Dropbox.com because someone shared a file with me using that service. I really didn't think much about it at the time and treated it like all the rest of the File Sharing over the Internet services out ther. However, the more I used it the more I got hooked on it. I'll also state for the record that I have no affiliation with Dropbox.com, don't know them, never have met them and get nothing from them other than great service. Now that I have that out of the way let me explain briefly what sets Dropbox.com apart from the rest of the services I've tried.


How does Dropbox.com work?

First off you head over to Dropbox.com and setup your FREE account. You get 2GBs for free and while that doesn't sound like a lot (it's really not, but…), it's free and will cover most people's needs for sharing documents. You can also earn an additional 250MB's of space (up to 10GB total), per each friend you refer that signs up for a free account.

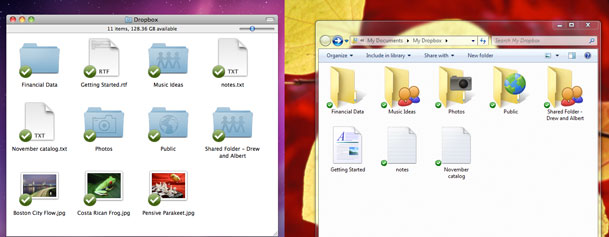
At this point you haven't done anything special that you couldn't have done on a dozen file sharing sites out there. However, what you also get is the ability to download the Dropbox.com application for your Mac or PC (as well as mobile devices such as iPad, iPhone, Android, Blackberry, etc.). With the Dropbox App installed it sets up a "Dropbox" folder wherever you want it be on your drive. You can treat this folder like any other folder. You can create subfolders in it as well. The difference is that anything you put in this folder will AUTOMATICALLY and securely sync up to the "Dropbox" cloud. The files will still be on your local drive, but they will also be available online via the Dropbox website as well as accessible from any of your mobile devices and sync'd to any other computers you have Dropbox installed on. This is what really sets it appart from most similar services out there. The latest version even offers the ability to keep this folder sync'd with your other computers on your LAN, which is a lot faster. Now that we know how it works (if not, watch the video at the end of this post), here are 5 ways to take advantage of it:


Have the same files on your Laptop and Desktop computer

Because Dropbox will sync the contents of your Dropbox folder across ALL of your computers (Mac, Windows, Linux), it makes it really easy to have the same files on a work/office/studio computer and a home computer or a Desktop Computer and a Laptop. Every operating system out there gives each user account a "Documents" folder. Instead of putting your documents in the default "Documents" folder, put them in a Documents folder located inside your Dropbox folder. Now you can work as you always do and when you get home those same documents will be there waiting for you on your home computer or on your laptop. This same concept would work for photos, music and movies as well.  Syncing happens in the background once the document is saved and closed. 


Share a folder with your colleagues

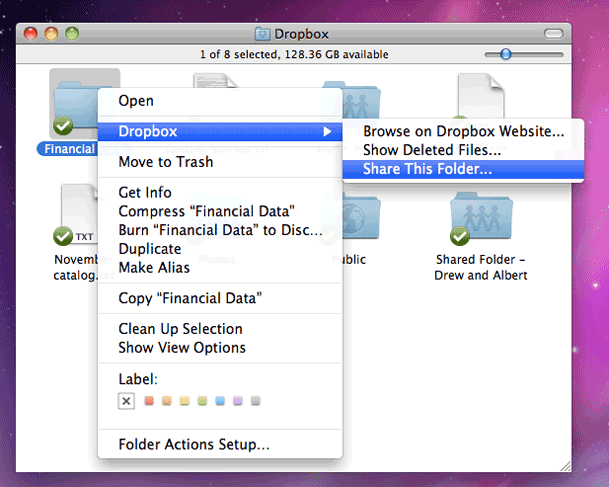
The shared folder concept is how I got started with Dropbox in the first place. Someone shared a folder with me and the other people working on the project. When any of us would add things or make changes to the stuff in that folder, it would automatically sync those things to each of our computers. No more emailing files back and forth or using thumb drives. This is also useful for sharing photos with a group of if multiple people take photos at an event, they can all copy them to a shared Dropbox folder for everyone to have a set.


Create instant online, sharable photo galleries

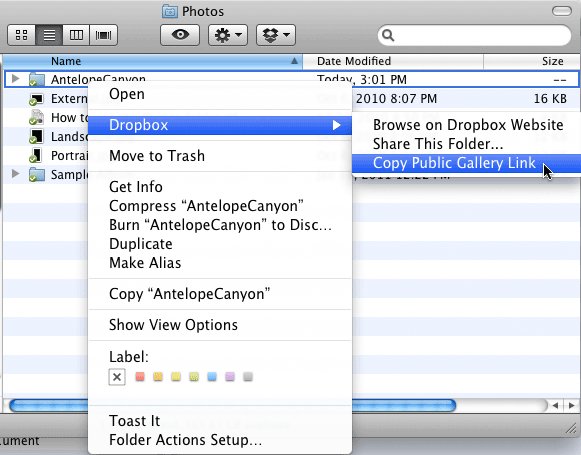
I hadn't really discovered this feature until recently. If you stick a folder of JPGs in the default "Photos" folder, Drobbox will automatically turn it into a gallery and let you share a link to that specific folder for anyone to see even if they don't have a Dropbox account. Here's an example gallery that I created.

Continue reading “5 Ways To Take Advantage of Dropbox”

The New MacBook Pros are Here!


As rumored, Apple introduced their NEW MacBook Pro lineup today and while they didn't introduce the MacBook PrAir that I'd hoped for, these new machines are noteworthy in terms of performance features. The most notable enhancement is the new "Thunderbolt" (aka Light Peak) multipurpose port offering up to 10Gbps data throughput. This makes it the fastest I/O port that Apple has ever used on a notebook offering speeds that are 12 times faster than Firewire 800. The next notable update is the move to the Intel Quad Core "Sandy Bridge" processors. Lastly in the notable update area is the upgraded "FaceTime HD" camera offering a much higher resolution image over the previous iSight camera. Apple also moved to AMD graphics cards. I had hoped for faster Nvidia cards with 1GB of RAM or more for Mercury (effects) Playback in Premiere Pro CS5, but the good news is that Premiere Pro rocks with real-time GPU playback on AMD too.

Get all the specs here.


So what will I do?

Although I had hoped for a New MacBook Pro that was closer to the MacBook Air in terms of weight, I can't argue the potential of these new notebooks for making my work and demos go even faster. I look forward to a NEW 15" "work" MacBook Pro (is the store back up yet? 🙂 ) However, I had a backup plan in case these weren't the new lighter weight models that I dreamed of and that plan is to buy a 13" MacBook Air to be my "personal" notebook. Granted I do personal stuff on my work notebook and I'd probably do work on my personal notebook, but having the choice of either one depending on my needs for a particular trip would be great. This way if I'm NOT traveling to do a demo/teach a class where I need all the horse power I can get, then I'd bring the Air. I'd probably also use the Air around the house along with the iPad. With services like Dropbox.com keeping files in sync between multiple computers is not a problem these days. So that's my plan.


UPDATE – To answer the questions I'm getting regarding Premiere Pro playback on the new AMD graphics cards

Here's a video by my buddy Dave

httpv://www.youtube.com/watch?v=dUyxSJUVQb0


How to Work With Images in Adobe InDesign CS5

httpv://www.youtube.com/watch?v=pqAb2Rk11d8


In this episode I take on one of the most fundamental challenges for NEW InDesign users as well as Photographers who are tired of trying to do layouts in Photoshop (right tool for the wrong job 🙂 ). After watching this video you should have a good handle on not only how to bring images into InDesign, but also how to sizes them and display them the way you want.


See more of my Adobe Creative Suite Videos on my Adobe Creative Suite Podcast and get the App here. It features EXCLUSIVE CONTENT that no one else gets to see. This episode has a BONUS CLIP that is available on in the App!:

Learn Adobe Creative Suite with Terry White - Wizzard Media


Review: IPEVO Point 2 View USB Camera for iPad/Mobile Device Demos

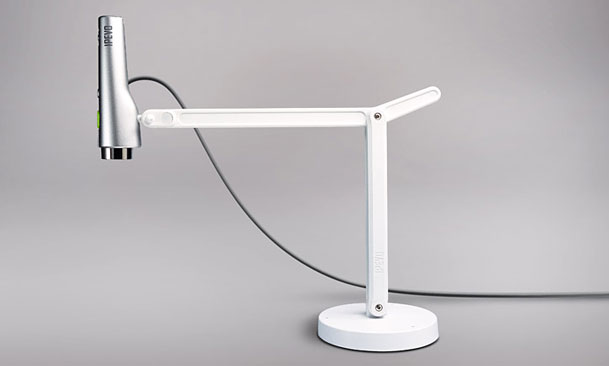
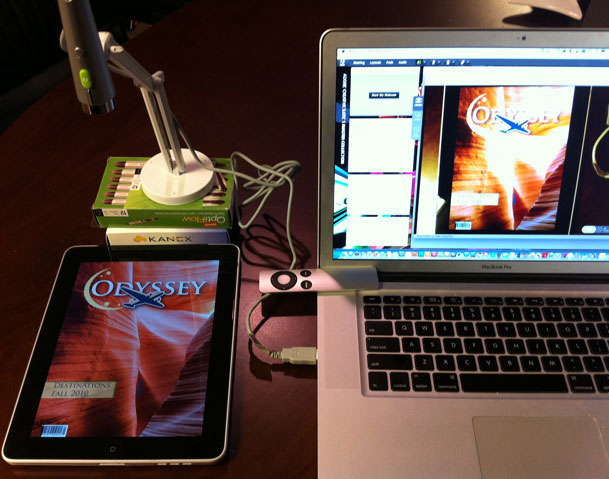
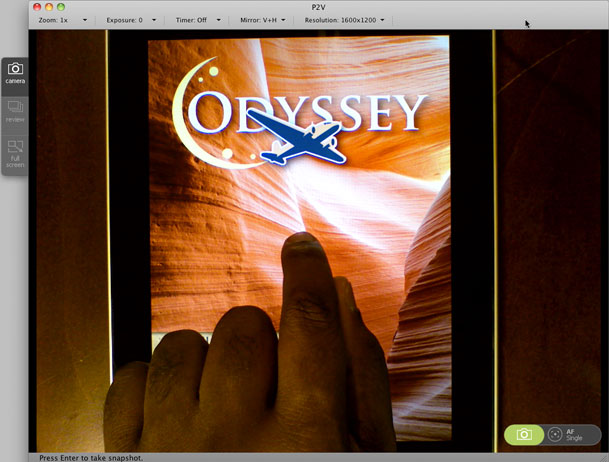
As I go out a demo Adobe's Digital Publishing Suite one of the biggest challenges is showing the final product to the audience on the iPad/Android tablet. Although the iPad does have a video out solution via the iPad to VGA adapter, that Adapter only works in certain Apps and apparently adding support for to your App (depending on what your app does) can be tricky. The only other solution is to use a document camera. While document cameras certainly aren't new, they are not really designed for travel. My colleague Colin Fleming pointed me to the IPEVO Point 2 View USB Camera. He hadn't tried it yet, but it came up in his Goole search. While I loved the size I was very leary about the "USB 2" connection. Most solutions I've tried that are USB 2 based have low frame rates, which makes it challenging to show any type of movement. These "document cameras" were never designed to shoot anything moving (ie. movies, multi-gestures) or animating on screen. They were designed to take still pictures of objects or "documents".  


Low cost of entry

I went out and read every review of the Point 2 View that I could find and most of the reviews slammed it as  "webcam". This is largely due to the fact that it doesn't have a built-in microphone. Since I have no desire to use it as a webcam and the fact that it was only $70 (cheap compared to other solutions), I decided to give it a shot.


It works!

The good news is that it works! It should be fine for what I want to use it for. It's small enough to put in a laptop bag or suitcase and the weighted base means that it won't easily fall over. It's far from perfect though:

The Good

  • It's Cheap! $70 – most solutions cost at least twice as much
  • It's very portable and travel friendly – A MUST
  • It has a weighted base and is designed to point down
  • Doesn't require any drivers on the Mac. Just launch their supplied App and turn it on.
  • One button auto focus or choose Continuous Focus (not fast, but good)
  • Has a full screen mode – great for making training videos
  • In App Zoom, Exposure Controls
  • Update: Works with other Apps too including iChat, ScreenFlow, Skype, etc., which will make giving mobile demos online and recording them even easier. Thanks Cari!
  • Software lets you reverse the image both horizontally and vertically which means it doesn't have to face the same way in every situation. 
  • The included stand allows the camera to be mounted in front or on the sides
  • It can take a picture too. (download two sample shots here)

The Bad

  • The frame rate is not great, but should be good enough for Adobe Connect demos and  live demos
  • You HAVE TO USE THEIR APP. Not the end of the world, but it's the only way you will see it on screen CORRECTION, it works in other apps too
  • The stand is barely tall enough for iPad in portrait view so may need to put the stand on top of something else to raise it up a bit.
  • No built-in mic – I don't care.
  • White Balance Sucks – no controls for it either
  • Not great in low light, but shouldn't be a problem shooting a lit display of a device
  • USB cable is hardwired in, but luckily it's long enough.


The Bottom Line

Frankly I'm stunned that someone hasn't designed a device for the sole purpose of demoing mobile devices. Mobile devices are exploding and it seems like some clever  person would see the need and develop a specific product to do this! While you could go with a cheaper webcam with better video quality, the challenge is always finding a way to mount it on a stand and face it down as most webcams are designed to attach to your computer display. In the meantime the IPEVO Point 2 View USB Camera will be my solution until something better comes along. It does have the right blend of size, price and features to be the best solution that  I've seen so far for doing demos of mobile devices on the go.

You can get the IPEVO Point 2 View USB Camera for $69 here.

Continue reading “Review: IPEVO Point 2 View USB Camera for iPad/Mobile Device Demos”

Review: My New Jawbone Era Headset – It’s Jack’s Fault :)

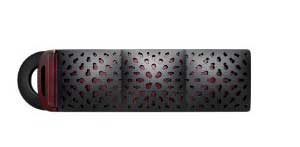
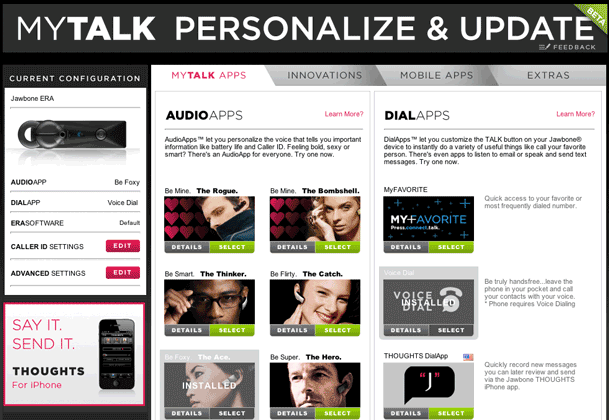
I've been totally happy with my Jawbone ICON headset (see my original review here). I did notice a new model called the Jawbone Era, but I didn't really get around to looking at it. Then my buddy Jack did his review of it and I read it. There was one thing in his review that caused me to place an order on the spot. Well actually it was two things. The first thing and probably the one that stood out the most was actually a little thing. When I receive a call on the Jawbone ICON it rings in the headset, but it also reads off the phone number from the caller-ID. While that's fine, in most cases I'm not going to know whose number it is because I don't commit phone numbers to memory. This means I either just take the call or look at the display on my phone first. The Jawbone Era has a feature that lets you enter up to 20 favorite numbers with names via the MyTalk website and it will actually read off the name aloud when that person calls. This makes an already great headset that much more "handsfree". The next thing was the Noise Cancellation. According to Jawbone, this headset has their "Military-grade NoiseAssassin 3.0" and while I never had a problem with people hearing me with the ICON, there have been times I've been in noisy environments and better noise reduction would have been nice. 


But wait, there's more

Those reasons might not be enough for the general population to upgrade. So Jawbone didn't stop there. This new version while it's slightly longer than the ICON is also slightly thinner. It appears that this configuration allowed them to use a bigger or better battery. So now instead of 4 hours of talk time I get 5 hours. This is also the first headset with a built-in accelermeter. That's right! You can shake to answer a call. I didn't say it wouldn't make you look strange, but the feature is there if you want to enable it and use it. I much prefer the new "doubletap" to answer feature. Like the Jawbone ICON, the Jawbone Era is software upgradable with firmware updates as well as software add-ons. My favorite voice is "The Ace". If you have an iPhone or Blackberry the headset's battery indicator will display right on your phone. I also commend Jawbone for including several different ear gels at different sizes. It also supports A2DP which allows you to use this headset for your music and App playback as well.

I can't think of a single feature that I would add to this headset. It does it all and is a great step up from the ICON.

You can get the Jawbone Era here for $129.99 or less.

I want a 15″ MacBook Air

I've always been a fan of the size and weight of the MacBook Air. However, due to the low end performance that they typically have I could never use one as my primary notebook. It's rumored that we will see New MacBook Pros sometime in March and it's also rumored that Apple will take some design cues from the MacBook Air and implement them in the MacBook Pro. For example, eliminating the optical drive. That got me to thinking about what I would want in my next MacBook Pro? Here's my wishlist:

  • 15.4" ANTI-GLARE Display (I could live with a 13" display, but I really like the 15.4" size)
  • Intel Core i7 level of performance <-this is probably the hardest to do and the biggest deal breaker for me on the current Airs
  • 2 USB Ports
  • 4GB RAM minimum, expandable to 8GB of RAM or more (If i can't get Core i7 performance, then I definitely want 8GBs of RAM
  • 1 FW 800 Port (I'd be willing to give up the FW 800 port in favor of USB 3.0)
  • 1 Gigabit Ethernet Port (not  a deal breaker if it had to be 10/100)
  • 1 SD card slot (I would give this up in favor of the other ports though)
  • Audio in/Audio out
  • iSight Camera
  • 512GB SSD
  • 802.11n WiFi/ Bluetooth of course
  • a built-in 3G data option would be nice, but I'd probably use my MiFi anyway
  • 4-5 hours of REAL battery life (does anyone ever get the 8-9 hours they claim on the current model, ever?)
  • Fast Nvidia Graphics Card <-a wish, I know
  • Display Port video out

I really could live without the optical drive. I only use it every blue moon these days and as long as there was an option to use the external SuperDrive when I needed to, I'd be fine.

What really attracts me to the MacBook Air is that it's so darn light! If Apple could build a MacBook Pro with the above specs and have it come in under 4 pounds I'd order one without blinking.


Call it a MacBook Prair 🙂  – thanks Lukas for that!

Great Night of Digital Publishing to the iPad

I wanted to take a few moments to thank everyone who attended last night's InDesign Users Group Meeting in Livonia MI. I had a blast presenting Adobe's NEW Digital Publishing Suite to you all. It was great having a meeting with enough time to give you an in-depth look at the tools and how they work from start to finish. Thanks for the great interactions and questions. It was also a pleasure giving you guys some sneak peeks into what's on the horizon.

If you are an inDesign/Creative Suite User, you should definitely check out your local InDesign Users Group

5 Tips on Drawing in Illustrator CS5 with Special Guest Mordy Golding

httpv://www.youtube.com/watch?v=LCb0shXPKeA


In this episode special guest Mordy Golding shows us 5 Tips for Drawing in Adobe Illustrator CS5. These tips are great for beginners and even experienced AI users that may be new to CS5.
Check out Mordy's Fridays with Mordy and Design Responsibly.


See more of my Adobe Creative Suite Videos on my Adobe Creative Suite Podcast and get the App here. It features EXCLUSIVE CONTENT that no one else gets to see:

Learn Adobe Creative Suite with Terry White - Wizzard Media