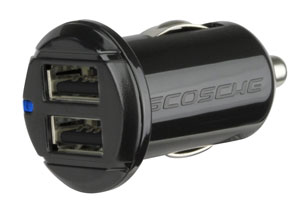
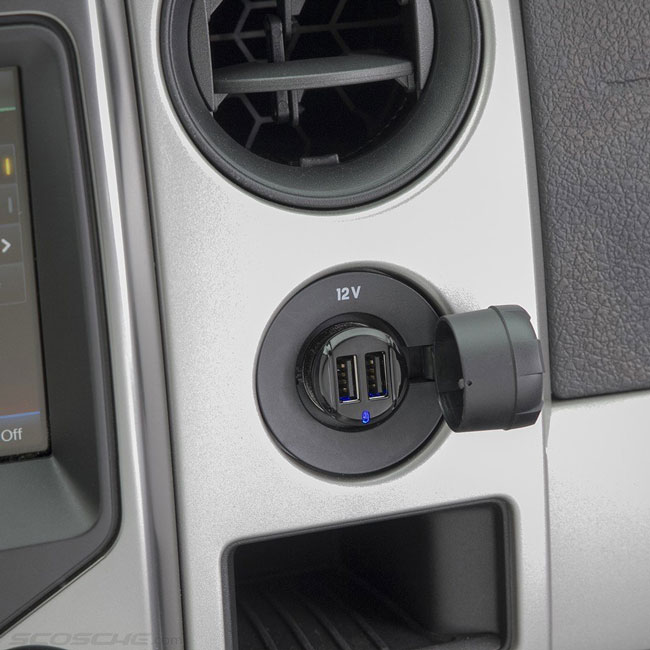
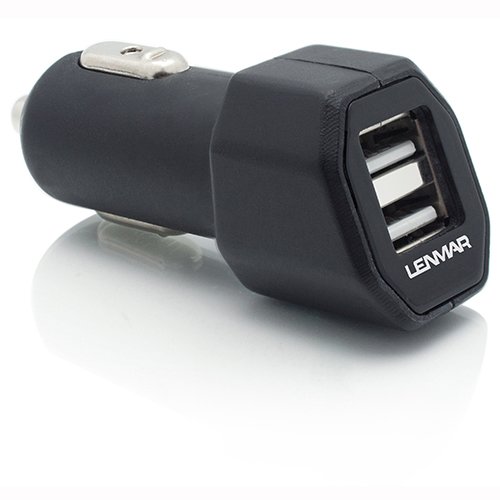
Every time I turn around there seems to be a new, better car charger than the one I’ve been using. I actually started with this Scosche Dual Charger over a year ago. It worked great, but the thing that I didn’t like about it was that only one of the ports charged at the faster 2.1A speed. Then I discovered this one by Lenmar. It gave me what I wanted, TWO ports both charging at 2.1 AMP/10 watts each. Perfect! Well it was perfect until I discovered that Schosche released a dual 12 watt charger! If you have a newer iPad 4th generation or iPad Air you might have noticed that Apple now includes a 12 watt wall charger instead of the 10 watt charger included with previous models. Now you can charge your iPad Air in car at full speed or speed charge a smartphone. Since we usually aren’t in our cars for hours at a time each day, speed matters. You might be able to get back up to a full charge faster on a shorter commute. I also figure why have just one port when you can have two? This way you can charge your phone and another device such as a tablet or a passenger’s phone.
I also like the low profile fit. The original Schosche I used back in the day stuck out of the socket quite a bit. This one almost fits flush with the 12V socket. Even if your car has a built-in USB port I’m going to go out on a limb and say that it doesn’t provide 12 watts of power. In most cases it’s probably a 5v 1A USB port. As far as I can tell this is one of the fastest car chargers on the market.
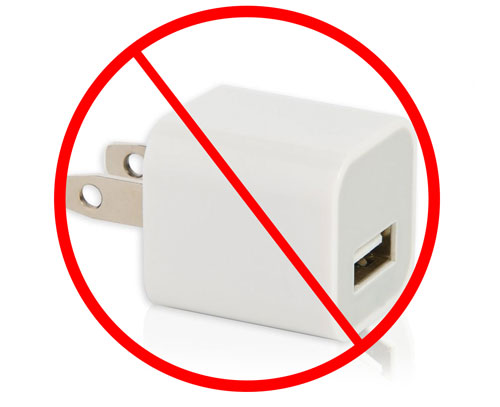
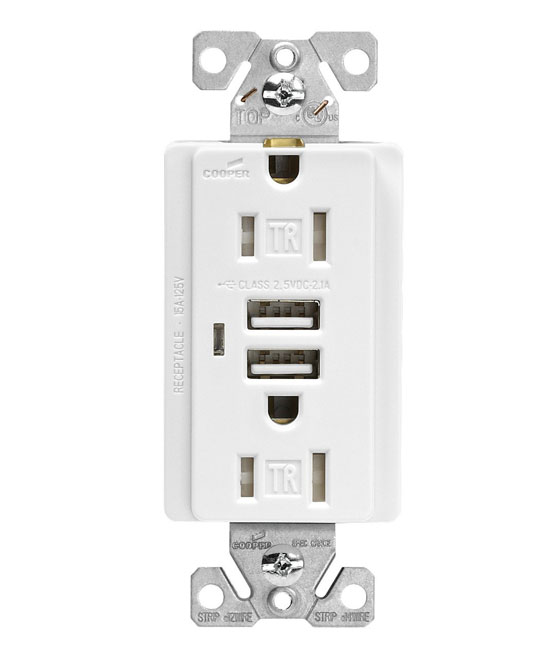
Your smartphone probably came with a USB wall charger. Chances are you probably need or at least would find it convenient to have more than one. Perhaps one at your desk, one by the bed and maybe one in your travel bag. A quick check shows that the retail price of an Apple USB wall charger is $19. Of course you could get ANY 3rd party wall charger for half that price or less. However, even at $9 for a good quality generic charger you might want to consider a different option. If you’re buying a charger that’s going to have a permanent home under your desk, behind a nightstand, etc. then why not just get a power strip that also has USB ports on it? This way you could plug in your lamp, computer, speaker, etc. and charge your smartphone and/or tablet as well.
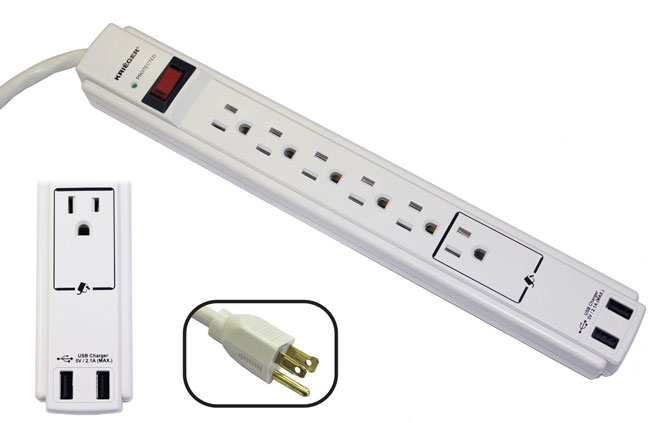
I just bought 3 of these for use around the home and home office. So far they’re working out GREAT! Unlike most power strips/surge protectors this one has a longer than average 6 foot cord. It has a lighted power switch as well as 2 USB ports that can provide up to 2.1A of power, which is enough to charge an iPad. Also the fact that it’s a surge protector as well doesn’t hurt. The only downside is that the 2.1A is shared between the two ports. This means that you can charge two devices or one device at the full 2.1A speed. Yes, you can charge an iPad (or other tablet) and iPhone (or other smartphone) at the same time, just not two devices that both require 2.1A each.
Here’s the best part: This power strip is on sale for only $14.99, which is less than the cost of a name brand single port USB charger. Get this one and you can use the charger that came with your phone as a travel charger.
In this episode of Adobe Creative Cloud TV, I’ll show you how to use Adobe Photoshop Generator to make webclip icons for your website so that when people bookmark your website to their home screens on iPad, iPhone or iPod touch they’ll get your custom icon.
Are you missing out on my Bonus Content?
See more of my Adobe Creative Cloud Videos on my Adobe Creative Cloud TV and get the App below. It features EXCLUSIVE CONTENT that no one else gets to see. This episode has a BONUS CLIP that is available only in the App! My iOS App is a Universal App for iPhone, iPad and iPod touch. I also have an Android version on the Amazon App Store:
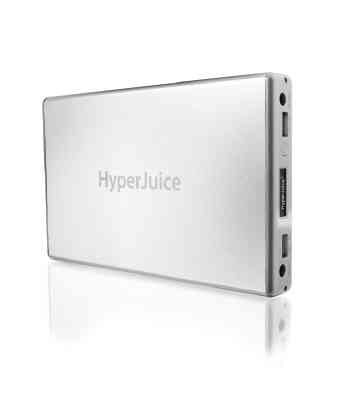
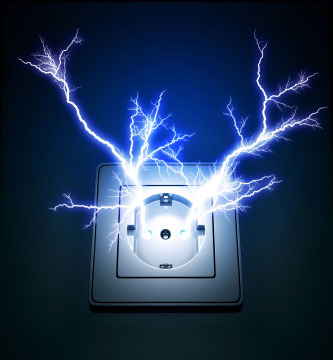
There I am at my desk at 5PM on a Sunday and I can hear the rain outside. Next I hear the wind really whipping by and bam, there go the lights. After a few seconds the lights came back on and then after a few more seconds they went off for good! Sure my APS UPS Systems kept my Server and Internet Router going for a while before they eventually ran out of juice. Since I was headed out of town the next morning I just decided to relax and take it easy for the rest of the evening. However, the one thing that I definitely wanted to keep charged and running the entire night was my iPhone. I have a battery that I keep in my backpack which is good for a couple of charges, but I had never tried to go all night with it. Also while I was sitting at my desk I hadn’t plugged my phone in so it was already down to around 40% battery left. That’s when I remembered my HyperJuice battery that was also in my office and fully charged!
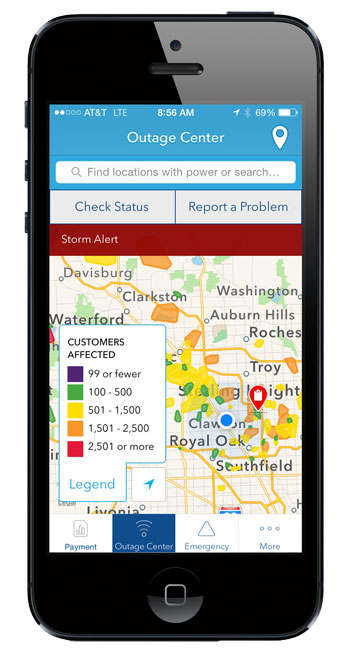
I commend DTE Energy for having a nice App to not only report the outage, but get status updates and see what other areas are affected:
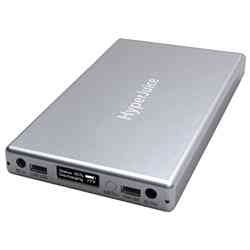
This battery is really designed to power your MacBook for long periods of time when AC power isn’t readily available. However, it also has a USB port for charging/powering phones and tablets. I plugged my iPhone into the USB port and not only did I wake up fully charged 8 hours later, but the HyperJuice still had plenty of juice to top off my MacBook Pro as well! When I originally bought this battery it was for long flights and being at seminars where there were no plugs nearby. I hadn’t carried it in a while and never thought that I’d be using it to get me through the night because of a power outage.
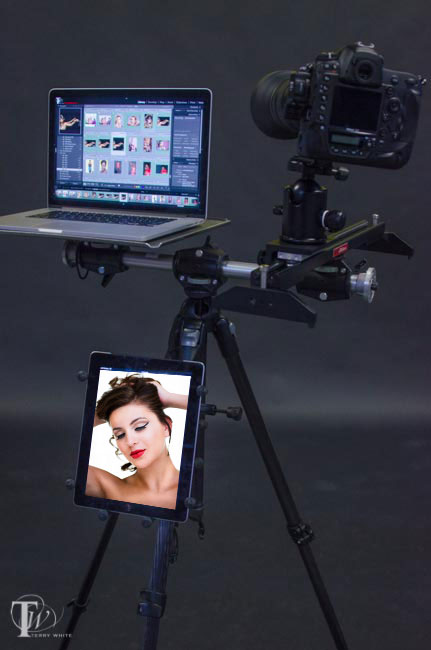
Lightroom has allowed for USB tethered capture from popular Nikon and Canon cameras for several years now. However, I can’t tell you how many people have asked me about tethering directly to an iPad pretty much since the 1st shipped in 2010. Four years later, while there are several shoot to iPad solutions out there, there still isn’t a way to plug your camera directly into an iPad and shoot tethered like you do with your computer and Lightroom.
Here’s what’s in my Tripod Rig Setup Above
RAM-B-121-UN9U The RAM X-Grip Universal Clamping Cradle and Clamp
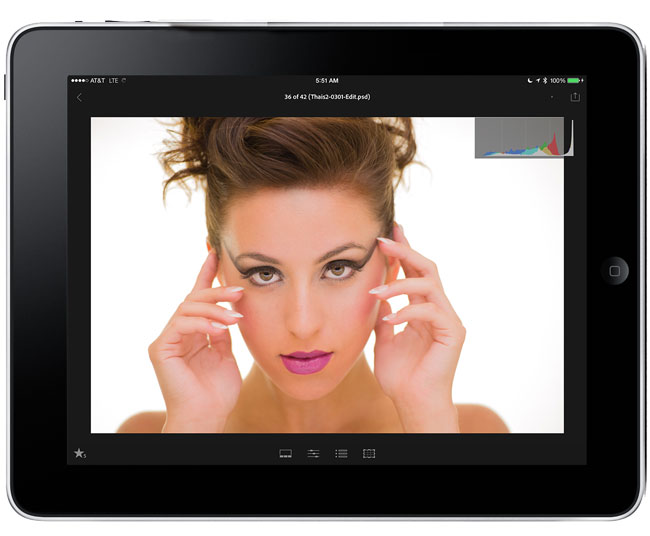
I personally use an Eye-Fi card when I’m out in the field and my iPad then becomes a nice big 10″ display to preview my shots. The Eye-Fi cards create their own ad-hoc network and therefore no hotspot is required. The images wirelessly transfer from my camera to my iPad. Now that Lightroom mobile is here, the question becomes can I shoot tethered into Lightroom mobile and the answer is yes! However, even though the answer is yes, it still involves your computer as there is still no way to connect your camera directly to your iPad via a USB cable and shoot tethered like you do with your computer. In studio I’m shooting either tethered directly to Lightroom via a USB cable, to my computer from my Nikon D4 via Ethernet or via the Nikon WT-5A Wireless Transmitter to a folder where the images are auto imported into Lightroom. There are two ways to shoot tethered to Lightroom mobile:
Before we get into the methods you’re going to need Lightroom 5.5 and a Creative Cloud membership. The Creative Cloud Photography program is affordable at only $9.99/month and includes Photoshop CC, Lightroom, and unlimited syncing to Lightroom mobile.
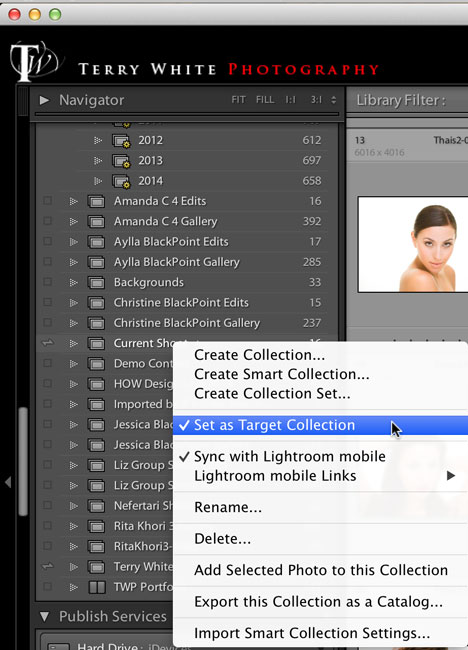
Recently Scott Kelby did a post “My First Studio Shoot Using Lightroom Mobile” during this shoot he was shooting tethered from his DSLR to his computer running Lightroom 5.5 desktop. However, he did a very clever thing. He had a collection marked to sync with Lightroom mobile and his creative director was holding his iPad. He made that collection the “target collection” (a Lightroom feature) so that as he saw images coming in from his camera that he really liked all he had to do was hit the letter “b” on his keyboard to add those images to the collection that was sync’d to Lightroom Mobile. Now the creative director could see the images on the iPad from any location and help direct the shoot, make changes to the wardrobe, etc. Since Lightroom mobile is a two-way communication between the iPad and the desktop version of Lightroom she could also flag or star rate images on the iPad and those flags and ratings would appear in Lightroom on the desktop for Scott to look at further and tweak if needed. This is an awesome way to work and it allows you to show only the BEST images to your client, director, assistant, etc. However, it does require more interaction on your part as you have to hit “b” for each image you want to be added to the collection. I had never thought of using the Target Collection in this way and it makes total sense. This got me to thinking if perhaps there was a way to automate this so that each image would just go into a collection as they come in to Lightroom via tethering? Currently Lightroom mobile doesn’t support Lightroom’s Smart Collections. So I began to look at 3rd party plugins….
The next method “Tethering to Lightroom mobile”
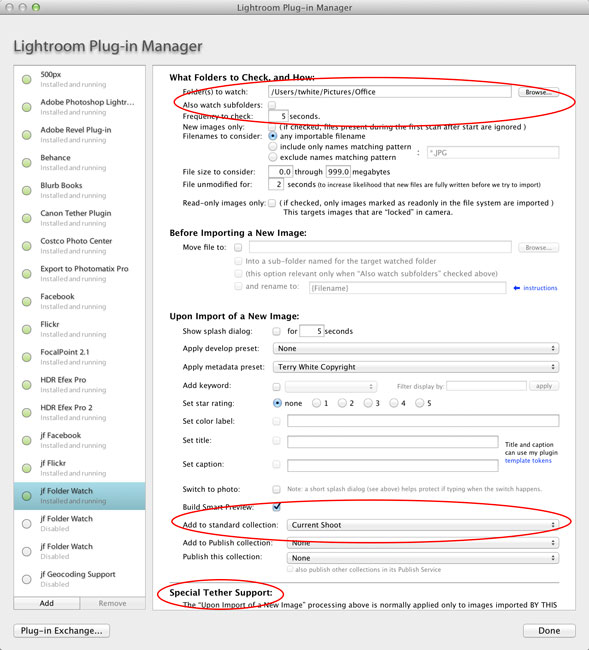
Like I said above, I wanted a way to bring in all the images I’m shooting so I wouldn’t have to touch the keyboard every time I wanted an image added to the iPad/Lightroom mobile. After looking at Scott’s method above this definitely has some downsides to it. As you know not every shot is good. Sometimes the strobe doesn’t fire or the image is out of focus. Sometimes the model isn’t ready or you capture an awkward frame. Chances are you don’t want your client seeing this frames. If that’s the case you’re better off using the “Selective Tethering” method above. However, if it’s you and say an assistant or other person on set that needs to be able to see what you’re shooting via the iPad then you probably don’t care as much if a few bad ones get in. As a matter of fact if it’s an assistant they could be helping by “rejecting” the bad ones for you! My search for a 3rd party solution started and ended with Jeffrey Friedl’s “Folder Watch” plug-in.
This plug-in was originally designed as a more full featured alternative to Lightroom’s Auto Import (what we used before native Tethering) feature. Sadly after I downloaded it I realized it wouldn’t work with Lightroom’s Tether Capture feature because it needed to do the import before it could add the images to a collection.I reached out to Jeffrey and told him what I wanted it to do and guess what? He immediately added the feature for me! Now with this “donationware” plugin you can shoot tethered into Lightroom as you always do and designate a collection to add the images to as you shoot. All you do once you create the collection is sync it to Lightroom mobile.
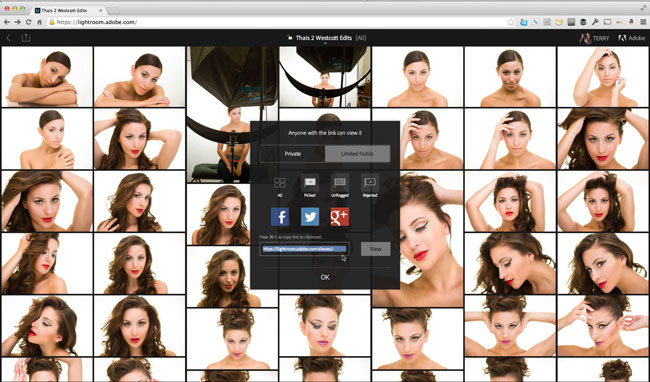
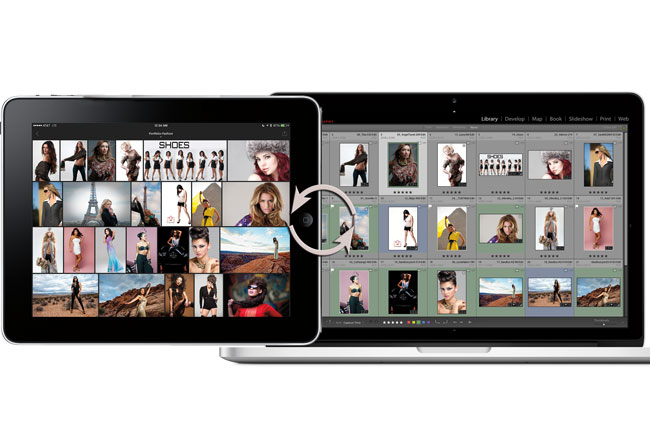
Share with REMOTE viewers too. On ANY platform!
One of Lightroom mobile’s best kept secrets is that it’s not just for iPad and iPhone. There’s also a web component. If you head to lightroom.adobe.com and sign in with your Adobe ID you can all of your Lightroom mobile collection right in a web browser. You can click on any of your collections and grab the link for it and share it with whomever you want to be able to view that collection. This means that you can have a large audience watching your shoot and they will see your new images as you take them (by hitting refresh in the browser) pretty much on ANY platform.
Lastly don’t forget that Lightroom is also on iPhone now
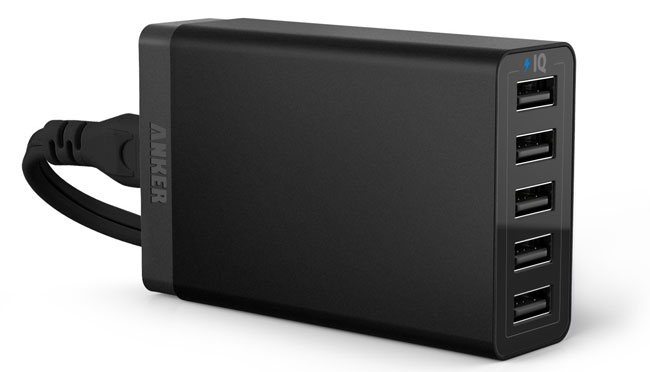
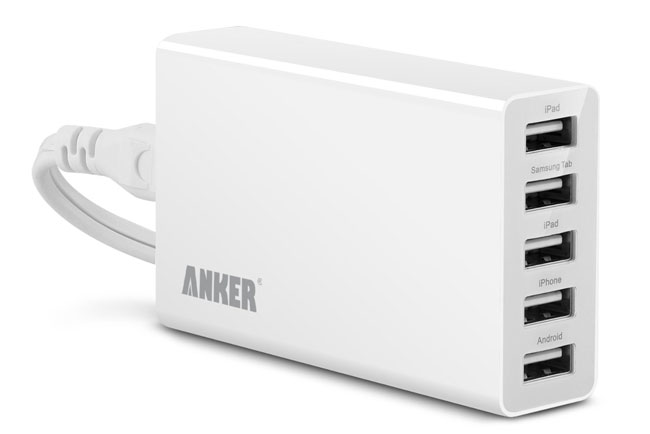
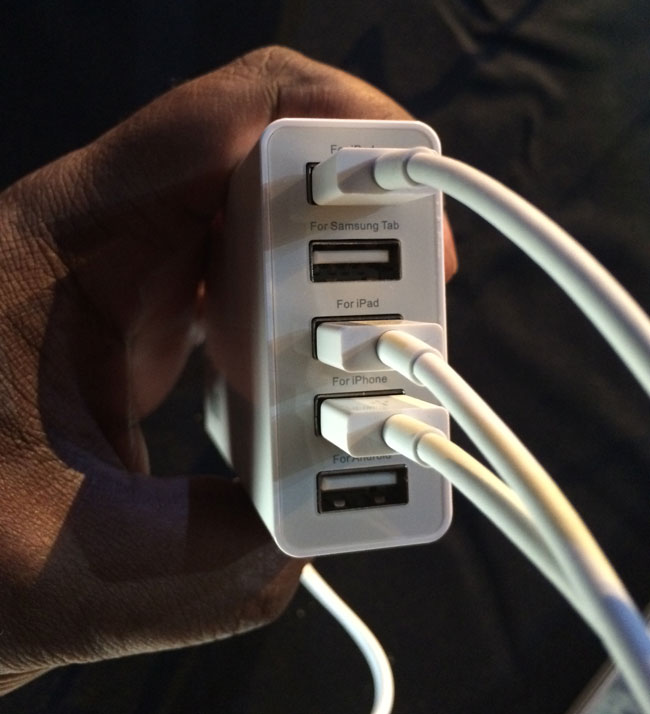
Charging USB devices at home is no big deal as I have charges around the studio, office, bedroom, etc. and even USB wall plates. However, on the road it’s bit more challenging as there are limited AC outlets in hotels and on stage during presentations. Once again I sought out a USB charger that could not only charge multiple devices, but also charge at least 2 iPads, which require a little more juice (2.1A). My search led me to the Anker® 25W 5-Port Family-Sized Desktop USB Charger Travel Power Adapter. This relatively small charger can handle charging up to 5 of your USB devices including 2 iPads at full speed. While I don’t travel with 2 iPads, I do want to be able to charge one iPad and my iPhone at the faster 2.1A speed as well as 2-3 other devices at the same time. If you’re an Android user you’ll even have a dedicated Samsung Tab port as well. Even if you don’t have the specific devices labeled on each port you can charge ANY 5 USB devices at the same time. Speaking of labeled ports that’s another thing I love about this charger. Many of the smaller chargers that have only 2 ports with one of them being high speed don’t always label which one in particular is the high speed one. Lastly another reason I really like this model over previous multiple port chargers that I’ve used is that it has a regular detachable AC cord on the other end with a decent length of 5 feet. This means that I can plug in the one cord into a power strip on stage or outlet behind a night stand and put the charger itself on the table top to connect all the cords too. I used it in LA this week at my event and it worked perfectly and to my surprise it also didn’t get warm to the touch like other charger tend to do.
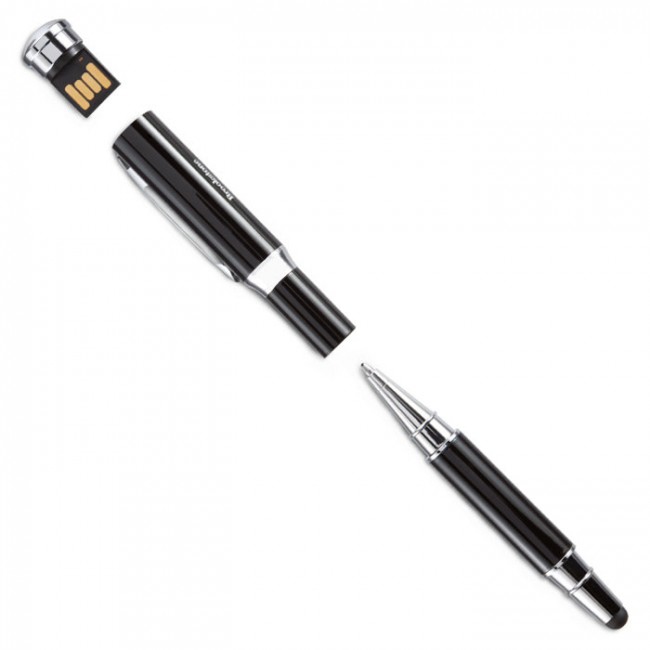
I usually carry my Wacom Bamboo Duo Stylus or Wacom Creative Stylus when I travel for business. The Wacom Bamboo Duo Stylus is a great general purpose stylus for touch screens and the Wacom Creative Stylus takes it up a notch by adding pressure sensitivity with supported apps such as Adobe Ideas. However, on a recent trip to Boston I forgot to pack my usual gear and decided to pick one up from Brookstone in the airport. I really was looking for something basic, but I couldn’t resist the Brookstone 3-in-1 USB Tablet Stylus. Like the Wacom Bamboo Duo it serves both as a stylus for touch screens AND a regular ink pen, but they added a 4GB USB flash drive on the end. I don’t use flash drives much these days, but it’s nice to know I have one for a quick file transfer to a client/colleague.
The Brookstone 3-in-1 USB Tablet Stylus feels good in my hand and definitely allows me to draw and sign more accurately on my iPad/iPhone. I guess my only small nitpick is that if you’re going to including a USB flash drive, it’s probably best to make it at least 8GB these days. 4GB seems so small. Otherwise this was a great emergency buy and I will continue to use it along side my other ones.
You can get the Brookstone 3-in-1 USB Table Stylus here.
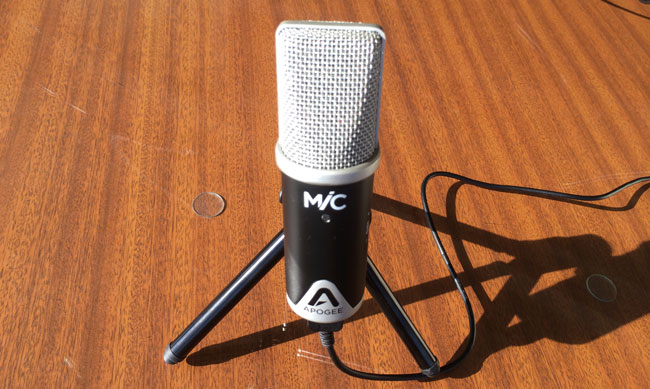
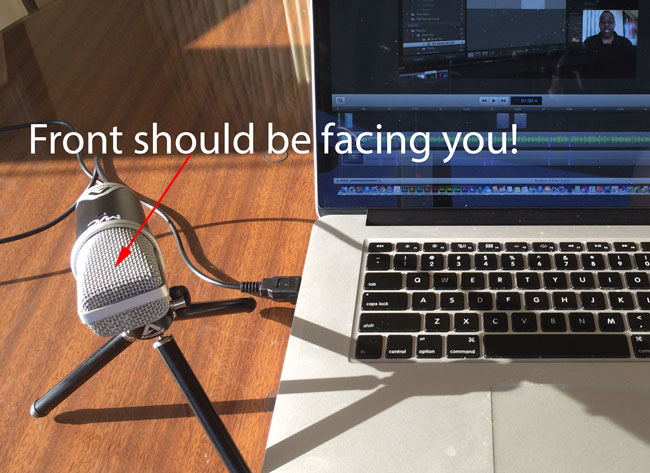
I’m on the road and I realized that I’m going to be doing more tutorials for my YouTube channel and Creative Cloud TV. While I have a great microphone in my studio, I really didn’t have a good one that’s small enough to travel with. I was in the Apple Store in San Francisco and decided to check out their selection. I was with my colleague and musician Jason Levine. I picked up a small microphone by Apogee and Jason immediately recognized the name and said “you can’t go wrong with them.” Apparently they are well known for professional audio equipment. He saw that it was 24-bit and was again very impressed. Since I trust Jason’s opinion when it comes to audio gear I knew I was holding the best one. I was also intrigued to see that this particular microphone not only had GREAT specs, but it was designed to work with a Mac, iPad, or iPhone! That made this a win-win purchase. I could have a great quality mic for recording on any of my devices.
Setting up the Mic 96k
One concern I had before leaving the store was that it was unclear if it included the stand that was pictured on the box. It stated that it included a “mic adapter” (which it does). The Apple Store rep didn’t know either. I was pleasantly surprised to see that once I opened the box it not only included the little tabletop stand, but also three cables. I expected to have a USB cable for the Mac and one for the Lightning connector on the iPad/iPhone, but it even included the older cable with the 30pin connector for older iOS devices. Setting up the Mic 96 is really easy. Just attach the appropriate cable for your device and plug it in. That’s it. No software to install. The light will go on blue at first. This lets you know that it’s on but not ready. It will then turn green when it’s ready and red if your gain is too high.
I screwed up my first recording
I mistakenly positioned the capsule up instead of facing me.
OK sometimes I’m an idiot when it comes to things like this. I didn’t pay attention to the capsule location so I had the mic pointing at me like a singer would hold a mic instead of straight up and down. It worked, but boy what a difference it made once I put it in the proper orientation. I did a quick test into Screenflow and the sound quality was outstanding. Sadly it was too late to re-record my latest episode as it was already posted.
Testing on the iPad Air
Since I blew my chance to get a real world recording for this week’s episode, I decided to do a quick test on the iPad using Adobe Voice. You can hear the results below or here:
The Bottom Line
Overall I’m very happy with the quality of the hardware itself as well as the audio quality. My only complaint is that for the price I feel it should have come with a carrying case, especially since they tout it as a solution for iPad/iPhone. This means that they expect people to carry it. Other than that I love it!
The long awaited Lightroom mobile is here and I couldn’t be happier to give you your first look:
Today we’re announcing the immediate availability of Lightroom mobile. Lightroom mobile extends your existing workflows beyond the desktop. Lightroom mobile allows you to utilize your iPad to do all sorts of great things and have the changes sync back to your Lightroom catalog at home, including:
Access images in your Lightroom catalog
Make selects, reject unworthy photos
Apply a preset
Refine your adjustments using all your favorites from the Basic panel, including Highlights, Shadows, and Clarity
Import new photos directly from the camera roll
Lightroom mobile utilizes Smart Previews to provide raw editing functionality on your iPad. First introduced in Lightroom 5 beta, Smart Previews are:
Based on the DNG file format
Limited to 2560 pixels on the long edge
Smaller version original raw files
Can be used to make adjustments even when the original files aren’t available locally
Adjustments made to Smart Previews are applied to the original when the original files are available
How to get started:
1. Download Lightroom 5.4
Lightroom mobile is a companion to Lightroom desktop. Lightroom 5.4 is the first version of Lightroom desktop that includes the ability to sync images to Lightroom mobile. Please update to the latest version of Lightroom 5 using either the Creative Cloud app or by clicking on the “Help-> Check for Updates” menu option.
2. Sign In
Lightroom mobile utilizes cloud services to sync Smart Previews and changes between Lightroom desktop and Lightroom mobile. Lightroom mobile requires a qualifying Creative Cloud or Photoshop Photography Plan subscription:
Photoshop Photography Program (Get Photoshop CC, Lightroom 5 (including Lightroom mobile), 20GB of online storage for files (optional use), and a Behance Prosite for only $9.99/month.)
Creative Cloud complete plan
Creative Cloud Student and Teacher Edition
Creative Cloud for teams complete plan
A free 30-day trial of Lightroom mobile is available.
3. Sync a collection
Lightroom mobile is organized around Collections. Images within Collections will be synced and be available in Lightroom mobile.
4. Download Lightroom mobile for iPad
Visit the App Store on your iPad and download Lightroom mobile. Once you login with the same Creative Cloud account, you’ll see all of your synced Collections. .
5. Check out your photos at lightroom.adobe.com
In addition to Lightroom mobile, we’ve also launched Lightroom web, a new way to view and share your images from any web browser. Available at http://lightroom.adobe.com.
System Requirements
Lightroom mobile is available now on iPad 2 or later, and works on iOS7 or later.
Thanks!
Are you missing out on my Bonus Content?
See more of my Adobe Creative Cloud Videos on my Adobe Creative Cloud TV and get the App below. It features EXCLUSIVE CONTENT that no one else gets to see. This episode has a BONUS CLIP that is available only in the App! My iOS App is a Universal App for iPhone, iPad and iPod touch. I also have an Android version on the Amazon App Store:
If you have a smartphone and you use it throughout the day chances are your battery won’t last from the time you wake up til the time you go to bed. If you work in an office or other stationary place then you probably charge your device at your desk. If you drive around you probably charge your device in the car. However, what if you’re out and about all day, take trains and are just not near a wall outlet? There are ways to charge on the go. Here are a few of my favorite accessories:
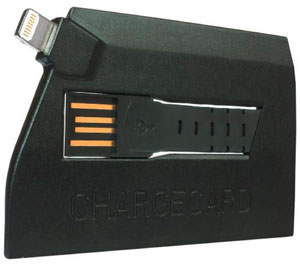
ChargeCard
First off even if you can get to a charger or USB port and you’re an iDevice user then you’re going to need a cable. Good luck if you are borrowing a charger from your friends that use Android and other platforms. This is why I love the “ChargeCard” it’s a credit card size “cable” that I keep in my wallet. Pop out the USB plug, plug it into any standard charger or USB port and the other end into your Lightning port on your iPhone, iPad or iPod touch. Away you go…
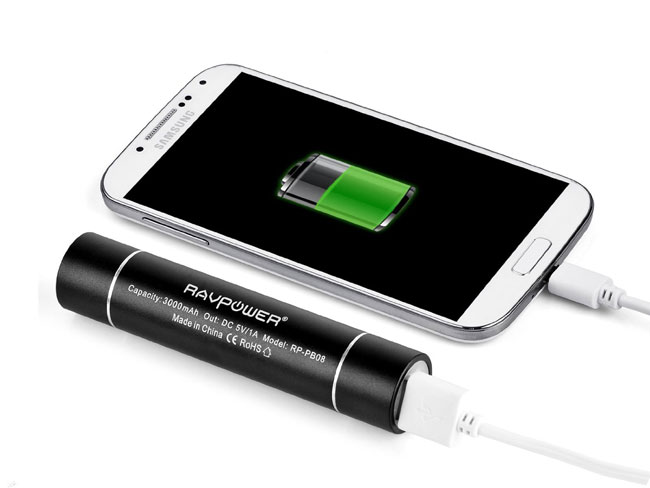
I have a variety of different portable batteries. However, this is one the coolest ones I have because of its size and form factor. At first glance it looks like a standard small LED Flashlight and it is! However, on the other end is a standard USB port so that you can plug in your smartphone and charge it back up. What more can I say? A device that serves more than one purpose effectively is always going to be a favorite of mine!
Get the RAVPower Lipstick External Power Pack here.
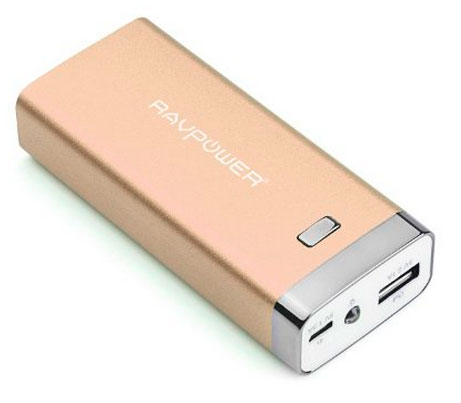
RAVPower Luster 6000 mAh Battery Pack
Need more juice? If you want to be able to charge either a smartphone or a tablet then you’re probably going to want 2.1A output. That’s why I carry a RAVPower Luster 6000 mAh Battery Pack. This one has enough juice to charge either my iPhone 5s or my iPad Air. Even if you’re only going to want to charge a smartphone, then you might want to get this one because the higher output will charge your smartphone faster!
Get the RAVPower Luster 6000 mAh Battery Pack (in multiple colors) here.
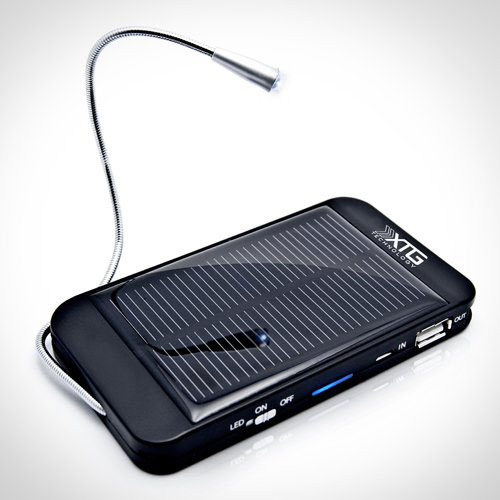
Premium Solar Charger
A battery is great, but what about those times when even the external battery goes dead? Well there’s always the sun as a backup. This is a battery pack similar to the ones above that can be charged up via a wall outlet, but it also can be charged via solar energy.