A Less Expensive USB-C Hub for your Mac/PC, iPhone 15 or iPad

With the introduction of the iPhone 15 and iPhone 15 Pro phones, I’m connecting more peripherals to my iPhone 15 Pro than ever. For the first time, I can connect to gigabit ethernet, which is GREAT for those times when I need to sync a ton of raw photos and 4K videos to the cloud.

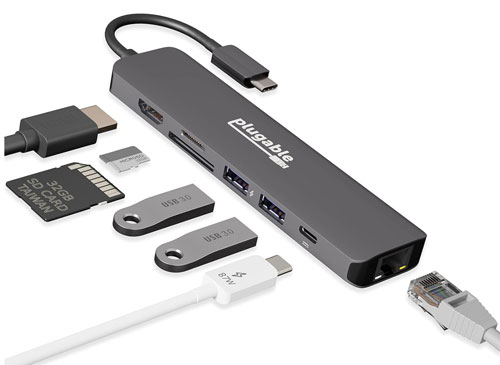
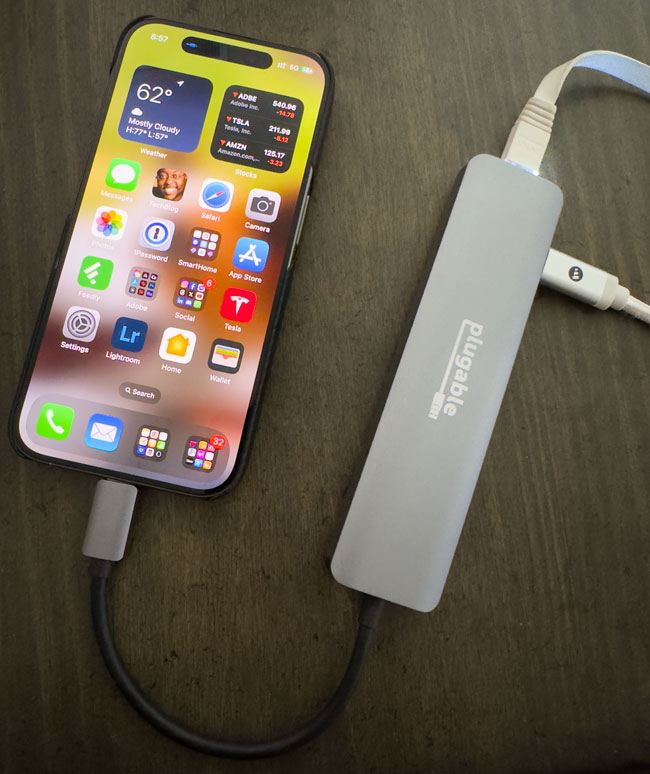
The Plugable 7-in-1 USB-C hub is plugged into my iPhone Pro. I currently have it connected to Ethernet, USB-C power and a microSD memory card from my drone.

When I first blogged about this, I recommended a great 9-in-1 USB-C hub, Hyperdrive. However, it was expensive (about $99). I discovered a 7-in-1 USB-C Hub with the same connectivity minus one USB port and one audio port. If you can live without these two additional ports, then you can save money by getting the Plugable 7-in-1 USB-C hub (about $40) instead.

The Plugable 7-in-1 USB-C Hub gives me four things in one.

Continue reading “A Less Expensive USB-C Hub for your Mac/PC, iPhone 15 or iPad”

An Affordable Thunderbolt 2 Dock with 4K and Dual Display Support

elgato-thunderbolt2-dock-front

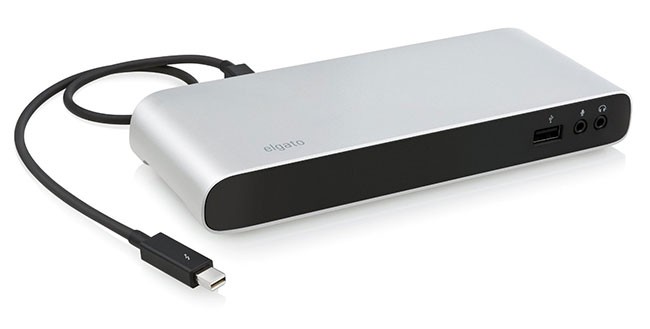
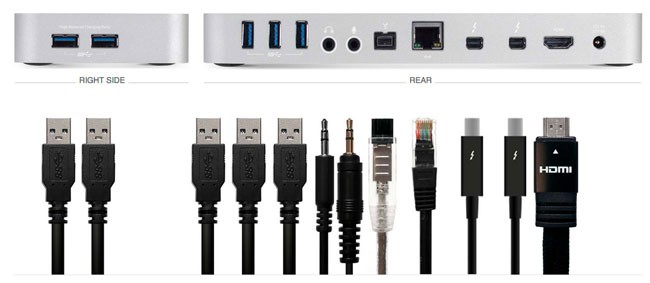
For years now my MacBook Pro has been my primary computer. Now my only desktop computer is my Mac OS X Server. Having a MacBook Pro doesn’t mean that I don’t have a ton of peripherals that I need to connect. The last thing I want to do when I leave or return from a trip is connect a bunch of cables. That’s where a Thunderbolt 2 dock comes in. Although I’ve used a Belkin one for years now, people are always asking for a lower priced alternative. Elgato has created one the fits the bill nicely. For a hundred dollars less than the competition you still get 2 Thunderbolt 2 ports, 3 USB 3.0 ports, 1 HDMI port, 1 Gigabit Ethernet port, and an audio in and audio out port. Really the only thing missing is more USB 3.0 ports and a legacy port like Firewire 800 or eSATA. Since I connect more than 5 USB devices anyway I would still need a USB 3.0 hub. Also most people at this point have probably replaced their older Firewire 800/eSATA devices with newer tech. If you fall into that category then I would save save the hundred bucks and use part of it to buy a USB 3.0 hub.
elgato-thunderbolt2-dock-back

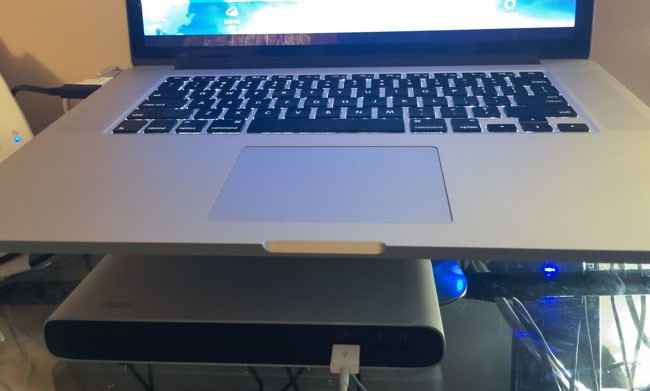
The design is nice and compact and it’s great having the audio ports on the front as well as the 3rd USB 3.0 port capable of charging your mobile device.

elgato_thunderbolt_2_dock_onmydesk

The Bottom Line

If you have a MacBook Pro then having a Thunderbolt 2 dock is a big plus. You’ll enjoy the single Thunderbolt connection and the additional ports. The one thing I wish that these devices offered are more Thunderbolt ports. You really don’t gain any because you have to connect the dock to one of your existing ports taking up a Thunderbolt port on the dock and one on your computer. That leaves you with the same number of Thunderbolt ports that you started with. I would like to see a model with 3 or 4 Thunderbolt ports for true Thunderbolt expansion.

You can get the Elgato Thunderbolt 2 Dock here on sale.

For a few bucks more you can get this one by OWC that has 5 USB 3.o ports and a Firewire 800 port.


OWC Creates a Better Thunderbolt Dock

OWC-thunderbolt-2-dock

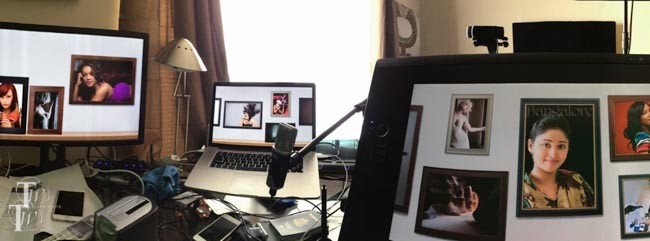
In 2013 I got the Belkin Thunderbolt Dock and I’ve been quite happy with it. So what could change in two years? Well, a lot. The basic principle is the same. A Thunderbolt dock allows you to plug in a single Thunderbolt cable into your Mac and expand the ports giving you more USB 3 ports, Firewire 800, audio line in/line out, etc. The NEW OWC Thunderbolt 2 Dock does what you would expect but offers 5 USB 3.0 ports instead of 3. It offers 2 Thunderbolt 2 ports, and HDMI (with 4K support) in addition to Firewire 800, Gigabit Ethernet, Audio in/out. Two of the five USB 3.0 ports are also high powered for charging your bigger devices such as iPads. With they addition of HDMI this means that now I only have to plug ONE Thunderbolt 2 cable and one display port cable to my Cintiq 24HD into my MacBook Pro and ALL of my devices and displays are connected.

wpid14281-IMG_3522_sm.jpg

For those of us who use our MacBook Pros like a desktop computer when we’re at our desks, these Thunderbolt docks are indispensable. It makes coming home or back to the office so much easier by just having to plug in one or two cables to have all of your devices connected. Now if it could only cut down on the amount of clutter on my desk, I’d be even happier! 🙂

You can get/pre-order the OWC Thunderbolt 2 Dock here. Initial supplies are limited. I ordered mine the minute they announced it and was happy when it shipped.


Actiontec MyWirelessTV Stream HDMI Sources Wirelessly to Another HDTV

In my studio I have one Comcast cable connection connected to a TiVo box in an upstairs office. However, in the reception area I have an HDTV on the wall that’s used to display photos via an Apple TV. While I could easily have Comcast run a line to that HDTV on the wall, I didn’t want an ugly cable box hanging off it. I could also perhaps run a long HDMI cable from the upstairs room through the walls to the HDTV in question. However, I didn’t want to attempt it on my own. I’ve been skeptical of the performance of wireless streaming systems, but I decided to give one a try. As a matter of fact I was so skeptical that I didn’t even open it for 2 weeks after it arrived.

Actiontec My Wireless TV WiFi / HDMI Multi-Room Wireless HD Video Kit

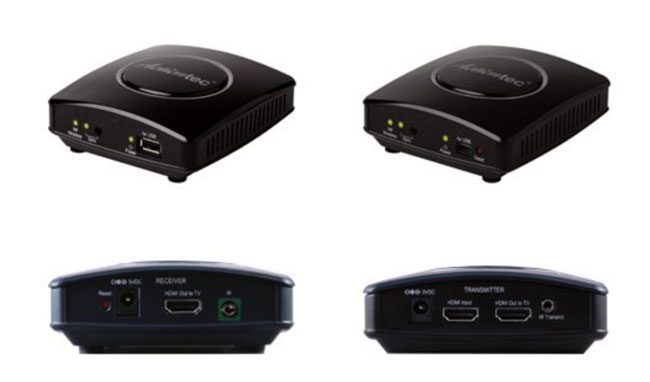
Wow, that’s quite a product name (they need help there). Let’s just call it the Actiontec MyWirelessTV for the sake of this review. I decided to finally open the box and setup the Actiontec MyWirelessTV. The installation was very straight forward. I didn’t once think about looking at the manual. The transmitter has 2 HDMI ports, one for your source (my TiVo box) and the other goes back out to the HDTV (the one upstairs). They include 2 HDMI cables (one for the transmitter and one for the receiver). I plugged in the IR receiver as well as the power supply. I saw the lights blinking and headed downstairs to the reception area HDTV. I plugged the receiver into a second HDMI port on the TV, I plugged in both the IR transmitter and the power. Much to my amazement after a few seconds I was seeing the live broadcast from the TV box on the reception area HDTV right in front of me. The image quality was AWESOME. MUCH MUCH MUCH better than I expected. The sound was good. I was done! It worked! Floored!

The next thing I tried was grabbing the Harmony One remote from upstairs and trying to change channels. Unfortunately that didn’t work at all. I’m still trying to troubleshoot the IR Blaster transmitter/receiver to see if there’s something else I have to do? Luckily if I just point the remote at the staircase it bounces the signal up to the TiVo and I was able to change the channel.

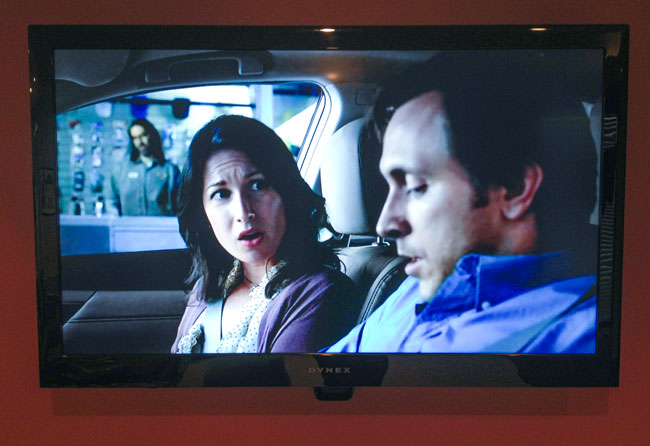
Lastly I don’t want to see the box! I tried simply putting the box behind the HDTV resting on the wall mount. At 1st I completely lost signal. I unplugged it and plugged it back in and everything came back. My HDTV reports that the signal being received is 1080p.

Now the only thing I have to do is get a multi-AC plug adapter so that I can hide the power cord behind the TV as well. Currently the two plugs are being taken up by the HDTV and the Apple TV.

One thing I should point out. Although the long name has the word “WiF” in it, it doesn’t connect to your WiFi network at all. It uses its own internal wireless technology. That’s why it just worked the minuted I plugged it in.
The Bottom Line

Even if I don’t get the IR function working, I’m completely happy to be able to watch my TiVo and LIVE HDTV in another room without having to run cables or pay for additional cable boxes. Is the quality as good as a hardwire HDMI connection? No, but it’s more than acceptable for the use that I bought it for.

UPDATE! I tried the original TiVo remote and the IR Blaster worked just fine. So it appears to be an incompatibility with my universal remote, the Harmony One. Now I’m 100% happy with it! I was planning on keeping the TiVo remote downstairs anyway so I wouldn’t have to carry the remote back and forth.

You can get the Actiontec MyWirelessTV Video Kit here.

You can get additional receivers here.
Monoprice: So much more than low cost cables


Over the years I’ve published posts about spending too much money on cables. When you go to retail store to buy your electronics those stores typically lower the cost of the gadgets themselves to remain competitive (otherwise you’d just buy online or down the street). However, they tend to recoup that lost revenue in other areas and services such as cables. I’ve lost count of how many times I’ve seen a sells rep bring out a $100+ Monster HDMI cable explaining to the customer how much they really need a “quality” cable. I agree! You should have a quality cable. The problem is that it doesn’t have to cost an arm and a leg. I’ve got some really low cost HDMI and Ethernet cables over the years that are still in operation to this day without any problems.

Whenever I bring up the topic of low cost cables, someone enviably calls out monoprice.com. Monoprice has become my goto source for low cost/high quality cables of all types. Especially HDMI, USB and Ethernet. The prices are almost too good to be true and the quality of the cables is outstanding!

The point of today’s post is that Monoprice is more than just cables. I wanted to mount a 32″ HDTV on the wall in my office. What I didn’t want to do was pay an arm and a leg for the mounting bracket. This is another source of revenue for retailers. These brackets can easily cost $100 or more. A quick search on Monoprice.com revealed that not only could I get the bracket I needed a fraction of the cost, but it even offered a nifty built-in level. I ordered my bracket, installed my HDTV and I couldn’t be happier. It came with everything to mount the bracket to the wall/studs as well as the necessary screws to attach the TV to the bracket. It came with a variety of different screws for all kinds of wall materials and different TVs.


The next time you want to save money on cables and accessories, check them out!


Review: BlackMagic Intensity Extreme Thunderbolt HD Capture Device

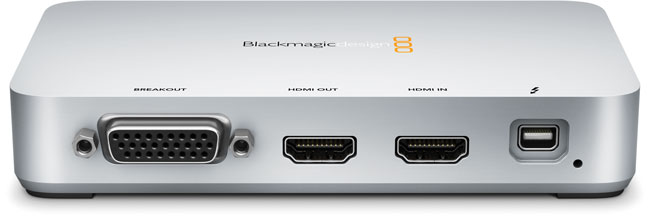
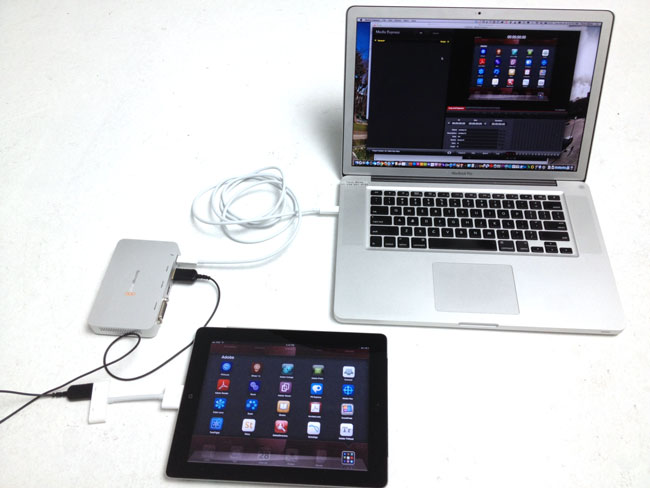
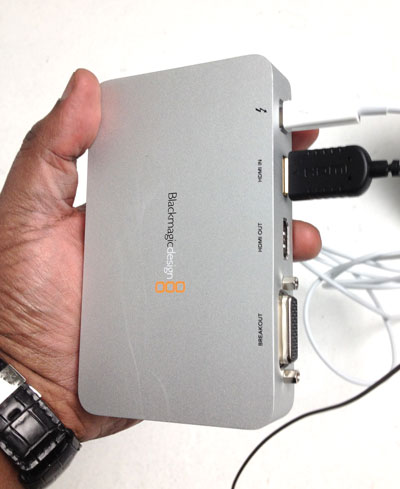
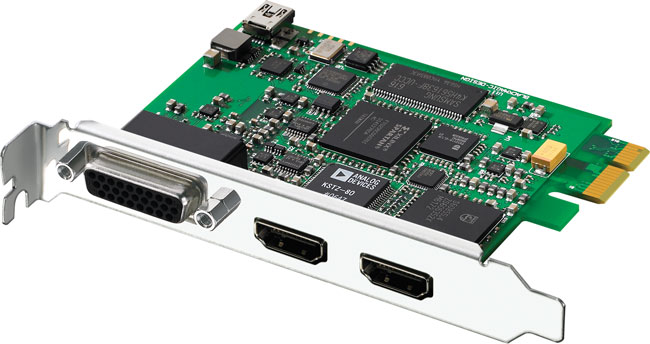
Earlier this week I released a video showing the NEW Photoshop Touch for iPad 2. The video was recorded using the iPad Digital AV Adapter that allows you to connect an iPad 2 to an HDTV via HDMI and a BlackMagic Intensity Pro that is installed in my Mac Pro tower. While the Intensity Pro card works well it means that any videos that I want to produce directly from my iPad 2 have to be done on that computer. A few months back BlackMagic announced a new external verison, the Intensity Extreme! The difference is is that the Intensity Extreme is an external capture device that connects to your Mac via the super fast Thunderbolt connector. As a matter of fact this is my 1st Thunderbolt device. While Apple has been equipping their new Macs with Thunderbolt ports, the actual 3rd party Thunderbolt equipped devices and peripherals have been slow coming to market.

How does it work?

Before I could even get started I had to go get a Thunderbolt cable from the Apple Store, as it’s not included. As far as I can tell Apple is currently the only company shipping a Thuderbolt cable ($49). While I’m totally against overpriced cables, the Thunderbolt cable is more than just wire and connectors. The cable actually has some chips/processors in it. However, I expect that competition will bring the price. down.

Once I got back with the cable I installed the BlackMagic software/driver, connected the box and to my pleasant surprise the Intensity Extreme is bus powered via the Thunderbolt port. NO POWER BRICK! I was already used to the software as it’s the exact same software that the Intensity Pro uses. Once I set my preferences, the iPad 2 showed up in the capture window and I was ready to go (record)!

What about audio?

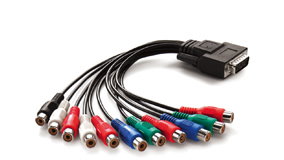
While HDMI does carry both video and audio, the problem is that I want the audio from my voice to be recorded along with the demo. There are a couple of options. The Intensity Pro also supports a breakout set of analog cables and even supplies all the female connections (pictured above). Just plug in your audio gear and you should be good. However, just like on my Intensity Pro, I don’t use this set of connections. The reason is I’m also going to want to be on camera and may integrate things/software demos from my computer too. In this case I record both my talking head image, whatever I’m doing on my computer and my audio simultaneously into Screenflow while I’m doing the demo on the iPad 2, which is being recorded into the Intensity Extreme. I put the two videos together in post using Adobe Premiere Pro CS 5.5 as well as adding the iPad “frame” as a Photoshop file on a layer below.

The Bottom Line

This new Intensity Extreme is a winner on all counts. While it took longer than expected to actually ship it, they got it right. It’s small enough to travel with and produces FANTASTIC uncompressed HD results so that you’re starting with the cleanest HD video possible!

UPDATE: this also works the exact same way with the iPhone 4s. You use the same Apple AV Adapter and plug it in and you can record video out from your iPhone 4s as well. Thanks blog reader “RF” for the tip!

You can get the BlackMagic Intensity Extreme here for about $285. You also get your Thunderbolt cable on the same order here.


Continue reading “Review: BlackMagic Intensity Extreme Thunderbolt HD Capture Device”

Travel Tip: Watch Your iPad Movies on the Big Screen HDTV in Your Room

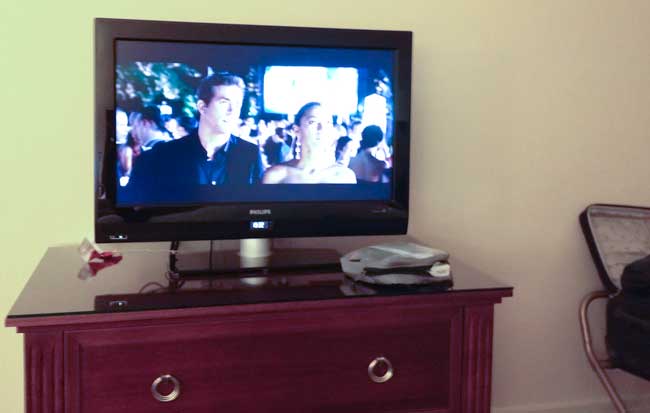
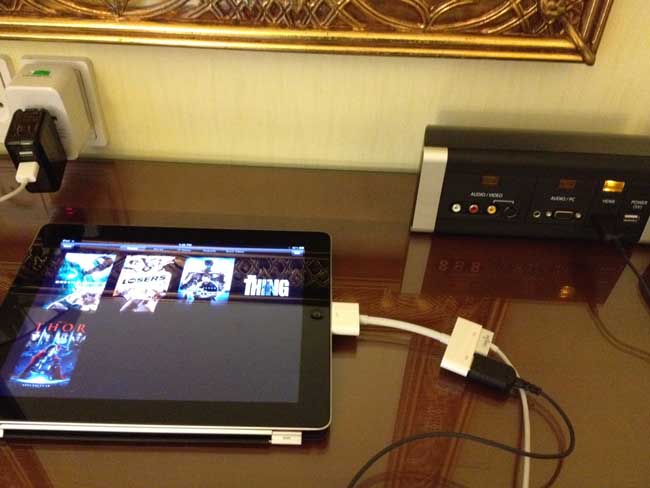
If you have an iPad 2, then you have the ability to mirror your display to either VGA or HDMI connections. While most hotels now have LCD/LED Flat Panels in their guest rooms, some even let you connect your own gear to them. Marriotts are known for this and while I was in Copenhagen I decided to watch some of my rented movies on the 32″ HDTV in my room.

What does it take to connect your iPad to a HDTV?

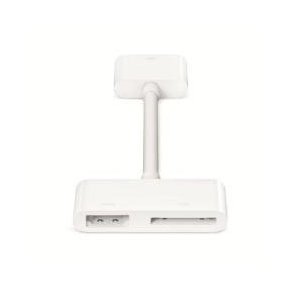
If your HDTV has an available HDMI port then it’s much easier as Apple sells an iPad HDMI (Digital AV) adapter. The best part about this adapter is that not only does it send the video and sound, but it also has a standard 30 pin connector so that you can attach your power/sync cable too. This way your iPad can be charging while you’re watching your video content. There is nothing really to setup. All you do is plug in the cable and adapter and your iPad 2 will automatically mirror its display to your HDTV.


What if my Hotel Room only has a VGA connection?

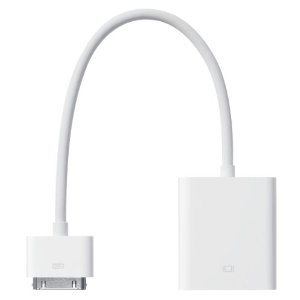
Not all hotels offer an HDMI connection. Some offer only a VGA connection assuming that you’ll be connecting your laptop. Before the iPad 2, Apple sold a VGA iPad Adapter. The good news is that this Adapter works just fine on iPad 2 as well. The downside is that the VGA connection doesn’t carry sound. So if you want to also output sound to your TV, you’ll need an adapter from your headphone jack out to RCA (left/right) connections or to a 3.5mm in.


The Bottom Line

If you’re on the road and you’ve got some time to kill and movies to watch, you might as well enjoy them on a bigger screen.

Here’s what you’ll want

Besides an iPad 2, you’ll want the following adapters/cables:

iPad HDMI (Digital AV) Adapter

Thin HDMI cable for easy travel (hotel rooms most likely will not have any cables for these connections)


If you want to be prepared for just about any connection, then you’ll want these too:

iPad VGA Adapter

Thin VGA Cable

3.5mm to 3.5mm audio cable

3.5mm to RCA cable

Octava 3 Port HD Switch to the Rescue

When I named my top favorite gadgets of 2011, I also declared my Sony Google TV as the most disappointing gadget that I bought in 2011. One of the things that annoys me the most when I'm just watching TV on it is the overly complicated Input Selection implementation. Instead of simply pressing a input button and cycling through the available inputs, you get a menu on screen and then you have to cycle to the one you want and worse press the Select button to make your choice. While this isn't the end of the world using the supplied remote, it becomes a pain in the butt when trying to train universal remotes like my Harmony One or Harmony Link. The benefit of Harmony remotes is that you can press one button for the "Activity" you want and the remote will turn on/off all the appropriate gear and switch inputs. I was actually considering getting rid of this TV and replacing it with one that has regular Input selections. That's when I remembered my Octava HDMI 4×1 with Toslink switch that I use in my home theater. I wondered if Octava had an HDMI switch that would solve my problem in the room with the Sony Google TV and they did! It's their 3 Port HD Switch. Like all of their HDMI switches, it supports the latest HDMI standards, CDP, 1080p resolution and high speed for things like 3D TVs and Blu-ray players. It also come with an IR remote.

It works perfectly

I ordered the 3 Port HD Switch and got it with a Free HDMI cable. I set it up so that the output goes to the HDMI 1 port on the TV. I connected my TiVo Premiere XL to HDMI IN 1, Apple TV 2 to HDMI IN 2 and Sony Blu-ray player to HDMI IN 3. I had to reconfigure my Harmony One and Hamony Link to know about the Octava Switch. Now I can press one button to switch Activities and the Octava Switch switches to the right source as it should!

Normally I would only use the Octava HDMI switches when I have a shortage of HDMI ports, but this time it solved another problem.

You can learn about the Octava HDMI Switches here.

BlackMagic Intensity Pro: Capturing an iPad 2 Demo via HDMI Out

One of the main features of the iPad 2 that I use the most over the iPad 1 is the ability to mirror my desktop out to a projector when doing demos. I've been using this feature extensively on my latest Adobe CS5 Evolution Tour. You can use either the original Apple VGA Adapter or the NEW Apple Digital AV (HDMI) Adapter. While this works GREAT for live presentations I also wanted to take advantage of it when recording tutorial videos or App reviews. The problem was finding a solution that allowed me to take either the VGA out or HDMI out of the iPad 2 back into my computer.


BlackMagic Intensity Pro to the rescue

Continue reading “BlackMagic Intensity Pro: Capturing an iPad 2 Demo via HDMI Out”

Quote of the Week: At lengths less than 4 meters you can just about use silly string…

Last week I wrote a post about Paying too much for cables and while most of the response both privately and publicly was in agreement there were a couple of people who felt that I was wrong or my logic was flawed. So I spent a little more time doing some more research. The surprising thing was that I couldn't find a single article or study that suggested that the more expensive cables were worth it. 

One point of clarification

One of the comments suggested that the length of the cable DOES matter and that you should pay for a better cable for longer runs. On this point I TOTALLY AGREE! If I were building a cable into a wall I would absolutely want a better cable as it wouldn't be easily replaced once the construction was done. However, that doesn't necessarily mean that the $200 30 foot cable is necessarily any better than the $50 30 foot cable. Also when I said "it either works or it doesn't", I meant that for ANY length or type of cable. If I buy a 30 foot cable then I expect it to perform like ANY other 30 foot cable should perform. In other words if the picture is distorted, noisy or has artifacts, doesn't transmit HDCP, etc. then that's my definition of "it doesn't work!" Just so you know, I'm also going to plug in the long cable and test it before building it in 🙂


The quote of the week – "At lengths less than 4 meters you can just about use silly string…"

comes from this extensive study that a guy did comparing cables and although he starts off stating that there is a difference in quality, his final takeaways  actually confirm my suspicions:

Your take-away from all this should be the following:


  • At lengths less than 4 meters you can just about use silly string (OK, not really) and get HDMI to pass at any current resolution. At less than 3 meters you'll even extend that to 12-bit color and possibly the next crazy idea HDMI Licensing decides to throw at consumers. Don't spend a lot on these cables and if you want to save money you won't let anyone at a big box store talk you into buying from them.
  • At long lengths (over 10 meters) you really need to pay attention to the manufacturer if you don't want to risk running into potential problems with 1080p and future formats such as Deep Color. With that said, just about any cable at or under 10 meters will pass 720p/1080i and nearly everyone will pass 1080p at 8-bit color as well.
  • If you have an existing HDMI cable and are running into problems, we'd suggest at least attempting the insertion of an active component at the sink (display) side. This is going to be far cheaper than ripping out your walls and re-running new cables – and likely just as effective.
  • HDMI has proven to be a moving target and there is no telling what crazy (likely unnecessary) format they will try to push down the cable next. Due to this, it's always good to "overbuild" your cable install, especially if it's a longer distance and going to end up behind drywall.
  • If you're not prone to upgraditis and think 1080p will be your maximum resolution for the life of your install, don't sweat it…

See the full report here.

Also see this comparison and this comparison. It would be fun to sit people down in a room with an HDTV, good 1080p source and a quality receiver and do a blind test using different cables. I'd be willing to bet money that the doubters wouldn't be able to tell the difference.


Lastly, Thanks!

Thanks to everyone that suggested monoprice.com as a source for low cost cables. I've placed an order for some even shorter HDMI cables than the 3 foot ones I found locally.

BTW: If you still disagree and feel better about the more expensive cables you bought, that's fine with me. Enjoy! 🙂 Y.M.M.V.