If You Have an iPhone 7 You Need This Adapter

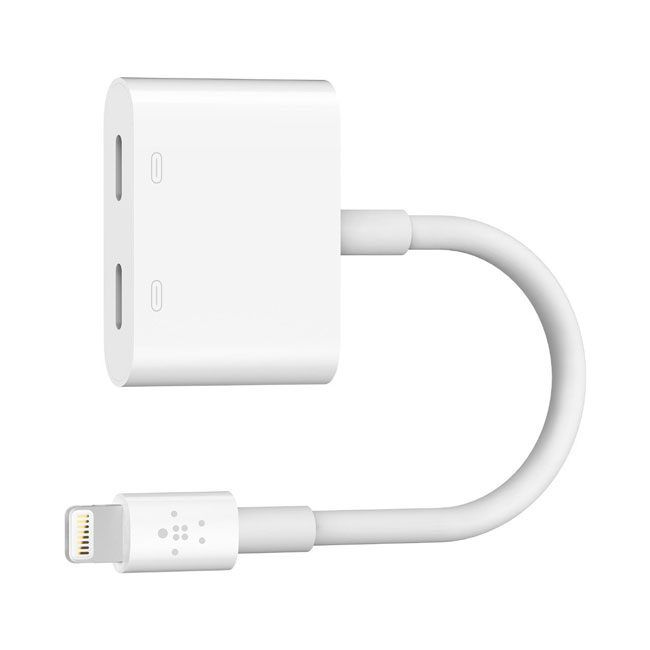
Although I don’t generally miss the headphone jack on my iPhone 7 Plus, there is one scenario that I do miss it. With only having the Lightning port this means that you have to decide to either charge or use a wired headset. Like I said, this generally isn’t a problem because I’m either using a wireless headset or I’m sitting at my desk and my iPhone 7 Plus is sitting in a iPhone dock which also has a wired headset attached to it. However, for those times when I want to plug in a headset and charge at the same time I’ve found the Belkin Lightning Audio + Charge Rockstar adapter. This adapter give you TWO Lightning ports instead of one.

It works great as long as you know the limitations…

Continue reading “If You Have an iPhone 7 You Need This Adapter”

An AWESOME Microphone for your Mac, iPad and iPhone – Apogee Mic 96k

apogee_mic96k

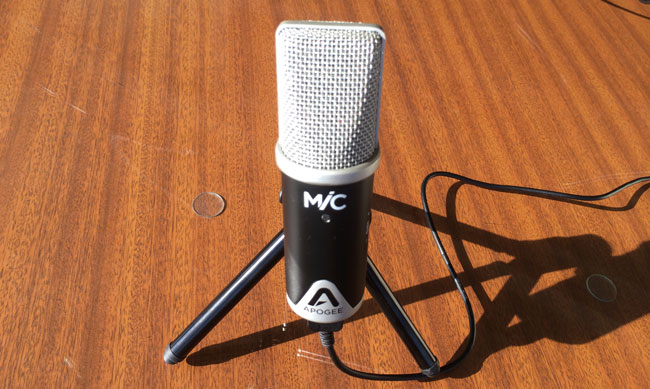
I’m on the road and I realized that I’m going to be doing more tutorials for my YouTube channel and Creative Cloud TV.  While I have a great microphone in my studio, I really didn’t have a good one that’s small enough to travel with. I was in the Apple Store in San Francisco and decided to check out their selection. I was with my colleague and musician Jason Levine. I picked up a small microphone by Apogee and Jason immediately recognized the name and said “you can’t go wrong with them.” Apparently they are well known for professional audio equipment. He saw that it was 24-bit and was again very impressed. Since I trust Jason’s opinion when it comes to audio gear I knew I was holding the best one. I was also intrigued to see that this particular microphone not only had GREAT specs, but it was designed to work with a Mac, iPad, or iPhone! That made this a win-win purchase. I could have a great quality mic for recording on any of my devices.


Setting up the Mic 96k

One concern I had before leaving the store was that it was unclear if it included the stand that was pictured on the box. It stated that it included a “mic adapter” (which it does). The Apple Store rep didn’t know either. I was pleasantly surprised to see that once I opened the box it not only included the little tabletop stand, but also three cables. I expected to have a USB cable for the Mac and one for the Lightning connector on the iPad/iPhone, but it even included the older cable with the 30pin connector for older iOS devices. Setting up the Mic 96 is really easy. Just attach the appropriate cable for your device and plug it in. That’s it. No software to install. The light will go on blue at first. This lets you know that it’s on but not ready. It will then turn green when it’s ready and red if your gain is too high.

I screwed up my first recording

mic96k_MacBook_Pro
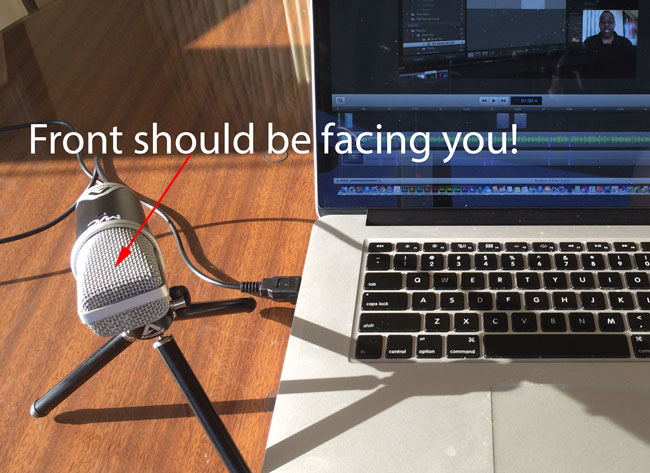
I mistakenly positioned the capsule up instead of facing me.

OK sometimes I’m an idiot when it comes to things like this. I didn’t pay attention to the capsule location so I had the mic pointing at me like a singer would hold a mic instead of straight up and down. It worked, but boy what a difference it made once I put it in the proper orientation. I did a quick test into Screenflow and the sound quality was outstanding. Sadly it was too late to re-record my latest episode as it was already posted.

Testing on the iPad Air

MiC96k_iPad

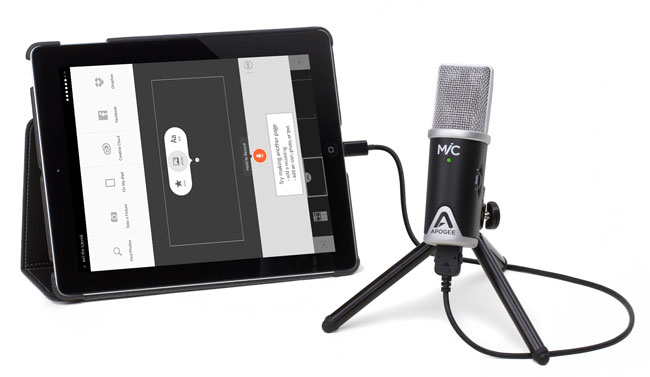
Since I blew my chance to get a real world recording for this week’s episode, I decided to do a quick test on the iPad using Adobe Voice. You can hear the results below or here:

The Bottom Line

Overall I’m very happy with the quality of the hardware itself as well as the audio quality. My only complaint is that for the price I feel it should have come with a carrying case, especially since they tout it as a solution for iPad/iPhone. This means that they expect people to carry it. Other than that I love it!

You can get the Apogee Mic 96k here or here

You can get the Apogee Mic carrying case here.

You can get Adobe Voice for iPad here and tell your story for free:

.

Guest Blog featuring Scott Diussa: Basic Audio for DSLR Video Shooters

Hi Everyone! My name is Scott Diussa and I’m the Field Operations Manager for Nikon Professional Services. I want to thank Terry for the opportunity to share with you something that I have been talking to photographers about more and more in the past year or two. If you have been a DSLR still image shooter for a long time and you are making your way into the world of creating multimedia projects with your DSLR that shoots HD video then you have been experiencing quite a learning curve. Now, I’m not say that learning curve has been solely based around how to actually shoot the video footage with a camera that wasn’t originally designed for this purpose, I’m talking about the fact that now you have to be an audio expert just as much as a video expert! It’s sort of like when digital photography first came out, people could shoot the images but had no idea that they now had to be their own photo lab! But, things change and the more you learn the better you get so I’m going to talk to you today about some of the basics of audio and how they relate to DSLR video that I think will help you from here on out with any of your multimedia projects.

First of all, before I went to school for photography I went to school for audio engineering. There I learned a lot, actually too much to retain. But, even thought that was in the late days of analog audio the principles of things such as microphones and levels and editing still remain the same today. This isn’t any different than a photographer coming from film to digital photography. Camera bodies, apertures, shutter speeds and lenses still do the same thing as they did when film was king. So, as you can see there are ways of relating some theories about audio to photography and that’s what I plan to do here to make understanding the relationship between the two easier. So, let’s get started…
 

Microphones (Lenses)

There are just as many microphone choice and price ranges as there are lenses in photography or even more so… It can be a pretty overwhelming task to choose the right one. But, as any good photographer knows, you can’t just have one lens that does it all. Sure you can have one that does a lot but there isn’t one single lens that does it all. This is exactly the same for microphones as well. Also, when it comes to lenses… you get what you pay for. It’s the same with microphones. Of course, there’s always the thought of… get what you need to get the job done… within reason.

There are two main types of microphones available that you will need to understand some basic about, dynamic and condenser.

Dynamic mics are more durable, less sensitive and don’t require any extra power to work. They deliver what known as a “mic level” signal which requires a device such as a mixer at the other end to amplify the sound to “line level” which is what a DSLR camera mic input needs. So, most mics that hook up to a DSLR camera are not dynamic mics.

Condenser mics are a bit more fragile (but not too bad in some cases) and require either a battery or what called “phantom power”. “Phantom power” is delivered to the microphone by a mixer and DSLR cameras don’t work this way. So, mics that you will get that work well for a DSLR camera will require a battery. These mics deliver “line level” output that the camera likes in order to deliver good quality sound. There are other variables in play here, too, but let’s keep it somewhat simple today.

Now that we know we are most likely going to be using mics that require their own power source which type of mic will we need? Just like lenses, it all depends on the shooting situation. If you are going want a “wide angle” type of sound then you would want a stereo mic. If you want a more “telephoto” sound then you would want a shotgun mic. Those are the two main types of mics that you will use on a normal basis. So, if your multimedia piece needs to portray a sound moving from left to right then a stereo mic would allow the sound to go from left to right. If you are needing to capture the sound of a single voice then a shotgun mic will do a better job of picking up that voice and ignoring the competing sound off to the sides of the subject.

Another type of mic that is commonly used in any sort of video interview situation is a “lav” mic. You’ve seen these on every news person on TV. It’s the small mic clipped to the lapel of a shirt that is somewhat un-noticeable. You can have either wired or wireless versions of these microphones. Wireless versions can be expensive but there is a new one coming out by Samson that looks very interesting…

Continue reading “Guest Blog featuring Scott Diussa: Basic Audio for DSLR Video Shooters”
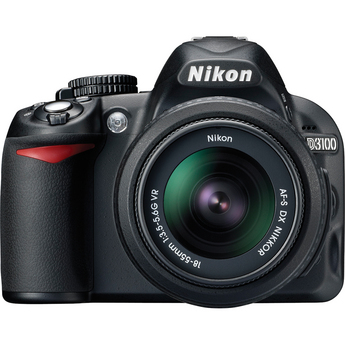
Nikon Breaks Out with a D3100 and it’s So Close To What I Want!

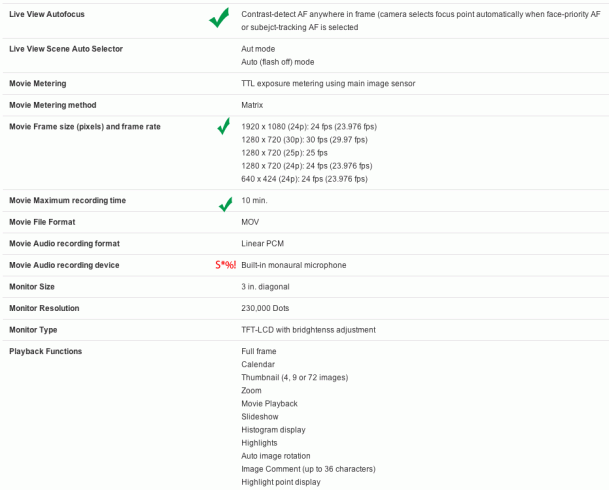
In case you missed it, Nikon introduced their New D3100 DSLR body just this past Thursday. This camera was rumored for quite a while and the rumored specs were pretty accurate. So it wasn't a shocker to see it, but there was one feature that I was hoping to see that didn't seem to make the cut. My current travel camera is a Nikon D5000 and I like the size and weight of the D5000 for travel, plus the ability to shoot video. The one thing that would have made me upgrade (or downgrade) to the D3100 in a heartbeat would have been audio in. Sigh…. While the D3100 steps up to 14.2 MP, adds 1080p video (Yay! and about freaking time), continuous auto focus in Live View (we'll have to see if it really works or not) and 12,800 ISO (equivalent), the audio for video recording is still limited to the built in Mono mic. 


I want good audio too

Most video cameras have crappy built-in mics. However, most video cameras also let you plug in a better mic via a stereo audio input. To make matters worse is that the built-in audio on Nikon DSLRs is only 11hz. A bad mic with bad compression, equals really really bad audio. Giving this camera 1080p, auto focusing video is AWESOME, but the limitation for many is definitely going to be the audio. Now if you plan to shoot video with your great lenses in all of the D3100's 1080p glory and then add your own sound track or music later, then this won't be a big deal, but if you need the source audio from the event you're recording, then you're going to either have to record the audio on a different device and merge them later in post or have sub par audio to go with your great video.

I would upgrade to a D300s at this point, but I'll continue to wait and see what comes next since the D300s was last year's model. It DOES have audio in, but it's only 720p video and if I'm going to spend the bucks, I'd rather wait since I don't think Nikon is done for 2010 just yet 🙂


What to do?

If I didn't already have the D5000, and was looking for a small Nikon DSLR with some pretty cool features, then I wouldn't hesitate to get this one. The price won't break the bank and it has a few features that even the higher end models don't have yet. I may still sell my D5000 (since my D5000 doesn't have audio in either)  to get this if I get a good price on the D5000. For now, personally I'm in wait and see mode.

You can get the D3100 here for a great price of $699.95 with a 18-55mm VR lens


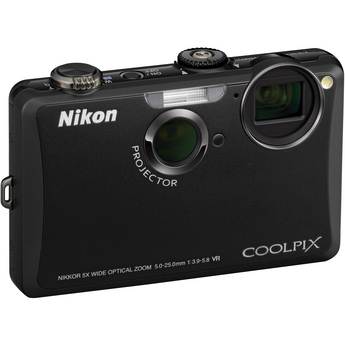
Also be sure to check out the NEW Nikon Coolpix S1100PJ Camera with a Built-in Projector!


You can get the New Coolpix S1100PJ here for $349.95.

Adobe Audition for Mac: Technology “Sneak” Preview

To all my Audio loving Mac buddies, Adobe's Worldwide Creative Suite Evangelist – Jason Levine gives us a special Technology "Sneak" Preview of Adobe Audition for Mac. Check out these two videos:

httpv://www.youtube.com/watch?v=aRc49EKb9VY


httpv://www.youtube.com/watch?v=N1AblAwOpSA


Signup to be notified of the Public Beta here.