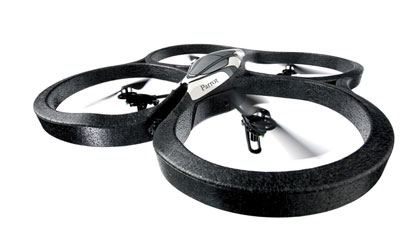
AR.Drone 2.0 – My In Studio Test Flight

When the original AR.Drone came out I have to admit that I immediately dismissed it as a “toy” and I had very little interest in it. Sure, like any toy it would be fun to play with for a while. However, like many other toys you could quickly lose interest. Therefore I never bought one. Not even for the “cool (aka geek) factor”.  Then the AR Drone 2.0 came along and it added something that I thought would be useful. The AR Drone 2.0 adds a better camera that does video at 720p HD. Yes, this raised an eyebrow and I decided to take a look. I did a pre-order and my AR.Drone showed up a couple of days ago. I figured I might have a use for this on set, especially on location shoots to do fly arounds of the set and the area that I’m photographing.

What’s Great…

The great thing about this little drone is that it’s light weight and very easy to fly. It doesn’t come with a remote control! You actually fly it from your mobile device (iOS or Android). I downloaded the App on my iPad and iPhone. The AR Drone 2.0 has it’s own built-in WiFi network. Once you charge the battery and pop it in, it powers up and starts broadcasting a network. You connect to this adhoc network from your device and then launch the AR Drone App (a free download). You see what the AR Drone sees right on your device. Using the accelerometers in your iPad, iPhone, etc. you tilt the device to control direction. There’s an on screen joystick to turn the drone. If you suddenly lose control, just take your fingers off the screen and the Drone will hover in place.
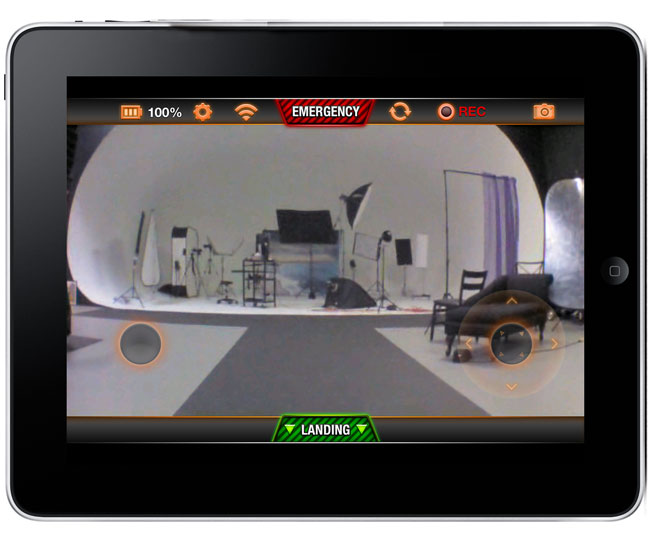
Since the built-in camera is always running you can tap the record button within the App and start recording/streaming video from the AR Drone right to your mobile device. Very Cool! The App even allows sharing directly to YouTube.

Here’s a sample video I did flying around my photography studio while a friend also video’d the AR.Drone 2.0 itself using my iPhone 4s:

What’s not so great…

Battery life is still relatively SHORT! You get one rechargeable battery and charger and the battery last for about 10 minutes of flying. Then you’ll need about 90 minutes to charge it back up. Unless you plan to do really short flights/videos, you’ll definitely want to have a couple of charged batteries on hand (about $35 each). It’s light weight and while that’s a good thing for travel, it means that a strong wind will take it away. Since it works via WiFi you’ll also have limited range. Like most small cheap HD cameras, this one doesn’t do well in low light. With a small lens/sensor comes lower quality video in low light. However, with enough light the video is more than acceptable for my needs.

The Bottom Line
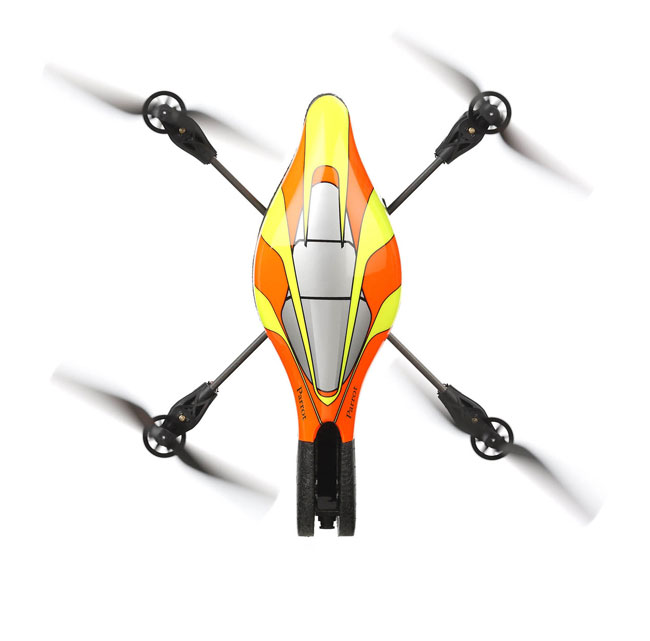
The AR.Drone 2.0 is an improvement over the original! Adding 720p Video Recording makes it useful as a tool. On a calm day I can really see some great outdoor uses for it.

You can get the AR.Drone 2.0 for about $299 here.
You can get the AR.Drone Free Flight iOS App here from the iTunes

Lightroom to InDesign to iPad: Interactive Portfolios for Photographers

In this episode of the Adobe Creative Suite Podcast Terry White shows how to use a Lightroom Web Gallery from The Turning Gate in InDesign to make an Interactive Portfolio for your iPad or Android Tablet.

Grab the Photoswipe Gallery Plug-in that I used in the video here.

Are you missing out on my Bonus Content?

See more of my Adobe Creative Suite Videos on my Adobe Creative Suite Podcast and get the App here. It features EXCLUSIVE CONTENT that no one else gets to see. This episode has a BONUS CLIP that is available only in the App! My iOS App is a Universal App for iPhone, iPad and iPod touch. I also have an Android version:

Learn Adobe Creative Suite with Terry White - Wizzard Media

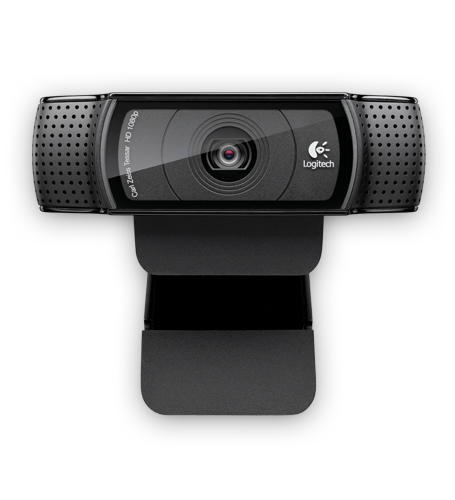
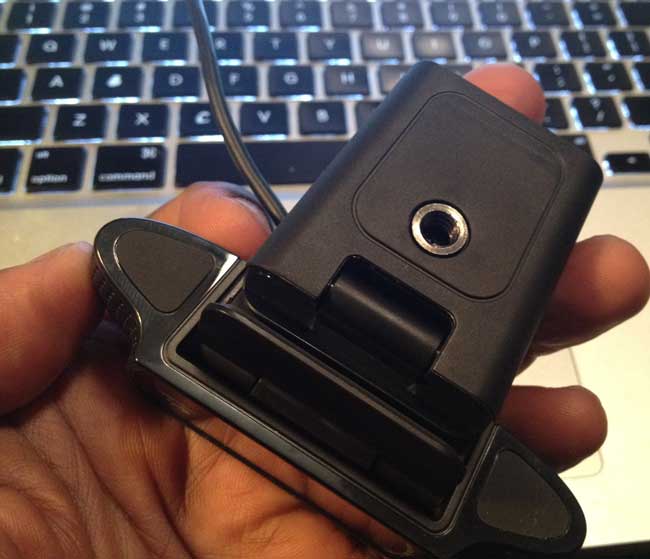
Logitech Listened! C920 Webcam Has a Tripod Mount

In October 2011 I posted a rant asking Logitech to add a tripod mount to their webcams. While readers did point out that the C615 does in fact have one, my webcam of choice was the C910, which did not have one. “Hey Terry! Why do you even need a webcam since your MacBook Pro has an HD FaceTime camera built-in?” The FaceTime HD camera that is built-in to my MacBook Pro is fine for video chat, Skype, FaceTime, etc. however, for my video recording/podcasting needs I want to be able to mount the camera higher than the top of my laptop. Logitech seemed to be stuck on this being the only option for the majority of their cameras. I did ultimately get a C615 and I use it on the road because it’s so small. I usually mount it to a Gorillapod and life is good. However, when I’m in studio or at home I prefer the higher quality of the C…… oh wait, they have a new one….

The Logitech C920 is What I Asked For!

Hands down the NEW Logitech C920 has to be the best if not one of the best webcams for the money. The video quality is crystal clear and smooth. Also at long last it has a standard tripod mount in the base! Woohoo!

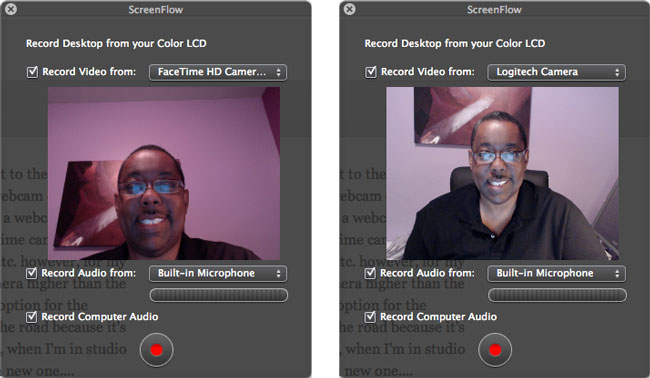
You can immediately see the advantage of being able to mount the camera where you want in the sample above. I’m sitting at my desk and the FaceTime HD camera is tilted up so that I can see my screen. However, the Logitech C920 is mounted on a tripod right in front of my desk and is aimed straight on. This way I can put the camera where ever I want. You can even see the difference in lighting/quality in these unretouched/unadjusted screen grabs.

I record my video tutorials/demos using Screenflow. Screenflow recognized the new camera right away with no need to install any drivers or other software.

“Terry, can’t you use your Nikon D7000 or D4 for even better quality?” Sure and I have used my DSLRs for better quality than these sub $100 webcams. The problem though is that it adds to the post production process since the video would then have to sync’d and edited in afterwards vs recording directly into Screenflow. Also DSLR video is harder to focus when you’re working alone 🙂

They did more than just add a tripod mount

This camera got some beefier specs too! Adding onboard compression (reduces CPU usage of your computer) and H.264 as well.

The Bottom Line

This is my new favorite webcam for screen casting and recording my Creative Suite Video Podcast. You can get the Logitech C920 here for about $80. (List price $99.99)

Elgato Thunderbolt SSD Portable Drive – Fast, Expensive


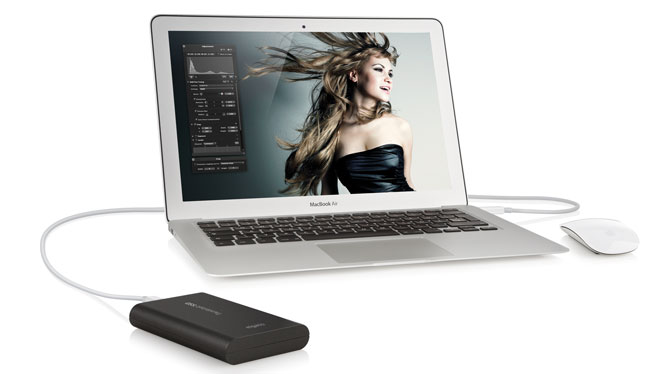
I’m always in search of the fastest portable external drive I can find and I think I found it. I got the Elgato Thunderbolt SSD 240GB drive. It is by far the fastest portable external hard drive I’ve ever used, rivaling the speed of my internal SSD drive. Typically I use an external drive to boot from while running beta software or beta OS’s. While I’m testing things like Adobe CS 6 I want it to perform as fast as it does when I’m booted from my regular internal drive.
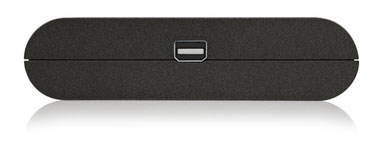
The Elgato Thunderbolt SSD Portable Drive is FAST, but has a flaw

While this drive definitely has the speed I’ve always wanted, it doesn’t come cheap. It comes in two flavors. There is a 120GB version for $429.95 and the 240GB version for $699.95! Those prices are crazy, but they are what they are. While the price could be a big showstopper for many, the price is not the flaw I was thinking of. The one problem with this drive is that it only has ONE Thunderbolt port. That doesn’t sound like much of a problem except that Apple uses the Thunderbolt port on MacBooks to also connect mini-display adapters too. This means that I can’t have the drive plugged in AND a projector. That kinda kills it for me for using this drive when doing live presentations.

This and other Thunderbolt devices need to have two ports. You need the ability to be able to pass through to a second device or display. Apple did a good job in putting multiple ports in their Thunderbolt Display and Belkin is coming out with a $299 Thunderbolt hub (it also has Firewire 800 and other ports to help justify the price), but we shouldn’t need a hub just to hook up a display and a drive. Other than this flaw, there is no doubt that the Elgato Thunderbolt SSD drives is one of the fast bus powered portable hard drives that you can get.

You can check out the Elgato drives here and here.

Shooting Wirelessly with The Nikon D4 and WT-5

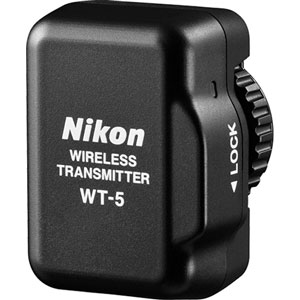
You can find all kinds of reviews and sample images on both the Nikon D4 and D800 out there. My goal here is not so much to review this great new camera, but to put it to the test when it comes to shooting wirelessly with the New WT-5 WiFi module. The WT-5 currently only works with the D4 as it plugs into a special new port that only the D4 has. This was one of actually one of the deciding factors that pushed me to the D4 instead of the D800 (although the D800 should work with Eye-Fi cards).

Wireless Freedom

When I’m in studio I’m shooting tethered to my MacBook Pro and Adobe Lightroom 99.9% of the time. This means long USB cables and enviably tripping over them. The D4 has a USB port on it as well as an Ethernet Port! While the potential for fast Ethernet transfers intrigues me, it would still mean having a cable attached and potentially tripping over it regularly. While I had no doubts that the WT-5 would work, the question was would it be fast enough to allow me to cut the cable?

Last night I did my first shoot with the Nikon D4 and I did the entire shoot wirelessly with the WT-5! I configured the WT-5 to connect to my studio’s WiFi network and to send the images directly to my MacBook Pro on the same network. Keep in mind that I shoot in RAW and the images (16.2 MP NEFs) are also being written to the card when you use the WT-5. I stuck in one of my new Transcend 32GB 400x CF cards, configured a Lightroom 4 to Auto Import from the Nikon folder and began shooting.

The 1st image takes a while

From the time you press the shutter till the time you see the 1st image appear in Lightroom it can take an agonizing 30-60 seconds (wow we’re impatient). Much of this time is for the WT-5 to wake up, connect to your WiFi network and find your computer. However, if you keep shooting the subsequent images come in much much faster, usually 5-8 seconds for RAW. That’s much more acceptable and usable. While it wasn’t fun waiting for the 1st image to come in during my live shoot, it wasn’t the end of the world. Once I saw that the lighting was right I could just keep right on shooting knowing that the rest of the images would be transferring as I shot.

Here’s a video on how long it takes…


The Bottom Line

While shooting tethered via a wire is faster and cheaper, I’ll take the speed hit to shoot wirelessly any day! This solution also works great with the recently updated Shuttersnitch App on iPad. The WT-5 is way way way overpriced IMHO, but it works as advertised and the ability to add multiple profiles, setup an adhoc network, shoot directly to a PC/Mac via the Nikon software or to any FTP server makes it a killer solution for those that want/need wireless shooting. Next I’ll play with the remote control capabilities of the WT-5 and controlling it from any web browser including Safari on iOS.

You can get the Nikon D4 here

You can get the Nikon WT-5 here

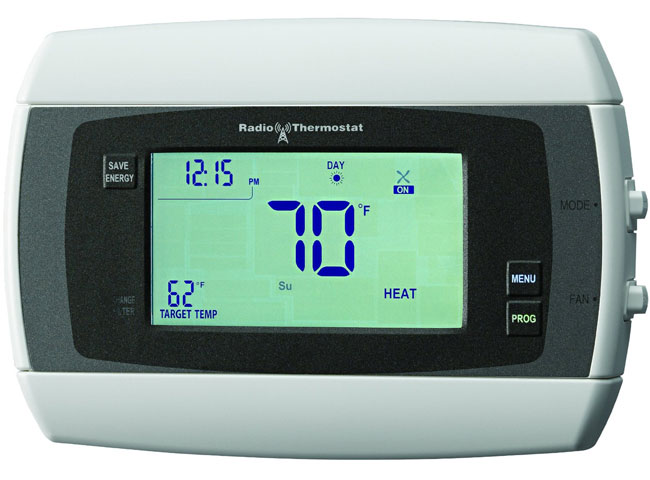
Homeworks Internet Controllable Radio Thermostat

Programmable thermostats are certainly not a new thing. I’ve had one in my home for several years. They allow you to lower your energy costs by turning the temperature up/down automatically at times throughout the day/night where you’re either not home or wouldn’t notice as much because you’re asleep. You can set these times and days of the week to match your daily routine/schedule. While that’s all well and good, it doesn’t help much in a situation where you don’t have a daily routine. For example, in my studio I’m not there on any kind of regular schedule. Some days I could be there every day for several days in a row and other times I could be gone for weeks at a time. In the past I would simply put the thermostat on the lowest setting before I leave and turn it back up when I arrive. There have also been times where I’ve forgotten to turn it down and the heat was going for no reason for a day or two with no one there. I started looking for a better solution.

The Homeworks Radio Thermostat was the answer

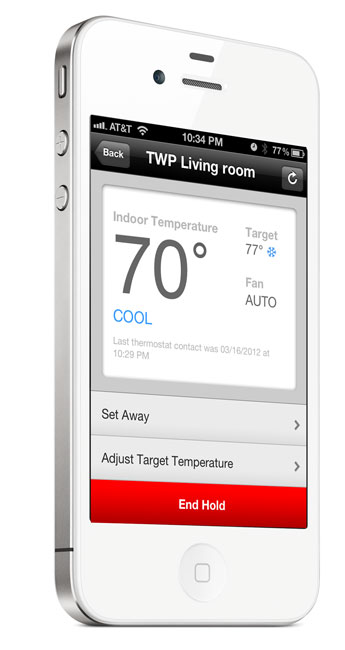
This thermostat is programmable like all the others, but it also allows you to control it via an App on your smartphone or tablet over the internet or locally via WiFi! With the App I can see the current temperature of the studio AND adjust the thermostat remotely at any time. If I forget to adjust it when I leave, no problem as I can now adjust it from anywhere in the world. If I want to turn the air conditioning on to cool it down before I arrive, I just pull out my iPhone and adjust the thermostat on my way in. So far this device and App have worked really well.

Installation – While I have installed thermostats myself in the past, I decided to let my electrician do it since I had him out working on other things anyway. It didn’t take him long to wire it up. Once It was installed all I had to do was set it up via the iOS App (works on Android too) and connect it to my WiFi network and pair to my account. From that point I could control it from my iPhone or iPad inside the building or via the internet from anywhere. The only thing that I can’t seem to figure out how to do is to switch it from Heat to Cool or to Auto from the App. I can do this from the panel itself, but not remotely. Otherwise, I have the control I need from the App.

You can get the Homeworks Radio Thermostat here for about $107.

You can get the App for free here from the iTunes

Adobe Announces Photoshop CS6 Beta – See My Top 6 Favorite Features!

Today we are releasing a Public Beta of one of my all time favorite tools – Adobe Photoshop CS6 Beta is here!

New Features in Photoshop CS6 Beta

Photoshop CS6 beta demonstrates Adobe’s focus on huge performance enhancements, imaging magic and creativity tools that offer customers a new experience in digital imaging. Key features include new additions to the Content-Aware tools: Content-Aware Patch allows greater control by letting users select and duplicate an area of an image to fill in or “patch” another. Content-Aware Move lets users select and magically move an object to a new place in the image.

Customers will experience incredible performance, powered by the new Adobe Mercury Graphics Engine*, enabling near-instant results from popular editing tools including Liquify, Puppet Warp, Transform and Lighting Effects; and a refined, modern interface featuring dark UI options to make images pop. New and re-engineered design tools make creating designs faster and more efficient. Vector layers allow users to apply dashed lines and gradient strokes, searchable layers help quickly zero in on any layer you need, and new type styles let designers quickly apply type treatments to their designs.

In addition, the Photoshop CS6 beta offers all the features of Adobe Photoshop CS6 and Adobe Photoshop CS6 Extended, such as new 3D editing features and quantitative imaging analysis capabilities. These features will be included in the shipping version of Photoshop CS6 Extended when it becomes available.

My Top 6 Favorite Features of Photoshop CS6

As usual I’ve got my favorite features and I’m going to share them with you in this video:

Grab your copy of the Photoshop CS6 Beta here.

Are you missing out on my Bonus Content?

See more of my Adobe Creative Suite Videos on my Adobe Creative Suite Podcast and get the App here. It features EXCLUSIVE CONTENT that no one else gets to see. This episode has a BONUS CLIP that is available only in the App! My iOS App is a Universal App for iPhone, iPad and iPod touch. I also have an Android version:

Learn Adobe Creative Suite with Terry White - Wizzard Media

What I’m Teaching at Photoshop World DC

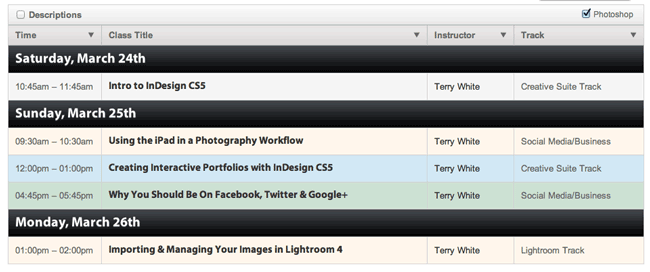
It’s that time of year again. It’s time to head out to one of my favorite shows – Adobe Photoshop World. This year’s east coast event takes us to Washington DC. As usual I have a slew of classes that I’m teaching on a variety of topics. Everything from using the iPad in your Digital Photography Workflow, to InDesign classes for Photographers and Designers, to Importing and Managing your Images in Lightroom 4. Also while I’ve got your attention, the class that I’m doing on creating Interactive Portfolios is based on using InDesign to create Interactive Portfolios for Tablets.

I look forward to seeing you there!