Why You Should Be On Behance

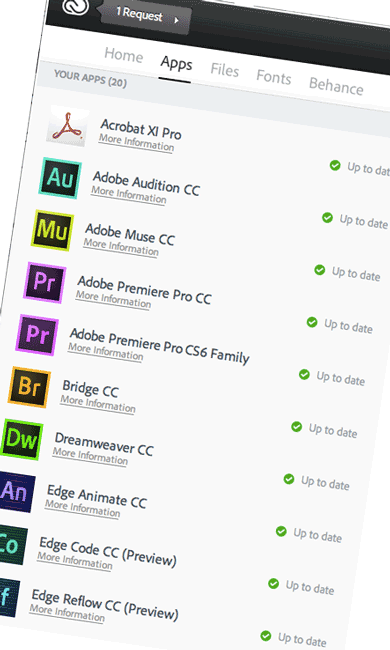
behance.net_safari

I’m a photographer. I have a website. I post images to photography oriented sites such as 500px.com, Flickr.com, Smugmug.com, etc. These sites and others are geared towards photography. However, what if you’re a graphic designer, musician, visual effects artist, retoucher, etc.? Sure many of the photographer sites let you post videos and such, but the communities on those sites really aren’t geared towards anything other than photography. There’s an online community for creatives. It’s called Behance.net and it’s the world’s largest creative community with well over 1 million members.

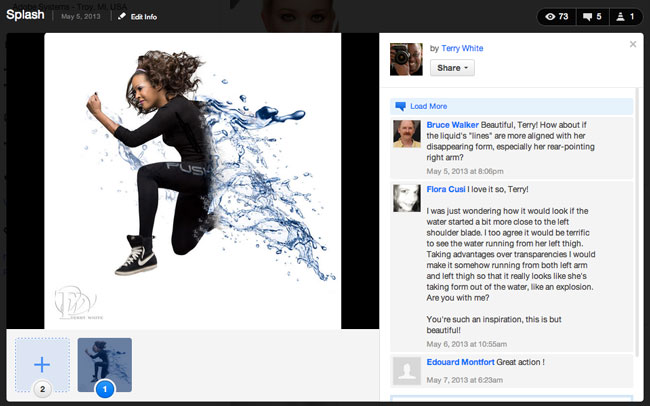
Young up and coming photographers and graphic designers are always asking me to look at their work and give feedback. I do it when time permits, but usually what makes it more time-consuming is the the way the work is presented to me to look at it. It’s either an attachment in a Facebook message or on a website. From there I have to look, evaluate and then find the original communication to give feedback on via a reply. With Behance you can post projects that you’re working on (work in progress) all the way through to completed projects, including revisions along the way. These can be photos if you’re a photographer, they can be graphic designs, videos, and even music. You can follow others for inspiration, but best of all you can post your work and get feedback from those who follow you. If you make revisions, people can see those revisions in place without having to seek them out. The more I use Behance, the more I like it. If you like something on Facebook you can hit the Like button. If you like something on Behance you hit the “Appreciate” button. If you post work on Behance you can easily share the link via all your other social networks with the built-in sharing features.

kandice_work_in_progress_splash

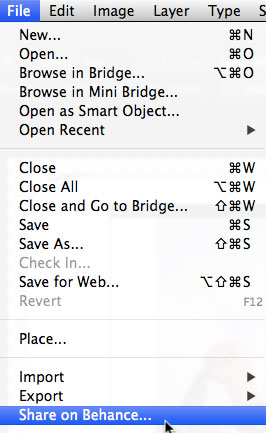
Sounds great! What does all this cost? It’s free! You can set up your Behance account and start posting work in a matter of minutes. You can even sign in with your Adobe ID. You can upload your work via your web browser. However, if you’re using Photoshop CC or Illustrator CC you can use the Share on Behance command directly from the File menu to share your open document.

share_on_behance_PSCC


Get work!

Behance.net also has a Job listing area where creatives can get full-time job listings as well as freelance work.


Be sure to follow me on Behance.


Create a Professional Online Portfolio

terrywhite.prosite.com

While Behance.net is free to use, there is an optional paid service called “Prosite”. Prosite allows you to build a customized portfolio that you can brand as your own. You can even point a custom domain name to it. During the Prosite building process you can either pull in your completed Behance projects or create new ones on the fly. Prosite goes for $99/year. However, if you’re an Adobe Creative Cloud member, it’s part of your membership. Just sign in and build your Portfolio. While many of my photographer buddies are raving about squarespace.com ($8/month), I’d rather use Prosite since it’s already part of my Creative Cloud membership and I can upload directly to Behance from Photoshop, Illustrator, and Lightroom.

Here’s mine.


Go Mobile

Both Behance and Behance Prosite have free iOS Apps. I did a post here to tell you more about them.

Lightroom 5 has Shipped!

Lr5_splash

Today Adobe has shipped Lightroom 5! With over 400 bugs fixed since the Public Beta and a NEW Publish to Behance feature, Adobe Photoshop Lightroom 5 is now shipping. The retail price of $149 remains in effect as well as an upgrade/student price of $79. Of course Lightroom 5 is also available to Creative Cloud members to download and install at no additional cost.

Key New Features Include:

  • Smart Previews
  • PNG support
  • A new Full Screen Mode
  • User Configurable Grid Overlays
  • Windows HiDPI support
  • New Smart Collection Criteria
  • Behance Publish Service
  • Advance Healing Brush
  • Radial Filter
  • Upright Image Straightening and Perspective Correction
  • LAB Color Readout
  • Book Page Numbers, Improved Text Creation and User Pages
  • Videos in Slideshows
  • Tethering support for Nikon D600
  • Several JDI enhancements


How To Do a Complete Portrait Retouch In Lightroom 5

The Develop module has come a long way in Lightroom 5 and with the addition of the Radial Filter and non-circular Spot Removal Tool I now feel comfortable enough to do a complete portrait retouch in Lightroom. Since all of the adjustments are in the Develop Module the entire process is completely non-destructive.


I’m honored…

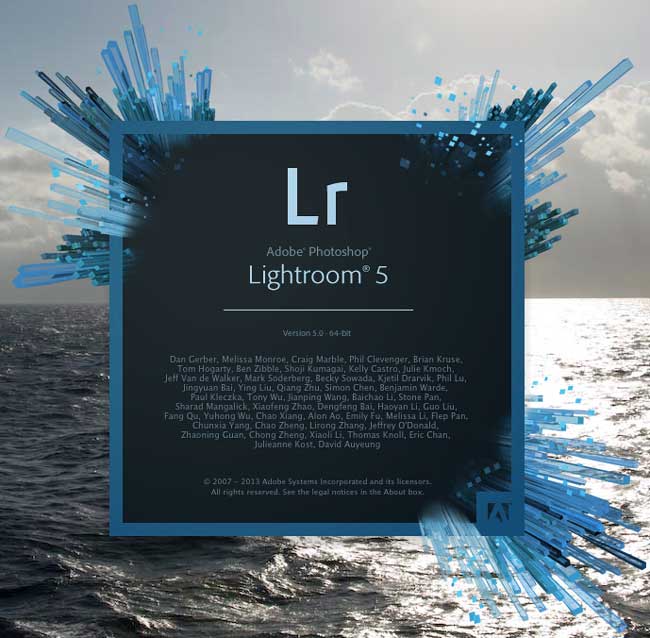
I’m also very honored to have made it into the About Lightroom credits screen. It’s an honor to have my name on such a fantastic product!

about_Lightroom_5


In case you missed it, see Lightroom 5 in action and my Top 5 Favorite Features:


Camera RAW 8.1 and DNG Converter 8.1 Now Available Too

See the details here.


di-GPS Eco ProSumer GPS for Nikon

di-gps-eco-prosumer
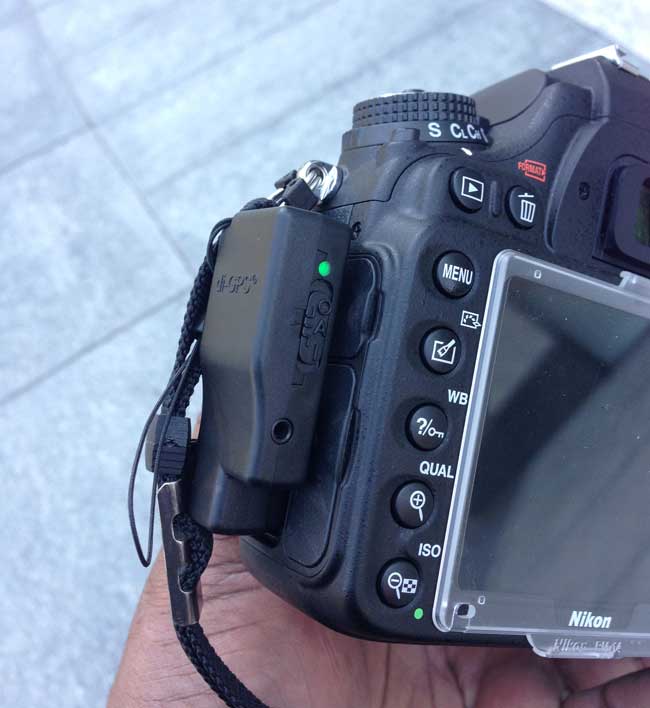
di-GPS Eco ProSumer GPS on a Nikon D600

It’s been a while since I’ve done a review of a GPS device for Nikon DSLR cameras. The main reason is that I haven’t seen much movement or innovation in this space. The second reason is that I had kinda moved on to using my iPhone 5 as my GPS and creating .GPX log files that can be read by Lightroom 4/5. Since I always have my iPhone with me I could always just fire up the Geotag Photos Pro App and start recording my movements to a log file. With that said, there are some definite advantages to having a physical GPS device on the camera itself. First of all a physical GPS device will be more accurate. Logging apps only update based on a predefined interval. The next advantage is that a physical GPS just needs to be turned on. In a matter of seconds it locks on to satellites and away you go. Lastly, the logging apps on your smartphone will drain your smartphone’s battery sooner. Not to mention that there is no post-processing with a physical GPS. The longitude and latitude are written to the metadata of the images as you capture them. Yet, I was still using my iPhone more than the physical GPS devices I had. I think the biggest reason for this was the design of the GPS units I’ve used to date. Nikon DSLRs have direct support for external GPS units. On the more recent models like my D600 there’s a dedicated GPS port. Almost all of the GPS units I’ve used to date attached via a cable. This short cable plugs into the Nikon DSLR and the other end attaches to the GPS itself. This is what I never really liked. You either had to attach the GPS to your hotshoe or to your camera strap. The cable was always in my way. I was either constantly knocking the GPS out of the hotshoe or putting stress on the port that the cable was plugged into.

The Eco ProSumer GPS (pro-s)

The Eco ProSumer GPS is one of the latest models from Dawn Technology. First off the thing that attracted me to this model was the fact that there is NO CABLE. It’s small and plugs right into the side of my camera. It’s not in the way! Like the previous Dawn models it allows you to use it in auto mode or always on. In auto mode it will turn on/off with the camera. So then what else is new besides the design? It’s lightweight at only 16g. It’s very power efficient at 19mA (1/3rd of the aging Nikon GP1). It’s also faster at acquiring a GPS lock. Basically it’s better in every way. There is a port on it that allows you to connect a cable release, and of course Dawn Technology sells those too.

wpid12278-TLW6133_sm.jpg

Continue reading “di-GPS Eco ProSumer GPS for Nikon”

Review: Liquid Image Scuba Mask HD


wpid12253-jamaica2013-0300_sm.jpg

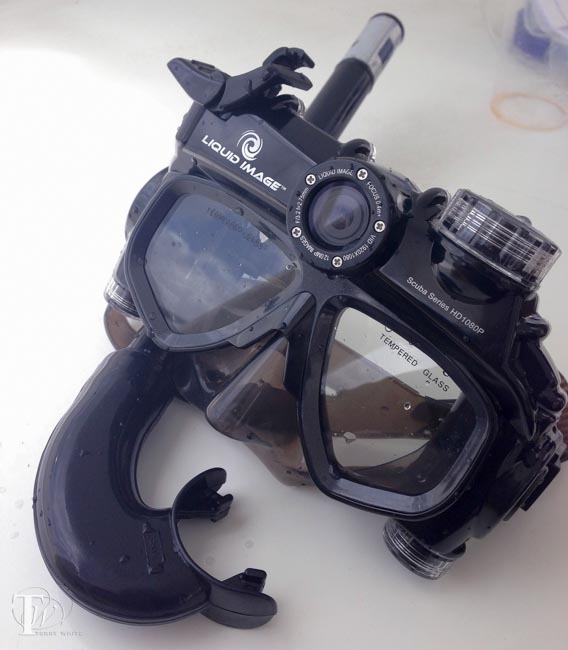
I’m a fan of water and water sports. I love to swim and I love to snorkel. One of these days I’ll take the time to get certified for scuba. Last year I got a chance to do some snorkeling in the Virgin Islands and I remember feeling so unprepared to capture all the underwater beauty that I was seeing. I had no underwater camera of any kind with me. I remember my colleague at the time Greg Rewis telling me about his recent sailing experience and once I spotted the Liquid Image Scuba Mask Series, I knew that it would be on my list for the next time I headed out to a nice area to dive/snorkel. I got the mask and couldn’t wait to try it. The obvious advantage is that this mask has an HD camera in it that records to a micro-SD card (4GB supplied, supports up to 32GB). You can shoot video or stills. This means that your hands are mostly free and where ever you look that’s what you’re shooting. (1080p @ 30fps, 720p @ 60fps, 5MP Still sensor/ 12MP interpolated)

wpid12261-jamaica2013-0253_sm.jpg

How does it work?

I really wish I had taken the time to familiarize myself with the mask more than just a few minutes the night before. I set it up, loaded the memory card and batteries and then took it out for a try the next morning. While I understood the basic operation of the mask, a little more testing up front would have made me feel more comfortable with it. The mask runs on 4 AAA batteries and depending on which model you get you’ll either get 4 rechargeable batteries or 4 Energizers. The memory card is a 4GB card, which is rated at being able to capture up to 2 hours of video. Going in I had no idea how much recording time I had or how long the batteries would last. Again, I could have read all this before hand, but I didn’t. Totally my fault. This made me a little anxious since I was going out with a group, I wouldn’t get a second shot at this (at least not on this trip). I was more interested in capturing video than stills, but wanted to try both. Overall the mask performed as advertised. I was actually very impressed with the quality of both video and stills.  I bought and used their optional red and blue filters. The shots here were with the red filter. I meant to use the blue one, but grabbed the wrong one.

Continue reading “Review: Liquid Image Scuba Mask HD”

How To Remove Hard-To-Find Dust Spots in Lightroom 5

Lightroom_5_splash

Lightroom 5 has a great new non-circular spot removing/healing brush. However, there’s a feature that many will overlook for using the tool for what it was originally intended for. It’s always been great at removing dust spots from dirt on your lens or sensor dust as long as you could see the spots in your images. Now with the new Visualize Spots feature you can find them much easier.


Are you missing out on my Bonus Content?

See more of my Adobe Creative Suite Videos on my Adobe Creative Cloud TV and get the App below. It features EXCLUSIVE CONTENT that no one else gets to see. This episode has a BONUS CLIP that is available only in the App! My iOS App is a Universal App for iPhone, iPad and iPod touch. I also have an Android version on the Amazon App Store:

Learn Adobe Creative Suite with Terry White - Wizzard Media

You can get the Lightroom 5 Public Beta here.


Memorial Day – A Day We Pay Tribute

I would like to take this opportunity to thank the men and women that currently serve or have served in our US Military Service! Your continued sacrifices to protect our freedoms are greatly appreciated. We are able to spend this day with our friends and families because of what you do!

As we observe this solemn day, we must remember all the brave men and women in uniform who gave their lives in the service of our great country.

Again, Thank You!

Terry White

FaceTime Over AT&T 4G Cellular For All In 2013 – Finally!

facetime-ATT-cellular

Last November I wrote a post about how AT&T was hinting at allowing those of us who were grandfathered in to unlimited data plans to be able to use FaceTime over cellular. It seemed like a pipe dream as the feature worked for a few, but not for most including me. Yesterday, I saw the news that AT&T was FINALLY going to allow all customers to use video calling features over 4G by the end of 2013. Just for the heck of it, I checked my settings and to my surprise it was already enabled! Just to be sure I turned off WiFi and attempted a FaceTime call over 4G. It worked!

I’m glad that AT&T finally came to their senses on this one. It didn’t make much sense that I could use Skype, Google+ Hangouts, etc, but not the built-in FaceTime. I’m on a corporate dataplan via my employer, however, if I had to buy my own plan I would have definitely considered other carriers. AT&T has restored a little (very small amount) of faith with this move. Thanks!

Seeing More USB Power On The Road

delta_power
Delta Gate Area Charging Stations

As a frequent traveler with gadgets I’m always looking for opportunities to charge up. Anytime that I have more than a 15-minute wait in one spot I check my surroundings to see what power options are nearby. If nothing is around then I don’t worry about it, but if there’s an opportunity to juice up I’ll usually take it. I fly Delta 99% of the time and Delta has been doing a good job in equipping their gate areas with not only standard AC power, but also USB power. This means that you can easily just plug in your phone or tablet without having to plug in a power adapter/brick. This leaves the regular outlets for those that need to charge up other devices such as laptops.

delta_inflight_power
Delta in-flight power in First Class

While regular power outlets and USB powered outlets are a welcome sight in the gate area, I do wish that airlines and the rest of the transportation industry would move faster towards having power available at every seat on planes, trains, etc. Delta was one of the first if not the first to equip most of their entire fleet with WiFi! Yay! Gogo WiFi is great. However, it’s only as good as having enough juice to actually use it. Since I’m a top tier flyer on Delta (Diamond Medallion), I get upgraded a lot and more often than not there is power at the seats in First/Business Class. This is great, but it shouldn’t be limited to just one part of the cabin. What happens if I don’t get upgraded and I have a lot of work to do? Also even when I do have the benefit of having power at my seat, it doesn’t always work. It’s really hit or miss if the outlet will actually function and power my MacBook Pro.

hampton_inn_power
Hampton Inn power at the nightstand

Some hotels are starting to get the point. One of the fanciest hotels I’ve ever stayed in from a technology standpoint was the Aria Hotel in Las Vegas. However, it was one of the worst in terms of power! The only available outlet during my stay was at the desk across the room. Want to charge your phone next to to bed? Sorry. Yet, recently I stayed in a Hampton Inn in the middle of nowhere and they not only had multiple outlets on the nightstand, but it also was equipped with USB ports to boot.

Continue reading “Seeing More USB Power On The Road”

Having Every Photo I’ve Ever Edited With Me At All Times Thanks to Lightroom 5

Lightroom_5_splash

When Lightroom 5 Public Beta was introduced I recorded a video showing my Top 5 Favorite Features (see below). One of the features that I knew would be a game changer for me was the new Smart Preview feature. When you build “Smart Previews” for your images they are available even if the original RAW files, TIFFS, JPGs, PSDs, etc. aren’t with you. You can perform edits on them in the Develop Module and also output them for web/email as well as use them in slideshows. I was curious as to how much space these Smart Previews would really take up. Last night I did a test. I opened my Portrait/Models Catalog and built Smart Previews for every photo I’ve ever edited. What constitutes an edit? An edit in this catalog means that I retouched (edited) the photo in Photoshop and the edited version is a PSD file in my catalog. To identify these “edits” I built Smart Collections that organize my edits by year.

smart_collection_years

I simply selected every image that I’ve ever edited as far back as 2006 (a total of 3,669 photos) and built Smart Previews for all of these images. Now keep in mind that all of the original PSDs but my most recent two shoots reside on my file server. They are NOT on my local hard drive in my MacBook Pro. However, I keep my catalogs with me in my Dropbox folder so that they are sync’d to my other Macs as well as backed up to the cloud. There’s no way that I’d want to house these 3,669 images on my internal drive. Nor would I actually have the available space even if I wanted to. However, there have been times that I’ve wanted to use these images in slideshows, email to clients or update my websites/social media presence with them. If Smart Previews would enable me to always have access to these images even if the originals are back in the studio on the server then I’d be elated. So the real test was how much room would the Smart Previews take up?

smart_previews_size

I was shocked and thrilled to see how little space they actually took up! Also keep in mind that the above 1.73GB Smart Preview file also contains Smart Preview for other images in that Catalog besides the 3,669 I did last night. Now I will always be able to show and SHARE my work even if the originals are “offline”.

You can get the Lightroom 5 Public Beta here.