Travel Routers: Cradlepoint CTR500 vs. AirPort Express

Sometimes it’s easier just to show you rather than to try to explain it in print. So check out my video review of the Cradlepoint CTR500 3G EVDO Travel Router vs the Apple AirPort Express:

…yes the video shot in HD and was edited in Adobe Premiere Pro CS4 (of course!)

A couple of additional features not shown in the video

The CTR500 not only shipped with an AC adapter (cigarette lighter) and multiple international plugs, but it also shipped with an Auto DC adapter. So in theory you could take that long car trip with the family and your passengers could have Wi-Fi internet access for their laptops, iPod touch’s, etc. while barreling down the highway. UPDATED INFO: Also the guys at the 3Gstore just alerted me to the fact that the latest Cradlepoint firmware now supports true Load Balancing. So if you do have the luxury of having two cards, you can use them together for increased bandwidth. They had me at “now supports”.

The Bottom Line

I’m always setting up ad-hoc Wi-Fi networks when I’m on the road. I love the convenience of coming back to my hotel room and just opening my laptop and being on the internet (just like at home). It’s also great to be able to share the same internet connection with colleagues in the next room or family that I’m traveling with and to have Wi-Fi access on multiple devices like my laptop, iPhone and Vonage VoIP Wi-Fi phone (great for calling home from overseas). Although the AirPort Express is GREAT (and I still use them extensively at home because of their AirTunes abilities), the Cradlepoint CTR500 gives me the ability to not only share an Ethernet connection over Wi-Fi, but also either of my 3G (EVDO/HSDPA) cards. It even works with some 3G cellphones via USB tethering. There was no software to install. Like most routers you configure it via your web browser. I’ve also never seen a router (let alone a travel router) with so many options to configure it just the way you like. Even my home D-Link router doesn’t have that many options. Speaking of configuring, there was one annoying default. After I set the router up with WPA password security, I noticed that I was still being routed to a web page, which required entering an additional password before being allowed access to the internet. I couldn’t find that way to turn this off fast enough! Once I turned off “Require User Login“(apparently one of the most frequently asked questions), I was totally happy with the setup. The CTR500 only came with a quickstart guide to get you setup with a basic setup. I wanted to dig a little deeper with the settings and therefore had to go to the website to get the complete user guide.

The Cradlepoint CTR500 goes for $179.95 (retail list price $199.99).  There are less expensive models (one of which even has a built-in LI-ION battery) if you don’t need both an ExpressCard slot AND USB. If that’s the case you might want to go with the USB model CTR350 at $129.38. The CTR500 has direct support for over 100 3G cards and cellphones. See the list and specs here. If all you need is to share a high speed internet connection via Ethernet then the AirPort Express ($94.61) is the way to go. If you’re in the market for a 3G data card/service, router etc., the guys at the 3G Store rock!.

I can’t wait to go on my next trip!

AT&T FamilyMap lets you get all big brotherish with family members

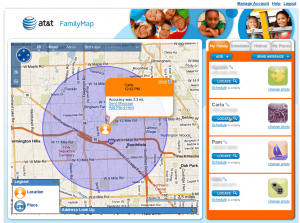
attfamilymap21 Click map for a larger view

Sure there have been those times when I’ve walked in the house and wondered, “where is everybody?” Well now I could just go to my computer and find out. AT&T recently launched a new service called “FamilyMap”. If you have an AT&T Wireless Family Plan, then you can sign up for the service and track any of the phones on that plan.

The way it works

Just like we see on modern day TV shows and Movies, your cell phone is constantly broadcasting your whereabouts via the cell towers (that must be why I see perfectly good cellphones lying by the side of the road). There have been apps like Loopt that allowed you to find friends (for free). Seems like AT&T wants to monetize this by offering it as a paid service (big surprise right?). Right now I’m doing the free 30 day trial. Not sure if I’ll continue it or not. We’ll see. Back to the way it works. You log onto the familymap.wireless.att.com site and once you’ve set up your account you can simply click the Locate button and within 2 minutes that person (actually their cellphone) will be pinpointed on the map.

You can name and save the locations so that they will show up with more meaningful names like “school”, “work”, “the gym”, etc. The accuracy of the location will also be displayed. I imagine phones with GPS’s in them might be a little more accurate, but not necessary if AT&T is only relying on the cell towers. The service works as advertised and it’s been fun to play with. I have a couple of teenagers and well, you know.

There’s also a mobile version of the site for your mobile phone’s web browser (http://attfamilymap.com/m). Looks great on the iPhone/iPod touch.

The Bottom Line

AT&T is offering FamilyMap for $9.99/month to locate up to two family members and $14.99/month to locate up to 5 family members. Like I said, you can try it for free for 30 days and see if it’s worth it to you. Not all phones work with FamilyMap such as the Pay as you Go ones. Sadly it doesn’t help you find a lost phone that’s in your house (still looking for one here). However, it will help you locate a lost or stolen phone that is elsewhere. If you’re interested in AT&T’s Family Map. Check out the website here.

Airfoil is the missing link

airfoillogo

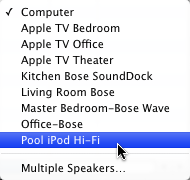
Although I’ve been enjoying streaming music wirelessly throughout the house using Apple’s AirTunes technology, there is one small problem. AirTunes only works with iTunes. AirTunes is built-in to the AirPort Express and now Apple TV hardware. The concept is simple. You put either an AirPort Express or Apple TV in any room that you want to stream music to and connect the device to a stereo, receiver or set of speakers. Then you launch iTunes from any computer on the network and choose the appropriate AirTunes speakers and when you play your music it will be streamed to your speakers (up to 3 rooms at a time).

airtunes

This is all well and good, but like I said, it only works with iTunes. What if you want to listen a different source app throughout your house? This is where Airfoil comes in. I have XM/Sirius satellite radio in my cars. With XM/Sirius account(s) you also get the ability to log on to their websites and listen to your favorite stations via the internet at no additional cost. While this is great, I want to be able to hear this content in any room and over my better speaker/stereo systems. I already have AirTunes setup, but again it only works with iTunes!

That’s were Airfoil comes in

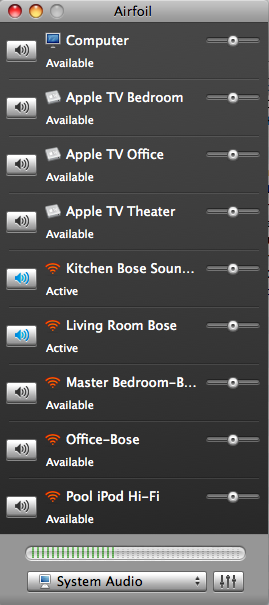
Airfoil is an app that you install on your Mac or PC that allows you to direct any app/source to your AirTunes speakers. It even comes with a bonus app called Airfoil Speakers that allows you to stream from one computer to another. Airfoil is very simple to setup. Once you download, install and launch it, it will automatically show all of your AirTunes speakers and make them available to any app or the system audio on your computer.

airfoil

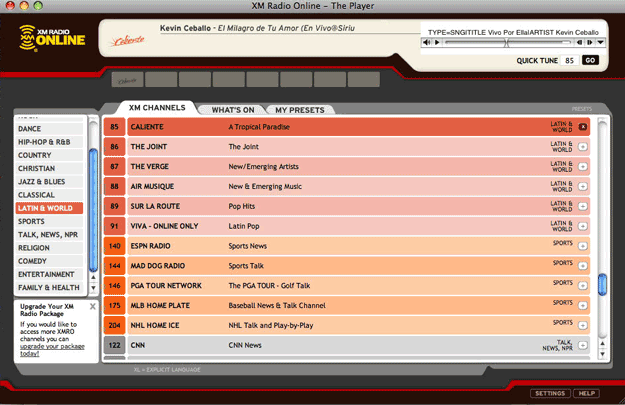
Once I installed Airfoil, I simply fired up my web browser and logged into the XM site. I selected a station, hit play and had music streaming throughout the house.

xm

The Bottom Line

Airfoil is by Rouge Amoeba. It goes for $25 and is available for both Mac and PC. If you use AirTunes and want to stream sources other than iTunes to your speakers then Airfoil is your answer!

More Mac for the Same $$$

0903imac_lineup

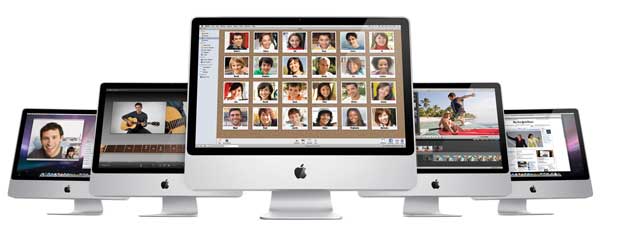
Apple revamped its entire desktop lineup today introducing updates to the iMac, Mac mini and Mac Pro. Each new update is awesome. More speed, more RAM, more/faster ports, faster video, bigger, better, faster! Probably Apple’s best and fastest line up of desktops ever.

They also updated both the AirPort Extreme and Time Capsule wireless base station and backup devices with simultaneous dual band support (2.4GHz and 5GHz). This means that you would no longer have to setup two wireless networks to optimize for 802.11n and 802.11 b/g traffic.

This is all great news and normally my credit card would have already been out and orders placed, but the problem is that times are uncertain. This is making me hesitant to upgrade. Unfortunately that is one of the major problems with our economy right now. People that have the money to buy things are holding off buying things. This in effect is going to slow the recovery even further.

My normal buying cycle for a Mac Pro tower is every other release. I’m now 3 releases back. I’ve been making due with the Mac Pro I have. Although Apple is certainly providing more bang for the buck with better specs at the same prices, that’s not enough to move me at the moment. I didn’t upgrade last year, because I had other priorities. This year I’m just afraid to spend the money! I could always use faster rendering times, but I can also continue to make do with what I have. Should I take the plunge and help get this economy moving again or hold off?

My streaming problem has been solved by YOU!

mm-minimount

Last week I put my blog readers to the task of giving me a way to stream content from my DVR to another TV wirelessly. It didn’t take long for the responses to start streaming in. I’m happy to report that not only did you solve my problem, but you blew past my expectations with the stuff you guys came up with. It was actually the second response by “Ivan” that really turned the tables. Ivan suggested something that I hadn’t even considered. He suggested replacing my Apple TV with a Mac mini.

“I’d suggest replacing the AppleTV with a MacMini :).

Has WiFi and could technically stream whatever you want, at least I think. Add Boxee to the mix, and you’ve got ABC, Hulu, Joost, local movies, local tv shows and so on on your TV.” – Ivan

I was so stuck on adding another box to the mix to do the one thing that I was missing, that I never considered replacing the existing box I was using with one that was more capable! At first glance at Ivan’s comment, I dismissed it. I thought that Ivan was missing the point. He talked about streaming shows from the internet. Well that wasn’t the problem. The TV already has a CableCARD in it and I get live TV all day long. However, when I gave it a second thought the lightbulb came on! I already have a Slingbox Pro connected to one of my DVRs (the Comcast box in my office). I use the SlingPlayer on my MacBook Pro when I’m on the road to watch stuff recorded to my DVR. It was at that moment that I realized that if I used a Mac mini instead of an Apple TV, I’d be able to install the SlingPlayer app on it and stream content from my DVR to the other TV out in my pool/workout area. That was it! That was the missing piece of the puzzle. It was so simple and the beauty of it was that it wasn’t going to cost me a dime! That’s right, I already had a Mac mini just sitting in my home theater going to waste. 


Mac mini vs. Apple TV – Smackdown!

It’s no secret that I’m a fan of Apple TV! I like the concept of a box that allows me to wireless stream my content (photos, movies, music, podcasts, etc.) from my Mac to my TV with a very slick interface and simple remote. Also now that it has movie rentals, it’s even more useful. However, the downside of Apple TV is that that’s all it does. If you want other content, you’re pretty much out of luck. Now I can take shows recorded on my TiVo HD, transfer them to my Mac (thanks to Toast) and convert them into an Apple TV/iPod format and watch them on my Apple TV. The problem is that the process takes 4-6 weeks to complete. OK, I’m exaggerating. However, it does take a long time depending on the length of the show and whether or not it’s in HD or not. This means that you really have to plan ahead. If I recorded 30 Rock on my TiVo HD and plan to watch it later/the next day out in the other room, I’d have to remember to start the transfer before I go to bed that night. Then when I wake up, I’d have to start the conversion process. For a 30 minute HD show, this could easily take a couple of hours in total. Once it’s converted, then I’d still have to transfer it to iTunes so that it would be available to watch on the Apple TV. It’s certainly doable, but that’s a lot of planning ahead. 

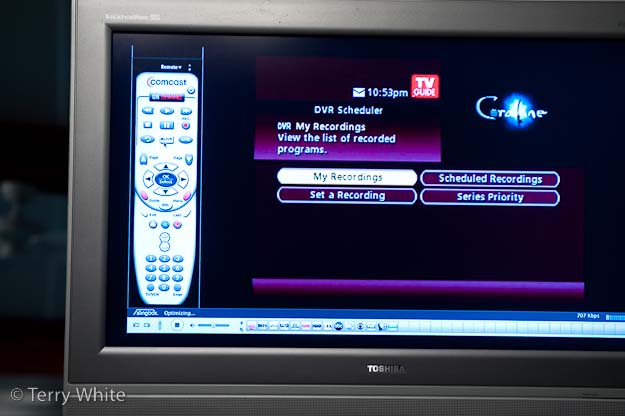
Since the Mac mini is a computer, that eliminates a lot of these steps. For one, I could just install the Toast/TiVo Transfer apps right on the Mac mini and after the show is transfered I could just watch it! No conversions necessary. However, that’s still going to take time as the TiVo transfers take longer than real-time to happen. So a 30 minute show could easily take an hour or longer to transfer. That’s where Slingbox and the SlingPlayer come in. With the Slingbox connected to my office DVR (the one that’s used the least), I can record all my favorite shows and then run the SlingPlayer app on the Mac mini to stream those recordings wirelessly and full screen.


My original Mac mini

I bought the first Mac mini, which came out in 2005 (wow time flies!). I originally bought it for much of what we’re talking about today. I bought it put in my home theater so that I could watch my iTunes content (there was no Apple TV back then). I also wanted the ability to run Delicious Library (my DVD cataloging app) on the big screen. This Mac mini is a 1.25 GHz G4 (a dinosaur by today’s standards). It was the base model and I upgraded it to 1GB of RAM. Once the Apple TV came out in 2007, the Mac mini just sat there for the most part. Most times I would forget it was even there until happened to look over and see. In my home theater, the Apple TV does everything I need. I already have all the other boxes I need in that room doing everything else. So the Apple TV was a perfect fit. 

mm-frontrow

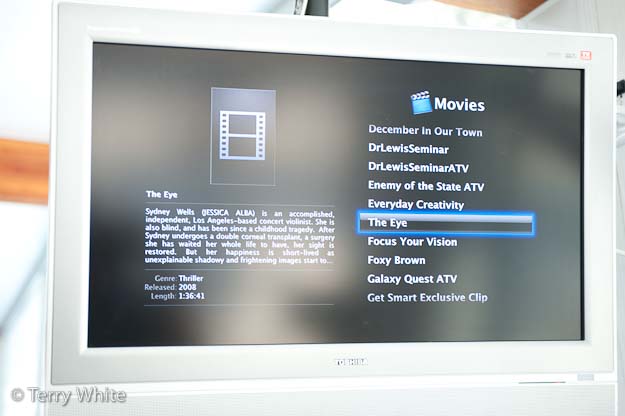
So when Ivan proposed using a Mac mini, I thought – “well gee, I already have one of those. Let’s give it a shot!” My initial concern was that it was going to be too slow to stream. I was concerned that it only had 802.11g wireless AND after I hooked it up I realized that this model didn’t have support for the Apple Remote. This meant that Front Row (Apple’s original Apple TV like interface that is built-in to the Mac OS) was going to be a problem. I then remembered that Apple included Front Row in Leopard. The first thing I did once I hooked it up was install Mac OS X 10.5 Leopard (with all the current updates). I remembered that even if you don’t have an Apple Remote you can still get into Front Row by hitting Command-ESC. It worked, but now that meant that I’d need a keyboard handy. I do have the newest Apple Wireless keyboard which is nice and small. I also still had my Bluetooth Trackball. While this was all fine, I really wanted ONE controller. A keyboard with an integrated pointing device.
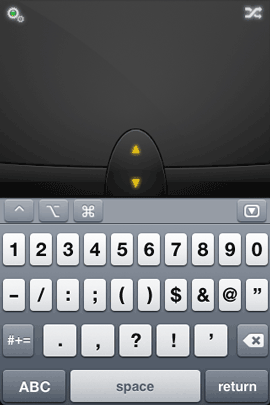
airmouse1    airmouse3  

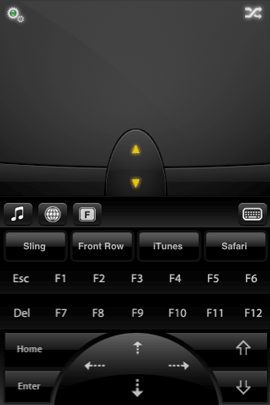
That’s when I remembered “Matt’s” comment about an iPhone/iPod touch app called Air Mouse Pro. PERFECT! This app was even better than I had hoped. It’s a trackpad and keyboard all in one and it even has a Front Row friendly mode with one button access to Front Row. This eliminates the need for the Apple Remote, separate keyboard and mouse. Air Mouse Pro totally rocks! It will definitely be my iPhone App of the Week! 🙂


What about TV resolution?

This is one advantage the Apple TV has over using a Mac mini. Out of the box the Apple TV already has all the right ports on the back. It has HDMI, Component, Optical and RCA audio jacks. Not only does it have the right connections, but it’s also geared to be connected to a TV at the various TV resolutions including 720p, 1080i and 1080p. Luckily I already had the right cables. I have a DVI to HDMI cable. I also had the necessary 3.5mm to stereo RCA cable for audio. When I connected the Mac mini to the TV and booted it, it detected the resolution and came right up. The problem was that the menu bar and dock were cut off. This is due to “overscan”! The Apple TV doesn’t suffer this problem because Apple was very careful to design the menus and interface so that they don’t go to the edge of the screen. On the Mac minis that came out later (like all the intel models), Apple added an Overscan option in the display preferences. This will slightly shrink the screen so that you can see the edges, but it will also potentially introduce black bars all the way around. No real way around this.
mm-fullscreen 

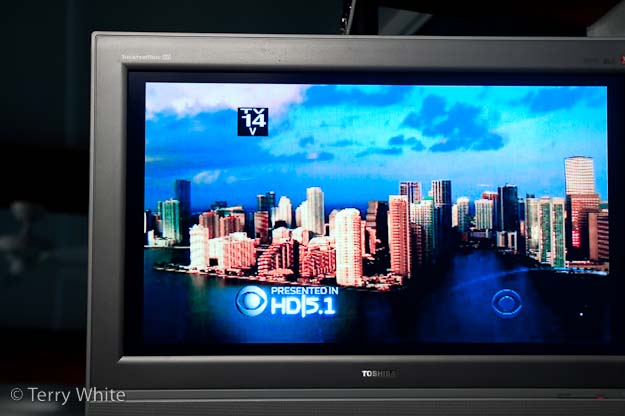
CSI Miami streaming from my DVR in the SlingPlayer running full screen at 720p


Since I don’t have the new Mac mini, I used a shareware app called SwitchResX. This app allows you to have custom resolutions and more importantly for me it also offers the overscan correction I needed. Once I turned that option on, I could see everything.


I shall call him Mini mount

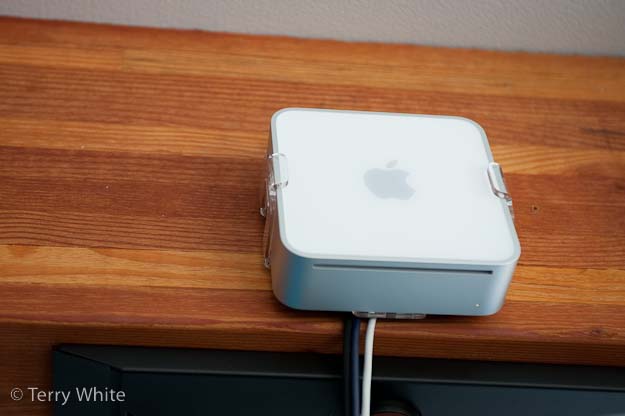
mm_minimount2

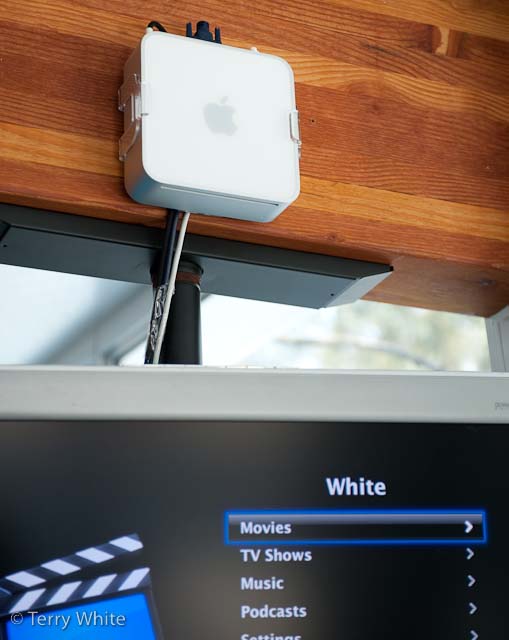
The good folks over at H-squared wanted to help out so they sent me their Mini mount which allows you to mount your Mac mini on the wall. This was perfect for my set up as my TV is suspended from the ceiling and there is no where for the Mac mini to sit. In case you were wondering what became of my Apple TV? I moved it to my office and used H-squared’s tvTray to mount it on the wall as well. I love the LED glow (now standard on the tvTray and optional for the Mini mount).
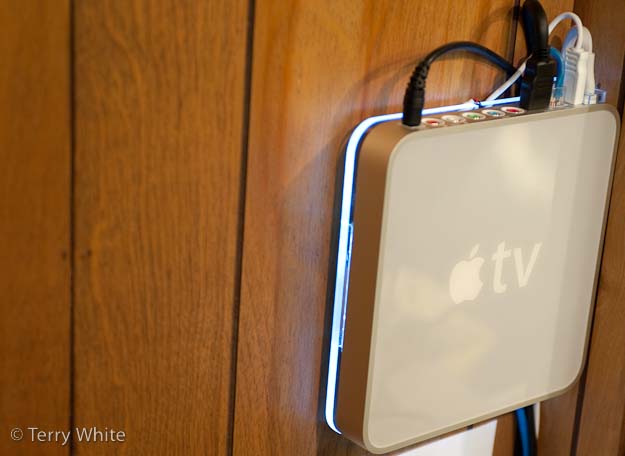
mm-appletv

I even used the very cool MultiLevel iPhone app to make sure the mounts were level on the wall 🙂 Not only was H-squared very very helpful to my cause, they even want to offer all of you a discount on their products. You have from now to the end of February to save 15% off their stuff. Just use the code, wait for it………… “TERRYROCKS” at checkout.


My Gear

One of the comments I got requested that I post the actual components of my final solution. So here they are:

  • Toshiba 27″ LCD HDTV with built-in DVD player and CableCARD slot – this TV was discontinued ages ago. I bought mine on eBay because it was only model I could find at the time that had both a CableCARD slot and built-in DVD player.
  • Mac mini – I have the original model which is 4  years old. The new ones are faster and have an Apple Remote.
  • Apple Wireless Keyboard – it’s small and bluetooth wireless.
  • Bluetooth Trackball – I’m not crazy about this as it takes several click to get it to reconnect after a reboot
  • Air Mouse Pro – Freakin’ AWESOME iPhone app to control it all!
  • Slingbox Pro – connected to the crappy Comcast DVR in my office (see my review here). Wait? Why is my Slingbox connected to your Comcast DVR (which sucks) instead of my TiVo HD? Good question! I connected it to least used DVR in the house because when you’re watching your DVR via the Slingbox, you’re actually controlling that DVR, changing channels, etc. I didn’t want to interrupt any other family member’s viewing. So the Comcast Motorola DVR is the one that gets the least use 🙂
  • SlingPlayer  for Mac – a free download
  • Mini mount – Mounts the Mac mini neatly on the wall (get 15% off with the code “TERRYROCKS”)
  • SwitchResX – because I have the original Mac mini I need this to correct for overscan issues on the TV’s resolution
  • DVI to HDMI Cable – The Mac mini has a built-in DVI port. Most newer TV’s have HDMI. So you’ll need a cable or adapter
  • Audio Cable – Although I used a Monster cable, any old Radio Shack cable will work just fine and will be much cheaper.


The Bottom Line

mm-comcastremote

SlingPlayer running on the Mac mini with an onscreen remote that looks just like the physical Comcast remote for my DVR.


The Mac mini was a perfect fit for my needs in this situation! Granted it costs twice as much as an Apple TV, but it has more than twice the capabilities. If Apple were to ever build-in a Blu-ray player, it would be the ultimate set top box/computer. Now I’m only scratching the surface here because I really only needed it to do the one thing and that is allow me to stream my DVR content over to another TV. However, because the Mac mini is a computer, it can do so much more. At a minimum you could also surf the net as needed. You can also stream TV content from sites like hulu.com and although I haven’t yet played with Boxee, it looks very promising. It doesn’t stop there! Remember Netflix streaming is now on the Mac. So you could stream anyone of up to 12,000 movies. You could also turn it into a DVR as well with products like EyeTV. Although it doesn’t have a built-in Blu-ray player, it does have a DVD drive in it. This means that it can playback all your standard DVDs and Netflix rentals too. So the Mac mini can just about do it all.

Once again, THANK YOU to all my blog readers and especially those that offered up the very cool solutions that made this a reality!
Your mission, should you choose to accept it…

Although I consider myself pretty tech and gadget savvy, I can’t know about every gadget out there. Many of the readers of this blog have helped me over the years by suggesting products that were in some cases better than the ones I’ve reviewed or complimentary to them. So I decided to really put your knowledge (geekiness) to the test. I’m looking for a solution to a problem and need your help!


Wireless broadcasting from my DVR to another HDTV

OK, here’s what I’m looking for: I have a 27″ Toshiba HDTV out in my recreation area that is suspended from the ceiling. It has a built in DVD player and CableCARD so that I can pick up all my digital Comcast channels including HD content. I went out of my way to find this particular set because it was the most self contained HDTV I could find. My goal was to have as few cables/boxes connected to it as possible. Having a built-in DVD player on the side, meant not having to connect an external one. Having a built-in CableCARD slot meant that I could pick up all my Comcast channels without the need for a box from Comcast.  The only box I have connected to it is an Apple TV ,which is great for seeing my movies (ripped DVD collection), music videos, renting movies and iTunes purchased content. I’m just missing ONE thing! There are times that I’ve recorded shows on my TiVo HD that I would LOVE to watch out there. However, I don’t want to connect a big box (DVR). I love the fact that this set is basically boxless. I allowed the Apple TV because it mounts neatly on the wall (thanks to the tvTray). So what I would love is a wireless solution that would stream video from my TiVo HD to this set. 

I’ve looked at the new Slingcatcher, which would be ideal here except that it doesn’t stream HD (which I could live without) AND requires and Ethernet connection or yet another box to be wireless. I’ve also looked at the Belkin Flywire, but I’m not willing to give up my first born to pay for it (they must be totally kidding with that price right? C’mon, seriously?). So what am I missing out there?


Requirements:

The ability to stream video from either my TiVo HD or Comcast DVR wirelessly to another HDTV.

Willing to have ONE SMALL box attached if need be.

Can’t cost more than the HDTV, Apple TV and all the furniture in the room (are you listening Belkin?).

Icing on the cake (actually this is almost a must) would be that I would be able to use a remote to control the TiVo HD from the other room.


So let’s see how good you really are?! What say you tech community? This post will self destruct in 5..4..3..2……..

EOS Multi-room wireless iPod Speaker System


core_black

I had a very specific need to be able to hear the music coming from my iPod in 3 rooms at my photography studio. So I set out to find the best solution without spending a fortune. At home my solution is to use the AirTunes technology built-in to the AirPort Express and Apple TV units. However, that solution was overkill for my studio and more than I wanted to spend there. Plus AirTunes is for your computer/Apple TV and not your iPod. 


A quick Google search lead me to EOS


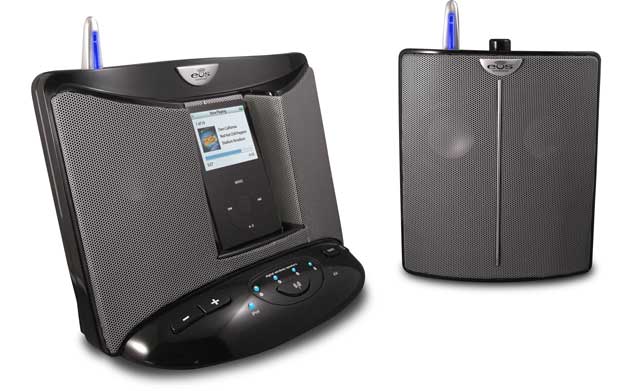
The EOS system was EXACTLY what I was looking for! EOS is a multi-room wireless speaker system for your iPod. The base unit resembles all the other iPod speaker systems out there where the iPod docks in the middle and you have stereo speakers on the sides. However, the EOS base unit has a built-in antenna that can broadcast the music wirelessly to up to 4 additional stereo speakers (5 rooms total). The base unit ships with one wireless stereo speaker. So out of the box you get a two room system. I wanted three rooms, so I ordered one additional speaker. The system doesn’t rely on wi-fi or any other network. It has it’s on 2.4GHz wireless setup. EOS advertises a range of up to 150′ feet. Think of it as a cordless phone like speaker system. So I’m sure the 150′ is under best case scenarios. Real world range is probably less.


How well does it work?

eos_white_speaker

The EOS system works exactly as advertised! Once you plug in the base unit all you have to do is take the additional speakers to your other rooms, plug them in and turn them on. The first speaker I turned on wasn’t detected automatically. I returned to the base and pressed the scan button and it detected it and paired to it right away. The second speaker paired automatically the minute I turned it on. The next thing of course was to dock the iPod and try it out. I docked my 3rd generation iPod nano, selected a playlist and started playing a song. The music was crystal clear. There was no distinction (to my ears) from the music coming out of the base to the music coming out of the wireless speakers. No static, no drop outs, no lag, no distortion!

speaker_plug_back

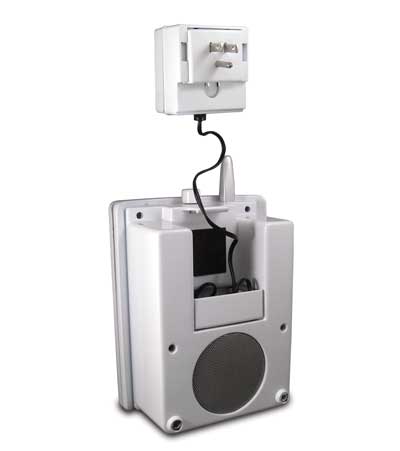
The power adapter is integrated into the back of the remote speakers so that they can actually hang right from the wall outlet OR you can separate the adapter and plug it in while the speaker is on a shelf.


The EOS system touts what they call SRS WOW!™ digital sound enhancement technology, which aims to more bass and a 3D surround sound like atmosphere. In all honesty I can’t really tell that this is making all that much of a difference and since there is no way to turn it off I can’t really tell if it makes a difference or not. The system I’m replacing with this was the original Bose SoundDock which sounded really good to begin with. The EOS ships with an IR remote to adjust the sound volume, pause, advance, etc. the tracks. The EOS comes in your choice of Black or White and also ships with various iPod universal dock adapters for the older iPods.

It’s also not just for iPods! Although there is a built-in iPod dock, there is also an auxiliary line-in port on the back of the base unit. So you could plug in just about any audio source including your computer. This would also help iPod shuffle users. They even supply the cable you’d need to plug in another audio device.


The Bottom Line

If you need to hear your iPod in multiple rooms in your home, office, etc. then it’s hard to go wrong with the EOS system. While I was prepared to pay their retail price, I was very happy to see that they offered refurb’d units at much lower prices. I got the base unit (which includes one extra speaker) and a second speaker (3 rooms in total) for only $218 (free ground shipping). That’s less than cost of a new base unit alone (at their retail price of $229). I do have a couple of issues with it though. The first one is that it’s not able to power the latest iPods/iPhones. If you have a 4th generation iPod nano, 2nd generation iPod touch or iPhone 3g, then you’ll see a message that “charging is not supported by this accessory.” You can solve this with the addition of the Scosche passPORT Dock. Hopefully, they’ll come out with a newer model that provides power over the proper pin in the dock connector for the newer iPods. The other issue I have is that while the additional speakers have an on/off/volume knob, I don’t see a way to turn OFF the base. Granted I never turned off my Bose SoundDock either, but the EOS base has blue LED lights on it that stay lit all the time and I don’t want others trying to figure out how to turn it off. So I just unplugged the power when I was ready to leave. I thought it was odd that the wireless speakers had the ability to be turned off, but not the base. To learn more or place an order, check out their site.

iPhone App of the Week – Keynote Remote

keynoteremote

I give presentations all the time and while I’m not a big fan of slides, when I do have to give a slide presentation Apple’s Keynote is my app of choice. Prior to my iPhone I used to use Salling Clicker on my Palm Treo 650 to remote control my slides via Bluetooth. I do miss that one aspect of my old phone. As you know, I’m a big fan of Apple’s “Remote” app that allows you to control your iTunes app or Apple TV via your iPhone or iPod touch. The app is very well done and feature complete. So needless to say, I just figured that when Apple announced that they were releasing another Remote app that allowed you to remote control your Keynote ’09 presentations, it would be just as good.


Basic Functionality

keynote1

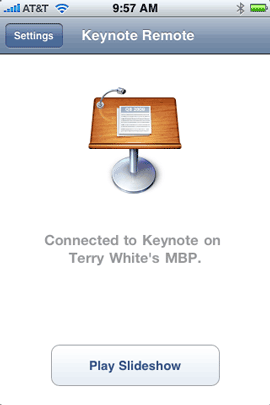
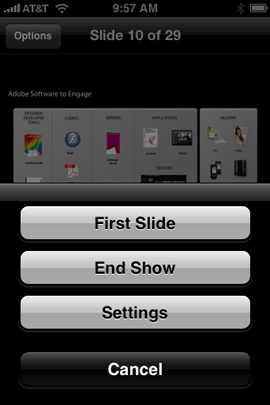
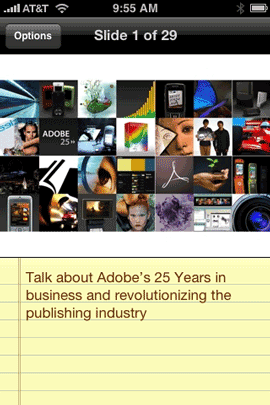
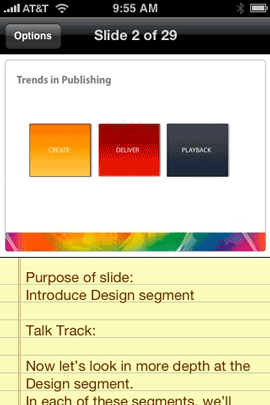
The Keynote Remote app pairs with your iPhone/iPod touch and your Mac running Keynote ’09 via Wi-Fi. So both your iPhone and Mac need to be on the same Wi-Fi network. That in and of itself could be an issue depending upon your presentation venue (more on this later). Once you have the two paired you can open a Keynote presentation on your Mac and then start playing it on your iPhone. Once Keynote is in “Play” mode you can see the current slide right on the iPhone’s screen including your speaker notes. To advance to the next slide you swipe your finger across the screen. You can also go back to the previous slide. There is a few second delay from the time the slide appears on the big screen until it appears on your iPhone’s screen. That’s about it!

keynote2

keynote3

My slides displaying on the iPhone complete with the speaker notes that were keyed into Keynote.

keynote4


What’s missing?

Although this app does what it advertises, there is so much more that it could do. The first thing that I missed was a configurable slide/presentation timer. In other words, I’d like to see how much time I have left while doing my presentation. I’d like to configure a 10 minute and 5 minute warning beep or vibrate. While I appreciate the coolness of a finger swipe to advance slides, it would be more practical to have a large forward/back onscreen overlay button. If your thumb is at the top of the screen it would advance the slides forward, if it’s at the bottom, it would go back a slide. These are simple fixes that Apple can add. However, the big thing is that this App works over Wi-Fi instead of Bluetooth. Bluetooth is such a natural fit for this kind of app. Granted the range wouldn’t be as good, but there’s no reason why the app couldn’t work over Wi-Fi or Bluetooth. Since it only works over Wi-Fi this means that you would either need to have a Wi-Fi connection in your presentation venue OR you would need to setup an ad-hoc network between your Mac and iPhone. Another concern that presenters shouldn’t have to worry about. Although the app allows for controlling your presentation in portrait or landscape orientation of your iPhone, you have to set it in the preferences. I would have expected Apple to take advantage of the accelerometer and simply allow you to tilt your iPhone to change the orientation.


The Bottom Line

The Remote app for iTunes/Apple TV sets the bar for remote apps on the iPhone! Unfortunately, the Keynote Remote app doesn’t live up to this standard. I was also stunned that Apple charged 99¢ for this app. Considering that Remote is a FREE app and the Keynote Remote app requires Keynote ’09, you would think it would just be included in iWork ’09 or FREE. With these limits, you might be wondering WHY would I name this app, App of the Week? I chose this app because it does work, but more importantly it does have potential! The things that it needs (with the exception of Bluetooth control) are easily added! If Apple quickly follows up with a 1.1 update that adds the things I listed above, then this app would kick butt. Luckily this isn’t the only app that allows you to remote control a Keynote presentation. The favorite seems to be “Stage Hand.” $7.99

Apple’s Keynote Remote app is compatible with iPhone and iPod touch and of course requires a Mac running Keynote ’09. You can check out Keynote Remote here on the App Store for 99¢.

Macworld Expo: Leave it to Google :)

I’m sure it comes as no surprise to you that with thousands of Mac users in town for Macworld Expo, there would also be thousands of iPhones in use! As a matter of fact there are so many iPhones here this week that AT&T’s data network was brought to its knees on Tuesday during and after the keynote. You could make calls, but you could just about forget about using the EDGE or 3G network.

Google is showing how they think ahead by providing an iPhone charging station for up to 8 people to charge their iPhones in the Google booth at a time. Obviously you’re not going to leave your iPhone unattended, so what are you going to do while you wait? Check out the stuff that Google has to offer. Genius!

iPhone App of the Week – iWant

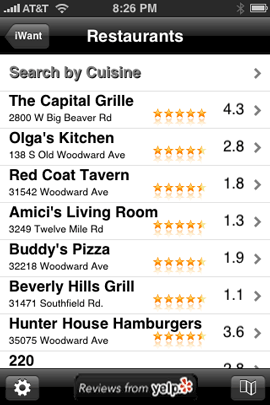
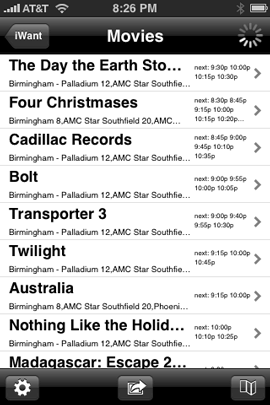
There are quite a few iPhone apps that try to be your one stop shop for all the businesses around you that you may want to go to. While I have tried many of them, for some reason I keep coming back to iWant. iWant is a location based app that allows you to quickly find the closest restaurants, bars, cafes, grocery stores, drug stores, clothing stores, movie theaters/show times, hotels, department stores, banks, gas stations and car rental places.


How well does it work?

The interface is quite simple. Nice big icons that cover each of the above categories. Once you tap a category it will start to display all of the businesses around your current location based on the category you tapped on. It seems to do a pretty good job of finding just about every business I could think of around me in each given category except for the banks. There are three Bank of America banks nearby and it didn’t list any of them. There is a Comerica bank about a block away and it didn’t find that one either. Not sure if there is some brand preference going on or not, but it doesn’t find every business in every category. Even with this shortfall I still like it as I’ve found the same limitation in the other apps I’ve tried as well.


A couple of added benefits

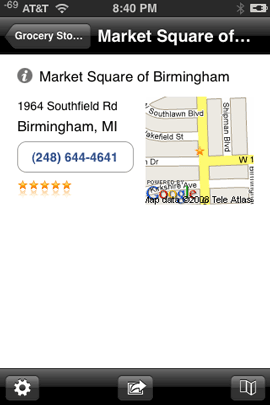
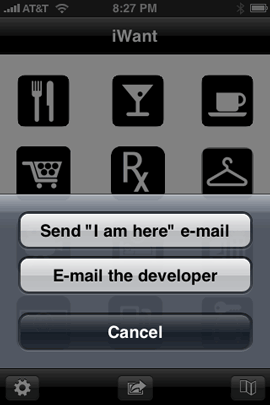
Once you tap on a business, you get to see the address and of course the phone number which you can tap to dial. You also get to see it on the built-in Google Map app for easy directions to if from where you are. The Action menu at the bottom of the screen allows you to email your current location to anyone you like and it will automatically generate a link with your coordinates. This is cool when you are unfamiliar with the area and you’re trying to explain where you are. You also have a built-in option to email the developer. I wish more apps included this ability. You can also easily control the search radius with a slider.


The Bottom Line

It’s hard to go wrong with this app. It’s easy to use, it’s fast and best of all it’s FREE! Download it from the App Store now.