Every now and then I’m going to have a post that’s not about a product or service that I’m reviewing, but more of a rant. Today is the day for the one that’s been bugging me for a long time. As a frequent travel I stay in hotels on a regular basis. Of course I travel with my laptop and access the internet while I’m in my room. I’ve found that internet charges range anywhere from FREE to $16.99/night (more overseas). I really got to thinking about this on my trip to Arizona a couple of months ago. While I was in Page Arizona I stayed at a Courtyard Marriott and the internet was FREE. Wi-Fi access throughout the building at no extra cost. As I was heading home I spent one night at a regular Marriott near the Phoenix Airport. Not only was there a charge for the internet, they even had tiered pricing for connecting at faster speeds. I thought, "wow they’ve even gone through extra trouble to be able to charge you more for a faster connection. Now while I wasn’t surprised by a charge for internet access, I was curious why Courtyard Marriott hotels can offer FREE internet access and charge less for their rooms than standard Marriott Hotels? The room rate for the Page Courtyard was $89/night (free Wi-Fi). The room rate for the airport Marriott was $120/night and the internet access for the basic speed for $9.95/night. I don’t even remember what the higher speed internet cost. As a Marriott Rewards Member I thought that this would have been a perfect way to "reward" me for my loyalty. Why not give the Marriott Rewards members free basic access and charge for the higher speeds?
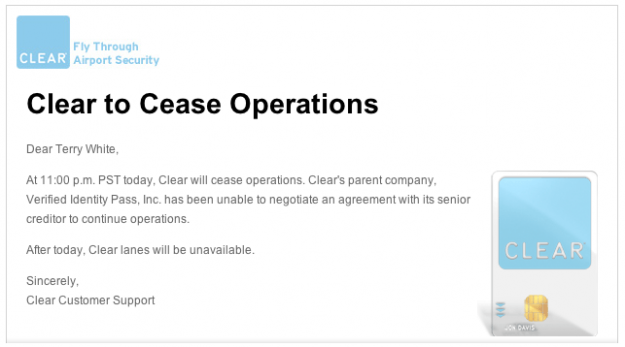
Clear just went under
One of the ways I used to make travel a little easier was to use my Clear card to zip through airport security. Clear was an approved TSA pre-screening service that you would apply for and basically get a TSA background check. Once you were approved you got a Clear card that you could use to go through a much shorter line at the airports that offered Clear lanes. So imagine my heart break when I got this email last night! I’m totally bummed!
iPhone App of the Week – SlingPlayer Mobile
![]()
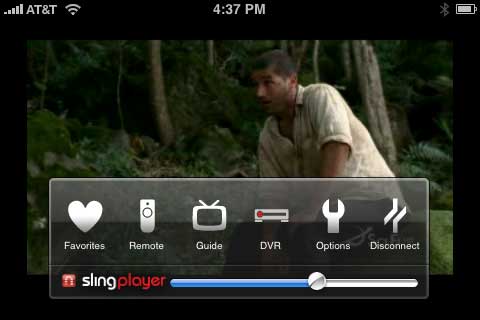
This is a bitter sweet kinda review. So let me get to it. When the iPhone 2.0 update came out last year and the iPhone was open to 3rd party app development, one of the main apps on my wishlist way back then was a SlingPlayer Mobile app. After all Sling Media had produced mobile versions of their player for other mobile platforms and the iPhone seemed like a natural for this kind of app. So I waited. Then I thought my dream might actually come true. I actually got to play with an early Alpha fo the SlingPlayer Mobile app back in January at Macworld Expo in San Francisco. The app was beautiful with a nice translucent display for onscreen buttons. I started getting really excited until I heard those words. They said, “well we’re just about ready to begin the submission process to Apple.” That’s when it dawned upon me that even though this app was being developed, that doesn’t mean that it will actually make its way into the hands of users. Unlike most other mobile device platforms, Apple has to approve every app submitted for the App Store. So there’s always a chance that the app could be rejected. Back in late March, the news broke that SlingPlayer Mobile app had been submitted to the App Store for approval. The approval process takes about a week on average. When two weeks went by, I knew that there was trouble in paradise. Something was wrong. Another week went by and I had pretty much assumed that this thing would never see the light of day. I had a suspicion that the problem was not with Apple, but with AT&T. AT&T has recently been reemphasizing their polices on streaming data and bandwidth to wireless devices. The SlingPlayer certainly would violate this policy. Even though they later came back and said that the update was released in error, the writing was on the wall. So it was no surprise to me that when the SlingPlayer Mobile App finally got released this week that the ability to stream video over 3G networks was removed.
–
It’s finally here! SlingPlayer Mobile for iPhone
–
What’s a SlingBox and SlingPlayer?
To save time, if you have no idea what a SlingPlayer is and why you’d want one, go read my review of the Slingbox Pro here. Go ahead and read it now. We’ll wait…..
–
How well does the SlingPlayer Mobile App for iPhone work?
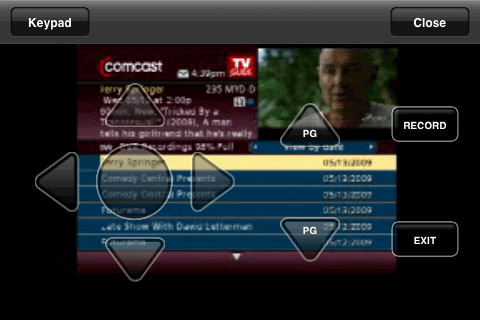
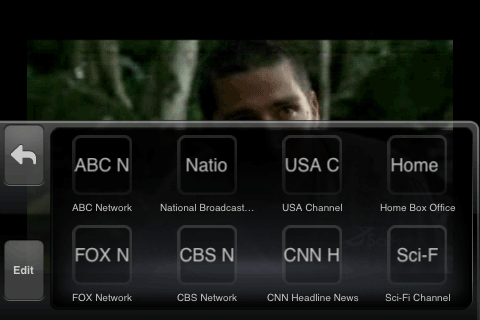
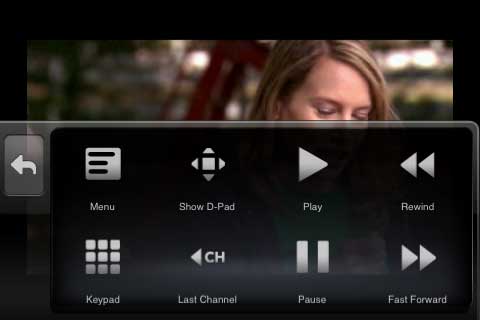
Now that we’ve gotten past all of the politics (well not quite, but let’s put that on hold for a sec) and what a Slingbox/Player is, let me concentrate on the app itself. The idea of the SlingPlayer and SlingPlayer Mobile app is that you can watch your TV (DVR, DVD player, Apple TV, basically any video source you have connected to the Slingbox) on the go. I LOVE the ability to watch recorded shows from my DVR anywhere I happen to be as long as I have my laptop and internet connection. The SlingPlayer Mobile app promises to give you that same capability on your iPhone or iPod touch. It’s great to have this ability when you find yourself with some down time or sitting in a waiting room somewhere. Plug in your headphones, fire up the SlingPlayer Mobile App and using the on screen remote control interface you can change channels, switch sources and watch recorded shows from your DVR.
My DVR of choice is the TiVo HD. I have Comcast cable and I do have one Comcast (Motorola) DVR. This is the DVR that I have my SlingBox Pro connected to. Why not connect it to one of the TiVo HDs? There’s a reason that I have it connected to the Comcast box instead of my favorite DVRs. When you use a SlingPlayer to watch your TV/DVR remotely, you are physically controlling that DVR in real-time. So whatever you do will be seen by the people in your home if that TV happens to be on. So as to not disrupt the TV viewing for the rest of my family, I put the SlingBox Pro on the DVR that no one likes to use. Yep, that’d be the Comcast box in my office. This way I can have it to myself when I’m on the road.
I downloaded the SlingPlayer Mobile app the minute it became available (something like 1AM my time). I wanted to see how well it worked and of course tell you about it as well. The app works great! I haven’t had a single issue yet. When I first fired it up, it requested that I log into to my Sling account online. I hadn’t actually set up an online account yet, but I did right there on the spot. Took just a couple of seconds to get going.
Once I had my account setup the app/site found my Slingbox and I was watching live TV! Wow! It works! I don’t really have much interest in watching live TV, so of course the next thing I wanted to see was my DVR. The integration was right on the money. I pressed the onscreen DVR button and it sent the proper commands to my DVR to bring up the list of recorded shows. I was able to easily navigate to a show and start playing it. Again, it just worked as advertised. Although I don’t really use the SlingPlayer to watch live TV, I wanted to test these features too. So I setup my “Favorites” buttons so that I could switch to any of my favorite channels with the press of a button. It worked fine.
–
What could be better?
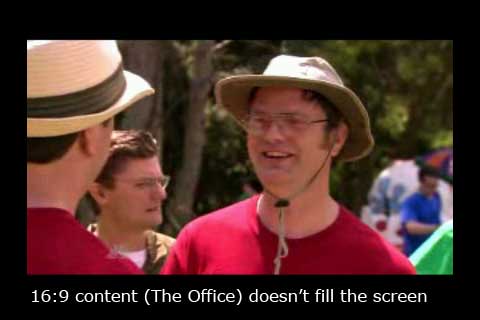

The one thing I noticed is that I can’t ever seem to get the video to fill the screen. If I watch 4×3 content I can set it to letterbox it. However, if I watch 16:9 widescreen content, there doesn’t seem to be a way to zoom in on it (even if I’m willing to crop some off) to see it fill the screen from edge to edge. Apple allows this in the iPod app. I would like to see this in the SlingPlayer app as well. Although the remote functions well, there will be a few second delay from the time you press a button until the results are displayed. You have to remember that it’s sending these commands over the internet and then via IR to your device. So give it a sec.
Bonus Tip: Since you have control of your DVR via this app, there’s nothing stopping you from using this as a remote control to schedule recordings too.
I can’t ignore the elephant in the room. As great as this app is, the single biggest frustration is that it only works over a Wi-Fi connection. If you’re an iPod touch user, you’re used to this. So it’s probably no big deal. However, if you’re an iPhone user, it may be a deal breaker. It means that you’ll only be able to stream content from your TV source or DVR when you’re connected to Wi-Fi and not over the 3G network. Argggggh! So close, but so far.
–
The Bottom Line
Here’s the thing with this app, it works as advertised. However, I can’t ignore the biggest problem and that is it’s been crippled by AT&T restrictions and doesn’t not allowed to work over a 3G cellular network. It only works over a Wi-Fi connection. While it’s easy to blame AT&T for this restriction, there is one thing that Sling Media could have done to soften the blow and that is lower the price! I don’t have a problem paying $29.99 for a SlingPlayer Mobile app (heck I just did). However, I do have a problem paying the SAME price as every other version of the SlingPlayer Mobile app (for BlackBerry, Palm, Windows Mobile, Symbian, etc.) and not being able to watch over the SAME 3G network as all the other players do. Think about it! If I go buy a BlackBerry from AT&T, I can buy the SlingPlayer Mobile App for BlackBerry and watch TV over AT&T’s 3G network. Granted, it’s probably in violation of the small print in the agreement I would sign, but there would be nothing stopping me from doing it technically. If caught, AT&T would be within their right to suspend my account. I’m not advocating breaking the rules. I’m just using this as an example.
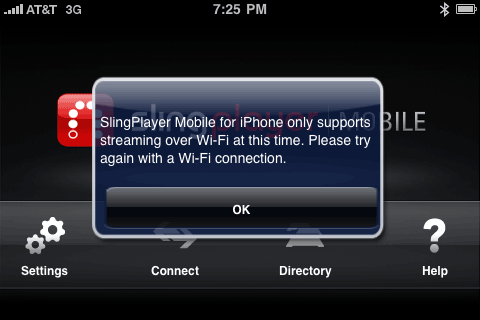
This is not the first app crippled by AT&T. Remember, it wasn’t long ago that Skype shipped their iPhone app and like the SlingPlayer for iPhone, it only works over Wi-Fi.
Bandwidth abuse or overuse is a legitimate concern especially when you know that your network can’t handle the hit. If you’ve been to the last two Macworld Expos you’ve witnessed AT&T’s data network brought to its knees by the sheer volume of iPhone users simply checking email and surfing the web. Each year after the Apple keynote you could forget about using your iPhone to do anything data related on AT&T’s network. Nothing but gridlock. Streaming video/audio takes way more bandwidth than email and web surfing. AT&T is concerned that thousands or hundreds of thousands of SlingPlayer users suddenly streaming video for hours on end would be a significant impact to all their users. They’re probably right!
I have read many of the angry comments in protest of this and people are saying that they refuse to buy the app without 3G support. Frankly, I don’t blame them. Yes, I know that software development costs money. Remember, I work for a software developer? I know that Sling’s hands were tied over the whole 3G issue, but they are the ones that set the price. Why should we be asked to pay the same price for our app that doesn’t have the same functionality of the same apps on every other mobile platform that this app is available for? So there I’ve said what many of you have been wanting to hear. I agree with you!
Apparently AT&T released a statement explaining their stance. Let’s hope that this rumor is not true that they purposely crippled this app as it was competition for an U-verse app that they are going to release.
The SlingPlayer Mobile app (Wi-Fi) is available for the iPhone and iPod touch for $29.99 from the App Store. I don’t think I need to say it, but just in case: you will also need a Slingbox connected to at least one video/audio source in order to take advantage of the app. Need a Slingbox? The Slingbox Pro HD is here for $234.80 (List Price $299).
Sling Media has done a very good job coding this app. If they lowered the price OR if AT&T would allow it to work over 3G it would be a must have for every Slingbox user out there.
Travel Routers: Cradlepoint CTR500 vs. AirPort Express
Sometimes it’s easier just to show you rather than to try to explain it in print. So check out my video review of the Cradlepoint CTR500 3G EVDO Travel Router vs the Apple AirPort Express:
…yes the video shot in HD and was edited in Adobe Premiere Pro CS4 (of course!)
–
A couple of additional features not shown in the video
The CTR500 not only shipped with an AC adapter (cigarette lighter) and multiple international plugs, but it also shipped with an Auto DC adapter. So in theory you could take that long car trip with the family and your passengers could have Wi-Fi internet access for their laptops, iPod touch’s, etc. while barreling down the highway. UPDATED INFO: Also the guys at the 3Gstore just alerted me to the fact that the latest Cradlepoint firmware now supports true Load Balancing. So if you do have the luxury of having two cards, you can use them together for increased bandwidth. They had me at “now supports”.
–
The Bottom Line
I’m always setting up ad-hoc Wi-Fi networks when I’m on the road. I love the convenience of coming back to my hotel room and just opening my laptop and being on the internet (just like at home). It’s also great to be able to share the same internet connection with colleagues in the next room or family that I’m traveling with and to have Wi-Fi access on multiple devices like my laptop, iPhone and Vonage VoIP Wi-Fi phone (great for calling home from overseas). Although the AirPort Express is GREAT (and I still use them extensively at home because of their AirTunes abilities), the Cradlepoint CTR500 gives me the ability to not only share an Ethernet connection over Wi-Fi, but also either of my 3G (EVDO/HSDPA) cards. It even works with some 3G cellphones via USB tethering. There was no software to install. Like most routers you configure it via your web browser. I’ve also never seen a router (let alone a travel router) with so many options to configure it just the way you like. Even my home D-Link router doesn’t have that many options. Speaking of configuring, there was one annoying default. After I set the router up with WPA password security, I noticed that I was still being routed to a web page, which required entering an additional password before being allowed access to the internet. I couldn’t find that way to turn this off fast enough! Once I turned off “Require User Login“(apparently one of the most frequently asked questions), I was totally happy with the setup. The CTR500 only came with a quickstart guide to get you setup with a basic setup. I wanted to dig a little deeper with the settings and therefore had to go to the website to get the complete user guide.
The Cradlepoint CTR500 goes for $179.95 (retail list price $199.99). There are less expensive models (one of which even has a built-in LI-ION battery) if you don’t need both an ExpressCard slot AND USB. If that’s the case you might want to go with the USB model CTR350 at $129.38. The CTR500 has direct support for over 100 3G cards and cellphones. See the list and specs here. If all you need is to share a high speed internet connection via Ethernet then the AirPort Express ($94.61) is the way to go. If you’re in the market for a 3G data card/service, router etc., the guys at the 3G Store rock!.
I can’t wait to go on my next trip!
iPhone App of the Week – TripIt

I got hooked on TripIt.com when I first checked out another iPhone app called FlightTrack Pro (see my review here). FlightTrack Pro is strickly for checking your flight status, gates, departure, arrival times, etc. Although you can use the app in a standalone fashion, it really sings when you link it to your FREE TripIt account.
The TripIt service works great for me. I love it mostly because it requires very little effort on my part. I simply forward my email itinerary that received from my travel agent or airlines to plans@tripit.com and like magic my account populates with all the details of my trip. The flight portion of the trip is picked up by FlightTrack Pro.
Although TripIt does have an iPhone/iPod touch friendly version of their site (http://mobile.tripit.com), I was thinking how much I would love to have a dedicated app. FlightTrack Pro is cool for the flight info, but I want all the details of my itinerary at my finger tips. Nothing beats standing at a hotel reception desk and being able to go right to my confirmation number.
My wish was granted
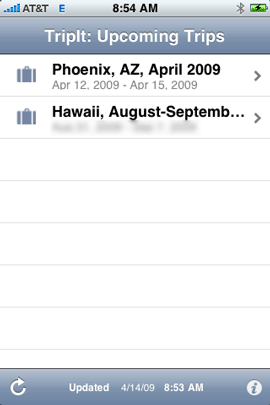
TripIt sent me an email this week letting me know that they had released their iPhone app and I clicked the link immediately to download it. Once I had the app on my iPhone I put in my TripIt account login info and as expected my upcoming trips were on screen. As a matter of fact I was already on one of those trips at the time. Everything was there just like the website. Confirmation numbers, check in/out times, phone numbers (which are clickable to dial), all the details of my trip were right there.
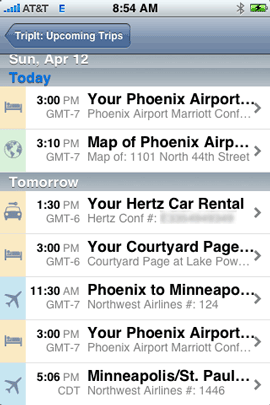
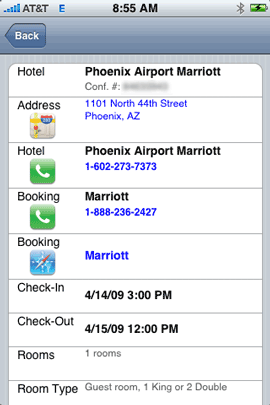
Room for improvement
The TripIt app works exactly as advertised! Although I’m happy with it in its current form, there are some things that would make it even better. The first improvemet is actually a biggy! The app only works when you have an internet connection. There’s no logical reason for this. The app should be able to DOWNLOAD your itineraries to your device and then only use the internet for updates. That’s the whole advantage of having a native app! Otherwise you might as well just use the website.
The next one is that revolves around social networking. I’ve started linking up with friends, colleagues and family on TripIt so that we can kinda know where each other is. The app doesn’t give you any access to your TripIt Network. Again, this should be an easy add since the info is already there in the database that the app is pulling from.
Lastly, the app doesn’t have any editing capabilites. Earlier this week I checked out of one hotel a day early and booked another one that was closer to the airport. I forwarded the confirmation for the new hotel to the plans@tripit.com address and it showed up properly, but there was no way to change the fact that I was checking out of the first hotel without going to the website to do it. So if your plans change or you have a new trip, you’ll have to make those changes via the website and email.
The Bottom Line
I love TripIt.com! It’s FREE! It just rocks! The TripIt app for iPhone/iPod touch is a great first start, but there is so much more potential for an even better app. If you have a TripIt account (and there’s no reason not to), then you should download the TripIt app from the App Store.
My Arizona Photographic Adventure and Drive From Hell
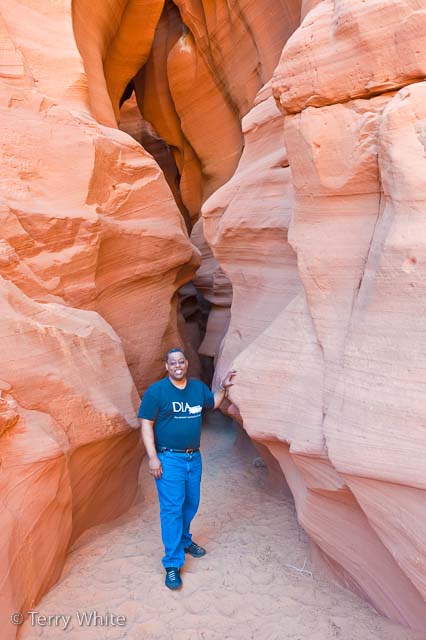
I knew I had week off coming up in April and unfortunately due to bad timing it was the week after my kids’ spring break. So here I am with a week off and wanting to make the best of it. I’ve been itching to go to Antelope Canyon ever since I saw Scott Kelby’s shots from his 2007 trip. Since I had a week off I decided to make the best of it and go on a photographic adventure. No family, no friends, just “me time.” Time to do things on my own, explore and just be me. So I really started asking Scott about the locations he went to and as luck would have it, he told me that everyone else told him the best time to go was in April! I said, OK that’s it I’M GOING! I booked a room with a non-refundable deposit at the Courtyard Marriott in Page Arizona and now I was committed. Next I booked my flight and rental car.
First stop, Horseshoe Bend!
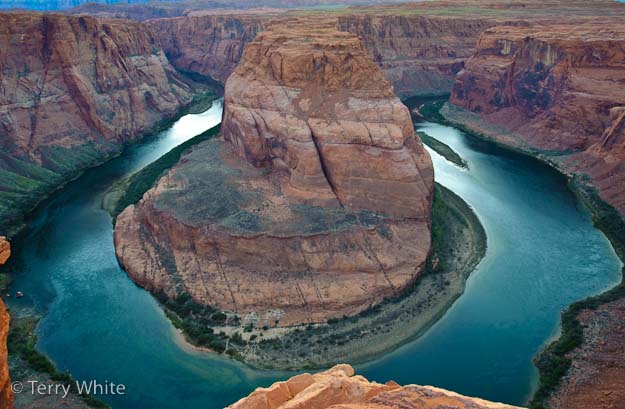
Any landscape photographer will tell you that the best times to shoot landscapes are in the morning (sunrise) and the evening (sunset). The reason for this is the sky looks its best and has the most beautiful color at these times. It’s almost magical!

An example of that magical sky I was talking about. Sunset in San Francisco at Coit Tower.
So I drove from the Phoenix airport (4 hours) directly to Horseshoe Bend to try to catch the sunset. I got there in what I thought was enough time until I realized that after climbing the first steep hill, it was about a mile to Bend. I was really hoofing it to race the sun and make it to the “cliff” in time. I got there setup my tripod and started shooting.
Although I got the shot, I would have liked to have had a little more time to capture it from a few more vantage points. After I got the shot I learned my first lesson about shooting in the desert. I turned around to head back to the car only to see a horizon and terrain that all looked the same. If there hadn’t been other people walking ahead of me off in the distance I could have easily walked back in the wrong direction. I wouldn’t have been lost, because I knew the general vicinity of the car. However, I could have walked several hundred yards out of my way.
I used to laugh when I saw the iPhone commercials advertising the apps that help you find your car. I downloaded one of those apps the minute I got back to my room!
Antelope Canyon, the main reason for my trip

Scott started telling me about other places that he learned about after his trip that he wished he had photographed. One was Horseshoe Bend. While all of the spots he was telling me about were interested and definitely worthy of capturing, I had my heart set on the slot canyons. I was awestruck by the sheer beauty and colors of these magnificent canyons.
Like I said above, the best time to shoot landscapes is in the early morning and in the evening. However, for the slot canyons, you actually have to wait a little longer until the sun is a little higher in the sky to get the beams of light coming down. Since the sky isn’t the main focus of these shots. It makes sense.
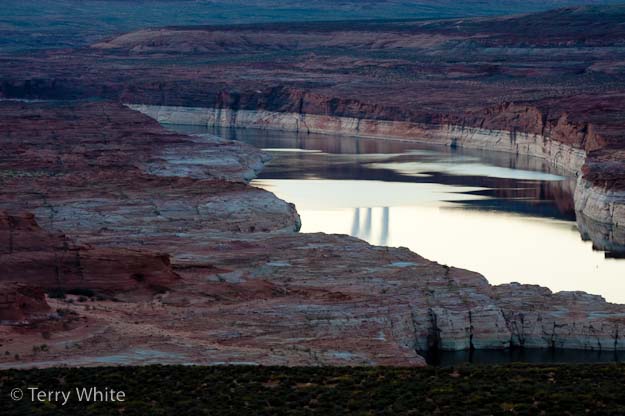
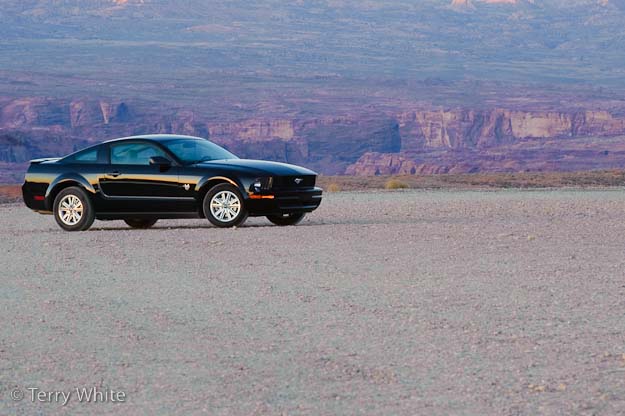
So since I had a sunrise coming and didn’t want to waste it, I headed to the closest “Scenic View” point to grab some shots of the lake. Unfortunately, there wasn’t really much magic in the light because the sky was completely clear. It’s the sun lighting up the clouds in the sky that really makes the shots pop. Although I got a couple decent shots, nothing was really setting me on fire until I turned around and saw my rental car. The sun was lighting the Mustang perfectly! It looked like a car ad. So I grabbed a couple shots and was happier with those than my lake shots.
I went back to the hotel, had breakfast and headed out to the slot canyons. There are actually two different locations to shoot the famous canyons. There are the upper slots and the lower slots. It seems like the Lower Slots are for the pros and the upper slots are for the tourists. My guess is that because you have to physically climb down into the lower slots, that most average travelers aren’t going to go through the hassle.

This is actually the entrance to the Lower Slots. You just start climbing down gear and all.
When I got down into the lower slots every photographer down there had a tripod and an dSLR. There were only about 10-12 people down there. So there was plenty of opportunity to get shots without anyone being in your way. Most of the folks down there were on a tour. I had heard that the tour of the lower slots wasn’t worthy it and you could just pay and go on your own. That’s what I did! The lady at the desk asked me if I was going to be taking pictures? I said “yes” and she then handed me a sticky note to wear that said “Ken’s Photography Tours.” She told me that I would have 4 hours to shoot. Wow! 4 hours? Not sure who Ken was, but I was glad to have the extra time with no rush.
The lower slot canyon is MAGNIFICENT! It’s hard to get a bad photo there. Also because there are so many different angles and vantage points, no two photographers are going to walk away with the exact same shots. I got exactly what I came for!
Although I was totally happy with what I got in the Lower Slots, I decided to head to the Upper Slots on the other side of the road (about 1/4 mile down). This canyon required that you actually go with a group. They have to drive you to the entrance, which is about a mile (or more) away from the parking lot. Although you’re in a group with a guide, the guide was totally cool with you taking your time to get the shots you wanted. I was probably the only Pro Photographer in this group and I have a theory as to why. The best light had already past for the day. It was after 2PM and to shoot the Upper Slots to get the beams of light that you would want, you have to do it between 11AM and 1PM. I was amazed by how friendly the guide was in that he was even taking the time to help people change the settings on their point and shoot cameras to get the best results.

I was the only one in this canyon with a tripod and YOU NEED A TRIPOD! Most of the time I shot in Aperture Priority Mode which means you set your desired f stop and let the camera figure out the shutter speed. In some spots you can easily be taking 10-30 second exposures. It’s impossible to hand hold a camera and get a non-blurry shot that long. Now of course you can crank up the ISO so that you can shoot hand held, but then you’re going to be sacrificing image quality and introducing noise. I wanted to keep my ISO at 200 the whole time. Even though I was on a tripod, I still used a cable release. This reduces the vibration that you could get by using your hand to press the shutter release on the camera body itself. If you’re a tact sharp fanatic, then you could even shoot using the mirror lockup feature.
Although I missed the beams of light for the day in the Upper Slot Canyon I was still glad that I went. It is “different”! There’s no climbing involved and it’s much wider on the inside. I planed on coming back the next day to get the beams, but that didn’t happen…
An adventure and a nightmare
Since I was done for the morning and achieved my main objective for the trip, my attention was now on “what am I going to shoot at sunset?” I started thinking about the Grand Canyon and then someone I was on the truck with coming back from the Upper Slots mentioned Bryce Canyon. They showed me a calendar that they bought with an incredible image in it. Of course I wanted to take a shot like that. So I went back to my room and reviewed the shots from the Antelope Canyon. I got so absorbed by them that I skipped lunch. Now it was 4PM and if I was going to make it to Bryce Canyon by sunset I had to leave NOW!
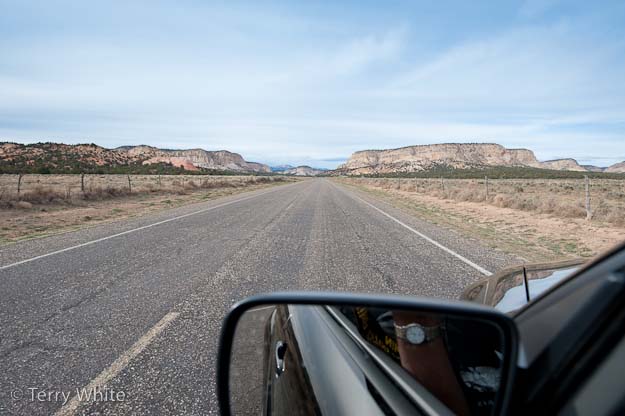
I plotted my course in my Garmin nuvi 765t and I was on my way. I thought for a second, “I should grab some food before I leave, but the restaurants in Page were in the opposite direction.” “I’m sure I’ll pass something on the way and grab food then.” BIG MISTAKE! I learned a hard lesson that day. I assumed that like most highways I’ve driven on in my life, there’s always a fast food place, gas station, convenience store, etc. Um NO! That isn’t always the case!
I got about 10 minutes out of Page and noticed I had no cell service. No biggie right? I now know the definition of “the middle of nowhere!” I saw NOTHING for 115 miles. Nope, nadda, nothing! No gas station, no little store, no nothing! Oh well, I’ll suck it up and get something when I get to Bryce. This is where the real fun began.
I’m a gadget guy. Although I know that gadgets are not perfect, I tend to rely on them heavily. Today was no exception. I never once looked at a map. I was blindly following my Garmin, which had never let me down. The nice lady on the Garmin told me to make a right turn. I almost skidded off the road because the right turn was on a road so small that I didn’t see it until I was right up on it. I stopped! There was a sign in front of the road that said “4 wheel drive recommended. AND ” This is NOT a road to Bryce Canyon.” Wow! OK apparently a lot of people must have been routed to that point since they made a sign for it. So I went back to main road and kept going. Of course the Garmin recalculated a new route and I had another right turn in 14 miles. This time the road was paved so I took it.
This was a road right out of a movie or car commercial. It was winding and beautiful country. Amazing scenery. Fantastic and the kind of road you would really open up on with a sports car 🙂 My next turn was coming up in about 21 miles. I enjoyed the road and got to my next turn. It was unfortunately another dirt road. However, this one was bigger and there were no 4 wheel drive signs. There were even signs telling you how far the next road, city, etc. was. I looked down at the Garmin and it said I’d be on that road for 30 miles and then basically be 6 miles away from Bryce after that. I thought about it! I really didn’t feel like taking a dirt road, but at this point it was either turn back and miss the sunset or go forward the endure the dirt road.
I started down the dirt road and for the first couple of miles it wasn’t too bad. Then things started getting a little tricky. I was going up and down hills, around bends, etc. I even crossed a couple of very very very shallow streams of water. I’m not kidding. I then noticed that I hadn’t seen another vehicle yet. I also noticed that there were only one or two houses every 5-6 miles. I started to freakout a little on the inside. Anyone that knows me, knows that I rarely ever freakout on the outside, but I was really starting to come unglued on the inside. I kept thinking, “if this car breaks down or if I get multiple flat tires I’M SCREWED!” I had no cell service, no food, a very small amount of water and I was alone! No one knew where I was at this point. Then the adventure got kicked up a notch. The road started winding up and down and around the mountains. There were NO GARDRAILS! Nope, nadda, nothing. You drive a few feet to far to the right and start sliding and you’re off the edge of a very steep cliff. I’m not afraid of heights, but I’m definitely afraid of falling! On the inside I was bouncing off the walls! I was thinking that If something happens, I’ll never be heard from again. Rocks were hitting the under carriage. I was spinning left and right in the sand. Most of road was like driving over one long series of speed bumps. I was also secretly wishing that this Mustang was KITT from Night Rider and could transform into a 4 wheel drive F150. Sadly, that never happened.
Yes, I know that there was a time when there were no cellphones or GPS navigation. Yes, and our parents had to walk 5 miles to school up hill both ways. I get it. Call me spoiled. I am!
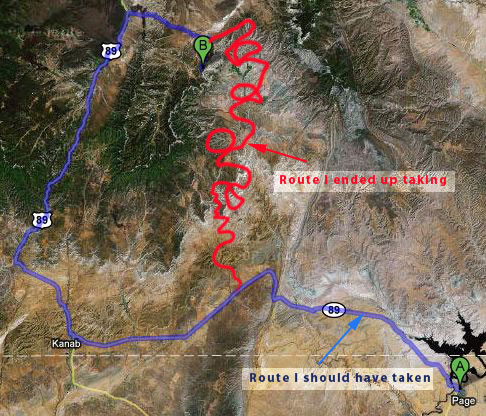
This was the longest 30 miles of my life, but I finally made it back to the pavement. However, it took so long (over an hour) to drive the 30 mile death road that there was no way I was going to make Bryce by sunset. My attention turned towards “how the hell am I gonna get back to the hotel?” There is no F’ing way that I’m going back down that dirt road especially in the pitch black of the night. I got to a small town and pulled in to a strip shopping/restaurant/gas station area. I noticed the store was just closing. I walked into the restaurant to use the bathroom. As soon I came out, they were closing too. This entire little town closes down a 7PM and it was 7:05! OK, fine no food – I’ll live, but still how am I going to go back?
I decided to turn back but stay on the paved road. My logic told me that there had to be a paved route back to Page. I’m sure these little towns get their supplies by semi-trucks and there’s no way a semi-truck is going to make it on that dirt road. I drove for about 20 miles until the paved road dead ended at…wait for it…another dirt road. I turned back around and headed back toward Bryce. The Garmin had indicated that I could have stayed on that road and made it back to Page. Although this seemed to defy all directional logic in my mind, I was willing to try anything not to go back on a dirt road.
I kept driving past Bryce Canyon and of course the sky was a gorgeous blue that I’ve never seen before. Oh well! My luck started to change for the better though. I found a gas station that was (OMG) still open! I raided the snacks, water, flare guns, satellite phone (OK, I’m kidding) and supplies like I was preparing for World War III. Although I had enough gas to make it back, I filled up anyway. As I was walking out of the door, she was turning off the lights. I had just made it in time.
The main road looped around the mountains and took me back to Page on the darkest drive I’ve ever had. Had I taken two seconds to look at a map before leaving Page, i would have seen that you could absolutely stay on the main road all the way to Bryce. Technically the Garmin was doing its job. It was routing me the “shortest route” to Bryce Canyon, just not the smartest route! This is a problem with ALL GPS units. Moral of the story, always take a look at map before you head into unfamiliar territory. I still love my Garmin nuvi 765t and it’s absolutely the best GPS that I’ve ever used. However, it’s not perfect and no GPS unit is!
Monument Valley?
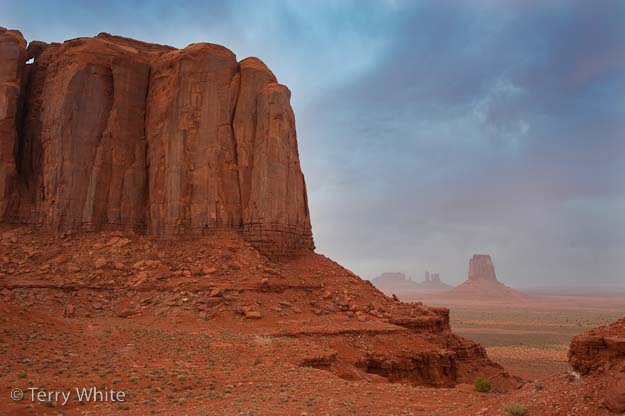
After the 5 hour driving ordeal I had the night before, I wasn’t too keen on driving anywhere else. I was way to exhausted to get up and go back to the slots. However, a friend of mind: Mia talked me into continuing with my plans of shooting Monument Valley before heading home. I’m glad we talked, because she was right! “When are you ever going to be in that area again? I’d go if I were you!” I already had a tour setup with a guide. So I packed my bags and checked out of the Marriott. I was going to go up to Monument Valley to shoot the sunset and then head back to Phoenix to catch my morning flight back home. I looked at the map this time (like 5 times) and saw that there were paved roads all the way there 🙂 The Garmin performed flawlessly and routed me there with no problems. Needless to say, I had enough stuff in my car to last me a week if need be :/
Mother Nature doesn’t always cooperate. Although I was getting to Monument Valley at the right time, the skys were completely overcast. Clouds are usually good for sunset/sunrise, but these were like thick black storm clouds. So there was not going to be any magical light tonight. I still proceeded with the tour. Worse case scenario was that I wouldn’t get any shots that I liked, but I’d have a good time on the tour. I booked a private tour with Kéyah Hózhóní. This company came highly recommend by Scott Kelby and the difference was, these guys not only had 30 years of experience, but they were also photographers. So they not only knew the sites, they also knew exactly where to stand to get the best shots. My guide was Carl, the son. Carl was great! We made the best of it and I got some pretty decent shots.
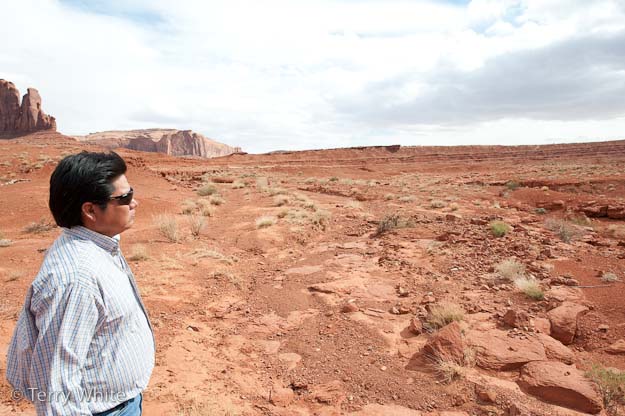
We made it to our first stop and I started shooting when I realized that for some of the shots I wanted to use my 70-200mm f/2.8 VR lens. So I asked Carl to give me a minute while I switched lenses. I opened my backpack and then it dawned on me that I had accidentally left my 70-200mm lens in the trunk of the rental car. I took it out to move some stuff around and forgot to put it back in. In hind sight I should have asked Carl to take me back to retrieve it. After all, it was “my” tour. Oh well, next time!
The tour would normally last 4 hours, but the wind really started whipping up and I was getting sand in places I didn’t even know I had. I can still taste it. We both agreed that the light wasn’t really going to get any better so we wrapped things up and I went back to the car. Carl was really concerned that I was disappointed. To be honest, I really wasn’t. I had a good time and it certainly wasn’t his fault that the weather wasn’t optimal. I would definitely call him again if/when I go back.
My gear, my settings
One of the biggest questions I got was “what settings did you use?” Most of what I shot was using Aperture Priority Mode. I shot anywhere from f 5.6 to f 11. Although Aperture Priority Mode works most of the time for landscapes, it doesn’t work all of the time. With Aperture Priority the camera is using its built-in light meter to set the shutter speed. It doesn’t always guess right. It doesn’t always properly expose the image especially when you’ve got a bright sky and a subject in the shadows. So in those cases I switched to manual mode and set the shutter speed to what I wanted it to be.
I used my Nikon D700 and I shot 100% in RAW. I kept my ISO at 200 and when there was a case that I needed longer exposures I used my Gitzo Traveler Tripod and Kirk BH-3 ballhead. To reduce the chance of camera shake I used a cable release. I also used my di-GPS Pro to geotag all my shots (with the exception of some of the ones in the Slot Canyons where there wasn’t a clear view of the sky for the GPS to lock on to).
My main lens on this trip was the Nikkor 14-24mm f/2.8 Lens! I was told that I would really want to use a wide angle lens for most of what I was shooting. While I do own a Sigma 10-20mm lens, I really wanted one that would take advantage of my full-frame D700. I have used/reviewed the Nikkor 14-24mm lens before. However, I don’t yet own one. The lens costs about $1,600 and I just really don’t do enough landscape shooting to justify owning it (at least not yet). So I did the next best thing. I rented it. I met the guys from LensPro To Go at Photoshop World Boston. So I decided to give them a shot and the experience was awesome. They shipped the lens and it was in EXCELLENT Condition. They even shipped it in a nice pelican case to ensure that there was no damge. I rented it for 2 weeks even though I really only needed it for one week. The price difference between 1 week and 2 weeks wasn’t that much. I also opted for the additional insurance.
If I had it to do over again…
This was an exciting trip and for the most part I got out of it everything I wanted. However, now that I’ve done it there are a couple of things I would have changed. First of all, I would have done more advance planing and research on places to shoot. I was kinda frustrated trying to figure out where to be for sunrise and sunset. Also there were places that I would have gone to, but they required permits in advance. There also doesn’t seem to be enough details out there. For example, at Rainbow Arch, you have to hike to it (like most of the attractions here). How long is the hike? A mile or 14 miles?
The next one is a little more obvious to frequent travelers. I really only needed about a day and half in Page to get Antelope Canyon and Horseshoe Bend. So there was no reason to stay there the whole time. Next time I would have booked hotels for the other nights in the other places I wanted to shoot. That way I would always wake up at the location I wanted to shoot the sunrise in instead of having to drive there in the wee hours of the morning. I would have stayed at Bryce Canyon one night and Monument Valley the next. This way I could shoot in the morning, drive in the afternoon and shoot the sunset and sunrise of the next location.
The next thing is a minor one. My rental car (a very cool black Mustang) had Sirius satellite radio. Great! However, there were times I wanted to listen to my own music, podcasts, etc. There was an AUX jack and yes I even had the right cable, but I just didn’t think it would work because the AUX button on the dash switched to the Sirius radio. So next time I would burn a couple of audio CDs. This car even had an MP3 CD player. So I could have put hours of music on a single CD in MP3 format. As a matter of fact I should just burn two CDs now (one MP3, one standard audio) now with my favorite music on them and just keep them in my luggage. That way I won’t have to think about it. I do have some loaded on the Garmin, but not enough for a several hour drive. Also with the Garmin it relies on a built-in FM Transmitter. While it does work, I’m just not a fan of FM transmitters.
FAQs
Q. I noticed you said you brought both your MacBook Pro AND your Epson P6000 backup unit. If you’re bringing your laptop, why did you need the P600?
A. Because I’m paranoid! I use the P6000 to backup immediately after the shoot while I’m still out in the field. I don’t take my MacBook Pro into field. I leave it in the hotel. When I get back to the hotel, I import the cards into Adobe Photoshop Lightroom on my computer. Then I start the review process, retouching and sharing online with friends and family.
Q. You said you used a guide at Monument Valley, but not one at Antelope Canyon or Horseshoe Bend. Is a guide really necessary? Can you just explore?
A. In all the spots I went to, you can export. Even in the Upper Slots the guide saw that I was a pro shooter and asked me if I just wanted to go shoot on my own? However, at Monument Valley, there’s no way you’re going to no what’s where without a guide. While you can certainly just pay and drive in on your own, you’re gonna miss stuff! I didn’t want to miss anything! I was standing right next to things that Carl pointed out that I would have otherwise missed.
Q. I see that your brought your Gitzo Traveler Tripod. Did you carry it on the plane? I thought you couldn’t travel with something like that for fear that it could be used as a weapon?
A. I’ve heard that too. As far as I’m concerned it’s urban legend. I’ve traveled with a tripod in my carry on luggage more times than I can count and never had an issue. As a matter of fact on the way back home I was subject to a “bag check” (a frequent thing for me). They were having problems seeing through all the electronics in my suitcase. They even pulled out the tripod, looked it over and put it right back in. The problem wasn’t the tripod, it was my Garmin bean bag mount. They couldn’t see through it.
Q. I see that you used a GPS and cable release. Is it possible to use both at the same time?
A. YES! That’s one of the main new features of the di-GPS Pro in that it has a 10 pin terminal pass-through port built in on the top. The non-pro model doesn’t have that feature.
Q. Did you forget anything?
A. Yep! I forgot to bring my hat. Luckily this time of year the temperatures are very mild. I’m not a hat guy, so I always forget to pack a hat. I have a growing “hotel gift shot hat collection” that you wouldn’t believe. I almost forgot two important pieces of gear. Since the backpack is not my everyday bag I had to pack it by taking items from the computer bag I do use every day. I almost forgot my MacBook Pro power cable and my Firewire 800 CF card reader. While I could have bought a card reader at the local Walmart, the MacBook Pro power supply would have been a little more challenging. Luckily I remembered both items at the last minute before leaving the house.
Q. Was there any technology that didn’t work?
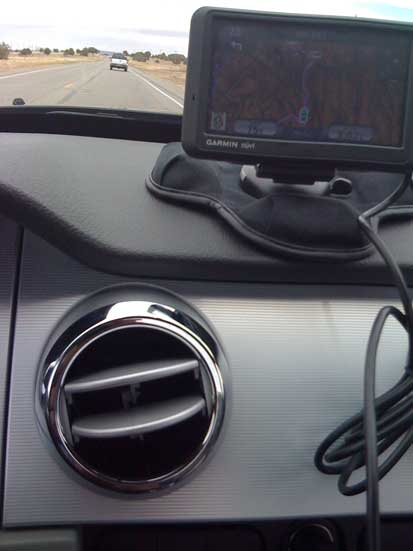
A. There was only one small problem. I brought my GPS vent mount and the Mustang vents are circular, so I had a hard time using it and just switched to my bean bag mount (which I just happened to bring as a backup) instead.
I brought my 3G wireless card so that I wouldn’t have to depend on hotel interent. Of course this area of the country doesn’t have 3G coverage. So I ended up using the wireless at the Marriott, which was free. Otherwise, all my gear performed very well!
See all of my current gear recommendations here!
Check out my shots on your HDTV via Apple TV
If you have an interest in my photography and want to see it on your big screen and you have an Apple TV, there’s a way. Simply go to the Photos option on the menu and choose MobileMe. Select “Add Gallery” and key in “terrywhite“. You see all my public albums and any new photos I post from here on out. It’s really slick the way it works!
Otherwise you can see my Page Arizona shots here and my Monument Valley shots here.
Which photo sharing site to use?

Yesterday I logged on to my Photoshop.com site, which I hadn’t updated basically since the first day I setup my account. A colleague of mine sent me a link to his pictures from an event that we attended and I thought “oh yeah, I have a few galleries on here too!” So needless to say I did a little house cleaning and updated the pics I had up there.
Later in the evening I uploaded a new pic to my Flickr account only to receive a message stating that my “Flickr Pro” account had expired and that now my account would only display my most recent 200 images. I thought to myself, “do I even have 200 images on here?” I had never paid for a Flickr Pro account in the first place. Apparently it came as part of one of my other internet hosting packages and I guess now it’s no longer included. Then I checked to see what a Flickr Pro account actually costs and while $25/year certainly isn’t going to break the bank, I paused and said “do I really need this?”
How many photo sharing sites do we need?
I’ve got a Photoshop.com, Flickr, Facebook, Twitter, NAPP, MobileMe, MPIX, Shutterfly, Kodak, and a few other accounts I’m not thinking of at the moment. I have photos on all of these different services that I have shared with family, friends and colleagues. How many services do I really need? Is one better than the rest? Unfortunately, I haven’t found one that really does EVERYTHING I’d want. However, Flickr is pretty darn close. I like the fact that Flickr will automatically detect the metadata and geotag information of the shots I upload and place them on a map. However, most of my friends and family are on Facebook. Photoshop.com and MobileMe seem to have the slickest slideshow/presentation features. If I upload to Shutterfly or Kodak, then my friends/family can order their own prints. Arggghhhhhh!
I was testing a new blogging app for the iPhone and in order to get pictures into the blog they had to be uploaded to a Picasa account. Just what I need, yet another service. There is both a Flickr and Facebook upload/output plugin for Lightroom! Since all my photos are in Adobe Photoshop Lightroom, this makes it easy to share! However, if I want certain photos on my iPhone or Apple TV, I export them from Lightroom to iPhoto just for the sake of convenience. The new iPhoto can also upload/sync to Facebook and Flickr, but not Photoshop.com or any of the others (besides MobileMe).
The bottom line is that all of these services offer similar features, but in most cases each service offers one or two things that the others don’t. If I had to settle on just ONE, it probably would be Flickr because it has the most features that I’m looking for. I can upload to Flickr directly from Lightroom. I can mark pictures as private or share with friends or family or both. You can order prints if need be. They do the metadata detection and geotagging that I really like. They also have several options for organizing your photos. There is also some integration with Facebook via various apps. The site is also geared towards setting up communities to share photos with. This way several members can contribute their favorite photos to the group. There’s even a really cool iPhone app called Mobile Fotos that uploads to and views your Flickr pics.
Even though Flickr seems to be the logical choice for me in that it has just about everything I’m looking for. It seems that I spent most of last week at Photoshop World uploading pics to Twitter/Facebook for quick sharing! Twitter and Facebook have the advantage that your friends are already there monitoring each other’s status and new pics just show up. No need to announce anything or send a link. However, this means that those friends and family members out there that don’t have either Twitter or Facebook accounts would never see my pics. Of course there’s also this blog and my website. I could post photos in either of those two spots too. Lightroom can also export a web gallery and ftp it up directly to my website. However, no one is going to know it’s there unless I announce it. The ultimate would be to have ONE site that I could post to that would feed everything else!
Is anyone else feeling my pain? Is there just one service that is king? What do you guys use and why? How do you use it? Meaning what’s your workflow? Hit me back in the comments below and also vote in the poll on the left hand side of this post!
iPhone App of the Week – FlightTrack Pro

I’m a seasoned traveler! I travel for business all the time and last year clocked over 90,000 flight miles. So needless to say I’ve had my eye out for the ultimate travel app for the iPhone. When I travel, I want an App that can keep track of my flights, reservations, and updates if anything changes. Nothing is more frustrating than to break your neck getting to the airport only to find out that your plane has been delayed for an hour anyway. I was pretty comfortable using the mobile version of Northwest Airlines (mobile.nwa.com) and putting my schedule on my calendar. I would also put the confirmation numbers in the notes of those calendar events. My frequent flyer/stay numbers go in the notes of the Contact records. Granted this is a multiple app/entry effort, but I’ve used it now for years.
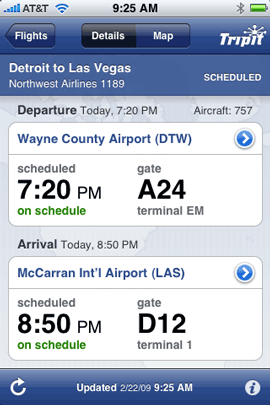
FlightTrack Pro is it!
Actually FlightTrack Pro isn’t it all by itself, FlightTrack Pro works in conjunction with the free travel website TripIt.com. It’s the integration of these two pieces that make this a near perfect solution. FlightTrack Pro by itself is an app for the iPhone/iPod touch that keeps track of your flight information. It will stay updated on any delays and gate changes. The information about your flight becomes live 3 days before your flight takes off. FlightTrack Pro also displays the ever important GATE number. It also allows you to check the weather for both your departure location and your destination as well as any airport delays.
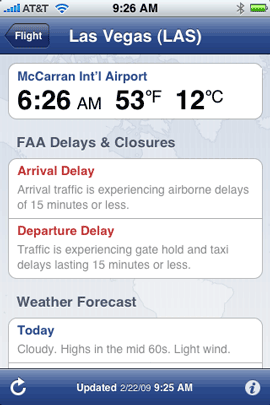
This is all well and good, but it wouldn’t be enough for me to pay for. Again, I pretty much fly one airline and most of the above is available for free on a cool iPhone friendly version of their site. It’s the TripIt integration that makes FlightTrack Pro worth the price.
TripIt.com is the secret sauce
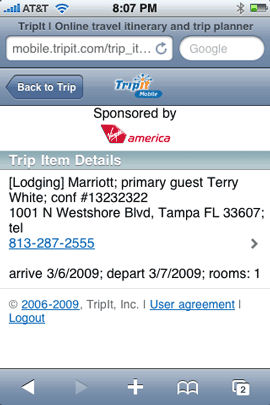
Like I said, TripIt.com is a FREE site. You can go there right now and sign up and start using it to manage your travel. What I absolutely LOVE about TripIt.com is that I don’t have to manually enter my trip information. They make it so easy! All you have to do is email/forward your itinerary to plans@tripit.com from the email address(es) that you registered with the site. The site automatically converts that email into all the right fields on the site. It takes only a few seconds once you send the email, for the site to be updated. It’s like magic. I was blown away by how well this works. When I book travel for work our travel agent sends the itinerary as a PDF attachment in an email. I was thinking, “this will never work”. However, I decided I had nothing to lose by trying it, so I forwarded the PDF itinerary and IT WORKED! I was floored that the site was able to digest the PDF.
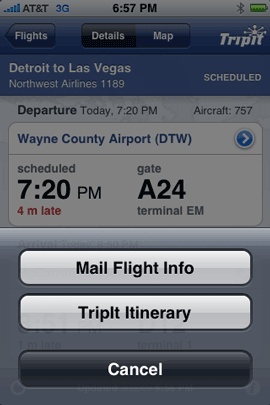
Once you configure FlightTrack Pro with your TripIt login info, FlightTrack Pro will then pick up your flight information automatically and instantly! You can even email your itinerary to someone (perhaps the person meeting you) directly from FlightTrack Pro. There is also a button that you can tap to take you right to the TripIt site on your iPhone if you want to see more details about your reservation such as hotel, rental car, etc.
![]()
Mac Users: TripIt has an added bonus! It automatically generates an iCal that you (or your loved ones, colleagues, etc.) can subscribe to that contains all your travel details! This feature is outstanding and icing on the cake.
It even tracks the current progress of the flight
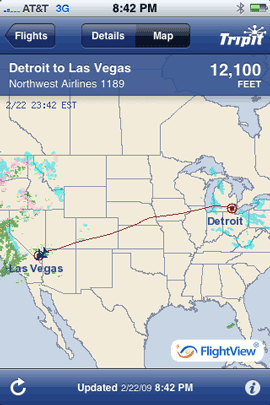
This feature isn’t really that useful for the actual traveler unless you just happen to be on a flight with Wi-Fi. The reason is, in order to show your current flight status such as location on the map, altitude, MPH, etc., you have to be able to get online, which is a no no while you’re in the air on most commercial flights. Now if you enter the flight information of a loved one or someone you’re shuttling to/from the airport, it’s pretty awesome to know EXACTLY where their plane is and when it will land.
The Bottom Line
FlightTrack Pro by itself is not that exciting. FlightTrack Pro combined with TripIt.com ROCKS! While FlightTrack Pro works as advertised, I’d like to see the 2.0 version of the app or maybe a super pro version that incorporates ALL of the itinerary instead of just the flight info. This has the potential for being the ULTIMATE travel app. While the link/button to TripIt is cool, I would much rather have the native app contain ALL of the info. Imagine how cool it would be since the app would know about your entire trip? For example, it would know about your flights like it does now. Once you land it would then display your rental car info or other ground transportation info/confirmation numbers. It could use the iPhone’s GPS to track where you are and direct you to your hotel. Once you arrive at the hotel it could automatically display your hotel confirmation number. How about suggest restaurants in the area?
This app is great, but there is so much more potential! The only thing that I was slightly disappointed in is that in its current incarnation when I landed, it would have been nice for the app to display the baggage claim carousel. Granted, this info may not even be available via the database that the app uses (FlightStats™), but it would be nice! Other than that I think the app is well worth the price for anyone who travels by air on a regular basis.
FlighTrack Pro goes for $9.99 on the App Store. Even if you don’t buy the app, you should head over to TripIt.com and setup an account TODAY!
AirCurve, it sounds better than you’d think

Â
I have to admit that when I saw the AirCurve, I was a little skeptical. I received it as a gift for a class I gave and it took me days to even get motivated to give it a try. I just didn’t believe that simply amplifying the iPhone’s built-in speaker would be good enough. I finally decided to give it a try and I couldn’t believe it. It not only worked as advertised by amplifying the iPhone’s built-in speaker by 10 decibels, but it actually sounded decent. No, it didn’t sound as good as a good pair of speakers, but it definitely sounded good enough for use on the road in a hotel room.Â
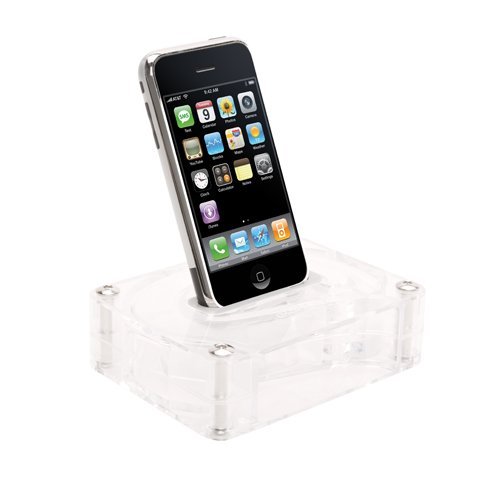
The AirCurve doesn’t have any electrical or moving parts and therefore requires no power. The AirCurve is designed to amplify your iPhone’s built-in speaker acoustically. It works with both the original iPhone and the iPhone 3g (comes with custom inserts for both models). They even designed it so that you can use your existing sync cable for power or docking with your computer while the iPhone sits in the AirCurve. I also like it because it’s well built, stylish and not flimsy. So it should travel well in a suitcase.
I also gave it a try using the iPhone’s speaker phone while it sat in the AirCurve. It worked fine. When I received a call, the music faded. I answered the call and pressed the speaker button. The person on the other end had no problem hearing me and of course I had no problem hearing them either because of the amplification.
Â
The Bottom Line
The AirCurve works as advertised, no question about that. If you’re an audiophile or someone who likes bass, you’ll probably be a little underwhelmed. For everyone else, this is a great low cost solution for amplifying your iPhone’s speaker. Although the second generation iPod touch does come with an external speaker, it’s not as good as the one on the iPhone so it looks like Griffin didn’t bother making an insert for iPod touch users. The AirCurve retails for $19.99. Amazon has it for $13.33. At that price it’s a no-brainer.
TSA makes me go huh?
I’m traveling today for a family visit and once again I decided to use the new option at Northwest Airlines that allows me to have the boarding pass sent to my phone instead of printing one out. See my earlier blog post on it here. However, today things didn’t go as smoothly. I got to the TSA security desk and for some reason the scanner wouldn’t scan the barcode on my screen. They said that it hadn’t worked all day.
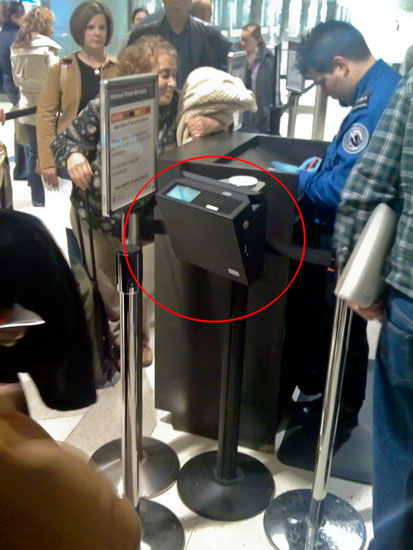
So I was wondering what would happen next? You guessed it, they made me go back to the ticket counter (or in my case the electronic kiosk) and print a boarding pass. Luckily I had plenty of time and the airport was not crowded today. Once I returned to the TSA desk, they looked at my “printed” boarding pass, initialed it and I was on my way.
Â
No big deal right?
This got me thinking, why did I need the paper? If you think about it, you can print a boarding pass at home right? You could even fake one (don’t! it’s against the law!). So what was different about a piece of paper vs. my iPhone screen. Granted the scanner, scans the barcode on my iPhone and then displays my name which will match my ID and even says which flight I’m on, but the paper never gets scanned. They just look at it. They spend more time scrutinizing your ID. So couldn’t they just look at my phone? Or wouldn’t it make more sense just to use your ID and have a computer there that says which flight your on? The funny thing was that when I got to my gate, I asked if the scanner was working with phones and they said yes and instead of using the paper boarding pass, I used the electronic one on my iPhone and got on the plane no problem.
I continue to be amazed by the lack of thought that goes into this whole airport “security” thing!
