iPhone App of the Week – Google Mobile App

You might be wondering, “why do I need a Google app on my iPhone? Isn’t Google built-in?” I wondered the same thing. The first time I downloaded the Google Mobile App a couple of months back, it was because the built-in Contacts app was soooooo slow at searching Contacts that I used the Google Mobile App instead. Once Apple brought acceptable speed back to the Contacts app via software updates, I deleted the Google Mobile App. Recently I put the app back on. I was intrigued by the New Voice Search. Although I love voice recognition technology, it usually doesn’t work very well for me. It usually takes 3-6 tries to get the device/app to recognize what I’m trying to say. I have voice recognition in my car and almost never use it for this reason. So I decided to give this App a try just for fun. Although it’s not perfect with my voice, it does work more times than not. Of course you don’t have to use the voice feature at all. You can just key in your search words as you would expect.
 

Why do I need the Google Mobile App? Isn’t Google built-in to the iPhone?

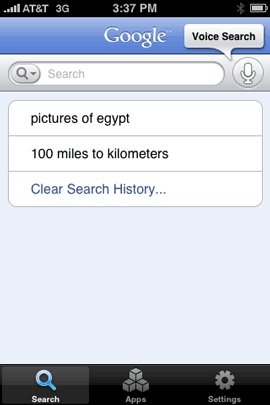
Beyond the new voice recognition capabilities, you’re probably still wondering why you need the Google Mobile App? It’s simple. The built-in Google search in Safari and Google maps are good! I use them all the time. However, they only search the internet. The Google Mobile App searches your iPhone data (Contacts) and the internet at the same time. Beyond that it offers suggestions and word completion for what it thinks you’re searching for. Although Apple did speed up Contact searching, the Google Mobile App is still faster. The Google Mobile App also keeps a history of your searches to make it easy to do the same searches again. Another thing that sets the Google Mobile App apart from the built-in Google search in Safari is that it’s Location Aware. This means that you can do searches for things around you. Yes the Google Maps can do this for businesses, etc., but it’s not as comprehensive as all that would be available to you searching the full Google Search Engine.
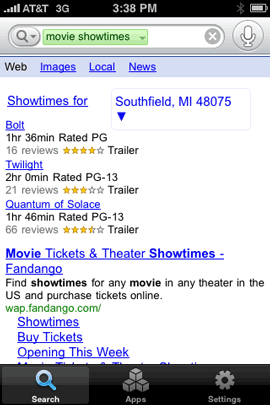
Searching for Showtimes in the Google Maps App that’s built-in to the iPhone just brought up a nearby theater.
If you’re a user of other Google services such as GMAIL, Notebook, Calendar, etc. You’ll have quick access to those services too.
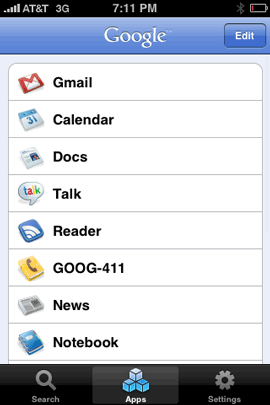
Don’t get too excited. These apps are Google’s web based apps and open in Safari. They are not native iPhone apps.


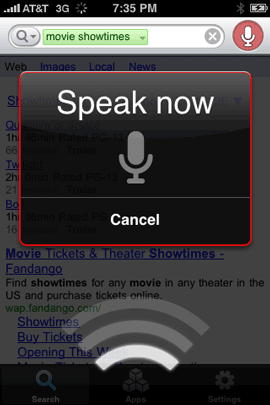
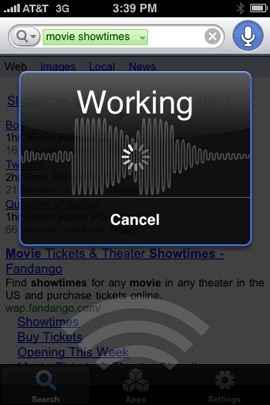
How does the voice feature work?

Google recorded this cool demonstration. See it for yourself:


The Bottom Line

I like this app a lot. I really like the voice feature although it’s not perfect at recognizing my voice. It’s really cool just to speak your search and have it done. I like that it searches my Contacts at the same time it searches the web, but I wish it also searched my calendars too. It would be MUCH faster than having to scroll through looking for an appointment. As a matter of fact the Calendar app should have its own search feature like the Contacts app. It would be great if the Google Mobile App could search both at the same time. That being said, this app is FREE so it’s hard for me to complain about it. It does what it was built to do and does it well.

The Google Mobile App is FREE and available for both the iPhone and iPod touch. Download it from the App Store here: Google Mobile App

iPhone App of the Week – iChoose

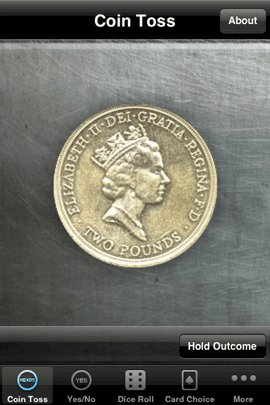
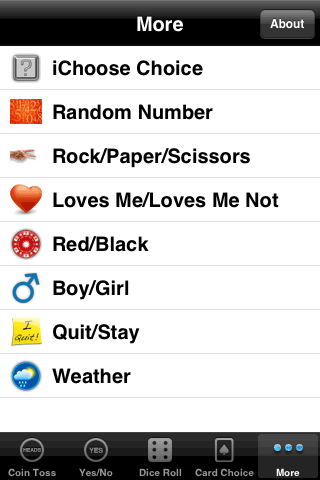
Having a problem making a decision? Thinking of flipping a coin and going with chance? If that’s how you roll, then iChoose is your app. This isn’t just your basic coin flipping app. iChoose has got it all: Coin Toss, Yes/No, Dice Roll, Card Choice, Boy/Girl, Weather, Quit/Stay (in these economic times STAY!), Loves Me/Loves Me Not, and even Rock, Paper, Scissors. The latest version even comes with a random number generator, which you can set the range for in the preferences. 

Does this app solve the problems of the world? No, but it does make being on the fence regarding a decision a lot more fun. Check it out in the App Store. It’s FREE and works on the iPhone and the iPod touch. Download it here.


iPhone App of the Week – MyWeather Mobile

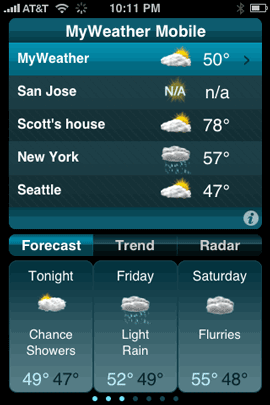
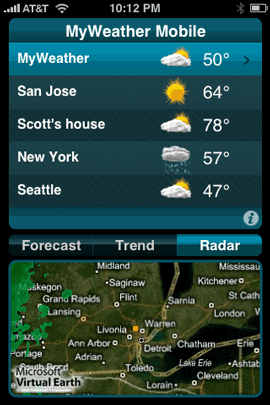
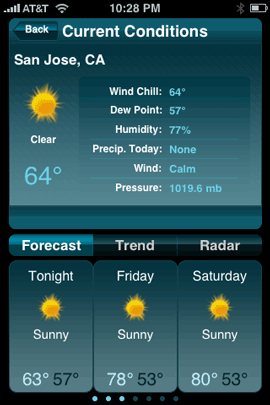
The iPhone has a built-in weather app. So why would anyone pay $9.99 for another one? I was very hesitant at first to try MyWeather Mobile. After all $9.99 is on the high end of iPhone app prices. Although the built-in weather app does a good job of letting you know the current conditions and the highs and lows, it does nothing for showing you forecasts, trends or precipitation. 


Is it going to rain/snow today?

If you live somewhere that has mild climates or weather that doesn’t change much, then you can probably be quite content with the built-in app. However, if you live in the North or Midwest, then you know weather can change at the drop of a hat. Here in Michigan it could be 70° and sunny, raining and cloudy, snowing with sleet and hail all in the same day. As a frequent traveler, I want to know what I’m heading into. Will there be a chance that my flights could be delayed or cancelled due to weather?


MyWeather Mobile

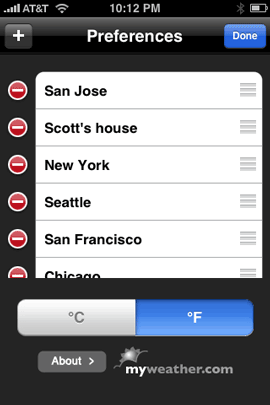
This is where MyWeather Mobile comes in. This app goes way beyond the features of the built-in weather app. The big feature for me is forecasts! Not just what it’s doing outside now. Like the built-in app, you can add multiple cities. However, in addition to enter the city, you can actually use your contacts list.

So for example, rather than putting in Scott’s city, I can just use his Contact info as a location and it will show me the weather where he lives. Also instead of having to put your current city in all the time, it’s location based and will always show you the weather of where you currently are located.

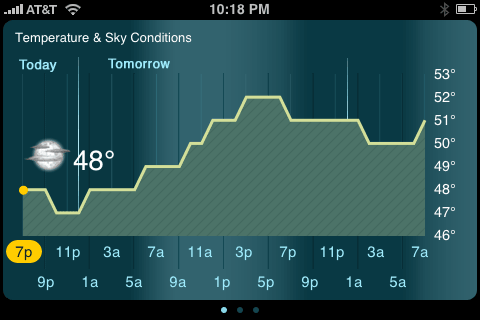
The graphics are great in this app. Very detailed and well done. It also supports a widescreen view of the trends screen. Just rotate your iPhone or iPod touch.

The bottom line

If the built-in weather app leaves you wanting more, then MyWeather mobile is worth a look. Do I think it should cost less, absolutely. However, if you need/want these features, then $9.99 is worth it. Otherwise, keep looking. After having it now for a few weeks, I don’t regret spending $9.99 on it. Works with the iPhone and iPod touch. You can check it out here on the App Store.

iPhone App of the Week – Sportacular

Admittedly I’m not a huge sports fan. In other words unless it’s something special, I don’t plan to watch sports on TV. That doesn’t mean that I don’t have favorite teams and like to engage in conversations with friends about who’s winning and who’s losing. Speaking of losing, no cracks about the Detroit Lions. Enough said.

Sportacular gets it right

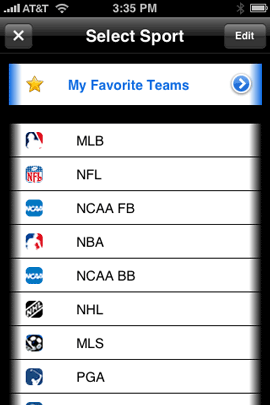
Sportacular is a FREE app for the iPhone and iPod touch that allows you to keep track of your favorite teams. The interface is brilliant. You simply select your favorite teams across national and college leagues and Sportactular will give you up to the minute scores, schedules of upcoming games, and stats.

Just last weekend I was in a workshop and someone mentioned that the Lions were playing. So I pulled out my iPhone and tapped Sportacular and in a few seconds I had the score (they were winning by the way at the point). Scores are updated every 30 seconds as long as the app is running. Every year my buddy who graduated from Ohio State likes to come over and watch the Ohio vs. Michigan game. I have no vested interest in either team, but it’s fun watching him get all worked up. With Sportacular I can keep track of Michigan’s college games too including the schedule of upcoming games.

Sportacular is another example of a well thought out app that just works! That’s why it’s my pick for the iPhone App of the Week. It’s free and has minimal ads. Download it from the App Store.


Congratulations to the winners of the iPhone Photo Contest

I want to take a moment to congratulate and thank the Winners of the iPhone Photo Contest. Lot’s of great entries and it was certainly hard to pick winners. Luckily the public helped out in a big way by voting!

Adobe CS4 Wallpapers and Screen Saver

Back by popular demand!

You’ve asked for them and now they’re here. Adobe has made available Creative Suite 4 themed wallpapers and screen savers and you can download them here. Adobe CS4 Wallpapers Adobe CS4 Screen Saver – Mac Adobe CS4 Screen Saver – Windows

iPhone App of the Week – SuperBall 2

Time to have some fun! 

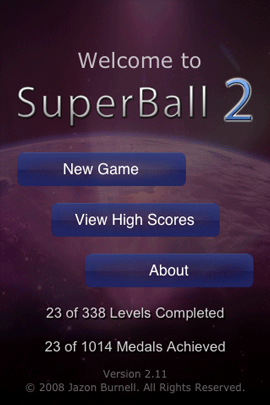
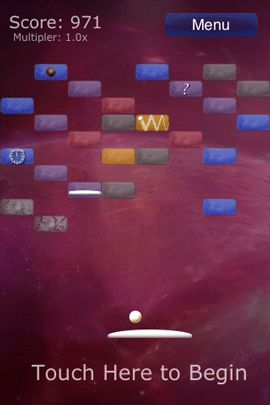
While I certainly love picking from the hundreds if not thousands of iPhone apps (there are now over 5,000 apps on the App Store) that increase my productivity, I do like to have fun every now and then. That leads me to my new addiction: SuperBall 2! This game is like crack. Once you start playing it, you just won’t be able to stop. This game is like a mix between the old pong games and Breakout. You control it using the built-in iPhone (or iPod touch) accelerometer. So you move the paddle side-to-side by tilting the device.

I started with the FREE version: SuperBall 2 Lite. This free version has 10 levels. Not bad at all for a free game. I must say that I absolutely SUCKED at this game at first. It took me a long time to even get pass the first level. Then I finally got the hang of it. After I got the hang of it, I wanted MORE! So I didn’t hesitate to head over to the App Store and buy the full version which sports 300 LEVELS plus a dozen two player levels! I was also pleased to see it on sale for only $1.99. Game play is good and the variety of activities/levels is also good. The sound effects are well done. Also no crashes. 

With an iPhone, you never have any reason to be bored. Now I won’t mind waiting in long lines on November 4th to cast my vote in the general election. I’ll have something make the time fly. I better start reviewing some of those external batteries 🙂

You can download the FREE version of SuperBall 2 Lite or the full version of SuperBall 2 for $1.99. These work on the iPhone or the iPod touch.

Fujitsu ScanSnap S300M Review

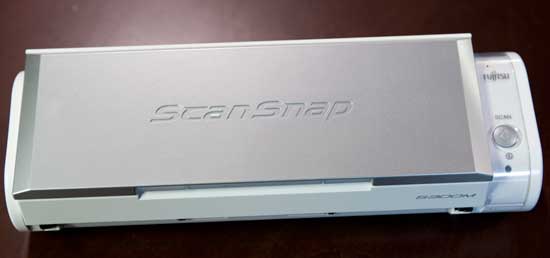
If you’ve been following my blog over the past few months, you know I have had an interest in portable document scanners. The first one that I took a look at was the Fujitsu ScanSnap S510M. I’m still using it and VERY HAPPY with it. Then I wanted something smaller and more portable for scanning receipts. So I took a look at the latest one from Neat Receipts. It fit the bill for the size that I was looking for and has a great app that drives it (especially for scanning receipts), but the hardware pales by comparison to the ScanSnap S510M. So that brings me to the Fujitsu ScanSnap S300M. This scanner is smaller than the S510M, but larger than the Neat Receipts scanner. It’s not as fast as the S510M, but much faster than the Neat Receipts model. So it clearly fits right in the middle of the two in just about every way.

Â

Neat Receipts

ScanSnap S300M

ScanSnap S510M

Speed 4 rpm-receipts per minute (single sided) 8 ppm (double sided) 18 ppm (double sided)
Two Sided Scanning No Yes Yes
Color & B&W Scanning Yes Yes Yes
Size 10.8″Wx1.6″Dx1.3″H 11.18″Wx3.74″Dx3.03″H 11.2″Wx6.2″Dx6.2″H
USB Powered Yes Yes (either USB or AC) No
Scan to PDF Yes Yes Yes
OCR Capability/Searchable PDF Yes No Yes
Auto Document Feader None 10 sheets 50 sheets
Comes with full Acrobat No No Yes
Price $161.85 $266.79 $433.89

How fast is the ScanSnap 300M?

I decided to put all 3 scanners to the test and record it so that you can see for yourself. I took the same 3 documents and scanned them on each scanner. See for yourself in this video:

I like all 3 models

Of course each one has its pluses and minuses. When it comes to eliminating paper on my desk, nothing beats the ScanSnap S510M. I’m still blown away by how FAST this scanner works. I’ve never seen anything like it. I also like its “baby brother” the S300M because it takes up less space and costs less. Also since I already own Acrobat 9 Professional, I don’t need the added expense of having that bundled in (like it is on the S510M). When It comes to scanning on the go and especially scanning receipts, the NeatReceipts scanner is my choice. But what if you only could buy one?

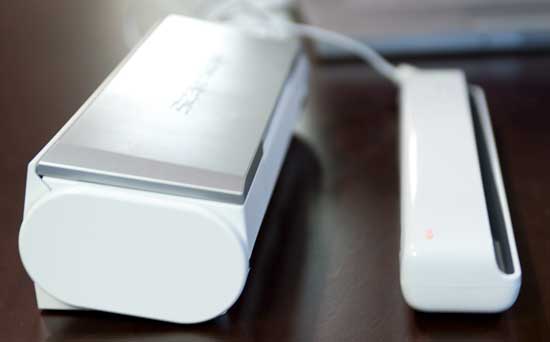
As you can see, the S300M is at least twice the size of the NeatReceipts

Which one is right for you?

Chances are you only need one of these. So it really depends on what you need to scan most and how cost conscious you are. Clearly the NeatReceipts scanner is the smallest and costs less, but it’s also by far the slowest and only handles single-sided documents one page at a time. If you plan to scan a lot of stuff, often, then the S510M would be the way to go. Like I said above, this thing devours stacks of paper without blinking an eye. If you want a happy medium, then I would say go with the S300M. It’s a nice balance between the two. You get double-sided scanning. You get a smaller form factor than the S510M. It can be USB powered for portability and you don’t end up paying for Acrobat if you already have it. The only two downsides to the scanner is that you don’t get OCR (searchable PDF capability built-in), but again if you already own Acrobat, you can do the OCR in Acrobat instead. It’s also a bit bulkier. So you won’t be sliding this one into your laptop bag as easily as the NeatReceipts scanner.

The S300M: Although the S300M doesn’t come with Acrobat or the AbbyFine Reader software like it’s big brother the S510M, it does come with Cardiris for scanning business cards and automatically adding them to your contact manager (such as Address Book on the Mac). The S300M can be USB powered from your computer or powered with the supplied AC adapter. However, I should note that powering it over USB requires TWO USB ports: one for data and one for power. It comes with the necessary cables to either run via USB or AC power.

The Bottom Line

You really can’t go wrong with either one of these 3 scanners. Like I said, I like them all. I do find myself using the NeatReceipts scanner when it comes time to do expense reports at work and the S510M for home/office clean-up and archiving. The NeatReceipts app just can’t be beat for filing receipts and its even improved in a few ways since my initial review.  All of these scanners are available for Mac or Windows PCs. The S510M and S300M are specifically for Mac (that’s what the “M” stands for), but like I said, you can get the Windows version too (the one without the “M”). These 3 scanners are truly a “Good”, “Better”, “Best” scenario. If I could only have ONE of these, it would probably be the S300M. It’s the right balance between performance and features. See the S300M specs here. You can get the Fujitsu ScanSnap S300M for $266.79 here at Amazon.com.

iPhone App of the Week – PhotoBuddy

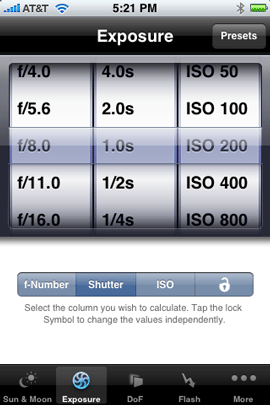
While I didn’t make it the PhotoPlus East tradeshow in NYC this week, I have been spending some time with one of my new iPhone apps. PhotoBuddy aims to be your Photographer Assistant. The main purpose of this app is to help you calculate things like Exposure changes, Flash timing, DOF (Depth of Field) and can even measure the distance of objects (this feature only works on the 1st gen iPhones).

However, it has other useful features too. For example, when I captured the shot below in Spain, the one thing I didn’t know at the time was what time sunrise occurs for the area I was in. The hotel staff looked it for me on the internet.

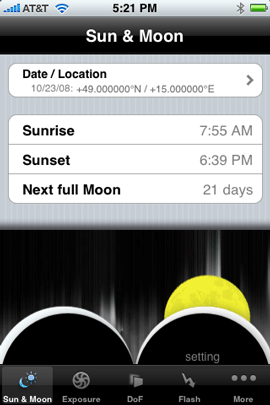
However, had I had PhotoBuddy back then, I would have simply been able to use the built-in Sunrise calculator. The Sunrise calculator is location based and tells you the sunrise, sunset and next full moon. I used to use a separate “Sunrise” app for this. It even displays your current longitude and latitude which is handy for noting and geotagging your photos later in post production. You can also advance to a date in the future to see what time the Sunrise/Sunset will be on a specific day.

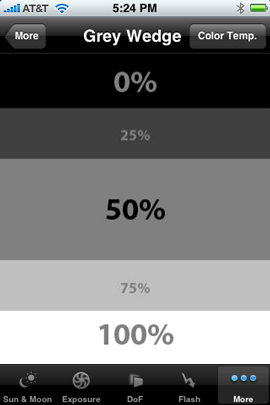
One of the other features I was happy to see is the “grey wedge” to help white balance your shots. Now you have to keep in mind that this feature is not totally accurate because your iPhone’s screen is not color calibrated. So the displayed tones are not neutral. However, they are off by a constant value, so you can use it to color calibrate images.

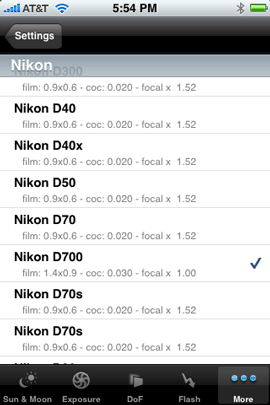
There are a ton of settings. One of the things that helps you quite a bit is that you start off by telling PhotoBuddy which camera model you have. This gives PhotoBuddy the important information that it needs about your sensor. If your camera is not listed, you can choose an “undefined setting” or choose the film equivalent. 


The Bottom Line

There are a few apps with similar features on the App Store. I’ve tried a couple of them so far and I like PhotoBuddy best (a close second would be PhotoCalc, which has a better Sunrise/Sunset calculator). Most of these apps do the same things. However, PhotoBuddy offers a couple of nice little extras and fit and finish. Also PhotoBuddy is only $1.99 so it’s hard to go wrong. You can download PhotoBuddy here for your iPhone or iPod touch.

iPhone App of the Week – AirMe

I’m a big fan of geotagging my photos. I love the fact that now the iPhone can automatically put in the longitude and latitude of where you are when you take the shot. Even if you’re not outside or you have the older model iPhone that didn’t include the GPS, you can still get pretty close using the cell towers and wi-fi hotspots. When I upload my shots to Flickr using the iPhone app Flickup, the GPS/location information is honored and the image is automatically added to My Map. (note that you have to turn this preference on in the Flickr Privacy settings: http://www.flickr.com/account/geo/privacy for your account). While this is cool, I also upload photos to Facebook and unfortunately Facebook doesn’t honor this info, nor does it have a built-in map feature. 


AirMe to the rescue

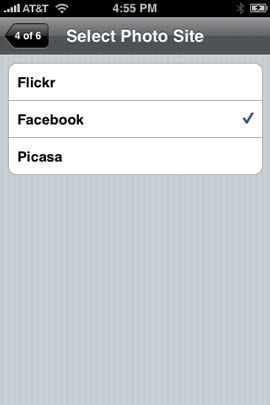
Luckily there is a FREE iPhone app called AirMe. AirMe can upload your photos to Flickr, Facebook, Picasa or send to Twitter. So far, no big deal right? Here’s what makes AirMe special: It not only has the ability to upload the shot with the GPS data, but it’s Location Aware and translates your location information into tags that appear in the photo description when someone clicks on the photo on the site you’ve uploaded it to. It not only tags the photo with the location, but also other things like the weather (optional). 


Tagged photo in Facebook, uploaded by AirMe

Tagged photo in Facebook, uploaded by AirMe. As you can see, AirMe added the tags 17°C (it will use Fahrenheit in the US), Sunny, Spadina, Canada, Ontario, Toronto. I added the optional tag of travel.


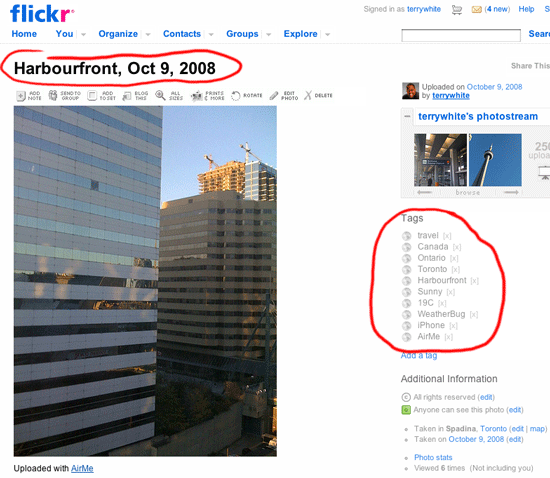
When I uploaded a photo to Flickr, the tags appeared as well as the name that AirMe used on the photo:


Shot taken in Toronto uploaded to Flickr using AirMe

Shot taken in Toronto uploaded to Flickr using AirMe


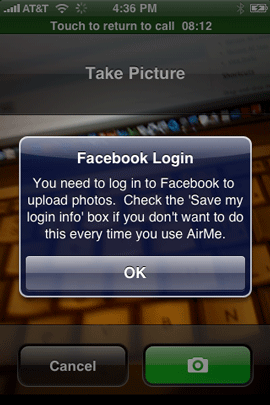
Although I really like AirMe, there is room for improvement. I have two issues with this app. The first issue is that after you authorize your Facebook account to use it, you are still required to login each time (at least once a day). I wrote to the developer about this and he said that there used to be a checkbox on the Facebook page to keep you logged in or remember your login. Now that it’s gone, they will try to accommodate a work around in their next update.

The other issue is that switching from one site to another, for example, going from Facebook to Flicker, requires you to authorize the app again (even though it will tell you on the site that the app is already authorized). Again the developer promises to fix this in the next update. However, this is such a pain that for right now I’ll just use it for Facebook uploads and continue to use Flickup for Flickr Uploads.


AirMe needs to remember my login info

AirMe needs to remember my login info


The Bottom Line

AirMe has been a blast use and I do really like it. Once the app has the ability to remember me on the various sites I use it on, I’ll like it even more. It automatically provides the location information for my shots in an intelligent way (using tags) that saves me the work of having to do it all manually. This free app is definitely a keeper. You can download it for your iPhone here for FREE!

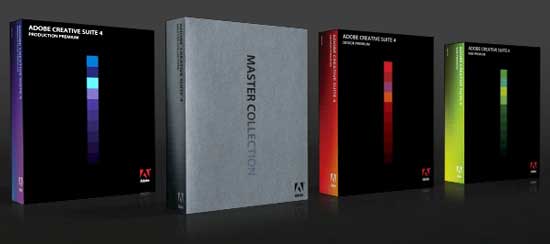
Adobe Creative Suite 4 Now Shipping!


I’ve been showing Adobe Creative Suite 4 to some enthusiastic crowds and the number one question I get is, "when is it shipping?" My response has always been "soon." Well soon means TODAY! That’s right Adobe is shipping all of the Creative Suite 4 products and suites and they are available for immediate download. Check out my Creative Suite Podcast for ongoing videos highlighting the features of the new CS4 apps.