iPhone App of the Week – Flixster Movies

movieslogo

As we enter the official summer blockbuster movie season I’m relying more and more on the apps on my iPhone to give the latest and greatest movie info and showtimes. I’ve choosen “Movies” by Flixter as my iPhone App of the Week this week because it seems to the closest app to offering all the things I want. You would think it wouldn’t be that hard to come up with a movie showtimes app, but I’ve got 3-4 of them on my iPhone at any given time. That’s because each one offers something that the others don’t offer or each one has a better user interface in one area or another.

Here’s what I want…

  • show times – this is the main reason for the app! So I want to launch it and get to the showtimes for the movie I want to see as quickly as possible. I hate it when an app makes you click through an ad to get to this info. I’d rather just pay for the app then to have to deal with ads that get in the way of functionality. Also only list times that haven’t happened yet for that day. Don’t show movie times that have past.
  • ratings/rankings – I need know what the movie is rated (G, PG, PG-13, R, etc.). It’s also nice to see how it’s rated/ranked by those who have seen it already.
  • Location based – of course the app needs to take advantage of Location Services. If I’m traveling, I want to know about the movies playing around me.
  • Favorite theater – when I’m not traveling, I go to the same theater about 99.9% of the time. So I really just need to know quickly what time is the movie that I want to see playing at my Favorite/Default theater.
  • Trailers – Movie trailers are nice if they are fast. Half the time I get bored waiting for the trailer to load. Chances are I’ve already decided on the movie I want to see anyway. So trailers are cool, but not a deal breaker.
  • Little to no Ads – Like I said above, given a choice of ads or pay for the app, I’d opt to pay for the app not to have to see the ads. I know that free apps are often subsidized by the advertising in them, but unless the ad is a banner ad that doesn’t get in the way of how the app works, I’d just rather not have them period. Whatever you do don’t make me have to watch a full screen ad before I can get to the info that the app provides. That really grinds me the wrong way!
  • Map to theater/directions – If I’m on the road, having a link directly to built-in Maps app is key. This way I can not only see the closest theater, but also see how to get there from where I’m at.
  • Buy tickets – oddly enough there’s only one app (Fandang0) that supports buying tickets at my closest/favorite theater. The other apps allow for ticket purchases, just not at my theater. Buying tickets via the app is nice, but what would really make me use this feature a lot more is if there was a way to buy the tickets online via the app and either print them or email them to my computer for printing. I would love to print the movie tickets before leaving the house and just go straight to the ticket taker person.
  • Add movies to my Netflix queue – Usually when I’m sitting there before the movie starts I’m watching the trailers for other movies that are coming out. Many times I’ll see a movie that I’d like to see, but know that I won’t see it in the theaters. So I like to add it to my Netfilx Queue right then and there while I’m thinking about it.

  • Bonus Features/Nice to haves – these are not deal breakers, but nice to have features:
  • email show times to friends – if you’re going to the movies with friends, it would be nice to either email or SMS the movie times so that you can all pick a time and meet up at the theater. If you’re going to have this feature, I guess you’ll also need the ability to email the map/directions to the theater too.
  • See upcoming movie/DVD releases – It’s nice to be able to see what movies are coming to the theaters or DVD/Blu-ray on which dates/weeks.
  • Facebook, Twitter integration – usually after I see a movie, I want to either tell people how great it was or how much it sucked! So having the ability to rate the movie and instantly post that rating on Twitter and/or Facebook is a plus.
  • Concession Stand Ordering – How cool would it be to also place your food order (fill out the mortgage app first) before getting to the theater so that you can just pick it up when you arrive and walk straight in with your printed tickets too.

So out of all the things I want above, Movies comes the closest and seems to be the one I tap on first most times. I just fired it up to see how quickly I could get to the show times for Star Trek at my favorite theater. The first thing it hit me with was the option to play the trailer:
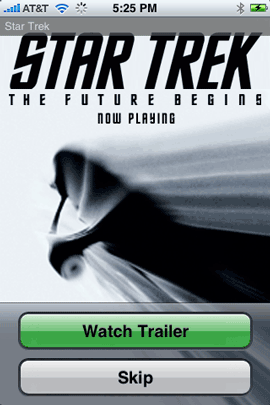
moves1

When I hit “Skip” it took me to the Box Office Screen to show the list of movies Opening this Week. Star Trek was at the top of the list. Cool, but I already know the movie I want (Star Trek) and I know which theater I want to see it at.
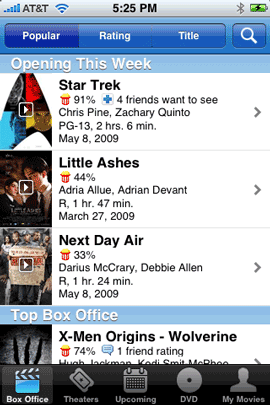
moves2

So I taped the Theaters button and my favorite theater is at the top of the list (good!)
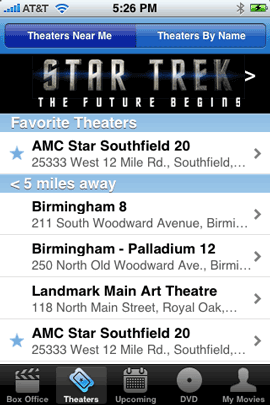
moves3

I tapped my favorite theater and then it showed the list of showtimes and I scrolled down until I found Star Trek.
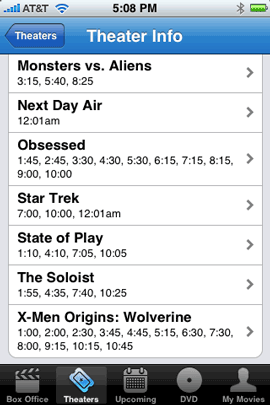
moves4

Mission Accomplished! However, call me silly, but shouldn’t I be able to set a default that just takes me right to this screen every time I launch the app? I mean after all, I’m usually going to the same theater when I do go to the movies. I usually know what I want to see and I’m really just launching the app to see what times the movie is playing? That’s how this app could be better! That’s how all of the movie apps could be better. Let me set my landing page and let me get there with one tap! Before these apps were available I used to use a Web Clip to the mobile Fandango site for my theater and son of a gun, it launched Safari and took me right to the page for my theater listing the current times. I want the native apps to do the same thing. Then if I want to do more like see trailers, see other theaters, see other movies, etc. I can choose to do those things. Just for kicks I recreated my Web Clip for my favorite theater and timed how long it would take to get me right to the times for Star Trek. It was on screen in about 7 seconds. I had to tap one more button to get to the next page where the Star Trek movie was listed. Otherwise it would have been more like 5 seconds.
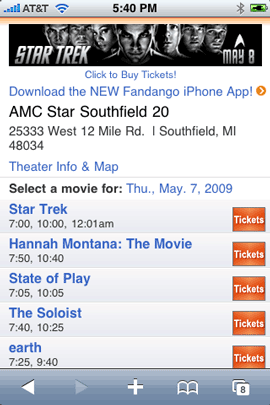
Fandango Mobile Site in Safari

The Bottom Line

Like I said, Movies is probably the app I use the most. But it’s not the only App I use because there are other apps on my iPhone that do some things better. I do recommend Movies as it’s the most popular and closest to everything I want. However, I also recommend looking at iTV (more than just movie listing and offers Netflix management and TiVo scheduling too. iTV is a KILLER app and it would be my first choice if it were faster. I use it more for TV listings which is what it really excells at!), OneTap Movies, which was my first favorite movie app and Fandango, which has a ways to go in the interface and features department, but it’s the only one that actually lets me buy tickets at MY theater.

You can download Flixster Movies App here from the App Store. It’s FREE and works on the iPhone and iPod touch.

All of the Apps I mentioned above are FREE and therefore you should try them all out and see which one you like best. Perhaps at the end of the day I’d use a web clip to quickly get to show times and the Movies app for everything else.

MetaX completes me

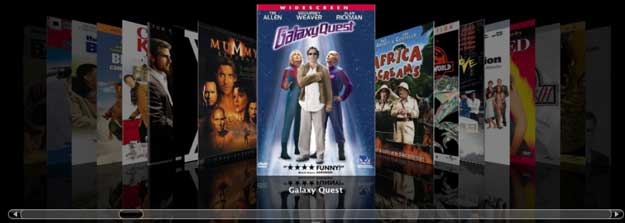
In yesterday’s post I talked about my project to convert all of my purchased movie DVDs into MP4 format for streaming playback to any TV in my house (via Apple TV). I got lots of questions about the workflow and some of the questions revolved around Movie Poster artwork. When you rip your Audio CDs iTunes happily finds the missing album art for you and inserts it. It also looks up the track names and other info to help with the process. However, for movies iTunes doesn’t offer much help at all. I was quite content just having the name of the movie and the DVD artwork. I was manually looking up the artwork on the web and copying and pasting it in via the Artwork tab in iTunes Get Info area. It was working! However, the one thing I thought would be nice to have is the Movie Ratings (G, PG, PG-13, R, etc.). Even if I wanted to put these in manually, iTunes doesn’t allow access to this field. So I just decided to live without it.

MetaX rocks!

The one thing I’ve found out about blogging is that if you blog about a product or workflow, there’s usually someone out there reading that post that’s either done the same thing you’re doing or tried other products that do similar things. I’ve gotten some of my best tech recommendations from the comments area of my posts. Well my blog readers were very quick to offer suggestions to help with my project this time too. Blog reader “Noel” suggested an app called MetaX, which would pull in the Movie Poster art AND other data. Well of course I went to go check it out and I was floored by how well it works!

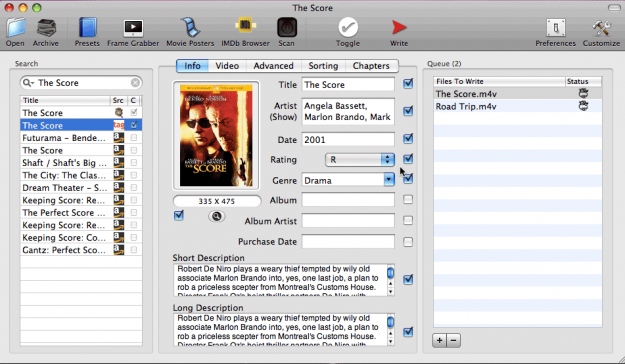
MetaX Interface, click to enlarge

MetaX polls a variety of databases to grab not only the Movie Poster art, but the description, ratings, actors/acrtresses, chapter names and more! You can go movie by movie and tell it what you want from each database by checking off the boxes in the interface and then let it batch write those tags into your movie files. Be prepared as this process can take 5 minutes per movie on average. I ran it on all the movies I had already ripped and it’s still going as of this morning (almost done though). Speaking of Movie Art, this app even has the ability to allow you to manually crop off the annoying white background that some Movie Posters will come in with.

click to make larger

As you can see above the top two movies have no extra metadata and the bottom two have been run through MetaX to grab the rating, genre, year, description and the movie art (which isn’t shown here).

Believe it or not MetaX is free to download. The author requests a donation via PayPal, which I will be happily making today! It also works great for TV shows. MetaX is a Mac only App. I don’t have a similar solution for Windows users. However, if one exists I’m sure someone will chime in in the comments and let us know.

Thanks Noel for the suggestion! You’ve helped make this project even better than I imagined it would be. My workflow now puts MetaX right in the middle. I go from HandBrake to MetaX and then into iTunes.

Apple iTunes

Apple iTunesApple iTunes Apple iTunes

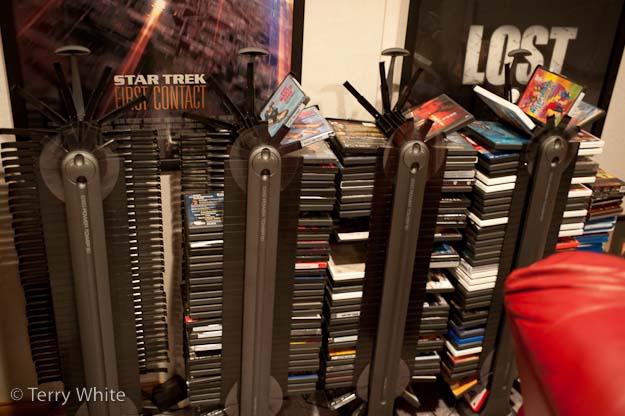
One rack down, three to go: 80+ DVDs ripped!

_tlw8074

About a month ago I started the process to rip (convert) all of my movie DVDs to my iTunes server (an intel iMac with a Drobo attached running iTunes). The idea is to basically create my own video on demand system so that any movie I have could be watched on any of my TV’s via an Apple TV.

The first 80+ DVDs are done

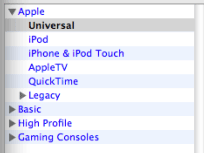
So I’ve been using 3 Macs in my house to convert these DVDs at my leisure. I’ve been using HandBrake to rip these DVDs into .MP4 format. I learned a lesson about the Handbrake presets midway through the process. At first I was using the Apple TV setting so that I could retain the Dolby Digital 5.1 surround track (a must!). However, the downside to this preset is that MP4’s created this way will only play on a computer or an Apple TV. This means that If I wanted to take a movie with me on an iPod or iPhone I’d have to rip a second version. Then one day it dawned upon me that when you buy a movie from the iTunes store it includes the 5.1 surround track AND it’s compatible with iPods and iPhones too. So that led me to take another look at the HandBrake presets.

hb1

I discovered that the “Universal” preset is the one I really want to use for the best of both worlds. It does include the 5.1 surround sound track and it will make an MP4 file that work on iPods, iPhones, Apple TVs and computers. One movie file that does it all.

hb2

I didn’t go back and re-rip the ones that I had already done with the Apple TV preset. I figure I could do this on an as needed basis. I did however, test the quality of the “Universal” preset and I was happy with it on the big screen.

Is it worth it?

rippeddvds

It’s a slow process! Even though I’m only a quarter of the way through this project, it has already paid off. I have rediscovered some movies that I bought and never watched. Some were even still in the shrinkwrap. Being able to pull up and watch any movie I own on any one of my HDTV/Apple TV’s is really cool. It’s just as gratifying as being able to listen to any song I own without having to dig out a CD. Last weekend we watched all three of the original Terminator movies to get in the mood for the upcoming Terminator Salvation.

The ripping continues! At this rate I should be done in July or August. Depending on the speed of the computer it could take anywhere from 35-50 minutes to 5-7 hours to rip one DVD. Intel Macs like my Mac Pro do it very fast. Older Power PC Macs take hours. I’m thinking of firing up a 4th Mac (iMac G5) that’s just sitting there for sale. Might as well use it until I find a buyer. Although it takes hours to rip a movie on this system, that’s one less movie I have to do on the other 3.

_
Apple iTunes

iPhone App of the Week – Zillow

zillowlogo

Have you ever said, “gee, I wonder how much the houses cost in this area?” Well if you have, you will LOVE this app. Zillow is a real estate data app that simply blew me away. It’s location based, so you don’t have to enter addresses. Simply fire it up, wait a few seconds for it to acquire your location and you will start to see the houses in your immediate vicinity appear on the map with little price tags above them. Now of course this data is only as good as the real estate databases out there and don’t take into account for any recent modifications, renovations or disasters. However, it will definitely give you a feel for whether or not the houses you’re eying are in your price range or not.

zillow1

WARNING: Depression Alert!

I live in Michigan, which has one of if not the worst economies in the country. So I don’t recommend running this app on your own house/neighborhood if you live in this area (or a similar area) or you just may wind up on the floor in the fetal position or reaching for your gun. Houses all around me are going for a fraction of what they cost a year or two ago. It’s definitely a buyers market. Sigh…

How well does it work?

zillow2a

Since I’m on an iPhone 3G with an actually GPS in it, my location was very accurate. In most cases it put me on the map exactly where I was in my car. I drove to a relatively new development (built in the last 4 years) and I was really curious to see what those homes were now going for. Again, not pretty, but good info.

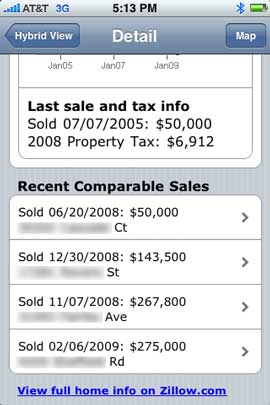
The Zillow app has both standard Map and Hybrid (satellite) views. There’s also a handy List view for viewing the properties by address. As you might expect the app will also tell you if a house is for sale or not (aren’t just about all houses for sale if you offer enough money?). Once you find a house that you want to drill down on you simply tap right on it and you’ll see the address and basic specs like number of bedrooms and baths as well as the estimated value. Tap again and you’ll get a more detailed listing including charts and price range that that house has fluctuated in. You can also see when the house was built, square footage of the lot and the house, and the property taxes. I was also impressed by how the map scrolled as I drove and the GPS updated my position. Pretty neat.

You can also simply enter an address in the search field. I’m surprised that there is no tie to the Contacts app for a quick look up of your friend’s…….never mind.

zillow3a zillow4

The Bottom Line

This is simply a cool app! Even if you’re not in the market for a house (I’m not), it’s still fun to play with. Who knows, if the right deal were to come along it may change your mind about staying where you are? Although this app works both on the iPhone and the iPod touch, I can’t see it being as useful on the touch in situations when you wouldn’t have a wi-fi connection to look up the data.

zillow5

You can download Zillow for FREE from the App Store here.

I have to give credit to my Twitter follower @TareqAlrashid for turning me on to this app. Follow me on Twitter and tell me which Apps you love!

TweetDeck is slick!

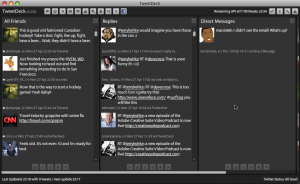
TweetDeck window - Click to enlarge

Twitter is gaining in popularity and experiencing explosive growth. It’s not uncomon to see people Twittering on their phones and laptops throughout the day. When you use Twitter on your computer, it’s usually through a web browser. However, there is a full featured stand alone app called TweetDeck, which is free to download.

TweetDeck Twitter Dashboard – Twitter in real-time!

TweetDeck not only takes advantage of all of the Twitter features, but it even displays a small notification window in the upper right corner of your screen when new Tweets arrive. It also has Facebook integration, which is nice! One app to update both your Twitter and Facebook status. TweetDeck also lets you share pictures with Twitpic. TweetDeck is actually an Adobe AIR app (yeah that makes me happy!) That means that it’s cross platform for both Mac and Windows users. If you’re a Twitter user you should really check out TweetDeck.

Download TweetDeck here. Also follow me on Twitter.

iPhone App of the Week – Mobile Fotos

mobilefotos

If you use Flickr.com and you have an iPhone/iPod touch, then you’re going to want this app! It is by far the best app I’ve seen to date to browse and upload to Flickr.

mf1

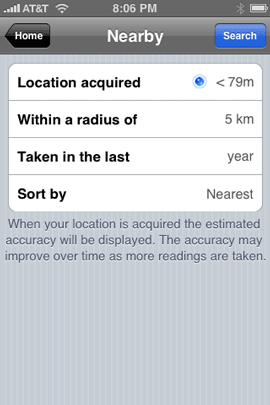
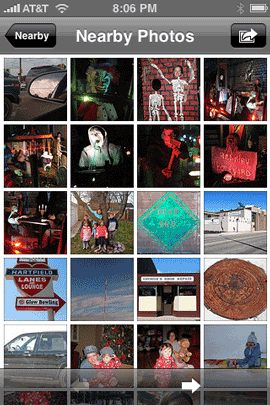
Not only does it let you bowse your own photos, it can use your current location to show you photos that were taken nearby by others.

mf7 mf2

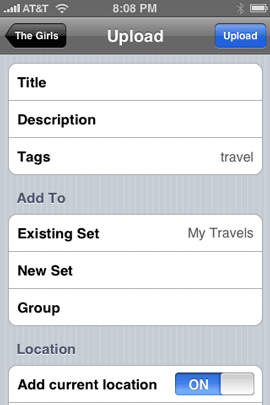
I’ve used other apps that let me upload to various services. However, this one is great in that it lets you properly tag the photo and pick the photo set you want it uploaded to before you actually upload it. You can also use Mobile Fotos to view videos on Flickr. I haven’t played with this as I don’t have any videos on Flickr yet, nor do any of my friends. Currently videos are limited to 90 seconds and 500MB on Flickr. So for now I’ll stick with YouTube.

Uploading

mf3 mf4

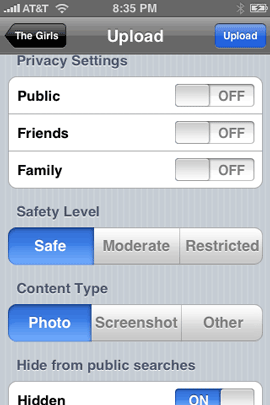
One of the main reasons I use Mobile Fotos is to upload snapshots I’ve taken with my iPhone. The upload feature is the most full featured uploader I’ve ever seen in any iPhone app. It let’s you use every option available for Flickr just as if you were uploading from your computer. You can choose a Title Description, Tags, Set (including creating a new Set on the fly), Group, Location, Privacy settings, Safety Level, Content Type, whether or not the photos hould be Hidden and Resolution. Yep, it’s full featured and this should be the model for all apps that let you upload to a photo service. Even Apple’s built-in upload to MobileMe could learn a few tricks here and seems anemic by comparison.

It Geotags too

Monument Valley shot

One of my favorite features of Flickr is that it automatically adds your photos to the Yahoo map if they contain location information (longitude & latitude). Of course when you take a picture with your iPhone’s camera you have the option of including location information. Mobile Fotos uses that location information and includes it in the upload.

Not always about you

mf5 mf6

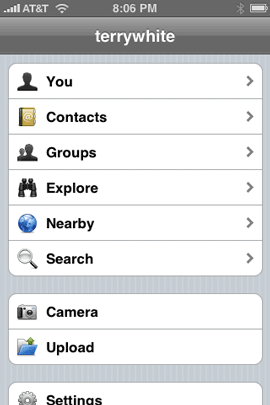
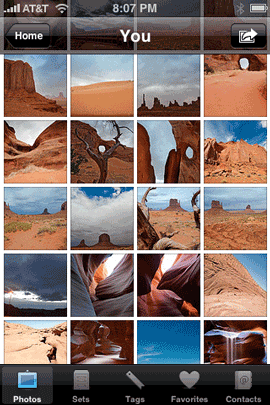
You can also tap the Contacts icon to see the latest and greatest shots of your Flickr Friends. This really allows you to not only share your photos quickly and easily as they happen, but also to see what’s going on with your friends and family that also use Flickr. You also browse your Flickr groups!

The Bottom Line

There’s not much else I can say! This app totally rocks and does exactly what it’s supposed to do. It’s easy to use, full featured and works great. If you use Flickr, this is your app! Mobile Fotos is $2.99 and available at the App Store here.

An Evening with Terry White – My Lightroom 2 Workflow

eveningwithterry

Last month I did my first: “An Evening With Terry White!” I was happy with the turnout and the way things worked out so I’m back to do it again. Last month I did Photoshop CS4 Essentials (see the recording here). This month by popular demand I’m back to do another session. Here’s how it works: I will pick an evening and a topic and do a one hour live session on that topic over the internet. There will be no cost to the attendees, It’s on me (well actually it’s on Adobe).

The Next Topic

This second evening will be on “My Adobe Photoshop Lightroom 2 Workflow.” I will take you through my Lightroom workflow from start to finish. We’ll even detour over to Photoshop for a quick portrait retouch. You’ll see how I bring my photos in, organize them in catalogs, pick my favorite ones, bouce over to Photoshop as needed and deliver proofs and the final images to the client.

Although I’ll be using Lighroom 2, you’re not required to have Lightroom 2 to benefit from this session. Many of the techniques I plan to cover will be applicable to users of the older version. However, if you just want to be up-to-date and all, feel free head over to the Adobe Store. You can buy your upgrade and download it on the spot 🙂

When and where? R.S.V.P.?

This second evening will be Tuesday, April 28th @ 7PM E.T. and it will take place via Adobe Acrobat Connect Pro. Here’s the URL: http://my.adobe.acrobat.com/eveningwithterry

Sign on as a GUEST with your real name. While there is no pre-registration required, this session will be limited to 100 attendees. So it’s first come, first served. I advise you to log in 15 minutes before the 7PM start time as I plan to start on time.

Will you be able to ask questions?

There will be a Q&A session at the end. You will be able to submit your questions throughout the presentation in the Q&A pod. I will address as many of the submitted questions as I can at the end. Although I plan to end the presentation part within one hour, I will probably be able hang out a bit afterwards to continue answering questions. This will give people that only have an hour the chance to see the entire presentation before having to leave.

What you will need to participate

If you’re reading this blog, you probably have the necessary equipment to watch this session. You will need a computer (Mac or PC) with a web browser, a high speed internet connection and the Flash Player. The audio will come through your computer’s speakers. That’s pretty much it! There is no software that you need to install. If you want to make sure that your computer and internet connection are up to par, you can run this test. Although the last part of the test checks to see if you have the “add-in”, it’s not necessary to have it for this session. Go ahead and run the test now so that you’ll be ready in time for Tuesday. Also keep in mind that if for whatever reason your connection is not up to par or it’s not going well for you, there’s nothing I can do about it on my end and please accept my apology now.

What if you can’t make it or you’re 101st person?

If all goes well, this session will be recorded and I will post the link to it the next day on my blog. So if you can’t attend or if you don’t make it into the session due to a large turnout, you will be able to enjoy it afterwards at your leisure.

Why am I doing this and what’s next?

Although I can post videos anytime I want on my Adobe Creative Suite Video Podcast, nothing beats live interaction. I like talking with customers and this will give me real-time feedback. If this continues to work well I will do it again with different topics. If not, well we can’t say that I didn’t try. 🙂 See you on Tuesday!

iPhone App of the Week – TripIt

tripitlogo

I got hooked on TripIt.com when I first checked out another iPhone app called FlightTrack Pro (see my review here). FlightTrack Pro is strickly for checking your flight status, gates, departure, arrival times, etc. Although you can use the app in a standalone fashion, it really sings when you link it to your FREE TripIt account.

The TripIt service works great for me. I love it mostly because it requires very little effort on my part. I simply forward my email itinerary that received from my travel agent or airlines to plans@tripit.com and like magic my account populates with all the details of my trip. The flight portion of the trip is picked up by FlightTrack Pro.

Although TripIt does have an iPhone/iPod touch friendly version of their site (http://mobile.tripit.com), I was thinking how much I would love to have a dedicated app. FlightTrack Pro is cool for the flight info, but I want all the details of my itinerary at my finger tips. Nothing beats standing at a hotel reception desk and being able to go right to my confirmation number.

My wish was granted

tripit-upcoming

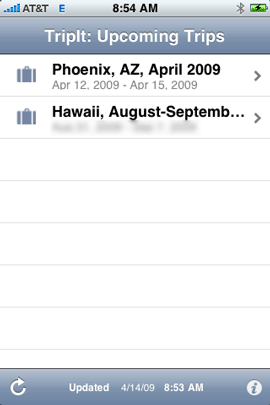
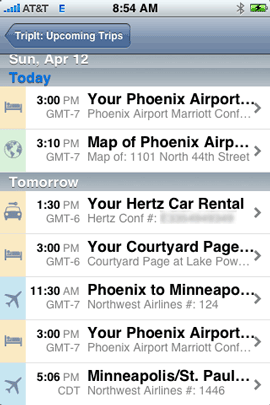
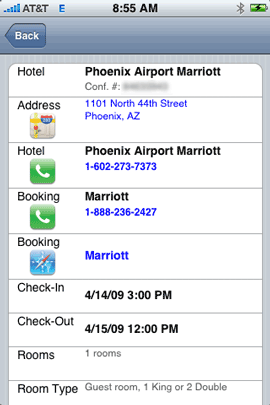
TripIt sent me an email this week letting me know that they had released their iPhone app and I clicked the link immediately to download it. Once I had the app on my iPhone I put in my TripIt account login info and as expected my upcoming trips were on screen. As a matter of fact I was already on one of those trips at the time. Everything was there just like the website. Confirmation numbers, check in/out times, phone numbers (which are clickable to dial), all the details of my trip were right there.

tripit-itinerary tripit-details

Room for improvement

The TripIt app works exactly as advertised! Although I’m happy with it in its current form, there are some things that would make it even better. The first improvemet is actually a biggy! The app only works when you have an internet connection. There’s no logical reason for this. The app should be able to DOWNLOAD your itineraries to your device and then only use the internet for updates. That’s the whole advantage of having a native app! Otherwise you might as well just use the website.

The next one is that revolves around social networking. I’ve started linking up with friends, colleagues and family on TripIt so that we can kinda know where each other is. The app doesn’t give you any access to your TripIt Network. Again, this should be an easy add since the info is already there in the database that the app is pulling from.

Lastly, the app doesn’t have any editing capabilites. Earlier this week I checked out of one hotel a day early and booked another one that was closer to the airport. I forwarded the confirmation for the new hotel to the plans@tripit.com address and it showed up properly, but there was no way to change the fact that I was checking out of the first hotel without going to the website to do it. So if your plans change or you have a new trip, you’ll have to make those changes via the website and email.

The Bottom Line

I love TripIt.com! It’s FREE! It just rocks! The TripIt app for iPhone/iPod touch is a great first start, but there is so much more potential for an even better app. If you have a TripIt account (and there’s no reason not to), then you should download the TripIt app from the App Store.

Be the One Billionth iPhone App Download and Win Big!

billion
Apple is about to hit the One Billionth App download mark! As usual their celebrating by giving some lucky person the chance to win some really cool prizes! The cool thing is that you can download either free or paid apps.

Download an app and you’ll automatically get the chance to win a $10,000 iTunes Gift Card, an iPod touch, a Time Capsule, and a MacBook Pro. Just go to the iTunes Store, browse the App Store, and download your best app yet.

See the details here.

Airfoil is the missing link

airfoillogo

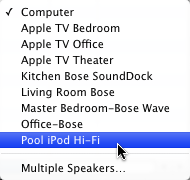
Although I’ve been enjoying streaming music wirelessly throughout the house using Apple’s AirTunes technology, there is one small problem. AirTunes only works with iTunes. AirTunes is built-in to the AirPort Express and now Apple TV hardware. The concept is simple. You put either an AirPort Express or Apple TV in any room that you want to stream music to and connect the device to a stereo, receiver or set of speakers. Then you launch iTunes from any computer on the network and choose the appropriate AirTunes speakers and when you play your music it will be streamed to your speakers (up to 3 rooms at a time).

airtunes

This is all well and good, but like I said, it only works with iTunes. What if you want to listen a different source app throughout your house? This is where Airfoil comes in. I have XM/Sirius satellite radio in my cars. With XM/Sirius account(s) you also get the ability to log on to their websites and listen to your favorite stations via the internet at no additional cost. While this is great, I want to be able to hear this content in any room and over my better speaker/stereo systems. I already have AirTunes setup, but again it only works with iTunes!

That’s were Airfoil comes in

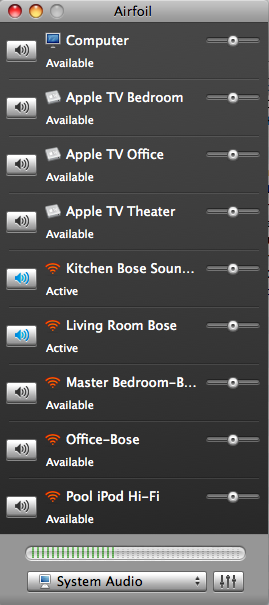
Airfoil is an app that you install on your Mac or PC that allows you to direct any app/source to your AirTunes speakers. It even comes with a bonus app called Airfoil Speakers that allows you to stream from one computer to another. Airfoil is very simple to setup. Once you download, install and launch it, it will automatically show all of your AirTunes speakers and make them available to any app or the system audio on your computer.

airfoil

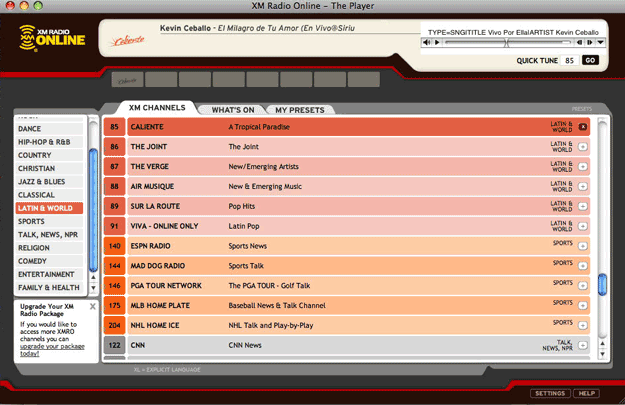
Once I installed Airfoil, I simply fired up my web browser and logged into the XM site. I selected a station, hit play and had music streaming throughout the house.
xm

The Bottom Line

Airfoil is by Rouge Amoeba. It goes for $25 and is available for both Mac and PC. If you use AirTunes and want to stream sources other than iTunes to your speakers then Airfoil is your answer!