How Much Faster is an SSD Drive?


SSD (Solid State Drives) are expensive! So the question that people usually have is “how much faster are they and will I see a difference?” In a nutshell the answer I have is FAST and YES! See my speed test above.


The SSD configuration is Apple’s CTO (configure to order) 512GB Drive. It’s in a 2011 MacBook Pro with 8GB of RAM and the 2.3GHz Quad Core i7 processor.

The 2010 MacBook that it’s being compared to has a 500GB 7200 RPM SATA drive. It also has 8GB of RAM and a 2.66GHz Dual Core i7 processor.

You don’t have to buy a new computer to get an SSD speed boost. OWC has several options for your existing computer.

Review: Drobo FS


I've been a happy Drobo user since October 2008. My main Drobo 4 Bay Firewire 800 unit is being used as the main storage on my Mac OS X Server in my home office. My second Drobo 4 Bay Firewire 800 unit is being used on my dedicated media server (an iMac running iTunes) and it houses all of our music, movies, TV shows etc. I love Drobos because you can easily increase the storage capacity by swapping one or more drives for larger ones without having to start over and reformat. I also love the fact that the drives don't have to be the same capacity. While my Drobos have been relatively trouble free from a hardware standpoint, I did suffer from a directory corruption problem once back in February 2009. Luckily I knew better and had my data backed up. While Drobo is GREAT at protecting you against drive failures there's is no magical protection against accidental file deletions, viruses, or directory corruption. In my current setup I have each Drobo being backed up on a nightly bases to external large capacity drives via SuperDuper! This all works great, but it does still leave me exposed to one problem. 


An Oops Moment

We all have those oops moments. Those moments where we do something that we wished we hadn't. It could be deleting a file that you thought you no longer needed or doing a Save when you meant to do a Save As, etc. If that happens to me and I catch it right away, no problem I can restore from yesterday's backup. However, if that happens and I don't realize it right away then I could lose the file completely after the new file gets backed up during the next evening's backup. In this case Time Machine really shines. As a Mac user I have Time Machine right in the OS. I use it on my MacBook Pro and other computers around the house. So no worries if this problem happens on one of those computers because i can just go back in time and grab and older version. However, if the file is on my Sever then I don't have that protection. Same goes for my iTunes collection. If I delete something there without realizing it, it will be gone for good after the next backup. 


Drobo FS to the rescue
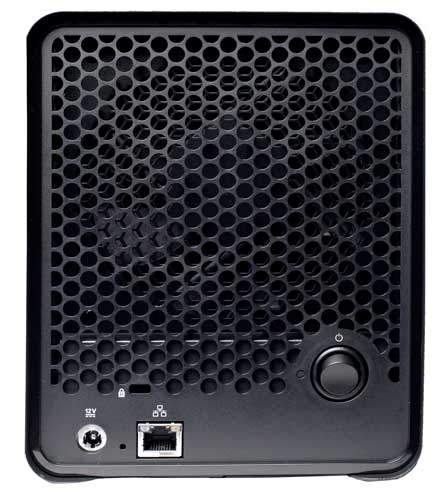
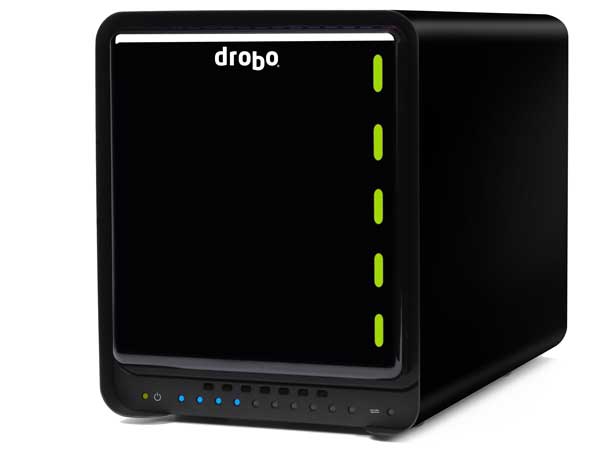
While I can pretty easily clone my Drobos to nice big 2TB and 3TB drives, it becomes more challenging using Time Machine for that much data on a single backup drive. The drives would fill up quickly and I would be no more protected than I was with a clone. In this case I wanted to use Time Machine but I would need something as large as the capacity of my Drobos and actually significantly larger if I want to go back further in time. The solution was clear – another Drobo. With another Drobo I could put large drives in it and it would not only have the storage I needed to backup one Drobo, but both Drobos. Since the two computers are not in the same room, I needed a network solution. This lead me to the Drobo FS. While I could have put another Drobo on my Mac mini server it would mean having to daisy chain it via Firewire and I also have limited space in that area of my office. The Drobo FS is a 5 bay unit that connects directly to your network via Ethernet. This means that it can be anywhere in my house including a closet or storage room. The 5bay FS doesn't cost that much more than a directly connected Drobo model.


Setting up the FS
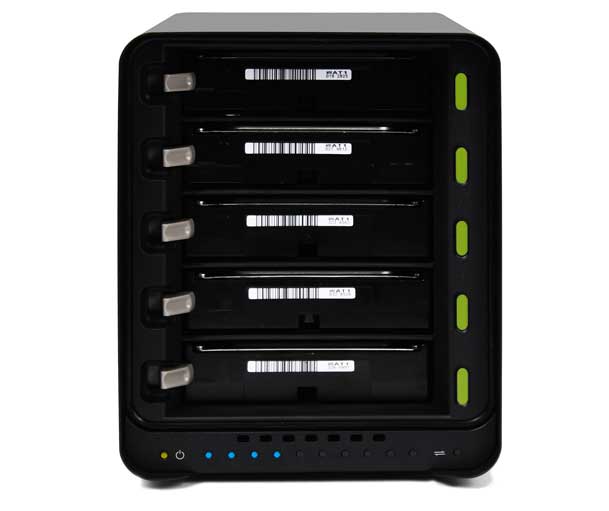
I love it when all the instructions that you'll need to setup a new device fit on a single card. The Drobo FS is that easy to setup. install the software. Insert one or more hard drives (2 or more is best for protection) and they don't even have to be the same capacity. Plug in your Ethernet cable (gigabit ethernet if you want performance) and turn it on!

The Drobo automatically formats itself and in a few moments shows up in the Drobo dashboard of all your networked computers. At that point you change the administrator username/password and create the "Shares" you want to be seen on the network. Add your users/passwords and you're done. 


Using it for Time Machine

Since I already have a Fileserver that I'm happy with I didn't really need to setup any shared folders beyond the one for my network Time Machine backups. You create a share and then just enable the Checkbox so that this new Share can be used and seen by Macs as a Time Machine volume.
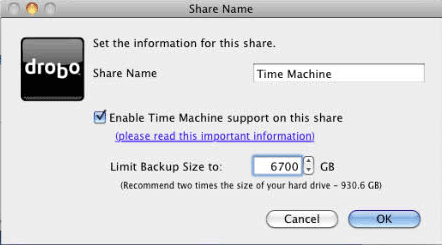
Unfortunately you do need to install the Drobo Dashboard on each of the Macs that you want to backup to it via Time Machine. It's not the end of the world, I just dont' like installing any more software than I absolutely have to. Once the Drobo Dashboard is installed on a Mac that you wish to backup, you mount the Share and then choose it in the Time Machine System Preferences. For now I've decided to use it for all of my Desktop Macs including both servers and another iMac and Mac Pro. I've completed the backup on a couple of these Macs as of the writing of this review. The big ones are going to take a day or two to complete because if you've ever tried to backup 1.5-2TBs of data you know that it can take a while.


The Bottom Line
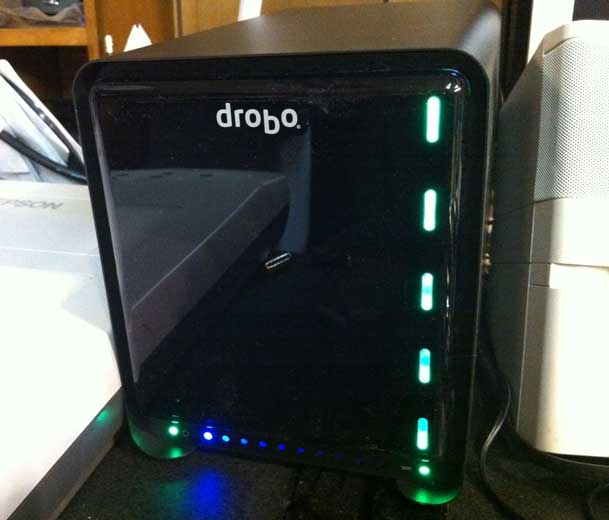
The Drobo FS is a great solution for any home or small business looking to setup a File Server/NAS or Network backup that is painless and has built-in redundancy for protection against drive failure. If you are going to use one in a File Server capacity keep in mind that while Drobo protects against drive failure, you should still back it up too! That goes for any drive solution. Also if you are going to use it as a File Server you can enable the Drobo Apps so that you get File Server type features such as web serving, ftp, etc. I didn't enable these as again, this isn't my main server.

The fact that the Drobo FS connects directly to my network instead of requiring a host computer is huge for me! I would hate it if the day comes that I restore an entire Drobo from a backup because it would take a while. I would hate it even more if the day came that I needed to restore a large amount of data and I didn't have a backup at all.

You can get the Drobo FS enclosure for less than $615 from B&H Photo and Video

You can get 2TB SATA Hard Drives here for $75. The price of storage has never been cheaper!

You can use the Drobo Storage Calculator here to figure out how much storage you would have based on the drives that you put in it.
Review: IPEVO Point 2 View USB Camera for iPad/Mobile Device Demos

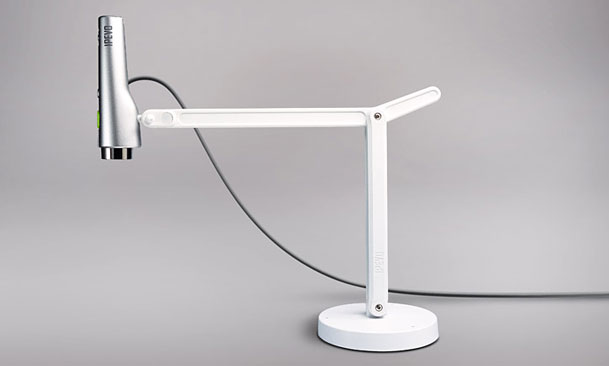
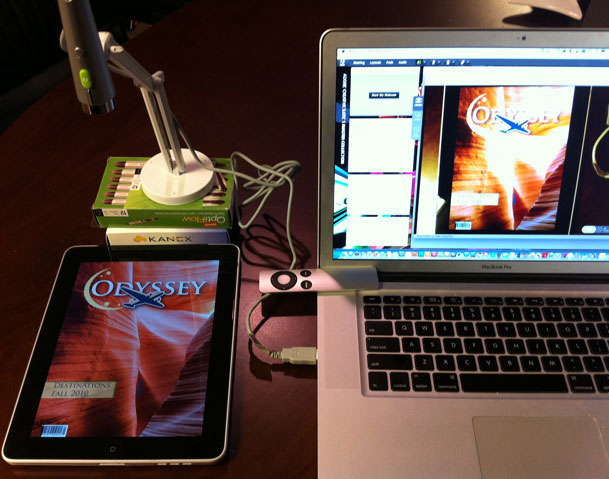
As I go out a demo Adobe's Digital Publishing Suite one of the biggest challenges is showing the final product to the audience on the iPad/Android tablet. Although the iPad does have a video out solution via the iPad to VGA adapter, that Adapter only works in certain Apps and apparently adding support for to your App (depending on what your app does) can be tricky. The only other solution is to use a document camera. While document cameras certainly aren't new, they are not really designed for travel. My colleague Colin Fleming pointed me to the IPEVO Point 2 View USB Camera. He hadn't tried it yet, but it came up in his Goole search. While I loved the size I was very leary about the "USB 2" connection. Most solutions I've tried that are USB 2 based have low frame rates, which makes it challenging to show any type of movement. These "document cameras" were never designed to shoot anything moving (ie. movies, multi-gestures) or animating on screen. They were designed to take still pictures of objects or "documents".  


Low cost of entry

I went out and read every review of the Point 2 View that I could find and most of the reviews slammed it as  "webcam". This is largely due to the fact that it doesn't have a built-in microphone. Since I have no desire to use it as a webcam and the fact that it was only $70 (cheap compared to other solutions), I decided to give it a shot.


It works!

The good news is that it works! It should be fine for what I want to use it for. It's small enough to put in a laptop bag or suitcase and the weighted base means that it won't easily fall over. It's far from perfect though:

The Good

  • It's Cheap! $70 – most solutions cost at least twice as much
  • It's very portable and travel friendly – A MUST
  • It has a weighted base and is designed to point down
  • Doesn't require any drivers on the Mac. Just launch their supplied App and turn it on.
  • One button auto focus or choose Continuous Focus (not fast, but good)
  • Has a full screen mode – great for making training videos
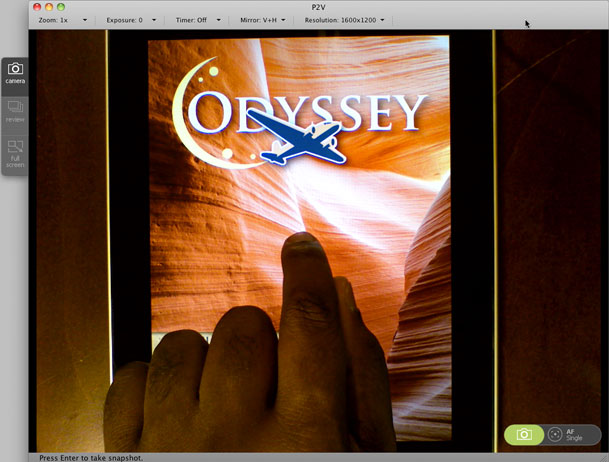
  • In App Zoom, Exposure Controls
  • Update: Works with other Apps too including iChat, ScreenFlow, Skype, etc., which will make giving mobile demos online and recording them even easier. Thanks Cari!
  • Software lets you reverse the image both horizontally and vertically which means it doesn't have to face the same way in every situation. 
  • The included stand allows the camera to be mounted in front or on the sides
  • It can take a picture too. (download two sample shots here)

The Bad

  • The frame rate is not great, but should be good enough for Adobe Connect demos and  live demos
  • You HAVE TO USE THEIR APP. Not the end of the world, but it's the only way you will see it on screen CORRECTION, it works in other apps too
  • The stand is barely tall enough for iPad in portrait view so may need to put the stand on top of something else to raise it up a bit.
  • No built-in mic – I don't care.
  • White Balance Sucks – no controls for it either
  • Not great in low light, but shouldn't be a problem shooting a lit display of a device
  • USB cable is hardwired in, but luckily it's long enough.


The Bottom Line

Frankly I'm stunned that someone hasn't designed a device for the sole purpose of demoing mobile devices. Mobile devices are exploding and it seems like some clever  person would see the need and develop a specific product to do this! While you could go with a cheaper webcam with better video quality, the challenge is always finding a way to mount it on a stand and face it down as most webcams are designed to attach to your computer display. In the meantime the IPEVO Point 2 View USB Camera will be my solution until something better comes along. It does have the right blend of size, price and features to be the best solution that  I've seen so far for doing demos of mobile devices on the go.

You can get the IPEVO Point 2 View USB Camera for $69 here.

Continue reading “Review: IPEVO Point 2 View USB Camera for iPad/Mobile Device Demos”

Charge Up To 4 Devices At Once

photo compliments of iStockphoto.com

Last week I told you about a great new home improvement gadget, the U-Socket that allows you to charge multiple USB devices via newly designed wall outlet. However, what if you want to charge multiple USB devices while you're on the road? After all I'm finding more and more of my devices (phone, bluetooth headset, iPod, iPad, camera GPS, etc.) now charge via USB power. 

I do like the Belkin Mini Surge Protector Dual USB Charger, but it doesn't play well on the higher voltage abroad. For this reason it's no longer in my travel bag.


Charge Up to 4 Devices via USB On The Go


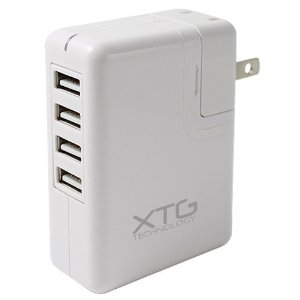
I found this wall charger that charges up to 4 devices (including the iPad) at once. It also can handle 100-240v input, which means I can use it abroad with the appropriate adapter. I like that it has a blue LED to let you know whether or not it's getting power. In my limited testing it works great and has charged everything I've thrown at it. However, make no mistake about it, this thing was cheaply made 🙂 While it make resemble an AirPort Express, they used a lighter weight plastic. However, it looks like as long as you don't beat it up to badly it should last for a while.

The other advantage that this charger gives me is not having to carry multiple USB adapters with me. I can carry one instead of 3 or 4.

You can get it here for $17


Got one for the car too

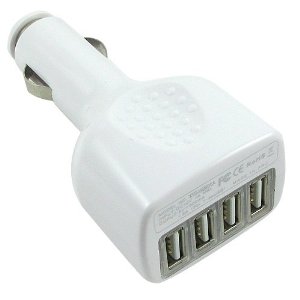
Why stop there? I also found this one by the same company (XTG) for your cigarette lighter socket in your car. 

You can get it here for $12.

Review: U-Socket is here!

I remember about a year ago when FastMac teased us with this product. I'm sure they wanted to release it sooner, but they went back to the drawing board and redesigned a better product! The U-Socket is designed to replace your standard US 110V outlet with one that also has two powered USB ports. This way you can charge two standard USB devices and still have access to both outlets for other devices. I ordered three of these and while I didn't expect them until February, they surprisingly showed up yesterday. I was like a kid on Christmas day. I don't know why I was so excited to see such a simple product, but I just think these things are cool.


Before you do it yourself

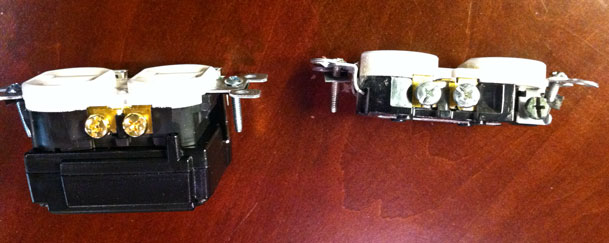
Electricity doesn't really frighten me. Plumbing and Natural Gas on the other hand do. Although this device has standard electrical wiring like most outlets, it is an electrical installation and if you are the least bit squimish please please please hire a licensed Electrician to install yours. I'm not responsible if you, your devices or your house get fried! I warned you! I'm warning you again. Let a professional do it! With that said, I've been installing replacement outlets and light switches in my house for years. So I was not afraid to TURN OFF the circuit at the circuit breaker and then proceed with the installation. Although the wiring is very straight forward it took a little longer than usual. The biggest problem is that outlet is about twice the depth of a standard outlet. Yes it's designed to fit in a standard box, but it will be tight. The one that I replaced had a little plaster around the box that I had to take my time and chip away first. I also had to be more careful about how I ran the wires around the outlet itself as there is very little wiggle room. To this point I went to install the other two in a newer part of my home and the wiring was more complicated. While I could certainly do it, I would rather pay the electrician to do it as I don't feel like playing trial and error with the connections that are already in those boxes.


Success

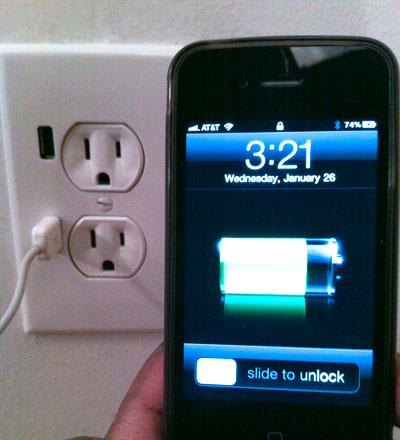
Once I got it installed and restored power to the outlet I couldn't wait to test it. First I tested the regular AC plugs and they worked. Then I plugged in a USB cable and my iPhone 4 and heard the familiar tone the indicated that it was charging. 

What about the iPad? As you may or may not know the iPad wants 10v of USB power instead of the standard 5v required by most USB products. I expected to get the "not enough power" message when I plugged in the iPad, but to my surprise it gave me the same tone that it was charging. This is actually no different than using an older iPhone charger with your iPad. While it works, it will definitely take LONGER to charge it than the 10v power adapter that comes with the iPad So if I had to give it any strikes that would be the only one. I wish that the ports were 10v instead of 5v. Other than that I think these are really cool.

Correction: The iPad wants 10w, not 10v. FastMac notes iPad "compatibility" . So we're good here!

OLDER USB 2.0 ports only supplied 0.5 amp which would only charge an iPad while it's off or very very slowly while it's on.

Newer USB ports can supply the 1.5 amps that the iPad wants. The U-Socket has enough power at:

  • 2.4A-5V USB 3.0 Power Ports @ 2400 mA (total)
  • Charge 4 Devices Simultaneously


You can get the U-Socket here for about $24.

Quote of the Week: At lengths less than 4 meters you can just about use silly string…

Last week I wrote a post about Paying too much for cables and while most of the response both privately and publicly was in agreement there were a couple of people who felt that I was wrong or my logic was flawed. So I spent a little more time doing some more research. The surprising thing was that I couldn't find a single article or study that suggested that the more expensive cables were worth it. 

One point of clarification

One of the comments suggested that the length of the cable DOES matter and that you should pay for a better cable for longer runs. On this point I TOTALLY AGREE! If I were building a cable into a wall I would absolutely want a better cable as it wouldn't be easily replaced once the construction was done. However, that doesn't necessarily mean that the $200 30 foot cable is necessarily any better than the $50 30 foot cable. Also when I said "it either works or it doesn't", I meant that for ANY length or type of cable. If I buy a 30 foot cable then I expect it to perform like ANY other 30 foot cable should perform. In other words if the picture is distorted, noisy or has artifacts, doesn't transmit HDCP, etc. then that's my definition of "it doesn't work!" Just so you know, I'm also going to plug in the long cable and test it before building it in 🙂


The quote of the week – "At lengths less than 4 meters you can just about use silly string…"

comes from this extensive study that a guy did comparing cables and although he starts off stating that there is a difference in quality, his final takeaways  actually confirm my suspicions:

Your take-away from all this should be the following:


  • At lengths less than 4 meters you can just about use silly string (OK, not really) and get HDMI to pass at any current resolution. At less than 3 meters you'll even extend that to 12-bit color and possibly the next crazy idea HDMI Licensing decides to throw at consumers. Don't spend a lot on these cables and if you want to save money you won't let anyone at a big box store talk you into buying from them.
  • At long lengths (over 10 meters) you really need to pay attention to the manufacturer if you don't want to risk running into potential problems with 1080p and future formats such as Deep Color. With that said, just about any cable at or under 10 meters will pass 720p/1080i and nearly everyone will pass 1080p at 8-bit color as well.
  • If you have an existing HDMI cable and are running into problems, we'd suggest at least attempting the insertion of an active component at the sink (display) side. This is going to be far cheaper than ripping out your walls and re-running new cables – and likely just as effective.
  • HDMI has proven to be a moving target and there is no telling what crazy (likely unnecessary) format they will try to push down the cable next. Due to this, it's always good to "overbuild" your cable install, especially if it's a longer distance and going to end up behind drywall.
  • If you're not prone to upgraditis and think 1080p will be your maximum resolution for the life of your install, don't sweat it…

See the full report here.

Also see this comparison and this comparison. It would be fun to sit people down in a room with an HDTV, good 1080p source and a quality receiver and do a blind test using different cables. I'd be willing to bet money that the doubters wouldn't be able to tell the difference.


Lastly, Thanks!

Thanks to everyone that suggested monoprice.com as a source for low cost cables. I've placed an order for some even shorter HDMI cables than the 3 foot ones I found locally.

BTW: If you still disagree and feel better about the more expensive cables you bought, that's fine with me. Enjoy! 🙂 Y.M.M.V.

I’m Reminded Once Again: You’re Probably Paying too Much for Cables

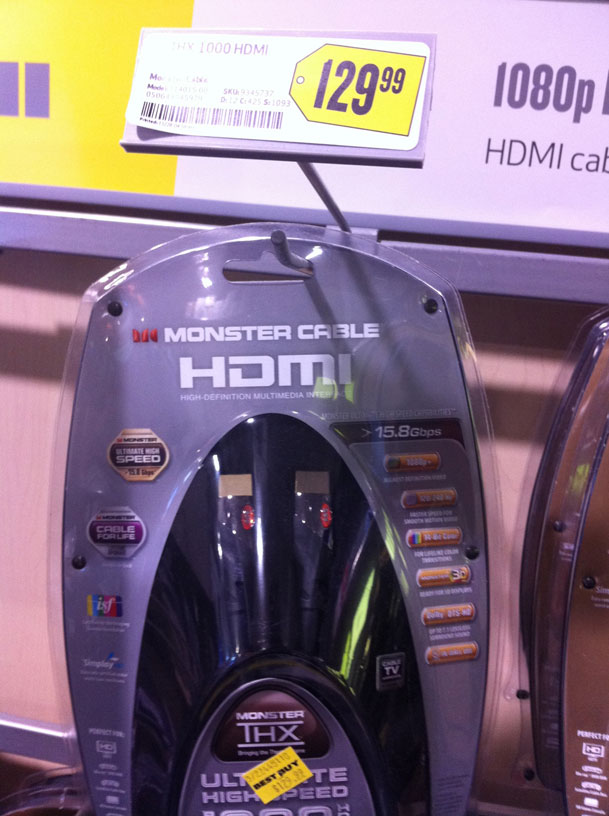
Many of you may remember my post from the summer of 2009 when I found some HDMI cables for as little as 17¢. By the way those cables are still working great! As a matter of fact I made sure to tell my friends and family NOT to be suckered into buying cables during the holiday season from the same retail outlets that they may be buying their holiday tech gifts from. In this price competitive landscape retailers often use things like cables to make up for lost margins on higher ticket items like HDTVs and Bluray players. For example, I laughed out loud when I cruised through my local Best Buy and saw this "great" deal on a Monster HDMI cable:


So Monster, let me get this straight…

You can get an Apple TV for less than $99. You can now get Bluray Players for less than $90. Yet you would have us believe that there is more expensive technology in your "cable" than the device it's being connected to? The bottom line is with ALL HDMI cables they are digital sending 0's and 1's. They either work or they don't! Here's a great post that explains the rip off even further.

By the way, although the cables I bought back in 2009 (I have a drawer full of them) are no longer 17¢, they are now only going for a few bucks here.


The Cheaper HDMI Cables Even Outperformed the GE Branded HDMI Cables

What? How does an HDMI cable outperform another one if it's all digital? OK, maybe "outperformed" is the wrong word. Let's say "more compatible". Over the holiday break I got the pleasure of setting up a NEW HDTV and receiver with all HDMI connections. I went to my HDMI drawer and grabbed the 4 cables that I needed. I hooked everything up and everything worked great. Although everything worked, there was one slight problem. Three of these components were literally either right next to each other or on top of each other and the 6 foot cables were longer than I wanted them to be. I remembered seeing some 3 foot cables at my local hardware store and they were reasonable priced around $8 each. I headed over and bought 3 of them to replace the longer ones. I plugged them in and everything was working once again. Later that evening I rented a movie via Apple TV in HD. However, when I went to watch it I got a warning I had never seen before:

"This content requires HDCP for playback. HDCP isn't supported by your HDMI connection."

WTF! Basically what this message means is that the HD Copy Protection signal isn't making its way from the Apple TV to the receiver/HDTV. I tried all the usual stuff of rebooting, restarting, etc. etc. and then it dawned on me that the only thing that had changed was the cable. I went and grabbed one of the no name HDMI "cheap" cables and replaced the GE branded cable and the movie rental played fine! It's hard to believe that there would be any cables on the shelves today that don't support HDCP, let alone from a name brand like GE, but there you have it! If you want to read more about this error, see this tech note.


It's not just HDMI Cables either!

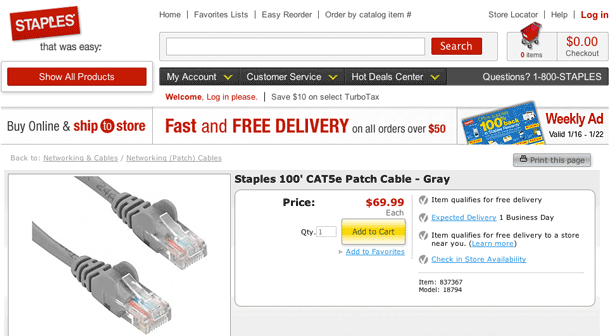
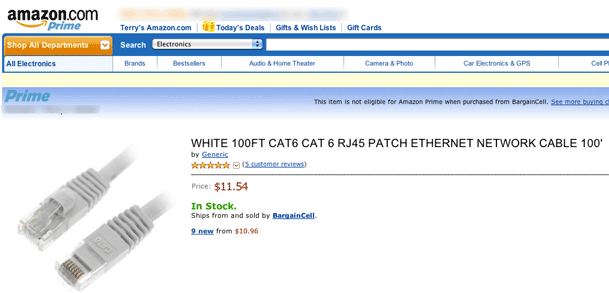
A couple of weeks ago I finally decided to run that 100' Ethernet cable from one end of my house to the other between floors that I have been putting off for years. Of course I needed to buy the Cat6 100 foot cable to do the job. Normally I don't think about the price of Ethernet cables. There's a Staples within walking distance of my house and I typically run over there when I need a network cable. However, since it was going to be such a long cable I wasn't even sure if they carried them in stock in that length. I headed to website and sure enough they do have them, but then I saw the price:

It was $70!


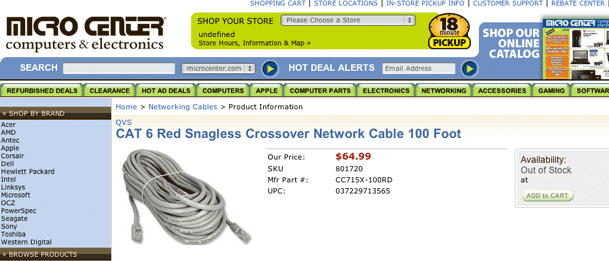
I decided to check with my local Micro Center for a sanity check:

While they were a little cheaper at $65, the cable wasn't even in stock.


Then I wondered, "are they cheaper elsewhere?"


Sure enough they were. While it would mean ordering online and having to wait for it to be shipped (darn, I'd have to put off that chore a little longer 🙂 ), the savings would be worth it. Yes, this cable that I bought (heck, I ordered two) arrived a couple of days later via Priority Mail and is working fine. By the way, the 7 foot Ethernet cables at Staples go for $19.99!


This is just a reminder! More expensive cables don't necessarily work any better or last any longer, especially digital ones. Don't pay too much!


UPDATE from Twitter follower @photoandmac

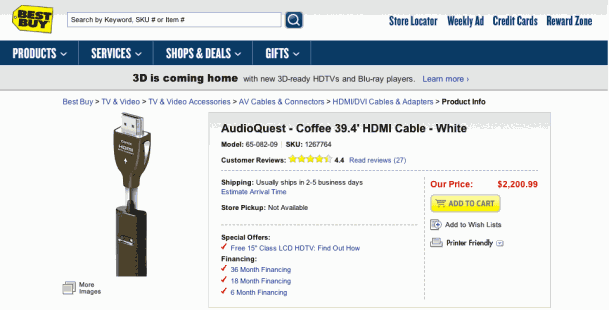
You know you're in trouble when they offer "Financing" for your HDMIcable! 🙂 Ooooooohhh, Ahhhhhhhhh! I'm not making this up! This 39.4 foot HDMI cable goes for $2,200.99. Here's the link.


Review: Nvidia Quadro 4000 for the Mac Pro

I never really used to pay much attention to graphics cards in the past. I figured that the stock video card would be more than enough for my needs. I'm not into hardcore gaming where I would need a high frame rate or rendering lots of 3D work. I've also never really had any complaints with the standard video cards that came with my systems in the past. However, this year when I upgraded my 4 year old Mac Pro to a new 12 Core Mac Pro system, I knew that I was going to replace the stock video card. With the introduction of Adobe Premiere Pro CS5 and the Mercury Playback Engine I knew that I would want a compatible video card to take advantage of it. With Mercury Playback Engine in Premiere Pro it has support for the Nvidia Card's CUDA chips and GPU acceleration. This means playing back multiple layers of HD video with effects in real-time without having to render first. Sign me up!


The New Nvidia Quadro 4000

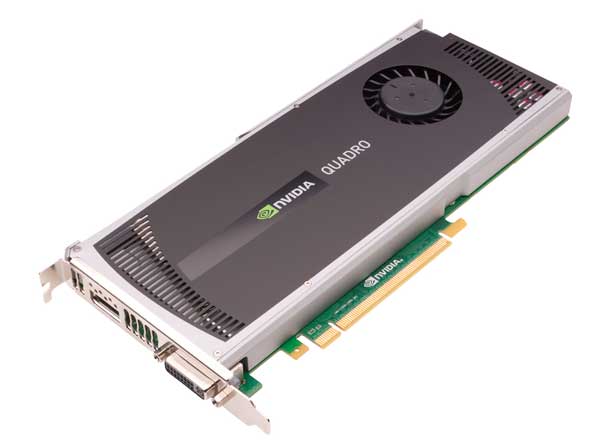
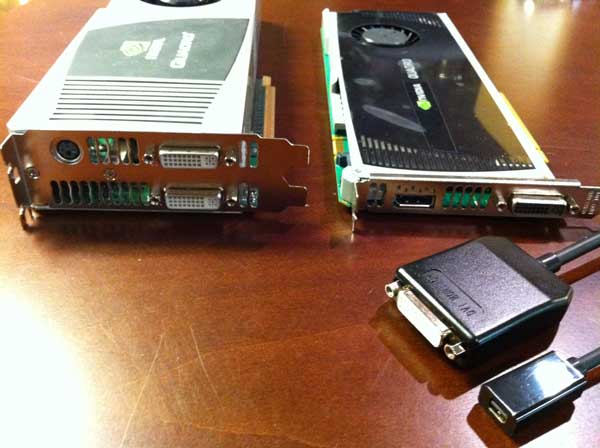
Although I had a loaner Nvidia Quadro 4800 card (their older discontinued card) that worked fine in my new system, I was anxiously awaiting to see the next card they were working on for the Mac Pro. The New Quadro 4000 for Mac (yes it's for PC too) is better in just about every way over the older card. First off it only takes up one slot instead of two like the previous model and the stock ATI card that came with my Mac Pro. Secondly there is a built-in DVI port and a second port in which you can plug in either one of the two supplied dongles. One dongle gives you a Display Port for Apple's and other manufacturers newer displays and the other dongle provides a second DVI port to drive a second display.

Although I'm perfectly happy using this card to drive my existing 30" Cinema Display, it's nice to know that if I ever have to go to a new display with a Display Port connection, I'm all set. Installation was pretty easy. Install the Driver first! Then just open the case unplug the old card and plug in the new one. It did leave an "open" hole (the old card took up two PCI spots) in the back of the machine as Apple doesn't ship a spare cover. I was going to scrounge around my house looking for one (as I'm sure I have a few), but decided to stick an OWC USB 3.0 card in that slot instead.  

This new card is not only slimmer, but also better on power consumption while providing a 30-40% speed improvement over the previous model in intensive graphics work and has more onboard RAM. Again my main concern was more around Video Editing than scientific computations. So my first question to Nvidia was "how much faster is it in Premere Pro CS5 over the previous model?" The answer was "about 10% faster." What this means to you is that if you have an existing Quadro 4800 card, there is very little reason to buy this one! However, if you're in the market for a NEW card to replace the stock ATI card then this is a great choice. It's less expensive than the previous model and like I said it's faster, uses less space and consumes less power. Full Specs Here.


Putting it to the test

People that do video editing know what it's like to have to render an effect or scene first to preview it before you can move on to the next edit. If you didn't have to render the scene/effect then your editing is going go much much faster. Although the built-in "Software" Mercury Engine in Premiere Pro CS5 works well on a fast system. Having a compatible Nvidia card with CUDA support simply blows away everything else out there on a desktop system!

I recorded this quick video to show the Mercury Playback Engine in action. Rather than do a typical screen recording using software, I wanted to show the real performance without the screen recording software processing in the background. So in this case I setup a video camera pointing at the screen to show the playback in real-time. Enjoy!

httpv://www.youtube.com/watch?v=foLxsL5RU6k


You can get the Nvidia Quadro 4000 for Mac here for $1,195 or here (thanks Brian Stone for this incredible find) for only $761.78!


You can get Adobe Premiere Pro CS5 here.

Download the 30 day trial here and play.

Review: The XShot iPhone 4 Case Tripod Adapter

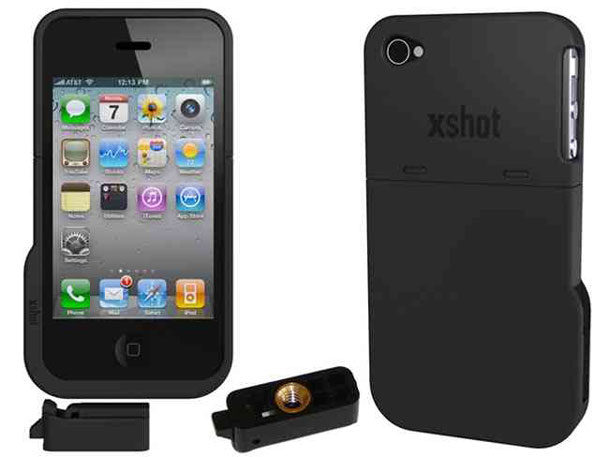
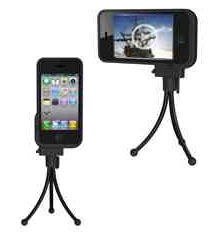
I love it when a company puts a lot of thought into a problem and then comes up with a solution that is so simple you smack your forehead and say "why didn't I think of that?" I've reviewed various iPhone tripod adapters in the past. When XShot asked to send me their new one, my 1st thought was "ok, whatever. sure." I was already in the mindset of "been there, done that." That all changed the minute I opened the box. XShot not only designed the iPhone 4 adapter that many of you have asked me for (one that works both vertically AND horizontally" but they did it in a stealthy way that I didn't even get at first glance. The first thing I thought was "cool". Just put your iPhone 4 in and you can attach it to your tripod in either orientation. I thought that was going to be the end of the review. Problem solved. Moving on… Then it really hit me as to what they did. They didn't just design an iPhone 4 tripod adapter. They designed an iPhone 4 CASE that can be attached to a tripod. 

It's a case stupid

I truly had a "duh" moment. I was thinking that while the adapter was nice I'd have to take my iPhone 4 out of my existing case and put into this "adapter" each time I wanted to use it. It's better than that. This was designed to be an iPhone 4 case first. It's a hard case offering protection to your iPhone 4 and the very necessary cover over the exposed antenna gap. There are two low profile slots on the bottom and the size that allow you to slide on the supplied tripod mount "quick release" clip. AWESOME! You get two clips in the package. This also means speedy changes from portrait to landscape by leaving the clip on the tripod and just sliding the iPhone on or off in the orientation you want. 

Well done XShot! You really were thinking on this one.

You can get the XShot iPhone 4 Case here.

Don’t Shoot DSLR Video without a Z-Finder Pro


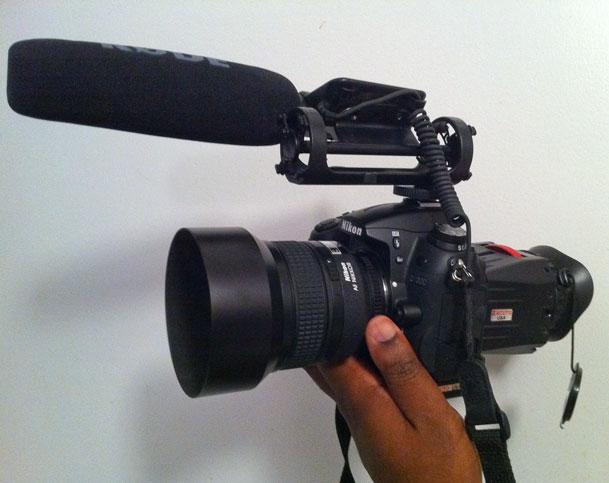
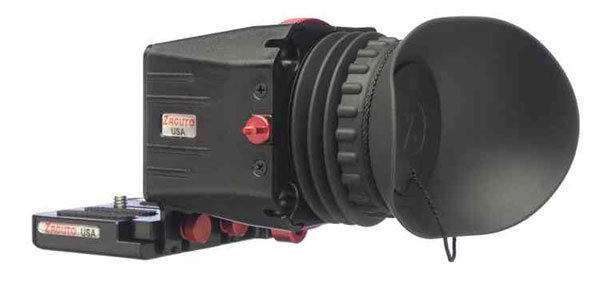
Nikon D7000, 85mm f/1.4 lens, Rode VideoMic and Zacuto Z-Finder Pro 3x

Shooting Video with a DSLR camera is all the rage now. However, one of the biggest problems with shooting video with a DSLR camera is keeping the video in focus. When you shoot at a shallow depth of field (one of the benefits of DSLR video), it's almost impossible to maintain focus while looking at the LCD on the back of your camera. While 3" may seem like a nice healthy screen size for a camera, it's really small when you're trying to check the focus of a scene. If you're shooting stills it's less of a problem because you can take a shot and then zoom in on it to check focus. When you're shooting video you don't have the same luxury. You can can't zoom the preview while you're shooting. The camera manufacturers haven't figured out that they should give us the option of looking through the lens via the eyepiece when shooting video yet. So for now we have to rely on the LCD for everything video.


The Zacuto Z-Finder Pro to the rescue

Zacuto has a few solutions for this problem. The one that I like the most is the Z-Finder Pro. It's designed to attach to a supplied bracket that goes on the bottom of your DSLR. It then gives you a more standard eye piece/viewfinder to look through while you're shooting. It also magnifies the screen. Once you put your eye up to the Z-Finder Pro you'll never want to shoot video without it again.

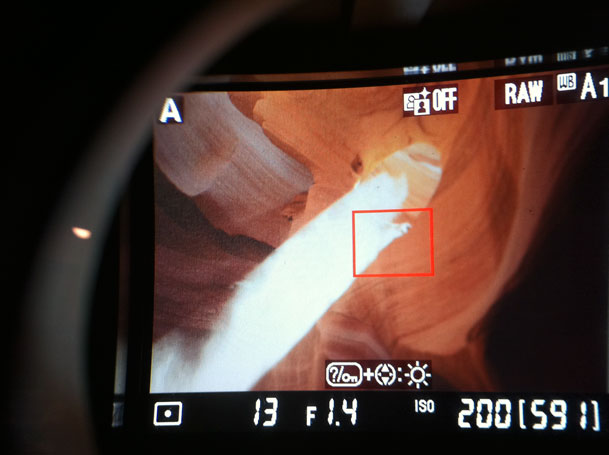
Looking through the Z-Finder Pro 3X


How would I redesign it?

The Z-Finder Pro attaches to a plate with two thumb screws. While you can certainly loosen these screws to remove the Z-Finder when you want to go back to shooting stills, I'd make a faster "quick release" system for quickly detaching it and re-attaching it. I also haven't tried this yet with a tripod mount/ball head. It might be interesting if the popular ballhead manufacturers had built-in support for the Zacuto bracket or vice versa.


If you shoot DSLR video, you want this!


You can get the Z-Finder Pro 2.5x mag here for $375.25

You can get the Z-Finder pro 3x mag (the one I used) here for $375.25