Don’t think you need to backup a Drobo? Think again!

yourdatawashere

I've lost enough important data in my life to be very backup conscious! So when I got my Drobo (what's a Drobo and how does it work? read my earlier review.) last year, I was still very concerned about regular backups. You might think that with a Drobo, there's no need right? After all, isn't the point of a RAID system like this to protect your data against drive failures? The answer is yes! Drobo is engineered to protect your data in the event of a drive going bad. As a matter of fact it goes out of its way to monitor the health and well being of the drives and report any potential problems. However, you can still lose data! 


This was not the blog post I intended on writing

I had originally sat down to continue to write about more stuff on streaming TV content and my transition for an Apple TV to a Mac mini in one of my rooms. I snapped some shots of my setup with my digital camera and began the import process on one of my computers over my network to my server. The only problem was that I was getting write errors that looked like something had gone haywire with the permissions of the folder I was trying to write to. When I checked folder in the OS it was EMPTY! I thought that was odd, and went over to the actual Mac OS X Server machine and all the data was there. So I did the normal troubleshooting stuff including rebooting and that's where my evening of fun began.
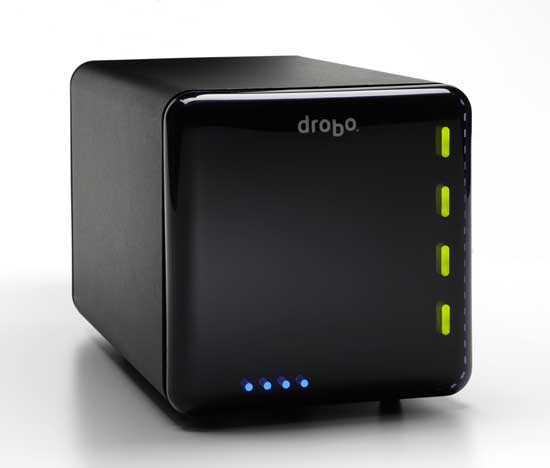


Nothing but green lights!

Not once did the Drobo report a problem. Why? Because technically there wasn't a problem with the hardware. The drives were operating normally. The next thing that happened was kind of heart stopping. After another reboot, the Drobo no longer appeared on the desktop. What was even worse was that there are 10 blue LED lights on the front of the Drobo unit to show you visually how much capacity has been used up. Normally for me there are 3 of those lights on. Not only was the drive not mounting on the desktop, but now there was only one light on. What had happened was something I hadn't thought about. My main volume's directory structure had become corrupt! Now this is not the first time that this has happened to me on my computers. As a matter of fact Alsoft's Disk Warrior has saved my bacon on many occasions. However, this was the first problem I ever encountered with the Drobo. So I ran Disk Warrior (not knowing what else to do) and sure enough Disk Warrior reported all kinds of problems. However, Disk Warrior is really good at correcting this stuff, so I let it do it's magic. Mid way through the process the drive appeared on the desktop and I was breathing a little easier. After the process was done, I verified some of the folders and everything looked good. However, there was still only one blue LED on. So I rebooted again and nothing. Upon closer examination, I noticed that many of my folders were now EMPTY! That's right, stuff was GONE! Here's the thing, I know the files were all technically still there, but the directory just didn't know about them anymore. I ran Disk Warrior again and it reported one more problem and fixed it, but still most of my data (to the tune of about one terabyte) was missing in action!


This is why backups are so important

This could have been a major catastrophe if I had relied on Drobo alone! Luckily I backup my Drobo automatically every night to another external drive for JUST SUCH AN EMERGENCY! Granted my backup drive isn't as large as the Drobo itself. My Drobo is 4TB's. However, I had only used around 1TB of space so far. So I was backing up to a 1.5TB external firewire drive each night using SuperDuper! In theory it will take me quite a while to fill up 4TB's of space. As my storage needs grow, I figure that drives will continue to grow as well. 2TB drives were just recently announced. I'll just keep getting bigger backup drives as needed. The Drobo is not my server's boot drive. It's just for data. So what about the internal boot drive that's running Mac OS X Server? Yep, I back that up too! That one is being backed up to another external 1TB drive via Time Machine. While there are no precious photos or other keepsakes on that boot drive, it does have my Server OS as well as all my settings. Who wants to start from scratch setting up a server all over again and all the various permissions? Not me! So I back it up! As I write this post, SuperDuper is cloning the backup data from LAST NIGHT back on to the Drobo (after I reformatted the Drobo of course). The process will take several hours. Although it will take hours for this clone to happen, I would have never been able to recreate all the data that would have been potentially LOST!


Offsite too!

I'm so paranoid about this stuff that I actually have TWO 1.5TB backup drives. One of them is always in the safe deposit box at the bank. I would like to think that I'm good about rotating the drives each week. Honestly, I'm lucky if I remember to do it monthly. However, I'd rather lose a month's worth of data than EVERYTHING! A backup does you no good if it's in the house that burns down, floods or is burglarized. Now I know what you're thinking, "that's not very likely to happen to ME!" OK, no worries. You go ahead and live on the edge. Clearly you have it under control and your data is protected, and you sleep well at night. Rock on! Have a nice day and best of luck to you. Forget I ever mentioned it.
Apple’s NEW In-Ear Headphones with Remote and Mic

appleinear

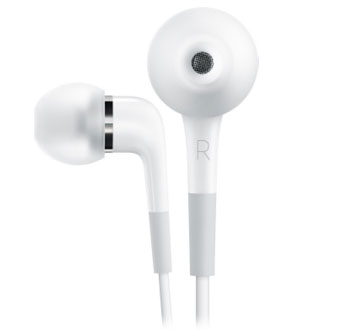
Although I’ve never really been a fan of in-ear headphones, I’ve been using them more and more when I travel. So I’ve been experimenting with many different models. Over the next few days, I’ll be reviewing the various ones that I’ve tested. I’m going to start at (believe it or not) the low end of the price range for the ones that I’ve been using. It’s rare that Apple is at the low end of a price range. However, their new $79 In-Ear Headphones are actually the lowest cost ones I’ve tried recently. The others start at $99 and go up from there. 


Why I usually don’t like in-ear headphones

The reason that I haven’t liked in-ear headphones in the past is because quite frankly they hurt my ears. The older models were supposedly one size fits all. Remember the original iPod earbuds? They sucked so badly that I couldn’t stand to have them in my ears for more than a few minutes at a time. Apple has been refining them over the years and the latest ones aren’t as bad. However, the higher end models including their own new in-ear headphones, usually include 3 different sized (small, medium and large) cushions. I usually find either the small or the medium ones to be the most comfortable. With the new Apple ones, the small and medium ones feel about the same. The medium ones are probably best for me to isolate external noise.


What they got right

icon-controlApple spent some time on these and they are probably the best ear-phones they’ve ever produced (not the best I’ve used). They are much more comfortable than any other previous attempt. The sound quality is decent (not stellar). Beyond the basics, you also get an integrated mic and remote control. The remote allows you to control the volume (on the iPod nano (4th generation), iPod classic (120GB), and iPod touch (2nd generation)). You cannot control the volume on previous iPod models or the iPhone. Since I’ll be using these with an iPhone more than an iPod, I was really interested to see what worked and what didn’t. If you’re an iPhone user, these will control everything just like the supplied iPhone earbuds, except for the volume (which the supplied earbuds don’t control either). So you can play, pause advance tracks when the iPod app is running. You can answer calls and use the integrated mic for handsfree communication. So these do make a great replacement for the iPhone earbuds. 


What could be better

I like bass in my music, so I would like to see a little more bass in these. However, they do sound pretty good as is. The other thing I was stunned by was that the volume control didn’t work on the iPhone. After all, it’s not like they are from a different company. It’s Apple. You would think they would be able to make the iPhone/in-ear headphones work together. It’s not the end of the world, just puzzling. 


The Bottom Line

For $79 you get a better, more comfortable set of earbuds than the ones that originally shipped with your iPod or iPhone. If you’re an iPod touch 2nd generation user, you stand to gain the most as you’ll be able to use all the features including the integrated mic for recording into third party apps. The iPod touch doesn’t have a built-in mic, so this headset is a plus. I have other headphones that cost more and sound better. However, I have not tried any other ones in the $79 price range that are better. So for the money, these are the best for iPod and iPhone users. You can get them here for $79.

New iPod/iPhone, Old Speaker System, not charging?

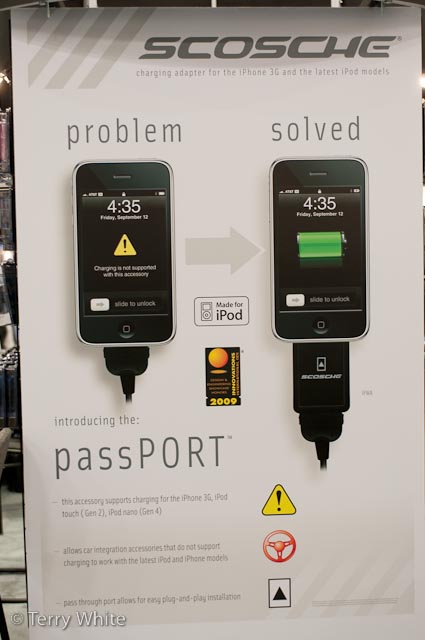
If you have an iPhone 3g, 2nd gen iPod touch or 4th gen iPod nano, you may have noticed an issue with plugging them into your older speaker system. As I understand it, the newest crop of iPhones and iPods no longer allow charging over the Firewire pin in the standard 30 pin iPod connector found on hundreds of iPod accessories out there. They now only charge via the USB powered pin in the same 30 pin connector.

I first noticed this problem with my iPhone 3g. I noticed it didn’t work with the integrated iPod connection in my car. I could plug it in and play music through the car’s speakers, but the iPhone wouldn’t charge. Buy a new car? Not today! Some car manufacturers started offering a newer cable to correct the problem. Rather than wait for a new cable to be produced for my car, I was lucky to find out about the passPORT by Scosche.


passPORT to the rescue

passport

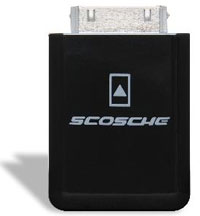
The passPORT is an adapter that goes between your car’s cable and your iPhone/iPod. Since older iPods and iPhones can be charged over USB too, this adapter is backwards compatible. There’s really not much more to say about it. You plug it in and it works. Your iPhone 3g and newer iPods will now charge via your older cable. The adapter goes for $29.99. Amazon has it for $27.99. The price seems a little high, but it’s a lot cheaper than a new car 🙂

_tlw1396


What about your speaker system?

If you spent good money for an iPod speaker system, then chances are you want to keep using it. However, if you bought your speaker system a while back, then you may be facing the same issue I did above. Your older speaker system may not charge or work properly with your newer iPhone 3g or iPod. While I was at Macworld Expo, I stopped by the Scosche booth while I was at Macworld Expo to buy a second passPORT for my new EOS Wireless Speaker system (a review on that is coming). Although this speaker system is not that old, it’s old enough not to work properly with the new iPhone 3g or iPods. When I got to the Scosche booth I saw a display on the wall for their new passPORT Dock product.

passportdock

This adapter is designed specifically for the Universal Dock connector found in most speaker systems. As a matter of fact even Apple’s own (now discontinued) Apple iPod Hi-Fi system. When this system was being sold it retailed for $399. If you spent $400 on an iPod Hi-Fi, then you probably want to keep using it with your new iPod or iPhone 3g. Same goes for the original Bose SoundDock ($299). 

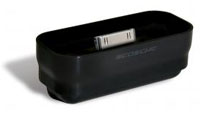
The passPORT Dock is a $40 adapter that sits right in your speaker’s universal dock connector. It sits up about an inch and has it’s own Universal Dock on top which will accept the standard Apple dock inserts that ship with the various iPods and are available for the iPhone. The passPORT dock comes in either white or black to match your speaker system. Again, I think $40 is a little pricey, but considering what you may have spent for your speaker system $40 is not much to keep using it with your newer iPhone/iPod.

You can order the passPORT Dock directly from their site.

Macworld Expo: Neat Receipts Update

I’m here at Macworld and I got a chance to check out the new software update to the Neat Receipts scanner that I reviewed in 2008. One of the number one questions I got then was “can the software (which rocks) be used with other scanners like the Fujitsu Scan Snap series. Now the answer is YES!

Epson P6000 Multimedia Viewer/Backup Review

One of the things that photographers are constantly concerned about is backing up their photos. While it's pretty easy to do if you're in the studio, it's more challenging when you're out on location. For this reason I have been using Epson Multimedia viewers for the last couple of years. These devices are pretty cool because they are small enough to fit in just about any camera bag and have just about all the functions you would want.


What's built in?

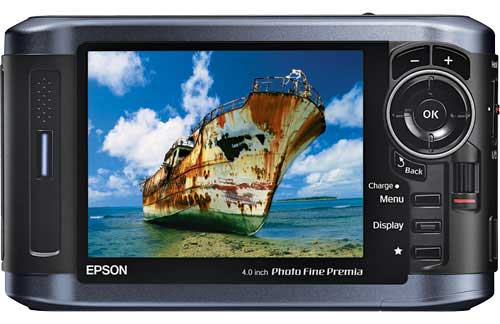
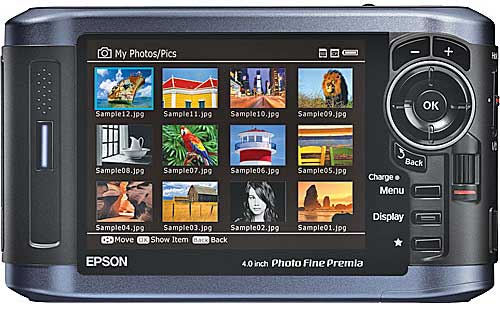
First of all they have a built-in hard drive. The current models come in either 80GB or 160GB capacities. They have a high quality 4 inch LCD screen and both Compact Flash and SD slots built-in. After a shoot you simply take the card out of your camera and put it in the Epson Multimedia Viewer.


Execute the Backup command and it will copy the photos from your card onto its built-in hard drive. Put the card away, don't erase it! The whole point of a backup is to have your data in two or more places. If you erase the card, then you are still vulnerable because the photos will only be in one place.


What other features does it have?

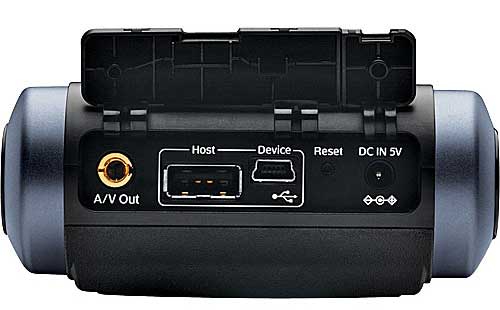
The Epson Multimedia Devices can also play music which is handy for doing impromptu slideshows. You can have your MP3 files already on the device and be ready to play them. The other more important feature is that these devices support Camera RAW files (yes, of course it supports JPGs too) from the most popular cameras today. This means that you can not only backup your cards, but you can use its 4 inch screen to display your pictures. Both the P6000 and P7000 now support 94% of the Adobe RGB color space which means you'll be seeing your photos more true to the way they will actually print instead of the striped down sRGB color space. Lastly there is also video/audio out jacks so that you could hook up your P6000 or P7000 to a TV or projector to show your work on the big screen.


How well does this device perform?

I've had my new one for a few weeks now and I have no real complaints. The backup speed is acceptable and I haven't had any card/image compatibility problems. It seems that with my P3000 there were certain CF and SD cards that couldn't be read (mostly the cheaper off brand cards from friends). Navigating the images is done via a jog wheel, which after working with an iPhone for the past year seems kind of archaic now. I would love to be able to "flick" my images by. Speaking of the interface, it has improved a little since the P3000, but it's time for an over-hall. There are still too many screens, menu options to get to what you want at times.


What about the price?

Here's the biggest problem of them all. These devices are best in class and you'll pay a premium because of that. They are, in my opinion over priced. The 80GB Epson P6000 lists for $599.99 (yes $600 bucks). The 160GB Epson P7000 lists for $799.99 (nope, it's not a typo, $800!). Considering the cost of storage these days and the fact that I don't imagine that there was a ton of RD that went into these latest models, they are easily $200 over priced. Now I have no idea what these cost to manufacture and it's quite possible that I'm missing something here. I admit that. However, there are full blown PC laptops on the market that cost less. For example, here's a Gateway/eMachines laptop that comes with a 160GB hard drive, 15.4 inch LCD, 3GB of RAM, Keyboard, DVD burner, and wireless networking for $599.99. Is this a quality laptop? Probably not, but the fact is it has more components and costs less. It seems that Epson keeps increasing the storage, but never lowers the price. 


The Bottom Line

Although these things are pricy, I do LOVE my P6000 and would never think of going on location for a shoot without it. Once I get back home, I can either copy the cards again to my computer or I can simply plug in my Epson P6000 via the USB cable and copy all the shots that way. Since it does mount on the desktop as a hard drive, I can easily copy my portfolio to it to show perspective clients. Do I recommend them? Yes, if you have the budget for it. They work as advertised and have never let me down. Battery life is decent too and the rechargeable battery is removable and user replaceable. As far as which model to get, I can't really see much of a reason at all to get the P7000. Granted you do get double the hard drive space, but it will also cost you $200 MORE! Seeing how I doubt that I would ever shoot 10 8GB cards worth of shots in one setting, the 80GB model is plenty. I'm also remind that the model I upgraded from only had a 40GB drive and that was never too limiting for me either. So 80GB is more than enough. As for as room for improvement goes, for the prices that these are going for I would at least like to see some wireless/Wi-Fi transfer options. Even an EVDO 3g card slot would be nice too. That way I could not only back up my photos, but I could email them directly from the device to someone. Amazon has the Epson P6000 for $579.20 (or less) and B&H has the Epson P7000 for $799.95.

Epson Workforce 600 All-in-One Wi-Fi Printer, etc.


You might have noticed that I don’t review very many printers here. That’s primarily because I’m a printer snob and don’t change printers very often. My rules have been simple: If I want a fast network printer, I use a Xerox Phaser that has Adobe Postscript 3 built-in. If I want to print photos I use an Epson Stylus Color Photo Printer. Life is simple it works! 


What about Scanning and Faxing?

I’ve used both Epson and Canon scanners over the years and have no real complaints with either. I have always loved Epson’s scanner software, but I’ve also loved Canon’s portable line of scanners and the fact that they are more proactive about updating drivers when a New Operating System comes out. We’ve all experienced orphaned equipment before (equipment that is working perfectly, but will not work with a new OS because the company doesn’t update the drivers).  As far as Faxing goes, I don’t do enough of it to care. I have an older stand alone Brother fax machine for the 1-3 times a year that I need to send a fax and I use a free eFax account or Mac OS X Server to receive faxes directly to my email.


Why the Epson Workforce 600 may change all of this for me?

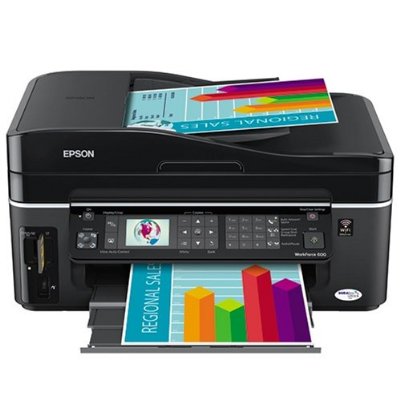
I was recently given the Epson Workforce 600 by Epson to put to the test (the very stringent no B.S. Terry White testing lab). At first when Epson contacted me, I have to admit, I said [sarcasm] "oh goodie, an all-in-one printer to review! I can’t wait [/sarcasm]. When the box arrived it sat in my garage for a week until I felt I had time to give it a spin. Keep in mind that I do take my reviews seriously and I didn’t want to do a half a$$ job on it. So I waited until I would actually have the time to give it a good tryout. I just wasn’t excited about this category. I always felt that stand alone devices were always stronger in their respective areas. Believe it or not, that all changed when I took The Workforce 600 out of the box. I was floored by how well this thing was designed. As I’ve said when reviewing other products, "it’s the little things and attention to detail that really turn me on." I actually started getting excited about this product the more I looked at it and just where everything was placed on it.


Very well thought out

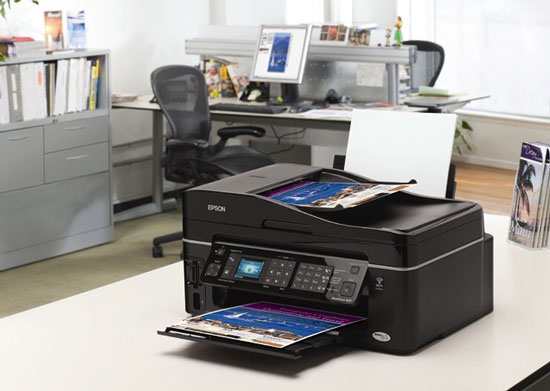
I have to hand it to Epson on this one for creating a very well thought out product. First let’s talk about it’s features. It prints, copies, scans and faxes. It can be connected to your network directly via Ethernet or Wi-Fi. No lame external boxes or print servers required! It’s cross platform out of the box and works both on Mac and Windows PCs. It has an automatic document feeder and built-in memory card readers for CF (Compact Flash), SD, xD and Memory Stick (does anyone use these?). It even has a USB port for a thumb drive (albeit a little to recessed for my tastes, it’s there)! Yep it has it all. It meets all the requirements I would have If I were looking for an all-in-one device! No question!


Setup

Like most techies, I like to see how much setup I can do without looking at the instructions. I was able to unpack it, install the ink cartridges and make copies without ever touching the instructions. I probably could have sent a fax too, but um, I don’t send faxes (at least not often). Now it was time to print. At this point I could have simply grabbed a USB cable (not supplied) and installed the driver and printed. However, I wanted to see how well this thing worked on Wi-Fi. I love wireless technology and a Wi-Fi connected all-in-one device is very intriguing to me. Well it was time to reach for the instructions because I had no idea how to configure this thing to connect to my network. I knew that I either had to do it on the control panel or the from my computer. However, I didn’t know which. As it turns out, you do it from your computer. Although the Epson Workforce 600 has built-in Wi-Fi, you have to connect it to your network via Ethernet to set it up. Luckily they do supply an ethernet cable. I plugged it into my gigabit switch and installed the software onto my MacBook Pro from the supplied CD (later I downloaded the latest drivers from Epson’s site). The software walks you through the various setup options. I was given a choice of setting it up for Wi-Fi or as a network printer on Ethernet. I choose the Wi-Fi option. It found my network and I entered my WPA password. After a few moments the printer was configured and I was instructed to unplug the Ethernet cable.


Printing


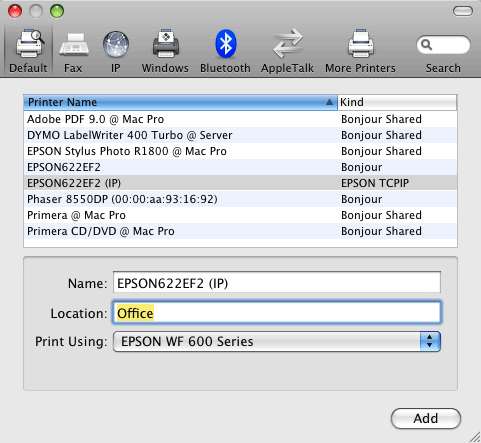
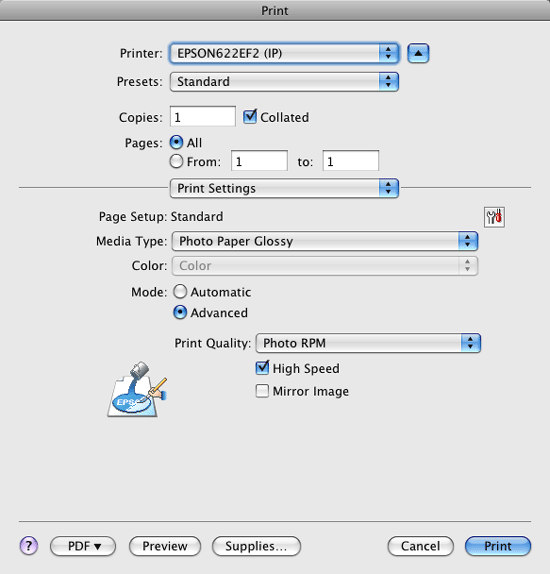
Although the software installed the drivers and configured the printer for Wi-Fi access, I still had to "add" the printer using the Mac OS X System Preferences. No big deal as it saw the printer right away (after I walked over and woke it up) and I printed my first document. No surprises, it just worked. While the printer is rated at 38 ppm in draft mode (wow that’s FAST!) for both Black & White and Color, I was curious about it’s print speed for photos. After all thing has memory card slots built-in so that seems to me that testing photo print time would be fair game. I brought up a high-res photo in Adobe Photoshop CS4 and printed using Epson’s Premium Glossy 8"x10" photo paper. I used the borderless setting and I figured this would be worse case scenario. It was! The high-res print over Wi-Fi took 6 minutes and 7 seconds. While it certainly won’t win any speed contests for high quality photos, it did look great (must be those Durabright Inks)! The color was rich and although this is only a 4 color printer, it didn’t feel like it. Again, this printer is not billed as a photo printer, so you shouldn’t be discouraged by the longer print time. The fact that it printed so well at this price point and wirelessly to boot is a plus.

The Workforce 600 has a built-in 2.5" tilt color LCD to view, edit and print your images. So you can just pop in your memory card or USB thumb drive, select, crop and print your images without using a computer. 


Copying

Copying is pretty straight forward and of course doesn’t require your computer. You can just put your material in the ADF (automatic document feeder) or right on the glass. You control all aspects of the copy process right on the front LCD control panel. Very straightforward and easy to use. You also have the option of copying in Color or Black & White. No surprises, no complaints. You can copy up to 99 pages at a time. The ADF holds up to 30 pages. 


Scanning

When I installed the software it also installed the software to scan with. I was wondering would this thing actually allow me to scan wirelessly? Unfortunately it did not! Although I didn’t find anything in the documentation that would suggest that scanning over Wi-Fi was not an option, the Epson Scan app wouldn’t even launch until I physically connected the Epson Workforce 600 via a USB cable. Once I connected it to my MacBook Pro, I was able to launch the Scan app and perform some scans. It’s a TWAIN compatible scanner, so I was able to scan right into Photoshop and Acrobat as well. Don’t feel like connecting your computer? You can actually perform a scan right on the device itself and have it save to a thumb drive. I tried scanning the same 8"X10" that I printed earlier directly to a thumb drive and it worked just fine. I was prompted with which format to save in and my choices were JPEG or PDF. Makes sense since this scanner is geared towards photos and documents. Those would be my two choices of format anyway. Although I didn’t time the scan, it was certainly fast enough for me. The Scanner is rated at 1200 x 2400 dpi and comes with the ABBYY FineReader for converting scanned text into actual text (OCR).

UPDATE!: Scanning over Wi-Fi via the Mac works after all! Epson lead me to the magic utility that gets installed in the Utilities folder for configuring the Scanner on your network. It took all of about 1 minute to set it up and bam, I could launch the Scan App and scan over the air! Freaky 🙂 


Faxing

Like I said, I just don’t do a lot of faxing. However, when I do need to send a FAX, I need to send a FAX. I don’t have time to mess around. It seems like when I need to send a FAX, it’s always urgent. So with that in mind, I decided to send a test FAX from my home office to my eFax account see how easy or difficult it would be. Like most things on this device, it just worked. I connected a phone line to it and I then pressed the Home button until it cycled through to FAX. I keyed in my FAX number and pressed the start button. I had two pages in the ADF and I like that it scans all the pages first before wasting time dialing. Once the pages are scanned, you can pick them up and leave if you have to. It will dial and send your FAX unattended at that point. It has auto redial and auto answer and can store up to 60 speed dials (I don’t think I know 60 people with FAX numbers, but good to know I could if I had to). If you’re out of paper you’ll be happy to know that it can hold up to 180 received FAX pages in memory. That would cover me for years.


The Bottom Line

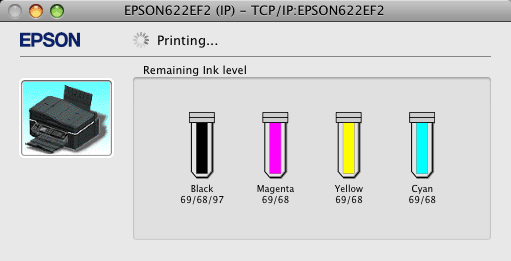
I don’t really have any complaints (rare, I know). I’m not into this category of devices, but If I had to recommend an all-in-one device, this would be the one! It’s perfect for any small office or home office. It’s ideal for someone who is tight on space and doesn’t have the room or the budget for multiple devices. Most multifunction devices usually don’t do any one thing really well, however, the Epson Workforce 600 does a fine job at all of its functions. If Epson works out the Wireless Scanning on a Mac I would even be more impressed. Being able to scan directly to a thumb drive is sufficient for now and keeps me from having to directly connect my computer to the device. Anyone want to buy a Brother FAX machine cheap? Let me know. 🙂 The Epson Workforce 600 retails for $199. Amazon has it for as low as $149.99! As with most printers, the real cost of ownership is the ink cost. This printer has 4 separate ink cartridges (Cyan, Yellow, Magenta & Black). Multipacks start at $35.86. Rumor has it that this printer will NOT allow you to print if one of the inks runs out even if all you want is Black & White. I usually don’t try to keep printing if my printer runs out of one color, but some of you out there do, so that might be a consideration. All-in-all I highly recommend this all-in-one! For more information about the Epson Workforce 600, please click here.


Reading SDHC cards via the ExpressCard slot

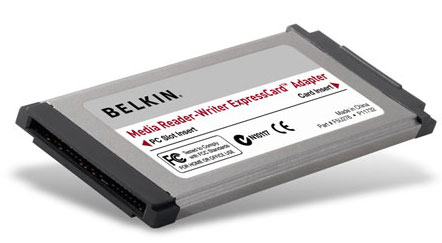
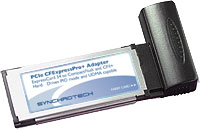
I’ve been using ExpressCard media readers for about as long as I’ve been using a MacBook Pro (years). I’ve used ones from SanDisk, Griffin Technologies, Synchrotech and now Belkin. Hands down my favorite Compact Flash reader/writer is the Synchrotech CF Express Card Reader. This is one of the only ones that takes true advantage of the ExpressCard slot’s speed when reading high-speed UDMA enabled Compact Flash cards. Read my earlier reviews of this card here and here.


What about reading SD cards?

My point and shoot still camera and consumer HD camcorder both use SD cards. So what about those? Although I love my San Disk 12-in-1 memory card reader, it’s really overkill since I’m only dealing CF and SD cards these days. Also since I don’t want to read CF cards at USB speeds, then I would only be using that reader for SD cards. So my answer is a very small ExpressCard Media Reader. I actually have a couple of these. However, I recently realized that the ones I have are older models that don’t read the high capacity SD (SDHC) cards. I ran into this problem just last weekend while doing an Adobe Premiere Pro CS4 demo. I needed the read the 8GB SDHC card from my Canon HF10 HD camcorder. My old Belkin ExpressCard reader wouldn’t mount the card. Luckily there was someone in the audience with a newer model and he let me use his.

Knowing that I was going to need to use one from here on out (SD cards continue to grow in capacity), I stopped by the Apple Store while I was in San Francisco for Adobe MAX. I was looking for the same brand that he had let me borrow (SanDisk). Unfortunately, I could only find ONE model and it was the Belkin. As a matter of fact it was the last one left and it looked just like the one I was using already. However, on the side of the packaging it did specifically show the SDHC logo, so I took a chance and bought it. When I got back to my hotel room, I compared the two and there was a difference in part number. So apparently Belkin had upgraded it. It worked like a charm!

Although these ExpressCard readers from Belkin and others (not counting the Syncrotech CF reader), go in the ExpressCard slot, they operate at USB speeds. So you really don’t gain anything speed wise (until someone develops a native ExpressCard slot one for SD), however, you do gain on compactness. When this Belkin reader is in the ExpressCard slot it’s flush with the side of my MacBook Pro. So nothing sticks out. You could even leave it in all the time if you don’t use your ExpressCard slot for other cards.

These readers read/write: SD/SDHC, MMC, MMCplus, MemoryStick, MemoryStick Pro, and xD-Picture Card without the need for an adapter. There really is no functional difference between the Belkin, SanDisk and Griffin Technology (although the Griffin reader doesn’t specially call out SDHC. It may not be updated yet!) readers. However, since they they all do the same thing and both the Belkin and SanDisk readers specifically list SDHC, you’re probably better off going with the SanDisk. Why? Because it lists for only $17.29, while the Belkin reader lists for $29.99. Had the Apple Store had the SanDisk model for that price, I would have gotten it.

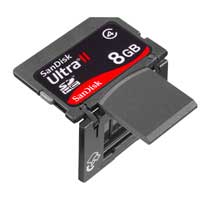
If your Mac or PC notebook has an ExpressCard slot, then having one of these adapters is a must. They will fit in just about any pocket in your laptop bag. If you need Compact Flash support and you have an ExpressCard slot, then go with the Syncrotech. It will be way faster than your USB reader. If all you’re going to use is SD/SDHC cards, then you might be better off going with SanDisk’s very clever Ultra II SD/SDHC Plus Cards. These cards fold in half to expose a USB plug that goes right into your computer. No card reader necessary. They are my FAVORITE SD cards hands down!

How do you recycle your old gear?

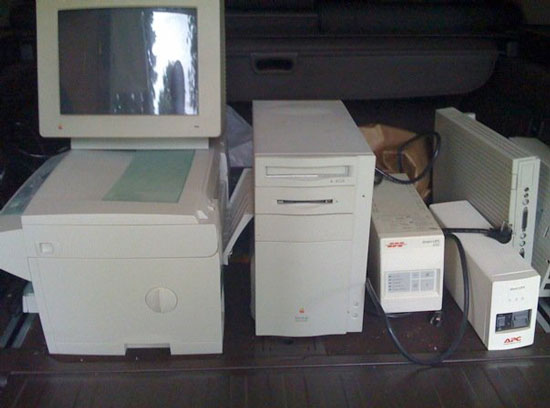
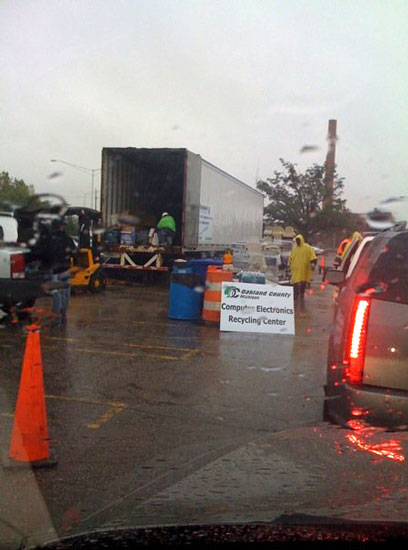
Usually when I upgrade to a new piece of gear, there is a family member, friend or eBay customer that benefits from my old gear. However, sometimes I hold on to stuff so long that it’s just not really worth the effort of trying to sell or pass down. I’ve been guilty in the past of just tossing old outdated electronics in the trash. However, this year I wanted to start doing the right thing by recycling my ancient stuff. Luckily someone posted a message on my user group’s bulletin board about a “recycling event” nearby where you could just drive up with all your unwanted gear and they would take it off your hands. Although I had a million things going on that weekend, I said to myself “when am I going to get another chance like this to dump all this stuff that’s just taking up space?” So I loaded up the back of the SUV and headed over to the lot on a rainy Saturday morning. 

There was a semi truck and a team of people unloading people’s cars. The whole process was painless! I left with a warm fuzzy green feeling about the whole thing and vowed never to just toss electronics again. From here on out I would dispose of my gear properly. If you’re looking for your local electronics recycling place, here’s a good site to start with.


The scary truth about the electronics and computers we discard

In a perfect world our old gear is recycled responsibly. However, where there is a buck to be made, there will be corruption and laws broken. Check out this scary video about the reality of the recycling underworld:


Also check out this Popular Mechanics article: Recycling Myths Debunked – Interest Recycling Facts.

Synchrotech Firewire 800 to 400 adapter

Apple has certainly made a couple of controversial moves in the latest MacBook line up. The New MacBook drops Firewire altogether and both the New MacBook and MacBook Pro come with a glossy screen behind a piece of glass. Luckily, the 15″ MacBook Pro does still include a single Firewire 800 port.

While I’m waiting to receive my new MacBook Pro before passing judgement on the glossy display, I am getting ready for the loss of the Firewire 400 port (the older MacBook Pro had both a Firewire 800 AND Firewire 400 port). Although I do have some Firewire 800 to 400 cables, sometimes you may have cables that are just the right length and rather than go out have to buy all new cables, there’s a simpler option…


The Synchrotech Firewire 800 to 400 adapter

This simple adapter lets you keep using your existing Firewire 400 cables. All you do is plug this adapter into your Firewire 800 port and it converts it to a Firewire 400 port. That’s it! No muss, no fuss.

The Synchrotech Firewire 800 to 400 adapter goes for a mere $9. You can order it here.

Fujitsu ScanSnap S300M Review

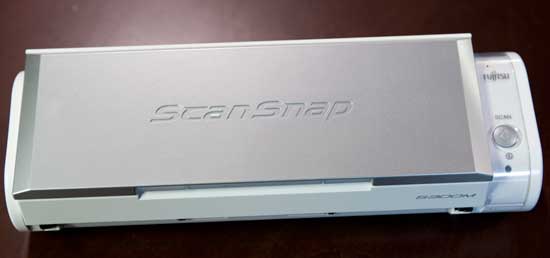
If you’ve been following my blog over the past few months, you know I have had an interest in portable document scanners. The first one that I took a look at was the Fujitsu ScanSnap S510M. I’m still using it and VERY HAPPY with it. Then I wanted something smaller and more portable for scanning receipts. So I took a look at the latest one from Neat Receipts. It fit the bill for the size that I was looking for and has a great app that drives it (especially for scanning receipts), but the hardware pales by comparison to the ScanSnap S510M. So that brings me to the Fujitsu ScanSnap S300M. This scanner is smaller than the S510M, but larger than the Neat Receipts scanner. It’s not as fast as the S510M, but much faster than the Neat Receipts model. So it clearly fits right in the middle of the two in just about every way.

Â

Neat Receipts

ScanSnap S300M

ScanSnap S510M

Speed 4 rpm-receipts per minute (single sided) 8 ppm (double sided) 18 ppm (double sided)
Two Sided Scanning No Yes Yes
Color & B&W Scanning Yes Yes Yes
Size 10.8″Wx1.6″Dx1.3″H 11.18″Wx3.74″Dx3.03″H 11.2″Wx6.2″Dx6.2″H
USB Powered Yes Yes (either USB or AC) No
Scan to PDF Yes Yes Yes
OCR Capability/Searchable PDF Yes No Yes
Auto Document Feader None 10 sheets 50 sheets
Comes with full Acrobat No No Yes
Price $161.85 $266.79 $433.89

How fast is the ScanSnap 300M?

I decided to put all 3 scanners to the test and record it so that you can see for yourself. I took the same 3 documents and scanned them on each scanner. See for yourself in this video:

I like all 3 models

Of course each one has its pluses and minuses. When it comes to eliminating paper on my desk, nothing beats the ScanSnap S510M. I’m still blown away by how FAST this scanner works. I’ve never seen anything like it. I also like its “baby brother” the S300M because it takes up less space and costs less. Also since I already own Acrobat 9 Professional, I don’t need the added expense of having that bundled in (like it is on the S510M). When It comes to scanning on the go and especially scanning receipts, the NeatReceipts scanner is my choice. But what if you only could buy one?

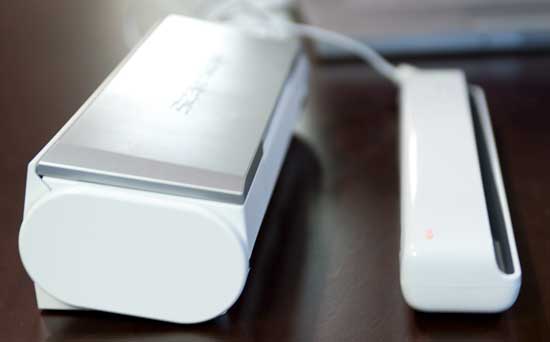
As you can see, the S300M is at least twice the size of the NeatReceipts

Which one is right for you?

Chances are you only need one of these. So it really depends on what you need to scan most and how cost conscious you are. Clearly the NeatReceipts scanner is the smallest and costs less, but it’s also by far the slowest and only handles single-sided documents one page at a time. If you plan to scan a lot of stuff, often, then the S510M would be the way to go. Like I said above, this thing devours stacks of paper without blinking an eye. If you want a happy medium, then I would say go with the S300M. It’s a nice balance between the two. You get double-sided scanning. You get a smaller form factor than the S510M. It can be USB powered for portability and you don’t end up paying for Acrobat if you already have it. The only two downsides to the scanner is that you don’t get OCR (searchable PDF capability built-in), but again if you already own Acrobat, you can do the OCR in Acrobat instead. It’s also a bit bulkier. So you won’t be sliding this one into your laptop bag as easily as the NeatReceipts scanner.

The S300M: Although the S300M doesn’t come with Acrobat or the AbbyFine Reader software like it’s big brother the S510M, it does come with Cardiris for scanning business cards and automatically adding them to your contact manager (such as Address Book on the Mac). The S300M can be USB powered from your computer or powered with the supplied AC adapter. However, I should note that powering it over USB requires TWO USB ports: one for data and one for power. It comes with the necessary cables to either run via USB or AC power.

The Bottom Line

You really can’t go wrong with either one of these 3 scanners. Like I said, I like them all. I do find myself using the NeatReceipts scanner when it comes time to do expense reports at work and the S510M for home/office clean-up and archiving. The NeatReceipts app just can’t be beat for filing receipts and its even improved in a few ways since my initial review.  All of these scanners are available for Mac or Windows PCs. The S510M and S300M are specifically for Mac (that’s what the “M” stands for), but like I said, you can get the Windows version too (the one without the “M”). These 3 scanners are truly a “Good”, “Better”, “Best” scenario. If I could only have ONE of these, it would probably be the S300M. It’s the right balance between performance and features. See the S300M specs here. You can get the Fujitsu ScanSnap S300M for $266.79 here at Amazon.com.