Being a gadget guy, I’m always buying new gear, toys, gadgets, etc. This means that I usually always have something for sale. However, most times the stuff just sits here because of the effort it takes to sell it. For example, this week I’m selling my Nikon D300 DSLR Camera Body on eBay. I’ve learned over the years that when I get something new that I’m not going to keep it forever, therefore I try to keep the original box, cables, manuals, etc. intact so that when that day comes that I want to sell it I have everything ready to go. Even with that effort it’s not as easy as it should be.
Check out Joe McNally’s New Website
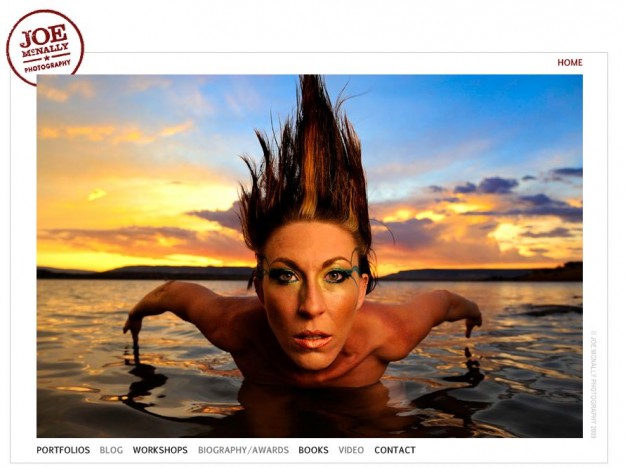
Joe McNally is one of my favorite and most inspiring photographers. He just launched his newly updated website! Check it out here. The man is amazing and his creativity knows no limits.
I’m honored once again!
Earlier this year I had the honor of having one of my photos selected to be published in the 2009 F.J. Westcott catalog. So imagine my delight to find out that I’ve now been choosen as one of Westcott’s Top Westcott Endorsed Pros! Wow!

See more of my work here.
Shooting tethered to an HDTV

As many of you know, when I’m in the studio I’m almost always shooting tethered to my laptop right into Adobe Photoshop Lightroom. Although I’ve got it down to a science, there is still a lag of a few seconds (doesn’t sound like a long time I know, but wait until you’re the one waiting) from the time I press the shutter until the RAW file is transferred via USB 2 to a folder (via Nikon’s Camera Control Pro 2) and then imported into Lightroom and rendered on screen at nice large size. It’s actually pretty amazing that all that happens in just a few seconds.
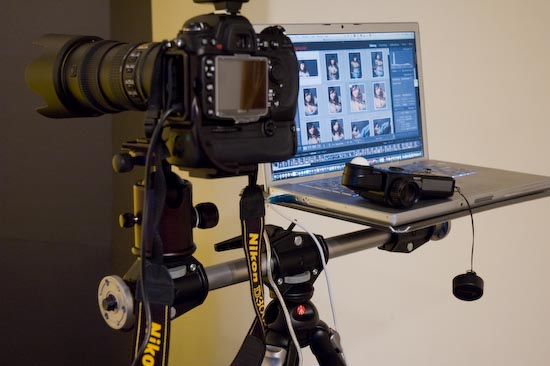
See my laptop set up here.
However, nothing is faster than plugging your camera up to a TV monitor and shooting. You see the shots instantly! You see them nice and big because chances are the TV screen is going to be much larger than your laptop screen (unless you’re using a desktop computer and larger display).
I’ve always wanted to start using an HDTV instead, especially since both my Nikon D300 and Nikon D700 DSLR cameras have HDMI outputs built right in. However, the question has always been “WHICH HDTV DO I BUY?” I’ve experimented with some smaller models and the problem has always been, what I see on the HDTV doesn’t match closely enough to the actual image. In some cases the color can be way off. In other cases the image on screen is much crisper than the actual photo. All of this can lure you into a false sense of security that your final image will look like this, good or bad. That’s why shooting into Lightroom has always been where I’ve been most comfortable because I know what I see in Lightroom is what I actually shot. After all, it’s in the computer and being shown on the display that I’ll be using from that point on to review, adjust and retouch the photos.
–
JVC introduces a New HDTV targeted specifically at photographers
The New 42″ XIVIEW LCD TV is a 1080p set that has one thing that most HDTV’s don’t have and that is the Adobe RGB color gamut. It also has 52 manual picture quality adjustments, which means that you stand a much better chance at getting an image on screen that looks like the image that will ultimately wind up on your computer display. Here’s what JVC has to say about it:
But here’s what truly distinguishes the LT-42WX70: Its color gamut is capable of encompassing 100% of the sRGB color space and offers a coverage rate of 96% for Adobe RGB, making it possible to faithfully reproduce, as an industry first, the striking colors, subtle nuances and unique ambience of D-SLR photographs on a 42″ Class screen. The monitor also offers a selection from one of the six preset modes that are most suitable for the source such as Photo PRO and Theater.
–
OK, now what?
Sounds great! However, here are a couple of things that keep from running out and getting one today. First of all the list price on this baby is $2,399.95. That’s a sizable investment for a guy who only does this as a hobby. Don’t get me wrong, I’m a gearhead and I have no problem spending on the gear that will make a difference, but ouch, that’s a lot of coin to shave “seconds” off my workflow. Yeah, I know that the seconds add up, but again this is a hobby. The second thing is that I would want the option of rotating this display in either a portrait or landscape orientation. That means that I either need to find a special mount or build it myself. Ideally I’d want this on a table or cart that can be wheeled around. I could wall mount it, but that would be just too limiting. So I would need to find or make the right setup for it first.
The Bottom Line: This is a huge step in the right direction! I’d like to see some smaller options too. I actually don’t need a 42″ display. Ideally a 32″ or even a 22″ would be fine. Will this display be near the top of my wishlist? Absolutely! Now that JVC has created the HDTV photographers want, will someone step up and finish it by creating the stands, tables, wallmounts, etc. that rotate and have cable management. While we’re at it and while I’m assigning a list of things to do (manufacturer/invent), how about some wireless tethered shooting methods that are fast enough to handle RAW files and are built-in or easily added to DSLRs? I can only dream…
When I don’t have a photographic assistant

There are times like the shot above, where the sun is cooperating and I can get beautiful light coming in the window. However, there are those other times when the light is too harsh and needs to be diffused. I LOVE natural light!
Ask any photographer who has ever worked with an assistant on set and they will tell you that it’s absolutely fantastic to have some one to hold that reflector or move that light or change that setting. However, most times I’m flying solo when I’m in the studio. Although I get lots of offers from friends that want to volunteer to help me out, I just usually work alone. So the more equipment and gadgets that I can get to help me out the better.
One of my frustrations when shooting natural light coming through the windows is that sometimes I need to diffuse the light. This is where an assistant would come in to hold the diffuser at just the right angle. You won’t believe some of the ways that I’ve propped up diffusers in the past.
–
Lastolite to the rescue, again!
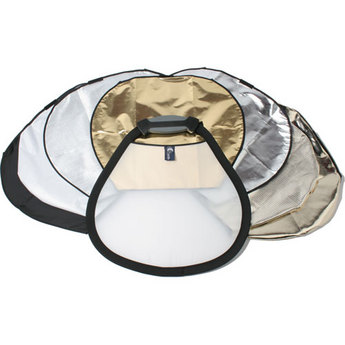
The first item in my bag of tricks is the Lastolite Mini TriFlip 8-in-1 Collapsible Reflector kit. This one does it all. It’s a reflector or a two stop diffuser. If you use it as a reflector you have a choice of white, silver sunfire, sunlite, or gold. You can also use it as a flag because you get black as well. Like I said, having an assistant to hold this up when needed is great, but when you’re flying solo then you’re going to want the next item.
–
The TriGrip Bracket
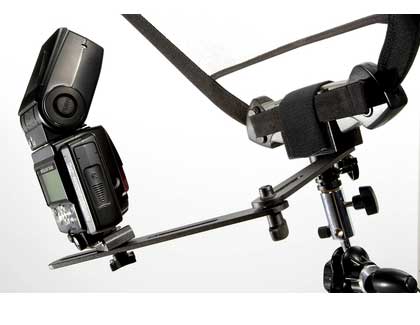
This handy gadget is an adjustable arm that holds your TriFlip Reflector at just about any angle you want by simply putting it on a light stand and adjusting it the way you want. It gets better, not only can it hold your TriFlip/TriGrip reflector/diffuser/flag, but it can also hold your speedlight. This is great for when you want to shoot through the diffuser to diffuse the light. Now you can do it all from just one light stand and you can keep your hands free to actually take the shot.
The Bottom Line
If you have an assistant GREAT! Then you’ve got someone to hold stuff up for you. However, if you work alone sometimes or if your assistant can’t be in two places at once holding stuff up, then you’ll definitely want to check out both the TriFlip and TriGrip Bracket from Lastolite. I highly recommend them both. The Lastolite TriFlip kit goes for $75.95 at B&H Photo. The Lastolite TriGrip Bracket (not yet on B&H’s site – hint hint) goes for $117.90 here.
Scott Kelby’s 2nd Annual Worldwide Photowalk
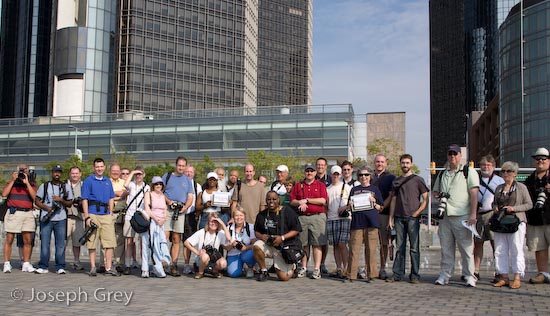
My buddy Scott Kelby just announced his 2nd Annual Worldwide Photowalk to take place Saturday, July 18th 2009. This is a worldwide event with photographers gathering in their local area and taking photos to all be submitted for the big contest or doing it just for fun. I lead the Detroit walk last year and not only did we have a blast, but one of our photographer’s (Jim Howe) photos was a finalist in the contest. I’ll be leading the Detroit walk again this year and as of 9AM this morning it was already half full. So if you even think that you want to participate, you better head over to the site and save your spot no matter what city your in!
Check out our group from last year:
Wacom Intuos 4 Video Review
It seems like it was only yesterday when Wacom introduced the Intuos 4 line of professional pen tablets at Photoshop World Boston. I did a first look on that day and promised to follow up with a more detailed review. Sometimes I’m finding that it’s just easier to show you rather than write paragraphs of text. So here’s another one of my video reviews showing some of the most important and my favorite features of the new Intuos 4:
–
The Bottom Line
The more I use the Intuos 4 tablets the more I just love them! If you spend ANY time in Photoshop or Illustrator, these tablets are a MUST HAVE! Both Photoshop and Illustrator’s tool sets take advantage of the pressure sensitivity of the Wacom tablets. I still love my Cintiq, but when I have to travel with a tablet or just want to use one around the house, I reach for either my Intuos 4 Medium or Small tablets. The Intuos 4 Small stays in my laptop bag and goes everywhere I go.
Intuos Small $199.99 (List Price $229)
Intuos Medium $335.98 (List Price $369)
Replace that stranger with a stick
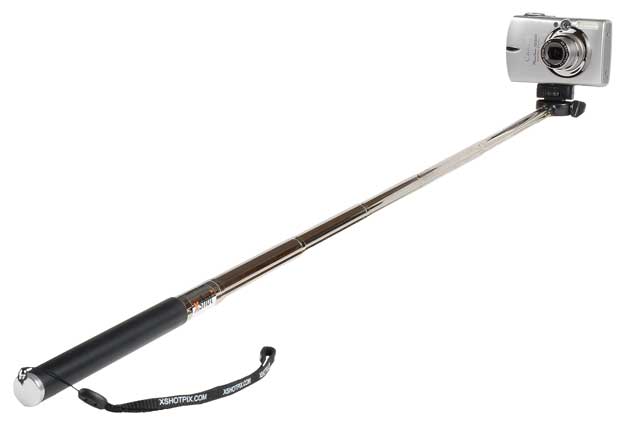
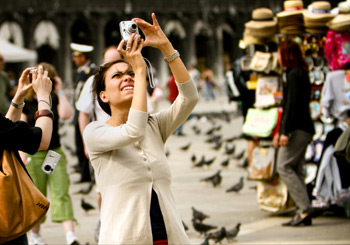
We’ve all been there at some point. You’re out and about either alone or with that special someone or family member and you want to be in a picture with. The problem is that if you didn’t bring a tripod, you’d have to rely on a stranger to take your camera and take the picture. While this seems like a relatively simple task, I’m always floored by the way people act as if they’ve never even seen a camera before. Let’s face it, the shutter release has been in the same spot for the last thirty years. Yet we always hear “what do I press?” Next there’s the whole auto focus, press the shutter down half way thing. I don’t even want to go there with that one.
You might want to get an XShot
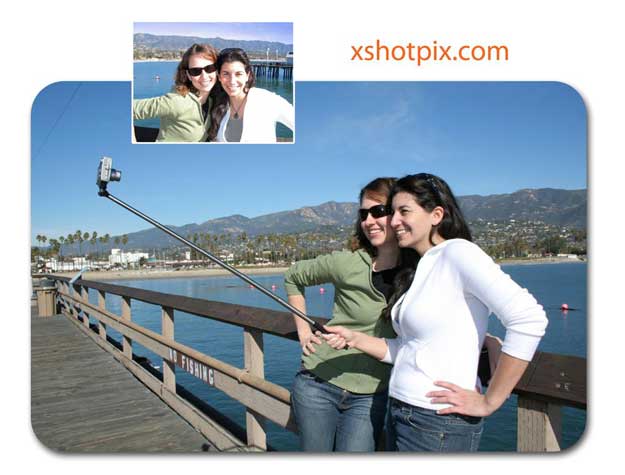
I was at my Mac User Group meeting a couple weeks back and one of the members (Wanda) came up to me and she was showing off her XShot. The concept is so simple, it makes me think “now why didn’t I think of that?” Basically the XShot is a telescoping arm with a tripod mount on the end that can swivel. The idea is that you set your camera to use the built-in timer feature, extend the XShot arm and press the shutter. You have a few seconds to pose or look natural while you hold the arm of the XShot out of sight. Being a gadget junkie, I had to order one of these and try it out.
How well does it work?

The XShot works as advertised. I mean there’s not much to it. I was taking pictures with it within minutes of taking it out of the packaging. It took me longer to figure out how to set the timer on my Canon Powershot 850IS than to actually get the XShot ready. Although the XShot does exactly what it’s designed to do, there are a couple of things you might want to think about. The first thing is that whole framing issue. Since you can’t see the LCD screen, you’re totally guessing on how to frame the shot. However, you’ll probably still do a better job blindly than the average stranger you were using before. The next thing is the auto focus feature. My Canon has Face Detection, but when I reach out to press the shutter and start the timer, I’m not quite in the frame when the camera focuses. In my testing with two people this wasn’t an issue, however, taking a picture of yourself might require you to bring the camera in closer to get the proper auto focus.
The Bottom Line

For the $19.95 ($29.99 list price) price, it’s not bad. It’s cheaper and smaller than most other solutions I’ve seen. It’s also can offer a huge improvement over the typical Myspace/Facebook profile pictures that I see out there so much (you know the ones where you see the person’s arm in the shot as they try to take their own pictures? Or worse the ones taken in a mirror in the bathroom?). The XShot folds down to 9″ and extends up to 37″. It weighs only 5 oz. Amazon has it for only $19.95.
Another great evening! Thanks!
click to enlarge
Once again I want to thank all of you who attended my "Evening with Terry White – My Photoshop Lightroom Workflow"! I’m very pleased with the turn out and the enthusiasm that you all expressed. We also had people attending from Europe and it was after midnight their time. So thanks for hanging in there.
The recording
If you couldn’t attend live, I did record the session and you can watch it here.
Some follow up Q&A
Q. How can I learn more about DNG?
A. Check it out here on Adobe.com.
Q. Are there any good deals on Lightroom 2?
A. Yes, here for the full version and here for the upgrade.
Q. You mentioned a 3rd party web gallery that you use for showing client proofs. Which one is it.
A. I use The Turning Gate Client Response Gallery. Check it out here.
Q. You showed how to upload pictures form Lightroom to Flickr, Facebook, etc. How is that done?
A. I use third party plugins. Here are a few: Flickr, Facebook, Smugmug, iStockPhoto.
Q. Which GPS do you use with your camera?
A. I geotag my photos with the di-GPS Pro for Nikon cameras.
Q. Where can we see the Arizona shots you took?
A. Right here.
Q. Where can I see more of your videos, presentations, etc.?
A. Check out my Adobe Creative Suite Video Podcast.
Q. When you were retouching the photo, you said you were using a Wacom tablet. Which one was it?
A. It was the New Wacom Intuos 4 Medium Tablet. See all my gadget and gear recommendations here.
iPhone App of the Week – Mobile Fotos

If you use Flickr.com and you have an iPhone/iPod touch, then you’re going to want this app! It is by far the best app I’ve seen to date to browse and upload to Flickr.
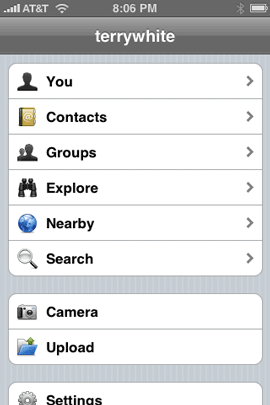
Not only does it let you bowse your own photos, it can use your current location to show you photos that were taken nearby by others.
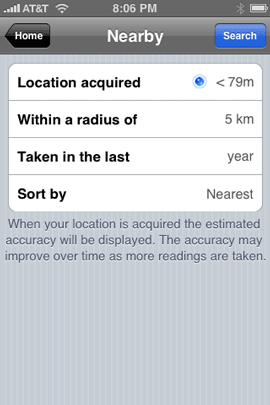
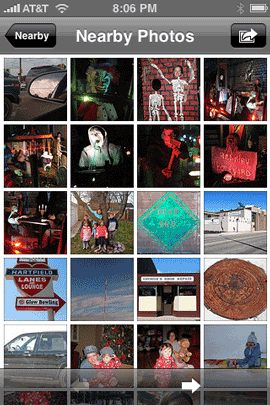
I’ve used other apps that let me upload to various services. However, this one is great in that it lets you properly tag the photo and pick the photo set you want it uploaded to before you actually upload it. You can also use Mobile Fotos to view videos on Flickr. I haven’t played with this as I don’t have any videos on Flickr yet, nor do any of my friends. Currently videos are limited to 90 seconds and 500MB on Flickr. So for now I’ll stick with YouTube.
Uploading
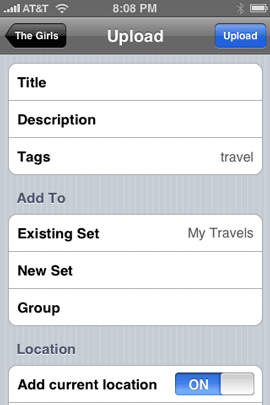
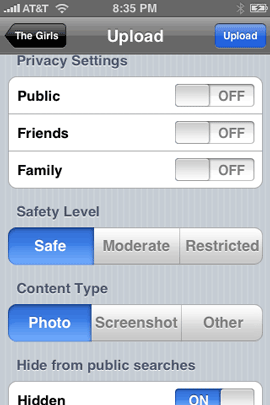
One of the main reasons I use Mobile Fotos is to upload snapshots I’ve taken with my iPhone. The upload feature is the most full featured uploader I’ve ever seen in any iPhone app. It let’s you use every option available for Flickr just as if you were uploading from your computer. You can choose a Title Description, Tags, Set (including creating a new Set on the fly), Group, Location, Privacy settings, Safety Level, Content Type, whether or not the photos hould be Hidden and Resolution. Yep, it’s full featured and this should be the model for all apps that let you upload to a photo service. Even Apple’s built-in upload to MobileMe could learn a few tricks here and seems anemic by comparison.
It Geotags too
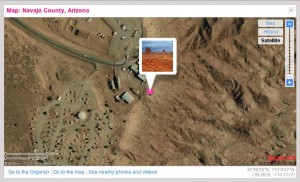
One of my favorite features of Flickr is that it automatically adds your photos to the Yahoo map if they contain location information (longitude & latitude). Of course when you take a picture with your iPhone’s camera you have the option of including location information. Mobile Fotos uses that location information and includes it in the upload.
Not always about you
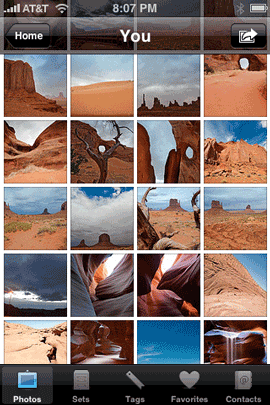

You can also tap the Contacts icon to see the latest and greatest shots of your Flickr Friends. This really allows you to not only share your photos quickly and easily as they happen, but also to see what’s going on with your friends and family that also use Flickr. You also browse your Flickr groups!
The Bottom Line
There’s not much else I can say! This app totally rocks and does exactly what it’s supposed to do. It’s easy to use, full featured and works great. If you use Flickr, this is your app! Mobile Fotos is $2.99 and available at the App Store here.
