

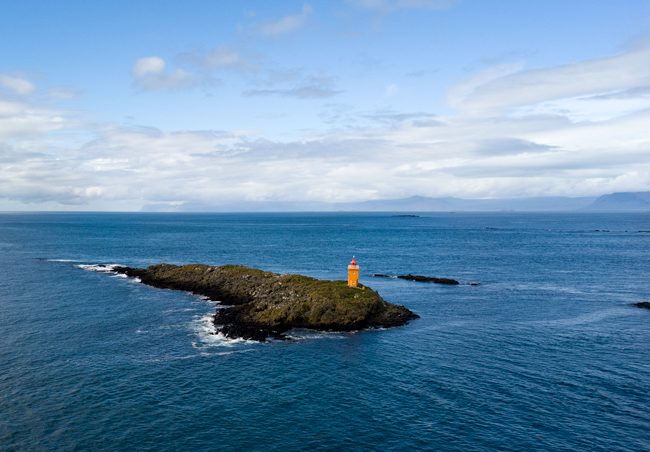
When I got my DJI Mavic Pro drone
Your Mavic Pro settings will make or break your images
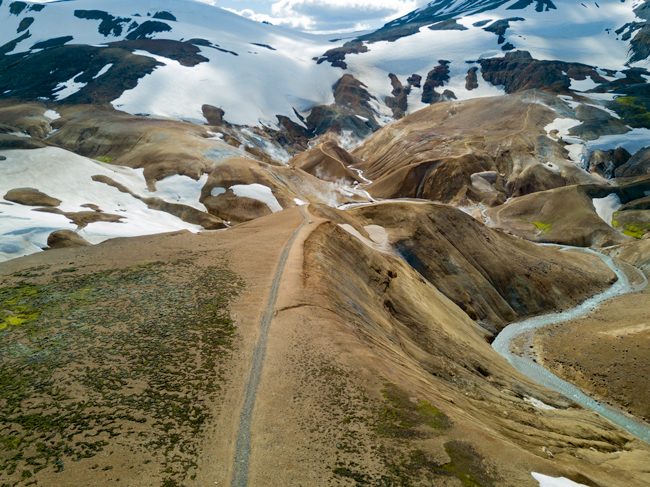
I realized by accident, how much better the images could be. I did a firmware update at one point while I was in Iceland and hadn’t realized that all of “my settings” had somehow reverted back to the factory defaults. I flew capturing images and when I landed and transferred the footage I realized that the images were in JPG format. I knew that I had set my format to DNG (Raw). However, when I looked that the images I was blown away! They were STUNNING! The colors were rich and the sharpness seemed to be right on the money. Having been a photographer for over 10 years I know that Raw files out of the camera are typically flat and dull looking. This is because they are unprocessed. After seeing the JPGs I knew that the camera was capable of giving me what I wanted, but I just had to find the magic settings to get past this over sharpening problem. I searched and found some good videos, but the one thing I found was that usually each person contradicted the next. In other words beauty is in the eye of the beholder. You have to find the settings that YOU will like best. With that said, I’ll share mine and then share the one setting you may want to tweak to find the right look for YOU.
In order to change your photo and video settings you’ll need to power up your drone and controller as well as the DJI 4 Go app. In other words get it ready to fly even if you don’t plan to actually do a flight right now. You can even do this indoors if you want. Just don’t actually take off unless you want to.
Let’s start with the photo settings because there’s only a few differences for video. When you get into the DJI 4 Go app tap the settings button for photos:
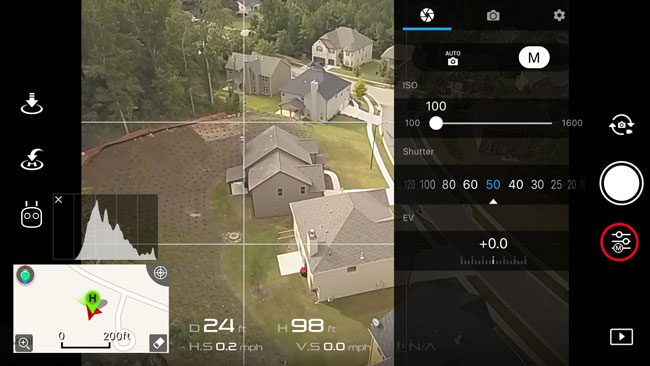
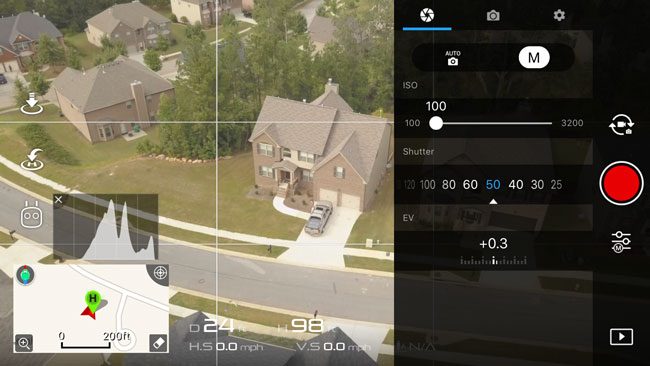
Your first choice will either bet to shoot on Auto or Manual. Of course this is totally up to you. In manual you can adjust your ISO and Shutter speed. There is no option to adjust Aperture on the Mavic Pro. If you want to dial in a specific shutter speed then manual is the way to go. If you want to not have to worry about it then shoot on Auto. I do both.
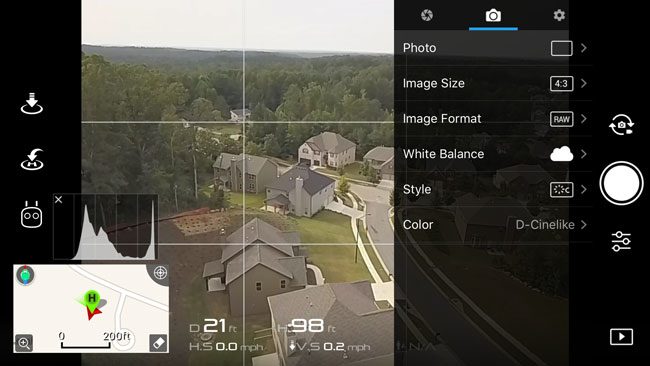
Photo: In the 2nd tab you’ll have more choices to make. Photo allows you to choose between a single still, bracketing, HDR, Timed, etc. In most cases you’ll do a single frame. I do like the HDR option a LOT! I use these two the most.
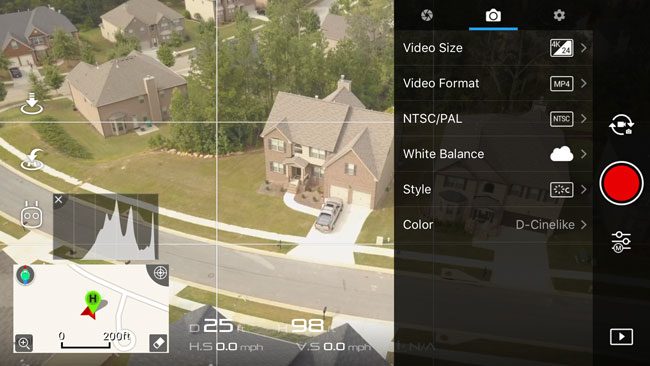
Image Size: You can use 4:3 or 16:9. I use 4:3 for my stills.
Image Format: Since I want the best possible image that this little sensor can capture, I almost always shoot Raw. The files will be larger and the other downside is that DJI still doesn’t allow you to wirelessly transfer Raw files to your phone (I wish they would change this since I have Lightroom Mobile and edit Raw files on my iPhone now). With this in mind if I want to share some shots immediately I’ll sometimes switch to Raw + JPEG. This will give you both a Raw and Jpeg of each image you take.
White Balance: You should set the White Balance to the conditions that you’re shooting in. Most likely either Cloudy or Sunny.
Style: Believe it or not this is the setting that will either make or break your stills and footage. The default style is way too sharp in my opinion and when you shoot in Raw it just makes certain details look like “mush”. This is also the setting that not too many people agree on the same setting. What I have found to work best for me is:
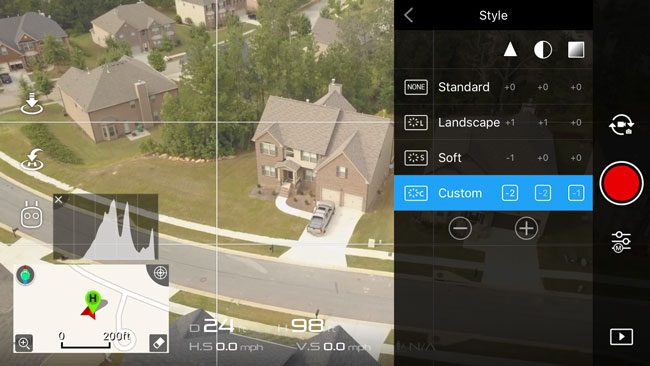
Here you’ll definitely want to choose anything other than Standard! I use Custom and set the sharpness to -2, contrast -2 and Saturation -1. Some will suggest the opposite and go more sharpness. I think it really depends on if you plan to take whatever you get out of the camera and post process it or use it as is. This of course will change how you approach these settings. Do a test flight and adjust these settings on the fly and snap a picture after each change. Then compare them to get the ones you like best for what you plan to do. My settings will result in a relatively FLAT DNG Raw file or 4K video, because I plan to adjust them in Lightroom and Premiere Pro CC in post.
Color: The last setting here is to choose a color mode. I like the D-Cinelike option.
Now switch to the last tab (the gear).
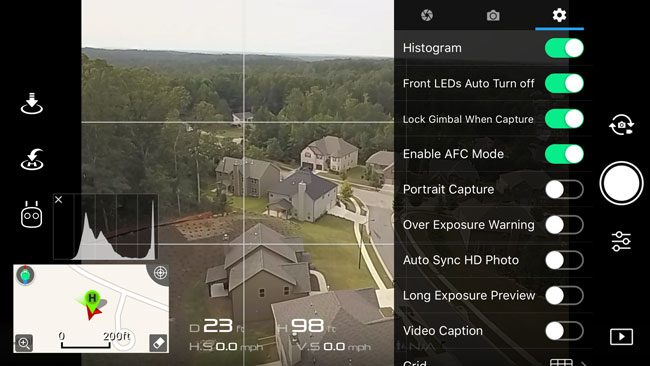
Turn the floating Histogram on. It will help you to see your dynamic range. In the example above at first glance the highlights look hot!
Front LEDs Auto Turn off, set to ON. This will turn them off while filming to prevent glare.
Lock Gimbal When Capture, set to ON. This is for stills and good for long exposures reducing blur.
Enable AFC Mode, set to ON. This Auto Focus Continuously is obviously good for video as it will keep auto focusing without you having to tap the screen constantly.
Scroll down:
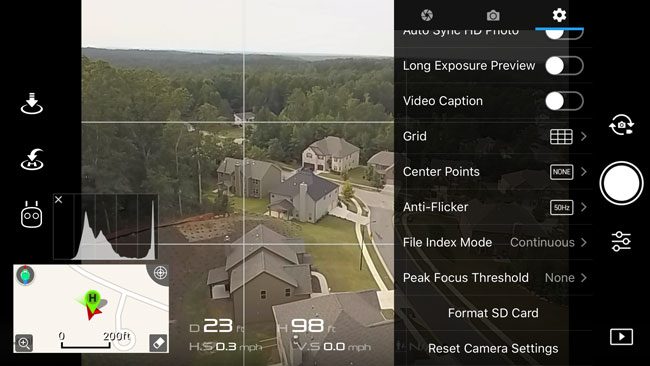
Set the Grid to Rule of Thirds to help you compose your shots.
Anti-Flicker should be on 60Hz in the US, but for whatever reason I haven’t been able to change it.
File Index Mode definitely set this to Continuous. Otherwise the count will reset back to 1 for your pictures with every new/erased card. For the life of me I don’t know why this isn’t the default.
Now for the Video Settings
Fortunately for this post, but unfortunately in general the photo and video capture shares most of the same settings. I truly wish they were separate because I don’t necessarily want the same Style for video as I do for photos. However, until they change this, it is what it is.
Toggle the Camera icon above the shutter button to switch to Video
Usually you’ll want your video in manual mode so that you can set your shutter speed to twice that of your frame rate. I shoot 4K video at 24fps, so I’d want my shutter speed ideally to be at 50. However, keep in mind that on a sunny day this setting may be hard to achieve without the use of ND (Neutral Density) filters
Video Size: 4K/24fps 3840×2160
Video Format: MP4
The rest of the settings are the same as above for stills. Again for Style you may want to experiment if you don’t like my Custom -2, -2, -1
One more thing…
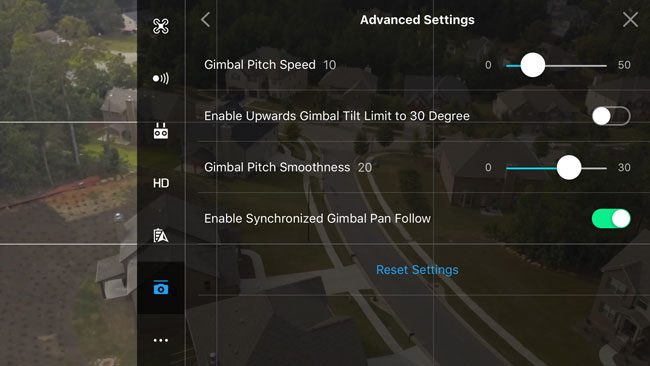
This last setting is not a photo or video setting. It’s a gimbal setting. Your RC controller can move your camera up or down at the turn of the left wheel. However, it’s way to fast by default. Go into your advanced settings menu from the main menu (•••) in the upper right corner of your display. Tap on the gimbal icon in the lower left.
Set your Gimbal Pitch Speed down to 10 (sounds slow, but you’ll love it).
Set your Gimbal Pitch Smoothness to 20 to take the jerk out of your gimbal movements up/down. This will be like an Ease In.
Here’s my latest video project shot with the DJI Mavic Pro:
The Bottom Line
You can have a lot of fun with the Mavic Pro out of the box. However, if you bought it for taking pictures and video then you’ll definitely want to use the settings above. They will make a big difference. After I changed my settings in Iceland and saw the first video afterwards I had a big smile on my face. I was finally happy with the camera on the Mavic Pro.
Thanks Terry – really useful to get your thoughts, particularly on the sharpness debate. I keep thinking DJI must fix some of these things in a firmware update because the first thing anybody does is change most of the defaults!
No problem, yeah many of the defaults make me say “who would ever want this to be the default?” I’m guessing they tune it out of the box to get s goid jpg without changing anything for the non-pro.
The gimbal pitch speed setting will be very helpful, as I have found my videos way too jarring. Another question: I’ve had problems with the maximum altitude. Even though I’m not on beginner mode and I’m logged into my DJ app, the Mavic won’t fly above 30 meters. Any suggestions?
Make sure you update your firmware and that you’re not trying in a no fly zone.
I’ve learned from the web that the Style settings for Sharpness below +1 will make the noise reduction kick in in surprising times making some details mushy. It’s kind of hit or miss if it will kick in or not but the situation is Sharpness settings -3, -2, -1 and 0 can’t be used if you don’t want noise reduction to kick in (even with the lowest ISO setting).
You haven’t run into this issue with your Mavic?
Thanks Terry! This is awesome! Can’t wait to tweak the settings and fly!
Not a Drone question ( even though I have a Mavic and Yuneec drone):
Great tutorials, ..my question..I finished a bluRay for someone and delivered it 5 months ago June 2017, and they just now saw it Dec 15, 2017.. they only had one complaint. instead of Mr. and Mrs. it reads Mrs.and Mr. , now I deleted all material from computer and backup hdd, But I do have the .ISO I burned within Encore CS6, is there a way to correct the “Mr. and Mrs.” error, what would be the work around?..Thanks..?Also forgot to mention, the error is only in the menu, and I do have a BD-RE Backup of completed video. Thakns again.?