Using Tether Tools in a way they never intended

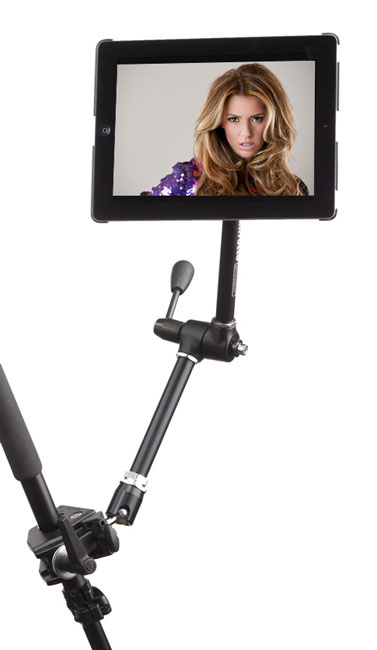
Anyone that follows me and follows my photography knows that I’m a fan of shooting tethered. Last week I had the good fortune of meeting with a TetherTools rep. She showed me some samples of their newer products for mounting iPads to various things such as tripods and tables. As you know I recently reviewed the clamps from TripodClamps.com. A product that I’m quite pleased with. However, I try not to put on blinders and I’m usually willing to look at other solutions. I’ve followed TetherTools for some time now as they relate to Digital Photography, but it was neat to check out their iPad products too. I left that meeting with a few samples: Wallee iPad Case for iPad 3 – Black, Wallee iPad Connect Bracket, Wallee Connect Lite Bracket Rock Solid Mini ProClamp Rock Solid Articulating Arm with Center Lock 7″ and the Handstrap. Now keep in mind that a couple of these pieces have overlapping functionality. For example you wouldn’t use the Handstrap and Articulating Arm at the same time. Nor would you use the Connect Bracket and the Connect Lite Bracket at the same time. I left with solutions for mounting an iPad in a variety of different situations.

Using Tether Tools in a way that they hadn’t thought of
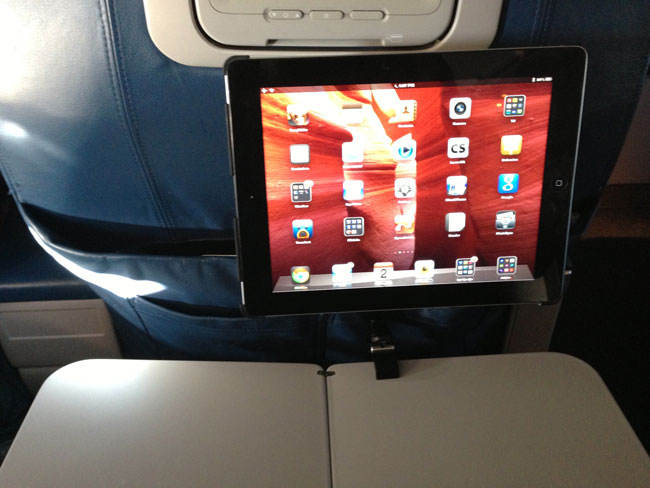
On the flight home I decided to test a theory that RC, Brad, Pete and I had during the meeting. I decided to use the Tether Tools Wallee iPad Case, Wallee Connect Lite Bracket, Rock Solid Mini ProClamp and Rock Solid Articulating Arm to mount my iPad on my tray table. The idea was to get the iPad up and at a comfortable viewing angle and freeing up the table for the in flight meal. It worked great! As a matter of fact, had I had these for sale the flight attendant would have bought one from me on the spot. Actually that brings me to the problem with using it this way. If you’re buying this gear as a professional photographer and plan to mount your iPad as part of your digital photography workflow, then this makes a great solution. However, if you were buying this just to mount your iPad for inflight use then it would be a tad bit pricy and cumbersome to travel with. This solution could work very well for mounting your iPad as an inflight entertainment system, but it would need to be streamlined a bit. It would need to be sold at a lower price and as perhaps a single kit. There’s no doubt that you could use this solution in a variety of settings. Just last week I used it to record the video on the Pocket Socket generator that I reviewed. Yep, that was an iPad video with the iPad mounted to my desk. However, for the personal looking for a single solution for iPad travel then it would be overkill unless Tether Tools repackages it for that audience.

Be sure to check out Tether Tools’ other solutions for digital photography and iPad mounting here at tethertools.com.
Charge Your Cellphone During a Power Outage

One of the lessons that Hurricane Sandy taught us is that Mother Nature can strike at any time and as a result you could be without power for days. My heart and prayers go out to those affected by the hurricane. To make matters worse another storm is bearing down on the northeast. While generators are great, there could be situations where there is no gas to run them. In those cases you are probably going to want to at least keep your cellphone going at a minimum.

K-TOR Pocket Socket Hand Generator Can Save The Day

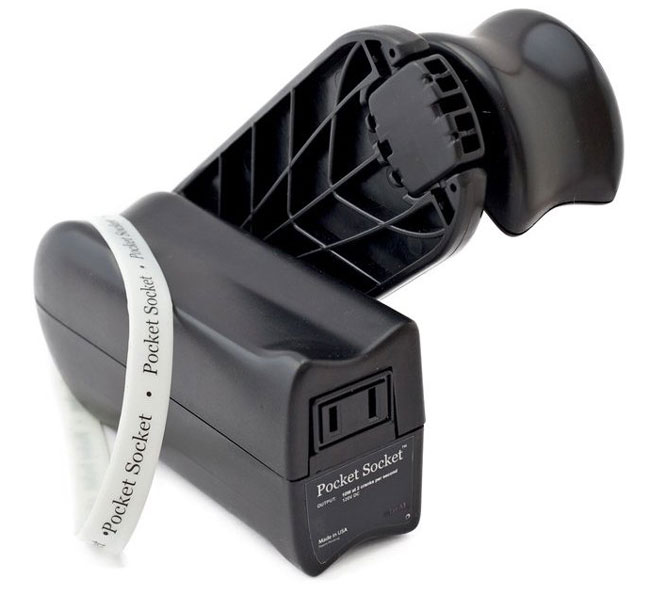
Having a portable hand crank generator may be the difference between a charged cellphone battery and a dead one. The concept is simple. Plug in your USB charger in to the standard AC outlet on the Pocket Socket and plug in your phone. Then start cranking. Unfortunately there is no free lunch. If you stop cranking the handle, then you stop generating electricity and therefore you stop charging. You will definitely get a good workout for the time it takes to charge your battery, but I’d be willing to bet there were some folks out there that had no power and therefore a dead phone who would have had no problem cranking this handle for as long as it took to charge up there devices.

http://www.youtube.com/watch?v=mQ5k36KZwX0

The K-TOR Pocket Socket generates 10W 120v DC at 2 cranks per second. How long does it take to charge your phone? The answer is the same amount of time it takes to charge your phone now. If you can get a decent charge in 10 minutes, then you will have to crank for 10 minutes.

You should definitely make one of these part of your emergency preparedness kit!

You can get the K-TOR Hand Crank Generator here.

I also keep one of these charged for shorter power outages.

UPDATE

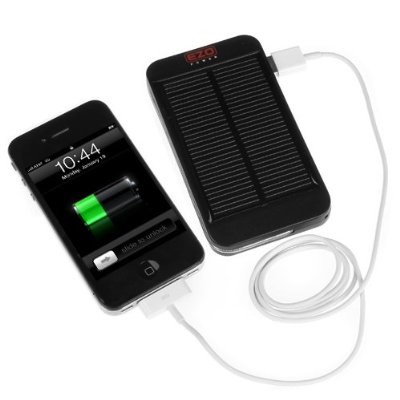
Some of my readers were asking about or suggesting solar options. A solar charger is a great way to go too as long as you’ve got access to the sun 🙂 The nice part about this particular one is that you can charge it during the daylight and charge your phone each evening even if the sun has gone down.

Get a great one here.

iStabilizer Mount for Smartphones

There is no doubt in my mind that smartphone photography is here to stay and in particular iPhone photography has become a category in and of itself. With that said, people are always asking me about various mounts to mount their iPhones and other smartphones to tripods. I’ve reviewed different ones here in the past and with each one there were pros and cons. In the past the problem was that in order to have a really good mount you really needed one that your iPhone would go into like a case. However, the downside to this is that if you already have a case you would have to take your case off in order to put your iPhone into the mount-case. The other problem is that the iPhone changes form factor every couple of years. The iPhone is different from the iPhone 3G/3GS is different from the iPhone 4/4S and different from the iPhone 5.

iStabilizer is more universal

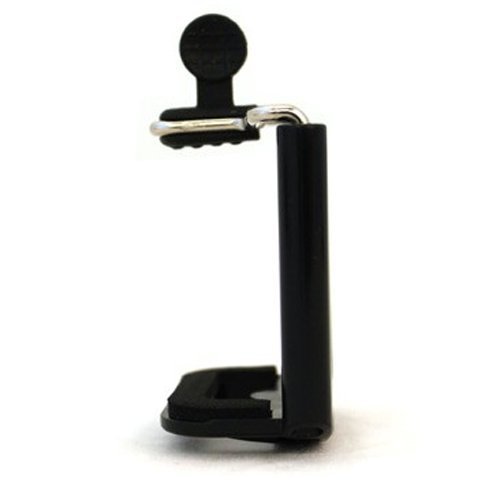
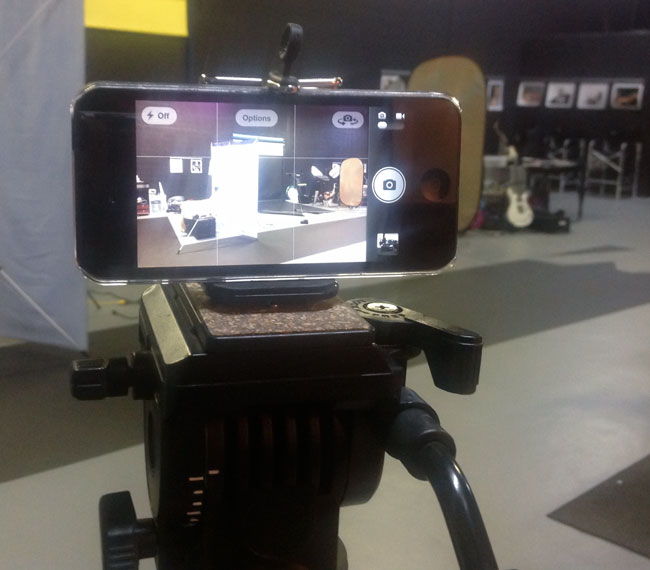
The iStabilizer Mount isn’t designed for a specific type of smartphone. Instead it’s more like a universal clamp that holds your iPhone or other smartphone in place. It’s spring loaded. Just pull the top up, slide your smartphone in and gently release it.  The great part about this mount is that you can leave your smartphone in its case. Another great thing is that it’s fast. No need to put your smartphone in a special case or holder first before mounting. It has a standard tripod mount on the bottom. Below is a pic of my iPhone 5 in the Caze 0.5mm clear case mounted on my Sony tripod.

What’s the downside?

The only downside to this mount is that it doesn’t allow for vertical mounting. The clamp isn’t tall enough to mount a smartphone in the portrait position. However, since it does hold the smartphone very firmly in place if your tripod head can tilt then you could potentially take portraits by simply rotating the tripod itself. It’s now a permanent fixture in my laptop/travel bag.

You can get the iStabilizer mount here.

If you doubt that iPhone photography is real, check out this cover of Time Magazine that was shot with an iPhone by photographer Ben Lowy. See the story here:

How To Get Started With Adobe InDesign CS6 – 10 Things Beginners Want To Know How To Do


In this episode of the Adobe Creative Suite Podcast Terry White shows beginners How To Get Started with Adobe InDesign CS6 – The 10 Things Beginners Want to Know How To Do. InDesign is a core piece of the Creative Suite and Creative Cloud. This video takes the approach of showing beginners how to do the things they usually want to know how to do right away. See how to create a layout from scratch.

Are you missing out on my Bonus Content?

See more of my Adobe Creative Suite Videos on my Adobe Creative Suite Podcast and get the App here. It features EXCLUSIVE CONTENT that no one else gets to see. This episode has a BONUS CLIP that is available only in the App! My iOS App is a Universal App for iPhone, iPad and iPod touch. I also have an Android version on the Amazon App Store:

Learn Adobe Creative Suite with Terry White - Wizzard Media

Adding an iPad Mount to My Tripod Rig

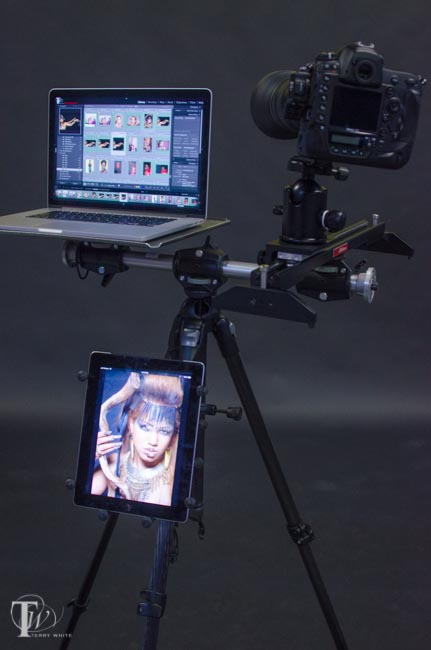
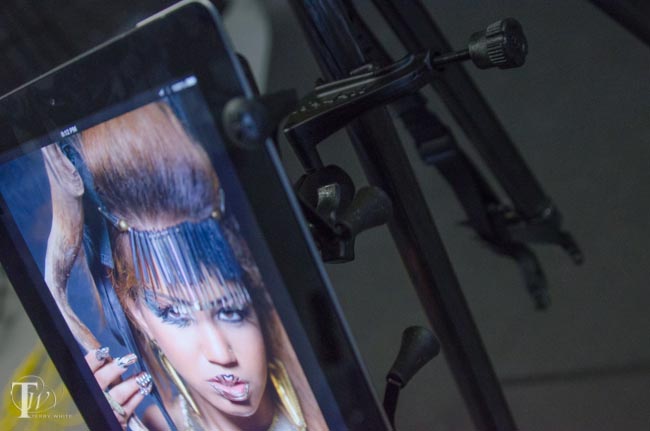
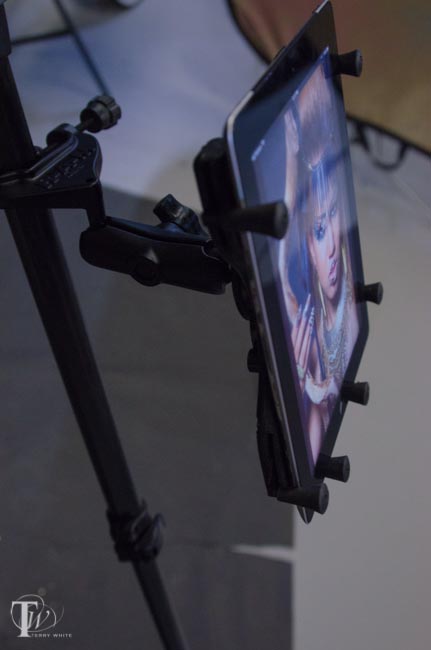
I’ve been shooting tethered for years. Judging an image via a 3 inch display on the back of my DSLR is a last resort for me. I prefer shooting tethered to my MacBook Pro Retina Display and into Adobe Lightroom 4. Now I have a choice. I can also shoot wirelessly to my iPad. This is why I was interested in the new iPad Clamps and Mounts from TripodClamps.com. I will use this iPad mount mostly on location when shooting to my MacBook Pro may not be as feasible. The mount can clamp to just about any tripod and is very adjustable. You can pretty much tilt the iPad to any viewing angle. and more importantly it holds it very securely. It’s easy to put the iPad in the mount and take it out again with a quick release.

Here’s what’s in my Tripod Rig Setup Above


Nikon outs a New 70-200mm f/4 Lens

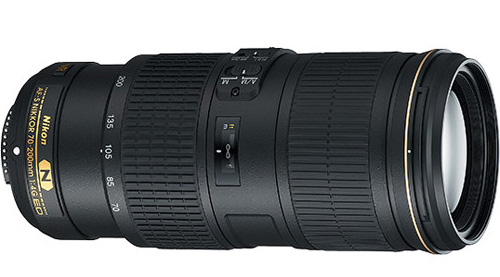
The Nikon lens that I use the most is my beloved 70-200mm f/2.8 VRII. I use it for the majority of my studio photography. I rarely travel with it because of the size and weight. I was intrigued to see that Nikon just announced a less expensive, smaller and lighter 70-200mm f/4 VRII.

I’m still quite happy with my 28-300mm lens for casual travel (when I only want to carry one lens), My current travel camera is a Nikon D7000 , but I’m eyeing the D600 as a replacement and at that point I’d be 100% full frame on my bodies and lenses. Decisions, decisions!

You can pre-order the new lens here.

I Went With a Caze Zero 5 for my iPhone 5

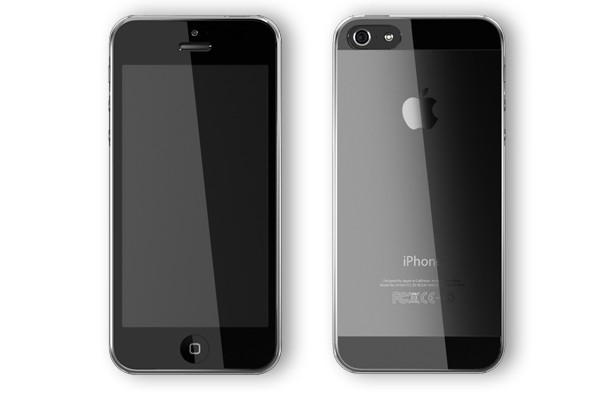
When I wrote my iPhone 5 review, I indicated that I was waiting for the case that I really wanted to arrive. Well it did and I love it. I can probably count the number of times that I’ve dropped my iPhone (all models) on one hand. I tend to be pretty careful, but as the saying goes S*it happens. Also the black iPhone seems to scratch more easily than previous models. For that reason alone I tend to protect my devices with either a Gelaskin, a case or both. I will ultimately put a custom Gelaskin on the back of my iPhone, but I also wanted “some” protection in case I drop it too. I’m not a fan of cases that add bulk and weight. Therefore I was looking for something really thin and if possible CLEAR. The Caze Zero 5 iPhone 5 was exactly what I was looking for. This is the thinest case I’ve seen and being clear it doesn’t detract from the beauty of the device. Also being so thin means that it fits in my holster.

You can check out the Caze Zero 5 here on their site.

Wacom Cintiq 24HD Review

I can’t imagine doing photo retouching in Photoshop without using a Wacom tablet. As a matter of fact I refuse to retouch without a tablet unless it’s an emergency. I’ve been a serious user since the Intuos 3. I’ve enjoyed the Intuos4, and Intuos5 as well as the Wacom Cintiq 12wx and Cintiq 21ux. Although I’ve owned a couple of Cintiqs I find that I used the regular Intuos tablets more often. The Cintiq line has been great and it’s awesome being able to draw/retouch right on screen, but the problem has always been “positioning”. While I could hold the Cintiq 12wx in my lap it still required some finesse to be able to hold it, draw, and have a hand free for occasional trips to the keyboard. The Cintiq 21 ux amplified this issue with no real way to bring it to my lap and I couldn’t really get an angle that I enjoyed more than a few minutes. So I used my regular Intuos tablets more often.

The Wacom Cintiq 24 HD changes everything!

It’s easier to show you rather than tell you. See my video below:

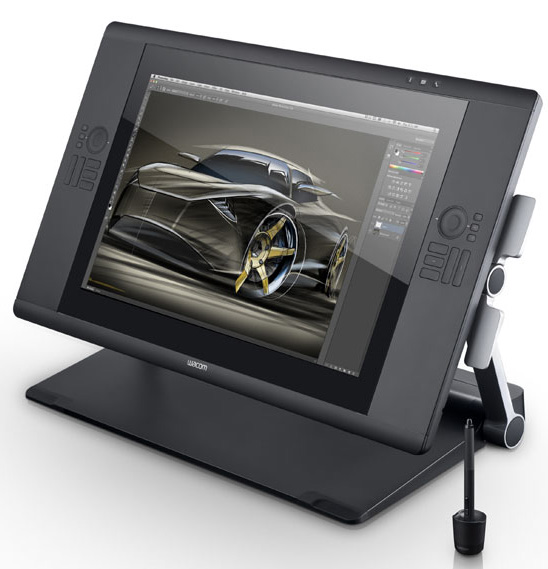
Not only is the Cintiq 24 HD a work of art, but they figured out a way to give me the angles that I always wanted. With the innovative new stand I can position the this 24″ HD display off the table and down into my lap to work. However, I don’t have to bear the weight of it actually on my lap. It floats there where I want it to be. The Wacom Cintiq 24 HD has all the bells and whistles you would expect. It has a gorgeous LCD HD display with 2,048 levels of pressure. It’s like having a large Intuos 5 built into a large display. You get 5 touch keys and a touch ring on each side. Each of these keys and rings can be programmed with different functions in different apps.

The Only way the Cintiq 24 HD could be better is to have multi-touch gestures! Oh, by the way, Wacom did that. The Cintiq 24 HD Touch is everything above with multi-touch gestures. They also make a less expensive 22 inch model too.

Wacom has knocked this one out of the park. From the moment I sat down with one of these beauties at Photo Plus East last year, I knew I wanted one! Now that I have it I can’t imagine not using it.

Get the Cintiq 24HD here

Get the Cintiq 24HD touch here

Get the Cintiq 22HD here

Get the Cintiq 12wx here