iPad Air Review

ipad-air-tw

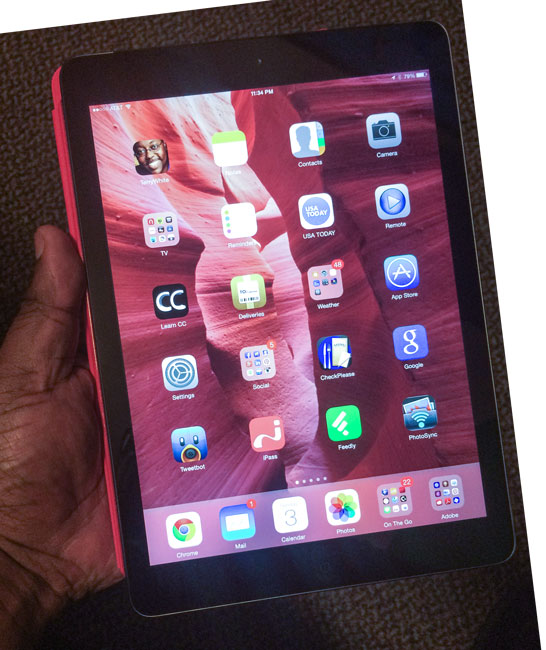
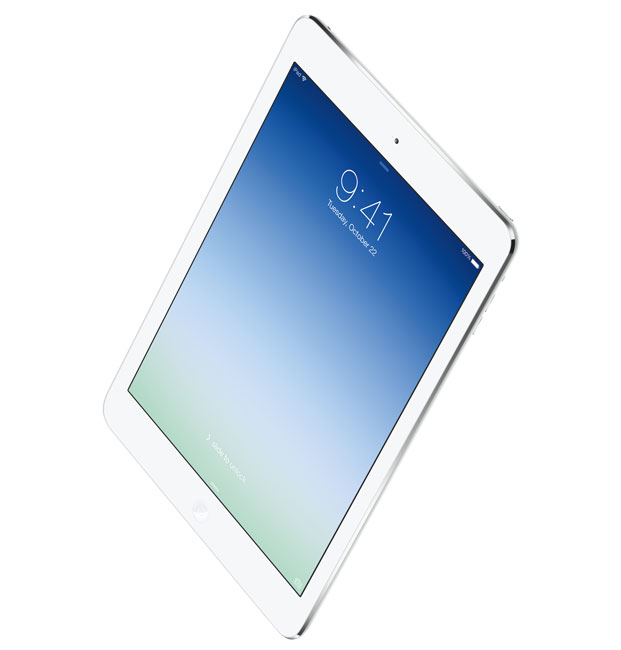
I use my work iPad quite a bit. I had been on an iPad 3rd generation (The New iPad) since it first came out. I skipped the 4th generation iPad since it really didn’t offer much in terms of an upgrade. The 4th generation iPad also came out a mere six months after the 3rd generation. I decided to wait for the next iPad. As you probably know by now, that iPad was introduced on October 22nd, 2013 and available in stores on November 1st, 2013. This iPad is a completely new design for the full sized iPad. While it still has the same size 9.7 inch Retina Display, it’s smaller and lighter in every other way. It’s narrower by reducing the bezel size on the sides. It’s also thinner and noticeably lighter in weight. So much so that I actually no longer feel the need to have an iPad mini. I prefer the larger screen size over the mini and now that the iPad Air  is lighter and thinner, my iPad mini envy has come to an end. The other thing I was really interested in was the increase in performance. The iPad 3rd generation was a good performer, but the 4th generation promised twice the performance and the iPad Air even faster than the 4th generation. The more heavy duty apps I was running the more I craved a faster iPad.

First impressions

It’s impossible to pick up the new iPad Air and not notice the difference in weight. It has the feel of the iPad mini due to the form factor and curves, but all the power and full screen size of an iPad Retina Display. Once I got it set up I could immediately see the difference in performance. Apps launch faster and the iPad Air is more responsive over all. It’s definitely much faster than my iPad 3rd generation. Since I never had the 4th generation I can’t really compare against that model (sorry).  Since the iPad Air is physically smaller in size you’ll likely need new cases, covers, etc. This means that I’m now anxiously awaiting Logitech to come out with a new Logitech Ultrathin Keyboard Cover. They make the best iPad keyboards on the market. Gelaskins has already announced new iPad Air skins. The other thing I’m pleased by is that the built-in speakers are definitely louder. I use my iPad to watch TV with the HBO Go and Xfinity Apps. On the iPad 3rd generation with the volume all the way up it still wasn’t quite loud enough. Now I can definitely hear the difference in the iPad Air. Apple did the same thing with the iPhone 5/5s over the 4s. Lastly you’ll notice an increase in WiFi speed too.

I went with the 128GB WiFi+Cellular AT&T model. This is a switch for me from Verizon. I had no problems with Verizon, but since I was grandfathered into the original AT&T unlimited plan for iPad and now they allow FaceTime over 4G, I was ready to come back. AT&T has more LTE 4G coverage now than they originally had as well. Also I was running out of space regularly on the 64GB model. The other thing I appreciate is the Lightning connector for charging/syncing. It’s nice to finally be able to use one cable to charge both my iPad and my iPhone 5s.

The Bottom Line

The iPad Air is better in every way over its predecessors. There’s nothing really revolutionary about it though. It’s an iPad and it works just like all other iPads before it. It’s smaller, thinner, lighter in weight and faster. These are all the things we would expect from an upgraded device. Surprisingly though the price is the same and it’s amazing that it hasn’t changed since day one. The iPad Air starts at $499 for the 16GB WiFi version. That was the same price/configuration when the iPad launched back in 2010. If you were looking for a smaller, lighter weight, faster full size iPad, then you can stop waiting. This is the one you’ve been wanting/waiting for. While I wish the price had dropped $100, the iPad Air doesn’t disappoint and lives up the promises made by Apple. iOS 7 runs like a dream on it too. No issues to report so far.

iPadAir

Update: Logitech is taking Pre-orders for the NEW iPad Air version of their Ultraslim Keyboard cover.

One Hundred Thousand Thank Yous!

100000subscribers

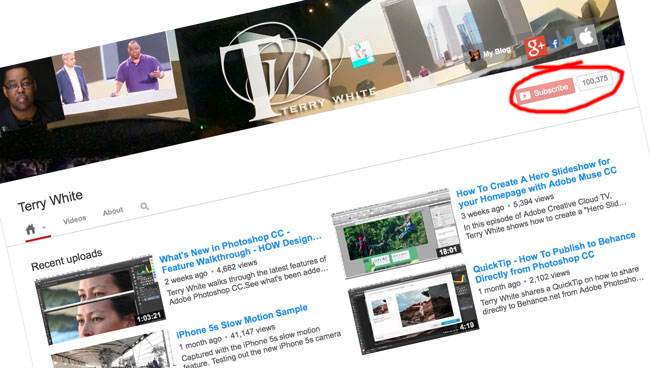
I just looked at my YouTube Channel and I was thrilled to see that I passed the 100,000 subscriber mark! I just wanted to take a moment to thank all of you for not only watching my content, but subscribing to my channel. At every event I do and public appearance I make there are always people coming up to me and thanking me for the videos that I do. Without your constant support I probably wouldn’t be as motivated to put out so much content. So again thank you! I’m on tour right now so I’ve been away from my recording studio, but as soon as I get back this weekend I promise to record a new tutorial or two. Cheers!

100000youtube

Nikon D5300 – Great Entry Level DSLR

Nikon_D5300

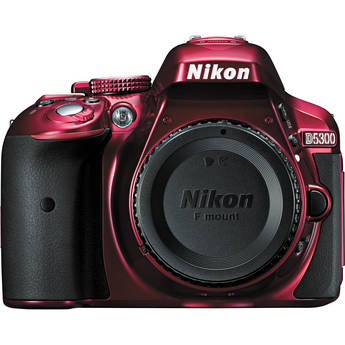
Young photographers just starting out always ask me which DSLR should they buy. Of course the answer to that question greatly relies on your budget. Also the great news is that it’s hard to go wrong with any of today’s DSLR products. I’m a Nikon shooter so therefore I’m familiar with Nikon’s product line more so than say Canon’s or Sony’s. Nikon just introduced the D5300. I’ve owned both a D5000 and a D5100 and this line is a great fit for those just starting out. What generally separates the entry level cameras from the more expensive pro level cameras usually has to do with the quality of materials and sensors, but also the number of buttons and external controls. On entry level models there are less buttons, therefore requiring the shooter to go into the menus to change settings more often. However, many times the entry level cameras introduce features that have not yet made it into the pro line. For example, the Nikon D5300 is Nikon’s first DSLR to offer built-in WiFi and GPS. I’m actually stunned that in 2013 these features aren’t on all cameras just like WiFi and GPS are on ALL smartphones. Nonetheless, they’re finally here. The D5300 also offers a swivel out LCD. Not a revolutionary feature by any means and has been around on previous models and lower end cameras for years, yet not really on pro level DSLRs yet.

The D5300 is a great choice if you’re just starting out. You can pre-order the body here (even in red) or the kit here.

What’s New in Photoshop CC? – Feature Walkthrough

PS_CC_totem

Last Tuesday I did a HOW Design Cast webinar giving a complete walkthrough of the new features of Photoshop CC. I not only showed the new features of Photoshop CC, but I also showed the new features that have been added since June.  If you missed it, here’s the recording.

Are you missing out on my Bonus Content?

See more of my Adobe Creative Cloud Videos on my Adobe Creative Cloud TV and get the App below. It features EXCLUSIVE CONTENT that no one else gets to see. This episode has a BONUS CLIP that is available only in the App! My iOS App is a Universal App for iPhone, iPad and iPod touch. I also have an Android version on the Amazon App Store:

.


New Nikon D610 Available for Preorder

Nikon_D610

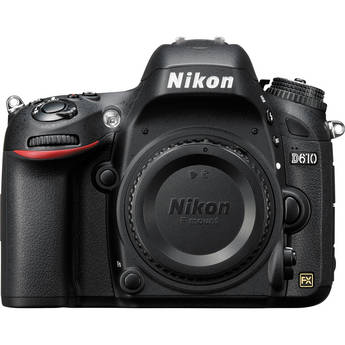
My second body is a Nikon D600 and it’s also my travel camera (although I’m considering going with a smaller, lighter mirror-less camera for non-photoshoot trips). I love the D600 and therefore the D610 should even be better. It’s a minor update and I have little reason to sell my D600 to move to a D610, but if you were in the market for Nikon’s lowest cost full frame DSLR, then it just got better for you. The Nikon D610 is just a minor update from the D600 with an improved shutter mechanism, new quiet continuous shooting options, slightly higher fps rate, and improved white balance.

Product Highlights/Specs

24.3MP FX-Format CMOS Sensor
EXPEED 3 Image Processor
3.2? 921k-Dot LCD Monitor
Full HD 1080p Video Recording at 30 fps (720p at 60 fps)
External Mic and Headphone Inputs
Continuous Shooting up to 6 fps <-NEW/Improved
Expandable Sensitivity to ISO 25600
Multi-CAM 4800 AF Sensor with 39 Points
Built-In Flash with Commander Mode
Supports WU-1b Wireless Mobile Adapter

You can pre-order the body here or the kit here.

Review: The Rapid Box Strip by Westcott

rapid_box_strip

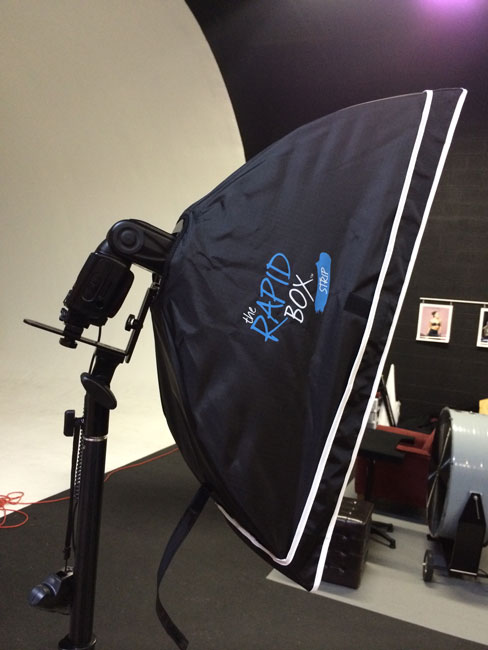
Here I was completely happy with my Westcott Terry White Travel Portrait Lighting Kit and then I went to Photoshop World Vegas. I brought my 26″ Rapid Box Octa with me and had a great shoot at Red Rock Canyon before the show even opened. However, once I got to the Photoshop World trade show floor and over to the Westcott booth, I noticed a “different” Rapid Box. I had no idea that they had a Rapid Box Strip! I use strip bank softboxes all the time in studio for rim lighting. When I saw the Rapid Box Strip it was pretty much an immediate “must have” situation for me. Now with a couple of speedlights and a couple of Rapid Boxes I could really have some fun on location.

It’s as easy to set up and just as compact as the Rapid Box Octa

rapid_box_strip_2

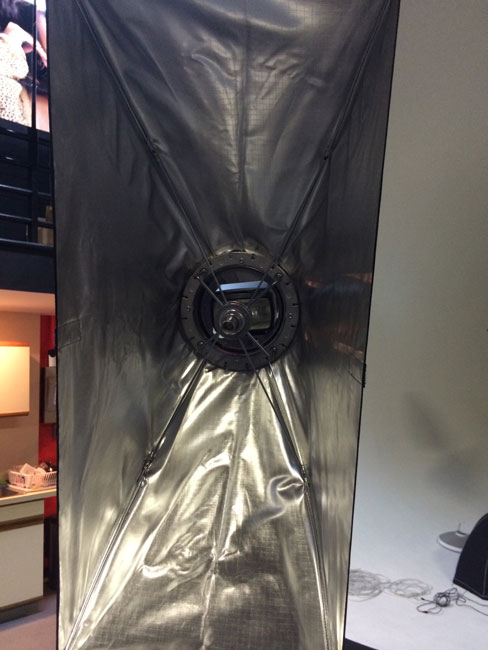
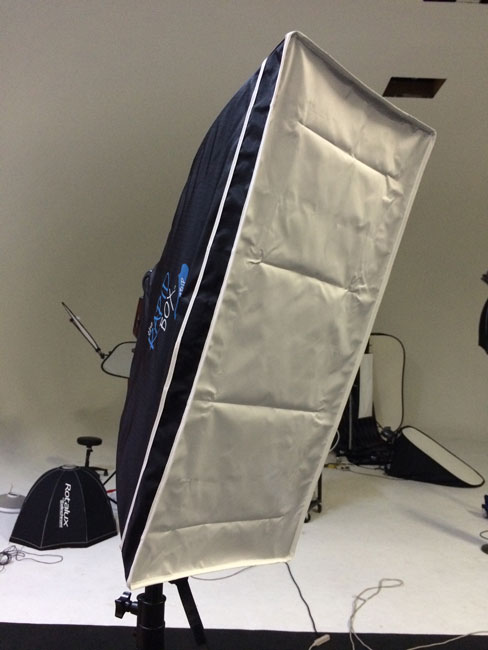
When I took it out of the box and looked at the carrying case it looked identical to the Rapid Box Octa. It was also just as easy to set up. Basically pop it open, put it on the supplied tilting bracket, put the 1-stop diffusion cover over the front, slide on your speedlight and you’re ready to shoot.

wpid12773-TLW3720_sm.jpg

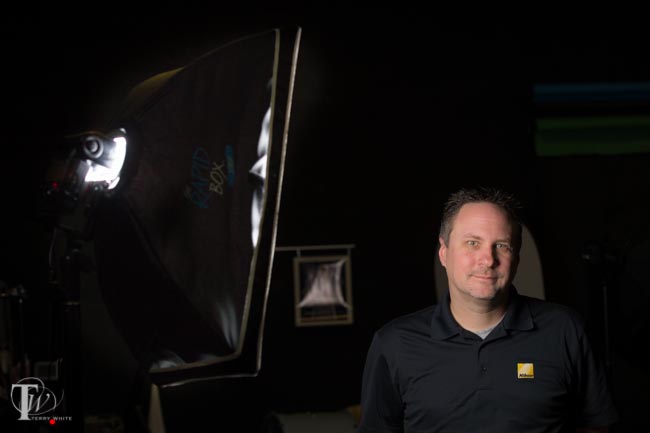
While I haven’t had a chance to take it on location yet, I did a quick impromptu shoot with Scott Diussa from Nikon who was visiting my studio. He was also impressed by the ease and quick set up. Disclaimer: Scott is not a professional model. He is a professional on the other side of the camera and a great musician 🙂 He humored me as a friend.

The Bottom Line

rapid_box_strip_3

If you’re looking for good quality, easy to set up and use softboxes for travel, I can’t recommend the Rapid Box line enough (no, I don’t get paid a dime by Westcott to review or recommend their products). They’re my primary light modifiers when I’m on the road! I love the “octa” shape and “strip” shape in studio and now I have them on the road too.

wpid12775-TLW3723_sm.jpg

You can get the Rapid Box 26″ Octa here

You can get the Rapid Box Strip 10″x 24″ here

You can get my Westcott Terry White Portrait Travel Kit here.


How To Create A Hero Slideshow for your Homepage with Adobe Muse CC

adobemuselogo


In this episode of Adobe Creative Cloud TV, I’ll show you how to create a hero slideshow for your homepage just like the major brands do, using Adobe Muse CC.

Are you missing out on my Bonus Content?

See more of my Adobe Creative Cloud Videos on my Adobe Creative Cloud TV and get the App below. It features EXCLUSIVE CONTENT that no one else gets to see. This episode has a BONUS CLIP that is available only in the App! My iOS App is a Universal App for iPhone, iPad and iPod touch. I also have an Android version on the Amazon App Store:

.


iTunes Radio Review

itunes_radio

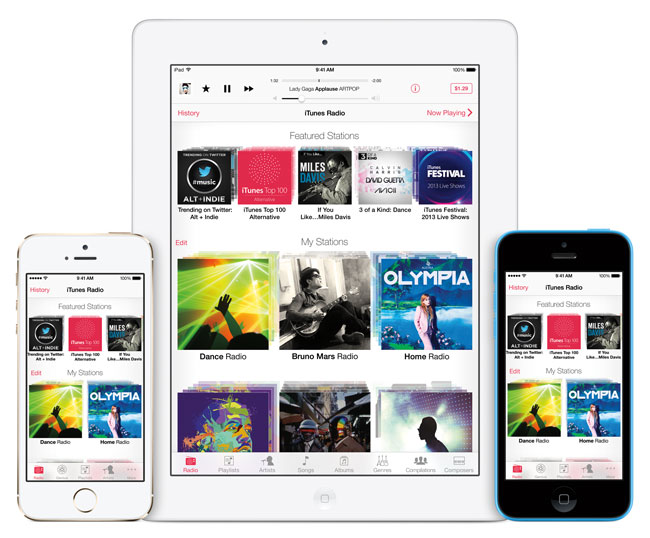
I was one of the ones anxiously awaiting the arrival of iTunes Radio. Before iTunes Radio I was a paid user of Pandora Radio. While Pandora does offer streaming Internet radio for free, I paid to avoid hearing ads. I like Pandora, but the beauty of iTunes Radio is that it would integrate right into iOS 7,  iTunes on Mac/PC, and Apple TV. Like Pandora you create stations from your favorite artists, songs, genres, etc. iTunes Radio will sync all your stations to all your devices automatically via iCloud. The interface is pretty clean and consistent for the most part.

Getting Started
create_new_station

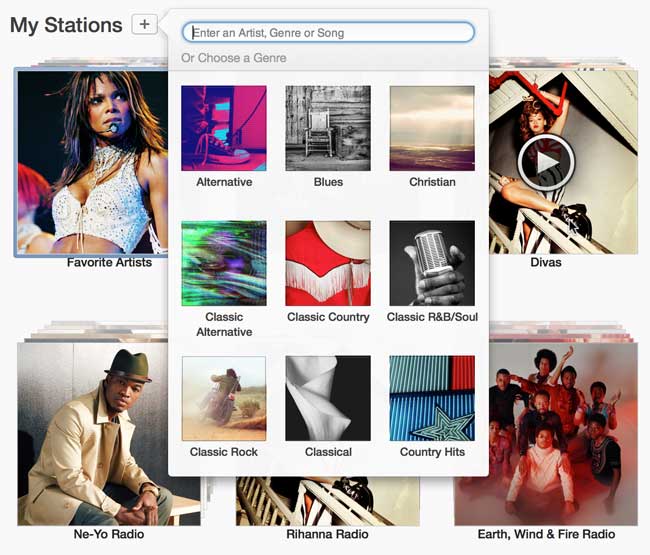
It was really easy to get started. Launch iTunes Radio on an iOS device or go to in iTunes and tap/click the + sign to add a new station. Key in an artist, song, genre, etc. and you’re done. You can add additional artists, songs, etc. if you like. I also LOVE the ability to add artists that I NEVER want to hear! (Justin Bieber). I don’t know if there is a limit on the number of stations you can add, but I was able to add in several with no problem.


Music Playback and Repeats

The audio quality is excellent and I’ve used it both on WiFi at home and 4G on the road and in my car with no problems or skips. I did have one problem station that I ended up deleting and recreating. It actually got stuck playing the same 3 songs in a row over and over again. Once I got my stations sorted out with favorite artists and artists to never hear from, I have been using it every day. I have noticed that it does play a lot of the same songs repeatedly, especially when starting out at the beginning of my day. It seems that only after I’ve listened for a while (at least 3 songs) do I start to hear new songs. Luckily the songs it repeats are ones I really like.


Skipping Tracks and Thumbs Down
never_play

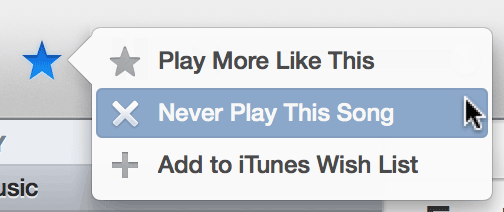
You can skip up to 6 tracks per hour per station. This is similar to Pandora. Due to the licensing restrictions from the music industry you can’t just keep skipping songs until you hear the one you want. One of the odd interface things in iTunes Radio is that at first glance there doesn’t appear to be a way to thumbs down or tell it that you never want to hear a particular song again. You CAN do it! However, it’s oddly hidden under the Star icon. At first glance I figured the Star was to mark songs that I like (thumbs up). It wasn’t until I tapped on it on my iPhone and discovered that it’s actually a menu that contains the choices “Play more like this”, Never Play this Song” and “Add to iTunes Wishlist”

Your stations can also be shared with your friends and family or on social media. You can also turn on/off explicit lyrics.


Costs and The Bottom Line

Like Pandora Radio, iTunes Radio is FREE with Ads. However, if you are an iTunes Match ($25/year) customer (and I am) then you won’t hear ads on the devices that you have set up for iTunes Match! This works out to be a cost savings for me ($3.99/month) since I already had iTunes Match  and was able to stop my Pandora Radio subscription. If you hear a song you like and want to buy it there’s a button in the upper right corner that lists the price. Just tap it and buy the song. Also each station keeps a “recent” history so that you can go back through and see which songs have played and buy them if you like.

While I like the potential of iTunes Radio and how it’s integrated into all my devices, it will take a little more time to see if the music really works itself out. I have used Pandora Radio for over a year and with the thumbs up and thumbs downs that I’ve done over the past year, I could listen to Pandora for hours on end and hear music that I liked. It will take time to train all my iTunes Radio stations the same way.

As far as improvements go, I’d love the ability to restrict a station to only songs from a particular artist. I’m sure this is probably against the licensing agreements, but it would be nice.

If you’ve upgraded to the latest iTunes (and you’re running on a newer Mac/PC OS – Lion or above on Mac) you’ll have iTunes Radio right in your Music section. If you’ve upgraded your iOS devices/Apple TV you can check out iTunes Radio right in the Music App or main menu.

I’m Headed To A City Near You! #CreateNow

wpid12436-BOtWnO3CMAAdPDO.jpg-large_sm.jpg
photo by Jason Levine

Today I head out on the Adobe Create Now World Tour. I’ll personally be making stops throughout the US and Canada. My 1st stop is Portland tomorrow and I’m looking forward to seeing YOU! To see all the tour stops, go here.

I also recorded a couple of QuickTip videos to whet your appetite for the kinds of things I’ll be showing on tour:


DJI Phantom Review

dji-phantom

As some of you may remember, a while back I bought a Parrot AR Drone 2.0 mostly for fun and to fly around and record videos of my production setups. While the AR Drone 2.0 worked perfectly for short distance flights, it’s limited by the range of WiFi. It’s also limited to the built-in 720p video camera. During Photoshop World Vegas I attended Russell Brown’s pre-conference on the DJI Phantom Quadcopter. The entire class was given instruction on flying them and the chance to fly them all day. I was impressed by the control and range of this one over the AR Drone. It was like going from a point and shoot camera to a DSLR. Both can capture great images, but you have much more control and potential quality with a DSLR. The Phantom comes with a mount to mount a GoPro camera. Since I already had a GoPro Hero 3 Black camera and they were offering a show special to pre-con attendees on the Phantom, I figured it was time to upgrade and step up to a better quadcopter. When it arrived the setup was relatively simple. You have to put the landing gear on and the propellers. There’s a compass calibration routine as well. One of my friends told me to upgrade the firmware and I did. However, I was a little ticked that the only way to upgrade the firmware was with a Windows PC. Their Utility only runs in Windows. I use Parallels on my MacBook Pro with Windows 7 and had no problem updating the software as well as running the utility. It would be nice to have a native Mac version. Lastly I mounted my GoPro in the supplied mount.

My first flight

You can see the video here from my first flight. I already knew that to get steady video you’re really going to have to ditch the supplied mount and get a gimbal. This will make your videos a million times steadier. So my video is not steady. I also forgot to put the GoPro in 720p wide mode, but here it is:

http://www.youtube.com/watch?v=4qsiO3pKIE4

I basically flew it straight up, captured some video and brought it back down. It was getting dark and I didn’t want to crash. After I got the hang of it I took it out the next day and went much higher and this time having the GoPro capture stills every 2 seconds.

phantomflt1

I’m amazed at how high this thing can go! My colleague has taken his over 1600 feet. I don’t have an altimeter, so i can’t say how high I’ve flown it, but I’ve flown it so high that I could barely see it and could no longer hear it.

phantom-blackdot

In the pic above that I captured with my iPhone, you can see a black dot. That’s the phantom so high up that it almost disappears. I’m having a blast with this thing.

pantomflt3

Above is a shot I took recently as the sun was setting. I also realized at this point that the GoPro doesn’t do well at all in low light. Most of the shots from this flight were blurry because the Phantom is vibrating and fighting the wind, so the camera is far from still. One of the things I really like is that the Phantom has a GPS built-in. If for whatever reason you fly out of range of the controller or the controller loses contact, the Phantom will fly up about 60 feet and then automatically returns to the point where it took off and lands. While I’ve had some really great flights so far, I did have a crash. I actually lost a propeller during flight. It wasn’t screwed on tight or had shaken loose and it flew right off. The Phantom came straight down spinning out of control. Luckily for me it hit the grass and there was no permanent damage. Thankfully the DJI Phantom comes with an extra set of propellers. It was really windy that day and I was flighting the wind just to keep the Phantom in place. I happened to be capturing video at the time with the GoPro. You can see the crash video below.

You can get the DJI Phantom (ON SALE) here. It comes with a battery that gives you about 12 minutes of flight. You’ll probably want an extra one here.

You can get the GoPro Hero 3 here.

I don’t have a gimbal yet, but here are some to allow you to record more stable video.


Continue reading “DJI Phantom Review”