Watch Adobe TV on your iPad

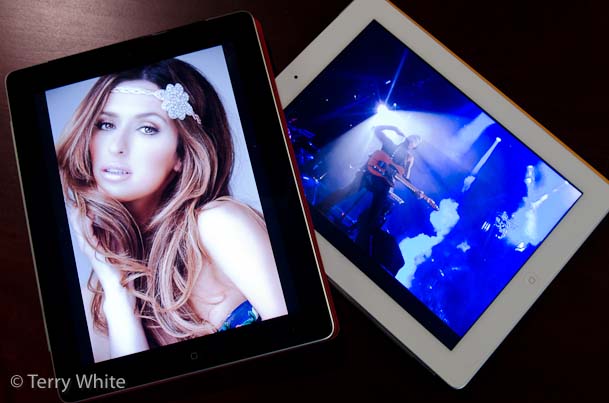
Adobe TV has recently been updated to now stream videos to the iPad. You can now watch hundreds of videos about your favorite Adobe products and technologies directly on your iPad for free. These videos will stream right on the Adobe TV page or you can watch them full screen. Many of the newer episodes are now showing in HD.

You can check out Adobe TV here on your computer or your iPad.

As always you can subscribe to my videos and download them to your computer or iOS devices for FREE here on iTunes.

5 Things You May Not Know About InDesign CS5

httpv://www.youtube.com/watch?v=dpGTT4JP9-k


In this episode I'll show you 5 features that you may not know about InDesign CS5. These are just 5 of the many little productivity features that are under the hood in InDesign CS5 to make life easier for InDesign users each and every time they use the application.


See more of my Adobe Creative Suite Videos on my Adobe Creative Suite Podcast and get the App here. It features EXCLUSIVE CONTENT that no one else gets to see. This episode has a BONUS CLIP that is available only in the App:

Learn Adobe Creative Suite with Terry White - Wizzard Media


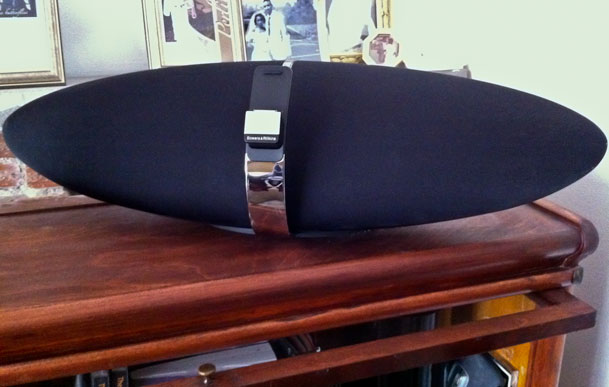
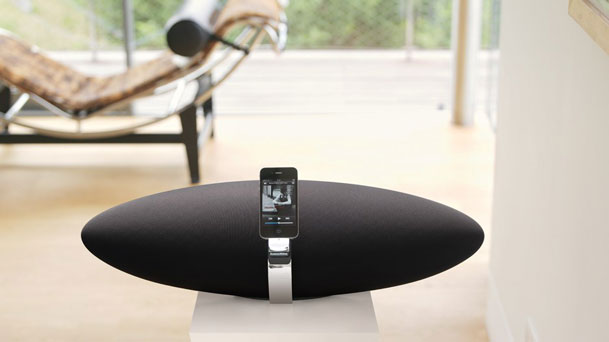
Review: Bowers & Wilkins Zeppelin Air with Built-In AirPlay Support

I've been a long time user of Apple's AirTunes (now called AirPlay) technology. As a matter of fact I bought the AirPort Express the day it was introduced, to be my travel WiFi hotspot, but then I quickly saw the benefits of wireless music streaming and set them up throughout my home. Each AirPort Express I have is either plugged into a powered speaker system like the Bose SoundDock or a surround sound system. Life has been good with this setup and it continues to get better now that Apple is putting AirPlay technology into more things. I also like steaming to audio to multiple rooms. I was really curious though what it would be like to have an AirPlay device that had this support built-in as opposed to having to tack on an AirPort Express to each speaker system. While the AirPort Express provides audio AirPlay support to any device with an audio-in jack, it is an extra expense and requires a cable to the audio device. 


Bowers & Wilkins shipped one of the 1st Speaker Systems with built-in AirPlay support

During last weekend's iPad 2 madness I noticed that my local Apple Store had the Zeppelin Air in stock. These speakers are sold out just about everywhere and even the Apple online store quotes a 3-5 week wait. It's not everyday that I plunk down $600 for a new sound system, but I was willing to give this one a shot. AirPlay is a great feature, but it has to sound amazing too. Bowers & Wilkins has a long standing history of making great sounding audio gear. I wasn't really worried about it not sounding great.


Setup could have been easier

The Zeppelin Air is beautifully packaged and unboxing it only takes a few moments. They supply a wireless remote, power cable and ethernet cable. The ethernet cable is really only needed for the initial configuration and this is what could be improved. In order to set it up (following the directions) you plug the ethernet cable into the speaker and into your Mac or PC. Then you fire up a browser and go to 169.254.1.1. However, you would have to know that the only way this will work is if you have disabled your Mac/PC's WiFi connection and the only connection you then have is via the Ethernet cable. Luckily I knew this going in. Also it takes a few moments for your computer to realize that this is the only connection you have before it brings up the page. This may cause some users to think that it's not working.

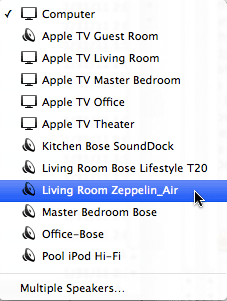
Once the built-in web page comes up you use it to select your WiFi network and enter the password for it. You can also use this opportunity to name the Zeppelin Air whatever you like. This name will show up whenever you go to choose it in iTunes or other AirPlay compatible Apps. While this seems straight forward you get a big warning message that unless you read it slowly, it will sound like the setting you just made didn't work. What the message is really warning you about is that "if" you entered the wrong information on the "previous" screen, it may not connect to your network. Duh! This warning should be on the screen where you're actually keying in the info. I did it 3 times before realizing that the message wasn't saying that it didn't work, it was saying that it may not work if I keyed it in wrong. After you click OK, you disconnect the ethernet cable. The flashing LED will turn a solid dark red if it worked and connected to your network. It also takes a few moments for it to connect, causing a bit of anxiety.

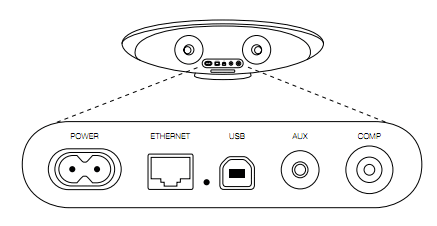
I also took this opportunity to download the latest firmware update from the B&W site and install it. This is when I knew that the process above could have gone better. The firmware update installs via a USB cable. Yep, there is also a USB port on the back of the speaker too. They don't supply the cable, but it made me think how much easier this whole setup could have been had they allowed it to happen over USB instead of Ethernet. There would have been no need to screw with your Mac/PC's network connection at all.  Oh well, it's up and running now!


The Zeppelin Air is Live on my Network

Once I got through the setup and Firmware update the next thing I obviously wanted to do was hear my new investment. While I could have simply docked an iPod or iPhone on the built-in dock, I wanted to hear it via AirPlay. So I fired up iTunes 10 and started streaming music to it over the air As I expected/hoped the sound was AWESOME. Nice bass response and just and overall great sound. I've often professed NOT to be an audiophile. I'm not one! However, I can definitely tell the difference between this speaker and other lesser speakers that I have around my home. It easily fills the room I have it and then some. No hiccups or other delays in streaming.


AirPlay from Devices

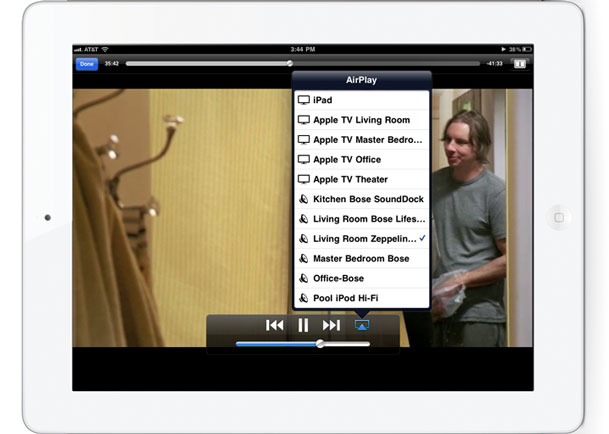
Since AirPlay is built-in to iOS 4 I can pickup  any of my iOS devices (iPad, iPhone 4 or iPod touch) and start streaming audio directly to this speaker. Besides having the ability to stream iPod content I can stream audio from Apps like Mobile Safari, Pandora Radio, YouTube, SlingPlayer Mobile for iPhone, etc. See more AirPlay Enabled Apps Here.


The Bottom Line

There really isn't anything "special" about this speaker system. It has AirPlay built-in! However, and I stress this again that the same exact thing can be accomplished with an AirPort Express Base Station and ANY speaker system, including other Bowers & Wilkins Speakers via a line out of the AirPort Express and into the speaker's audio-in jack. If you are starting from scratch and looking for an all in one solution that only has a single power cable once it's setup and sounds great, this is it! Audio streaming has been flawless so far.

I expect a flood of these kind of devices in 2011. I'm also hoping to see some video displays with AirPlay built-in for wireless streaming of video and audio. This is just the beginning.

You can get the Bowers & Wilins Zeppelin Air here for $600 or less.

Review: iPad 2

It appears that by all measures the iPad 2 launch was a success! iPad 2 officially went on sale in stores at 5PM local time on Friday, March 11, 2011. Online ordering opened up at 4AM ET the same day. When I woke up around 7AM and placed an order, my delivery time was set at 5-7 days. Apparently I missed the window of 3-5 days earlier in the morning. About an hour later the wait time went to 1-2 weeks for new orders and currently sits at 3-4 weeks for any new orders. This translates to Apple is selling iPad 2s as fast as they can build them and new orders will see a 3-4 week wait time. Placing an online order first thing in the morning for many served as a backup plan in case they didn't get one that evening locally.

Luckily, I was able to snag two at my local Apple Store. I got the 64GB black Wi-Fi+3G and the 32GB white Wi-Fi+3G (both on AT&T). I think the thing that surprised me the most was that even though there was a long line at most Apple stores throughout the US, Apple employees were still taking the time to offer a "personal" setup and walkthrough of the device. For many waiting in line, this meant that it was going to be a long night.


First Impressions

When I picked up the original iPad out of the box, my first reaction was "it's heavy". It was heavier than I expected it to be and I knew from that moment that it would not be comfortable for one handed reading for long periods of time. When I picked up the iPad 2 out of the box my initial reaction was "wow, it is lighter." On paper the iPad 2 is not that much lighter at all (1.34 lbs vs. 1.6 lbs). However, it is noticably lighter in reality. I still think it's probably too heavy for long periods of one-handed reading and the Kindle wins in that scenario big time, but for those of you who wished the iPad were lighter to hold and use, I'm happy to report that it is. Also with the new flatter back and rounded edges it's just more comfortable to hold in general. 

While I know that it now has a dual processor A5 chip and significantly faster graphics, I haven't actually felt the effects yet. This is largely due to the fact that I never felt that the original iPad was slow. The iPad 2 is fast and Apps open quickly and graphics display beautifully and fast. Again, I haven't been wowed by the speed increase though. I also have always said that we quickly assimilate speed. You don't really realize how much faster something is until you go back to something that was slow. So perhaps if I spent a day back on my "old" iPad I would notice it more.


Smart Covers

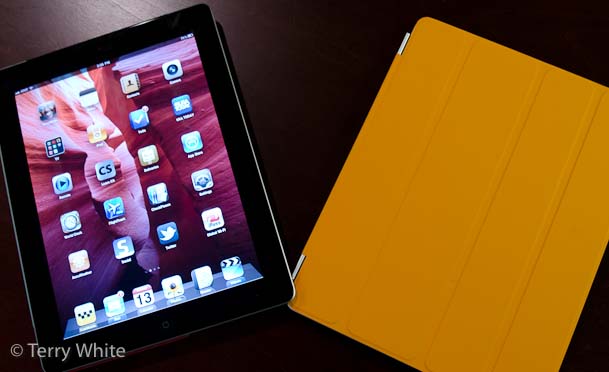
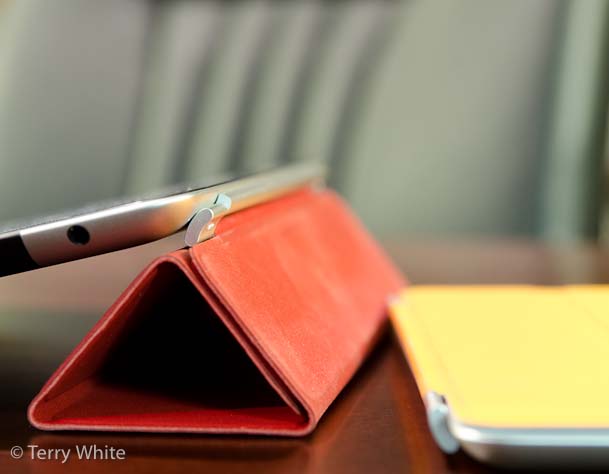
I opted for the red and black leather Smart Covers as well as an Orange polyurethane Smart Cover. I know that it's the little things in life that really matter sometimes and this is one of those times. During the keynote and introduction of the iPad 2, the thing that I was most excited about was actually the NEW cover. Don't get me wrong, I've wanted the cameras since day one, but we all knew that the cameras were coming. What we didn't see coming was the new Smart Cover design. Although I have a few different cases for the iPad 1, I was never really in love with any of them. I liked the Apple case the least, which is what lead me to buy the other two in the first place. I liked the Macally Bookstand Case (the one I used the most) and Incase Convertible Book Jacket, but while the Macally case was nice and thin, it never felt stiff enough and while the Incase offered the most support for standing it was too thick. So I alternated between them constantly.

The Smart Case is perfect for me! It keeps the iPad 2 nice and thin for travel. It attaches and detaches in a second. Also it's integrated in that opening the cover turns the iPad 2 on and closing it turns the iPad 2 off. By not covering the back it also makes it very easy to use with accessories such as docks and keyboards. 

Continue reading “Review: iPad 2”

Are you willing to give up unlimited data for a Personal Hotspot?

Although I know it's iPad 2 day (more on that to come), let's not forget that Apple released iOS 4.3 this week for iPhone, iPad and iPod touch. One of the most compelling features for iPhone users is the Personal Hotspot feature (finally!). However, use of this feature on AT&T comes at high price. I'm not talking about the monthly charge as much as I am the fact that original iPhone users have to make a choice if they are thinking about using it. Prior to the iPhone 4 iPhone users on AT&T have enjoyed unlimited 3G data for a single monthly charge. AT&T grandfathered this plan for people upgrading to the iPhone 4. In June 2010 AT&T discontinued the unlimited data plans for NEW iPhone/Smartphone customers. While the new plans offer a lower monthly charge for less data, the highest plan is capped at 2GBs/month. If you go over, you pay!


Unlimited Data or Personal Hotspot?

In order to take advantage of the new Personal Hotspot feature that allows you to connect your Laptop, WiFi iPad or other WiFi devices to your iPhone wirelessly to share your iPhone's 3G data connection, you have to switch to the newer Data Pro plan ($25/month for 2GB of data) AND you have to ADD a tethering plan ($20/month) for a total of $45/month. What sucks the most about this is that the extra $20/month doesn't get you any more data! It's a "just because we can" charge. CORRECTION: The New DataPro tethering plan gives your 4GB total per month. Of course if you use the Personal Hotspot feature you'll likely hit that 4GBs faster and then have to start paying for additional data. On the plus side you can choose to turn this feature on or off on your account as needed. If you know you're going on a trip and want to use it, you can turn it on and then turn it off for the following month. Either way, you still have to give up your Unlimited Data Plan to use it.


Choices

Your choice of course is to not switch. Besides that option, you can weigh the cost of a data card or the MiFi if you're going to be a heavy user. Lastly since Jailbreaking your iPhone is legal, you could use a Jailbroken App that allows you to turn your iPhone into a personal hotspot without switching plans (you may be violating AT&T's rules by doing this and I'm not telling you to do so. You would be doing this AT YOUR OWN RISK and risk to your Apple Warranty). Verizon is already rumored to be dropping their iPhone unlimited plans soon too!

For now and as long as it's allowed I'll be sticking with my Unlimited Plan! 


AT&T and Verizon you really need to rethink "data".

Continue reading “Are you willing to give up unlimited data for a Personal Hotspot?”

How Much Faster is an SSD Drive?


SSD (Solid State Drives) are expensive! So the question that people usually have is “how much faster are they and will I see a difference?” In a nutshell the answer I have is FAST and YES! See my speed test above.


The SSD configuration is Apple’s CTO (configure to order) 512GB Drive. It’s in a 2011 MacBook Pro with 8GB of RAM and the 2.3GHz Quad Core i7 processor.

The 2010 MacBook that it’s being compared to has a 500GB 7200 RPM SATA drive. It also has 8GB of RAM and a 2.66GHz Dual Core i7 processor.

You don’t have to buy a new computer to get an SSD speed boost. OWC has several options for your existing computer.

5 Things You May Not Know About Photoshop CS5

httpv://www.youtube.com/watch?v=2qq_20ruKA0


In this episode I'll show you 5 features that you may not know about in Photoshop CS5. These are just 5 of the many JDI (Just Do It) features that the Photoshop Team worked into Photoshop CS5 to make life easier for Photoshop users each and every time they use the application.


See more of my Adobe Creative Suite Videos on my Adobe Creative Suite Podcast and get the App here. It features EXCLUSIVE CONTENT that no one else gets to see. This episode has a BONUS CLIP that is available only in the App:

Learn Adobe Creative Suite with Terry White - Wizzard Media


My New Watch is an iPod nano

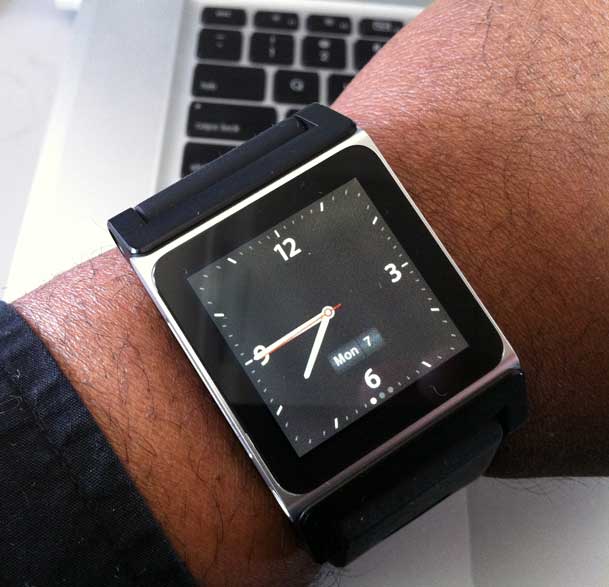
Although I love gadgets, when it comes to my watch I've always gone with something pretty simple. It's not even digital. I've worn an analog watch for years and have been happy. I remember when the 6th generation iPod nano was released and Steve made the joke about it being warn as a watch I smiled and really didn't give it a second thought. Actually I had no plans of ever buying the new nano simply because I didn't need one. My personal iPod is my iPhone 4. If I want to watch a movie on the go I usually do that on my iPad. I just don't need to carry around another iPod. The only other iPod I use is an iPod touch in my studio during photo shoots. I do own some of the older nanos and there is one dedicated to the glove compartment in my car. The only reason I would ever upgrade that one is if I needed more space or if Apple ever saw fit to provide WiFi syncing of media (that one I'd buy in a heartbeat). Nope, the new nano just never appealed to me.


I got a gift!

My buddy Bruce bought me the New nano as a belated Christmas present. The only reason the gift was delayed because he didn't just want to give me a nano (that I didn't need) he wanted to give me a cool tech watch! In order for that to happen he had to wait for the shipping of arguably the best wristband solution for the new iPod nano. It's called the TikTok. This was actually a Kickstarter seed project that got off the ground by individual donations/investments to the project and Bruce invested in them. The interest in this product was staggering!  They originally only wanted to raise $15,000 to do the project and to date they've raised $941,718! While the concept of wearing an iPod is certainly not new, it appears that there are lots of people that want to wear one as a watch.


Using the nano as a watch

First off while the band totally rocks! There are a couple of pros and cons to wearing an iPod nano as a watch though. The first one is that while the nano is a small iPod, it's a fairly large watch. I have large wrists so I can pull it off 🙂 The iPod nano has a multi-touch screen. This is cool because you have instant access to your music, pictures, FM radio, and other features like a pedometer, stopwatch and of course a clock. Speaking of the clock that's built-in to the nano you would think that the options to customize it would be endless. However, there are only a couple of choices. You can choose a black or white face. You can, umm….that's about it. There's no choice for a digital display or any other visual features. I'm fine with an analog display because that's what I was using anyway but it would be nice to have more options. The nano also offers an option to display the time upon touching the button no matter what App you are running. Again, this is an iPod that has a clock, not an Apple watch. It's clear that Apple didn't spend a lot of time trying to make this the ultimate "watch." The only real downside is having to press the button to see the time. Like all Apple multi-touch devices you can't just tap the display to wake it. You have to press the hardware button. I'd love to see a "shake" to display the time feature or a low power OLED continuous display. Although the nano doesn't run iOS, it's begging for Apps. I could see developers going nuts making "mini" or nano Apps for the wrist. Lastly even as an iPod the one other feature that is painfully missing is Bluetooth. I would LOVE to be able to use wireless headphones with this "watch". That would be killer!

All-in-all I'm happy with my gift! Thanks Bruce! It's my main watch now.


You can get the iPod nano here on sale starting at $134.

You can get the TikTok band here starting at $34.95.

Continue reading “My New Watch is an iPod nano”

Review: Drobo FS


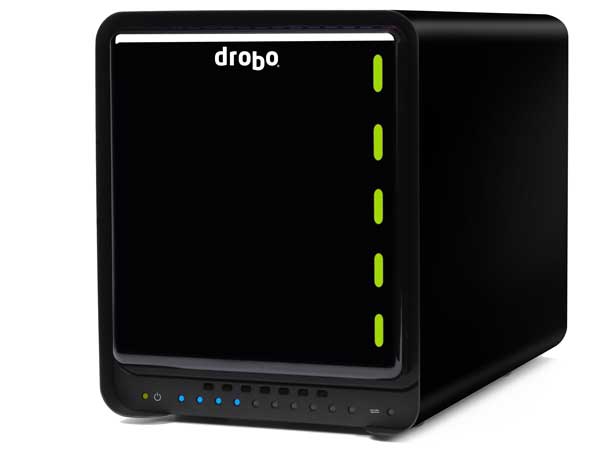
I've been a happy Drobo user since October 2008. My main Drobo 4 Bay Firewire 800 unit is being used as the main storage on my Mac OS X Server in my home office. My second Drobo 4 Bay Firewire 800 unit is being used on my dedicated media server (an iMac running iTunes) and it houses all of our music, movies, TV shows etc. I love Drobos because you can easily increase the storage capacity by swapping one or more drives for larger ones without having to start over and reformat. I also love the fact that the drives don't have to be the same capacity. While my Drobos have been relatively trouble free from a hardware standpoint, I did suffer from a directory corruption problem once back in February 2009. Luckily I knew better and had my data backed up. While Drobo is GREAT at protecting you against drive failures there's is no magical protection against accidental file deletions, viruses, or directory corruption. In my current setup I have each Drobo being backed up on a nightly bases to external large capacity drives via SuperDuper! This all works great, but it does still leave me exposed to one problem. 


An Oops Moment

We all have those oops moments. Those moments where we do something that we wished we hadn't. It could be deleting a file that you thought you no longer needed or doing a Save when you meant to do a Save As, etc. If that happens to me and I catch it right away, no problem I can restore from yesterday's backup. However, if that happens and I don't realize it right away then I could lose the file completely after the new file gets backed up during the next evening's backup. In this case Time Machine really shines. As a Mac user I have Time Machine right in the OS. I use it on my MacBook Pro and other computers around the house. So no worries if this problem happens on one of those computers because i can just go back in time and grab and older version. However, if the file is on my Sever then I don't have that protection. Same goes for my iTunes collection. If I delete something there without realizing it, it will be gone for good after the next backup. 


Drobo FS to the rescue
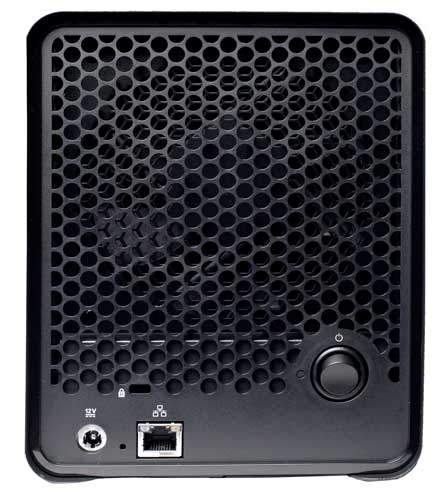
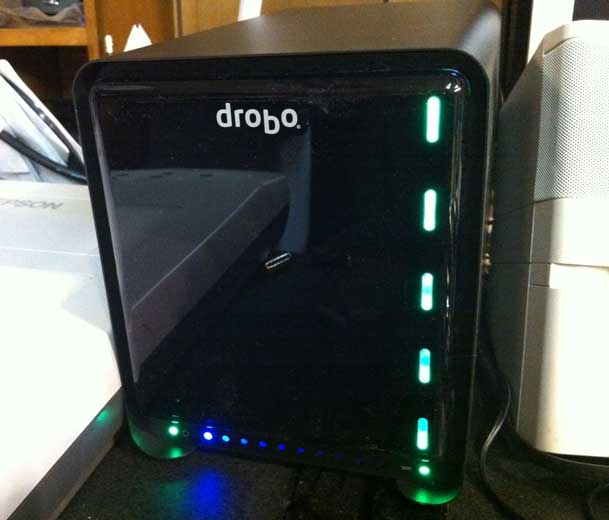
While I can pretty easily clone my Drobos to nice big 2TB and 3TB drives, it becomes more challenging using Time Machine for that much data on a single backup drive. The drives would fill up quickly and I would be no more protected than I was with a clone. In this case I wanted to use Time Machine but I would need something as large as the capacity of my Drobos and actually significantly larger if I want to go back further in time. The solution was clear – another Drobo. With another Drobo I could put large drives in it and it would not only have the storage I needed to backup one Drobo, but both Drobos. Since the two computers are not in the same room, I needed a network solution. This lead me to the Drobo FS. While I could have put another Drobo on my Mac mini server it would mean having to daisy chain it via Firewire and I also have limited space in that area of my office. The Drobo FS is a 5 bay unit that connects directly to your network via Ethernet. This means that it can be anywhere in my house including a closet or storage room. The 5bay FS doesn't cost that much more than a directly connected Drobo model.


Setting up the FS
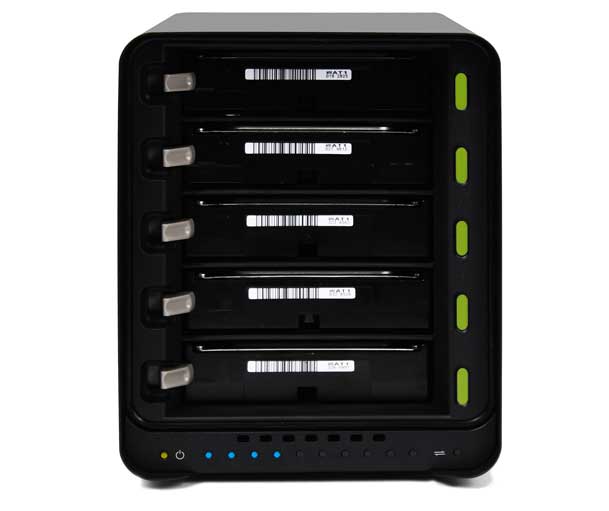
I love it when all the instructions that you'll need to setup a new device fit on a single card. The Drobo FS is that easy to setup. install the software. Insert one or more hard drives (2 or more is best for protection) and they don't even have to be the same capacity. Plug in your Ethernet cable (gigabit ethernet if you want performance) and turn it on!

The Drobo automatically formats itself and in a few moments shows up in the Drobo dashboard of all your networked computers. At that point you change the administrator username/password and create the "Shares" you want to be seen on the network. Add your users/passwords and you're done. 


Using it for Time Machine
Since I already have a Fileserver that I'm happy with I didn't really need to setup any shared folders beyond the one for my network Time Machine backups. You create a share and then just enable the Checkbox so that this new Share can be used and seen by Macs as a Time Machine volume.
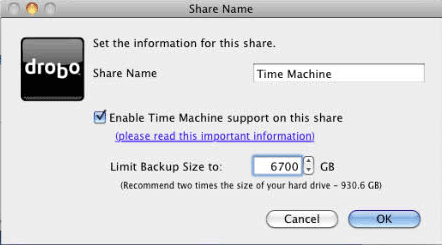
Unfortunately you do need to install the Drobo Dashboard on each of the Macs that you want to backup to it via Time Machine. It's not the end of the world, I just dont' like installing any more software than I absolutely have to. Once the Drobo Dashboard is installed on a Mac that you wish to backup, you mount the Share and then choose it in the Time Machine System Preferences. For now I've decided to use it for all of my Desktop Macs including both servers and another iMac and Mac Pro. I've completed the backup on a couple of these Macs as of the writing of this review. The big ones are going to take a day or two to complete because if you've ever tried to backup 1.5-2TBs of data you know that it can take a while.


The Bottom Line
The Drobo FS is a great solution for any home or small business looking to setup a File Server/NAS or Network backup that is painless and has built-in redundancy for protection against drive failure. If you are going to use one in a File Server capacity keep in mind that while Drobo protects against drive failure, you should still back it up too! That goes for any drive solution. Also if you are going to use it as a File Server you can enable the Drobo Apps so that you get File Server type features such as web serving, ftp, etc. I didn't enable these as again, this isn't my main server.

The fact that the Drobo FS connects directly to my network instead of requiring a host computer is huge for me! I would hate it if the day comes that I restore an entire Drobo from a backup because it would take a while. I would hate it even more if the day came that I needed to restore a large amount of data and I didn't have a backup at all.

You can get the Drobo FS enclosure for less than $615 from B&H Photo and Video

You can get 2TB SATA Hard Drives here for $75. The price of storage has never been cheaper!

You can use the Drobo Storage Calculator here to figure out how much storage you would have based on the drives that you put in it.

Do We Need All the LED Status Lights?


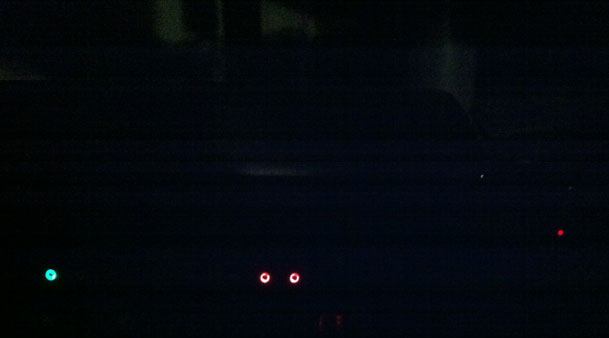
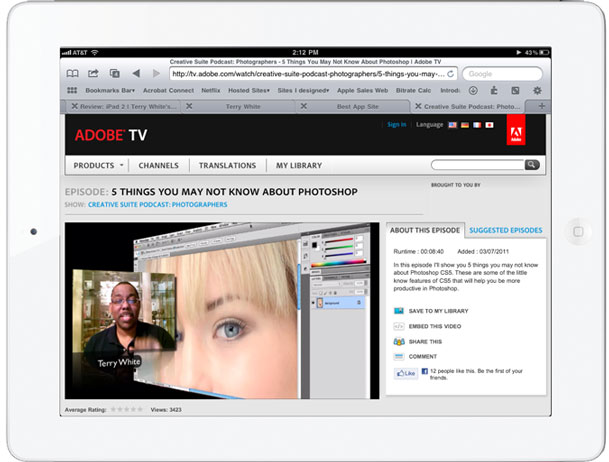
The other night I was walking through my house and the lights were off, but I was amazed by the number of things that have LED lights that are on all the time. I like to sleep in a TOTALLY DARK ROOM. I've gone as far as putting black tape over some of the most annoying LED lights in my bedroom. In most cases these LEDs are used to tell you the current status of the device. For example, on the TiVO Premiere a red LED comes on when it's recording something. A blue one comes on when it's transferring a show from from another TiVo. However, there's a green LED that's on all the time that simply means the device is on and has power. Since you never turn a TiVo OFF I question do we really need to see this green LED 24/7. I guess you'd want to know if it had become unplugged or lost power, but as I far as I can tell no one is climbing behind my TV and unplugging things. It gets worse.

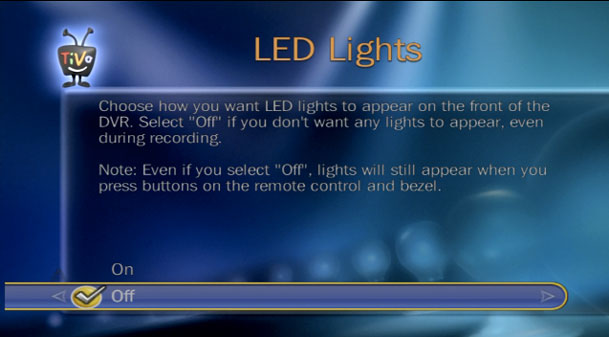
Update: TiVo does give you the option to turn them off (thanks Martha). It would be nice if MORE vendors offered this!

My bedroom TV has a red LED that is on when the TV is OFF. Again this simply means the device is plugged in and getting power. When you turn the TV on the LED goes off. I'm guessing that if there's no picture for more than a few minutes that the TV is not on. I'm also guessing that if I press the button to turn it on and it doesn't come on for some reason that there may be a power problem. In other words I don't need a continuous reminder that tells me that it's plugged in, has power and is OFF. 

Most of these devices have internal clocks. At a minimum it would be nice to be able to disable the LED at night automatically as a preference or simply turn it off altogether for those that don't need to see it. I was happy that Apple chose not to put the annoying pulsing bright white sleep light from the MacBook Air. Sadly it's still on the MacBook Pro, but clearly it's not essential as it was not deemed necessary on the Air.

If you are an interface design engineer and reading this post, please kill the unnecessary power wasting LED displays wherever possible. We'll all sleep better 🙂