Chances are that if you’re using an DSLR camera that uses Compact Flash cards, you’re pretty happy with the cards you’re using. However, there are times that it would be nice to be able use the SD card format in my Compact Flash (CF) gear. Don’t get me wrong, I can’t think of too many times (like never) that I would want to stick an SD card into my Nikon D300 or D700. However, there are times that someone will hand me an SD card with pictures on it and I only have either my Firewire 800 CF reader or my ExpressCard slot CF Reader with me. As a matter of fact that very thing just happened to me this past Sunday. I was at my users group meeting and there was a member there taking pictures and at the end of the meeting he handed me his SDHC SD card. I didn’t have my multi-format card reader with me. All I had was my FW800 CF Reader. Luckily I had a USB cable and we just connected his camera to my computer directly to transfer the pics.
Â
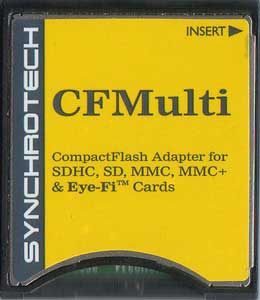
The CFMulti
Actually the CFMulti by Synchrotech is designed and promoted to allow the use of EyeFi SD Wi-Fi cards in CF based cameras (like many of the popular DSLRs out there today). There’s no software to install. You simply insert your SD card in the bottom of this adapter and then put the adapter (SD card and all) in your Compact Flash based device. As I’ve written in the past, I’m not a fan of the EyeFi card. I think it’s cool technology, but just not very usable (at least for me.) So if all this thing did was support the EyeFi card in CF based cameras, then I could really care less.
The picture I painted above is really the situation that I use the CFMulti in. With the CFMulti I can now just carry my favorite, fastest card reader(s) and not have to worry about not being able to read the occasional SD cards.
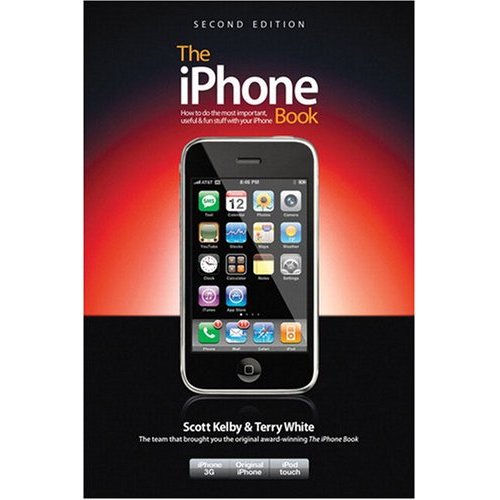
I’m very pleased to announce that my NEW BOOK, The iPhone Book 2nd Edition is now in stock at Amazon.com. I’m really excited about this new edition co-authored with my buddy Scott Kelby. We really sought out to improve this book from cover to cover. We’ve added a brand new "Killer Tips" chapter that is PACKED with tips and techniques for all users, whether you’re new to the iPhone or been using one since day one you’ll get some great tips on how to really take advantage of your iPhone (or iPod touch).
Reminder, submit your entries for the iPhone Photo Contest
In celebration of our new book we’ve launched an iPhone Photo Contest. There are only seven days left to submit your photos before the October 24th deadline. You could win a $500 Apple Store Gift Card among other cool prizes. See the details here.
So don’t wait, run out and buy a copy of the iPhone Book! Buy two. It’s only $13.59.
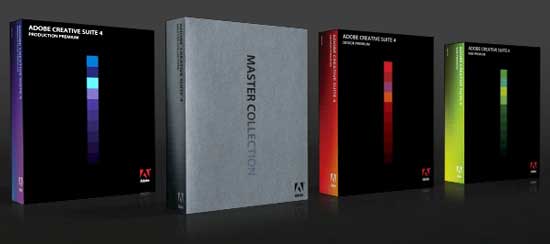
I’ve been showing Adobe Creative Suite 4 to some enthusiastic crowds and the number one question I get is, "when is it shipping?" My response has always been "soon." Well soon means TODAY! That’s right Adobe is shipping all of the Creative Suite 4 products and suites and they are available for immediate download. Check out my Creative Suite Podcast for ongoing videos highlighting the features of the new CS4 apps.
I’ve been holding off getting a new laptop at work because I knew Apple was due to come out with some major changes to the MacBook line. So I’ve been plugging away with my now 4 generation old 2.33 GHz MacBook Pro. It’s still a fine performer, but it’s starting to show signs of its age. Well yesterday Apple revamped the MacBook lineup and after what I’ve seen, I’m glad I waited!
Â
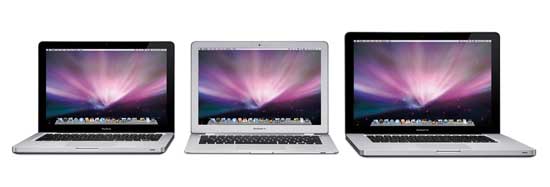
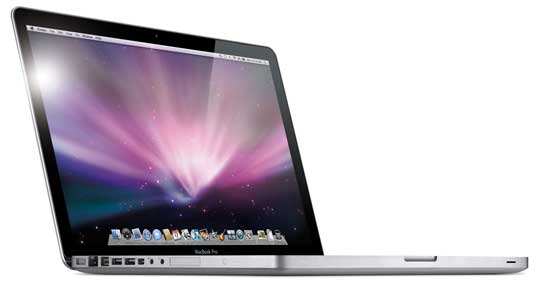
The New MacBook Pro
Apple has come up with a new process that involves making the case for the MacBook Pro out of a single piece of aluminum. This of course makes the case more sturdy and offers some potential weight benefits. too. All of the ports have been moved to one side and the slot loading Superdrive is now on the side. Apple has done away with the Firewire 400 port in favor of a single Firewire 800 port. Since Firewire 800 is backwards compatible (with the proper cable) to Firewire 400, this really isn’t a big deal although I will miss having two ports.
Apple also made access to the internal hard drive easier by locating it right below the battery. The front of the display is designed more like an iMac. The big news however is in the new trackpad. I’m going to reserve judgment until I actually get to play with one, but I’m not sure that I’m going to like not having a physical trackpad button. That’s right! It’s gone! You now tap the trackpad itself for everything. The new glass trackpad is like an iPhone’s touch screen. It supports multi-gestures things like a “right-click” via software. The older MacBook Pros allow you to turn on “Clicking” and “Dragging” and while some of my friends swear by this feature, I actually hate it!. So again, I’ll have to see what it’s like not having a physical button.
Apple also made a significant leap forward by going with Nvidia’s latest and greatest graphics chip. They are claiming 5-6 times performance gains, which will be great for the new Photoshop CS4 which takes advantage of your GPU.
One last thing, Apple made a new 128GB SSD (solid state disk) hard drive available across the line. So far I’ve not been impressed by this technology because for the price, you don’t really see a huge bump in speed or savings in battery. The MacBook Pro starts at $1,999. The 17″ MacBook Pro seems to have been left out of this round of updates. While Apple still offers it for sale on the store, it’s no where to be seen on the MacBook Pro page of Apple’s site.
Check out this clip of the New MacBook Pro Trackpad in action. Both Photoshop CS4 and InDesign CS4 take advantage of these new gestures.Â
Â
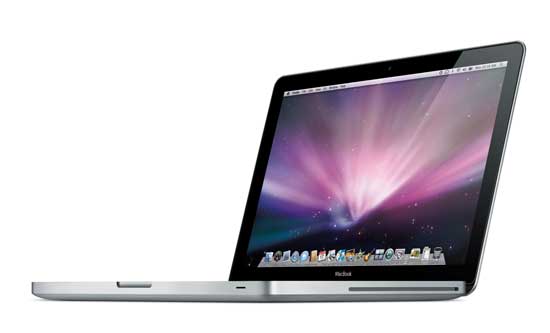
The MacBook gets a price drop and a new pro like model
The MacBook has always been like the baby brother of the MacBook Pro. It’s not as powerful, but also not as expensive. Apple lowered the price of the base model to $999, but also came out with a higher end ($1,299) model with many of the same features of the $1,999 MacBook Pro including the same aluminum case design. If you don’t need Firewire, an ExpressCard slot, a larger screen (13″ vs. 15″) or a faster processor (2.0GHz vs. 2.4GHz), then you could save yourself $700 and go with the new higher end MacBook.
Â
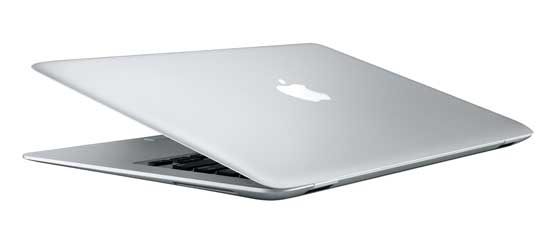
MacBook Air gets a couple of bumps too
I resisted temptation when the original MacBook Air came out because I just couldn’t live with a paltry 80GB internal drive. Although 120GB is still not enough for my day-to-day use, it is enough for my wife. So her MacBook goes to my daughter and my wife gets the new MacBook Air! The MacBook Air also gets a much needed bump to the Nividia 9400M graphics card! The MacBook Air is still priced at $1,799 and up.
Â
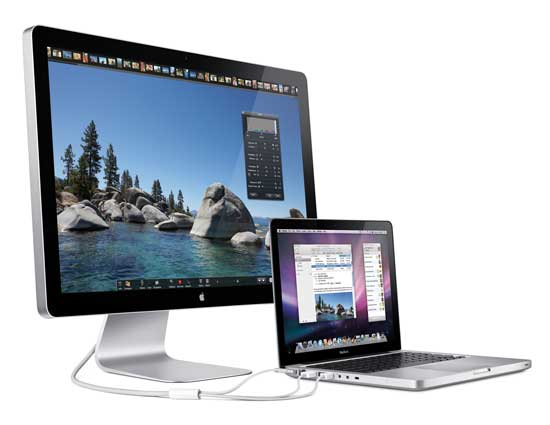
One more thing…
Apple also (finally) announced a New 24 inch Cinema Display that is LED based. I can’t believe that it has taken Apple all these years to begin to refresh their display line. Apple seems to have geared this display for portable Mac users. For one thing it has a MagSafe power adapter to power your MacBook directly from the display. Besides being LED based, it also has a built-in iSight camera, which is good and bad. It’s good because Apple stopped selling stand alone iSights years ago, but it’s bad for the locations that don’t allow cameras of any kind on the premises. I’m also stunned by the price. This puppy is $899 and that seems like a lot for a 24″ display. Yeah, I get that it’s LED based (which costs more) and that it has a built-in iSight and that Apple usually makes really good displays, but that still seems like a lot for a display.
Â
The Bottom Line
Aside from the new Cinema Display, I’m psyched about these new products. I can’t wait to get my new work MacBook Pro. I’m a little hesitant about the new trackpad design, but I’m open minded enough to give it a shot. I am a little disappointed in the lack of Blu-ray support. Apple seems to be dragging their feet on this one in hopes that Blu-ray is just a fad and everyone will move to downloadable HD content from the iTunes store. While that may happen some day, I’d love to see Blu-ray movie playback on the MacBook Pro. If you’re in the market for a new laptop, you have a range of options here that should satisfy just about any user.
See yesterday’s Steve Jobs keynote address video here.
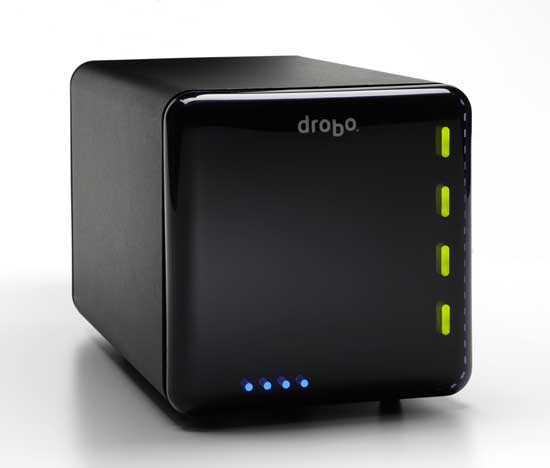
My buddies have been raving about Drobo for over a year. For some reason I was just not getting it. Maybe it was the name or the tagline of “data robot†that was throwing me. Anytime someone mentioned Drobo, I would have a vision of a robotic arm that would move drives from slot to slot.
What is Drobo?
Well, I finally took a closer look. Drobo is not a robot! At least not in the mechanical sense. Drobo is a 4 bay hard drive array (RAID) that continuously monitors the health of the drives you install. Drobo automatically combines the drives you install into a single volume mounted on your desktop. The drives are also automatically mirrored/stripped for data protection. For example, if you put in two 750GB drives you will only have 696.8GB of available storage to you. This is because Drobo is using the other space (drive) to constantly protect/mirror/backup your data as it’s writing it. It’s also reserving a little bit of space so that you can hot swap out a drive if needed because you want to install a bigger one or if one is failing.
What sets Drobo apart?
I have used and written about other RAID systems. What sets Drobo apart from the rest is that it doesn’t require that the drives be the same size. You could for example start with a 750GB drive and 1TB drive. This won’t buy you any extra space if you’re only using two drives, but it will allow you to grow your available space by adding say a 3rd drive. The Drobo website has a fantastic “Drobolator†(space calculator) that will allow you to play out all your “what if†scenarios on how much space you will have depending on how many drives you install. The other thing that sets Drobo apart is the way it works with multiple drives. Drobo uses a technology called BeyondRAID. This allows it use both Mirroring and Striping. Drobo is also different in that it constantly monitors the health of your drives and doesn’t just tell you a drive has failed, but also tells you that a drive is going bad so that you can replace it BEFORE it dies. Even if you didn’t notice the warning (red light) and it died, you would still be protected as your data would be on the other drive(s) in the unit.
Great design
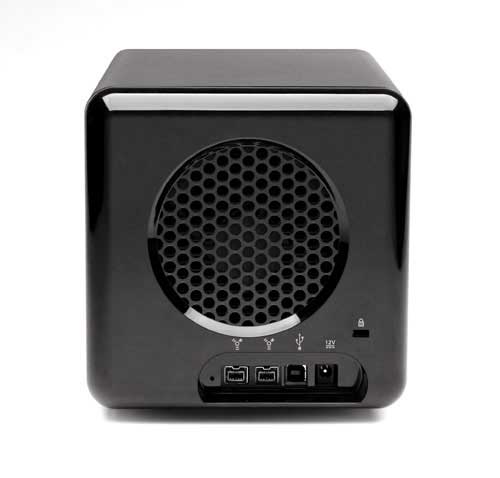
I love the way Drobo is designed. No screws or software to install (although the Drobo dashboard app makes it much easier to format your drive). You just pop off the magnetic cover and slide your hard drives in. The original Drobo was USB 2.0 ONLY. Many of the reviews I saw complained that this made it too slow for use as your main drive. The new Drobo is a Firewire 800 model (also has USB 2) and that makes it fast enough for regular use! The indicator lights on the front tell you all that you need to know including health of the drives and amount of space used.
What’s my configuration
I put four 1TB drives in it for a total usable capacity of 2.7TBs. Drobo is not bootable. I have it as a data drive on my Mac OS X Server. So far after a week, no major issues. It does take a few seconds longer to spin up, but that’s to be expected on any RAID system.
Archiving, Backing up and Data Drive
The original Drobo, which was USB 2.0 only, wasn’t really fast enough to be used as a main drive. At least that’s what most people said about it. Therefore, most people looked at Drobo as an archival solution only and not for active use. Now that the Drobo has Firewire 800 support, it is fast enough to be used for your main drive or online storage. However, keep in mind that the Drobo is NOT bootable (even if you got it to work, it’s not recommended). This is why I have Drobo attached to my Mac OS X Server as a data drive, but not as the boot drive. I still boot from the internal drive which runs the Server OS and then I have the Drobo shared on my network via Mac OS X Server. Speaking of Archiving, the question becomes how much "stuff" do you need to keep? I’ve watched my server storage needs grow each year. I quickly went from a 250GB, to a 500GB, to a 750GB, then to a 1TB and now to 2.7TB’s of storage. What’s taking up so much space? You guessed it: Digital Photos, Music and Videos. I recently had a conversation about this very topic with Scott Kelby and he even wrote a blog post about this important topic with some tips. As a photographer, let’s say I do a shoot and let’s say I end up with 500 captures. I’ll do my best to narrow that down as best I can, eliminating the bad ones, the ones that are very similar or the ones that I just don’t like. Now let’s say that I’m down to 300 shots. I’ll then post a web gallery for the client, model, friend, etc. to pick the ones they want. So now let’s say they’ve picked their favorite 10 or so and I’ve picked my favorite 10 or so. Those are the ones that get retouched. Those are the ones that are delivered as the "Final" shots. So what do I do with the other 280? You guessed it, I keep them! Not once has anyone ever come back to me and said, "hey, you know those shots you took 6 months ago that I really didn’t like, well I’d like a couple of those shots now." So I literally have thousands of photos on my Drobo that will likely never see the light of day. Now keep in mind I know that family photos should be cherished and photos from wedding shoots should probably be kept, but where do you draw the line? Should those photos that no one wants (you or the client) be deleted? Should they be moved offline to some cheaper storage? Should they be deleted after so many months or years because they will likely not be needed? Everyone is going to have a different take on this. One thing I don’t trust is storing photos on a CDR or DVD as they will eventually fail. Putting them on a hard drive that you don’t use regularly could be risky too. Drives have lubricant in them that will eventually dry up or seize up if not used regularly. Online storage can be expensive too. I’m intrigued by the use of Flash drives for archival use. They are increasing in capacity and coming down in price. For example, Micro Center sells a 4GB drive for $12, a 8GB drive for $20 and a 16GB drive for $40. They are small and therefore easily stored. You could even bill it into the cost of the shoot. For example, if you were doing a portrait shoot and you expected to end up with 300 12MB RAW files, those would fit on a 4GB flash drive. So you could bill an extra $12 to store these photos. Slap a label on it, put it in an envelope and staple it to the contract/model release. However, the question of longevity still comes to mind. What’s the shelf life of these flash drives?
The bottom line
If your storage needs continue to grow, then Drobo is something that you should look at. As you need more space, you just add/replace with bigger drives. the drives are even hot swappable. You have to also remember that even though your data is much safer in a Drobo than a single drive, this doesn’t protect you in the case of a fire, flood or theft. So you should still have a strategy for offsite storage. I’m currently backing up my Drobo to an external Firewire drive (actually I rotate between two) that I put in the Safe Deposit Box at the bank. Drobo is cross platform and works on both Macs and Windows PCs. An empty Drobo (no drives) goes for $499.99. You can then buy whatever SATA drives in whatever capacities you want. You have to start with at least two. Use it for data, use it for archiving or use it for backup. If you want to share a Drobo and you don’t already have a fileserver set up, you can buy an additional piece of hardware called DroboShare ($197.48). Note: Although DroboShare has a Gigabit Ethernet connection, DroboShare connects to Drobo (up to two Drobos) via the USB 2 port and NOT the Firewire 800 port. So I wonder if that creates a bottleneck in performance? See how Drobo works from the Video demonstrations here.
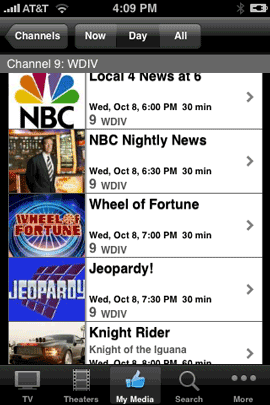
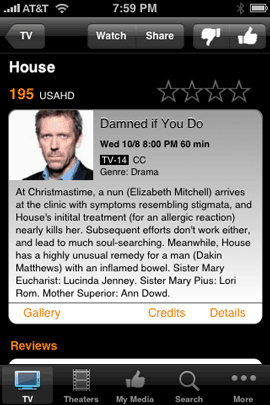
I never thought I would get excited about a TV guide app on my iPhone. However, if it’s well done and FAST, then I’m all in and that’s exactly what you get with i.TV. i.TV answers the question: "what’s coming on tonight?" The app is pretty straight forward. You start off by telling it where you are. Although the App supports location services, I still ended up putting in my Zip Code. Once I did, I got the choices for the providers in my area including Comcast Cable which is what I use most. As soon as a I made that my choice, that app started downloading the guide. I was on Wi-Fi at the time so the guide only took a few seconds to download. Once It was there, I could not only see the channels, but also little thumbnails for the shows that were currently on.
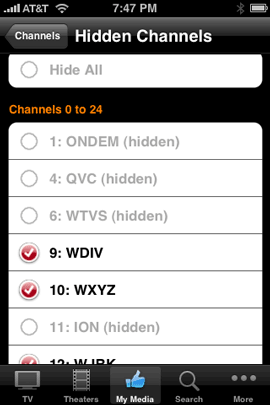
Great customization options
The one thing that is a must have in an app like this is the ability to narrow the list of channels down to just the ones YOU care about. I could care less about what’s on HGTV or the QVC channel. One quick trip to the "My Media" screen and I was able to edit down the list of channels to just the ones I watch.
But wait, there’s more
Not only do you get the listings for the shows, you also get a synopsis of the upcoming episode as well as a listing of upcoming episodes. If you register for an account on their site (free and optional), then you also get the ability to write reviews and give ratings.
Although there currently is no way to watch the show live on your iPhone, you can watch previews as well as see available photos from the show. There’s also a great search feature and the ability to see your listings by genre.
There are a couple of bugs
The first thing I noticed is that a few of my channels were missing! For example ABC HD in my area is on channel 231. NBC HD is 232, etc. Channels 231-234 and channel 300 (HBO) were simply not there. This wasn’t a big deal since the non HD equivalents were there (except for HBO). It was just weird that it choose not to show these channels. Perhaps on the next data update, they will appear.
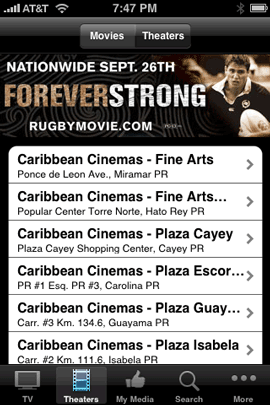
This app also has a Movies/Theater option. Although my Zip Code and Country have been entered correctly, i.TV insists on showing me movies and theaters in Puerto Rico. I already have a great movies app (One Tap Movies), so I really don’t care about this feature not working, but it would be nice if this app could do both TV and Movie listings for me. These aren’t show stopper bugs, but let’s hope the developer gets this stuff worked out soon.
My wishes for the next version
Other than fixing the bugs I noticed, I would pay money if this app could also schedule recordings on my TiVo HD. I know that the developer has no control over this, but I wish that either TiVo would release their own app or partner with these guys to add this functionality since their app already does everything else I would need.
The Bottom Line
i.TV is FREE. It’s got a couple of minor glitches (at least I ran into a couple, your mileage may vary), but they are definitely off to a GREAT start! It’s also faster than going to web based TV listing especially for jumping to a specific time or day, so it’s definitely worth a try. i.TV works on both the iPhone and iPod touch. You can download it here.
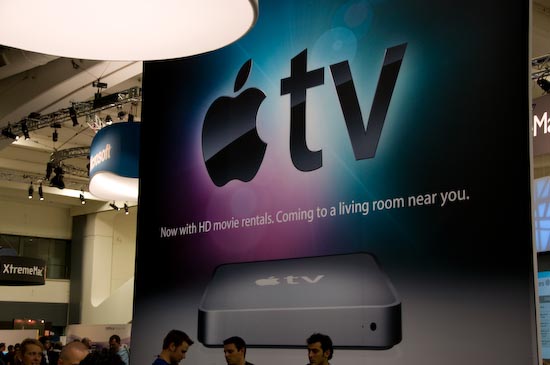
Although I’m a fan of Apple TV, one of my biggest pet peeves is that there was no way to play music videos back to back. This made no sense to me at all. I think it’s cool that if you’re throwing a party or just having a few friends over that you could not only have music playing in the background, but also the music videos themselves. Some music videos also make for good entertainment and conversation pieces.
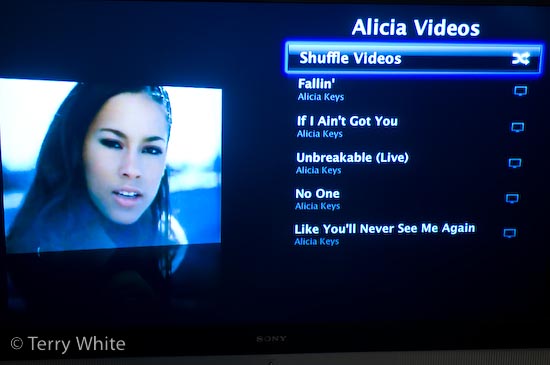
Well Apple finally fixed this in the most recent Apple TV software update. Not only did they add Genius Playlist support (new in iTunes 8), but they also quietly added the ability to not only play videos back to back, but also shuffle them as well.
You can build music video playlists in iTunes just like you do music playlists. As a matter of fact you can even mix the two. This way you could create a mix of your favorite songs and throw in the music videos you have without worrying about be limited to just music videos.
While we’re on this subject of fixing things, the next thing on my list is support for the iTunes visualizer. I’m still stunned that Apple doesn’t include this in the Apple TV. I guess as a work around you could record it with a screen recorder app (such as iShowU) and then add it to your library as a video and play it that way, but it’s just not the same. This feature should be built-in to the Apple TV, iPhone and iPods.
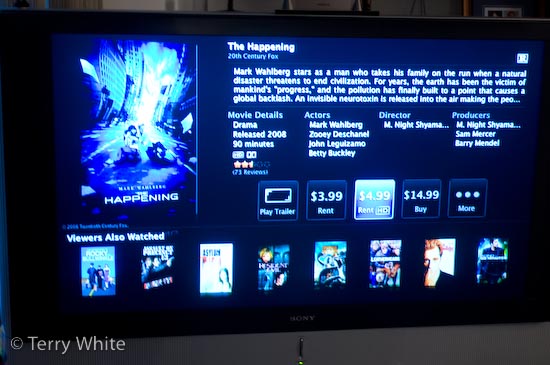
Movie Rentals Appearing Sooner
I also noticed that Apple is getting some movie rentals quicker than others. I remember being very disappointed when Steve Jobs touted the iTunes movie rental feature and then said that they would get titles to rent 30 DAYS after they made their debut on DVD. That pretty much killed it for me. I was thinking "long live Netflix!" However, I see that they are getting some titles at the same time that they come out on DVD/Blu-ray for rent.
For example, "The Happening" just came out yesterday and it’s now available on the iTunes store for rent as well.
If this trend continues, it could sway me away from Netflix. We’ll just have to wait and see.
The Bottom Line
The Apple TV continues to get better with each update. It has become an essential component in my home theater setup. Apple TV starts at $224 (40GB version) at Amazon.com.
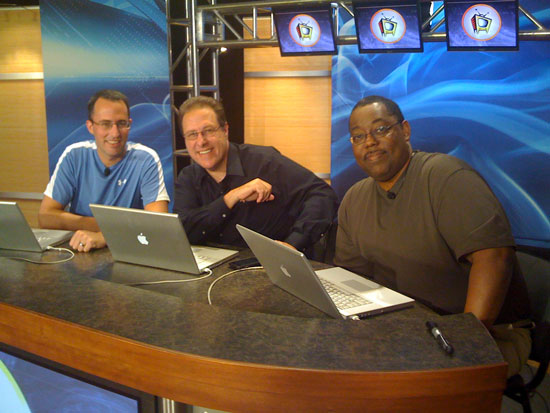
I recently got to hang out with my buddies Scott Kelby and Matt Kloskowski on an episode of Photoshop User TV and that episode is currently airing. These guys have a fantastic setup and a fantastic video crew. It’s amazing and entertaining to watch an episode come together in person. Be sure to check out this week’s episode where I show off some of the new features of Adobe Photoshop CS4.
People always ask me, "where do you find the time to do all that you do?" The truth of the matter is that there are only so many hours in the day. While I do love technology, have a full-time job and a family, there really isn’t enough time to do all the things that I want to do. So that means that I do have to give some things up. One of the things that I almost never have time to do is to read books. I write them, but rarely have time (make that, never have time ) to read any. So when I do read a book, it better be good and I better learn something.
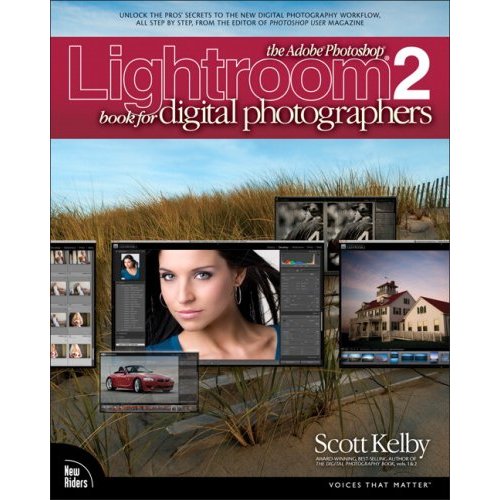
That leads me to my buddy Scott Kelby’s latest Lightroom 2 book for Digital Photographers. While I do work for Adobe and use Adobe Photoshop Lightroom 2 almost daily, that doesn’t mean that I know (or remember) everything there is to know about it. I got a chance to spend some time with Scott’s book this past weekend. Scott’s new book is a complete rewrite of his first book. Lightroom has changed in so many ways and Scott wanted to make this edition even better than the first, so he pretty much started from scratch.
The step-by-step instructions are clear and to the point. The photography is great too. However, the one thing that really stands out for me in this book is that he ends each chapter with a page or two of "Quick Tips." Like I said, I already know how to use Lightroom. I use it all the time. So these tips are the little things that are often missed when you’re self-taught.
For example, here’s a Grayscale Conversion Tip from page 288:
If you click the word "Grayscale" in the HSL/Color/Grayscale panel, it converts your photo to grayscale, and it’s kind of a flat-looking conversion, but the idea is that you’ll use the color sliders to move when the photo is now in black and white? Try this: once you’ve done your conversion and it’s time to tweak those color sliders, press Shift-Y to enter the Before & After split-screen view (if it shows a side-by-side view instead, just press Shift-Y again). Now you can see the color image on the left side of the screen and the black and white (grayscale) on the right, which makes it much easier to see which color does what.
It’s little tips like this that I love and this book is full of them.
The Bottom Line
If you’re using Lightroom 2 and you want to learn more about it, this is your book. Amazon has it for $29.69.
It never fails for me. I’ll ask one of my friends something like, "do you know a good carpenter?" Of course the answer usually is something like "yeah, I got a guy." Well I get asked for recommendations all the time. If you have someone that’s good enough to recommend, chances are that person or business is in your Contacts list. My problem with the iPhone since day one is that there was never a way to easily share a Contact with someone. So needless to say, I was pretty happy to see some apps on the App Store that actually allow you to email a contact to someone. That leads me to this week’s iPhone App of the Week:
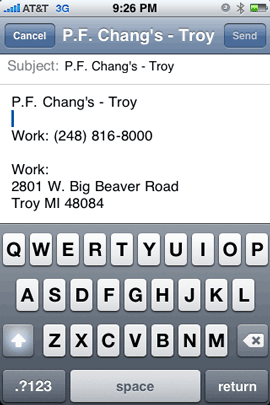
EmailContact
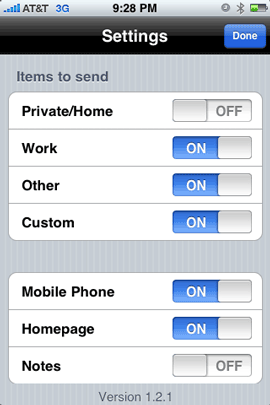
This app allows you to select one of your contacts and email it to someone. That’s pretty much it! It converts the Contact’s info into text and puts it into the body of the message. What’s nice is that you also have the option of turning on/off various fields that you want sent or don’t want sent. For example, I sometimes put notes on my Contact records that are personal to me. So I wouldn’t want the Note field to be sent. No problem, just turn off the Note field. Or maybe you want to send the work phone number, but not the home phone. That’s not a problem either.
Like I said and show above with the first screen capture, EmailContact sends the Contact information for the Contact that you select, as text. So the recipient is going to receive the information as text in the body of the email. It would be nice if this app offered the option to also send the Contact info as a vCard.
Sadly it doesn’t, but I do have an app that does. So this week you get two iPhone app recommendations for one. I also use an app called vCard Mailer. vCard Mailer works very similarly to EmailContact, except that it sends a vCard attachment instead of text. So it really depends on what you want to send (text or vCard)? For me it depends on why I’m sending the info and who I’m sending it to. Just the other day one of my friends needed the phone number for someone that we both knew. Since the iPhone doesn’t yet have Cut/Copy/Paste, I wasn’t able to just copy the phone number to an email. So I used EmailContact to send the info that he needed. Next my wife asked me for the address of a friend of ours and I knew that she would want to put all of this particular friend’s info in her Address Book, so I sent her a vCard using vCard Mailer. This way she could just double click on the attached vCard and automatically import it into her Address Book.
The Bottom Line
Both of these apps are necessary because neither app does what the other one does. Could you get by with one or the other? Sure. However, if you want the option to send text OR vCards then you’re gonna need both. The good news is that they are both economically priced. EmailContact goes for 99¢ and vCard Mailer goes for $1.99. Both apps work on either the iPhone or iPod touch.
Bonus App of the Week – Obama ’08
OK, so now I’m going to recommend a 3rd app to take a look at. Let me start by saying that I recognize that you may or may not support Obama for president. So please don’t respond with comments on how much you love or hate him (I’ll just delete them anyway). I’m not interested in your political views just like you’re probably not interested in mine.
My point for talking about this app is that I’m impressed with the use of the technology! This app allows you to get news about the Obama campaign, see videos and even find your local Obama headquarters based on your current location (it uses Location services). There’s even a feature (Call Friends) that displays YOUR contacts in order by the battleground states (that they are in) that Obama needs to win the most so that you can call your friends and persuade them to vote. Pretty innovative, although I’m not sure that I would feel comfortable calling all my friends and trying to tell them "how" they should vote (just like I don’t want them trying to tell me how I should vote), but it’s a cool feature nonetheless. Republican or Democrat, this app is cool and very well done. Whether you support Obama or not, you should check it out from a technology stand point. I think this app could be the model for a lot of other apps that could provide similar info/features for celebrities and organizations. Get the Free Obama ’08 app here. Works with both the iPhone and iPod touch.
Although I don’t care which way you vote, I do encourage EVERYONE to get out and VOTE! This is one of the most important elections of our time!