
Just over a year ago, I published a video tutorial on how to configure a UniFi IoT VLAN and Zone-based firewall rules for an Apple Home smart home. While that setup worked beautifully at the time, the smart home landscape has evolved rapidly over the last year—especially with the explosion of Matter-over-Wi-Fi devices.
If you followed that original video, you might have noticed that newer accessories (like Govee Matter lights) pair successfully but then inevitably throw a dreaded “No Response” error in the Apple Home app a few minutes later.
After diving deep into the latest UniFi OS updates and the strict networking requirements of the Matter protocol, I’ve completely overhauled my UniFi configuration. We are ditching the tedious port-specific firewall rules and fixing the multicast settings that are silently breaking your smart home.
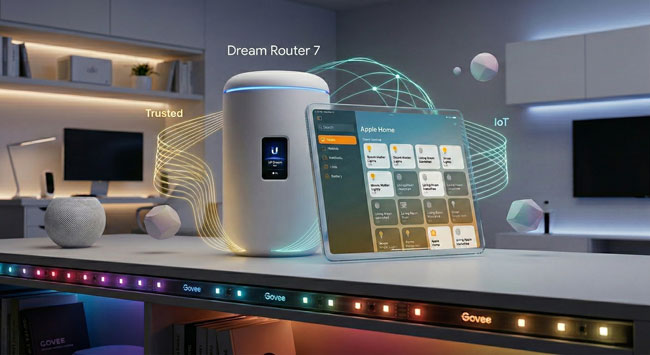
This is important: While I initially visualized this setup around a UDM-Pro, UniFi’s form factors have diversified. But whether you have a cylindrical Dream Machine or Dream Router, or a rack-mount Dream Machine Pro, Pro Max, or next-gen Gateway, they all run the exact same UniFi OS, and this guide is the definitive update for all of them.
Here is the bulletproof way to configure your modern UniFi gateway for Apple Home, Home Assistant, Homey Pro, and Matter.
1. Ditch the Port Rules for “Stateful” Firewall Rules
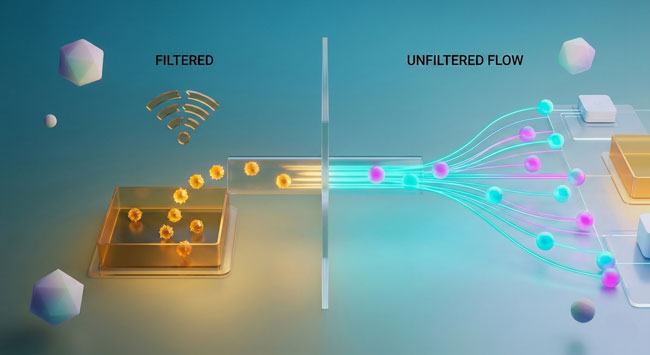
In my original video, I had you create a Network Object for specific ports (80, 443, and 5353 for mDNS) and build rules around them. Delete those rules.
Matter utilizes different ports (like 5540) and dynamically assigns source ports. Managing port groups is a nightmare. Instead, we are going to use “Stateful” firewall rules. This tells the router: “Let my Trusted network reach into the IoT network to give a command, and automatically let the IoT network reply.”
Go to Settings > Policy Engine > Policy Table and create these two simple policies in your Internal Zone:
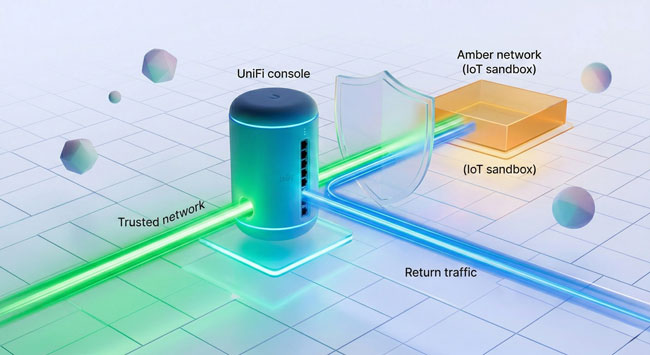
Rule 1: Allow IoT Return Traffic
- Action: Allow
- Source / Destination: Any to Any
- Connection State: Select Return Traffic (or check Established and Related on older firmware). (Save this policy and ensure it sits at the top of your list).
Rule 2: Block IoT to Trusted
- Action: Block
- Source: Network > IoT
- Destination: Network > Trusted
- Connection State: All
That’s it. Your controllers can now effortlessly talk to your smart plugs and lights, and the replies are dynamically allowed through without exposing your main network.
2. The Great IGMP Snooping Reversal
This is the biggest update from my previous video. Last year, I recommended turning ON IGMP Snooping. Turn it OFF.
While IGMP Snooping is meant to optimize network traffic, UniFi’s aggressive implementation frequently drops the exact multicast discovery packets that Apple HomePods, Apple TVs, and Matter devices rely on.
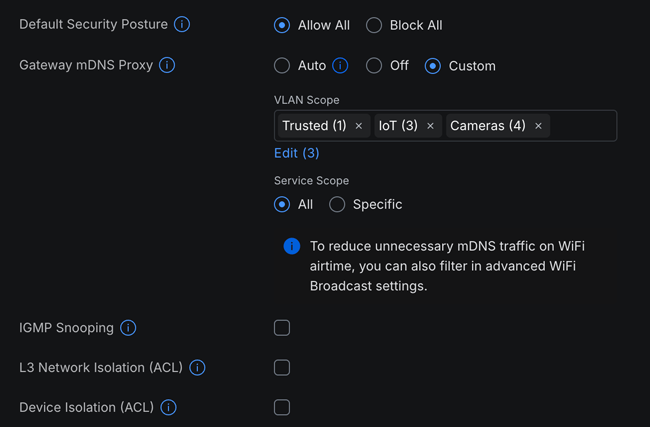
- Go to Settings > Networks> Multicast Settings.
- Ensure IoT Auto Discovery (mDNS) is enabled and includes both your Trusted and IoT networks.
- Under Multicast Filtering (IGMP Snooping), ensure NO networks are selected.
Additionally, you need to stop UniFi from altering your Wi-Fi broadcasts. Go to Settings > WiFi, edit your IoT Wi-Fi network, scroll down to Advanced > Hi-Capacity Tuning, and ensure Multicast to Unicast is unchecked.
3. The Secret Ingredient: Local IPv6
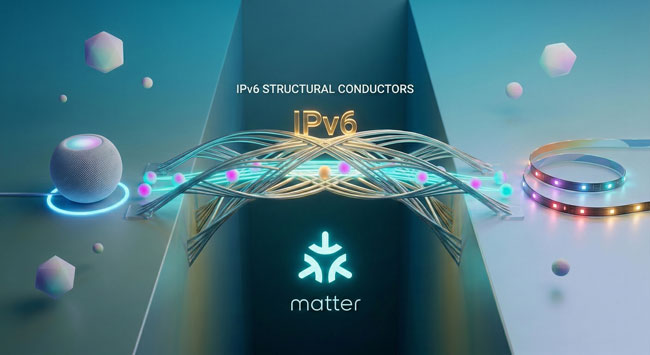
If you are struggling with Matter devices dropping offline across VLANs, this is the silver bullet. Matter over Wi-Fi strictly requires IPv6 Link-Local routing to maintain its connection to your Apple Home Hub.
Even if your internet service provider doesn’t support IPv6, you must create a local IPv6 network for both of your VLANs so the hub on the Trusted side can build a route to the devices on the IoT side.
Step A: Configure the Trusted Network Go to Settings > Networks and edit your Trusted network. Scroll down to the IPv6 section and apply these settings:
- Interface Type: Static
- IPv6 Address: Enter
fd00:1::1(Leave Netmask at 64) - Client Address Assignment: SLAAC
- Check Router Advertisement (RA)
Step B: Configure the IoT Network Now, go back and edit your IoT network. Apply the exact same settings, but you must give it a different local subnet so they don’t conflict:
- Interface Type: Static
- IPv6 Address: Enter
fd00:3::1(Leave Netmask at 64) - Client Address Assignment: SLAAC
- Check Router Advertisement (RA)
4. Where Do the Hubs Go?

I frequently get asked which VLAN the hubs should live on. Here is the golden rule:
- The “Commanders” go on the Trusted Network: Your Apple TVs, HomePod Minis, Home Assistant server, and Homey Pro are highly secure, constantly updated “brains” of the operation. They belong on your main Trusted network alongside your iPhone and Mac. (This also ensures flawless AirPlay and ultra-fast app response times).
- The “Translators” go on the IoT Network: Vendor-specific bridges like the Lutron Caseta smart bridge, Philips Hue bridge, Aqara hubs, and SwitchBot hubs belong in the IoT sandbox. They rely heavily on third-party clouds and should be isolated. Our new stateful firewall rules will ensure your Apple Home can still control them perfectly.
(Note: Sonos is the ultimate exception to every networking rule. Save yourself the headache and keep your Sonos speakers on the Trusted network).
The Final Step: The Great Reboot
Whenever you introduce IPv6 to a network or change multicast behaviors, your devices need to grab fresh IP leases and rebuild their routing tables.
Once you apply these UniFi settings, restart your Apple Home Hubs and manually unplug your smart lights/plugs from the wall for 10 seconds to force a hard reboot.
Once everything powers back up, your smart home will be locked down, blazing fast, and finally capable of handling Matter across VLANs flawlessly.
Here’s the original video for reference:
The Bottom Line
In most cases most users will never have anything to worry about if they never setup VLANs. However, for those that will sleep better at night knowing that cheap devices that may never get security updates or you just don’t trust them, this is probably the easiest way to keep them isolated and from screwing with your trusted devices.
Also if you’re interested in buying or upgrading your UniFi gear, here’s my affiliate link. Using it doesn’t cost you any extra, but it helps support my channel and my blog. Thanks in advance.