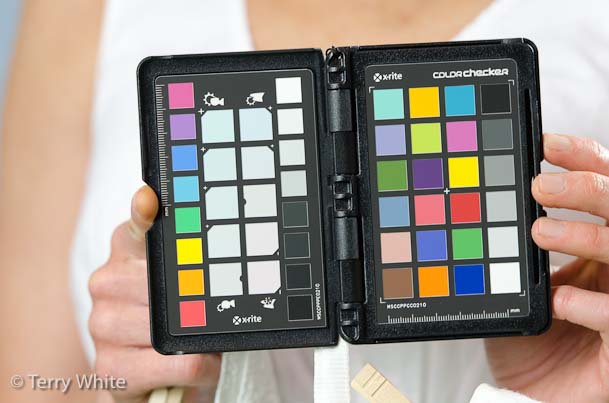
I was walking the Photoshop World show floor with Jason Lykins and he asked me “do you use one of those?” We had just passed by an X-rite ColorChecker Passport on display and I said “nah.” Although I’m sure I’ve seen this product in passing before as well as magazine ads for it, I never paid any attention to it because I thought it was just another color chart. Man was I wrong! Fellow photographer, Photoshop World Instructor and good friend David Cuerdon was in the break room and it just so happened that he had one and said “you want to see a demo?” (this is what we do in our spare time). I thought, yeah sure. The missing piece for me that this thing integrates directly into Adobe Photoshop Lightroom. He showed me how it works and I didn’t even let him finish talking. I got up, went back to the show floor and bought one on the spot.
The problem with RAW files
I shoot in RAW probably 99% of the time. While I’m quite comfortable achieving the end result that I want, it can be a challenge while shooting tethered and having the model/client seeing the images as you take them. If you’ve ever noticed this, as your image come in you see a great looking shot for a split second and then you see one that’s not as “colorful”. For that split second you were seeing the JPG preview. That’s the one where your camera made decisions for you on color, sharpness, etc. You can achieve these results by either manually tweaking a color profile in Lightroom or picking one of the default ones to more closely mimic the JPG preview. There’s even a better way!
This is where the ColorChecker Passport comes in
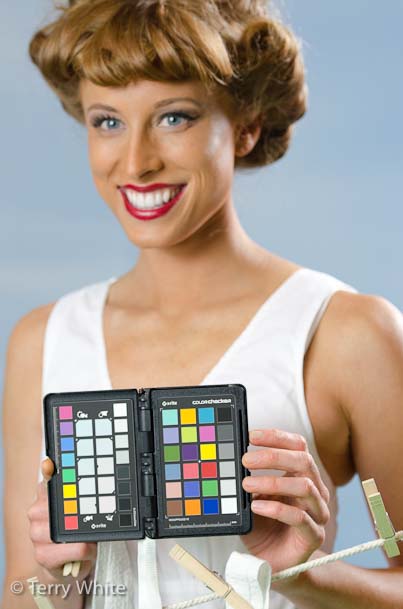
Take one shot under the same lighting conditions that you plan to do the rest of the shoot in with your subject holding the ColorChecker Passport (or simply place it in the shot). Bring that one shot into Lightroom and Export it to the ColorChecker Passport Lightroom Module. It will automatically and in the background process the RAW file (after it converts it to .DNG) and upon successful processing it will create a Custom Color Profile for you to use in Lightroom. Although it even automatically installs this Profile you’ll need to relaunch Lightroom before Lightroom sees it. Once Lightroom offers the profile as a choice you can then choose that Profile for this shot. Once you have the Profile chosen you can then save it as a Develop Preset. Now that you have this perfect preset, you can use it to AUTOMATICALLY ADJUST ALL INCOMING SHOTS whether you’re shooting tethered or just importing from a card.
The card even has White Balance Squares for both Portraits and Landscapes. Rather than just giving you Neutral White Balance you can (optionally) adjust to warmer or cooler by just clicking on the next square in the row. You can also add it to the Develop Preset to auto adjust as you bring the shots in.

See it in action here:
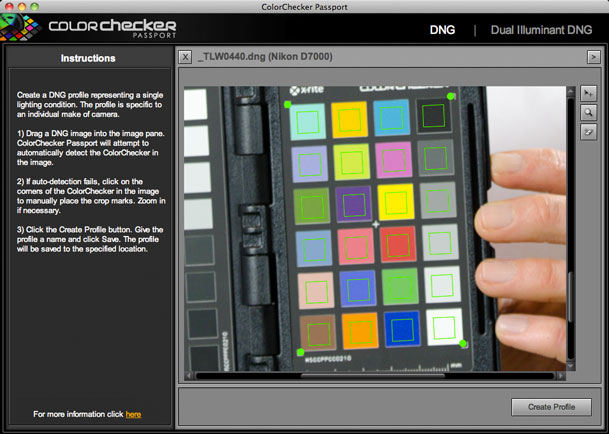
The software brilliantly identifies the color swatches AUTOMATICALLY and adjusts for what they should be as they are known values:
The Bottom Line
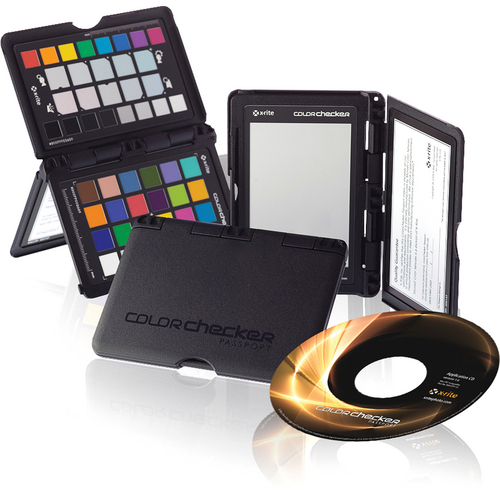
My life just got a little easier with this great tool! It’s now a part of my ever evolving workflow.
You can get the ColorChecker Passport for $99 here from Amazon or here from B&H Photo.


You say it can be used in Lightroom. I don’t use Lightroom as it doesn’t really do anything that I need. Can it be used in ACR in PHotoshop in the same way?
All the best.
John
It can be used with ACR, but it’s a little more of a manual process in that you have to launch their App and then drag in your .DNG file.
Yes you can use ColorChecker Passport in ACR. It comes with free standing software that allows you to create a profile from any image that will then be accessible in ACR.
Thanks Terry for the kind words!
B
I have had trouble with accurate colors in a studio situation until I purchased ColorChecker Passport. It nailed my color accuracy the first time. It is an amazing tool and now I don’t leave home without it.
I too want to know the Lightroom answer – I’m using Hasselblad Phocus and Photoshop CS2. Must I upgrade everything?
Is it usable with Apple’s Aperture?
As far as I can tell, Aperture is not supported. One of many reasons to switch to LR 😉
Not working with Aperture is a non-starter for me. I have my entire photo library (actually libraries) in Aperture and no desire to convert back to Light Room.
Color Checker Passport profiling is nailed to ACR and Lightroom since it makes DNG camera profiles. Datacolor has launched a similar product Spyder Checkr that creates developement settings based on a target. This could be incorporated in other raw developers like Aperture or Capture One, but Datacolor has only ACR/Lightroom support up to now.
I’ve had one of these ColorChecker Passports since they were introduced about 2 years ago and to me they are worth their weight in gold.
Terry, if you create dual-illuminant profiles and set them as default in Lightroom you don’t have to create new profiles for each shoot. Just shoot the White Balance panel and you’re set. And the kicker is that once the dual-illuminant profile is set in Lightroom it is automatically set as the default profile for ACR too.
One really cool feature that isn’t mentioned is that if you don’t like the profiles created by the ColorChecker software (some Canon shooters complain that some colors are too vivid) you can use the Adobe Profile Creator to tweak the profiles or make entirely new profiles. Then there’s another piece of software that isn’t shipped in the package, the DNG Profile Manager, that manages all your profiles regardless of whether they were created by ColorChecker or Adobe Profile Creator. No more digging around in the inner recesses of hidden files and folders.
My question has to do with Lightroom and a d3 or d700. The camera profiles seem fine…however, when I use adobe standard or a custom profile (color checker passport), the image seems overexposed by 0.5
I’ve read about something known as baseline exposure that adobe uses, but not from a credible source. Can you advise or point me in the right direction? Otherwise, I just feel like I’m wiggling sliders willy nilly and not sure if I’m getting the best results.
Thanks!
Noah
Hello
I shoot NEF (raw files) and use Lightroom LR3.
Question: it will process directly me Nef or I have to convert to DNG before to send to Passport color checker ? and is it the same with Photoshop
It will convert your NEF to DNG automatically but yes it does require DNG.