Adobe Photoshop Product Manager Bryan O’Neil Hughes on The Grid Live Today!

My colleague and friend Bryan O'Neil Hughes, Adobe Photoshop Product Manager is going to be LIVE on a special bonus episode of the Grid Today at 4PM. You'll be able to ask him any of your burning Photoshop questions and perhaps get a better understanding of what it takes to create an upgrade to Photoshop. How do they decide which features will go in and when? How do they please such a wide audience with a single product? etc.


You can catch the show at 4PM EDT (GMT -4) at this site.

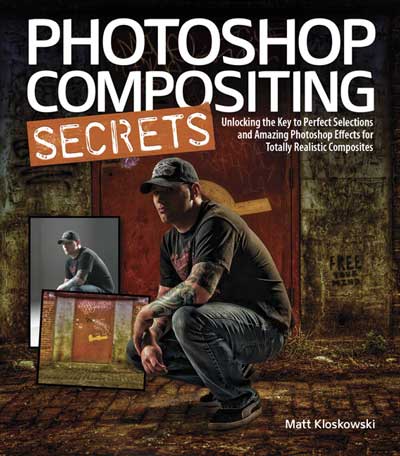
Get Matt’s New Photoshop Compositing Book!

I actually entered the world of photography backwards! I knew way more about Photoshop than I ever did about photography when I started. Over the past 5-7 years I've been spending much of my spare time honing my skills behind the camera instead of saying "I can fix it later in Photoshop." With that said, I kinda left the compositing stuff behind as well. After taking a look at Matt's new "Photoshop Compositing Secrets" Book, my interest in compositing has been reignited. Now that I have a little more photography and lighting under my belt I can begin to look for not only great scenes to capture, but also great opportunities to create composites too. I never used to think about capturing shots of background images to use later in composites. Now I do!


There's an art to compositing

While technically compositing in Photoshop is simply taking two or more photos and putting them together, my goal has always been to make it look "as real as possible." That means that when a composite is done people should either look at the finished piece and not think that it's a composite or they may think it's one but they have a hard time trying to tell. That's when I know I've done it right. Matt's book exposes a lot of short cuts that I wish I had known back in the day, but glad I know them now. 

The composites I'm showing in this post are actually some of my "old" ones that I did years ago. The second one I went in and updated the color of the model that I was never quite happy with.  There are always new selection techniques to learn and new workflow steps. If you have any interest in getting better at selecting, cutting images out of the background and compositing them onto other backgrounds, then I highly recommend that you take a look at Matt Kloskowski's new Photoshop Compositing Secrets: Unlocking the Key to Perfect Selections and Amazing Photoshop Effects for Totally Realistic Composites. I have the Kindle version on my iPad and you can get it here in Paper or Electronic form starting at $21.99. Off to do more reading…

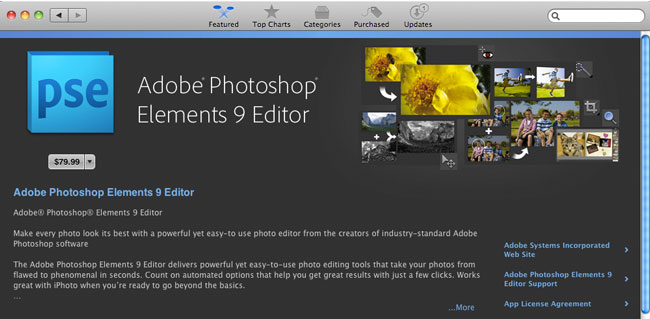
Photoshop Elements 9 on the Mac App Store

Aside from already being a great bargain, there's is a side benefit to having Adobe Photoshop Elements 9 on the Mac App Store. Like all Apps from the Mac App Store, you'll now be able to install Photoshop Elements on as many Macs as you own for the one price. That may not mean much for some, but for those that found the license  limit of two computers a bit too limiting, you'll now be able to install Photoshop Elements on each of your Macs. Of course this only applies to newly purchased copies via the Mac App Store and not existing shrink wrap licenses. 

You can get your copy of Photoshop Elements 9 for $79.99 here from the iTunes


Already own Elements?

Here are several free videos on how to use Adobe Photoshop Elements.

Digital Heavens Smooth Skins Actions for Photoshop

Photo Retouching is a large part of the digital photography portrait workflow. People have varying opinions on photo retouching and some will argue that you shouldn't retouch a photo at all. For those that feel that way you can probably stop here, move on to something else and have a nice day. The fact of the matter is that photo retouching happens everyday and I would dare you to pick up a cover of any magazine with a person on it and tell me that it came right out of the camera and went to press. As both a photographer and a Photoshop user I can tell you that portrait retouching is necessary. The reason that I feel that it's necessary is that when we see a photo of a person we see a image frozen in time and therefore our eyes have a chance to see and study every imperfection. However, when you see that same person in real life you would never sit there and stare at them for several minutes while they remained perfectly still. In a photo we see things that we would never pay attention to in real life. The goal of portrait retouching is to make the person look as good in the photo as they do in real life.

While I am a fan of portrait retouching, just like anything you can take things too far. I've learned over the years that less is more. I don't want to spend any more time retouching a portrait than I absolutely have to. I also don't want to do things to a portrait just for the sake of doing things.

My rule for removing things is that I remove things that either wouldn't be there in two weeks such as a pimple, or temporary bruise, etc. One of the last things I look at near the end of a portrait retouch is "Skin Smoothing." This is one of those topics that can easily get people up in arms and all of a sudden the pitch forks come out. This is also one of those areas in digital photography that can easily be and is often taken too far! 


Skin is already smooth

The first thing to remember is that skin is naturally smooth. What makes it look not smooth in a photo is typically the way the subject is lit. Depending on the lighting you will see areas of the skin show more detail in the shadows which causes the skin to look less smooth. A professional retoucher will tell you that the only way to correct for this properly is to go in pixel by pixel removing the areas that are causing the skin to not look smooth. If you think about it, let's say there was an area of skin with 20 pimples on it. If you removed all 20 pimples the skin would be smooth. Your job would be done. This is the "professional" way to do it and the way I would recommend when you have a paying client or you're working on the cover of a magazine. In other words if your work is going to be judged, then take the time and go in pixel by pixel. Unfortunately for most jobs this kind of time doesn't exist. Nor is it justified for every single photo. This is where the arguing usually starts 🙂 I'm not telling you to do it one way or the other, I'm just pointing out the facts. In these cases there are other methods of "skin smoothing." These methods typically involve running filters on the skin and then reducing the effect to allow the original pores to show through. Professional retouchers (the ones that make their money doing this) will crucify you for this technique. At the same time, I would argue that it can be OK if done right. There are several methods for this and people will even argue which Photoshop filter does a better job. I have my own methods that I'm happy with, but I'm always looking at ways to make it better or faster.


Digital Heavens Automates Skin Smoothing For You

The guys over at Digital Heavens have come up with a set of Actions for Photoshop to automate the entire process of Skin Smoothing for you. This is great because they employ several different techniques within the set and let you try them before committing to one or the other. This presents kind of a non-destructive workflow because everything is done with layers and your original photo/background is never touched. If you don't like the look you can simply delete the layers it creates. You start off by doing exactly what I described above. Get all the flaws fixed/removed first. If you still feel the need for Skin Smoothing after you done you can then just run an Action. As always you can control the amount smoothing via Opacity. One of the advantages of Smooth Skins by Digital Heavens is that it's a series of Actions, not plug-ins. That means that it's using the native features of Photoshop and not dependent on having to keep a setup of plug-ins updated. You get 10 Actions in the set. This gives you a wide variety of different techniques to try out and to pick the one you like best for your image. They've also done a great job with providing samples and tutorials to show you how the Actions work.

Here's a sample tutorial video of just one of the Actions that ships with Smooth Skins:

httpv://www.youtube.com/watch?v=3Ej06FtGuIU


A bit of final advice

No matter what technique you employ keep in mind the age of your subject. I find that you people (kids/teenagers) rarely need any skin smoothing at all! It makes my day when I DON'T have to do it. For example, the very first photo at the top of this post of Amanda has absolutely ZERO Skin Smoothing applied. I removed 3 pimples. That's it. She's young and already has beautiful skin. With older people you need to show some restraint too. Don't make the person look unbelievably too young. These actions are a great way to save time, try different techniques and have a way out if you don't like it all without having to create them yourself or do it manually each time. We've all seen "bad retouching" I'm guilty of a few bad retouches in my past as well. Another piece of advice is after you're done, close the image and reopen it hours later. Look at it and see if you still agree that it's "done" and not too much?

Before Smooth Skins from Digital Heavens I only had 2-3 different techniques. Now I have 10 New ones!

You can find out more about Digital Heavens Smooth Skins Actions here as well as additional video tutorials and examples.
Slickr Flickr Pro for WordPress

[slickr-flickr tag=”Australia” type=”slideshow” delay=”6″ items=”33″ size=”large” width=”650″ height=”488″ border=”on”]

I'm still trying out different methods of posting multiple images to my blog. Last week I showed you the extremely cool LR/Blog plug-in for Lightroom that allows you to post images directly from Lightroom to your WordPress blog. While the LR/Blog plug-in does exactly what I want it to do when I have a few images here or there to post, I was looking for another solution to post a "gallery" of images. Ideally I wanted to take the photos that I post to Flickr.com and have them displayed on my blog. This would make my life even easier since I can post to Flickr directly from Lightroom 3 anyway.


Flickr already does this

If you have a Flickr account you can set it up so that you can post a photoset directly from Flickr to your Blog! See an example here. However, there really isn't much control over it and it's IMMEDIATE! The minute I clicked "Post", it made a new blog post and released it without any warning. Again, there is nothing wrong with this and for many this simple solution will be just fine. As a matter of fact I could so see doing this while on the go or when returning from a photowalk and just letting the image rip! However, if I'm writing a more detailed post and I then want to include the images in that post then I require a little more control over layout, delivery and timing.


WordPress Plug-ins for Flickr

I started looking a few different WordPress plug-ins. Sadly almost all of them disappointed me in one way or another. Either they didn't allow me to simply choose a photoset (Flickr's term for a gallery) or they looked like crap in terms of display. I settled on Slickr Flickr Pro (at least for now). This plug-in offered the closest set of features to what I was looking for. While it oddly doesn't allow you to specify a particular photoset, it does allow you to select images via Tags. If you want to include a selection of images in a post, just tag them all with the same Tag and Slickr Flickr will use those images. 

You can display the images as a gallery (like my Australia Post) or you can make a self running slideshow like my images above. The Pro version allows you to go past the image count limit as well as it offers more customization features and better support. This is not the end all be all solution, but it works for now.


Yes I am actually in Australia

I took the photos above the last time I was here in 2007. I haven't had many photo ops on this visit, but I am looking forward to seeing you in Melbourne, tomorrow!

CS5 Evolution Tour

5 Lightroom Keyboard Shortcuts that will Speed Up Your Workflow

httpv://www.youtube.com/watch?v=8Sud57DpfgE


In this episode of the Adobe Creative Suite Video Podcast I'll show you 5 Keyboard Shortcuts for Lightroom that will speed up your day to day workflow!

See more of my Adobe Creative Suite Videos on my Adobe Creative Suite Podcast and get the App here. It features EXCLUSIVE CONTENT that no one else gets to see. This episode not only has a BONUS CLIP that is available only in the App, but it also has an EXCLUSIVE PDF with tons of Lightroom Keyboard Shortcuts:

Learn Adobe Creative Suite with Terry White - Wizzard Media


Live at Photoshop World: Setup


It’s that time of year again and I’m happy once again to be teaching and presenting at Photoshop World Orlando this week. As a result my blogging schedule will be all out of whack and therefore I’ll be blogging on the go and from different devices.

Looking forward to seeing you if you’re here. Let’s have fun!


– Posted using BlogPress from my iPad 2

Location:Convention Way,Orlando,United States

Watch Adobe TV on your iPad

Adobe TV has recently been updated to now stream videos to the iPad. You can now watch hundreds of videos about your favorite Adobe products and technologies directly on your iPad for free. These videos will stream right on the Adobe TV page or you can watch them full screen. Many of the newer episodes are now showing in HD.

You can check out Adobe TV here on your computer or your iPad.

As always you can subscribe to my videos and download them to your computer or iOS devices for FREE here on iTunes.

5 Things You May Not Know About Photoshop CS5

httpv://www.youtube.com/watch?v=2qq_20ruKA0


In this episode I'll show you 5 features that you may not know about in Photoshop CS5. These are just 5 of the many JDI (Just Do It) features that the Photoshop Team worked into Photoshop CS5 to make life easier for Photoshop users each and every time they use the application.


See more of my Adobe Creative Suite Videos on my Adobe Creative Suite Podcast and get the App here. It features EXCLUSIVE CONTENT that no one else gets to see. This episode has a BONUS CLIP that is available only in the App:

Learn Adobe Creative Suite with Terry White - Wizzard Media


How To Get Started With Adobe Photoshop Lightroom 3

httpv://www.youtube.com/watch?v=-5SA-uluPns


In this episode I show you how to get started with Adobe Photoshop Lightroom 3. Sure there are tons of videos and sites dedicated to Lightroom and showing tips and tricks, but this time I'm specifically aiming at Lightroom beginners. Learn how to get started the right way with Lightroom 3 no matter where you're coming from in terms of image management.


See more of my Adobe Creative Suite Videos on my Adobe Creative Suite Podcast and get the App here. It features EXCLUSIVE CONTENT that no one else gets to see. This episode has a BONUS CLIP that is available on in the App!:

Learn Adobe Creative Suite with Terry White - Wizzard Media