Having Fun with New Light Modifiers

fstoppers-flash_disc

If you’ve followed my photography over the years you know that I’m always looking at new light modifiers. I can never have too many in my arsenal. Over the past few evenings I’ve been experimenting with some new ones that have made their way into my studio. Let’s take a look at them and some of the results I’ve been getting so far.

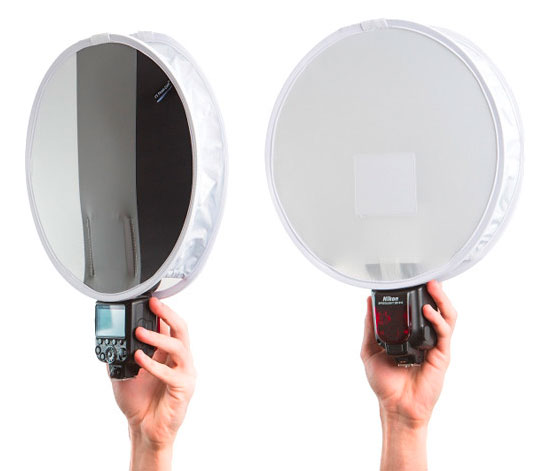
Fstoppers Flash Disc
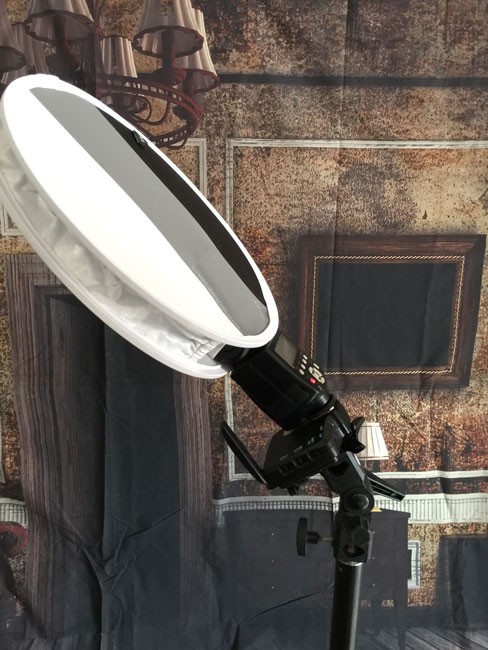
fstoppers-flash_disc-mounted

The first one was actually what I call a “checkout line impulse buy”. In other words my cart at B&H Photo had the items I wanted and I still had some money left on my gift card. I couldn’t think of anything else I wanted in the amount that was left over so I decided to add the Fstoppers Flash Disc. It looked cool, very portable (it folds down to a size smaller than the speed light), and I figured if nothing else I could use it as my white balance card.

Before last night’s shoot I decided to take a few test shots so that you can get a feel for what this will do for you. Now keep in mind that the bigger the light and the closer it is to your subject, the softer it will be. Since this modifier is relatively small I was skeptical. However, it did exactly what I expected. It gave me a better light than I would have gotten without it!

wpid14321-Christa-0002_sm.jpg

First up, here is worse case scenario. No modifier at all. Just flat horribly harsh lighting from the speed light using just the little built-in flip down diffuser. (yes I could have bounced it to make it better. Yes I could have turned the power down. Yes I could have done _____., but the point here is to show what small lights typically do straight on).

wpid14325-Christa-0011_sm.jpg

Now with the Fstoppers Flash Disc mounted directly on the speed light. The results are notably better than without it. If you look at the shoulders you see a software light pattern and her face is less blown out and not as flat. Again there are more things you can do to make the results even better, like bouncing the light and perhaps a different position/distance, but again the point here is to see simply what difference it would make by adding the Flash Disc.

Adding in the Westcott Omega

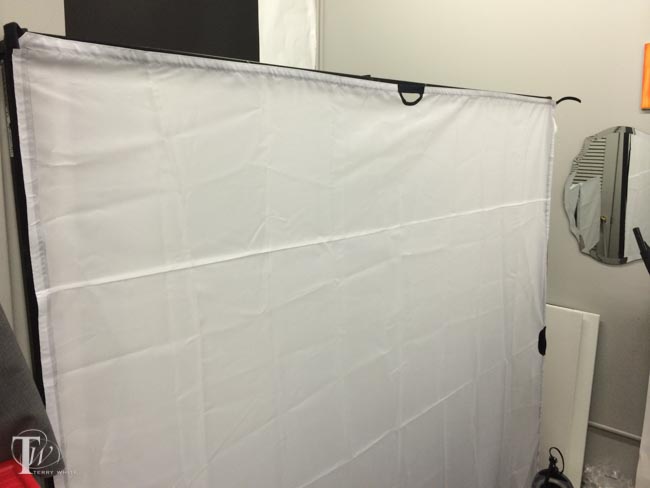
The next modifier I was going to look at was the NEW Westcott Omega 10-in-1 Reflector Kit. The material directly connected to the frame is a one stop diffusion panel. So before getting to my Omega setup I simply added the diffusor to my existing Flash Disc set up to get this result.

wpid14323-Christa-0009_sm.jpg

Same light. Same Flash Disc. However, the results are much much better simply by diffusing the light a little more. Add a reflector for under the eyes/chin and you’re golden.

fstopper-flash-disc-w-Omega

Since the Omega was effectively going to take the light down 1 stop, I increased the power setting on the speed light from 1/8 to 1/4 to compensate.

The Omega 10-in-1 Reflector Kit
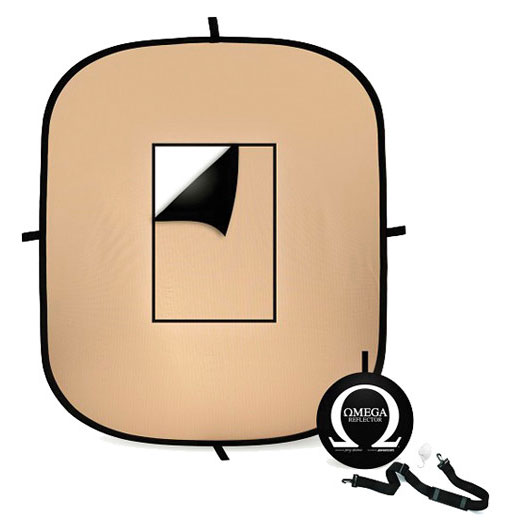
westcott-omega

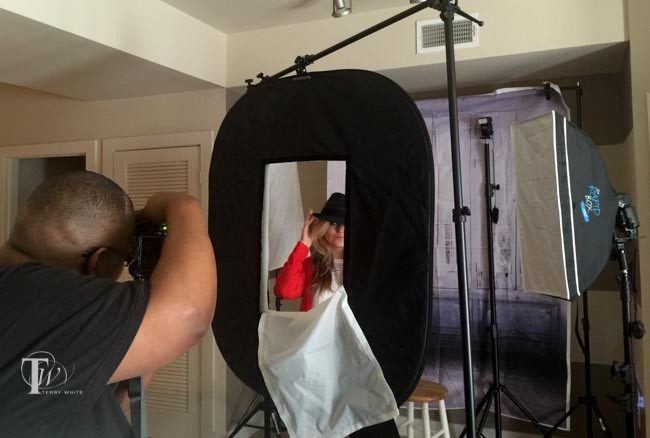
This reflector kit adds one element that I haven’t seen or had in any of my previous multi-use its and that is a “shoot through window”. First off you get a typical 5-in-1 kit right off the bat. You get Silver, Gold/Sunlight, White, Diffuser (built on to the frame) and Black. Now take all of those surfaces and remove the center piece for a 10-in-1 kit.
wpid14331-IMG_7838_sm.jpg

When doing a shoot through setup like this, you kinda have to think backwards as you’ll be using the reflective side facing the subject to light the subject. In the setup above I used two speed lights. The one in back (no modifier) was position up high to act more as a hair light and to add a little fill. The second speed light was mounted in a Rapid Box Strip to provide both a rim light and main light.

wpid14335-Elena-0066-Edit_sm.jpg

I like the results and the fact that this modifier made me think outside my box in ways of setting up lights that I probably wouldn’t have tried otherwise. It’s also ideal for putting up in front of a window either as a diffuser or shooting through the window from outside into the room without blocking the light.

The Westcott Omega 10-in-1 38″ x 45″ Reflector Kit is the one I’ll be traveling with from now on as it provides the basic reflecting, diffusing, flagging functions that I would need, plus the ability to shoot through.

The Rapid Box Duo

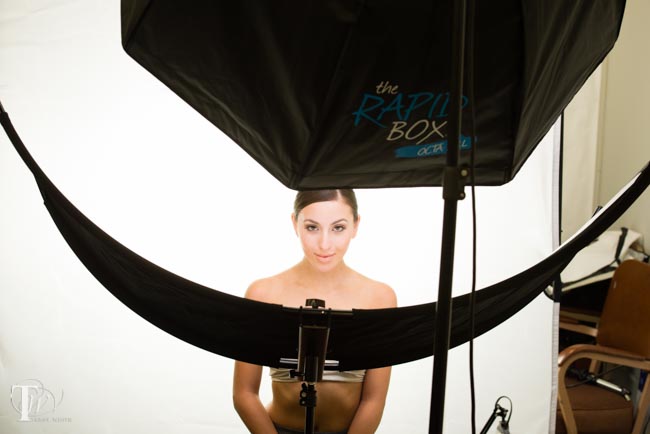
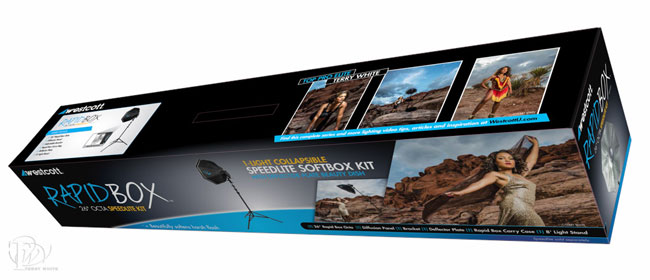
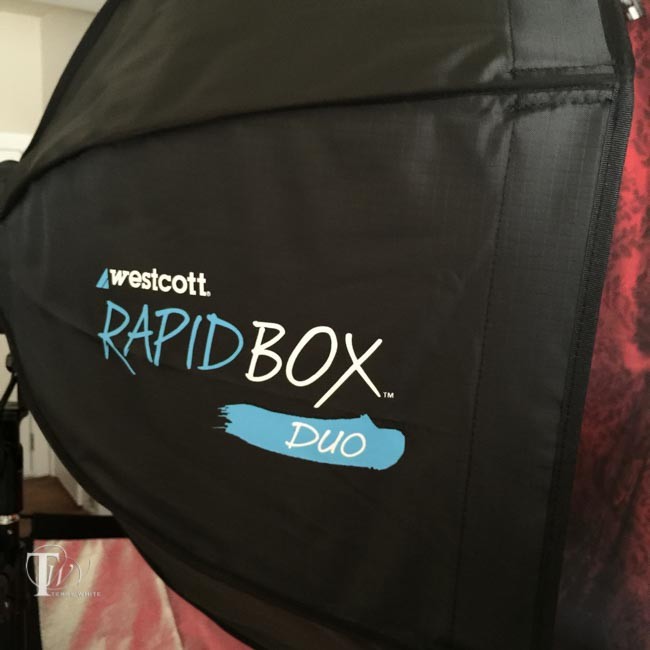
I was already a fan of the Westcott 26″ Rapid Box, which is part of my “Westcott Terry White Travel Portrait Lighting Kit“. So when they announced the Rapid Box Duo, I was intrigued.
wpid14345-IMG_5721_sm.jpg

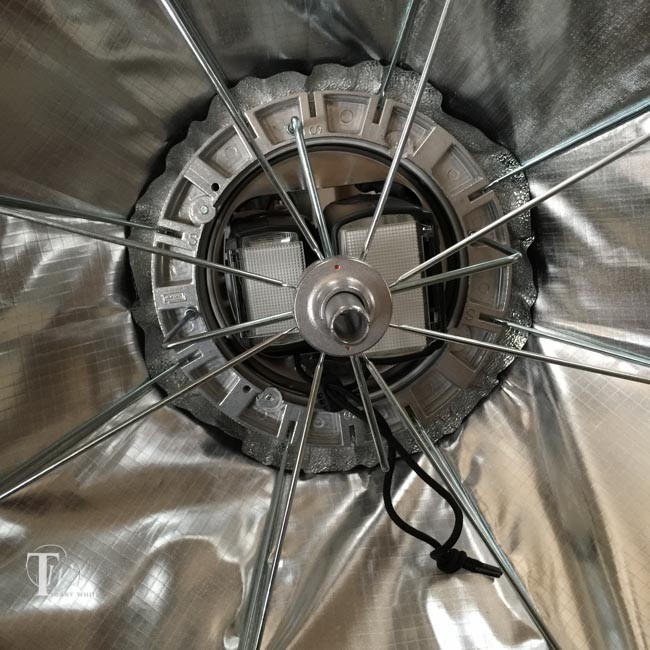
The big difference here is that this one allows you to mount one or two speed lights to give you more light. It’s also a slightly bigger size at 32″. It still collapses down for travel and comes with all the mounting hardware/angled bracket for mounting your speed lights outside for better triggering.
wpid14343-IMG_5720_sm.jpg


Here I have an Nikon SB 910 and SB 800 mounted.
wpid14337-IMG_7887_sm.jpg

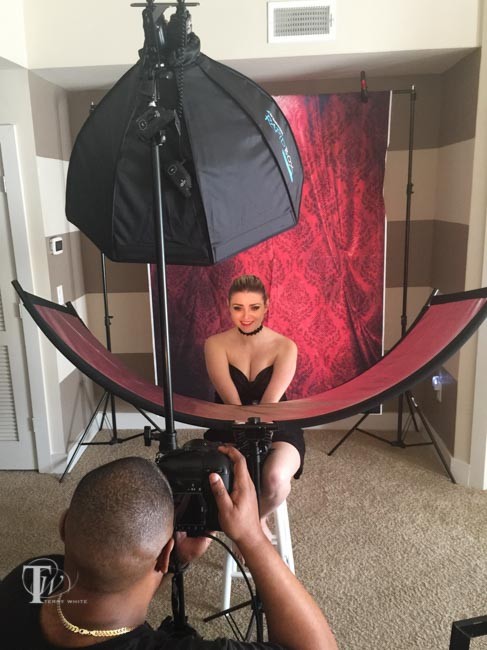
Adding in the Westscott Eyelighter, which is probably my favorite modifier of all time. I get the results on location that I would typically get with more expensive studio strobes.

wpid14341-Christa-0071-Edit_sm.jpg

As I’ve said many times. You can have the most expensive camera in the world, but without great light your pictures are liable to suck.

wpid14339-Christa-0171-Edit_sm.jpg


However, if you have great light you can get good results with just about any camera.

You can get the Fstoppers Flash Disc here. You’ll also want this “tilt mount” to be able to mount your speed light and tilt it down.

You can get the Westcott Omega 10-in-1 Reflector Kit here.

You can get the Westcott Rapid Box Duo here


Best Nikon DSLR GPS

di-gpsoncamera.jpg

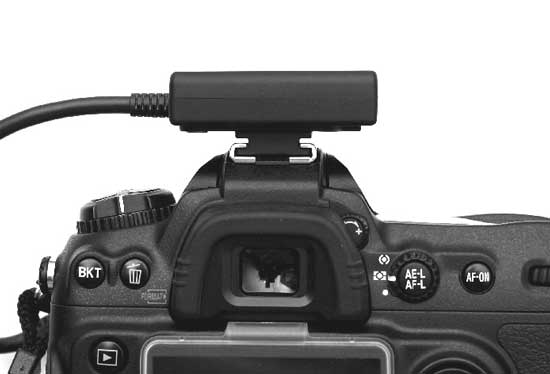
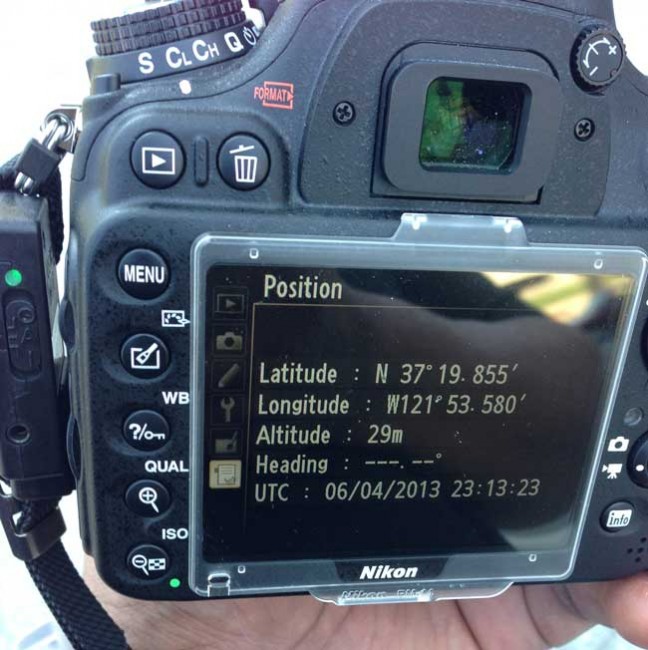
It has been a while since I’ve looked at GPS units for my Nikon DSLRs and yes it’s sad that in 2015 we still have to look at external solutions. However, that is the current state of affairs and the good news is that the prices have come down and the units continue to get better. Recently I was debating going with a NEW Nikon D750 vs a D810. When I was leaning strongly towards the D750 I tested my existing GPS unit (the one on my Nikon D600) and realized that since the GPS port was in a higher spot on the body that my Dawn di-GPS Eco model just wouldn’t work.

di-gps-eco-prosumer

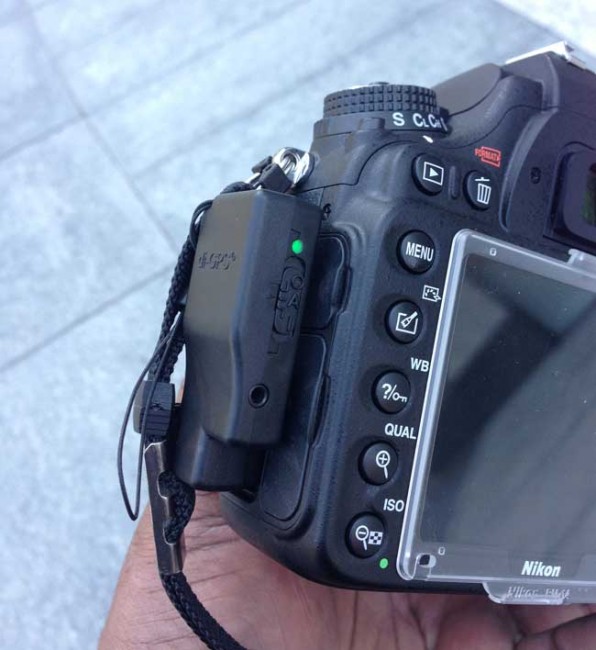
It’s a shame because I really like the flush to the body design of the di-GPS Eco models. I reached out to Dawn Tech to see if there was one on the horizon for the D750 and they informed me that they were working on something, but it wasn’t ready yet. In the mean time I got the UPDATED Mini3 MTK S5. I had worked with the older model in the past and this newer one now includes the “Last Position Memory” function, which is great for those times when you go inside and keep shooting. More importantly it has an even lower power consumption (19mA, less than 1/3 of the current consumption of Nikon’s own GP-1). While it doesn’t have the flush to the body design that I like so much in the di-GPS Eco, it’s very lightweight and can either sit in the hot shoe or attach to the camera strap.

di-gps-eco-pro

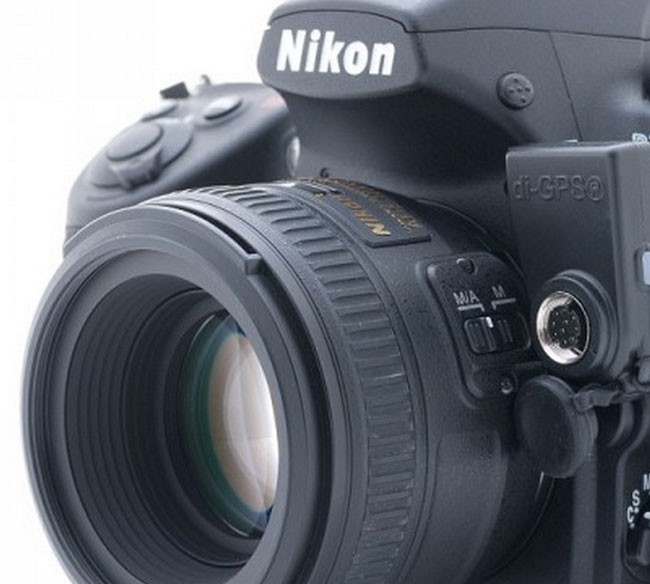
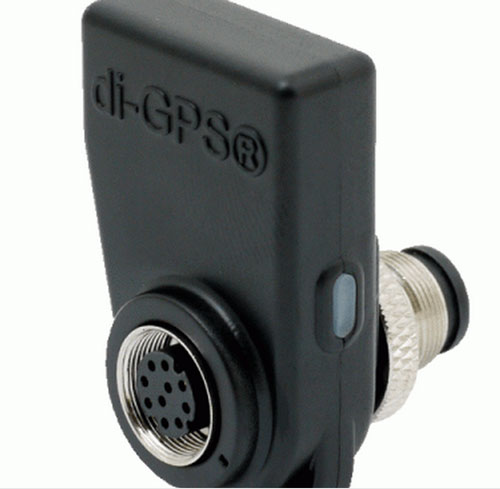
I ultimately decided on and bought the Nikon D810. So this means that I get to use the Eco ProFessional M model. This one has the same “flush” design that I like and it even has the important pass through terminal port so that I can use my cable release or other accessories.

di-gps-eco-pro-detatched

The Bottom Line

di-gps-eco-prosumer-Nikon_d600
Nikon has had GPS support built-in to their DSLRs for years, but still refuses to build the actual GPS receiver in to their DSLR bodies or battery grips.


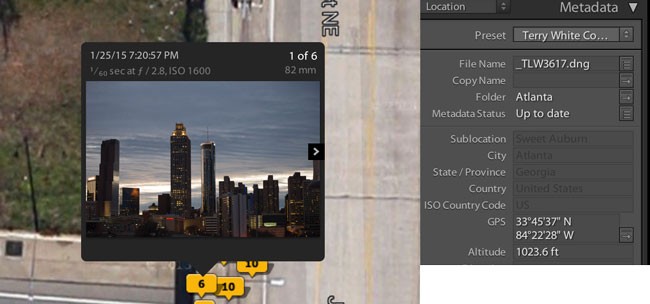
I love geotagging my photos as I take them. I use the Maps module in Lightroom quite a bit for my landscape and travel photos. It’s also easier to answer that “where did you take that shot” question as the galleries on my website also take advantage of this data allowing visitors to see exactly where each shot was taken. Sure there are many solutions and even iPhone apps like this one, but the most accurate and convenient way is to have the GPS data logged right into the metadata of each shot as you take them. While I applaud Nikon for having direct GPS support right in the menu of their DSLRs, it’s a shame that in 2015 we still have to buy “EXTERNAL” modules. As I’ve said many times I’d love to see this either built right in or at least built into an “optional” battery grip. Until that happens The GPS units from Dawn are your best bet.

Lightroom_GPS_Maps_Module
Using the Maps module I can easily see exactly where shots were taken and even copy to GPS data to images that were taken with other cameras that didn’t have GPS.


If you could design a DSLR, what would it have in it?

Image compliments of iStockphoto.com

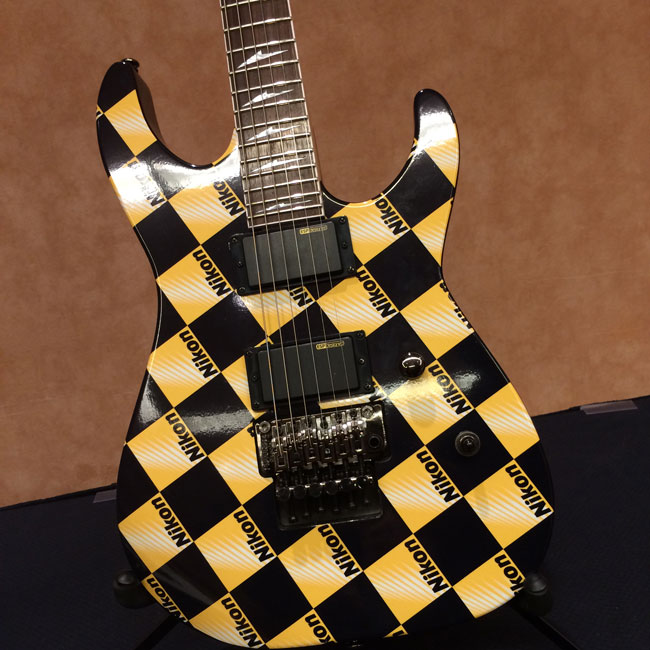
Last week while I was at Photoshop World, I stopped in to drop off my Nikon D600 for cleaning at the Nikon lounge. They offered a GREAT FREE cleaning service to all attendees and cleaned over 400 bodies. While hanging out in the lounge and catching up with my friends from Nikon I took a shot of the one of a kind Nikon guitar that they were giving away.

nikon-guitar

One of the Nikon reps started giving me crap (in fun) about shooting it with my iPhone instead of my Nikon camera. I threw it right back at him and said “well if this $3,300 Nikon D810 had WiFi built in and social sharing, then maybe I would have taken the shot with it instead.” Then we got into a debate about built-in WiFi and why the magnesium (metal) bodies didn’t have it. I said “so you mean to tell me that there’s just no way possible to design a metal body with Wifi? Really?” He couldn’t argue with me anymore. Nonetheless, I used the tool (in this case my iPhone 5s) that would get the job of shooting and sharing a shot on social media most efficiently. This friendly debate and jabbing got me to thinking (once again) about my dream DSLR body and what features it would have in it. Here are just a few of mine:

  • 16-24MP (36MP is GREAT, but only if they let me dial it down to smaller RAW file when I want)
  • Native DNG support
  • Built-in WiFi
  • Built-in GPS
  • Touch screen with customizable menus like a smartphone
  • 4K Video (not that I need that right now, but we are dreaming)
  • Very water resistant if not waterproof
  • Super light weight and rugged
  • Wireless control built-in to trigger from a mobile device and see a Live View

Now I know that many of the features above can be done with add-on accessories, but it’s 2014 and these things should be standard, especially on higher end models. Even for those that would say that they don’t want or need all of those things and therefore don’t want to have to pay for them by default, then I say at least build them all into an optional battery grip. That I buy the grip that adds ALL the modern features to my DSLR.

So I ask you, what would your list have?


Before and After the Westcott Eyelighter

wpid13605-Aylla2-0125-Edit_sm.jpg

When I initially gave a first look at the NEW Westcott Eyelighter a couple of weeks ago (here), one thing I failed to do was to show a before and after comparison

wpid13599-Thais2-0204-Edit_sm.jpg

So I took some time away from my vacation last week and setup a beauty shoot with a few models to really give you an idea of what the Eyelighter really does beyond providing interesting catchlights in the eyes. In the two shots above you can see the affect of the Eyelighter not only in the eyes of my subjects but also under the chin.

wpid13601-Thais2-0205-Edit_sm.jpg

What a difference an Eyelighter makes. The shot above is the same model under the same Westcott Skylux and XXL RapidBox 48″ octa softbox, but without the Eyelighter.

wpid13593-Thais2-0064-Edit_sm.jpg

The shot above is a production shot showing the Eyelighter setup just in front of the subject with the Skylux LED light above subject.

wpid13595-Thais2-0074-Edit_sm.jpg

The results are AWESOME and pretty much night and day.

wpid13597-Thais2-0075-Edit_sm.jpg

Again here’s another look without the Eyelighter using the exact same main light, subject and camera settings.

But what about the background?

wpid13608-IMG_2362_sm.jpg

The background was lit using two lights shining through the Westcott Scrim Jim. This gave me the High Key look that I wanted by providing a nice big soft light source directly behind the subject that wrapped around the subject with beautiful rim lighting.


The Bottom Line

wpid13611-Thais2-0084-Edit_sm.jpg

I’ve always been a fan of this clamshell beauty look and the Westcott Eyelighter makes it much much easier to do now with one light. Adding another light or two behind with the Scrim Jim makes this accessory useful for in studio work as well as on location work. All of the images above were shot with my Nikon D600 and 70-200mm f/2.8 VRII lens.


3 Tips for Shooting Tethered into Lightroom 5

Lightroom_totem

In this episode of Adobe Creative Cloud TV, I’ll share at least 3 tips that will make your life easier while shooting tethered with Lightroom 5. Get a long USB tethering cable here.

Are you missing out on my Bonus Content?

See more of my Adobe Creative Cloud Videos on my Adobe Creative Cloud TV and get the App below. It features EXCLUSIVE CONTENT that no one else gets to see. This episode has a BONUS CLIP that is available only in the App! My iOS App is a Universal App for iPhone, iPad and iPod touch. I also have an Android version on the Amazon App Store:

.


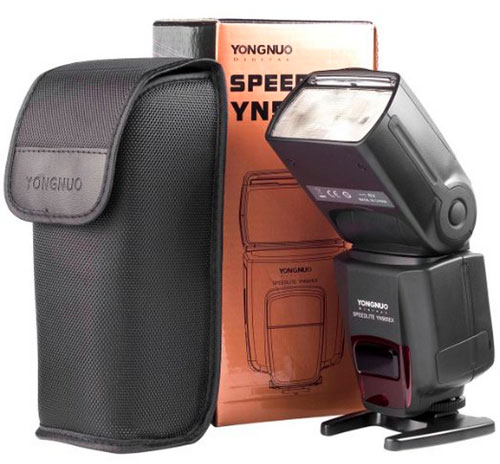
Yongnuo YN-565EX ETTL Speedlite Flash for Nikon Review

yongnuo-speedlite

If you’re a photographer and you shoot on location chances are you’re going to have the opportunity to use a speedlight flash from time to time. My first speedlight was a Nikon SB600, and then I bought the SB800 and finally an SB 900/910. The latter currently goes for $546.95! That’s a lot of money for a small battery operated flash. As a matter of fact you can get this Elinchrom BRX 250 Studio Strobe for only $524.99. I know that smaller electronics usually cost more than larger ones, but the cost of speedlights has always been a mystery to me. With that said I have a lot of new up and coming photographers following me that are making their first equipment purchases. I really like my Nikon SB 800 (discontinued) and my SB 910. They’ve never failed me. The only problem is they may easily be out of the reach of new photographers because of the cost. So I figured I would give the Yongnuo YN-565EX Speedlite a try as an alternative. I would love to have 3 SB 910s but I can’t justify the expense. Yes both Nikon and Canon make lower cost models, but those models typically have fewer features and lower output. Even with those limitations the lower cost models easily go for $300 or more. The Yongnuo YN-565EX ETTL Speedlite Flash for Nikon goes for a mere $143.99 (Canon version here). So basically I could get almost four of the Yongnuo speedlites for the price of one Nikon SB910. However, let’s keep one thing in mind…you get what you pay for.

Initial Impressions

For almost a quarter of the price of my professional speedlight I really wasn’t expecting very much in terms of quality. I also have read the reviews and heard from others both good and bad experiences with Yongnuo flashes in general. However, I remained optimistic that this unit should at least work, but the question is for how long? It’s too early for me to tell if this flash will last me for the months/years to come, but at least initially I’m pleased. When I took it out of the box my first thought was “low cost plastic”. I don’t like to use the word “cheap”, but it definitely has a “low cost” feel to it. However, it did have all the things on it that I wanted and would expect. It has a diffuser and bounce card in the head just like my SB910. The head swivels just like my SB910. It also has a sync port on it for external triggers just like my SB910 and most importantly this model supports Nikon’s TTL protocols. The controls on the back are very easy to operate and from what I can tell they pretty much copied the button layout from one of the Canon speedlites. I put my four AA batteries in, fired it up, and took some test shots. It worked perfectly. I tried both TTL and Manual modes. I also like the recycle beep (which you can disable). It’s very distinctive. While I’ve only tested this flash for a couple of days now I have had no problems with it. Recycle time is about 5 seconds.

The Bottom Line

My only concerns are those that have been voiced by others that have used Yongnuo speedlites. The main concerns I hear are that they drain the batteries faster than the manufacturer’s models and that eventually they simply die. Only time will tell on the latter and so far I haven’t exhausted a set of batteries yet and don’t feel that, at least at this point, that they drain that much faster than my Nikon SB910 does. Another thing to consider is that these won’t do high speed sync. Now on the plus side there are others that have sworn by these speedlites including Scott Kelby, who uses them on his tours. The other thing I like about them is that I’d be a lot less concerned if something happened to it in the field. For example, if it were stolen it would be a lot easier to swallow a $144 loss than a $547 loss. This is also the case if I were going to use it in less than ideal conditions such as wading out in a lake or the ocean to get a shot. If it fell in the water or off a cliff it would be a lot less traumatic. While they’re not quite disposable, they are a lot less to have to “worry” about.

The question you’re asking right now is, “should I get one?”

The answer to that is probably yes. You have a lot less to lose and if it works for longer than a year then you can probably feel like you got your money’s worth. Also even if you want a better quality more expensive speedlite as your main speedlite then the Yongnuo’s can be used as your second or third speedlite. That’s exactly how I plan to use them.

You can get the Yongnuo YN-565EX ETTL Speedlite Flash here for Nikon and here for Canon.
 

Need a light modifier?

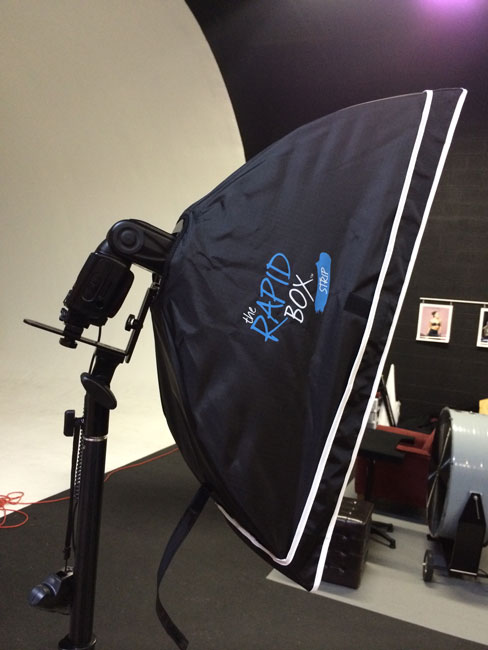
Speedlites are great, but you’ll get much better results using good modifiers. I recommend the Westcott Rapidbox Octa 26″ here and the Impact Quikbox here. Also check out my Westcott Terry White Travel Portrait Kit here.



Nikon D4s Announced and Available for Pre-order

nikon_d4s

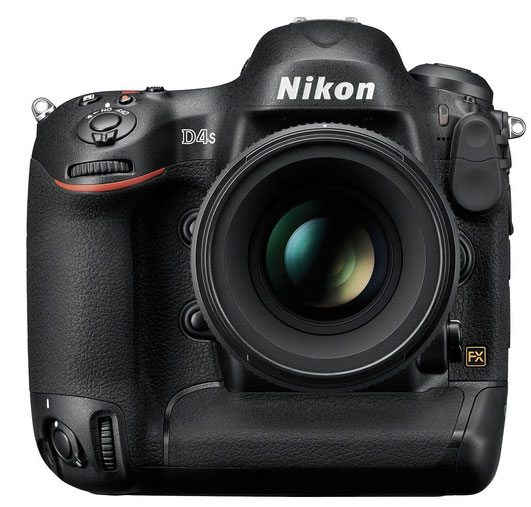
Seems like only yesterday that I announced that I was buying/upgrading to a Nikon D4 from my trusted Nikon D700. Believe it or not that was just over two years ago! Time flies… Well here we are in February 2014 and Nikon just took the wraps off the rumored Nikon D4s. At first glance it looks just like a Nikon D4. However, there are some new things going on on the inside that count.
  • 16.2MP FX-Format CMOS Sensor
  • EXPEED 4 Image Processor
  • 3.2″ LCD Monitor
  • Full HD 1080p Video Recording at 60 fps
  • Multi-CAM 3500FX 51-Point AF Sensor
  • Native ISO 25600, Extended to ISO 409600
  • 11 fps Shooting for 200 Shots with AE/AF
  • 91k-Pixel RGB Sensor and Group Area AF
  • 14-Bit RAW Files and 12-Bit RAW S Format
  • 1000 Base-T Gigabit Wired LAN Support

What makes the D4s better than the D4? Basically it boils down to a faster camera with better video support and better low light performance.

Will I be upgrading? While I may get a review unit to test, I most likely will not be upgrading to the D4s. This camera is more geared towards photographers who shoot sports or photographers that constantly work in low light situations (wedding photographers, etc.). Since I don’t focus on either one, I’ll probably be sitting this one out. Now if Nikon sends me one and forgets to ask for it back, I won’t complain either. hint hint, LOL

I’m actually waiting to see what they do with the D800 upgrade.

You can pre-order the Nikon D4s here.


Nikon D5300 – Great Entry Level DSLR

Nikon_D5300

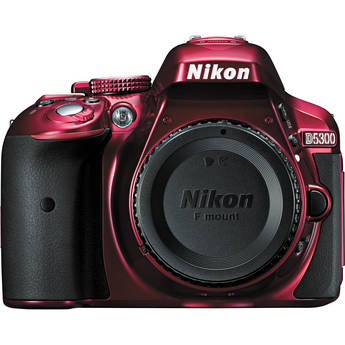
Young photographers just starting out always ask me which DSLR should they buy. Of course the answer to that question greatly relies on your budget. Also the great news is that it’s hard to go wrong with any of today’s DSLR products. I’m a Nikon shooter so therefore I’m familiar with Nikon’s product line more so than say Canon’s or Sony’s. Nikon just introduced the D5300. I’ve owned both a D5000 and a D5100 and this line is a great fit for those just starting out. What generally separates the entry level cameras from the more expensive pro level cameras usually has to do with the quality of materials and sensors, but also the number of buttons and external controls. On entry level models there are less buttons, therefore requiring the shooter to go into the menus to change settings more often. However, many times the entry level cameras introduce features that have not yet made it into the pro line. For example, the Nikon D5300 is Nikon’s first DSLR to offer built-in WiFi and GPS. I’m actually stunned that in 2013 these features aren’t on all cameras just like WiFi and GPS are on ALL smartphones. Nonetheless, they’re finally here. The D5300 also offers a swivel out LCD. Not a revolutionary feature by any means and has been around on previous models and lower end cameras for years, yet not really on pro level DSLRs yet.

The D5300 is a great choice if you’re just starting out. You can pre-order the body here (even in red) or the kit here.

New Nikon D610 Available for Preorder

Nikon_D610

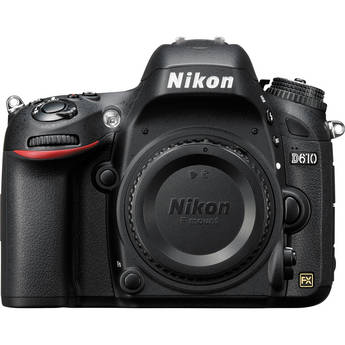
My second body is a Nikon D600 and it’s also my travel camera (although I’m considering going with a smaller, lighter mirror-less camera for non-photoshoot trips). I love the D600 and therefore the D610 should even be better. It’s a minor update and I have little reason to sell my D600 to move to a D610, but if you were in the market for Nikon’s lowest cost full frame DSLR, then it just got better for you. The Nikon D610 is just a minor update from the D600 with an improved shutter mechanism, new quiet continuous shooting options, slightly higher fps rate, and improved white balance.

Product Highlights/Specs

24.3MP FX-Format CMOS Sensor
EXPEED 3 Image Processor
3.2? 921k-Dot LCD Monitor
Full HD 1080p Video Recording at 30 fps (720p at 60 fps)
External Mic and Headphone Inputs
Continuous Shooting up to 6 fps <-NEW/Improved
Expandable Sensitivity to ISO 25600
Multi-CAM 4800 AF Sensor with 39 Points
Built-In Flash with Commander Mode
Supports WU-1b Wireless Mobile Adapter

You can pre-order the body here or the kit here.

Review: The Rapid Box Strip by Westcott

rapid_box_strip

Here I was completely happy with my Westcott Terry White Travel Portrait Lighting Kit and then I went to Photoshop World Vegas. I brought my 26″ Rapid Box Octa with me and had a great shoot at Red Rock Canyon before the show even opened. However, once I got to the Photoshop World trade show floor and over to the Westcott booth, I noticed a “different” Rapid Box. I had no idea that they had a Rapid Box Strip! I use strip bank softboxes all the time in studio for rim lighting. When I saw the Rapid Box Strip it was pretty much an immediate “must have” situation for me. Now with a couple of speedlights and a couple of Rapid Boxes I could really have some fun on location.

It’s as easy to set up and just as compact as the Rapid Box Octa

rapid_box_strip_2

When I took it out of the box and looked at the carrying case it looked identical to the Rapid Box Octa. It was also just as easy to set up. Basically pop it open, put it on the supplied tilting bracket, put the 1-stop diffusion cover over the front, slide on your speedlight and you’re ready to shoot.

wpid12773-TLW3720_sm.jpg

While I haven’t had a chance to take it on location yet, I did a quick impromptu shoot with Scott Diussa from Nikon who was visiting my studio. He was also impressed by the ease and quick set up. Disclaimer: Scott is not a professional model. He is a professional on the other side of the camera and a great musician 🙂 He humored me as a friend.

The Bottom Line

rapid_box_strip_3

If you’re looking for good quality, easy to set up and use softboxes for travel, I can’t recommend the Rapid Box line enough (no, I don’t get paid a dime by Westcott to review or recommend their products). They’re my primary light modifiers when I’m on the road! I love the “octa” shape and “strip” shape in studio and now I have them on the road too.

wpid12775-TLW3723_sm.jpg

You can get the Rapid Box 26″ Octa here

You can get the Rapid Box Strip 10″x 24″ here

You can get my Westcott Terry White Portrait Travel Kit here.