ExpoDisc 2.0 Review

expodisc_2.0_Nikon-70-200mm

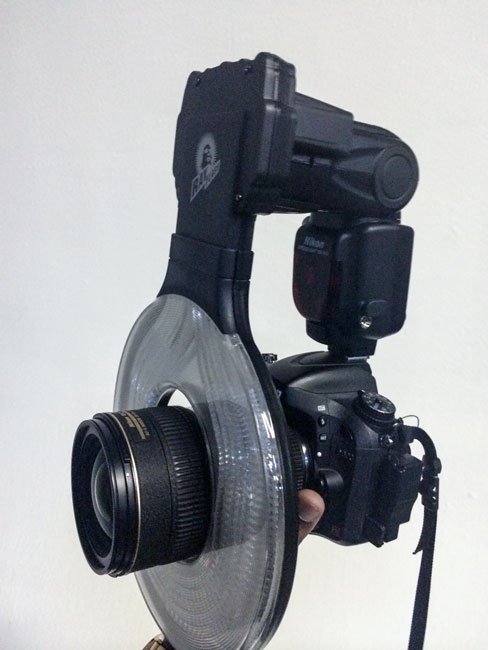
Having proper white balance in your photos can help make the difference between a good shot and a great shot. If you’re shooting RAW or in studio with a gray card or color passport, it’s pretty easy to adjust the white balance in post. However, if you’re shooting JPEG or shooting scenes where you can’t place a grey card then it’s probably best to get the proper white balance before you even start shooting. One of the best ways that I know to do this is with an Expoimaging ExpoDisc. I’ve used this product for years. I was pleased to see that they came out with a new version. The ExpoDisc 2.0 has been redesigned to make a good thing even better. The first thing I noticed and fell in love with is that it now clips on to your lens. There are two buttons on the outside that when depressed with your thumb and index finger retract the clips that hold it in place on your lens. This means that it’s very quick to put on and keep in place and take off. The older model didn’t have this feature and I would just lay it on my lens to set the white balance and of course it could fall off very easily. The other nice enhancement is that it comes with a set of warming filters too. This is great if you’re doing portraits. When photographing people you tend to want your subjects a little warmer than “standard/proper” white balance. These filters simply slide right on to the front of the ExpoDisc 2.0.

installing_warming_filter
Installing the warming filter

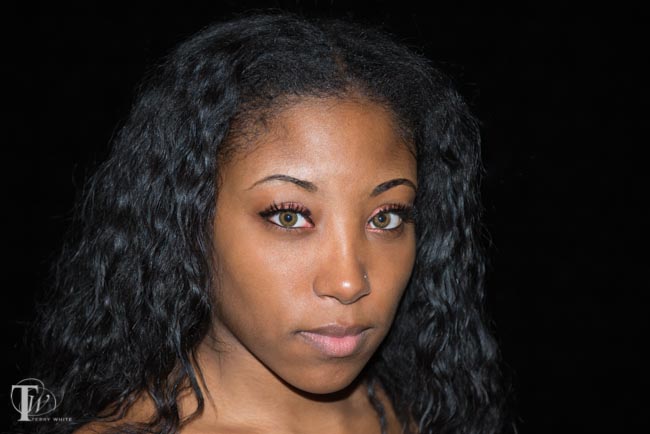
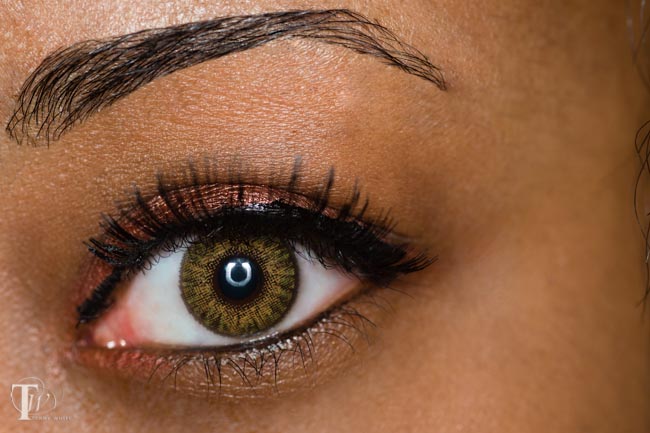
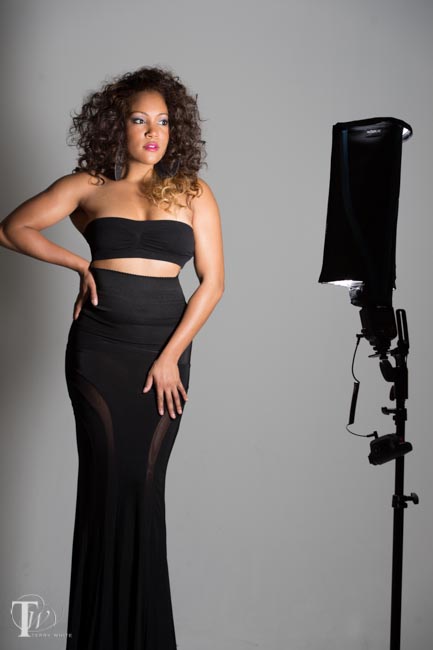
Once you have the ExpoDisc 2.0 in place with or without the included warming filter all you have to do is (depending on your camera model) put it in the mode for capturing a custom white balance. On the Nikon DSLRs you do this by putting the white balance selector on “Pre” and then holding down the white balance button until “Pre” starts blinking. You’ll have a few moments to take a shot. Now aim the camera at the light source and press the shutter. If all is well the display will now flash “Good” if not it will flash “No Good”, which means you’ll need to simply point at a different spot and try again. A couple of nights ago I did a portrait session in studio and used only the ExpoDisc 2.0 for my white balance. No adjustments to white balance in Lightroom. The results are below:

wpid13194-Delvis-Zeppelin-0068-Edit_sm.jpg
The shot above was captured with Auto White Balance and as you can see the skin tone is a little cooler and the wall behind is a little bluer.


wpid13192-Delvis-Zeppelin-0075-Edit_sm.jpg
The shot above was captured after using the ExpoDisc 2.0 and using one of the warming filters. This makes the skin more natural looking.


The Bottom Line

Professional photographers will tell you that it’s usually better to get things right in the camera rather than relying on post processing. I agree! If we are to agree on that then it makes sense to get white balance right in the camera as well. The ExpoDisc 2.0 is one of the best if not the best way of doing this. ExpoDisc 2.0 – Get one below:

ExpoDisc 2.0 77mm – B&H Photo

ExpoDisc 2.0 77mm – Amazon

ExpoImaging RayFlash 2 Review

rayflash2_nikon_d600_sb910

Ring lights are often used in fashion photography. However, unless you plan to use one on a regular basis they can be expensive and cumbersome. The RayFlash 2 is designed to work with your speedlight to provide a more attractive, flatter, shadowless feel to your images as opposed to just the pop-up flash or direct speedlight alone. Traditional ring light configurations come in all sizes and different specifications. Some of the newer LED based ones are lower cost. However, the professional ones tend to cost a few hundred to several hundred dollars. I like the looks of ring light photography, however not enough to invest hundreds of dollars in one. That’s why the RayFlash 2 is very attractive to me. It’s small enough for travel and low cost enough not to break the bank. You can see my original RayFlash review here that I did 5 years ago. Time flies. Since that time ExpoImaging has made some nice improvements on the RayFlash and introduced it as the RayFlash 2. The first enhancement is that it’s now much easier to attach and adjust. The head expands to fit around your speedlight easily. Also the channel slides up and down to accommodate the height of your DSLR and speedlight. Although it’s very adjustable it does come in two sizes. One for larger DSLR bodies like my Nikon D4 and D600 and a smaller model for smaller DSLRs. I wanted to try out the RayFlash 2 and here are my results:

wpid13167-DiorLoveJones2-0156-Edit_sm.jpg
This image of Dior was captured just using the on camera flash. NO RayFlash 2.

The image above was taken without the RayFlash 2 and just using on camera flash. As you can see there are definitely some distinct hard shadows under the chin. There’s a reason why so many photographers shy away from on camera flash. The results are usually less than desirable.

wpid13169-DiorLoveJones2-0164-Edit_sm.jpg
This image of Dior was captured using the RayFlash 2.

The image above was captured using my Nikon D600, SB 910 and the RayFlash 2. If you compare the shadows you can see that the RayFlash 2 produces a flatter more flattering result with softer shadows.

wpid13165-DiorLoveJones2-0007-Edit_sm-2.jpg
The RayFlash 2 produces a distinctive catch light in the eyes.


The Bottom Line

If you’re looking for the “ring flash look” and you have a speedlight then the RayFlash 2 is definitely worth considering. This is especially true if you don’t need to use a ring flash for every shoot. I also really like how portable the RayFlash 2 is and that it easily fits in either my backpack or regular luggage for travel. I would say the only downside is that it’s not as big as some of the more expensive units out there. It would be nice to have a bigger one that produces an even softer light and bigger catch light. Otherwise, I really really like it.

You can get the large RayFlash 2 here.

You can get the small RayFlash 2 here.


Hands On With the New Rogue XL Pro Lighting Kit

wpid12107-N-KandiceLynn20-0062-Edit_sm.jpg

During a brief visit to my studio between business trips I got a chance to try out the NEW Rogue XL Pro Lighting Kit. I’m a fan of the Rogue FlashBenders and Diffusion panels. I keep a set in the outer pocket of my suitcase because they are completely flat when not in use. This means that on those occasions when I’m on the road and come across an interesting subject to photograph I don’t have to worry that I didn’t bring my usual, larger light modifiers.

The NEW Rogue XL Pro Lighting Kit Changes the Game A Bit

I have all kinds of light modifiers in the my studio and smaller ones for travel and while I always looked at the Rogue FlashBenders as “great in a pinch.” I’m now looking at this new Rogue XL Pro as more of a primary tool for my on the road arsenal. The first thing I like about it is the XL part. It’s large enough to achieve better results. The larger the light source and the closer it is to your subject the softer it will be. So larger is definitely better. I also like the versatility in using it either to reflect light or diffuse it.

rogue_XL_pro

The kit comes with everything you need to set it up as a large bounce or as a strip bank softbox. It’s the use as a strip bank that I was most interested in. I use a large strip bank in my studio on a regular basis and I wondered how this much smaller one would perform. To my surprise it worked out even better than I anticipated. I typically use a strip bank to get nice rim lighting, but using it as a main light ain’t bad either.

Continue reading “Hands On With the New Rogue XL Pro Lighting Kit”

I Won’t Leave Home Without Rogue FlashBenders Again


I've had a pack of ExpoImaging Rogue FlashBenders sitting around for a while now. I decided to take them with me to my last workshop at Precision-Camera University. I figured I'd kill two birds with one stone. This way I could teach the class on how to use studio lighting with the NEW Westcott Spiderlite TD6's, but also spend a few minutes showing what I travel with as a very portable speedlight lighting kit. Normally I travel with a Nikon SB-900 speedlight, Westcott shoot-through umbrella and small light stand for off camera flash. I had these elements with me in my carryon and showed the class how to use the umbrella. Then I broke out my Rouge FlashBenders by the same company that gave us ExpoDisc for white balancing our DSLRs. 


I was blown away!

They worked way better than I imagined they would. You get 3 FlashBenders in a pack and they are designed to velcro right onto your speedlight. You can then "bend" them to aim the light any way you want. Using the configuration above, I got this shot:

ISO 200, 85mm (Nikon 85mm f/1/4 Lens), f/1.4, 1/125 sec

Next I decided to create a more dramatic look (not something I would do in a beauty setup), but using the medium sized one in a snoot configuration. With it I captured this shot.

ISO 400, 102mm (Nikon VR II 70-200 f/2.8 Lens), f/5.0, 1/80sec

The beauty of these is that they are completely flat when not in use and EASILY fit in the outer pocket of my carryon suitcase. Sure I'll take a giant softbox any day I can get one, but in situations when I'm on the road and taking portraits or lighting other scenes with my speedlights, these are AWESOME!


You can get the Rogue FlashBenders (3 in a set) here from B&H for $104.85 or individually Large $39.95, Small $34.95, or Bounce Card/Flag $29.95. My favorites are the Large and Bounce Card/Flag.