When I read my buddy Scott Kelby’s post yesterday on “7 Reasons Why Photographers Need to Be on Instagram” I was reminded why I like this platform so much. I’ve been active on Instagram since January 2012. At first I looked at it as “oh boy, one more thing to have to post to.” That was before I realized that I could use Instagram as my starting point any time I want to share a photo. Unlike most other sites, Instagram allows me to simultaneously share to my Instagram, Facebook, Twitter, Tumblr, Foursquare (check-ins), Email and Flickr. If for no other reason I’d use Instagram for this feature alone. However, Instagram actually became the social media site that I visit the most. For some reason (maybe it’s because I’m a visual person), I’m way more likely to scroll my Instagram feed to see all the posts from the people that I follow than I am on Facebook and Twitter. Even when I don’t post, I will still scroll through my Instagram feed checking out posts of others all the way down until I get to the post I saw last. To make the sharing experience even better to Twitter and my Facebook Fan Page, I created an IFTTT script that if I tag my Instagram post with #f it will post it directly to my Facebook Fan Page (as opposed to my personal Facebook page) and #t to post it as a NATIVE Twitter pic instead of just a link to the Instagram post.
Instagram is no longer just for squares. Probably one of the biggest reasons for photographers to rejoice and start using Instagram more is that Instagram now supports landscape and portrait images/videos directly in the Instagram app. I no longer have to use the Squaready Pro app to get the full image into a square format.
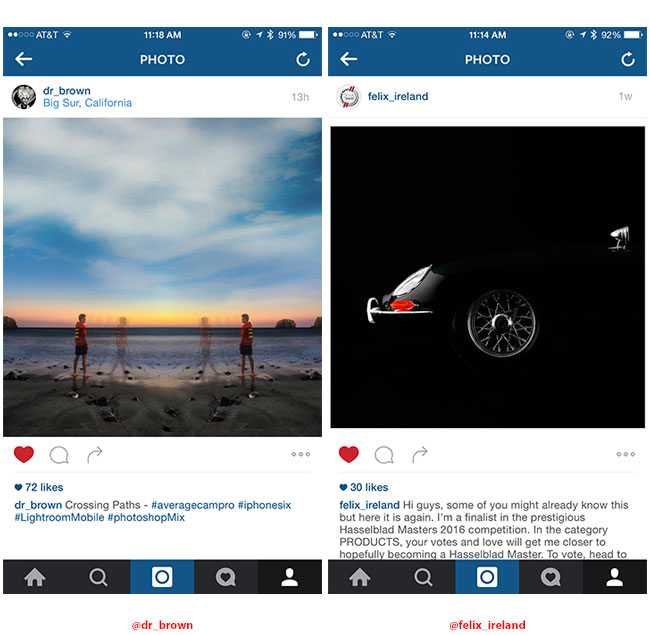
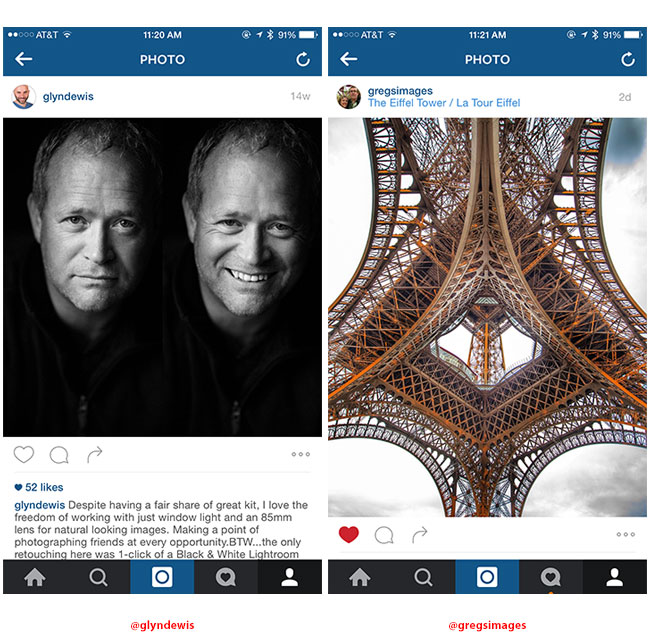
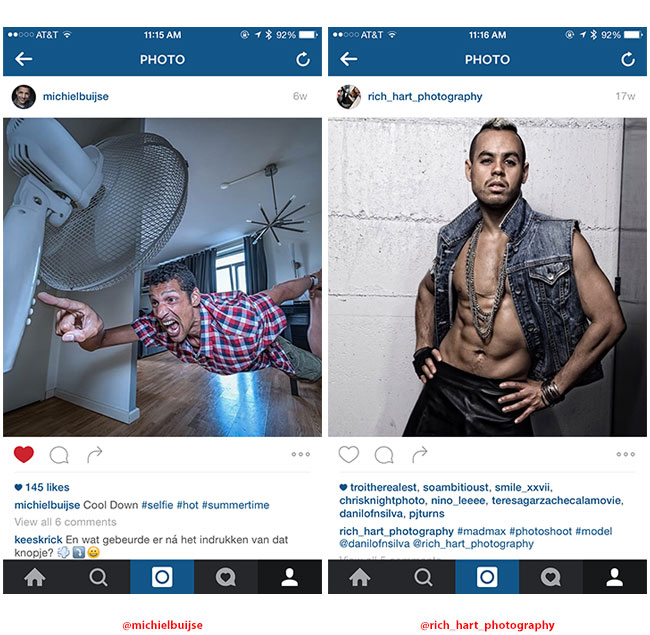
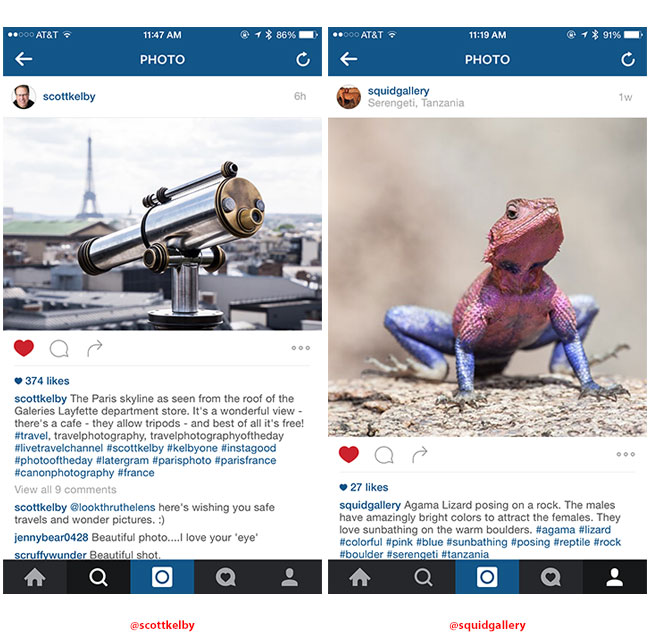
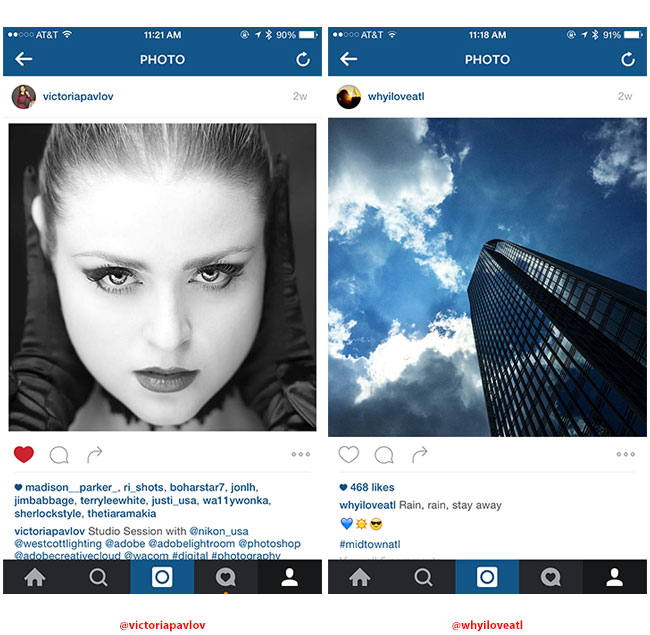
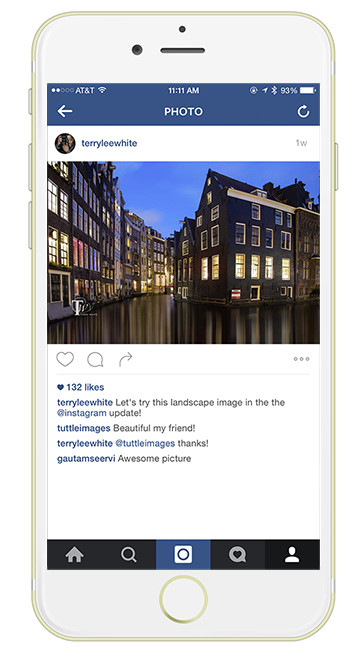
Here are 10 Photographers to Follow on Instagram
They each have a unique style and often post pics that make me pause when I’m scrolling my feed:
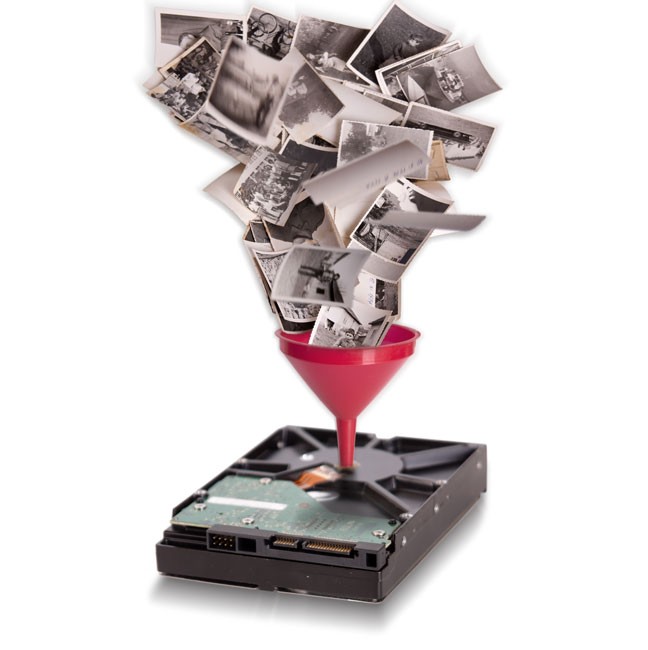
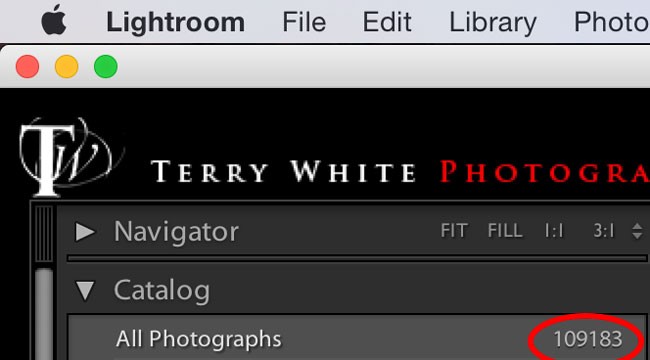
While having dinner with friends the conversation came up about running out of space on a laptop. I asked my friend who is retired and travels for pleasure most of the time, how he backs up his photos? He told me at first that he had merely moved some photos onto a “USB stick”. I dug a little deeper (knowing that my friend knows a lot about computers) and found out that he does have a backup strategy that involves multiple drives and offsite backup. Whew!! However, that got me thinking about the question I get a lot from new photographers, “how do you backup your photos?” Unlike your regular documents, chances are you have photos “everywhere”. You have photos on your memory cards. You have photos on your hard drive. You have photos on your “other” hard drive. You have photos on your smartphone. You have photos on your tablet. You have photos online. Worst yet the problem will continue to grow as you take more photos every day and you acquire more devices. There is nothing else you have electronically that will likely be in so many places and continue to grow. Music and videos can be a mess too, but generally you’re shooting more photos than you are videos and acquiring new music.
How to Backup Your Photos
This post is really not about a specific piece of hardware or software. Sure I will share the specific hardware and software that I use, but I really want you to focus on a simple rule first: “Always have your photos in at least three places with one of those places being offsite.” No matter what software, hardware or even cloud based solution you have, the worst mistake you can make is relying on ANY one thing/service. No matter what hard drive you buy, computer you use, service you backup to, etc., they are ALL SUBJECT TO FAIL! Nothing manmade will last forever. So don’t rely on any one thing to be the sole location for your precious memories. If you follow the simple rule above, you’ll be in a lot safer position than the average person out there.
What’s my workflow and how do I backup my photos?
Since this is a question I get on a regular basis I’ll share with you exactly what I do and how I backup. Keeping the rule in the previous paragraph in mind I know that my photos need to be in at least three places with one of those places being offsite. In that case let’s walk through one of my shoots:
Location #1
I either shoot on location to a memory card(s) or in studio tethered directly to my MacBook Pro. In the case of being on location the images are captured to the memory card first and that’s the first (temporary) location of my images by default. When I shoot tethered my images go directly to my laptop hard drive (yes you can use an external, but I don’t since they won’t be there for long.)
Location #2
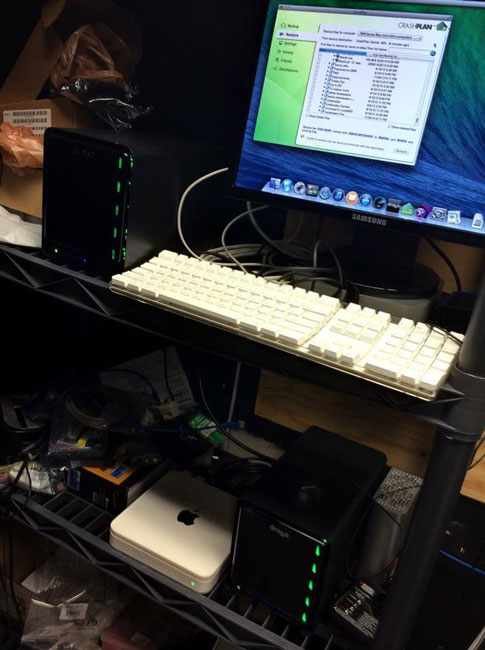
If I shot on location then I import the images into a folder on my MacBook Pro drive and from there into Adobe Lightroom 5. Since the images are still on the card this becomes location #2 by default. However, if I shot tethered then the photos are already in a folder on my drive. Since I’m on the Mac, I have TWO Time Machine Backups setup that AUTOMATICALLY alternate backing up every hour. This is the real location #2 (Location #1 = MacBook Pro and Location #2 one of two Time Machine Backup drives on the network).
Location #3a
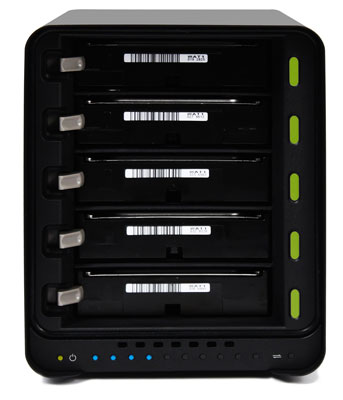
This one doesn’t really count as Location #3 because the photos are ultimately “moved” from my MacBook Pro onto a Drobo 5D which is attached to my Mac OS X Server (Mac mini). In other words the photos from my recent shoot are on the MacBook Pro hard drive while I work on them, retouch them and then finally deliver them. Once I’m done with them I move that folder from my MacBook Pro hard drive to my Drobo hard drive. So technically this is still location #2 as the photos will either be on the MacBook Pro OR the Drobo, but not both. I put this location in because it is part of the workflow.
Location #3b
Not only were my photos being backed up to my TWO Time Machine backups within 1 to 2 hours after being on my home network, they are also being backed up OFFSITE to CrashPlan.com. CrashPlan works in the background and immediately starts backing up any new files added to my pictures folder on my MacBook Pro. However, let’s say for the sake of argument that I move them to the Drobo before CrashPlan has a chance to back them all up. What happens then? You guessed it, the Mac mini connected to the Drobo is also backing up to Crashplan.com. In either case the photos will either get backed up offsite from the MacBook Pro or from the Mac mini if not both.
Location #1 AGAIN
It’s important to note that the Mac OS X Server (Mac mini with the Drobo 5D) ultimately becomes my archive. It’s where ALL of my photos eventually end up. It’s where my Lightroom catalogs point to for photos taken in years past. This means that the Mac mini/Drobo 5D technically becomes location #1 at some point in the digital life of my photos. So what now?
Location #2 AGAIN
The Mac OS X Server is backed up via Time Machine to ANOTHER Drobo. A networked Drobo 5N. This ultimately becomes location #2.
Location #3 is still Location #3
The Mac OS X Server is backed up offsite AUTOMATICALLY via CrashPlan.com. I could even setup CrashPlan as an App on the Drobo 5N so that it’s backs up the backup offsite.
Bonus Backup Locations
If all I had was the above strategy/workflow I’d feel “pretty” comfortable, but I’m a paranoid kinda guy when it comes to my data. So I have some bonus backups. Since Time Machine can backup automatically to as many drives as you add to it (automatically alternating between them), I backup on the go to small WD 2TB My Passport Wireless Drive. This one is the one that I travel with. Since I shoot out of town from time to time I can’t chance that my photos won’t be backed up before I get home. Therefore the memory cards become Location #1, the MacBook Pro hard drive becomes Location #2 and the WD My Passport Wireless Time Machine backup becomes location #3 on the road. Not to mention that if my internet connection is fast enough that CrashPlan is doing it’s thing in the background too. As far as just my data goes in general I have yet another backup of my entire drive. A “clone” backup (using either SuperDuper! or Carbon Copy Cloner) to another 1TB G-Drive Thunderbolt/USB 3.0 portable drive. This backup is less about photos and more about the day that my computer or OS gets hosed and I need to boot immediately and continue with my presentation/work. In other words for those scenarios when I don’t have time to do a Time Machine restore.
Since I now have a 2TB WD My Passport Wireless Drive with a built-in SD slot. I can make a backup of the card(s) in the field before I even get back to my computer.
The Never Ending Need for More Storage
Like I said in the opening, you’re going to be taking photos from here on out for the rest of your life. This means that you will always be ADDING files to your hard drives. Most users think that once their “main” drive fills up, just go buy an external drive. Yes, that works but it’s something you’re always going to need to do. Sure you can buy a bigger drive next time and copy everything from the first external onto the new external and that’s what I used to do. That was until copying everything got to the point that it was taking 18-24 hours to copy.
I knew years ago that I was going to need an “scalable” storage system and that’s why I went with Drobo way back then. They’re Beyond RAID technology allows me to swap out/or add a drive in my Drobo with a larger one without having to stop working or even reboot. As I need more space I just put in more/larger drives. If one (or even two drives fail at the same time) fails my data is protected. This doesn’t mean that I don’t need to backup. Remember what I said about everything manmade will eventually FAIL? Drobo or any other RAID system can fail at any time. However, I must say that to date I’ve had no major issues with my Drobo hardware and it has protected me on more than one occasion from drives that have died.
One day I came home to an email alert from my Drobo letting me know that one of the drives had failed. It safely protected the data with no data loss. I replaced the drive and kept right on working! Also feeling at ease knowing that I had a BACKUP!
I know that Drobo (or any other storage solution) can and will fail at some point, but that’s why I backup! That’s why I never depend on ANY one thing being the sole location of my precious data/photos.
Q&A
Q. Do I have to do what you do?
A. Nope, you can do whatever you want. They’re your photos.
Q. What about SSD drives? Aren’t they crash proof?
A. A common misconception about Solid State Drives (SSD) is that since they have no moving parts, they won’t crash. While I would agree that this makes them “less” crash prone, it doesn’t mean that they can’t die or have an issue that results in the loss of data. As a matter of fact I have first hand experience with losing data that was on a NEW SSD. See that story here.
Q. I don’t trust cloud services. Do I have to use CrashPlan?
A. Nope! The main thing is that you have at least one copy of your data OFFSITE. What good is a backup that sits right next to your computer if someone breaks in and steals the computer AND the backup drive or if you have a fire, flood or other major loss? I know many people that simply have two or more backup drives that they rotate between a friend/relative’s house or a safe deposit box at the bank. As a matter of fact this was my method for offsite backup before I started using CrashPlan. My server would do a clone backup to an external drive each night. I would take the drive to the bank and swap it about once a week. That’s how it started anyway. Then once a week became twice a month. Twice a month became once a month. Once a month became “I can’t remember the last time I swapped backups.” I use CrashPlan because it’s one less thing I have to think about. It works in the background and backs my photos/data up to their servers without having to think about it. It has already come in handy. Also on a side note you can still use CrashPlan without backing up to their servers! That’s right, you can download their software for free and set it up so that it backs up your computer to another computer (say at a friend’s or relative’s house) over the internet. You still have an offsite backup that’s automatic, but you control the location of the data. Provided you trust your friends or relatives 🙂
Q. CrashPlan sounds great! Why not just use that (or a similar service)?
A. You still want a local backup for a few reasons. #1 if something does happen it’s a whole lot faster to restore from a local backup then it is from the cloud. #2 CrashPlan doesn’t backup their servers! That’s right, they openly state that their servers are NOT backed up. Why? Because they know that they are your only backup.
Q. What do you get out of telling us all this?
A. What I hope to get is the peace of mind knowing that I helped at least one person protect their data and I will not have to hear one more person’s story about how they lost everything because of hardware failure or a virus. Drives are SO CHEAP now that there is NO REASON not to have multiple backups.
Q. I upload my photos to Facebook, Flickr, 500px, Smugmug, etc., is that a backup?
A. When you share your photos on social media it’s usually designed to be a one way trip. In other words most sites are not designed to share the original quality of the photo, store it and let your download it again. When you upload a photo to Facebook, that version is highly compressed and looks worse than the original. While having your photos online is better than nothing, it’s not a backup and there is no guarantee that the online entity will allow you to keep them there forever or even be around forever.
Q. You mentioned smartphones. Yes I have photos there that aren’t anywhere else. How are you handling those photos?
A. I look at my iPhone as another camera. I shoot with it and it’s true I don’t always download them to my computer right away, I do want them backed up. Luckily Apple let’s you do this for FREE. iCloud backup is free (5GB of YOUR data) and built-in to iOS. My iPhone 6 Plus gets backed up every night automatically. I also use Lightroom Mobile. I have a Collection in Lightroom Mobile on my iPhone and my iPad set to “Auto Import”. As soon as I launch Lightroom Mobile on my iPhone it imports any new pictures from my camera roll and syncs them to the cloud. These photos appear in Lightroom on my desktop (MacBook Pro) right along side my other photos. My MacBook Pro is being backed up as outlined above. Lightroom is the center of my photo universe. If it’s an important photo to me then it’s in my Lightroom catalog and the actual digital file (RAW or JPG) is in a folder on my server and two other places.
The Bottom Line
My goal is to always have my photos in at least three places! As you can see from the above workflow I’m cover 99% of the time. Even with what I do above there are still chances for loss. For example, a memory card can go bad before the pictures are ever transferred to the computer or copied to another card in the camera. If recovery software/services can’t retrieve them, they’re gone! What if all your camera equipment is stolen while you’re still out of town? There’s no way to be 100% safe, but at least with a workflow like the one above you’d be covered for the most common situations.
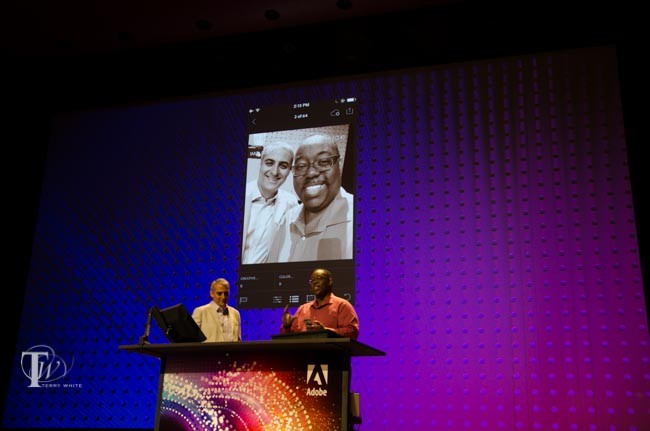
In this episode of Adobe Creative Cloud TV, I’ll show you how to use Lightroom Mobile to get client feedback on your photos. Find out which photos your clients like and perhaps want to purchase.
Lightroom 5.7 and Adobe Camera RAW 8.7 Released Today!
I cover the new features of Lightroom 5.7 as they relate to Lightroom Mobile in the video above. However, there are some more things you should know:
Integrated a utility to import images from Apple Aperture and Apple iPhoto libraries into Lightroom:
Previously available as a separate and downloadable plug-in, this utility has now been integrated into Lightroom 5.7
New Camera Support in Lightroom 5.7
Canon EOS 7D Mark II
Canon PowerShot G7 X
Canon PowerShot SX60 HS
Casio EX-100PRO
Fujifilm X30
Fujifilm X100T
Fujifilm X-T1 Graphite Silver
Leaf Credo 50
Leica D-Lux (Typ 109)
Leica M-P
Leica V-Lux (Typ 114)
Leica X (Typ 113)
Nikon D750
Olympus PEN E-PL7
Olympus STYLUS 1s
Panasonic DMC-CM1
Panasonic DMC-GM1S
Panasonic DMC-GM5
Panasonic DMC-LX
Pentax K-S1
Pentax QS-1
Samsung NX1
Sony ILCE-5100
Sony ILCE-QX1
Newly supported cameras for Tethered Capture in Lightroom 5.7
Nikon D4S
Nikon D810
New Lens Profile Support in Lightroom 5.7
Apple iPhone 6
Apple iPhone 6 Plus
Canon EF SIGMA 18-300mm F3.5-6.3 DC MACRO OS HSM C014
Canon EF SIGMA 150-600mm F5-6.3 DG OS HSM S014
Canon EF Tokina AT-X 116 PRO DX-II 11-16mm f/2.8
Canon EF Zeiss Otus 1.4/85 ZE
Fujifilm X Fujifilm X100T
Fujifilm X HandeVision IBELUX 40mm F0.85
GoPro Hero
GoPro Hero4 Black Edition
GoPro Hero4 Silver Edition
Leica M Leica SUMMARIT-M 35 mm f/2.4 ASPH
Leica M Leica SUMMARIT-M 50 mm f/2.4
Leica M Leica SUMMARIT-M 75 mm f/2.4
Leica M Leica SUMMARIT-M 90 mm f/2.4
Leica M SLR Magic 50mm T0.95 Hyperprime Cine Lens
Leica M Voigtlander VM 12mm F5.6 Ultra Wide Heliar ASPH.
Leica M Voigtlander VM 15mm F4.5 Super Wide Heliar II ASPH.
Leica M Voigtlander VM 21mm F1.8 Ultron ASPH.
Leica M Voigtlander VM 21mm F4 Color Skopar
Leica M Voigtlander VM 25mm F4 Color Skopar
Leica M Voigtlander VM 28mm F2 Ultron
Leica M Voigtlander VM 35mm F1.2 Nokton II ASPH.
Leica M Voigtlander VM 35mm F1.4 Nokton Classic
Leica M Voigtlander VM 35mm F2.5 Color Skopar
Leica M Voigtlander VM 40mm F1.4 Nokton Classic
Leica M Voigtlander VM 50mm F1.1 Nokton
Leica M Voigtlander VM 50mm F1.5 Nokton
Leica M Voigtlander VM 75mm F1.8 Heliar
Leica S Leica SUMMICRON-S 100 mm f/2 ASPH.
Nikon F Nikon AF-S NIKKOR 20mm f/1.8G ED
Nikon F Nikon AF-S NIKKOR 400mm f2.8E FL ED VR
Nikon F SIGMA 18-300mm F3.5-6.3 DC MACRO OS HSM C014
Nikon F SIGMA 150-600mm F5-6.3 DG OS HSM S014
Nikon F Tokina AT-X 116 PRO DX-II 11-16mm f/2.8
Nikon F Voigtlander SL 40mm F2 Ultron ASPHERICAL
Nikon F Voigtlander SL 40mm F2 Ultron ASPHERICAL Close-up Lens
Nikon F Zeiss Otus 1.4/85 ZF.2
Pentax HD PENTAX-DA 645 28-45mm F4.5 ED AW SR
Pentax HD PENTAX-DA 16-85mm F3.5-5.6 ED DC WR
Pentax HD PENTAX-DA 20-40mm F2.8-4 Limited
Sigma SIGMA 18-300mm F3.5-6.3 DC MACRO OS HSM C014
Sigma SIGMA 150-600mm F5-6.3 DG OS HSM S014
Sony Alpha SIGMA 18-300mm F3.5-6.3 DC MACRO OS HSM C014
Sony Alpha SIGMA 24-105mm F4 DG OS HSM A013
Sony Alpha Sony DT 18-55mm F3.5-5.6 SAM
Sony Alpha Sony DT 18-70mm F3.5-5.6
Sony Alpha Sony DT 55-200mm F4-5.6
Sony Alpha Sony 75-300mm F4.5-5.6
Sony Alpha Sony 300mm F2.8 G SSM
Sony Alpha Sony 500mm F4 G SSM
Sony E HandeVision IBELUX 40mm F0.85
Sony E SLR Magic 50mm F0.95 Hyperprime Lens
Sony E Sony FE 16-35mm F4 ZA OSS
Sony E Sony FE PZ 28-135mm F4 G OSS
Sony E Zeiss Loxia Biogon T* 2/35
Sony E Zeiss Loxia Planar T* 2/50
Bugs Corrected in Lightroom 5.7
The crop overlay displayed an intermediate step when progressing through images in the filmstrip with overlay displayed.
The lens profile for the Canon EF 16-35mm f/4 would not auto-select when using Lens Profile Corrections.
ICC profiles resulted in incorrectly clipped shadows and blacks in Lightroom. Note that this is related to the issue identified here and only occurs on Mac OSX 10.9 and later
Fixed crash when rapidly adding corrections with the Spot Removal tool.
Fixed bug that prevented the Filter Brush cursor from displaying while changing brush size when the Graduated and Radial Filter overlay is turned off.
Improved quality of Camera Matching color profiles for the Nikon D810. Fixes visible banding issues with the Camera Standard, Camera Vivid, Camera Landscape, and Camera Monochrome profiles.
ACR 8.7 now supports HiDPI displays on Windows. Please use the following steps to enabled HiDPI on Windows:
Go to Photoshop -> Preferences -> Experimental Features
Click on “Scaled UI 200% for high-density displays”
Bug Fixes:
Fixed crash when rapidly adding corrections with the Spot Removal tool.
Fixed bug that prevented the Filter Brush cursor from displaying while changing brush size when the Graduated and Radial Filter overlay is turned off.
Improved quality of Camera Matching color profiles for the Nikon D810. Fixes visible banding issues with the Camera Standard, Camera Vivid, Camera Landscape, and Camera Monochrome profiles.
Please note – If you have trouble updating to the latest ACR update via the Creative Cloud application, please refer to this installation note.
See more of my Adobe Creative Cloud Videos on my Adobe Creative Cloud TV and get the App below. It features EXCLUSIVE CONTENT that no one else gets to see. My iOS App is a Universal App for iPhone, iPad and iPod touch. I also have an Android version on the Amazon App Store:
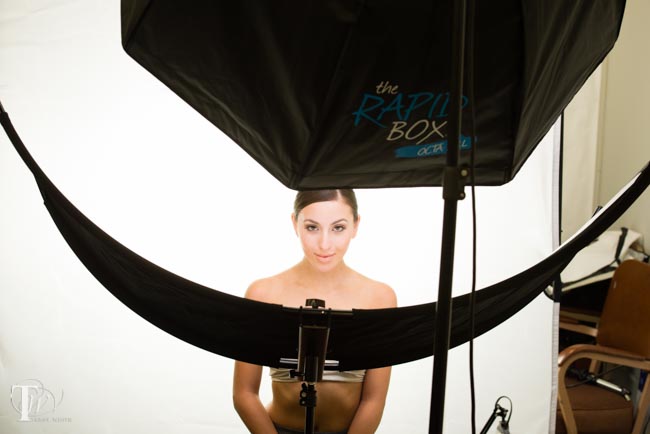
When I initially gave a first look at the NEW Westcott Eyelighter a couple of weeks ago (here), one thing I failed to do was to show a before and after comparison
So I took some time away from my vacation last week and setup a beauty shoot with a few models to really give you an idea of what the Eyelighter really does beyond providing interesting catchlights in the eyes. In the two shots above you can see the affect of the Eyelighter not only in the eyes of my subjects but also under the chin.
The shot above is a production shot showing the Eyelighter setup just in front of the subject with the Skylux LED light above subject.
The results are AWESOME and pretty much night and day.
Again here’s another look without the Eyelighter using the exact same main light, subject and camera settings.
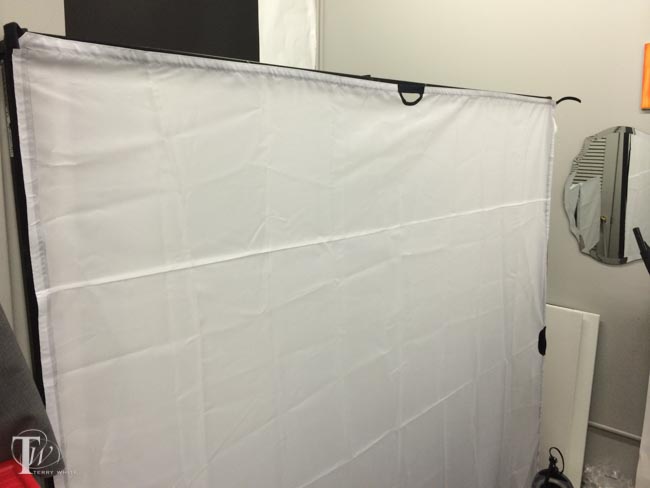
But what about the background?
The background was lit using two lights shining through the Westcott Scrim Jim. This gave me the High Key look that I wanted by providing a nice big soft light source directly behind the subject that wrapped around the subject with beautiful rim lighting.
The Bottom Line
I’ve always been a fan of this clamshell beauty look and the Westcott Eyelighter makes it much much easier to do now with one light. Adding another light or two behind with the Scrim Jim makes this accessory useful for in studio work as well as on location work. All of the images above were shot with my Nikon D600 and 70-200mm f/2.8 VRII lens.
A few days ago one of my readers left a comment on one of my posts and he was basically asking why I convert my camera’s RAW files into DNG (Digital Negative) format? He asked if I had a post that I could refer him to about my reasons. I realized that while I’ve talked about converting RAW files into DNG format for years at seminars, training classes and on my videos, I’ve never really done a blog post on it. So here it is – Why DNG?:
What is DNG?
DNG stands for Digital Negative format. The problem with the RAW files that your camera produces is that they are proprietary. Also since every camera manufacturer makes their own RAW format (Nikon .NEF, Canon .CR2, etc.) there is no real standard. Each camera manufacturer does whatever they feel like in their format. This also means that not all software can read every RAW format because with each camera manufacturer and each new camera the software companies have to update their software to be compatible with the slight changes in each RAW format. Notice how your software never has to be upgraded to read JPEG files. That’s because JPEG is a universal, non-proprietary standard. You never have to worry about a company going out of business and therefore not being able to access your JPEG files. Like JPEG, DNG is an open standard. Although it was created by Adobe, it’s an open standard with a published specification. If Adobe did nothing else with DNG the standard would still live on. Some cameras even shoot natively in DNG format now.
Why I convert my Nikon .NEF files into DNG
I’ve been converting my Nikon, Sony, and Canon RAW files into DNG format for several years now. However, as usual the question comes up – why? Why go through the extra step to convert your files to DNG. Here are a few reasons for me:
My images are my memories and can’t be replaced. I never want to worry about a day when I can’t open them up because of a company going out of business or deciding to stop support of a format. With DNG I have that extra peace of mind.
DNG saves me space. On average my DNG files take up about 1MB less space than my original .NEF files. Since there’s no loss of quality I’ll happily take the storage savings.
No XMP Sidecar Files! Since software programs can’t really edit RAW files (it’s the non-destructive benefit of working in RAW), any changes you make are made to a small text file that accompanies the RAW file. These small text files are called sidecar files and it becomes one more thing you have to keep track of. Now instead of a folder of images, you have a folder of images and sidecar files. With DNG the changes you make are written non-destructively right into the DNG file.
Backwards compatibility. DNG format has been supported since Photoshop 7, so I can hand off a DNG file from a camera that just came out to someone with an older version of Adobe Camera RAW or Lightroom and they’d be able to open it up and work on it.
How To Convert Your RAW files to DNG format
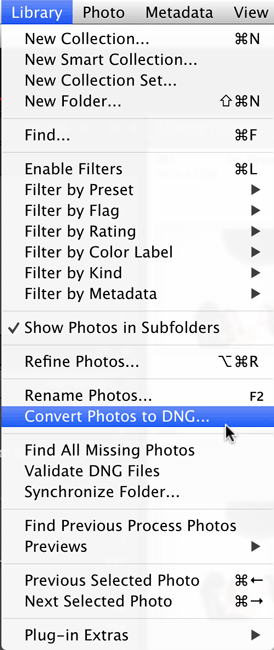
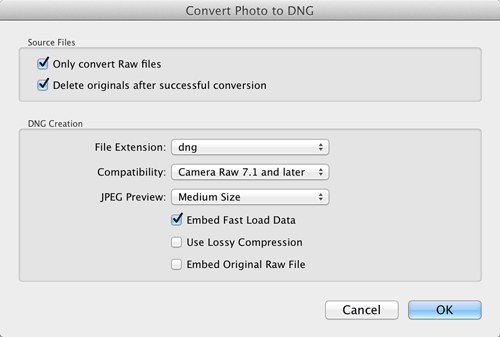
Like I said, I’ve been converting my RAW files into DNG for years now. I do it upon import into Adobe Lightroom. However, if you’ve already got images in Lightroom that are in your camera’s RAW format, you can convert them after the fact by selecting the ones you want to convert and choosing “Convert Photos to DNG” from the Library menu.
If you’re not using Lightroom, Adobe actually makes a FREE stand alone DNG converter. It’s always updated anytime there is a new version of Adobe Camera RAW or Lightroom so that it has support for the latest digital cameras and their RAW formats. You can learn more about DNG and grab the FREE DNG converter for Mac or Win here.
Having proper white balance in your photos can help make the difference between a good shot and a great shot. If you’re shooting RAW or in studio with a gray card or color passport, it’s pretty easy to adjust the white balance in post. However, if you’re shooting JPEG or shooting scenes where you can’t place a grey card then it’s probably best to get the proper white balance before you even start shooting. One of the best ways that I know to do this is with an Expoimaging ExpoDisc. I’ve used this product for years. I was pleased to see that they came out with a new version. The ExpoDisc 2.0 has been redesigned to make a good thing even better. The first thing I noticed and fell in love with is that it now clips on to your lens. There are two buttons on the outside that when depressed with your thumb and index finger retract the clips that hold it in place on your lens. This means that it’s very quick to put on and keep in place and take off. The older model didn’t have this feature and I would just lay it on my lens to set the white balance and of course it could fall off very easily. The other nice enhancement is that it comes with a set of warming filters too. This is great if you’re doing portraits. When photographing people you tend to want your subjects a little warmer than “standard/proper” white balance. These filters simply slide right on to the front of the ExpoDisc 2.0.
Installing the warming filter
Once you have the ExpoDisc 2.0 in place with or without the included warming filter all you have to do is (depending on your camera model) put it in the mode for capturing a custom white balance. On the Nikon DSLRs you do this by putting the white balance selector on “Pre” and then holding down the white balance button until “Pre” starts blinking. You’ll have a few moments to take a shot. Now aim the camera at the light source and press the shutter. If all is well the display will now flash “Good” if not it will flash “No Good”, which means you’ll need to simply point at a different spot and try again. A couple of nights ago I did a portrait session in studio and used only the ExpoDisc 2.0 for my white balance. No adjustments to white balance in Lightroom. The results are below:
The shot above was captured with Auto White Balance and as you can see the skin tone is a little cooler and the wall behind is a little bluer.
The shot above was captured after using the ExpoDisc 2.0 and using one of the warming filters. This makes the skin more natural looking.
The Bottom Line
Professional photographers will tell you that it’s usually better to get things right in the camera rather than relying on post processing. I agree! If we are to agree on that then it makes sense to get white balance right in the camera as well. The ExpoDisc 2.0 is one of the best if not the best way of doing this. ExpoDisc 2.0 – Get one below:
Whenever I review a product it’s usually one that I use. I usually try to buy the best gear that I can. As we all know photography gear can range in price and it can be expensive getting the “best” gear. However, that doesn’t mean that you can’t get good results with gear that costs less. So I thought I’d take this opportunity to review a “lower cost” speedlight softbox. Impact makes some decent gear, typically at lower cost than the competition. Now keep in mind that you get what you pay for in most cases, but if you’re on a budget and not making a living from your photography then low-cost options may work out best.
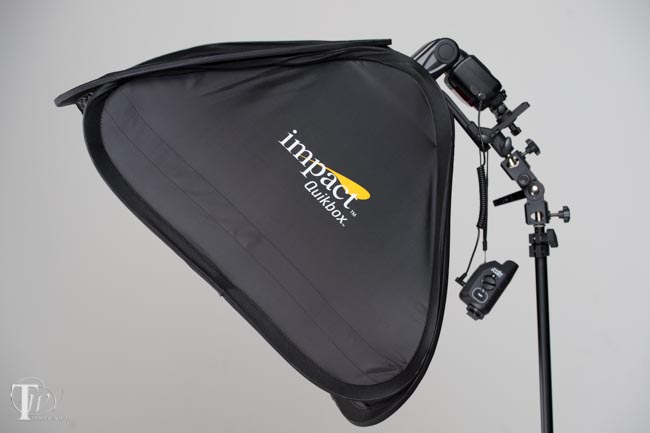
Impact Quikbox
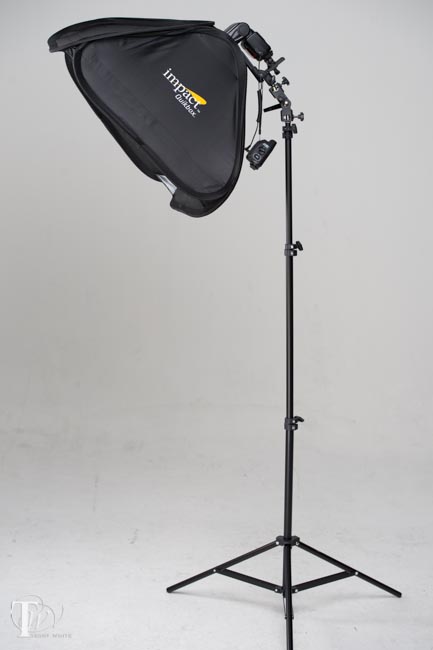
The Impact Quikbox is a 24″x24″ softbox for speedlights. B&H sells it in a kit complete with an Impact 8-foot stand and tilting bracket. The Quikbox is easy to set up. Just pop it open and put the inner baffle in and then the diffusion cloth on the end of it. Lastly mount the supplied speedlight bracket to it and you’re all set. The only thing I don’t like about their bracket is that it doesn’t tilt. This is why B&H includes an additional bracket that allows you to tilt the light. The 8-foot stand is very light — almost too light for the softbox setup. You may have to put a sandbag on it to keep it from falling over.
Putting it to the test
I had a regular commercial shoot this past weekend and decided to give the Impact kit a real world test. I mounted my Nikon SB 910 speedlight on it with a PocketWizard Plus X trigger.
I had the model hold a reflector to bounce a bit of light underneath her chin and I was pleased with the results and quality of light. With the size of this box, inner baffle and diffusion panel, the light was soft enough for my taste.
The Bottom Line
This Impact setup works as good as more expensive setups that I’ve used in the past. The quality of the materials used in the box is good. The only thing I don’t really like about it is that it doesn’t fold down nearly as small as my other boxes. So for travel this would not be my first choice. However, if you’re on a budget you can get this kit with stand and tilting bracket for less than others sell their boxes alone for.
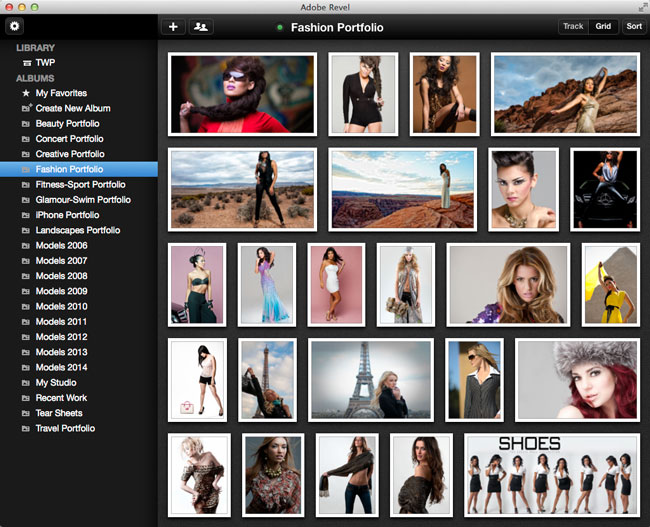
Adobe Revel (originally known as Carousel) got off to a shaky start. There were features missing that many saw as a show-stopper and originally the only way to use the service was to pay for it. A LOT has changed since then. First off, what is Adobe Revel? Adobe Revel is a photo sharing and storage service. Imagine having access to all of your photos no matter if you’re on your computer or your iPhone or iPad. With Adobe Revel you can upload an unlimited number of photos to the cloud. You can share them with others and have shared albums with family members and friends. Best of all (at least for me) you can use the Adobe Revel iPhone/iPad app to show your photos off.
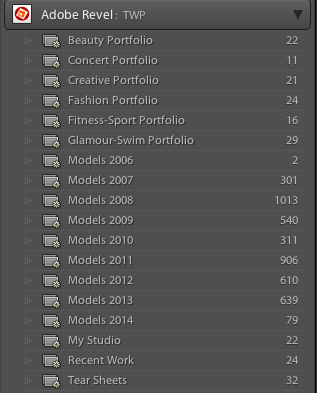
How do I get my photos into Adobe Revel?
There are a couple of ways to do it. You can import photos using the Adobe Revel desktop App. You can import photos using the iPhone and iPad app or you can upload to Adobe Revel directly from Lightroom 4 or 5 using the Adobe Revel publish service (the method I use).
How many photos can I store on Adobe Revel?
Unlike other services, Adobe Revel doesn’t have a photo limit. You can upload as many as you want. This is important and makes Adobe Revel better than many other services because your photo library is only going to get larger, not smaller.
Once my photos have been uploaded to Adobe Revel how do I view them?
You can view your photos in the desktop app, iPhone App, iPad App or via the web. Since you’re logging in to each app and the web with the same Adobe ID, your photos are instantly available on all your devices.
What if I’m offline, can I still view my photos on my computer or iPad?
Yes, Adobe Revel caches your photos to your device and they are available even if you’re offline.
Terry, why do you like Revel so much?
Adobe Revel gives me the thing I’ve always wanted. An easy way to have my portfolios with me and always up to date. Once I hit the publish button in Lightroom 5 on any of my published collections, I don’t have to think about it anymore. The next time I fire up Adobe Revel on my iPhone or iPad those photos are there. Sure there are more full featured portfolio apps out there, but all of them are a pain in the butt to keep photos updated in. Also the Revel team did a great job in redesigning the iPad App. It looks very elegant now.
If I share an album with others can they add photos/videos to it?
Yes, if you share albums with others they can add photos/videos from their devices. This is great for families on vacations or event photos.
Sounds too good; this must cost a fortune right?
This is why I said it’s time to take another look at Adobe Revel. You can start off with a 30-day trial and during those 30 days you can upload as many pics as you want. After that you can keep using Adobe Revel for free and have a limit of 50 new uploads a month. However, if you want to continue to have unlimited uploads it’s only $5.99/month for Revel Premium.
OK how much are the iPhone and iPad Apps?
They’re free to download. Actually it’s a Universal App and you can get it here:
One of my most popular videos right now is my How To Get Started with Lightroom 4 video. I figured it was time to make the Lightroom 5 version and here it is. In this episode of Adobe Creative Cloud TV I’ll show you how to get started using Lightroom 5. This is for beginners, first time Lightroom users, and folks who are self-taught and may be missing things. We’ll cover the 10 things beginners ask about the most. Definitely check out the last thing which is how to move your photos from one drive to another.
Are you missing out on my Bonus Content?
See more of my Adobe Creative Cloud Videos on my Adobe Creative Cloud TV and get the App below. It features EXCLUSIVE CONTENT that no one else gets to see. This episode has a BONUS CLIP that is available only in the App! My iOS App is a Universal App for iPhone, iPad and iPod touch. I also have an Android version on the Amazon App Store: