When I initially gave a first look at the NEW Westcott Eyelighter a couple of weeks ago (here), one thing I failed to do was to show a before and after comparison
So I took some time away from my vacation last week and setup a beauty shoot with a few models to really give you an idea of what the Eyelighter really does beyond providing interesting catchlights in the eyes. In the two shots above you can see the affect of the Eyelighter not only in the eyes of my subjects but also under the chin.
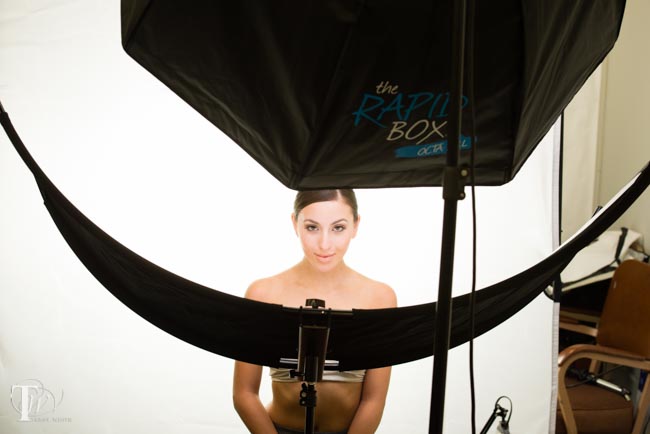
The shot above is a production shot showing the Eyelighter setup just in front of the subject with the Skylux LED light above subject.
The results are AWESOME and pretty much night and day.
Again here’s another look without the Eyelighter using the exact same main light, subject and camera settings.
But what about the background?
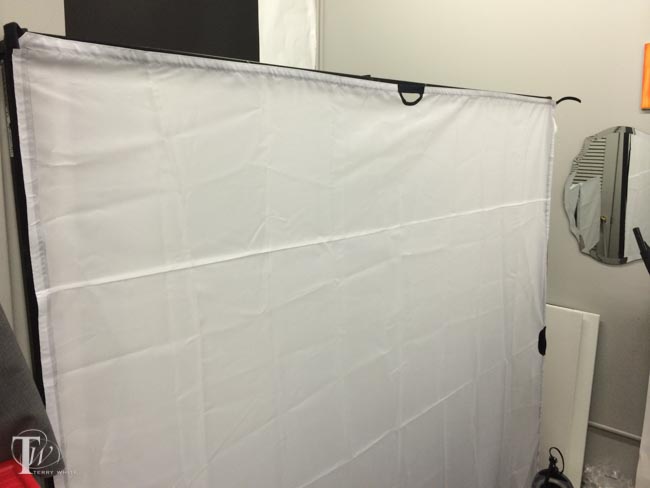
The background was lit using two lights shining through the Westcott Scrim Jim. This gave me the High Key look that I wanted by providing a nice big soft light source directly behind the subject that wrapped around the subject with beautiful rim lighting.
The Bottom Line
I’ve always been a fan of this clamshell beauty look and the Westcott Eyelighter makes it much much easier to do now with one light. Adding another light or two behind with the Scrim Jim makes this accessory useful for in studio work as well as on location work. All of the images above were shot with my Nikon D600 and 70-200mm f/2.8 VRII lens.
It’s been a while since I’ve done a review of a GPS device for Nikon DSLR cameras. The main reason is that I haven’t seen much movement or innovation in this space. The second reason is that I had kinda moved on to using my iPhone 5 as my GPS and creating .GPX log files that can be read by Lightroom 4/5. Since I always have my iPhone with me I could always just fire up the Geotag Photos Pro App and start recording my movements to a log file. With that said, there are some definite advantages to having a physical GPS device on the camera itself. First of all a physical GPS device will be more accurate. Logging apps only update based on a predefined interval. The next advantage is that a physical GPS just needs to be turned on. In a matter of seconds it locks on to satellites and away you go. Lastly, the logging apps on your smartphone will drain your smartphone’s battery sooner. Not to mention that there is no post-processing with a physical GPS. The longitude and latitude are written to the metadata of the images as you capture them. Yet, I was still using my iPhone more than the physical GPS devices I had. I think the biggest reason for this was the design of the GPS units I’ve used to date. Nikon DSLRs have direct support for external GPS units. On the more recent models like my D600 there’s a dedicated GPS port. Almost all of the GPS units I’ve used to date attached via a cable. This short cable plugs into the Nikon DSLR and the other end attaches to the GPS itself. This is what I never really liked. You either had to attach the GPS to your hotshoe or to your camera strap. The cable was always in my way. I was either constantly knocking the GPS out of the hotshoe or putting stress on the port that the cable was plugged into.
The Eco ProSumer GPS (pro-s)
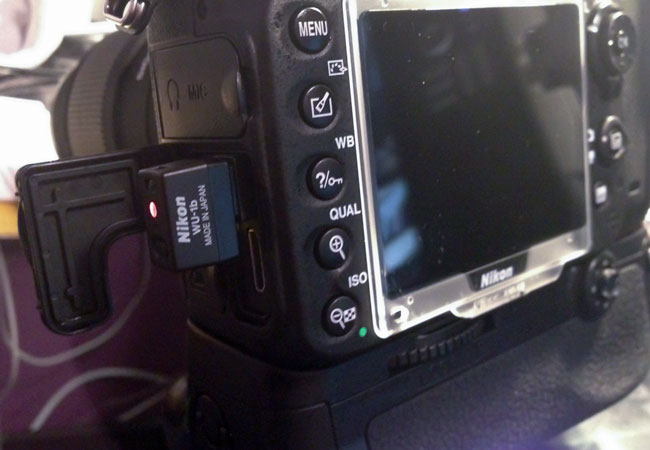
The Eco ProSumer GPS is one of the latest models from Dawn Technology. First off the thing that attracted me to this model was the fact that there is NO CABLE. It’s small and plugs right into the side of my camera. It’s not in the way! Like the previous Dawn models it allows you to use it in auto mode or always on. In auto mode it will turn on/off with the camera. So then what else is new besides the design? It’s lightweight at only 16g. It’s very power efficient at 19mA (1/3rd of the aging Nikon GP1). It’s also faster at acquiring a GPS lock. Basically it’s better in every way. There is a port on it that allows you to connect a cable release, and of course Dawn Technology sells those too.
I’ve been a fan of shooting wirelessly to my iPad since the early days when I got my Nikon D7000 using an Eye-Fi Pro X2 card. After that I configured my Nikon D4 and WT-5a module to shoot either wirelessly to my MacBook Pro or my iPad and now that I have a Nikon D600 (and loving it!) I was interested in seeing how the new Nikon WU-1b module works. The idea in all of these scenarios is to use the iPad or iPhone for review of what I’m shooting with my DSLR and sharing with email or social media of quick event photos.
The Nikon WU-1b is a narrowly focused solution
With the Eye-Fi and WT-5a module for the D4 you can wirelessly transmit your photos to a variety of Apps. However, the WU-1b seems to be narrowly focused by Nikon to shooting wirelessly to your iPhone or Android Smartphone. They provide a Free App (Wireless Mobile Adapter Utility) for both platforms (see my review of the iPhone version here). Once you download the App it’s pretty easy to get started. Just plug in the module into your D600’s USB port and turn your camera on. The WU-1b will start broadcasting its own WiFi hotspot. Connect to that hotspot via your smartphone and launch the App. Once you’re in the App you can either set it to wirelessly fire the shutter (with Live View on your smartphone) of your D600 and then transmit the image to your smartphone or you can switch the App to the mode that allows you to shoot normally with the camera and the images will be transferred to your smartphone as you take them. Whether you shoot in RAW or JPG the module will send JPGs to your smartphone. I normally shoot RAW to the 1st card and Basic JPG to the 2nd card (my Eye-Fi) card. When I’m in this RAW+JPG mode the WU-1b seems to send the smaller basic JPG. However, when I’m in just RAW mode it sends a larger full-sized JPG and of course that takes a lot longer. Speaking of time, the smaller JPG (about 500kb) takes about 5 seconds to show up on my iPhone. The larger JPG (about 1.6-2MB) takes about 10-15 seconds to show up on my iPhone.
It works as advertised, but…
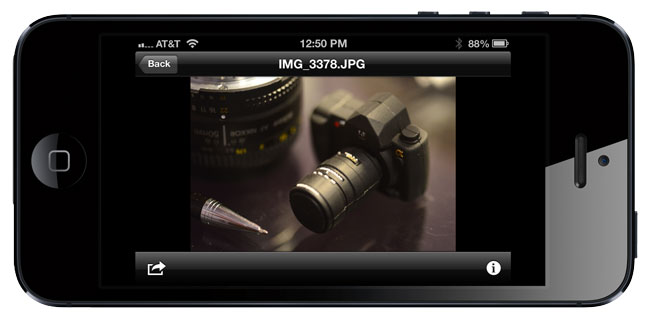
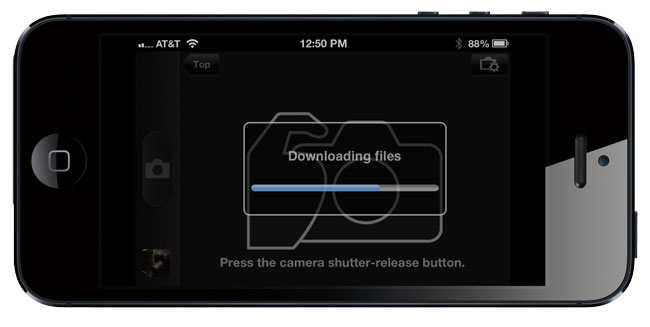
While the WU-1b works as intended it really falls short in the review department. Unlike other tethering solutions you don’t actually see the images as they come in to their App. Instead you see a progress bar and once the images are there you tap to review them. Also while the camera settings are displayed, there is no way to change them in the App. Look at this is merely a transfer utility and remote shutter. Also there is no native iPad support. Yes the app works on an iPad, but in the smaller phone size.
Shuttersnitch saves the day AGAIN!
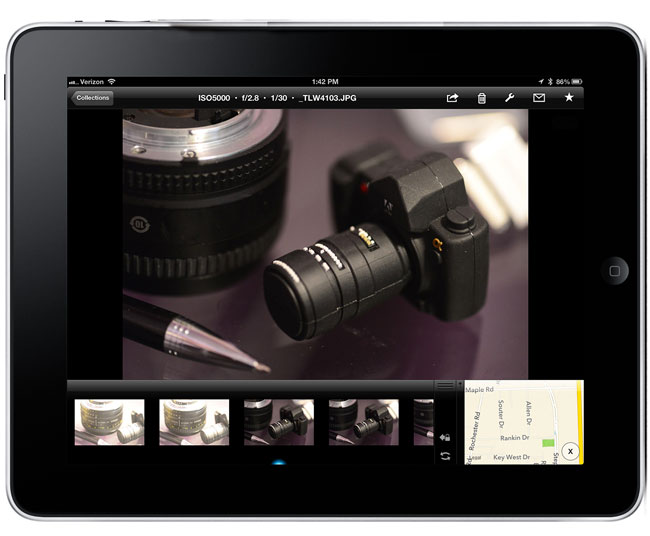
Shuttersnitch is the App I use for All my wireless tethering to iPad needs. It works with the Eye-Fi cards and it works with the Nikon WT-5a module. The good news is that it also works with the WU-1b module. Unlike the bear bones Nikon Utility, Shuttersnitch gives you a great way to review your images as you take them, star rate them, geotag them and share them via email, social media and cloud storage such as Dropbox or any FTP/WebDAV location. It’s a professional App! I remembered that a recent update of the App mentioned support of the WU-1b module and sure nuff it works great! I had to simply turn on support for the module in the settings and just start shooting. The images came in as usual.
Shuttersnitch for iPhone and iPad
The Bottom Line
For the price, there’s really no reason not to get the WU-1b module if you have a Nikon D600. It provides a pretty painless way to get images from your Nikon D600 wirelessly to your smartphone and it can work anywhere since it creates its own ad-hoc network. Add the Shuttersnitch App and you’ll be even happier with it. Oh yeah, one more thing: Nikon can you please explain why the Nikon WT-5a (for the Nikon D4) costs $500 more than the WU-1b (for the Nikon D600)? Is there really $500 more technology in the WT-5a? I’m thinking not! Yes I see the price is coming down on it from the outrageous $877 that I originally paid, but really? c-mon!
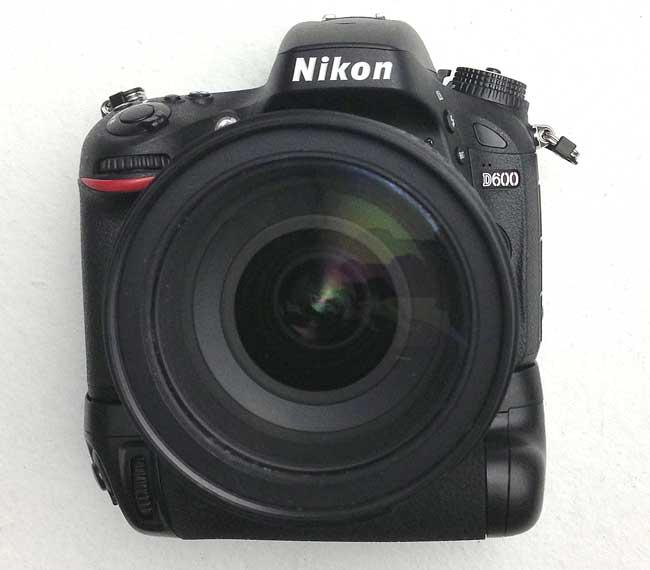
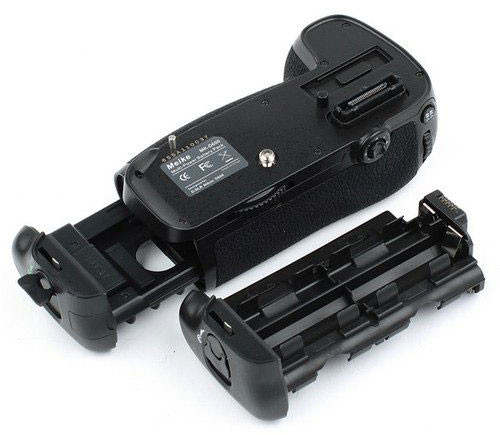
Back when I bought my Nikon D7000 I never really thought about buying the Nikon branded battery grip due to my use of that body as a travel body and the cost of the Nikon grip. However, the 1st time that I had to use it as a backup body when my D700 went into the shop for repair, I really wanted a battery grip for shooting portraits. Then I ran across this Meike 3rd party battery grip and decided to give it a try. It worked perfectly the entire time I had it. I sold it with my D7000 before upgrading to the D600. Once again I was in the same boat. I wanted a battery grip for the D600, but didn’t want to spend the money for the Nikon branded one.
What does it do?
Basically a battery grip does three things. 1) It gives you a way to grip your camera easily in portrait mode. 2) It allows you controls and shutter button access on the grip and lastly 3) it doubles your shooting time by allowing you to put in a second battery. In my opinion a battery grip either works or it doesn’t. Therefore, I have no problem buying a less expensive one as long as it works! Since I had good luck with the Meike knockoff for a fraction of the price, I tried one for my new Nikon D600 and it even works better than the 1st one! Better? Terry you just said “it either works or it doesn’t.” How can this one work better? There was one minor issue with the one for the D7000. The dials on the grip worked backwards. For example, if you wanted to go back one image during review you would have to dial to the right instead of the left. Weird, but I got used to it. I’m happy to report that this one works with the dials turning the right direction as you would expect them to work.
The Bottom Line
With any 3rd party accessory that accesses your camera’s electronics you are at some risk of it doing some damage. However, having used the previous one for over a year with no problems, I feel reasonably safe with this one on my D600. It comes with both trays for either a standard EN EL-15 battery or AA’s. You can get one here for about $68 or the Nikon branded one here for $273.
I recently replaced my Nikon D7000 with a Nikon D600. The D600 is to serve as my travel body and backup body to my Nikon D4. Although the D7000 served me well, I couldn’t help but be tempted by having another Full Frame (FX) body. All but one of my lenses are Full Frame lenses. So the D600 fits in perfectly. It’s Nikon’s lowest priced Full Frame body and while it’s not technically a D700 replacement, it is the closest thing to date that Nikon has introduced to replace the D700. Let me answer some questions right off the bat…
Why not a D800?
As I’ve said before, I love the D800 and the only thing that is stopping me from getting one is the fact that it shoots 36MP RAW files and that’s just more data than I “need” and certainly much more than I want to deal with in terms of retouching, RAM requirements, storage, transfer speeds, etc. etc. If they come out with a model or update that allows you to turn down the size of the RAW files I’d certainly give it another look.
What about the problems I’ve heard about the D600?
The first negative I read about the D600 was from David Hobby. The deal breaker for him was the Flash Sync Speed being capped at 1/200th. Not a concern for me. The next one I read about was “dust”. Apparently there are/were D600 shipping with dust on the sensor right out of the box. I haven’t noticed this issue. I do plan to do some extensive checking/testing, but as of right now, no dust that I can see. Lastly, both Scott Kelby and Jason Lykins were frustrated by not being able to program the center select button to zoom into an image at 100%. I can certainly see this as a potential deal breaker if you were used to that configuration on your previous/other body. Since I had never configured the button to do that on my other bodies, I don’t miss it not being there on the D600. Others have asked “is the 3 exposure bracketing limit too limiting for HDR?” I would say yes and no. If you shoot a lot of HDR, yes. However, you could always manually adjust the exposure to get more in s pinch. I don’t shoot a lot of HDR so I’m fine with this limitation. All systems go!
I took this HDR shot from my hotel window in San Francisco last week.
The Feel
The first thing I noticed when I picked up a D600 was how good it felt in my hand. It’s one of those things that you can’t really put into words, but it just felt very comfortable. Of course much lighter than my D4 and even a better “more secure” feel than my D7000 and even better than that of the D700 from what I remember.
The Buttons and Controls
When I talk to photographers that are just starting out, they usually ask me why do some DSLRs cost more than others. Outside of the differences in sensors, fps, and other internal characteristics, the other major difference is the number of dials and buttons on the body itself. Most low end DSLRs have few buttons and controls as dedicated buttons. This means more trips the menu. The D600 doesn’t have as many options as the much more expensive D4, but it does have the right balance/mix for what I intend to use it for. I can operate the camera in Manual mode or a shooting mode without making any additional trips to the menu.
What about the Wireless Module?
I have ordered the WU-1b wireless module, but I have yet to see it show up. In the meantime the D600 has been working just fine with my Eye-Fi card in the 2nd SD slot just like I used it in my D7000.
Other Stuff
I was very happy to see Nikon use the same battery/charger as the D7000 and D800. Since I already had some extra batteries for my D7000 I was able to use them in the D600 instead of selling them with the D7000. Once again I went with a 3rd party Battery Grip (just as I did with the D7000), look for a separate review of that this week.
Overall I’m quite pleased, but…
I love this camera! It’s perfect for my needs of a travel body and backup body. The 24MP upgrade from 16MP isn’t too bad either. However, there is one thing that annoys the crap out of me. The mode dial has a button on the top of that you have to press before turning the dial. I’ve never had to do this with any of my other Nikon bodies and while I’m sure I’ll get used to it, it bugs me a LOT right now. The only other wish I had was that of a terminal port. It’s not crucial for me for this body, but it definitely would have been a nice to have.