My 2012 Holiday Gadget Gift Guide (web version) is Here!

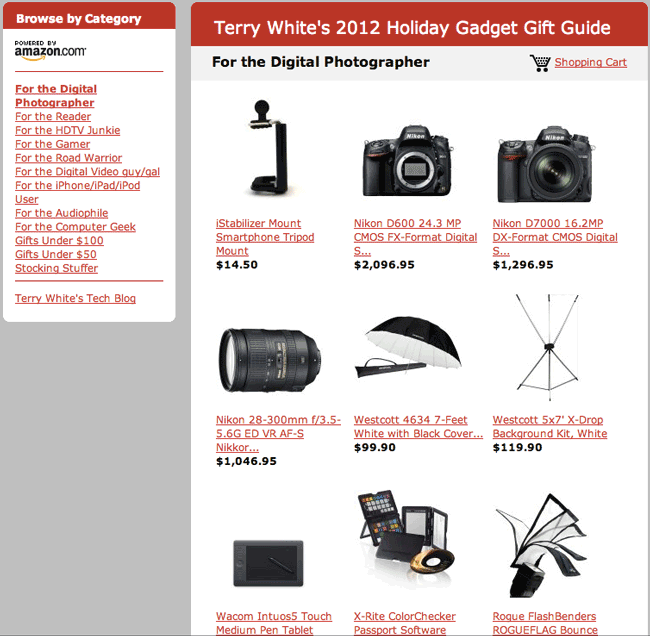
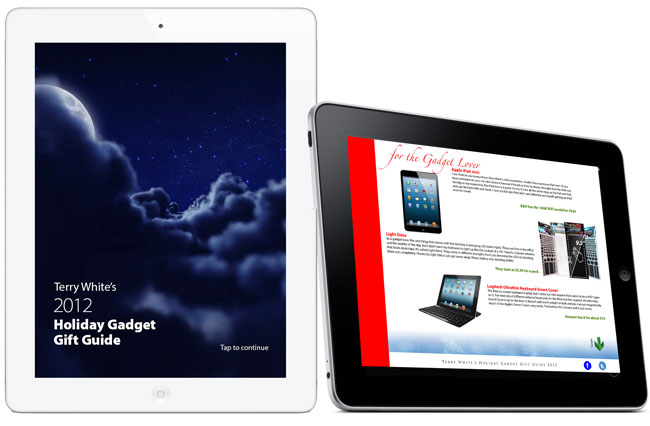
Last week I released my 2012 Holiday Gadget Gift Guide as an iPad App and as promised I’m releasing the web version today!

That’s right it’s my guide to help you with you holiday shopping for the gadget lover (freak) on your list. The way this thing started was each year towards the holiday season all my friends started asking me and emailing about what my picks were in various categories and of course the answers were usually the same. So I decided to compile a list and just email it to the folks that asked.

Once again I’ve put together a Holiday Gadget Gift Guide to help you pick out gifts for the techies and gadget lovers on your gift list. I’ve chosen Amazon.com simply because they are the one online retailer with not only the largest presence, but also the one that carries 99% of the items I recommend. Another advantage is that I can continue to add things that come up all the way up to the final days of the holiday season. In previous years I would always find some cool gadgets after the static gift guide was published. Now because they don’t carry every single item on my recommendation list, you can check for some Extras at the bottom of this post.


How did you pick the items that you recommend?

Simple! If it’s in my guide it’s because I either use it now, have used it in the past or one of my close friends or colleagues use it and I trust their opinion. Now in some cases there may be an item in the guide that is NEWER than the one I use and I had to list that one because my model is no longer available. Unless I’ve used it or know someone who has, it doesn’t get in PERIOD.


How does the gift guide work?

The guide is broken out by Category so that you can shop accordingly. This way you can pick your gift by the kind of person you’re shopping for. I know that sometimes you have to buy a gift based on a certain dollar amount or budget (like gifts for co-workers), so I’ve given you a couple of dollar amount categories too. Happy shopping and in case I don’t see you later, Happy Holidays to you and your family! You can go straight to my 2012 Holiday Gift Guide here.

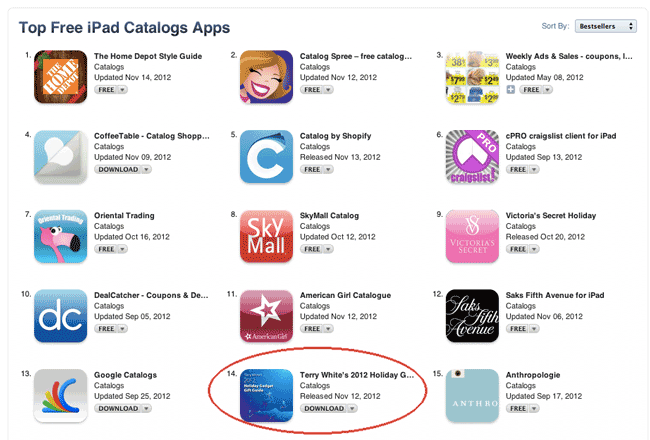
Thanks for Downloading the iPad Version and Pushing it into the Top 20 on the App Store

Grab it here:

iTunes


Continue reading “My 2012 Holiday Gadget Gift Guide (web version) is Here!”

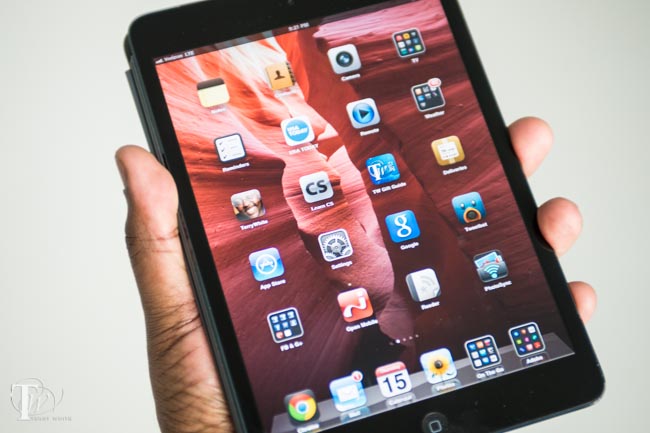
iPad mini WiFi + Cellular First Impressions

Let me start this by saying that I never had any interest in the smaller form factor tablets. Although I already have a Kindle Fire and think the size is PERFECT for eBook readers, I just wasn’t interested in a smaller iPad. That was before the iPad mini was actually introduced. What I didn’t want was a smaller screen at a smaller resolution. I didn’t want some middle device between an iPad and iPhone. However, when the iPad mini was introduced and although it has a smaller form factor it maintains the same original 1024×768 resolution. My interest was piqued. That coupled with compatibility with all of the existing iPad Apps got me to start considering the mini. I’ve always been a fan of smaller, thinner, lighter electronic gadgets. Once I got past my initial bias against smaller tablets, I was able to consider the iPad mini for what it really is. It’s a smaller, thinner, lighter iPad. It’s available in all the same sizes and configurations and costs less. The only real downside is the lack of a retina display. Also the newer 4th generation full size iPad has the faster A6 processor in it. Since I already have the 3rd generation iPad with retina and Verizon 4G LTE, I figured I could skip the 4th generation and look at the mini.

It’s smaller
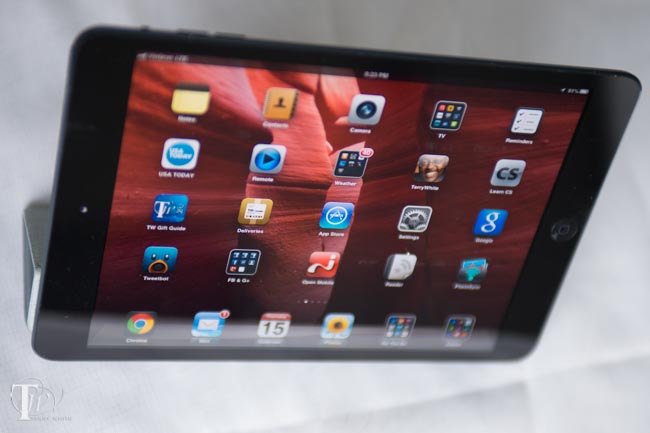
One of the biggest complaints that I hear about the full size iPad is that it’s hard to hold with one hand and therefore hard to read books on it for extended periods of time. That problem is definitely solved with the iPad mini. It’s small enough to hold easily with one hand and it’s certainly light enough to hold for longer periods of time without fatigue. It feels as light as my iPhone 5, although I know it’s heavier.

Is it too small? A couple of people commented on my Facebook page stating that they thought the iPad mini was too small. I must admit that this thought never crossed my mind. If you are using a smartphone or iPod touch then the iPad mini will definitely not feel too small. It’s still not small enough to fit in a pocket (and even if it does fit in your pocket it’s probably not a good idea). So to answer those concerns, no I don’t think it’s too small.

No Retina Display?
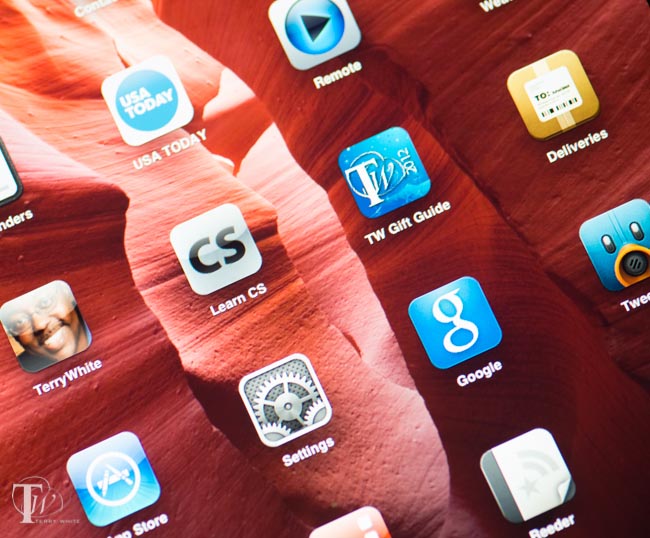
There is no Retina Display on the iPad mini and I wondered would that bother me. When I tried one out in the Apple Store before receiving mine, I could definitely tell a difference. Like most things, I didn’t really appreciate the Retina Display on my 3rd gen iPad until I looked at the iPad mini. It’s noticeable, but not the end of the world. It’s still bright and very easy to see and read. However, if you’re primarily going to be looking at photos on it or using it for a mobile portfolio then you may want to stick with the 3rd or 4th gen iPad with Retina Display or wait for the iPad mini with Retina Display.

Speed
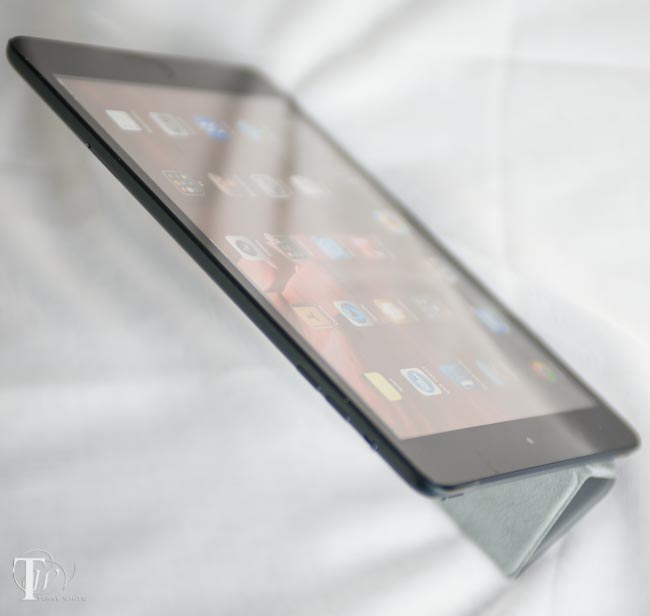
It feels the same as my iPad 3rd gen. However, the 4th gen iPad has the A6 chip and has been benchmarking at literally twice the speed of the previous models. This is important for gamers and graphic intensive Apps. If you’re not playing a ton of photo realistic action packed games then you probably wouldn’t notice the difference as much. Since I haven’t tested a 4th gen iPad yet, I can’t really say if the speed difference is noticeable in real world daily use. While the iPad mini doesn’t have the new A6 processor it does have faster WiFi taking advantage of 802.11n 5GHz and that’s definitely welcomed since most people use their iPads on WiFi than 3G/4G.

Will I keep and use both of them?
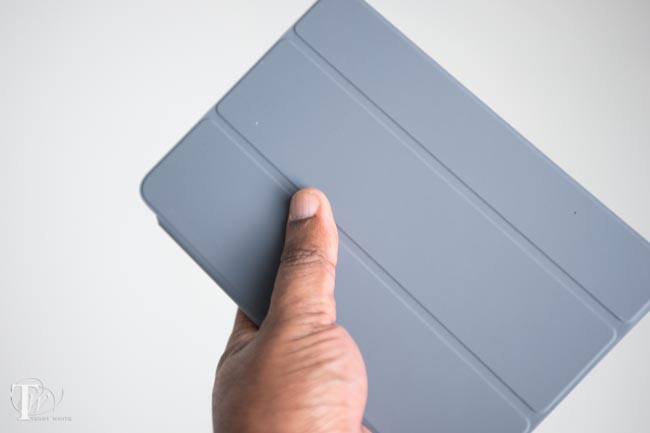
That’s the $659-$829 question. I purposely bought the largest WiFi-Cellular Verizon version because I figured if the iPad mini totally meets my need and becomes the iPad that I use the most then it’s conceivable that I may ditch (pass on) the full size iPad and just use the mini and if that were to happen then I’d want to have all the same storage and capabilities of the larger one that I’d be giving up. The plan for now is to use the large one when I travel with just an iPad (w/ Logitech Ultrathin Keyboard Cover) and the iPad mini when I travel with both a notebook and an iPad. I’ll also probably use the iPad mini around the house more simply because it’s smaller and lighter. There is definitely one more plus and that is having all my devices on the same connector. It’s a pain having the iPhone 5 on the newer Lightning connector and the 3rd gen iPad on the older 30 pin connector. It would be great to move on and go all Lightning connections. I also really like the newer Smart Covers. They seem to fit/stay on better than the original ones for the iPad 2/3.

My buying advice
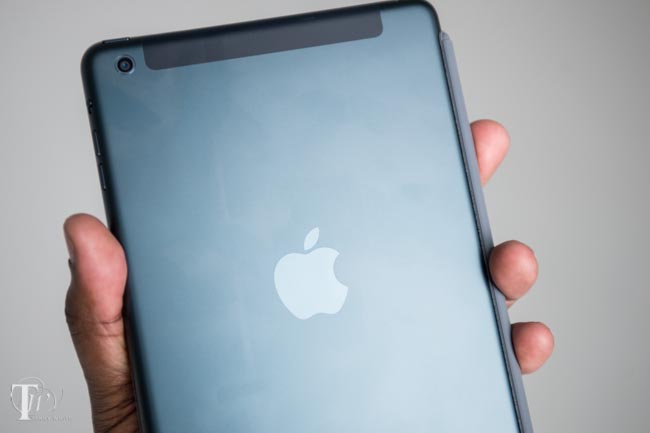
If you are buying an iPad for the 1st time then you should go to the Apple Store and pick up hold and check the screen out with your own eyes. Then you can decide which one is best for you. While the iPad mini is definitely smaller, the display doesn’t feel that much smaller since it goes closer to the edge and has the same resolution as the original iPad and iPad 2. If you’re looking to buy a second iPad and gift one to a family member then it’s hard to overlook the price difference in the iPad mini. If you’re on the original iPad, then the iPad mini would definitely make a nice upgrade. The device in Apple’s line up that is starting to look like the odd man out is the iPod touch. A 32GB iPod touch is $299. For $30 more you could get a 16GB iPad mini.
How To Use The Pen Tool in Adobe Illustrator, Photoshop and InDesign CS6

In this episode of the Adobe Creative Suite Podcast Terry White shows How to Use The Pen Tool in Adobe Illustrator, Photoshop and InDesign CS6. See how to create original art, trace and create custom InDesign frames for images and text.

Are you missing out on my Bonus Content?

See more of my Adobe Creative Suite Videos on my Adobe Creative Suite Podcast and get the App here. It features EXCLUSIVE CONTENT that no one else gets to see. This episode has a BONUS CLIP that is available only in the App! My iOS App is a Universal App for iPhone, iPad and iPod touch. I also have an Android version on the Amazon App Store:

Learn Adobe Creative Suite with Terry White - Wizzard Media

My 2012 Holiday Gadget Gift Guide is Here and it’s an iPad App!

Each year I put together my picks for the best Gadget Gifts to get that special someone on your Holiday Gift List. This year I decided to practice what I’ve been preaching and I’m releasing the guide as an iPad App as well as the web version. I built the App using Adobe InDesign CS6 and Adobe Creative Cloud. It’s interactive with videos, links and animation. The iPad App is a free download and while it’s focused on my top picks, you can access the full guide in the App as well.

Download it here:

iTunes

I’ll be releasing the full version of my 2012 Guide on the web next week.

Using Tether Tools in a way they never intended

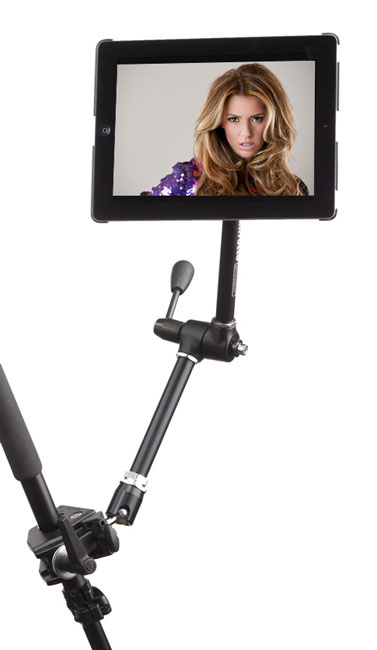
Anyone that follows me and follows my photography knows that I’m a fan of shooting tethered. Last week I had the good fortune of meeting with a TetherTools rep. She showed me some samples of their newer products for mounting iPads to various things such as tripods and tables. As you know I recently reviewed the clamps from TripodClamps.com. A product that I’m quite pleased with. However, I try not to put on blinders and I’m usually willing to look at other solutions. I’ve followed TetherTools for some time now as they relate to Digital Photography, but it was neat to check out their iPad products too. I left that meeting with a few samples: Wallee iPad Case for iPad 3 – Black, Wallee iPad Connect Bracket, Wallee Connect Lite Bracket Rock Solid Mini ProClamp Rock Solid Articulating Arm with Center Lock 7″ and the Handstrap. Now keep in mind that a couple of these pieces have overlapping functionality. For example you wouldn’t use the Handstrap and Articulating Arm at the same time. Nor would you use the Connect Bracket and the Connect Lite Bracket at the same time. I left with solutions for mounting an iPad in a variety of different situations.

Using Tether Tools in a way that they hadn’t thought of

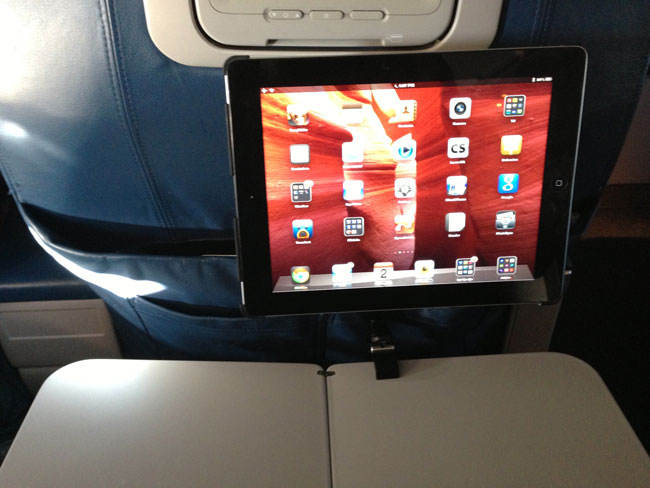
On the flight home I decided to test a theory that RC, Brad, Pete and I had during the meeting. I decided to use the Tether Tools Wallee iPad Case, Wallee Connect Lite Bracket, Rock Solid Mini ProClamp and Rock Solid Articulating Arm to mount my iPad on my tray table. The idea was to get the iPad up and at a comfortable viewing angle and freeing up the table for the in flight meal. It worked great! As a matter of fact, had I had these for sale the flight attendant would have bought one from me on the spot. Actually that brings me to the problem with using it this way. If you’re buying this gear as a professional photographer and plan to mount your iPad as part of your digital photography workflow, then this makes a great solution. However, if you were buying this just to mount your iPad for inflight use then it would be a tad bit pricy and cumbersome to travel with. This solution could work very well for mounting your iPad as an inflight entertainment system, but it would need to be streamlined a bit. It would need to be sold at a lower price and as perhaps a single kit. There’s no doubt that you could use this solution in a variety of settings. Just last week I used it to record the video on the Pocket Socket generator that I reviewed. Yep, that was an iPad video with the iPad mounted to my desk. However, for the personal looking for a single solution for iPad travel then it would be overkill unless Tether Tools repackages it for that audience.

Be sure to check out Tether Tools’ other solutions for digital photography and iPad mounting here at tethertools.com.

Charge Your Cellphone During a Power Outage

One of the lessons that Hurricane Sandy taught us is that Mother Nature can strike at any time and as a result you could be without power for days. My heart and prayers go out to those affected by the hurricane. To make matters worse another storm is bearing down on the northeast. While generators are great, there could be situations where there is no gas to run them. In those cases you are probably going to want to at least keep your cellphone going at a minimum.

K-TOR Pocket Socket Hand Generator Can Save The Day

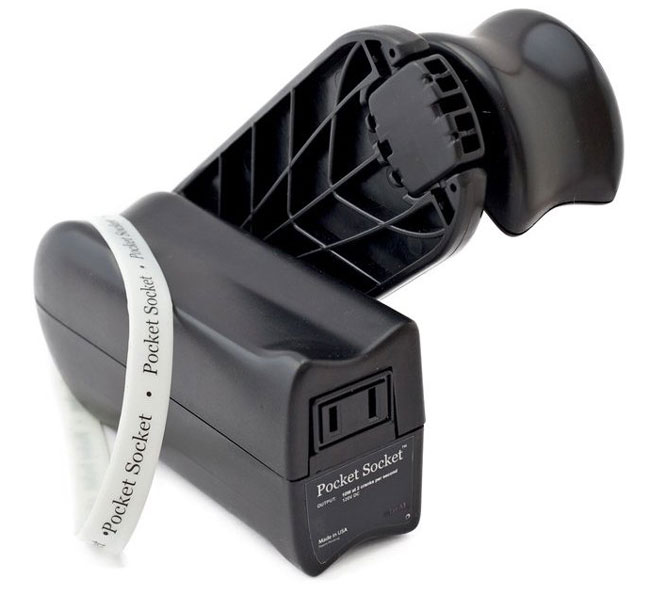
Having a portable hand crank generator may be the difference between a charged cellphone battery and a dead one. The concept is simple. Plug in your USB charger in to the standard AC outlet on the Pocket Socket and plug in your phone. Then start cranking. Unfortunately there is no free lunch. If you stop cranking the handle, then you stop generating electricity and therefore you stop charging. You will definitely get a good workout for the time it takes to charge your battery, but I’d be willing to bet there were some folks out there that had no power and therefore a dead phone who would have had no problem cranking this handle for as long as it took to charge up there devices.

The K-TOR Pocket Socket generates 10W 120v DC at 2 cranks per second. How long does it take to charge your phone? The answer is the same amount of time it takes to charge your phone now. If you can get a decent charge in 10 minutes, then you will have to crank for 10 minutes.

You should definitely make one of these part of your emergency preparedness kit!

You can get the K-TOR Hand Crank Generator here.

I also keep one of these charged for shorter power outages.

UPDATE

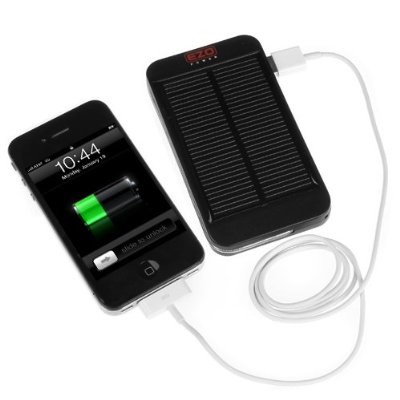
Some of my readers were asking about or suggesting solar options. A solar charger is a great way to go too as long as you’ve got access to the sun 🙂 The nice part about this particular one is that you can charge it during the daylight and charge your phone each evening even if the sun has gone down.

Get a great one here.

iStabilizer Mount for Smartphones

There is no doubt in my mind that smartphone photography is here to stay and in particular iPhone photography has become a category in and of itself. With that said, people are always asking me about various mounts to mount their iPhones and other smartphones to tripods. I’ve reviewed different ones here in the past and with each one there were pros and cons. In the past the problem was that in order to have a really good mount you really needed one that your iPhone would go into like a case. However, the downside to this is that if you already have a case you would have to take your case off in order to put your iPhone into the mount-case. The other problem is that the iPhone changes form factor every couple of years. The iPhone is different from the iPhone 3G/3GS is different from the iPhone 4/4S and different from the iPhone 5.

iStabilizer is more universal

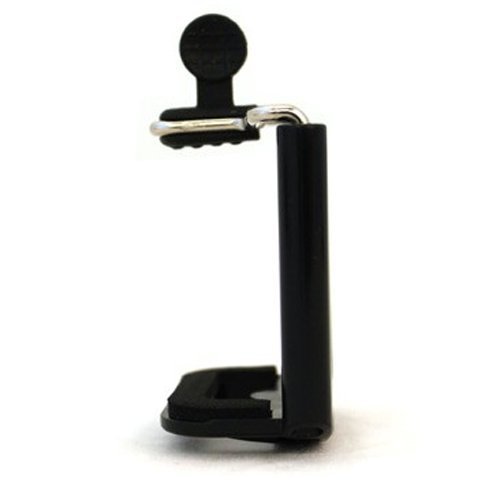
The iStabilizer Mount isn’t designed for a specific type of smartphone. Instead it’s more like a universal clamp that holds your iPhone or other smartphone in place. It’s spring loaded. Just pull the top up, slide your smartphone in and gently release it.  The great part about this mount is that you can leave your smartphone in its case. Another great thing is that it’s fast. No need to put your smartphone in a special case or holder first before mounting. It has a standard tripod mount on the bottom. Below is a pic of my iPhone 5 in the Caze 0.5mm clear case mounted on my Sony tripod.

What’s the downside?

The only downside to this mount is that it doesn’t allow for vertical mounting. The clamp isn’t tall enough to mount a smartphone in the portrait position. However, since it does hold the smartphone very firmly in place if your tripod head can tilt then you could potentially take portraits by simply rotating the tripod itself. It’s now a permanent fixture in my laptop/travel bag.

You can get the iStabilizer mount here.

If you doubt that iPhone photography is real, check out this cover of Time Magazine that was shot with an iPhone by photographer Ben Lowy. See the story here:

How To Get Started With Adobe InDesign CS6 – 10 Things Beginners Want To Know How To Do


In this episode of the Adobe Creative Suite Podcast Terry White shows beginners How To Get Started with Adobe InDesign CS6 – The 10 Things Beginners Want to Know How To Do. InDesign is a core piece of the Creative Suite and Creative Cloud. This video takes the approach of showing beginners how to do the things they usually want to know how to do right away. See how to create a layout from scratch.

Are you missing out on my Bonus Content?

See more of my Adobe Creative Suite Videos on my Adobe Creative Suite Podcast and get the App here. It features EXCLUSIVE CONTENT that no one else gets to see. This episode has a BONUS CLIP that is available only in the App! My iOS App is a Universal App for iPhone, iPad and iPod touch. I also have an Android version on the Amazon App Store:

Learn Adobe Creative Suite with Terry White - Wizzard Media