See my NEW iPhone 3G S Review – June 2009 Here. Last year I wrote one of the most detailed unbiased iPhone reviews on the net. It has drawn over 97,000 reads to date! So I thought it only appropriate to follow it up this year with a review of the NEW iPhone 3g. When I wrote my review last year I was comparing the iPhone to all other devices I had used including the Palm Treo 650 and Motorola Razer. This year, I'll be comparing the iPhone 3g to the original iPhone.
My buying experience
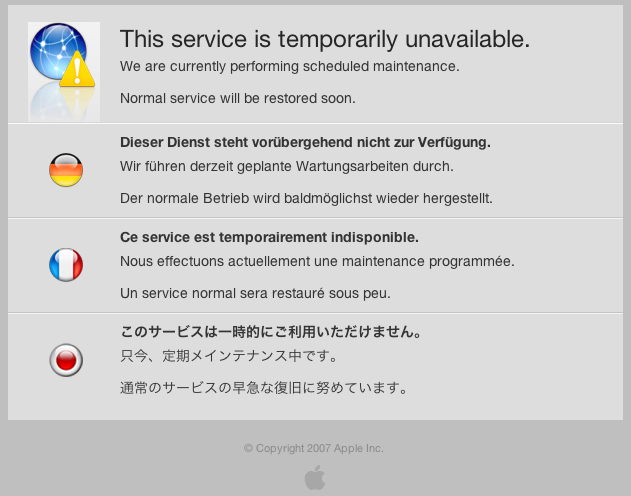
Last year's iPhone launch was VERY organized. This was the biggest hardware launch in Apple's history and quite frankly, they nailed it! I thought to myself "this should be the model for releasing new hardware to the masses." You could tell that months of planning had gone into it. Granted it wasn't without problems, but for the most part things went very smoothly. Last year, you stood in line, got to the counter/checkout person and said either 4GB or 8GB iPhone. You gave them your credit card and they gave your iPhone and emailed you your receipt. The whole process took 5 minutes for me once I got to the front of the line. Then you went home or back to the office and activated your iPhone using iTunes. Yes there were some issues on day one (and throughout the weekend) with the activation servers being overloaded and some people having to wait longer to get their iPhones activated. Overall though, the launch was a huge success. This year things didn't go so smoothly. There were MAJOR issues on day one. Apple chose Friday, July 11th not only to release the new iPhone 3g, but also to release the 2.0 software update for the 6 million iPhone users out there and to roll out the newly revamped MobileMe online service. Some would call this ambitious! Some might call this stupid. Hind sight is always 20-20 and I guess Apple severely under estimated the demand that these simultaneous launches would have on their servers. The problem was that not only did Apple/AT&T require you to activate your iPhone on the spot at the time of purchase, but they also require people updating their original iPhones to be reactivated at the very end of the 2.0 software update process. This was quite frankly too much for the servers to handle and they crashed/timed out early in the day. Even though Apple was quoted as saying that the average activating would only take 10-15 minutes before the iPhone went on sale, it just doesn't work that way. Apple/AT&T even handed out iReady rate sheets to people in line so that they would be prepared to walk up and ask for what they wanted. However, people are going to have questions. Each question is going to delay the purchase process and make the people waiting behind them wait even longer. I would guess that the average activation was taking more like 20-35 minutes. You might ask, "why would Apple go away from just selling the device and letting you activate it on your own time?" The problem with the last launch/iPhone was that there were thousands of iPhones that were never activated on AT&T. These phones most likely ended up in other countries on other networks. Therefore, both companies lost money. So to prevent that from happening, you have to signup for your 2 year commitment before you leave the store. It's clear that this was not a limit of the technology. When the activation servers crashed, reports say that some Apple Stores just sold the iPhones and told people to activate them when they got home. I would have much rather seen Apple offer an "optional" pay, let's say $599 up front and the difference in price would be credited back to your credit card immediately upon activation. This would have made things go much quicker for those that didn't want to activate there's on the spot. Friday, July 11th 2008, 6:00 AM PST I was in Los Angeles on Friday the 11th getting ready to deliver my InDesign Seminar to a FANTASTIC audience of over 600 people. My seminar started at 10AM and I had to be there to get setup no later than 9:40AM. So my plan was to head over to the local AT&T store by 7AM. The doors were to open at 8AM and I figured I'd be out by 9AM. Before I headed over, I was talking with my buddy Scott and he told me that the iPhone 2.0 software update had just come online. So I hung up the phone with him and decided "well I can install the update while I'm showering and getting ready." That was a mistake! While the update downloaded in a about 15 minutes and installed in about another 20 minutes, I was STUCK at the "Accessing iTunes Store" stage. The last part of the process which talks to the iTunes activation server could not complete. I was running out of time. So I disconnected the iPhone which did no harm, but I was basically holding an iBrick. Without completing that last step, the iPhone could only be used to make emergency 911 calls. I had to leave if I was going to get to the store!

I made it to the AT&T store a few minutes later than I had hoped. I was 112th in line. One of the AT&T reps walked the line and counted and assured everyone up to about the 125th person that they would get an iPhone. After that person, you were not guaranteed to get one because they were not going to have enough. 8AM came and the doors opened. The line moved a bit. 8:15 came and went. 8:25 came and went. The line didn't move again until about 8:30. This was not looking good. I had my MacBook Pro with me in line (still trying to connect to the iTunes activation server to reactivate my phone). When 9:00 came, I knew that I might as well leave. There was no way that the line was going to move fast enough for me to get in and out before my seminar. So now I had no iPhone. My old one was still bricked (un-activated) and I couldn't get the new one. I finally got connected to the iTunes activation server during my lunch break and got my original iPhone back up and running again. After my seminar was over at 5PM. I called the Apple Store (knowing that AT&T was now out of stock) and I was quoted a 4 hour wait!!! I decided that it wasn't worth it. So I went to dinner and then on to the airport to catch the redeye home. After about 2 hours sleep, I made it over to my local Apple Store (Somerset Troy, Michigan) at 9AM. There were about 30 people ahead of me. I walked out with a 16GB black iPhone 3g at about 10:50 AM on Saturday morning. When I left the store, the line had grown to about 100 people. On to the review…
Let's start with the new hardware
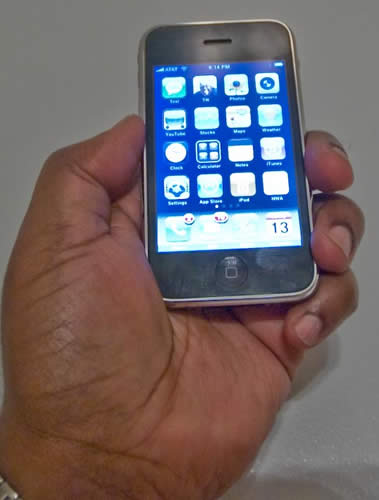
The iPhone 3g looks very similar (read almost identical) to the original iPhone, especially when you're looking at them from the front. However, when you look at the from the sides or the back you'll see that Apple has added a few more curves. The side volume control buttons and ringer on/off switch are more sleek and the stainless steel back plate is now a shiny black (or white) plastic. Although it's technically no thinner, it feels thinner in my hand. The slick black plastic also feels easier to hold. This is one of those things that's hard to convey in text. You'll have to hold one in your hands to get what I'm talking about here. By going away from stainless steel on the back and going to plastic, reception should be improved. My calls do seem to be very crystal clear. I'm also happy that the iPhone 3g fits nicely into my favorite iPhone case, the DLO Hipcase. 
3g data and GPS The iPhone 3g includes not only a 3g data transceiver but also a GPS unit built-in. Although I loved surfing the web on the original iPhone, I would always hesitate to do so when I wasn't connected to Wi-Fi. The previous model relied on EDGE and while EDGE speeds were OK, it wasn't something that you would look forward to using for hours on end. The big new thing about the new iPhone 3g is that it can use AT&T's (and other carriers around the world) faster 3g (3rd generation) faster data network. Apple bills the iPhone as twice as fast and I would have to agree. In some respects they may even be being a little modest. The iPhone 3g is definitely much much much faster at loading complex websites. It loads text based websites almost instantaneously.
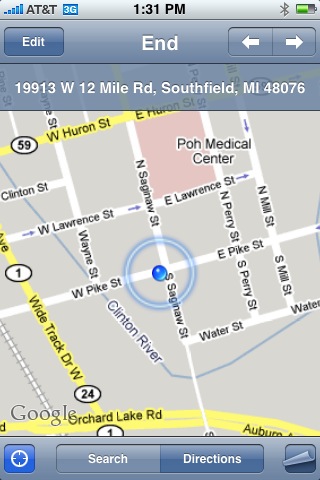
Although Apple includes a GPS with the iPhone 3g there is no turn-by-turn navigation feature. I've heard several theories on this including one that suggests with the case design, and power to the GPS, it's just not strong enough to do this. However, the GPS is strong enough to show and track your location on the Google Maps app. I tested this by plotting a route from my house to a local video game store. Once I got in my car and tapped the Locate Me button, the iPhone 3g showed my location with a pulsing icon. As I drove the route the iPhone 3g was VERY accurate in showing me where I was. It does work, but turn-by-turn with voice prompts would have been much better. Perhaps whatever the limitations are can either be overcome by a 3rd party developer or by Apple in a future software update. Smaller lesser phones have this, so how hard can it be? Geotagging your pictures! Another benefit of the GPS and Location Services of the iPhone 3g/iPhone 2.0 update is that when you take a picture with the built-in camera, the GPS data (longitude and latitude) are now stored in the metadata of the shot.

Here's a shot I took with the iPhone's built-in camera. The iPhone automatically put my location information in the file. If you click the photo it will take you to Google maps and show you where I was standing 🙂
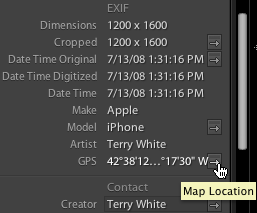
If you import these shots into apps like Adobe Photoshop Lightroom, you'll be one click away from seeing exactly where you were when you took the shot. Headphone jack and dock connector Apple did away with the funky recessed headphone jack from the original iPhone. Thank God! It was a pain in the butt to have to not only buy an adapter to use your favorite headphones, but also remembering to carry it with you. Now just about any set of standard headphones should work for listening to your iPod content. Although the iPhone 3g uses the same dock connector as all previous models and other iPods, I'm hearing reports that you can no longer use the old Firewire based chargers. There may also be issues plugging your iPhone 3g into the various iPod speaker systems out there. Typically Apple now provides a dock connector adapter with each new iPod they introduce. However, I haven't seen one yet for the iPhone 3g. Backwards compatibility The one bad thing about the slightly more curvy back is that the iPhone 3g doesn't fit properly in the original iPhone dock. Nor does the iPhone 3g come with a dock. If you want a dock for your iPhone 3g you'll have to buy it as a $29.95 add on. That doesn't bother me as much as the fact that I have the Apple Bluetooth Headset which comes with a dock that charges both the iPhone AND the headset. With the iPhone 3g I can't use that dock and Apple hasn't announced or shipped a replacement for it. So I either have to use just the iPhone Bluetooth Charging Cable which does work (charges both the iPhone 3g and the Bluetooth headset) or charge the iPhone and Bluetooth headset separately. Although Apple no longer includes a dock, strangely enough they do include a SIM eject tool so that you won't have to sacrifice one of your small paper clips. Granted I've swapped SIM cards on occasion here and there with my previous iPhones, but I can't imagine the average user doing this often. So I'm not quite sure why Apple included this tool. Perhaps it's for troubleshooting.
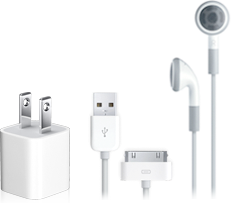
The other new item in the package is the newly redesigned USB charging adapter. It's much smaller! As a frequent traveler I do appreciate SMALLER electronics. However, the one thing I liked better about the older larger model is that the prongs folded down when not in use and for travel. On the new one the prongs are extended all the time. Phone Reception After all at the end of the day the iPhone is a phone! Therefore, nothing else really matters if you can't make or receive calls. I'm happy to report that the phone reception is BETTER! I would even say MUCH BETTER. There is a AT&T dead spot near my home. If I drove through that intersection while talking on my previous iPhone (hands-free of course), I would drop the call 100% of the time guaranteed. So the ultimate test was driving through that area today. Not only did I not drop the call, but the sound quality of the call remained consistent. As a matter of fact there are 3 dead spots on the way to my studio. I held a conversation today all the way from my house to the studio without a single drop. So therefore I'd have to say that the iPhone 3g definitely has better phone reception. Also I have to note that the speaker/speaker phone is definitely louder. Today I found myself needing to turn it down because it was too loud! Bluetooth Hands-free My car has Bluetooth hands-free built-in and it's compatible with the iPhone. The iPhone's Contact list downloads directly to the dashboard and I can look up numbers, make and receive calls without touching the iPhone itself. I noticed two differences with the iPhone 3g/2.0 update. The first is that now my contacts are listed last name first on the car's display. Before the update they were listed first name then last name. So if I were looking up Joe Smith, I'd go to the J's. Now I have to remember to go to the S's. No big deal, but I did notice it immediately. Also I now notice a slight echo when I'm on a hands-free call. It's not bad, but it is noticeable. I don't think the caller can hear it, but I sure can. Other than that, pairing and voice quality remained unchanged. It just works. Battery Life? It's hard to judge battery life at this point because I haven't had a "normal" day of usage yet. Like any other new toy I've spent most of the time playing with it, testing and reconfiguring settings, etc. So of course I've drained the battery faster than usual because the screen is on the whole time I'm playing. If you pinned me down. I'd have to say that battery life is less than what I had before, but again that's not fair as I haven't really used it the way I normally would yet. So let's just say the jury is still out on this one.
The NEW 2.0 Software
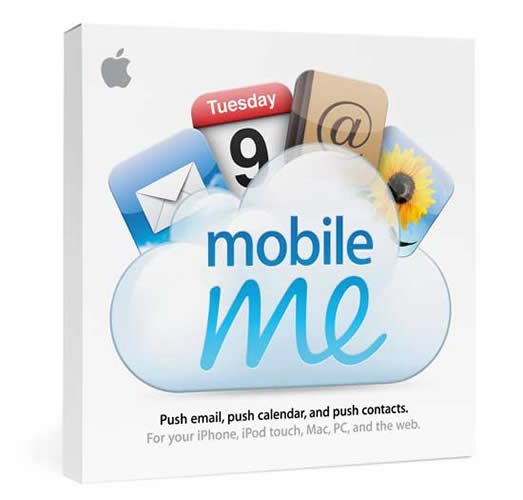
Granted the addition of 3g data speeds, a GPS and a standard headphone jack are all welcomed additions to the iPhone 3g, however the big news is the updated OS. iPhone Software 2.0 comes on the iPhone 3g and is available as a FREE update to the original iPhones. It's also available as a $9.95 upgrade for iPod touch users. With the iPhone 2.0 update Apple fixed some long standing issues. One of the issues I had was an intermittent syncing problem. That issue seemed to be resolved. They also not only tweaked some of the existing apps, but made it possible to add native 3rd party apps. Search your Contacts (it's almost there) I have over 1,000 contacts on my iPhone and it was a pain in the butt either having to scroll up and down the long list or break them down into groups. Now Apple has included a search feature right at the top of the Contact window. I was very happy to see this addition. It works, but it's not quite there yet. In Address Book (Apple's contact manager) on the desktop, Apple got search right! You type in what you want and no matter where it is in the contact record, it finds it. However, that's not quite the case in the iPhone search. For example, let's say you have a contact that is listed as a business, "BMW Dealer", but you also have the sales rep's name in the name field "Jim Edmondson". If you do a search for BMW, it comes up. However, if you search for Jim – it doesn't! Searching for either BMW or Jim in Mac OS X's Address Book would find the contact. New and Improved Calculator The original iPhone calculator was basic, but had a big flaw. There was no "Clear Entry" key. So literally there was no room for error. If you were keying in a bunch of entries and made a mistake, hitting "C" would clear the whole thing. Now in iPhone 2.0 hitting "C" performs a Clear Entry (of the last entry) and you can correct your mistake! YAY! FINALLY!. If you need a Scientific Calculator just rotate your iPhone and your basic calculator turns into a Scientific Calculator. Neat! New Contacts App Apple has provided an additional way to get to your Contacts. It may seem like duplication of effort at first and it is. However, from what I'm told, this was one of the most requested features. The ability to get to your Contacts in one tap without having to go to the Phone app first is welcomed. I must admit that I've used it a few times already and I like having this additional way to get there. Microsoft Exchange and Cisco VPN! – Official Enterprise Support At Last!!! This is BIG! Most major corporations use Microsoft Exchange for their Email, calendar and contact serving. The original iPhone software only supported Exchange via (relatively limted) IMAP support. Most corporations weren't willing to turn on Exchange IMAP support for their users to use iPhones. iPhone 2.0 changes all that! This is largely because IMAP just doesn't offer enough in terms of features/security such as remote wipe and requiring a password on the device. Now there is Microsoft's Active Sync support built right in. My employer's IT department is the best! They were very eager to see this support in the iPhone. Not only were they one of the beta testers, but they had corporate email, calendaring and LDAP contact support up and running for iPhone 2.0 users on day one! It's a joy to be able to get work email pushed out to my iPhone seamlessly and better than I've had on any previous device. I can also access web pages on our intranet for the first time with the iPhone's built-in Cisco VPN support. This also alleviates the worry of losing my iPhone or having it stolen and someone accessing my data. Corporate IT departments can institute a password requirement and remotely wipe a missing iPhone once it's reported stolen or lost. The remote wipe is secure and writes 1's and 0's repeatedly to the iPhone. Even if they pull the SIM card or turn off the iPhone. Once the iPhone is back on the wipe will continue. There is no way to stop it. Setup was a breeze and done over the air. I had it up and running on Friday before I left LA. This will mean that the iPhone will now be open to millions of business users that couldn't have used the original iPhone (software). This is probably one of the most useful additions to the 2.0 version for me. Push Email, Calendars and Contacts for the rest of us Apple also rolled out MobileMe on Friday. MobileMe replaces Apple's aging .Mac service. The new MobileMe service is cross platform now for both Mac and Windows users. The $99/year service gives you 20GB of online storage, an email account and access to your contacts, calendar, pictures and files from any internet connected computer. What's new and more relevant to iPhone users is that this service offers "Push" email, contacts and calendars for iPhones. Similar to what a corporate Microsoft Exchange user would get. The idea is that you wouldn't have to plug in your iPhone just to sync a new calendar entry or contact update. These updates would happen in both directions over the air. Once the MobileMe servers actually came online and stabilized, my "Pushed" information worked as advertised. My buddy sent me an address and phone number change. I made the change in Address Book on the Mac and noticed the change just happened automatically on the website version of MobileMe. Then I checked my iPhone 3g and it was there as well! I added a calendar appointment on the iPhone and checked my iCal and it was there. Although MobileMe seems to work as advertised there are a couple things I'd like to see improved. The first and probably the biggest thing is that I have multiple iCals, "work", "home" etc. Then I have some that aren't important enough to have with me on my iPhone. However, with MobileMe you either have to sync ALL or NONE of your iCals. There is no way to pick which ones go out to the iPhone and which ones don't. Worse is that if you subscribe to other people's/organization's calendars there is no way to have Subscribed calendars pushed out to your iPhone via MobileMe. For example, my wife and I share each other's personal iCals. She subscribes to mine and I subscribe to hers. Now with MobileMe "push" there is no way for me to see her iCal on my iPhone. This is a serious omission and I hope this gets resolved/added in an update. Yes it's for both Mac AND Windows users! I can't stress enough that while .Mac was for Mac users only, MobileMe AND the iPhone are cross platform. That's one of the reasons why Apple changed the name from .Mac. So on the Windows side, MobileMe and the iPhone 3g/2.0 offers support for Microsoft Outlook. You'll get the same "Push" abilities with your Outlook calendar and contacts.
A couple of undocumented features
With every new iPhone software update there are usually a couple of features that don't make it into the headlines. This iPhone 2.0 update is no different. The first one I am very thrilled about as I'm a co-author of "The iPhone Book", this one will be a tremendous help in finishing the update and that is the ability to natively take a screen shot of the iPhone screen. Simply hold down home button and press the power button to snap a picture of the screen. The picture is then added to your Camera Roll and can then be downloaded to your computer or emailed. The next one is a smaller, but welcomed addition and that is the Mail app now has a BCC (blind carbon copy) field. Also you can now switch the outgoing account that the mail is going to come from on the fly (this only works if you have multiple email accounts, of course).
3rd Party App Support
Aside from getting my work email and pushed content from my contacts and iCals, 3rd party App support is the next biggest favorite of mine. No software company can do everything. Apple is no different. Therefore, I'm very happy to see Apple open the iPhone up to 3rd party developers. There are some really great apps for the iPhone and on day one Apple announced over 500 apps that are available in the iTunes App Store! Many of the apps are either free or very low cost. Some of the new apps even addressed some of my early criticisms of the iPhone. For example, I was surprised that Apple didn't include iChat (instant messaging) on the iPhone in addition to SMS. No worries because AOL has made AIM for iPhone available as a FREE app. Also I couldn't believe that there wasn't a Movies widget that would let you see theaters, movies and show times. Now I have two. Movies.app was my favorite web based iPhone app. Now it's a native iPhone app. I also found BoxOffice. I haven't decided which one I like best yet. They're both FREE! Apple makes it pretty easy to add 3rd party apps to your iPhone. You can either download them using iTunes and then sync them to your iPhone or you can use the new App Store icon right on your iPhone to buy/download free apps. If you grab an app directly on your iPhone, it will be backed up to your your computer the next time you sync. Some of these 3rd party apps are really clever and take advantage of the built-in features of the iPhone. For example, Bank of America's "Mobile Banking" app uses the iPhone's location services. If you ask for the nearest ATM it will give you the option of keying in a zip code or simply finding it based on YOUR current location. The game Super Monkey Ball uses the built-in accelerometer and motion detectors of the iPhone to turn the entire iPhone into a game controller. Simply tilt and turn the iPhone to control the monkey through the game. Having 500 apps available on day one is just the beginning! I expect to see hundreds more apps in the coming months.
My top 10 favorite iPhone apps
Remote, AIM, eBay, Movies.app, Mobile Banking, PayPal, Blackjack, Super Monkey Ball, MySpace OK and then there's PhoneSaber because it just makes me (and everyone I show it to) laugh 🙂
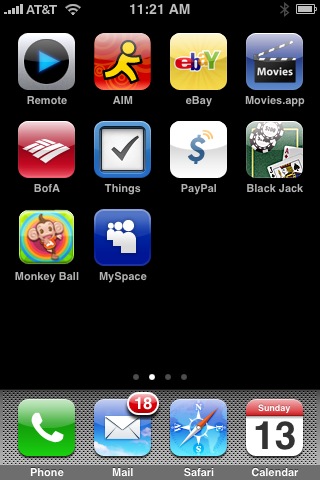
However, the app that I'm most anxiously awaiting is Slingbox for the iPhone! That will be a killer app.
Still room for improvement
The iPhone 3g along with the iPhone 2.0 software update goes a long way towards improving an already great device. However, there are still dozens of things I'd like to see added! For starters, the one thing keeping the web experience from being perfect or near perfect is the lack of Flash support. Hopefully Adobe can get this on the iPhone soon. It is in the works! The iPhone still lacks some other basics such as MMS messaging (the ability to send/receive pictures/movies/sounds from phone to phone directly), voice dialing and video recording. Here is my original list of "50 Ways To Make The iPhone Better" (via software updates). The ones that Apple has added via iPhone software updates recently are colored blue and the ones that were added either via iPhone 2.0 or 3rd party software have been colored green. The ones in black are still on my wishlist:
1 – Ability to use My OWN ringtones (sounds, music, etc.) The iTunes store will NEVER have some of the sounds I want to use.
2 – Sync Notes to the computer
3 – Cut/Copy Paste system wide
4 – Email anything (besides notes, photos URLs) Contacts, maps, directions, voicemail messages as attachments, etc.
5 – MMS (Multimedia Messaging – send pictures/movies directly to another phone)
6 – Consolidated Mail inBox and an easier way to jump between accounts than going back, back, back
7 – Flash support in Safari (this is now my number ONE request).
8 – Video and Voice (Memo) Recording (3rd Party)
9 – Color coded or Separate Calendar views (just like iCal does today)
10 – Searchable Contacts (there but still needs improvement)
11 – To be able to assign ringtones to groups of Contacts (it's really a pain doing them one-by-one)
12 – Wireless Syncing iPhone to Computer over Bluetooth or Wi-Fi (MobileMe Push)
13 – Voice dialing (3rd Party app – Speechcloud Voice Dialing – I haven't tried this app yet)
14 – Dial-up Networking (use the iPhone as a modem)
15 – iPhones on AT&T corporate plans (discounts or not, I shouldn't have to setup a personal account to use the iPhone on AT&T)
16 – Landscape Keyboard entry in all the apps
17 – Additional Audio email attachment support for files in Vonage (u-LAW encoded) WAV format
18 – Email to a group of Contacts
19 – iChat/AIM built-in (3rd Party)
20 – Calculator CE (clear entry) key
21 – Native Microsoft Exchange support (MS Direct Push or 3rd party support).
22 – Wireless stereo music playback over Bluetooth and AirTunes
23 – A one button Redial feature (example: triple tap the Home button)
24 – A "Dialed" list in addition to "Recent" and "Missed Calls"
25 – Ability to play music directly from the Slideshow feature
26 – Built in Unit Converter (I expect a 3rd party app for this)
27 – To Do's, sync'd with iCal/Outlook
28 – Password/Pin protected Notes
29 – An option that lets me choose what screen I land on when I wake my iPhone; it can either be (a) whichever I screen I was at last, like it does now, or (b) I can choose to always start at another screen (like the phone favorites, or the Home, etc.).
30 – Being able to rotate Mail 90 degrees
31 – Keynote app (now with TV out, you could use your iPhone for slide presentations without needing your laptop)
32 – Pseudo GPS based on cell towers to tie in with Google Maps feature (iPhone 3g includes a real GPS too)
33 – General file storage like a USB drive (Enable iPhone as a Hard Drive)
34 – Support for Stereo Audio over Bluetooth headphones
35 – Support for a Bluetooth Wireless Remote AND the ability to use the iPhone as a Remote
36 – Sound Profiles (example: I would create a profile that turns off all sounds except incoming calls for traveling)
37 – Auto dialing of a string of numbers/pauses (ie. you dial your company voicemail and tap a button to dial your ext. and pin)
38 – Built in "Movies" widget (show times, buy tickets, trailers) Yes I know there are good web based ones. Having one built-in would be faster to access and could remember your settings. (3rd Party)
39 – Safari password remember/store feature (Keychain for the iPhone)
40 – Multiple email signatures (also the ability to assign default ones per account)
41 – Mail spam filtering
42 – Mail Rules
43 – Full Bluetooth support on the Mac (Browse the device, dial from Address Book, etc.)
44 – Delete multiple items at once such as emails
45 – iPod songs as Alarm sounds
46 – A true RSS reader (the one in Safari desktop would be a good start) (3rd Party)
47 – Call duration display
48 – SMS to multiple Contacts
49 – .Mac Push Email
50 – The ability to direct ALL of the Audio sources over Bluetooth (such as email attachments, audio on web pages)
51 – Built in Dictionary/Thesaurus (3rd Party)
52 – Add a ".com" button on the MAIL keyboard as well.
53 – view PowerPoint attachments and now iWork files too. Â So as you can see Apple has made progress towards my list 🙂
The Bottom Line
I still feel the same way I did a year ago. The iPhone is not perfect! However, in my opinion it is the quite simply the best smartphone out there! The iPhone 2.0 software update brings 99% of what's on the new iPhone 3g to ALL iPhone users at no additional cost. Although Apple bills the iPhone as "Twice the speed, half the price", the iPhone 3g will end up costing you more than the model it replaces. This is due in part to the fact that AT&T raised the charge for unlimited data from $20/month to $30/month. They also no longer include the 200 SMS text messages like they did before. To get the same 200 messages as before it will cost you $5/month more now. When Apple says "Half the price", they are really referring to the cost of entry. The iPhone 3g now starts at $199 for the 8GB. That's a far cry from the original price of $599 (then dropped to $399). Also since this is a subsidized phone, in order to get the $199 or $299 price for the 16GB model, you have to either be NEW to AT&T or eligible for an upgrade. I watched a guy storm out of the Apple store because he hadn't had his existing AT&T (non-iPhone) phone for 18 months and therefore didn't qualify for the upgrade pricing. The iPhone 3g is available in a black 8GB model or your choice of black or white in the 16GB model. The iPhone is available here in the US by either visiting your local Apple store or AT&T store. To see many of the new iPhone features in action, check out Apple's iPhone 3g Guided Tour.
iPhone 3g News Since My Review: iPhone 2.0.1 Software Update Speeds Up The iPhone
See my NEW site for App Reviews and News – bestappsite.com: