Upgrade Your Garage Door Opener

How big is your garage door opener?

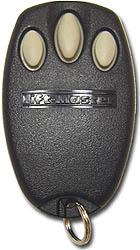
If you’re using the garage door opener that came with your unit, chances are it’s too big! Granted they have come down in size and the average is probably the size of a deck of cards. However, you can actually have one that is much much smaller! Luckily my cars have integrated openers built-in, however my daughter’s car does not. So rather than give her the original remote that came with the garage, I decided to find her a smaller one and one that could actually go on her keychain. 


My search lead me to this Liftmaster 970LM. Now of course I had to find one that was compatible with my existing system and as you would expect there is an online store called Click Away Remotes that sells all kinds of replacement remotes. I got mine through Amazon (which shipped from Click Away Remotes) at a lower price than buying direct. The remote works great and goes right on your keychain. This also provides an extra layer of security because you’re not leaving your remote in your car to be a temptation to thieves. If you’re currently leaving your remote in your car, you might want to reconsider that. In these tough times home invasions are on the rise. If a thief breaks into your car and figures out where you live, the remote would allow them easy access to your house (or at least the valuables in your garage). 

Setup was simple. I trained it using the original remote in less than 5 minutes. Great price, great solution!

NWA’s NEW E-Boarding Pass

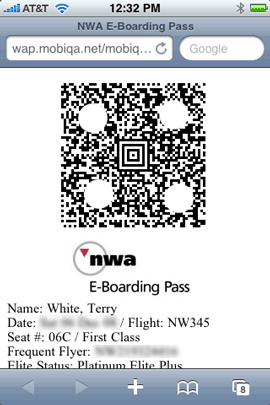
My boarding pass, slightly altered to protect the innocent


My boarding pass, slightly altered to protect the innocent


On a recent business trip I decided to give Northwest Airlines’ NEW E-Boarding Pass a shot. The way this works is that if you fly out of one of the currently supported airports (like DTW), you can check in for your flight using your “approved” smartphone/cellphone and actually use your smartphone/cellphone to go through security and board the plane. No paper boarding pass required. 

I had originally planned to get to the airport in plenty of time in case this didn’t work out. However, due to weather and traffic, I got to the airport 10 minutes later than I originally would have. So it had to work! I had no time for error. 


Here’s how it works…

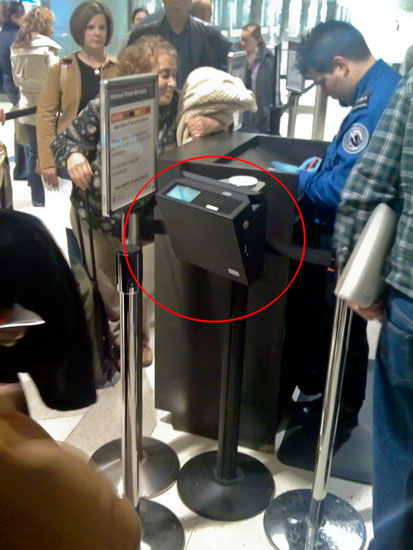
You can check in for your flight up to 24 hours before departure. If you use your cellphone, you can not only check in, but you can request that your boarding pass actually be sent directly to your phone. The E-Boarding Pass is sent to either an e-mail address or mobile phone number in the form of an e-mail, WAP push/link or MMS message. When you arrive to the airport, you show the screen with the 2D barcode on it and they actually have a barcode scanner right there at the TSA station.


One step forward, one step backwards

Now the interesting thing was, I was wondering how they would handle the requirement for showing your boarding pass to the agent standing on the other side of the X-Ray machine. In the Detroit Metropolitan Airport, they require that you show your boarding pass twice before going to your gate. You show it before going through the X-Ray machine to the TSA agent (who typically puts a physical pen mark/initials on your paper boarding pass) and again once you’re on the other side to another agent. The problem is you can’t walk through the X-Ray machine with your phone in hand! When I asked the first agent about this, he said he would, get this, walk over to the other guy and let him know that I was coming through and that I had shown him my phone. I thought, “oooooookkkkkkkkkk.”

After I got through the X-Ray machine (luckily no bag check this time), I told the guy that I didn’t have my boarding pass because it was electronic and on my phone. He said, “I still need to see it!” I said, well we’ll have to wait until my stuff comes through the X-Ray. So he holds up the other people in line until my stuff came through on the belt! I was stunned and thought, this is soooo inefficient. Clearly they haven’t thought this through yet. At a minimum the second guy (if we really need this guy in the first place), should either be double-checking boarding passes before you go through the X-Ray OR at the very end of the conveyor belt. 


I boarded the plane

When I got to my gate, the plane was already boarding. I walked right up and showed my iPhone to the agent. She told me where to hold it so that it could be scanned and I went right onboard. Cool!


The Bottom Line

I love seeing advances in technology like this, but clearly this one needs a little more work. There are also some potential issues. What if your battery dies? Since the iPhone doesn’t yet do MMS, you get a link via SMS to view your boarding pass in Safari. What if your web connection doesn’t work at that given moment as in some cases the iPhone’s Safari needs to be able to connect to the internet to be able to refresh a page. Do we really need boarding passes at all? Couldn’t your ID/Passport be your boarding pass (children/minors would still need them). I’m excited about the possibilities, but right now there are some things that need to be worked out. NWA’s E-Boarding Pass is currently offered on non-stop flights from Indianapolis, IN and Detroit, MI during check-in on nwa.com. If you are departing from IND or DTW you must be checking in as a single passenger on a Northwest operated non-stop flight within the United States.

iPhone App of the Week – Say Who-Dialer

Last week’s iPhone App of the Week was Google Mobile App. The one thing I was intrigued by was the new Voice Search feature. Like I said last week, voice recognition technology usually doesn’t work well for me. I try to speak as clearly as I possibly can and most times I end up repeating the phrase so many times that it would just be faster to type it. So how could I possibly pick another Voice Recognition app so quickly? 


Say Who-Dialer Works!!!

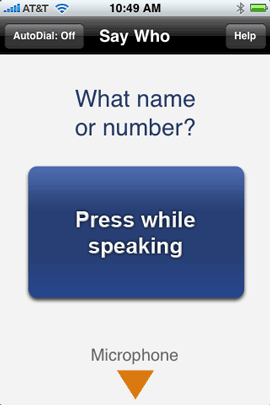
I was floored by how well this app works. I haven’t been this excited about an iPhone app since, well, never! Say Who-Dialer brings a much needed voice dialer to the iPhone. The app is simple. You launch it and after a few seconds, it’s ready to find your contacts simply by speaking their names. There is a big button on the screen that you hold down while you say the name of the contact you wish to dial. You can say the first name, first name and last name, nickname even, and you can add the number you wish to dial such as “Frank Jones Mobile.” When I first tried it, I thought “ok, how bad is this going to screw up what I’m trying to say?” I tried my buddy “Scott Kelby” and it came right up. I thought, OK that was a lucky one. Let’s try something a little harder like “Kwesi Aquil.” It WORKED! It actually worked for every name I through at it. If you don’t know the name, but you know the number you can just speak the digits (ie. 5 5 5 – 7 7 7 1).


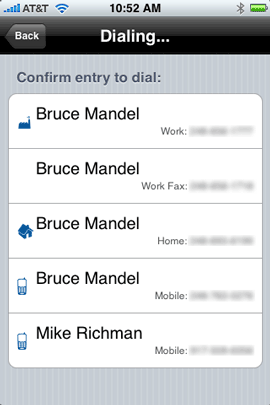
Here I said "Bruce Mandel"


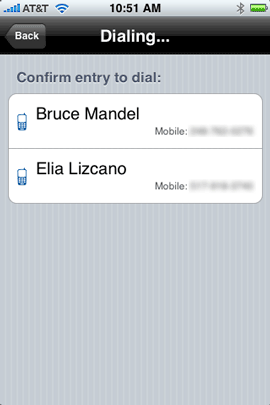
Here I said "Bruce Mandel mobile"


I was so amazed at how well it worked, I just kept throwing names at it all night. It never missed a beat. Now of course speech recognition is only as good as your surroundings. In a noisy environment, it will likely be less accurate. There is the option of having it auto dial as soon as you speak the name. I have this turned off, because I wanted to verify the results first. Like most search apps, it displays a list of results. Names it thinks you’re trying to say are listed in the order of most likely what you wanted at the top and then less likely names on down the list. I turned the Auto Dial feature back on to see what happens. With Auto Dial on, it displays result for a couple of seconds before dialing it. This would be fine as long as you’re not only speaking the name, but also which number you wanted dialed too (such as mobile, home, work, etc.) Every time I tried this app, the name I was trying to say was at the top of the list. It’s AMAZING! I have over 1,000 Contacts, so this app is VERY HANDY!


Room for improvement

I know, what could I possibly have to complain about? It works! Yes the app works well. No complaints on the voice recognition. They nailed it. However, I would like to see a couple of things added to the interface. The Google Mobile App takes advantage of the motion sensors in the iPhone so that when you hold it up to your face, it beeps and is ready for your voice input. I know that Google admitted that they broke the ruleso of the SDK with certain aspects of their app, however, I would love to see that feature in the Say Who-Dialer. I would also like to see it be completely voice driven. For example: I press the button and say “Dave Helmly Mobile”, then it replies “Dave Helmly Mobile” verbally to acknowledge that it’s about to dial the right name. I say “yes” and it dials it. This way I would never have to look at the screen which would be a plus while driving.

Although it works PERFECTLY for me for people’s names, I have not had good luck with business names. It only brought up 1 out of the 5 business names that I threw at it. However, It was smart on the one business that did work. I said “Rose Cleaners” and it did in fact bring up “Rose Dry Cleaning”.


The Bottom Line

This app freakin’ rocks! Hands down it’s the most excited I’ve ever been about a 3rd party iPhone app. Rarely is an app so good that it gets a spot on my main Home Screen. This one is so good that I’m even considering putting it in the dock so that it is always one tap away. It works way faster than bring up the Contacts and scrolling or searching. Here’s the other thing I can’t believe, it’s FREE! That’s right, this app is a FREE download from the App Store. So there is simply no reason not to try it out. I haven’t updated my Top 10 iPhone Apps in a while, but this will definitely be on it! Don’t walk, run to the App Store and download it now.


Over 10,000 Apps Now Available for the iPhone/iPod touch!

Wow how time flies when you’re having fun! iPhone app development has taken off like wildfire. Although I’m doing my favorite iPhone App of the Week, there are thousands of apps that I will probably never touch. With that in mind, here’s a site that is dedicated to keeping up with ALL the iPhone apps. It’s called 148Apps.com (named after the fact that you can have 148 apps installed on your iPhone or iPod touch). While I do this iPhone app thing once a week, they’re dedicated to doing it all the time. The App Store has only been up since July 11, 2008. It launched with 1,000 apps. In less than 6 months time it has 10 times that many apps. Imagine what it will be like by July 11, 2009? I will certainly enjoy the ride!

Epson Workforce 600 All-in-One Wi-Fi Printer, etc.


You might have noticed that I don’t review very many printers here. That’s primarily because I’m a printer snob and don’t change printers very often. My rules have been simple: If I want a fast network printer, I use a Xerox Phaser that has Adobe Postscript 3 built-in. If I want to print photos I use an Epson Stylus Color Photo Printer. Life is simple it works! 


What about Scanning and Faxing?

I’ve used both Epson and Canon scanners over the years and have no real complaints with either. I have always loved Epson’s scanner software, but I’ve also loved Canon’s portable line of scanners and the fact that they are more proactive about updating drivers when a New Operating System comes out. We’ve all experienced orphaned equipment before (equipment that is working perfectly, but will not work with a new OS because the company doesn’t update the drivers).  As far as Faxing goes, I don’t do enough of it to care. I have an older stand alone Brother fax machine for the 1-3 times a year that I need to send a fax and I use a free eFax account or Mac OS X Server to receive faxes directly to my email.


Why the Epson Workforce 600 may change all of this for me?

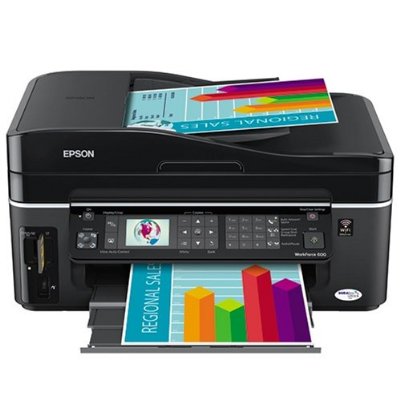
I was recently given the Epson Workforce 600 by Epson to put to the test (the very stringent no B.S. Terry White testing lab). At first when Epson contacted me, I have to admit, I said [sarcasm] "oh goodie, an all-in-one printer to review! I can’t wait [/sarcasm]. When the box arrived it sat in my garage for a week until I felt I had time to give it a spin. Keep in mind that I do take my reviews seriously and I didn’t want to do a half a$$ job on it. So I waited until I would actually have the time to give it a good tryout. I just wasn’t excited about this category. I always felt that stand alone devices were always stronger in their respective areas. Believe it or not, that all changed when I took The Workforce 600 out of the box. I was floored by how well this thing was designed. As I’ve said when reviewing other products, "it’s the little things and attention to detail that really turn me on." I actually started getting excited about this product the more I looked at it and just where everything was placed on it.


Very well thought out

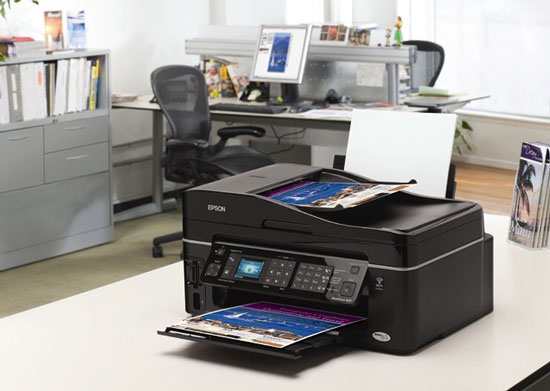
I have to hand it to Epson on this one for creating a very well thought out product. First let’s talk about it’s features. It prints, copies, scans and faxes. It can be connected to your network directly via Ethernet or Wi-Fi. No lame external boxes or print servers required! It’s cross platform out of the box and works both on Mac and Windows PCs. It has an automatic document feeder and built-in memory card readers for CF (Compact Flash), SD, xD and Memory Stick (does anyone use these?). It even has a USB port for a thumb drive (albeit a little to recessed for my tastes, it’s there)! Yep it has it all. It meets all the requirements I would have If I were looking for an all-in-one device! No question!


Setup

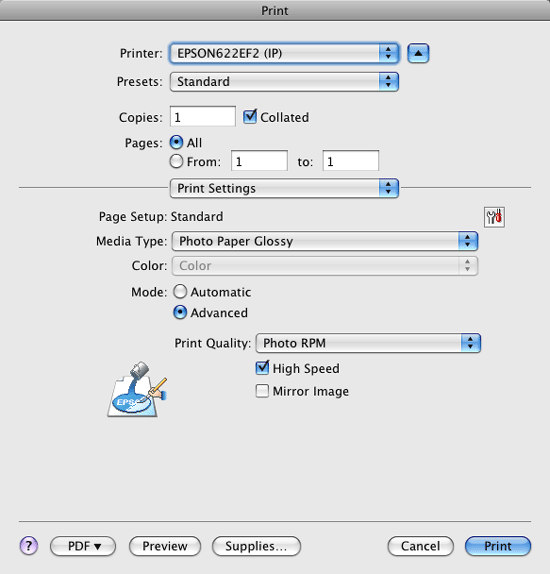
Like most techies, I like to see how much setup I can do without looking at the instructions. I was able to unpack it, install the ink cartridges and make copies without ever touching the instructions. I probably could have sent a fax too, but um, I don’t send faxes (at least not often). Now it was time to print. At this point I could have simply grabbed a USB cable (not supplied) and installed the driver and printed. However, I wanted to see how well this thing worked on Wi-Fi. I love wireless technology and a Wi-Fi connected all-in-one device is very intriguing to me. Well it was time to reach for the instructions because I had no idea how to configure this thing to connect to my network. I knew that I either had to do it on the control panel or the from my computer. However, I didn’t know which. As it turns out, you do it from your computer. Although the Epson Workforce 600 has built-in Wi-Fi, you have to connect it to your network via Ethernet to set it up. Luckily they do supply an ethernet cable. I plugged it into my gigabit switch and installed the software onto my MacBook Pro from the supplied CD (later I downloaded the latest drivers from Epson’s site). The software walks you through the various setup options. I was given a choice of setting it up for Wi-Fi or as a network printer on Ethernet. I choose the Wi-Fi option. It found my network and I entered my WPA password. After a few moments the printer was configured and I was instructed to unplug the Ethernet cable.


Printing


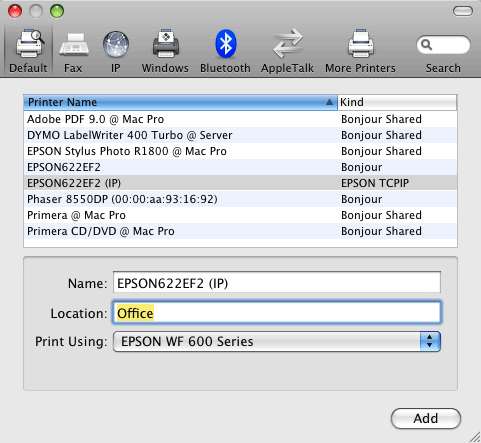
Although the software installed the drivers and configured the printer for Wi-Fi access, I still had to "add" the printer using the Mac OS X System Preferences. No big deal as it saw the printer right away (after I walked over and woke it up) and I printed my first document. No surprises, it just worked. While the printer is rated at 38 ppm in draft mode (wow that’s FAST!) for both Black & White and Color, I was curious about it’s print speed for photos. After all thing has memory card slots built-in so that seems to me that testing photo print time would be fair game. I brought up a high-res photo in Adobe Photoshop CS4 and printed using Epson’s Premium Glossy 8"x10" photo paper. I used the borderless setting and I figured this would be worse case scenario. It was! The high-res print over Wi-Fi took 6 minutes and 7 seconds. While it certainly won’t win any speed contests for high quality photos, it did look great (must be those Durabright Inks)! The color was rich and although this is only a 4 color printer, it didn’t feel like it. Again, this printer is not billed as a photo printer, so you shouldn’t be discouraged by the longer print time. The fact that it printed so well at this price point and wirelessly to boot is a plus.

The Workforce 600 has a built-in 2.5" tilt color LCD to view, edit and print your images. So you can just pop in your memory card or USB thumb drive, select, crop and print your images without using a computer. 


Copying

Copying is pretty straight forward and of course doesn’t require your computer. You can just put your material in the ADF (automatic document feeder) or right on the glass. You control all aspects of the copy process right on the front LCD control panel. Very straightforward and easy to use. You also have the option of copying in Color or Black & White. No surprises, no complaints. You can copy up to 99 pages at a time. The ADF holds up to 30 pages. 


Scanning

When I installed the software it also installed the software to scan with. I was wondering would this thing actually allow me to scan wirelessly? Unfortunately it did not! Although I didn’t find anything in the documentation that would suggest that scanning over Wi-Fi was not an option, the Epson Scan app wouldn’t even launch until I physically connected the Epson Workforce 600 via a USB cable. Once I connected it to my MacBook Pro, I was able to launch the Scan app and perform some scans. It’s a TWAIN compatible scanner, so I was able to scan right into Photoshop and Acrobat as well. Don’t feel like connecting your computer? You can actually perform a scan right on the device itself and have it save to a thumb drive. I tried scanning the same 8"X10" that I printed earlier directly to a thumb drive and it worked just fine. I was prompted with which format to save in and my choices were JPEG or PDF. Makes sense since this scanner is geared towards photos and documents. Those would be my two choices of format anyway. Although I didn’t time the scan, it was certainly fast enough for me. The Scanner is rated at 1200 x 2400 dpi and comes with the ABBYY FineReader for converting scanned text into actual text (OCR).

UPDATE!: Scanning over Wi-Fi via the Mac works after all! Epson lead me to the magic utility that gets installed in the Utilities folder for configuring the Scanner on your network. It took all of about 1 minute to set it up and bam, I could launch the Scan App and scan over the air! Freaky 🙂 


Faxing

Like I said, I just don’t do a lot of faxing. However, when I do need to send a FAX, I need to send a FAX. I don’t have time to mess around. It seems like when I need to send a FAX, it’s always urgent. So with that in mind, I decided to send a test FAX from my home office to my eFax account see how easy or difficult it would be. Like most things on this device, it just worked. I connected a phone line to it and I then pressed the Home button until it cycled through to FAX. I keyed in my FAX number and pressed the start button. I had two pages in the ADF and I like that it scans all the pages first before wasting time dialing. Once the pages are scanned, you can pick them up and leave if you have to. It will dial and send your FAX unattended at that point. It has auto redial and auto answer and can store up to 60 speed dials (I don’t think I know 60 people with FAX numbers, but good to know I could if I had to). If you’re out of paper you’ll be happy to know that it can hold up to 180 received FAX pages in memory. That would cover me for years.


The Bottom Line

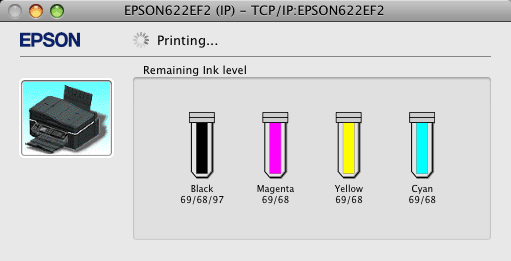
I don’t really have any complaints (rare, I know). I’m not into this category of devices, but If I had to recommend an all-in-one device, this would be the one! It’s perfect for any small office or home office. It’s ideal for someone who is tight on space and doesn’t have the room or the budget for multiple devices. Most multifunction devices usually don’t do any one thing really well, however, the Epson Workforce 600 does a fine job at all of its functions. If Epson works out the Wireless Scanning on a Mac I would even be more impressed. Being able to scan directly to a thumb drive is sufficient for now and keeps me from having to directly connect my computer to the device. Anyone want to buy a Brother FAX machine cheap? Let me know. 🙂 The Epson Workforce 600 retails for $199. Amazon has it for as low as $149.99! As with most printers, the real cost of ownership is the ink cost. This printer has 4 separate ink cartridges (Cyan, Yellow, Magenta & Black). Multipacks start at $35.86. Rumor has it that this printer will NOT allow you to print if one of the inks runs out even if all you want is Black & White. I usually don’t try to keep printing if my printer runs out of one color, but some of you out there do, so that might be a consideration. All-in-all I highly recommend this all-in-one! For more information about the Epson Workforce 600, please click here.


Put your Blu-ray player on your Wi-Fi network

It's great that the new line Blu-ray players support BD Live and online content to compliment the movies. It's also great that their firmware can be updated over the internet. What I don't understand is why all the Blu-ray players I've seen rely on an Ethernet connection for internet access. I don't know of too many people that have Ethernet drops near their TV's. My bedroom is a perfect example. I have a Sony Bravia LCD TV and Sony BDP-S350 Blu-ray player connected to it. It's located in a nice wall unit and unfortunately there is no ethernet jack nearby. 


The Solution: An Ethernet Wi-Fi Bridge

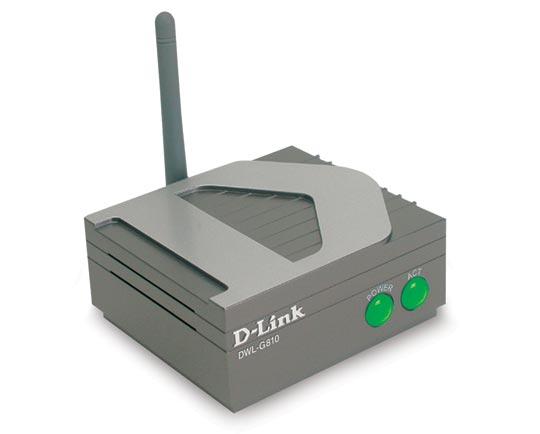
I've used D-Link Wireless Ethernet Bridges in years past to connect older computers that had Ethernet, but not Wi-Fi. Once again I was in need of one of these bridges. My old one only supported 802.11b and I can't find it. I at least wanted 802.11b/g support. So I started looking at newer models. I was floored by how much these things have gone up in price. It appears that they are now geared towards gamers. Most hardcore gamers want to play others online. This means that your game console has to be connected to the internet and we're back to the same problem that most people don't have Ethernet jacks near their TV's. The Wii and PS3 have Wi-Fi built-in. However, some of the older consoles do not. So companies like Linksys and D-Link have come to the rescue with "wireless gaming adapters." These "gaming adapters" (Ethernet Wi-Fi Bridges) now go for close to $100. I can remember when they were half that price.  Well I needed one of these Bridges, but didn't want to pay top dollar for one. So off to eBay I went. I found a D-Link DWL-G810 Wireless Ethernet Bridge New in the Box for a winning bid of $51. This model is newer than my old one (which I can't find) and supports 802.11b/g.


How does a Wireless Ethernet Bridge work?

The concept is simple. The Bridge has an Ethernet jack on it and of course a power adapter. You plug it into your computer's Ethernet port long enough to set it up. This means setting it up to join your current wireless (Wi-Fi) network, network name (SSID) and network password. Once it's setup (about 5 minutes), you unplug it from your computer and plug it into your Ethernet only device. In my case this was my Sony Blu-ray player. That's it! Your Blu-ray player will connect to the internet wirelessly even though it only has an Ethernet jack. The Bridge will bridge your Wi-Fi connection to the Ethernet port on your player. 


The Bottom Line

Blu-ray player manufacturers need to either build Wi-Fi in or at least provide a low cost Wi-Fi adapter like TiVo does for the TiVo HD. In the meantime if you want to connect your Ethernet only device to your network and don't want to run wires your best bet is a Wireless Ethernet Bridge. If you shop around you can find one at bargain prices. Check out the latest offerings from D-Link, Linksys and Netgear, but don't forget about eBay. Also to the Bridge manufacturers, why are these things designed to be so, um, ugly?


UPDATE!

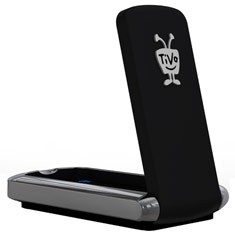
I wrote this 2 years ago and while not much has changed in terms of the need to put Ethernet devices on your WiFi network, the solutions have changed as well as my recommendation. Recently I've started using TiVo's Wireless N Network Adapter and while you would think that this is specifically for TiVo, the reality is it's NOT! It's a slick little 802.11n Bridge that connects to your device via Ethernet. The setup is simple and you first plug it into your computer to get it setup on your wireless network. After that is done (takes less than 5 minutes), you can then plug it into any device that has an Ethernet port to put it online via your WiFi Network. Once it's set up the TiVo Adapter has no idea whether it's plugged into a TiVo or Blu-ray player or computer. 

You can get the TiVo Wireless N Network Adapter here.


Apple iTunes


Migrate Windows Boot Camp Partition to a New Mac

Although I love getting the latest and greatest Mac notebook, one of the things I always dread is having to setup my Windows Boot Camp partition all over again from scratch. Apple makes it really easy to migrate your Mac to a New Mac. You just run the Migration Assistant and it will handle transferring all of you data, apps, settings to the new Mac. That’s it, you’re done! However, Apple does NOTHING to help you move your Windows Boot Camp installation over. As much as I have tried in the past, I’ve never been able to simply backup/ghost the Windows partition over to a new drive or new Mac. Yes, I’ve heard stories of people using Disk Utility to do it, but I’ve yet to meet anyone that has done it 🙂 – urban legend… LOL

I have had my New MacBook Pro for a couple of weeks now and decided this past weekend that it was time to tackle getting my Windows XP volume setup. This time I didn’t have to start from scratch!


Winclone to the rescue

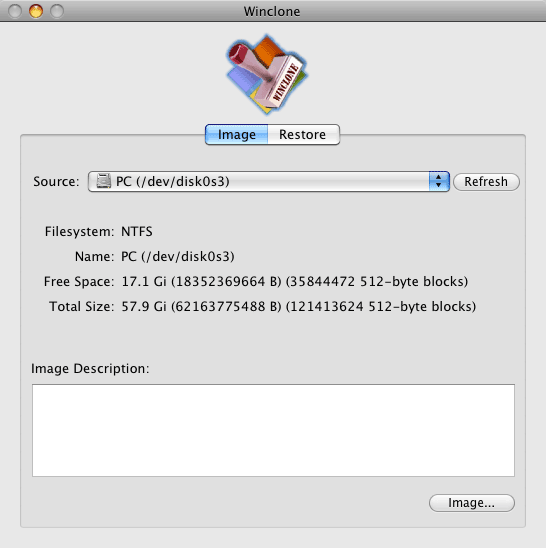
I had heard about Winclone months ago. It’s a Donationware/FREE Mac app that allows you to clone/backup AND restore your Windows Boot Camp Partition. I kept this utility in the back of my mind knowing that I would eventually be getting a new MacBook Pro and it would be worth a shot to try to use it to move over my existing Windows XP setup. I figured the worst that would happen is that it wouldn’t work or the restored Windows environment would be buggy/unstable and I’d just start from scratch anyway. So I had nothing to lose and everything to gain by giving it a shot.

When I knew that my New MacBook Pro was on the way, I fired up Winclone on my old Mac and cloned my Windows XP Boot Camp partition to an external Firewire drive. I used the Compressed option, which took my 60GB partition down to about 23GB (keeping in mind that there was only about 30-35GB’s used on the Windows partition). It creates a single Image file of your Windows drive. You can even mount the image as long as you don’t use the Compressed option.

According to the Winclone webpage one of the bullet items said: “Create a Bootcamp partition from within Winclone.” So I took that to mean that all I would have to do is fire up Winclone on my new Mac and it would not only do the restore, but also create the new Boot Camp partition. Sadly this was not the case. I looked everywhere in the app for the option to create a Boot Camp partition and it’s just not there. Since I was in no hurry to do this, I decided to send the guy an email asking about this and his response (very timely I might add) was that it was easiest to just use the Boot Camp Assistant (that comes with the Mac) to create the Windows partition and then quit the Boot Camp Assistant app and run the Winclone restore. It seemed simple enough and it worked perfectly. I fired up the Boot Camp Assistant and followed the prompts to create a new Boot Camp Partition. After about 5-10 minutes it was done and I just quit the app. So now I had an empty Windows partition ready to go.

Next I plugged in my external Firewire drive containing my Winclone backup image and then I fired up Winclone on my new Mac. I ran the restore of the Windows XP image and figured it would take a while so I went out and ran an errand. When I returned the restore was complete (I was gone for less than an hour, but I didn’t time the restore from start to finish). Fingers crossed, I rebooted my MacBook Pro, holding down the Option Key and there it was. I got the option to boot into Windows. Windows had to do some drive checking/repairing and I just let it do its thing. Once that was done, I saw my familiar Windows XP desktop. I was also being prompted to reactivate Windows (more on that in a minute). The next thing I knew I had to do was to update/install the drivers for all the things on the MacBook Pro such as the trackpad, iSight camera, graphics card drivers, Airport wireless, etc. Now instead of making you burn a CD, Apple includes these drivers on your Mac Installation DVD. This DVD is a dual format DVD, so when I inserted it, it did an Autorun and fired up the main menu allowing me to “Remote install Mac OS X on a MacBook Air”, “Install the CD/DVD Sharing app” for a MacBook Air, or install the Boot Camp Drivers. I picked the third option and it installed everything necessary to allow Windows to take advantage of the hardware built-in to the MacBook Pro.


What worked, what didn’t? Any gotchas?

For the most part everything worked PERFECTLY! During the first boot above I had to go grab an external keyboard. I have Windows XP set to require a login/password. In order to enter this password you have to press Control-Alt-Del. Unfortunately “Delete” on the MacBook Pro keyboard is NOT “Del” on the Windows keyboard. Apple takes care of this with their keyboard driver by mapping “Del” to the Delete key when you press the Function button. However, since I hadn’t gotten the drivers installed yet, the only way I was going to be able to login to Windows was to use an external keyboard that actually had a “Del” key.

I was stunned by how little I had to do afterwards. But there was one casualty. Although my Trackpad works, it doesn’t have all of the functionality. For example, I should be able to put two fingers on the trackpad and click for a right click. For some reason that’s not working now. I tried uninstalling and reinstalling the drivers and it’s just not working. However, two finger scrolling works, go figure. I went into the Boot Camp control panel and verified the settings were correct, it’s just not working. This is no biggie and may have something to do with the OLD Boot Camp drivers that were already present. This is one of the potential gotchas of NOT starting from scratch. It’s one I can live with for now. Usually when I’m in Windows via Boot Camp I’m doing a demo and I’d be using a mouse or tablet anyway. I also have a free little utility for Windows called Apple Mouse that lets you do a right click by holding down the Control button and tapping the trackpad button. So I’m good for now.

The other thing I had to do (which I fully expected), was to reactivate Windows XP. Windows looks for hardware changes like a different Ethernet card address and different processors, hard drives, etc. I was able to reactive Windows via the web with no problem. Everything else I’ve tried (so far) works fine. I can get online. My apps are working. No weird errors, no crashes. Winclone saved me HOURS of having to install everything from scratch.


Ongoing use of Winclone

Once I get my Windows environment updated the way I want (for example, uninstalling Adobe CS3 and installing Adobe CS4), I will use Winclone on a regular bases to create a backup of my Boot Camp Partition. This way if my Windows installation gets hosed, I can just restore it.


What about Parallels or VMware?

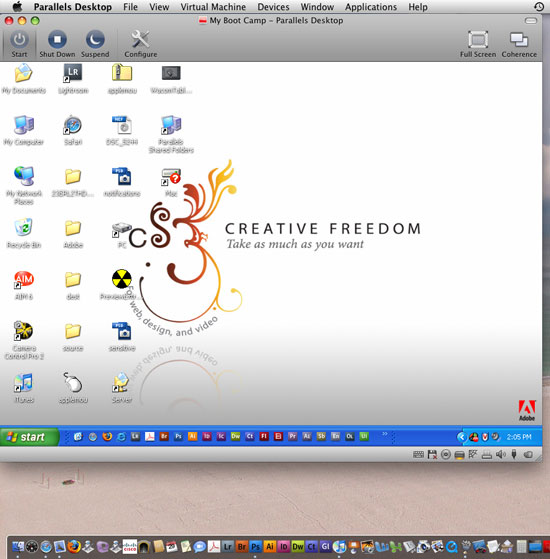
It’s true, with virtualization apps like Parallels, you don’t need to partition your drive. You would just have a Windows “image” that’s a file on your drive. It could even be on an external drive. With Parallels or VMware there’s also no need to reboot! Windows (or whatever OS you’re running) just runs in a Window right along side your Mac OS. So why Boot Camp? Parallels actually offers several modes of running Windows right along side your Mac OS including the ability to have it seamlessly integrate right into your Mac environment so that when you run Windows apps they show up in your Mac dock. It’s like running Windows apps in the Mac OS without seeing the Windows “window”. Although I love the sheer convenience of Parallels, I love the horse power of Boot Camp. When you run Windows under Parallels or VMware, you’re sharing resources with the Mac OS that’s ALWAYS running in the background. So you won’t have as much RAM available to either environment and you may not be able to take full advantage of your graphics card/3D graphics acceleration, Open GL, etc. Parallels is GREAT for the casual user or the user that isn’t running demanding apps. I actually use Parallels too. I use it for those times when I need to pop into Windows to do a task and don’t feel like rebooting my Mac. Both Parallels and VMware can use your Boot Camp Windows installation as their source for Windows, so you get the best of both worlds! If I need full power in Windows, I reboot and use Boot Camp. If I just need to do something quick or less demanding in Windows, then I run Windows in Parallels. The best part is that no matter which way I run Windows, it’s the SAME Windows installation with the same apps, files and settings. 


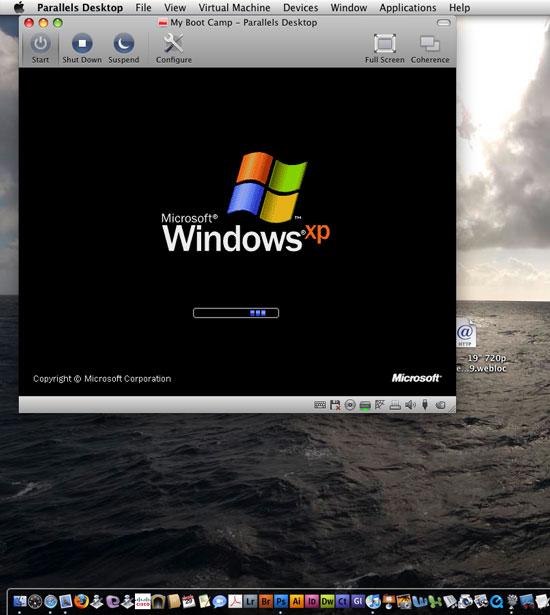
Windows XP starting up in Parallels 4 while the Mac OS runs in the background


Parallels 4.0

I also took this opportunity to upgrade from Parallels 3 to Parallels 4. While this isn’t a full review, it works great too. Because of the way Parallels installs stuff in your Windows environment, it changes just enough that Windows will probably need to be reactivated again. Had I known this up front I would have waited until Parallels 4 was installed before reactivating Windows. Since I had just recently reactivated it after the Boot Camp install, having to reactivate it again in such a short time probably appeared to Microsoft that I was trying to install it on two different computers. I was not allowed to reactivate it over the internet. I had to call in this time. It was still done automatically via a computer, but I had to answer the “how many computers are you installing this copy of Windows on?” question twice. It gave the necessary key code and I was all set. Parallels 4 is definitely faster than version 3. Also my Trackpad works perfectly under Parallels with the right-click functionally and scrolling.

I’ll have to review version 4.0 when time permits. However, booting up into Parallels now is dramatically faster. However, keep in mind that no matter how much they speed up Parallels, it will never be as fast as running in Boot Camp because you’ll always be sharing resources.

My Windows XP Boot Camp installation running in Parallels 4 as a Window on top of Mac OS X


The Bottom Line

The Mac is more popular than ever because of these capabilities. If you use Windows XP/Vista under Boot Camp on your intel Mac and you need to backup (duh, you need to backup), then Winclone is an indispensable Mac utility. If you need to migrate your Boot Camp Windows installation to another Mac, other than starting from scratch, there is no better way than using Winclone. You can download Winclone from here (yes it works with Vista too). Although there is no charge for this app, he is asking for donations. I had no problem donating because this is an app that I would have gladly paid for anyway. Apple should either buy this and include it with the OS or build-in this functionality into their existing Migration Assistant. People will be more willing to go to a new Mac if there is less hassle in doing so.

It’s Cyber Monday! huh?

I must admit that I had never heard of Cyber Monday until this past weekend. I guess I’m just not that into waiting to shop on certain days. Apparently Cyber Monday has been around since 2005. What is it? It’s another way for retailers (or etailers) to compete for your holiday shopping dollars online now that you’re back to work. Is it a sham? Maybe, depending on how you look at it. Both Black Friday and Cyber Monday are designed to get you to spend your money on certain days. However, if you’re in the market for stuff that you were going to buy anyway, why not take advantage of the deals if there are deals to be had? It certainly can’t hurt the economy.

Here’s a site that seems to have cornered the market on listing Cyber Monday Deals. There’s also Dealighted and Dealnews. Let us also not forget one of the biggest etailers of them all, Amazon.com. Amazon is always competing for your dollars and today will be no different.

iPhone App of the Week – Google Mobile App

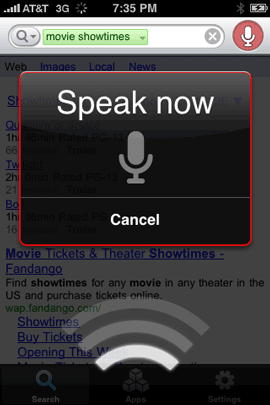
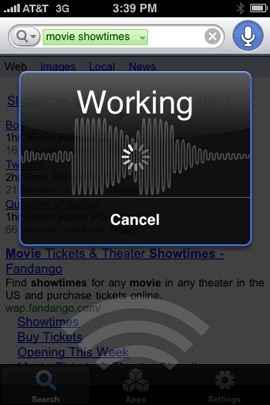
You might be wondering, “why do I need a Google app on my iPhone? Isn’t Google built-in?” I wondered the same thing. The first time I downloaded the Google Mobile App a couple of months back, it was because the built-in Contacts app was soooooo slow at searching Contacts that I used the Google Mobile App instead. Once Apple brought acceptable speed back to the Contacts app via software updates, I deleted the Google Mobile App. Recently I put the app back on. I was intrigued by the New Voice Search. Although I love voice recognition technology, it usually doesn’t work very well for me. It usually takes 3-6 tries to get the device/app to recognize what I’m trying to say. I have voice recognition in my car and almost never use it for this reason. So I decided to give this App a try just for fun. Although it’s not perfect with my voice, it does work more times than not. Of course you don’t have to use the voice feature at all. You can just key in your search words as you would expect.


Why do I need the Google Mobile App? Isn’t Google built-in to the iPhone?

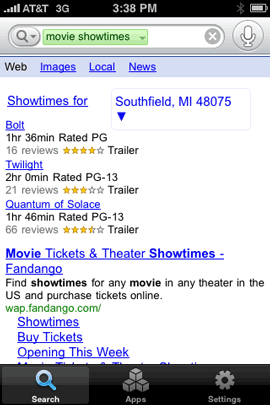
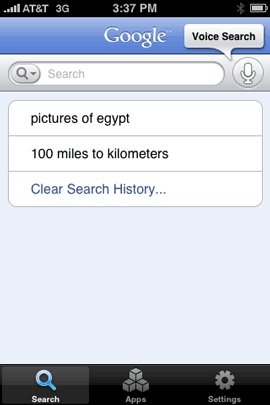
Beyond the new voice recognition capabilities, you’re probably still wondering why you need the Google Mobile App? It’s simple. The built-in Google search in Safari and Google maps are good! I use them all the time. However, they only search the internet. The Google Mobile App searches your iPhone data (Contacts) and the internet at the same time. Beyond that it offers suggestions and word completion for what it thinks you’re searching for. Although Apple did speed up Contact searching, the Google Mobile App is still faster. The Google Mobile App also keeps a history of your searches to make it easy to do the same searches again. Another thing that sets the Google Mobile App apart from the built-in Google search in Safari is that it’s Location Aware. This means that you can do searches for things around you. Yes the Google Maps can do this for businesses, etc., but it’s not as comprehensive as all that would be available to you searching the full Google Search Engine.

Searching for Showtimes in the Google Maps App that’s built-in to the iPhone just brought up a nearby theater.

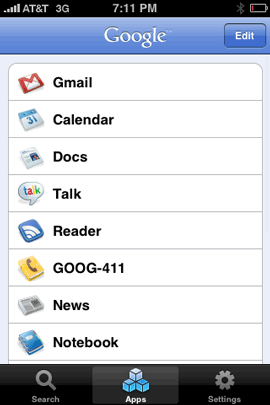
If you’re a user of other Google services such as GMAIL, Notebook, Calendar, etc. You’ll have quick access to those services too.

Don’t get too excited. These apps are Google’s web based apps and open in Safari. They are not native iPhone apps.


How does the voice feature work?

Google recorded this cool demonstration. See it for yourself:


The Bottom Line

I like this app a lot. I really like the voice feature although it’s not perfect at recognizing my voice. It’s really cool just to speak your search and have it done. I like that it searches my Contacts at the same time it searches the web, but I wish it also searched my calendars too. It would be MUCH faster than having to scroll through looking for an appointment. As a matter of fact the Calendar app should have its own search feature like the Contacts app. It would be great if the Google Mobile App could search both at the same time. That being said, this app is FREE so it’s hard for me to complain about it. It does what it was built to do and does it well.

The Google Mobile App is FREE and available for both the iPhone and iPod touch. Download it from the App Store here: Google Mobile App

Happy Thanksgiving & Black Friday ’08

With all that’s going on in the world, I’m very happy with my life. I want to take this opportunity to wish you and your family a very Happy Thanksgiving!


Black Friday 2008

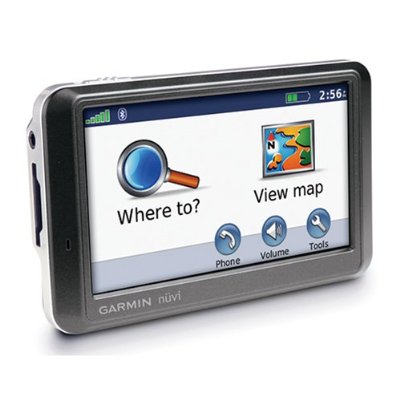
Well it’s here again! The day that retailers compete for your business. I do my best to avoid this madness at all costs. Last year was the first year that I went out shopping on Black Friday in YEARS! I just could resist the deals on GPS units at Staples. However, this year there is nothing tempting me. Nothing at all. So I plan to sleep in. I do know that many of you like deals and like gadgets (after all, that’s probably why you’re reading this right?). Before we get to the deals you might want some recommendations on cool stuff to bet. So check out my Holiday Gadget Gift Guide and my recent appearance on The MacJury. Now let’s get to the deals. Here are a few random Black Friday deals/sites you should check out:

First of all here’s a site that does a pretty good job of accumulating many of the Black Friday deals in one spot. It’s called Black Friday Gotta Deal.

The next one is Amazon.com. Since I HATE standing in lines, nothing pleases me more than to get good deals from the comfort of my chair. Check out Amazon’s Black Friday Deals.

Of course Apple products are always hot items on anyone’s list. So check out Apple’s Black Friday deals too.

Here are some deals at one of my favorite local computers/electronics stores – Micro Center.

I’m a Nikon shooter so I received a mailer with Nikon’s Black Friday Deals.

If you’re a video enthusiast then you probably want to check out The Video Guys.


Lastly, be sure to check out the Consumer Reports Electronics & Computers Gift Guide.


Enjoy!

Schedule TiVo recordings from your mobile phone

As an iPhone user, one of things I have had on my wishlist since the iPhone 2.0 software update was a “native” TiVo scheduler. While there still isn’t a native iPhone app for scheduling recordings remotely, TiVo has created a mobile friendly version of their website (finally).

That’s right, you can go to http://m.tivo.com from any mobile browser (or any browser period) and get a very streamlined mobile friendly version of their site. This mobile version is geared specifically for scheduling recordings on your TiVo Series 2 or TiVo Series 3/HD. 


Good start, but needs a little work

Let’s start with the fact that I think the main TiVo site needs some work. So I’m not surprised that the mobile version is less than perfect. On the main TiVo site you have the ability to log in and actually see a full blown “Guide” of all the channels you receive and what’s coming on several days in advance. From the guide you can either schedule one-time recordings or setup a Season Pass to always record your favorite shows.

Of course if you know the name of the show you want to record, you can just do a search for it. The Guide is a good thing to have, but it’s very cumbersome to navigate, and even worse on a mobile device. The biggest problem that I have with it is that you don’t get to narrow the selection down to just your favorite channels (although this is allowed on the actual TiVo hardware). So I end up have to scroll hundreds of channels that I will never watch/use. 

The mobile version doesn’t have a Guide at all. So the only way to schedule a recording is to do a search, pick from the Daily Picks or the Most Popular. This works well, but it brings up another issue (actually the same issue). Let’s say I do a search for “The Unit”.

It comes right up (very fast performance so far), however, since I can’t limit my search/account to just my favorite stations, it comes up with “The Unit” on channel 14. Channel 14 in my area is the old analog/basic standard def cable channel for CBS.

The channel I would rather record this show on would be channel 233, which is CBS HD in my area. I can choose to “view upcoming episodes” and it will then list the one I want on 233. This isn’t bad as an extra step.

However, I ran into a problem trying to do a Season Pass this way. I did my search and then chose to create a Season Pass. I saw that it was using the standard def station, so I then chose to View Upcoming Episodes, selected the same show on the HD channel and then completed my Season Pass. However, when I checked my TiVo HD, it had in fact created the Season Pass using the standard def channel. So for now I will not be using the mobile version of this site to do Season Passes. I also expect this problem to go away one way or the other by February 2009 when all stations are required to broadcast in digital. I expect those old basic cable channels to go away and this this won’t be an issue. The ultimate though would be for TiVo.com to just allow me to limit searches to my favorite channels. 

On a good note, I’m very happy that this mobile version seems to do a good job of keeping logged in. It’s a pain having always key in a user name and password. The desktop version of the site can’t even keep me logged in, so I’m pleasantly surprised that the mobile version can. I’m also happy that the mobile version allows me to choose which one of my TiVo HD’s to record to.


m.tivo.com added to the Home Screen


The Bottom Line

In all fairness, this mobile version of TiVo.com is listed as a “Beta”, so perhaps they will take my feedback and make improvements. If you have a TiVo Series 2 or Series 3/HD and a mobile phone (doesn’t require an iPhone), then you can’t go wrong with giving it a try. Although I can pull up the full version of the tivo.com site on my iPhone, this mobile version is sooooooooo much easier and faster. As good as the Safari browser is on the iPhone, I wish that ALL companies would offer mobile friendly versions of their websites. It’s just makes it easier and faster to get to the info we need. Less is more.