Review: OWC Mercury On-The-Go SSD External Drives

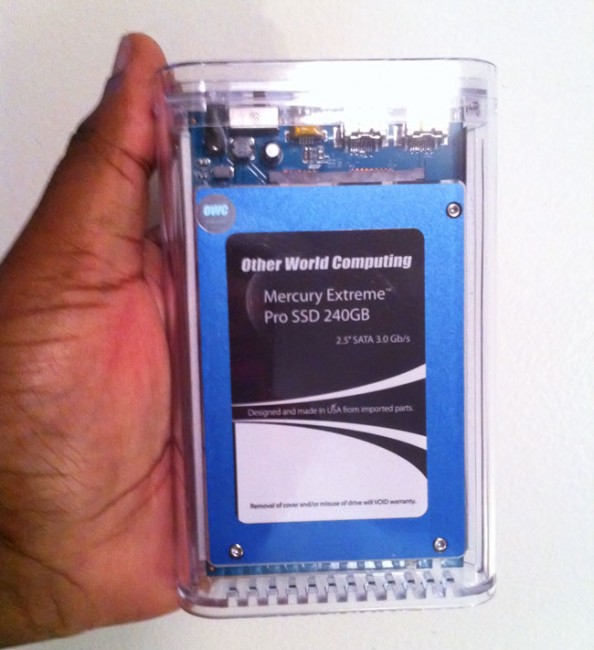
Yes I'm a speed freak. I spent much of the money I made as a youth paying for speeding tickets. This means I also like my computers to go as fast as possible. I moved to SSD (solid state drive) drives with my latest notebooks and while the cost is high, I do like the boot times, application launch times and of course the data copy times (see my original boot time comparison video here). Speaking of data copy this made me think about the drives that I'm copying that data to and from. While it's great having a fast internal drive, I started to look at the external drives I carry around too. This is when I decided to test the OWC Mercury On-The-Go SSD External Portable Drives. The good folks over at OWC sent me a review unit (a 240GB Mercury Extreme Pro). The first thing I wanted to test was copy speeds. The drive comes with a 1.73GB disk image of shareware on it. I figured I'd start my test copying this file back and forth and between drives. 


Copy Times (shorter is better)

To copy 1.73GB disc image from the OTG 240GB SSD Drive

To copy 1.73GB disc image to the OTG 240GB SSD Drive


To copy 1.73GB disc image from the LaCie


To copy 1.73GB disc image to the LaCie


Next up a folder of RAW photos

To copy 3.87GB folder of photos from the OTG 240GB SSD Drive


To copy 3.87GB folder of photos to the OTG 240GB SSD Drive


To copy 3.87GB folder of photos from the LaCie Drive

To copy 3.87GB folder of photos to the LaCie Drive

The OWC SSD drive won in every test and I imagine with larger copies such as backups and clones the time savings would be realized even more.


A Startling Realization – Firewire 800 is not fast enough

After doing just a couple of tests with the new SSD drive and my existing LaCie Rugged Drive I realized that while the OWC SSD drive was faster (see the numbers above), it wasn't night and day faster. I have a theory that the bottleneck is the Firewire 800 bus itself. In other words the data can only go as fast as Firewire 800 will transfer it. 


The Bottom Line

The OWC Mercury On-The-Go with an Extreme Pro SSD drive is Fast, Silent and Portable! It's also likely to be more reliable as there are no moving parts to fail like in traditional hard drives. SSD drives can slow down over time and that has yet to be seen with this model as I haven't had it long enough to know if that will happen or not. The one thing that isn't an advantage right now is speed over traditional drives with FW800. With that said they do offer a USB 3.0 version that will likely yield faster results over FW800 if you happen to have a USB 3.0 equipped computer. However, until we see Thunderbolt based portable drives I don't think we'll see the real speed potential of these SSD drives. With that said, you'd have to weigh the cost of going SSD vs. traditional hard drives for your portable data needs. Having a drive with no moving parts/peace of mind comes at a premium price.

The OWC Mercury On-The-Go 240GB SSD goes for $479.99

Their 320GB 7200 RPM Drive in the same case goes for $104.99.

Yes, Another Portable Speaker Review – Pop-up Mini Speakers


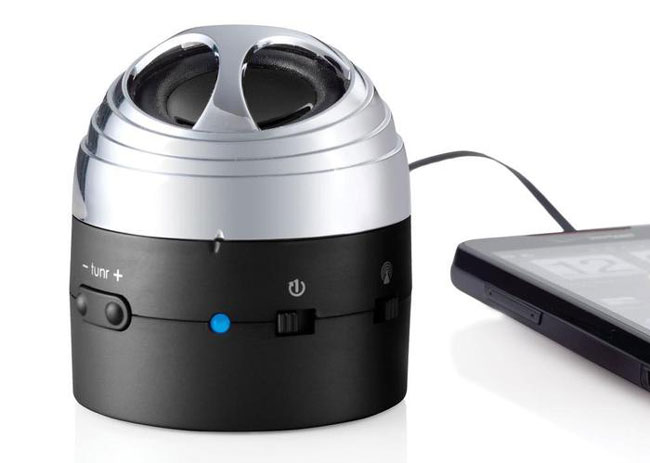
I've reviewed various travel sized speakers here in the past and I really like the ones I've already reviewed. However, my buddy Bruce Mandel was raving about a pair of "pop-up" speakers that he had gotten and he was so sure that I'd like them he loaned them to me. He said, "you have to try these." So i did. The funny thing was that my first experience with them was a test of my AirPort Express and using AirPlay to send music from my office to my studio. These speakers were the most accessible at the time and I decided to plug them in the AirPort Express mainly to see if my AirPlay would work in that location (very far from the main AirPort Extreme up stairs). I Turned on the speakers after plugging them in and walked all the way to the other end of the building where my office is located. When I fired up iTunes and selected those speakers (AirPort Express) I actually didn't expect to hear them until I got back into that area of the studio. I was blown away to actually not only hear them from such a great distance, but to actually hear that they sounded pretty good. 

Pop them up for more bass

During my initial test I hadn't even popped them up yet. When you do you actually get more base response than you do when they're closed. They definitely sound great for speakers this size. The two speakers magnetically attach to each other for travel/storage. When you pull them apart you can then pull out the audio cable from one to plug into the other for stereo sound.  They come with a separate cable for charging and of course there is a cable to plug in to your audio source. The speakers charge via USB. 

What I dont like

You've already heard all the things that I like about them. Small, good sound, battery powered. As far as what I don't like it's really more about the design of the cables, ports, switches, etc. While you certainly need the cables that are supplied, it just seems that they could have done a better job in the way the cables attach. Also I find the audio cable to your computer/iPod, etc. to be a bit short. I'd like the cable be about 6 inches longer. When I tested these the cable was so short that I had to put the speakers on the floor in order to reach the AirPort Express that was plugged in the wall.

While I'm not sure that I'd give up my previous Bluetooth speaker recommendation, these definitely have a better sound to them and I really like the magnetic coupling. I also really like that the cords are retractable right into the unit.

You can get a pair of these here for $49.95 or you can just get one here for $29.95.

Now the question becomes do I give these back to Bruce or not? 🙂

My New Lightroom Tethering Display

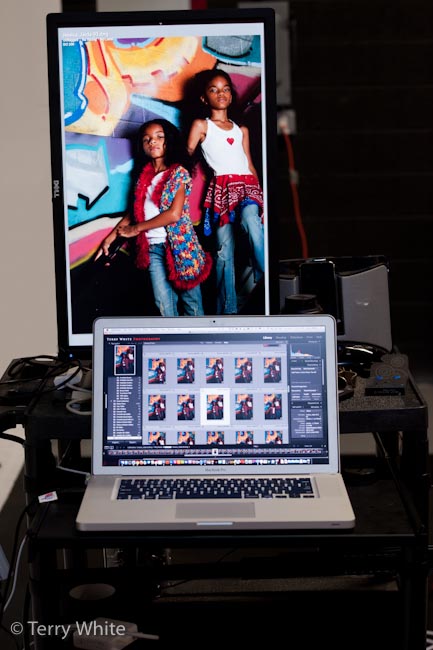
When I shoot in studio I'm usually shooting tethered to Lightroom 3 99% of the time. While my 15" MacBook Pro has been adequate all these years, I decided to go with an external display in my new studio. The question was, "which one do I get?" Right about the time I asked this question, I saw that Dell (yep, Dell) had just introduced a NEW 24" Display. You might be asking why would I get a Dell monitor for my Mac? Good question. The main attraction for me to this particular display is that it "rotates!" The display can be used in either portrait or landscape orientation. 

It has all the latest bells and whistles including: LED, IPS (in-plane switching) for wider viewing angles, Display Port, USB Hub, DVI, Adjustable Height and a 3 Year Warranty. 

For those of you old enough to remember the Radius Pivot Displays, you'll probably remember that back then the display would auto adjust based on the rotation and the driver on your computer. In the case of this new Dell there is no such magic for the Mac. However, manual display rotation is built-in to Mac OS X's Display Preferences. While it would be a slight pain to have to manually switch this setting every few seconds I find that I leave it in Portrait "most" of the time. If I shoot a wide shot, it displays it, but it just doesn't fill the screen. If i'm going to be shooting a long series of landscape oriented images then I'd make the System Pref adjustment.


Lightroom's 2nd Display Feature

Lightroom 3 natively supports dual displays. This means that I can set the second display to Loupe view, full screen with no overlays. It works GREAT!  This also means that I DON'T mirror the displays. I treat the Dell as a second display/virtual desktop.


Why not just shoot to an HDTV?

That question comes up a lot and I've tried it. My Nikon DSLRs have HDMI out and I could plug right into a nice big HDTV. The problem I find with this mostly is that the colors, brightness, contrast, etc. don't look the same. This means that after doing a shoot and importing the images into your computer they could look really different than what you adjusted for during the shoot. Since my shots are going to end up on a computer more often than a TV, I'd rather tether into my computer to begin with.


Dell? Really?

If you know me, you know that I've rarely if ever mentioned Dell on my blog (or anywhere else), but this time I gotta say that I'm currently a happy Dell customer. I'm actually surprised with all the accelerometer tech that Apple uses in iDevices that they haven't done this with their computer displays. Oh well, for now "it's a Dell."

You can check out the Dell UltraSharp U2412M "W Display here.

I also bought this Display Port to Mini Display Port cable. Of course after I ordered it I remembered that monoprice.com probably has it cheaper and they do.

Wacom Outs A New iPad Stylus and Sketching App


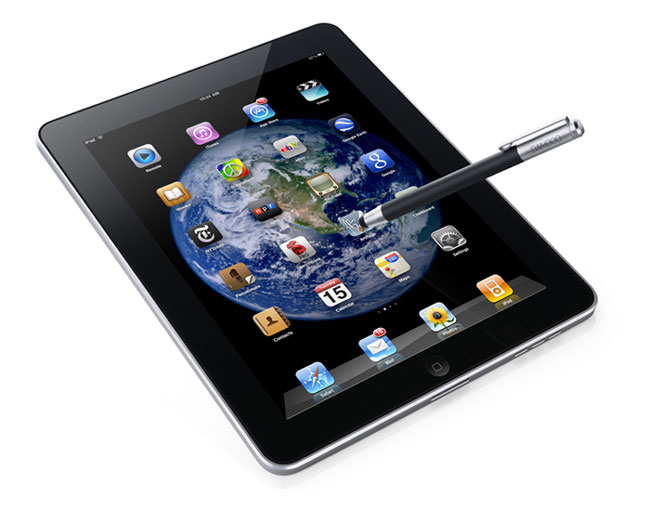
The great folks over a Wacom have shpped their NEW Bamboo Stylus for iPad (or any other touch screen mobile device). Ever since I started using the iPhone and then the iPad for doing model releases I realized that having a stylus was a must have accessory. While I've enjoyed my Pogo Sketch (the Targus one is OK too), I couldn't pass on the opportunity to try the one from the same company that makes my graphics tablet (Intuos 4). After all Wacom has had MANY YEARS of experience in designing tablets and pens to go with them. I figured that if anyone could design a good stylus for touch screen devices like the iPad it would be Wacom. Unfortunately the iPad doesn't offer pressure sensitivity like the Wacom tablets do. However, I have found the tip of this new stylus to be very comfortable to work with and smooth for on screen writing, signing and drawing. 


The Little Things

You might ask yourself "what is there to innovate in a stylus for an iPad?" That's a good question. After all, once you make a tip that works with touch screens what else is there? Surprisingly a lot. One thing I couldn't figure out with other styli is why there were designed to be so small? The first thing I noticed with the Bamboo Stylus was that it had a nice thickness to it as well as some weight to it that made it feel more natural in my big hands. Speaking of weight the other nice thing is that the slight weight differential of it is pushed to the tip end. This means that when I pick it up I can tell which end is the writing end without even looking at it. While I do wish that it was about a half inch longer, I found the length to be reasonable. Now on to the tip. This is probably the most important feature as it will either make it or break it for me when it comes to using a stylus. I prefer a tip that glides more easily on the touch screen. Some of the cheaper ones have more of a "rubber" feel, which is fine for "tapping" onscreen buttons, but horrible for writing/sketching. I'm happy to report that the Bamboo Stylus has a nice blend of easy gliding, but just enough grip for precise tapping. This is also due to the design of the tip and how it comes to a nicely rounded point. Again, there was some thought put into this and I would expect nothing less from Wacom. 


If you're in need of a stylus for your mobile touch screen device, it doesn't get much better than this. You can get the Wacom Bamboo Stylus for iPad here for $29.95 or less.


One more thing…

httpv://www.youtube.com/watch?v=AgByFtjYotQ

There's an App too. Wacom introduced a NEW iPad App called Bamboo Paper (see my review here). This App is a virtual notebook for your iPad. If you hurry you can grab a copy of the App for FREE until the end of June here from the iTunes

International Power! Revisited

Image compliments of iStockphoto.com

Last year I wrote a post called "International Power" and the purpose of that post was to recommend adapters and accessories that you might use when you travel abroad. Since that time though I have been experimenting with different solutions and have just about completely revamped my list of travel adapters and plugs. The first goal was to reduce the amount of adapters needed and the second goal was to accomodate the ever increasing number of mobile devices that I'm traveling with. Since my job now not only involves showing Adobe Creative Suite on the desktop, I now show tablet and mobile apps on both iOS and Android devices too. On my current trip I'm traveling with a MacBook Pro, iPad 2, iPhone 4, Motorola Atrix and Motorola Xoom. Not to mention a Nikon D7000 DSLR, iPod nano watch and camera GPS device. That's a LOT of batteries to keep charged each night. One of the other big problems is that many hotel rooms can have as few as one single accessible AC outlet for you to use! Here is my current crop of adapters and gadgets to accomodate charging and powering on the go.


The Universal Adapter

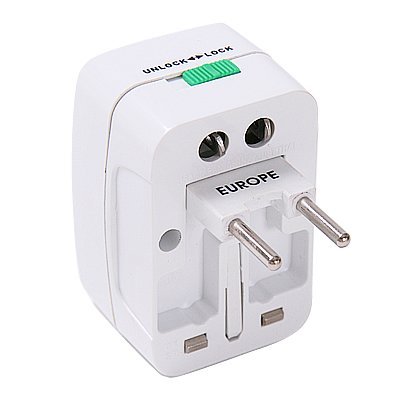
All of my devices either can accomodate the higher voltages in other countries or charge via USB. Therefore I only need a couple of "adapter" plugs to adapt the US prongs to the sockets of foreign outlets. The one above is one of my new favorites. I like it because the prongs fold into it so that they don't protrude in your bag. I typically have at least two of these in my suitcase to leave in the hotel while I'm out and about and one in my computer bag for meetings and presentations.

Get one here.


The Universal Power Strip

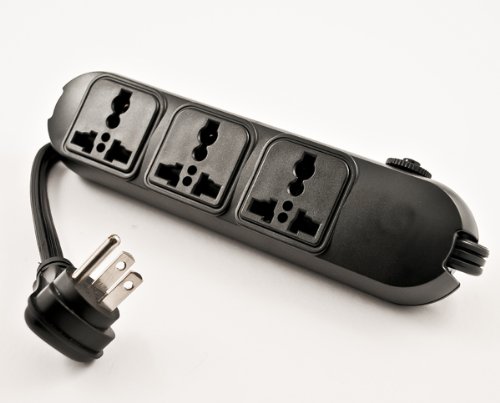
I don't want to have to adapt every single charger to a foreign plug and as I mentioned you may not even have the luxury of multiple outlets in the room. So just like at home I would love to use a power strip that plugs into the Universal Adapter above. This Power Strip not only works on US current and the higher European 220v outlets. Also the plugs work for both US and European based prongs.

You can get one here. I use this one in my computer bag.


Retractable Extension Cord

Another common problem is that the single available power outlet in the room may be located across the room. This is when I pull out my retractable extension cord. Granted it's only 5' long, but it can make all the difference in the world.

You can get one here.


Charge 4 USB Devices At Once

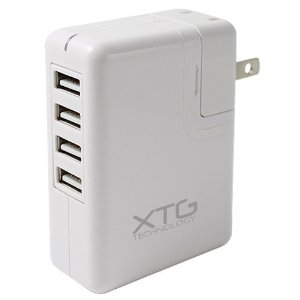
My phones, camera GPS and iPod watch all charge via USB. Therefore I can get away with one of these multiple USB charging devices. Yes they work on the higher 220v current too and deliver standard USB power to up to 4 devices simultaneously and yes I've charged 4 devices at once without issue.

You can get one here. I also like this flater one too.


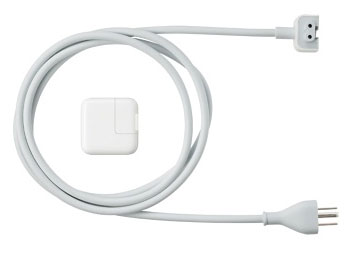
The iPad Power Adapter

While the iPad will charge over standard USB, it will do so at a slower rate. In this case I always travel with an iPad 10W adapter to charge the iPad/iPad 2 at top speed. This adapter also works at the higher voltages.

You can get one here.


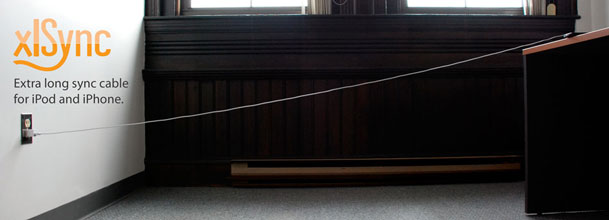
Longer iOS and USB cables

Since the only available outlet in the hotel room is sometimes behind furniture or across the room it may be necessary to have longer USB and iDevice cables. I found some nice long ones here.


The Bottom Line

When I have all these things plugged into a single outlet, it's not pretty! However, it works. I can easily charge 6 devices without any problem. It definitely cuts down on the number of little adapters I have to carry and I don't have to worry about not having enough of the right adapters for the country I'm in .

Review: M.I.C Compact Flash Reader for iPad

I reviewed Apple's Camera Connection Kit when it first came out. The Apple kit is two adapters. One is an SD reader and the other is a USB port designed to connect your camera directly to your iPad for image import. The one glaring omission is the lack of a way to bring in images directly from a Compact Flash (CF) card. During my review, I showed how you could attach a standard (San Disk) reader to the Camera Connection Kit and bring images in directly from your CF Cards. However, shortly after I did the review Apple released an iPad software update that basically reduced the amount of power that the dock connector outputs making it virtually impossible to power a card reader. I guess they didn't like people plugging in all the things (keyboard, drives, etc.) they were plugging in to the Camera Connection Kit on their magical devices. That left us with the only option being to use a USB cable and connect the camera directly to the iPad. While this works, it's slow and will drain the cameras battery during long transfers. 


Problem Solved by M.I.C

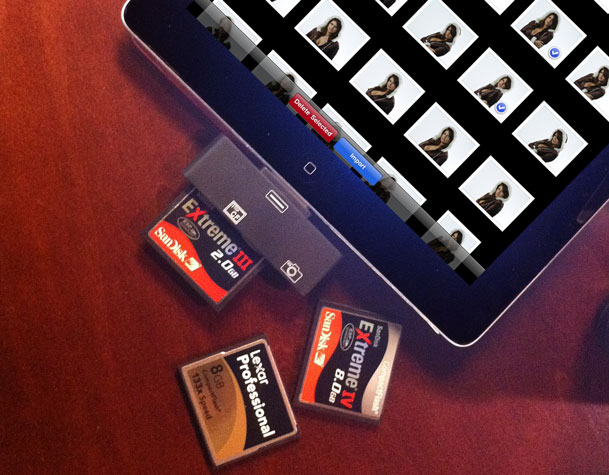
This Hong Kong based company has developed a CF Reader that attaches directly to your iPad and allows you to import your CF cards (up to 400x speed cards) right into your iPad. Of course I ordered a couple of these immediately and mine just arrived this past Friday. I was hopeful and doubtful at the same time. I just couldn't figure out how they would get around the power problem. Well, they did! I plugged in my standard SanDisk 8GB Extreme IV card and it showed up just like the Apple Camera Connection Kit does. I imported my RAW (.NEF) files with no problems. 

Hallelujah!

You can order the M.I.C CF Reader here. They are back logged (as you might expect), so give it a couple of weeks.


Show me!

I would normally do a video of such a gadget in action. However, they already had a video that shows it in action and I concur with the results shown. So here it is:

httpv://www.youtube.com/watch?v=CIQc22RoTyg

I Love LightDims

You might remember my rant from a few weeks back on the unnecessary LEDs on many consumer electronics that keep me up at night. While some of these devices allow you to turn off their annoying LEDs, there are many more that do not! In the past I've used everything from electrical tape to gaffer's tape to cover up these LEDs. While an inexpensive tape solution certainly gets the job done there are two problems with it. The first is that black tape doesn't look great over your expensive gear. The second is that sometimes you do actually need to see these status lights. For example, I have tape over the VERY BRIGHT LED on my AirPort Express. However, if I plug it into a connection in a hotel room I sometimes need to see the status light to see what's going on. Yep, I've just been peeling back the tape to take a peek. 


LightDims are better

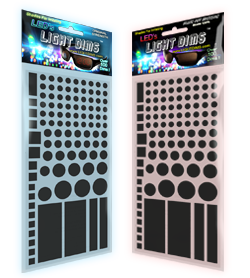
When I wrote my rant, one of my readers chimed and suggested that I take a look at LightDims. I did. I ordered both versions. These "stickers" come in two flavors. You can get the set that simply cut down on the brightness, effectively dimming the LEDs or you can get the total blackout set. There are situations where I would want to use one or the other. 

I gotta say it. I'm in love with these! I've replaced the unsightly tape on most of my gear and used the nicely precut LightDims instead. They really work! My bedroom is now completely dark at night just the way I like it.

You can order LightDims here starting at $5.99 for a set of 100!

Continue reading “I Love LightDims”

Triple Your MiFi Battery Life

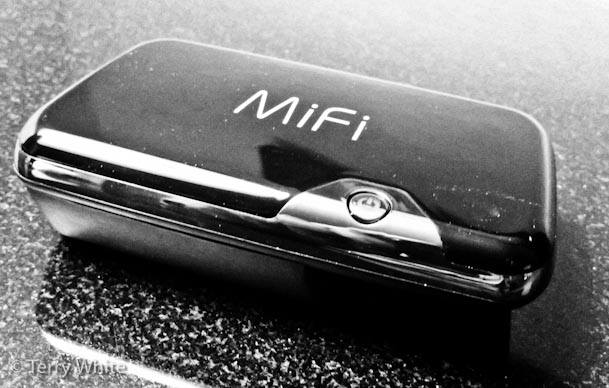
I love my MiFi 3G hotspot! I use it all the time. The only thing that can be a bit of a drag is when it runs out of battery power. If I’m near an outlet I can just plug in the supplied USB adapter and run it all day. However, if I’m in a seminar or other setting where I don’t have immediate access to an outlet the battery can only last about 4 hours tops. That all changed when I “super sized” my MiFi Battery.

A 3300 mAh Extended Battery Lasts me all Day!

As long as I have a good 3G signal, my MiFi will now last me all day with this battery. It’s designed to replace the stock battery and battery cover. This way it charges internally and as far as your MiFi is concerned it doesn’t see any difference. The good folks over at The 3G Store sell both Verizon MiFi 2200 and Novatel GSM MiFi 2352/2372 Extended Batteries for $90.

Yes it makes the MiFi about twice as thick, but it’s worth it if you need to be mobile and connected for several hours throughout the day.

By the way, you can get an unlocked MiFi GSM 2372 Mobile Hotspot here On Sale for $226.

How I Broke My D700 By Tethering

If you've been reading my posts for the past few days you've probably noticed a theme: Wireless Tethering/Shooting. Now I'll disclose the reason that increased my interest in wireless solutions for shooting to my iPad or laptop. A couple of weeks ago I taught a workflow workshop in Texas for Precision Camera and Westcott. An important part of my workflow is shooting tethered into Adobe Photoshop Lightroom 3. On the 3rd day of this 3 day workshop I just couldn't get the tethering to work. Nothing really changed on my end that I could see and it had worked flawlessly for two straight days, but for some reason I couldn't get past the 1st shot. I tried the usual troubleshooting things, but nothing would get this working again so I moved on. I shot to the card and just took breaks to import the shots via my Firewire 800 CF card reader and showed the class. I got home and didn't think about it again until my next studio shoot. This is when I knew something was really wrong. I tried different cables and nothing would work. Again I had to move on and shoot to the card to get through the session. When I got home that evening I decided to do some additional testing. I tried different cables and again nothing would work until I realized that the cable attaching to the camera seemed slightly more loose than usual. Nothing crazy, but noticeable. I applied a little more finger pressure to the cable end pressing leaning it one way and Lightroom saw the camera. I tried holding it this way as best I could, but the slightest movement would cause a disconnect again. 


It was time for a repair

On my way out the door to Photoshop World I stopped by my local authorized Nikon Repair Facility – Midwest Camera Repair (these guys are great) and dropped off the D700. They said that it was probably an issue with the port being broken off from the circuit board or the board itself had gone bad. If it was just the port then the repair would be around $125. If it was a bad board – oh oh – "we'll call you." Needless to say I was praying for a "disconnected port." Luckily that's all it was and I was happy to pay for this versus a whole new board. 


I don't want this to happen again

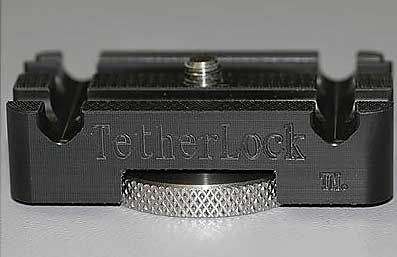
I shoot tethered 99.9% of the time in studio. I can't imagine going back to just looking at a 3 inch LCD. My colleague Tom Hogarty (Lightroom Product Manager) pointed me a device called TetherLock.

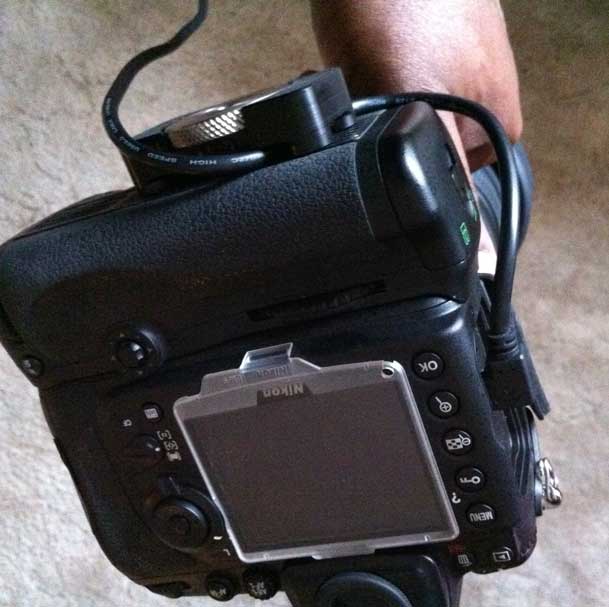
The concept is simple. You attach this device to your tripod hole/port (there is a pass-through so that you can still use a tripod) and run your cable through it. When you tighten it it not only keeps the cable in place, but if you accidentally step on or otherwise tug the cable while shooting there will be zero pressure/tension applied to the USB port on the camera. Like I said, the concept is simple. I ordered one here and it works fine. It's crazy expensive for what it is and YES there are several do-it-yourself options (I don't need you to list them for me, I get it 🙂 ), but as I've said before I'm not a D.I.Y. kinda guy. Clearly I'm not the only one with big feet tripping over tethering cables while shooting or this product wouldn't exist. 

The other thing I would recommend whether you go with TetherLock or your own solution, is a USB cable that has a L-Left head on it. This allows the cable to run down flush along the body as opposed to sticking straight out. Here's the one I use.


The Bottom Line

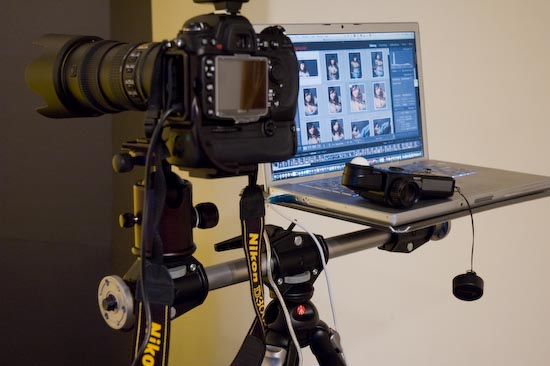
Above setup Bogen-Manfrotto Double Head Accessory Arm and Gitzo Laptop tray that sits right on my tripod.

Built-in WiFi on all cameras can't get here fast enough for me. Until that day happens I'll continue to shoot tethered via a USB cable for my studio shoots. Not ripping the cable out during future shoots is going to be nice and better yet not damaging the camera/USB port is even going to be better.

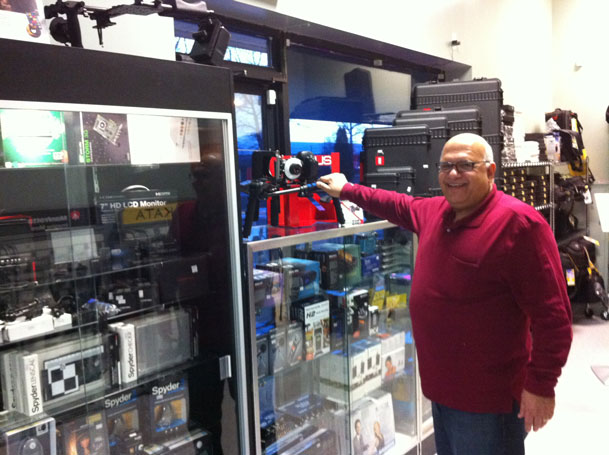
Meet George from LCD4Video

As a gadget guy I love finding gadgets that are useful but sometimes fly below the radar because they are not by the big named manufacturers. A lot of times there's a gadget out there that fills a need and unless you happen to be in the right place at the right time you may never know about it. Although I had ordered an LED video light from LCD4Video.com in the past, I had no idea that 1) they were located right in my backyard and 2) they have so many other cool little accessories for video and and still photography. 

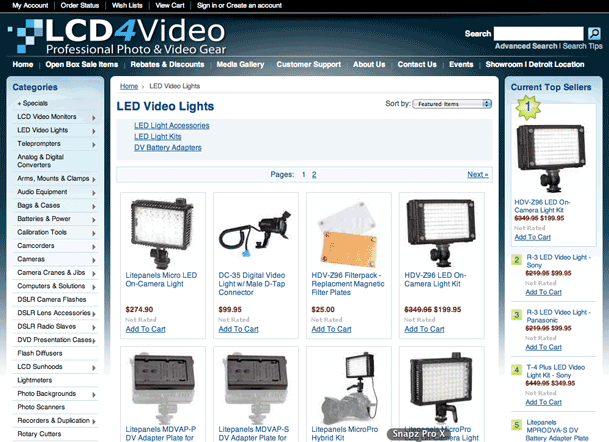
LCD4Video

They sell the usual gear such as cameras, lenses, tripods, cases and lighting equipment, but they also manufacture specialty items under their own brand. I had the chance to visit their location last week to attend a seminar put on by my good friend Mark Astman representing Manfrotto, Lastolite and Elinchrom. I didn't realize the connection between the seminar and the venue until I arrived. During one of the breaks I popped into the show room and before you know it I was buying hundreds of dollars in gear. 🙂

I wanted a small HD monitor that would fit in my hotshow on my Nikon D7000 for doing DSLR video. I also wanted another battery operated LED light for doing video podcasts. These guys had everything I wanted and even the things I never knew existed. George runs a great business and sticks behind what he sells. 

I highly recommend that you check out their site and the vast collection of products they offer! It's also always good to support the local dealers when possible.