More and more feature films are being touched with Adobe's Digital Video Solutions. Now that Premiere Pro CS5 and After Effects CS5 are 64 bit with real-time GPU playback it makes even more sense. See how much of the post production of The Social Network was done in Premiere Pro CS5 and After Effects CS5.
Creating an HTML 5 Website for Photographers in Adobe Lightroom 3
This one is for the Photographers out there!
Adobe Photoshop Lightroom has had web galleries since day one. You can either export out an HTML gallery of your images or a Flash Gallery of your images. Each one of course having its advantages and disadvantages. I find that photographers in general like Flash galleries because of two things: 1) they're (pardon the pun) flashy. You get transitions, animations, zooming, automatic slideshows etc. 2) they offer one more level of image protection by making it harder for people to just right click and download the images. The disadvantage is that not every device can display Flash galleries. If you go with an HTML gallery it can be seen on just about any device, but you lose the flashy appeal.
What about HTML 5?
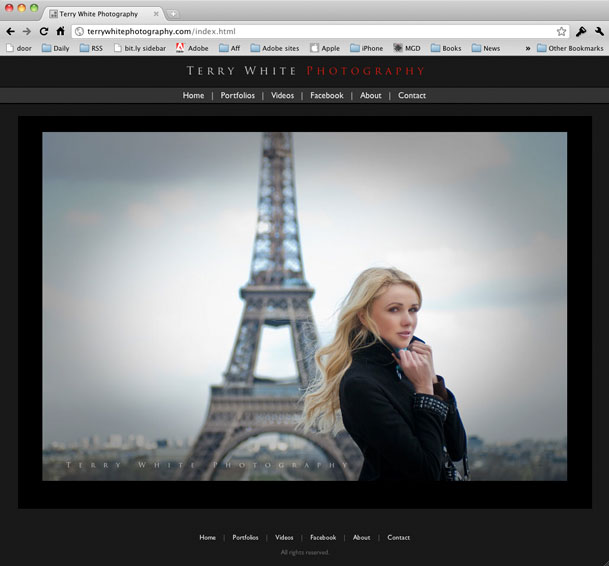
Up until yesterday my photography website was all Flash with an HTML fallback. I loved the features of my template. I loved the animations, image fading and slideshows and while I did have an HTML fallback for those that couldn't see the Flash site the biggest problem was keeping them BOTH up to date. The Flash site was driven by XML and was pretty easy to update with new images.. The HTML part was driven by a Lightroom web engine (more on that later) and required a separate export and upload each time I needed to do an update. It wasn't the end of the world to update them both, but I found myself updating the Flash site more often (because it was faster), which meant that people on non-Flash devices/computers wouldn't see my latest images. Not good!
What's this HTML 5 thing anyway? HTML 5 is next standard of HTML and it's still very much a WORK IN PROGRESS. This is why you don't see a ton of tools for it yet. Also and probably the biggest thing to note is that HTML 5 may never do all the things that Flash can do. This means that it's not a direct one to one replacement. At least not today for sure. HTML 5 authoring isn't just one thing. It's using HTML 5, CSS3 and Javascript. . Actually it's CSS3 that's the really interesting part. If you're really interested in developing in HTML 5 Adobe has already released the HTMl 5 pack for Dreamweaver and Illustrator. Check them out on Adobe Labs. More tools are in the works! Back to the photographers…
My goal
I started thinking about my site and the fact that it was a pain to update and therefore I wasn't updating it as often as I'd like to. Then I started listing the ideal things that I would want to have to make it easier:
- I'd want as much of the site as possible driven by Lightroom since that's where my images live anyway.
- Until HTML 5 is further along I still want Flash galleries for those who can see them.
- The site has to be viewable on devices/computers not running Flash
- I only want to update ONE set of images. In other words, both the Flash and HTMl version would use the same images.
- I want Video that plays on everything <-this is not as easy as you think!
- I don't want to write any code! Writing a line here and there during setup is fine, but I don't want to have to code the thing with every update.
The Turning Gate To The Rescue
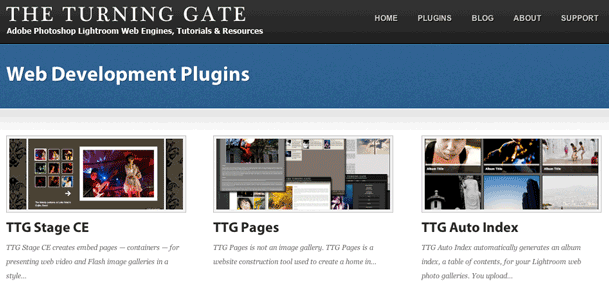
Once again The Turning Gate has come through for me. You might remember my post on using one of their web engines for my client review galleries. Since that review went live I've been working with Matthew Campagna at TTG on the ultimate solution to my goals. After countless emails back and forth (he's a great guy!) on what I wanted and tweaks to his engines based on my feedback I was able to create my entire site from scratch using Lightroom 3 and three TTG plug-ins.
Continue reading “Creating an HTML 5 Website for Photographers in Adobe Lightroom 3”
Don’t Shoot DSLR Video without a Z-Finder Pro
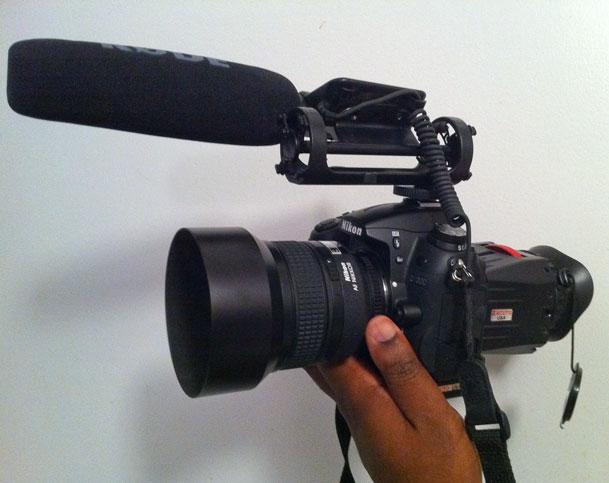
Nikon D7000, 85mm f/1.4 lens, Rode VideoMic and Zacuto Z-Finder Pro 3x
Shooting Video with a DSLR camera is all the rage now. However, one of the biggest problems with shooting video with a DSLR camera is keeping the video in focus. When you shoot at a shallow depth of field (one of the benefits of DSLR video), it's almost impossible to maintain focus while looking at the LCD on the back of your camera. While 3" may seem like a nice healthy screen size for a camera, it's really small when you're trying to check the focus of a scene. If you're shooting stills it's less of a problem because you can take a shot and then zoom in on it to check focus. When you're shooting video you don't have the same luxury. You can can't zoom the preview while you're shooting. The camera manufacturers haven't figured out that they should give us the option of looking through the lens via the eyepiece when shooting video yet. So for now we have to rely on the LCD for everything video.
The Zacuto Z-Finder Pro to the rescue
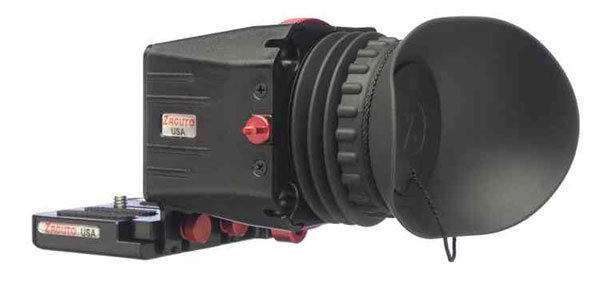
Zacuto has a few solutions for this problem. The one that I like the most is the Z-Finder Pro. It's designed to attach to a supplied bracket that goes on the bottom of your DSLR. It then gives you a more standard eye piece/viewfinder to look through while you're shooting. It also magnifies the screen. Once you put your eye up to the Z-Finder Pro you'll never want to shoot video without it again.
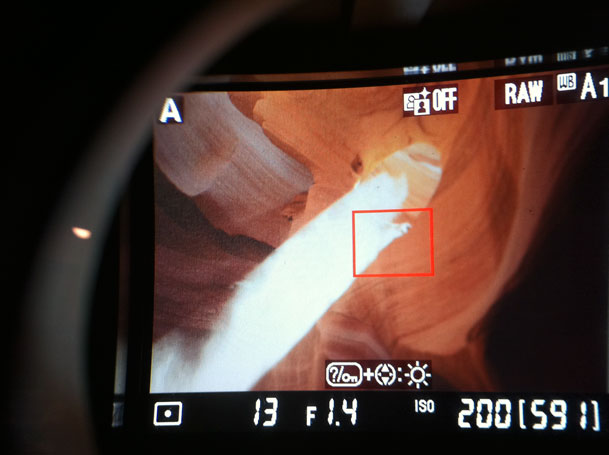
Looking through the Z-Finder Pro 3X
How would I redesign it?
The Z-Finder Pro attaches to a plate with two thumb screws. While you can certainly loosen these screws to remove the Z-Finder when you want to go back to shooting stills, I'd make a faster "quick release" system for quickly detaching it and re-attaching it. I also haven't tried this yet with a tripod mount/ball head. It might be interesting if the popular ballhead manufacturers had built-in support for the Zacuto bracket or vice versa.
If you shoot DSLR video, you want this!
You can get the Z-Finder Pro 2.5x mag here for $375.25
You can get the Z-Finder pro 3x mag (the one I used) here for $375.25
How Papyrus is Made in Egypt – a longer Nikon D7000 HD clip
httpv://www.youtube.com/watch?v=jX4xaQkgaIo
I took the liberty of posting this longer clip that I shot in Cairo at the Papyrus Museum giving a demo of how Papyrus Paper is made.
I shot it with the Nikon D7000 at 1080p 24fps. Yes it's handheld. Yes it's onboard audio. Yes it was shot with my Nikon 28-300mm lens at around f/5.6. Yes I was fiddling with the controls and focus a couple of times during recording. Yes she does reveal some top secret information at the end when she asks me to stop recording 😉
If this is the worse case scenario of HD video on this camera then I'm going to be very happy using it on a tripod with an external mic.
You can get the Nikon D7000 here from B&H Photo. This is one hot camera!
Photos from the trip here
OWC Mercury Pro Blu-ray Burner: Rip/Burn Blu-rays on a Mac
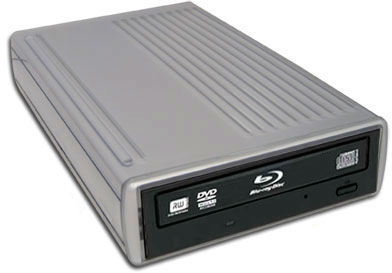
It's pretty clear to me at this point that Apple has no plans of offering a Blu-ray drive built-in to the Mac. Sure I could be wrong, but they have made no mention of Blu-rays in quite a while. After all, they sell and rent movies on iTunes and in a way Blu-ray movies are competition to that download/streaming model. Although there aren't many options to watch a Blu-ray movie on a Mac, there are still some reasons why you might want a Blu-ray drive on a Mac. First off, having a Blu-ray burner means that you could burn your own Blu-ray movie and data discs. Blu-ray discs hold up to 25 GBs of data per disc. That's a lot when it comes to archiving and transferring lots of information. Also since just about every digital camcorder being produced today has the option of recording in HD, it gives you a way to make High Def home movie blu-ray discs. I just got a brand new 12 core Mac Pro and I started looking at Blu-ray options for it.
OWC Does both External and Internal Blu-ray Drives
I'm starting off with a Mercury Pro External Blu-ray Quad-interface Drive review unit. This drive can connect via Firewire 800, 400, USB 2 and eSATA.
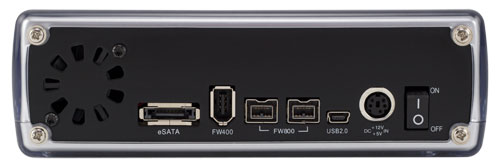
That pretty much covers all the connectivity options that I would care about. The drive was very simple to setup. Take it out of the box, plug in the power and an interface cable and turn it on. That's it! Although the Mac OS doesn't provide the necessary support to play a Blu-ray movie, it does provide the necessary support to see the drive as a standard storage device for both reading discs and burning them. I popped in my copy of Avatar on Blu-ray and it showed up on the Desktop like any other disc.
Ripping Blu-rays
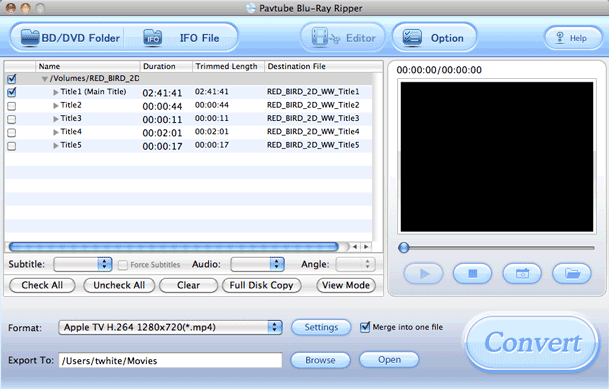
The next question many will have is what does it take to rip a Blu-ray disc? First off, you need to read up on copyright and know that I'm not a lawyer and nor am I'm sanctioning violation of any copyright laws. However, as far as I can tell (my interpretation) you are within your right to "backup" a movie disc that you PURCHASED (not rented) for your OWN PERSONAL USE. With that said, I wanted the option of Ripping a Blu-ray disc to take with me on the go or to watch via Apple TV if I choose to. Avatar is a perfect example! While this movie is available on iTunes and even includes a Digital Copy with the Blu-ray disc, both the iTunes version and Digital Copy are NOT high def. If I want to watch this movie via high definition without having to load the disc, the only way to do so is to Rip it. In the past I've used Handbrake to rip my entire DVD collection. Handbrake doesn't yet Rip Blu-ray movies, so I had to find another solution. The first application I came across is a commercial one called Pavtube Blu-Ray Ripper. There may be free ones or even better ones out there, but this one seems to do everything I want and has an interface that I like.
It's easy. Just put your Blu-ray disc in the drive and fire up Pavtube. Choose the Blu-ray disc using the BD/DVD Folder button and then choose your output destination and preset. All the usual suspects are there including iPhone/iPod, Apple TV HD and even iPad HD. Yep, Android is there too along with several other presets.
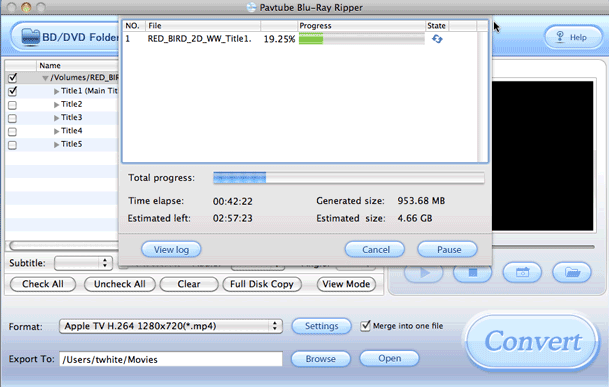
Then you just click the Convert button and be prepared to wait! Ripping a Blu-ray is no trivial task in terms of system resources. Even on my 12 core Mac, the 2 hour 42 minute movie is going to take over 3 hours to rip in Apple TV H.264 1280×720 resolution. Also the estimated file size for this movie is going to be a 4.66GB .MP4 file. Of course depending on the length of the movie, the preset you choose and the speed of your system, your mileage will vary.
Continue reading “OWC Mercury Pro Blu-ray Burner: Rip/Burn Blu-rays on a Mac”
Getting Started with DSLR Video for Photographers – Part 5 of 5
httpv://www.youtube.com/watch?v=eD8rIl2JKg0
In the final installment of this series, Adobe Worldwide Evangelist Jason Levine takes you through the process of exporting/rendering your DSLR video/stills creations using the 64-bit Adobe Media Encoder. He'll talk about some of the most common formats for going to mobile devices, iPods, blu-ray discs as well as common formats for Web delivery. You'll learn about background rendering and the ability to 'queue' multiple versions of your video edits. Also featured: using *presets* in the Media Encoder for your favorite destinations (like YouTube, Vimeo, HDTV, etc)
Download a FREE fully functional 30 day Trial of Adobe Premiere Pro CS5 and work right along side Jason.
Continue reading “Getting Started with DSLR Video for Photographers – Part 5 of 5”
Getting Started with DSLR Video for Photographers – Part 4
httpv://www.youtube.com/watch?v=dG1sqevWElE
Adobe's Worldwide Evangelist for Video and Audio, Jason Levine is back once again to give us his fourth installment on Getting Started With DSLR Video for Photographers.
Download a FREE fully functional 30 day Trial of Adobe Premiere Pro CS5 and work right along side Jason.
Continue reading “Getting Started with DSLR Video for Photographers – Part 4”
Adobe Releases Photoshop Elements 9 and Premiere Elements 9 for Mac/Windows
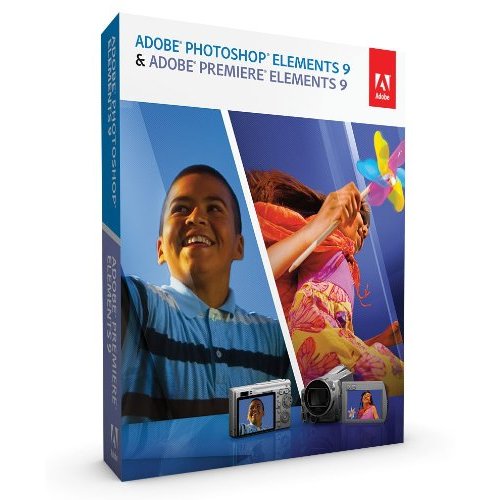
Adobe just took the wraps of the NEW Photoshop Elements 9 and Premiere Elements 9. Aside from the usual great new features this is the first release of Premiere Elements on the Mac! Woohoo! Here are the highlights:
Photoshop Elements 9
- Photomerge Style Match – you have to see to believe it
- Enhanced Healing Brush
- Facebook, Flickr and Smugmug integration
- New Photo Effects
- Multitouch support on the Mac
- Content Aware Fill for Panoramas
- New Photo Books and Other Printed Projects
- Integrated Tutorials
- See the new features in action here.
Premiere Elements 9
- Now for both Mac and Windows
- Animation Style Presets (like cartoon)
- Share videos easily on Facebook
- Optimized HD Editing!
- Native HD support from DSLR video, Flip cameras and more tapeless formats
- Easily fix Audio Problems
- See the new features in action here.
Order Photoshop Elements 9 here
Order Premiere Elements 9 here
Save money and order the Photoshop Elements 9 and Premiere Elements 9 BUNDLE here.
Getting Started with DSLR Video for Photographers – Part Three
httpv://www.youtube.com/watch?v=WxaN2bWwxKU
Adobe's Worldwide Evangelist for Video and Audio, Jason Levine is back once again to give us his second installment on Getting Started With DSLR Video for Photographers.
Download a FREE fully functional 30 day Trial of Adobe Premiere Pro CS5 and work right along side Jason.
Continue reading “Getting Started with DSLR Video for Photographers – Part Three”
Review Video Projects with Clients/Colleagues using CS Review

Now you can review Video Projects online with your customers and colleagues even if they don't have any video editing tools or knowhow. Adobe CS Review has now been integrated into Adobe Premiere CS5 allowing you to do review and commenting online of your various video projects. So now in addition to reviewing your Photoshop, Illustrator and InDesign projects your clients can review and provide feedback on your videos too. Check out my demo here:
httpv://www.youtube.com/watch?v=61hEwIAH6R0
Find out more about CS Review here.


