Lightroom 4.4 and Camera RAW 7.4 Release Candidates Posted

lightroom4

Lightroom 4.4  is now available as a Release Candidate  on Adobe Labs.   The ‘release candidate’ label indicates that this update is well tested but would benefit from additional community testing before it is distributed automatically to all of our customers.  The final release of Lightroom 4.4 may have additional corrections or camera support.

Bugs Corrected in the Lightroom 4.4 Release Candidate

The following bugs that were part the Lightroom 4 releases have been corrected. The team appreciates the very detailed feedback the community has provided on Lightroom 4 and we’re excited to correct a number of issues experienced by our customers. These issues have been FIXED:

  • The crop overlay tool resized incorrectly when used in conjunction with the “Constrain to Crop” checkbox in the Lens Correction panel
  • Background graphics were not correctly rendered within the Book Module
  • The supplied lens profile for the Sony RX-1 did not contain vignette information
  • Previews of photos in portrait orientation were blurry when viewed in the filmstrip in the Develop module. (Mac only)
  • Stack badges displayed the wrong count when creating new stack that included a preexisting stack.
  • The Filter scrollbar within the Library module was not rendering properly.
  • Auto-tone was not working properly when used in conjunction with the Exposure adjustment slider. (Win only)
  • The Black&White button was not creating a History state within the Develop module. (Win only)
  • RGB color readouts were specified in the Adobe RGB colorspace rather than the ProPhoto linear colorspace. This occurred when working in Soft Proofing within the Develop module.
  • Adding a page behaved inconsistently in the Book module depending on the method used to add a page.
  • The state of the “Remove Chromatic Aberrations” checkbox within the Lens Correction was not persistent between sessions of Lightroom.

Please provide feedback on your experience with the Lightroom 4.4 Release Candidate in our Feedback Portal (link – http://feedback.photoshop.com/photoshop_family)

New Camera Support in Lightroom 4.4 Release Candidates

  • Canon EOS 1D C
  • Casio Exilim EX-ZR700
  • Fujifilm X100s
  • Fujifilm X20
  • Hasselblad Lunar
  • Leica M
  • Nikon 1 V3
  • Nikon 1 S1
  • Pentax MX-1

Release Notes

Lightroom 4.4 RC includes a correction to the demosaic algorithms for Fujifilm cameras with the X-Trans sensor. This specifically impacts the following cameras:

  • Fujifilm X-Pro1
  • Fujifilm X-E1
  • Fujifilm X100S
  • Fujifilm X20

Camera Raw 7.4 and DNG Converter 7.4 Release Candidates are now available on Adobe Labs  This release includes bug fixes, new camera support, and new lens profiles.

New Camera Support in the Camera Raw 7.4 Release Candidate

  • Canon EOS 1D C
  • Casio Exilim EX-ZR700
  • Fujifilm X100s
  • Fujifilm X20
  • Hasselblad Lunar
  • Leica M
  • Nikon 1 V3
  • Nikon 1 S1
  • Pentax MX-1

New Lens Profile Support in the Camera Raw 7.4 Release Candidate

Lens Name

Lens Mount

Canon 24-70 f/4L IS

Canon

Canon EF 35mm f/2 IS USM

Canon

Nikon 1 NIKKOR 18.5mm f/1.8

Nikon

Nikon AF-S NIKKOR 70-200mm f/4G ED VR

Nikon

Sigma 18-250mm F3.5-6.3 DC MACRO HSM

Pentax, Sony

Sigma APO MACRO 180mm F2.8 EX DG OS HSM

Sony

Sigma 35mm F1.4 DG HSM A012

Canon, Nikon, Sigma

Sigma 17-70mm F2.8-4 DC MACRO OS HSM C013

Canon, Sigma

Sony E 10-18mm F4 OSS

Sony


These items have been FIXED in Camera Raw 7.4 Release Candidate:

  • The grayscale visualization associated with Noise Reduction Luminance was visible after mouse release. This occurred when positive Clarity was present.
  • The command/control + A “select all” keyboard shortcut did not select all photos.
  • Modifying the brush size using the Right-click + Drag method did not increase or decrease the brush size by the desired amount.
  • The crop overlay tool resized incorrectly when used in conjunction with the “Constrain to Crop” checkbox in the Lens Correction panel.
  • Hovering the mouse over a local adjustment pin would turn off the desired mask.
  • Horizontal artifacts occasionally appeared in DNG files.Improved interactive performance at intermediate zoom levels (e.g., 33% and 66%)

Release Notes

Camera Raw 7.4 RC includes a correction to the demosaic algorithms for Fujifilm cameras with the X-Trans sensor. This specifically impacts the following cameras:

  • Fujifilm X-Pro1
  • Fujifilm X-E1
  • Fujifilm X100S
  • Fujifilm X20

Thank You

How To Get Started with Adobe Creative Cloud – 10 Things Beginners Want to Know How To Do

Adobe_Creative_Cloud

In this episode of the Adobe Creative Suite Podcast Terry White shows you how to Get Started with the Adobe Creative Cloud – 10 Things Beginners Want To Know How To Do. Sign up, download your apps, access your cloud storage, sync, share and review files and more…

This video also completes my “How To Get Started with Adobe Creative Cloud For Designers and Photographers” See the rest of the videos here:

How to Get Started with Adobe Photoshop CS6

How To Get Started with Adobe Illustrator CS6

How To Get Started with Adobe InDesign CS6

How To Get Started with Adobe Lightroom 4

How To Get Started with Adobe Muse

Are you missing out on my Bonus Content?

See more of my Adobe Creative Suite Videos on my Adobe Creative Suite Podcast and get the App below. It features EXCLUSIVE CONTENT that no one else gets to see. This episode has a BONUS CLIP that is available only in the App! My iOS App is a Universal App for iPhone, iPad and iPod touch. I also have an Android version on the Amazon App Store:

Learn Adobe Creative Suite with Terry White - Wizzard Media


Your On Camera Flash Sucks Less With Lightscoop Deluxe

wpid11623-TLW4178_sm.jpg
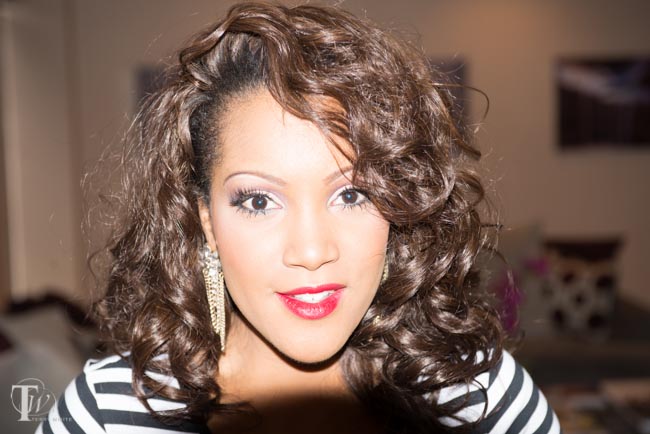
Shot taken with the pop up flash on my Nikon D600 complete with a harsh shadow off the lens hood.

Usually the only time I pop up the flash on my DSLR is to use it as a Commander to control and fire my off camera Nikon Speedlight. If you ever see me using it to light a subject you can almost bet that it was an emergency, there was no other choice and I’m hating life in that moment. There are two ways to combat the horrific effects of on camera flash. Either bounce it or diffuse it. When it comes to my speedlights I’m a “diffuse it” kinda guy. However, for the tiny popup flash built-in to most cameras, the options to diffuse them are less. This is probably why you never (or hardly ever) see pros using the pop-up flashes on their cameras. Heck, my Nikon D4 doesn’t even have one. They probably figured if you’re a D4 customer, you know better.

Professor Kobre’s Lightscoop Products Aim to Make your On Camera Flash Suck Less

LightScoopMini
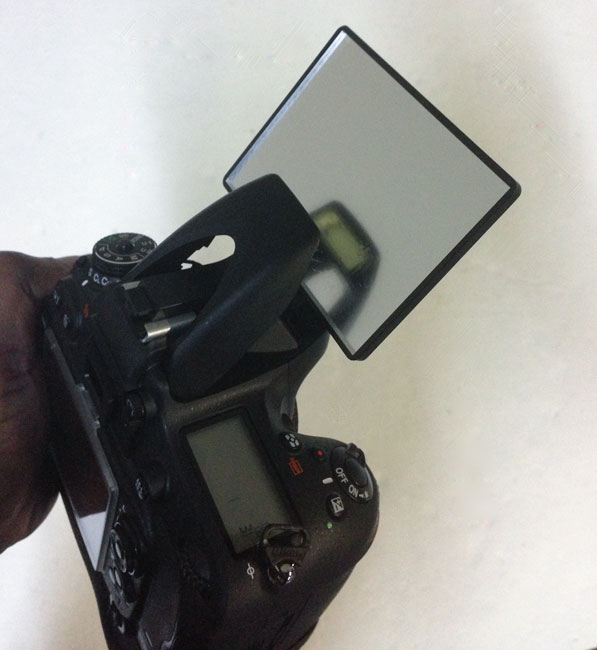
Nikon D600 Body with the Lightscoop Deluxe Attached

I reviewed their original Lightscoop way back in 2007. While it’s a great product, I rarely carried it because although it was small, it was still an odd shape that took up space in my bag and there just weren’t gonna be too many times that I’d be using it. Now they offer a Lightscoop Deluxe.

Continue reading “Your On Camera Flash Sucks Less With Lightscoop Deluxe”

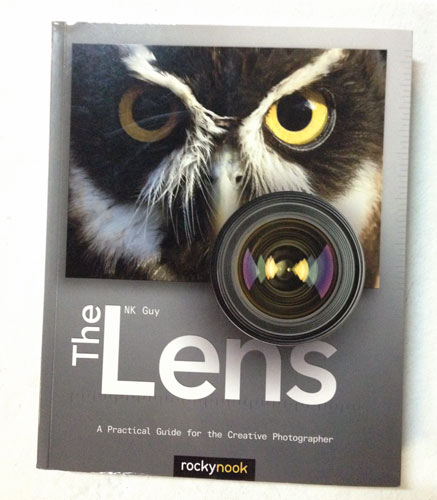
Review: The Lens by NK Guy

thelenscover

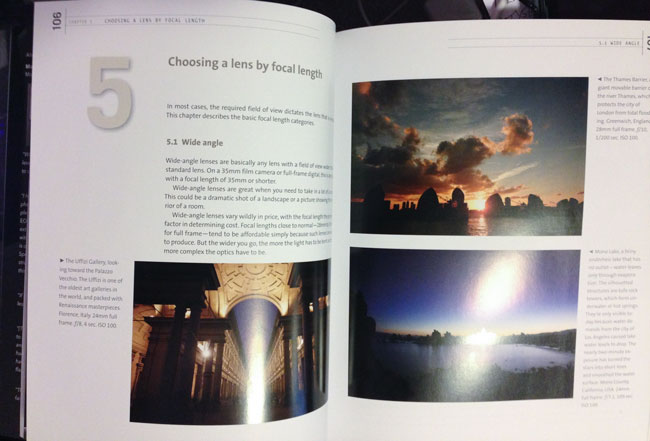
I’ve seen and read many books on digital photography. I’ve learned a lot about lighting, posing, setups, etc., but the one thing that I hadn’t seen before was a book that was all about lenses. “The Lens: A Practical Guide for the Creative Photographer” goes into great detail to answer the question “which lens should I buy?” Although I’m pretty set on the lenses I want/use on a day to day basis, that doesn’t mean that I always know which lens is the best to use for every situation. I go through trial and error sometimes. This book rocks when it comes to giving examples on not only which lenses to use in certain situations that may be obvious to some of the pros out there, but it gives examples of uses for lenses that you may not have thought about. I’m also guilty of using the same lenses for the same stuff that worked last time. This book gives me a refreshing look at what’s possible with the glass that I’ve invested in.

the_lens_telephoto

Whether you’re a pro photographer or you’re about to buy your first good lens, I recommend you take a look at “The Lens” by NK Guy. It’s available in print as well as Kindle format, which means that even though I enjoy the printed version I’ll be adding the Kindle version to my iPad to always have with me.

You can get it here.

the_Lens_choosing_focal_length

Why You Should Set Photoshop To Open JPEGs in Camera RAW

Photoshop_CS6_Extended

In this episode of the Adobe Creative Suite Podcast Terry White shows you How and Why you should set Photoshop’s Preference to open JPEGs in Adobe Camera RAW

Are you missing out on my Bonus Content?

See more of my Adobe Creative Suite Videos on my Adobe Creative Suite Podcast and get the App here. It features EXCLUSIVE CONTENT that no one else gets to see. This episode has a BONUS CLIP that is available only in the App! My iOS App is a Universal App for iPhone, iPad and iPod touch. I also have an Android version on the Amazon App Store:

Learn Adobe Creative Suite with Terry White - Wizzard Media


Guest Review by Jason Lykins: Sunbounce

Photo1

Photographers are an interesting bunch… We chase dreams, covet light, and are always in search of the next amazing piece of gear that we just can’t live without. A couple of months ago I was introduced to the Sunbounce line of light modifiers, specifically the Sunbounce Micro-Mini and the Bounce-Wall; both of which are now staples of my ever growing list of lighting tools. While I’m constantly looking for ways to make shaping light easier, faster, and better, I don’t know that it gets much better than the Sunbounce approach to reflectors. The Micro-Mini, Mini, Pro, and Big are some of the sturdiest, easiest to use that I’ve found; and when it comes to on camera flash modification, there is no better system or option than the bounce wall. If you’re an event photographer that is “running and gunning” at events (where there aren’t always walls or ceilings to bounce off of) the bounce wall is a godsend. If you’re a wedding photographer shooting reception photos, often times in dark halls with little to no bounce options you can’t go wrong with this system either. It gives you a constant, reliable source of bounce light no matter what your surroundings or what your subject. No matter what style of photography you do, if you need to reflect, bounce, or diffuse, Sunbounce has you covered.

Photo2

When I got my Sunbounce Micromini in the mail the first thing I noticed was the relative lightweight of it. For a reflector that is 2X3 feet wide and can withstand even the strongest of wind gusts, it’s very lightweight and not bothersome to carry all day long. It’s made of a lightweight aluminum frame that stretches the reflective material taught from side to side, end to end. It’s not quite as light as a traditional reflector but it is BY FAR the strongest, most robust reflector that I’ve ever used. Being made from a rigid aluminum frame, the Sunbounce Micromini will hold up in windy situations that would collapse traditional reflectors. As a professional, the piece of mind knowing that this won’t fail at the worst possible moment is huge to me! The reflective material comes in all of the traditional reflector colors; black, white, silver, gold, silver “zebra”, gold “zebra” etc. Just about anything that you could want. The cross bar is sturdy and easy to hold with one hand or two and can be easily positioned vertically or horizontally. Setup takes about a minute but the first time that assembled it, it took a little longer. They ship directions with it and you’ll want to use them the first time you assemble it. After that, you should be able to set the reflector up in a minute or less. I know what you’re thinking “a whole minute?! My other reflectors just spring to shape in 5 seconds”. This is true, it does take slightly longer to setup the Sunbounce than a traditional reflector, but that extra time is a good trade off for the extra rigity.

Photo3

Another area that these reflectors shine is versatility. From hand held, to lightstand mounted (as shown above) the Sunbounce can be positioned in many, many different locations and angles. I used a “Justin clamp” to position it in the above setup but a super clamp would work just as well if not better. Add in a super arm, or friction arm and the mounting possibilities are endless! Whether hand held, or lightstand mounted this reflector rocks! In an attempt to help users of small flash, or speed lights out they also added an optional flash bracket to allow photographers to use he Micromini as a source of bounce light. Attaching to the frame via a clamp the arm is extendable to 45cm to get proper distance between the light source and the reflective material. The flash bracket is the perfect accessory to the reflector kit.

Photo4
Jason Lykins


When it comes to event photography “run and gun” is the name of the game. Don’t confuse this with “spray and pray”. Run and gun means that you have to be light on your feet and very mobile. You usually don’t have the luxury of setting up lights, using big modifiers, or controlling the environment. As such, many event photographers rely on ceilings, walls, or some other source to bounce their light off of. They try to position themselves with the largest amount of bounce area around them that they can and go with it. Unfortunately there isn’t always a bounce source available. The other plaguing issue for event photographers is color. Sometimes you find a white wall or ceiling, but most of the time they have some sort of color to them. This is terrible for photographers because this means that our bounce light will take on the color of that wall or ceiling and give the subject a tint. Seeing a need Sunbounce decided “wouldn’t it be nice if you could create your own bounce surface, with the color temperature that you want”, and the Sunbounce Bounce-Wall was born. The bounce reflector itself is made of a plastic material coated in color corrected reflective material. Just like the Micromini the colors range from silver, white, gold, “zebra” and more! The frame of the Bounce-Wall is made of a hard composite material that is adjustable for the correct angle and light direction. The traditional angle of 45degrees and above is easily achieved almost every time with this reflector. The light source for the Bounce-Wall is any on camera TTL flash with a head that can be angled and turned. The bracket is not model specific so it is compatible with almost any brand of DSLR. While I’m not a huge event photographer (maybe 2-3 a year) I do a TON of weddings (34+ a year) and the Bounce-Wall is perfect for receptions because for all intents and purposes receptions are exactly the same thing shooting wise as events. So if you’re a wedding photographer, event photographer, or if you just plain like having every available option in your lighting arsenal, you should add a bounce wall to your lighting bag!

When it comes to my photo shoots, I usually have a time constraint whether it’s the client’s schedule, the wedding timeline, or some other unforeseen issue. I can’t afford to be wasting time with sub-par quality products and I certainly can’t spend my time worrying whether or not my products are going to fail on me. Sunbounce has, with the Bounce-Wall and the Sunbounce line of reflectors taken away the stresses of product quality, and made it easy for me to find a bounce source when there isn’t one already. The reflectors are top quality and the build is second to none. If you haven’t already done so, check out the Sunbounce line of products. I’m certain that they have something that fits your lighting style and needs.

Photographing Women: 1,000 Poses Book Review

photographingwomen1000poses

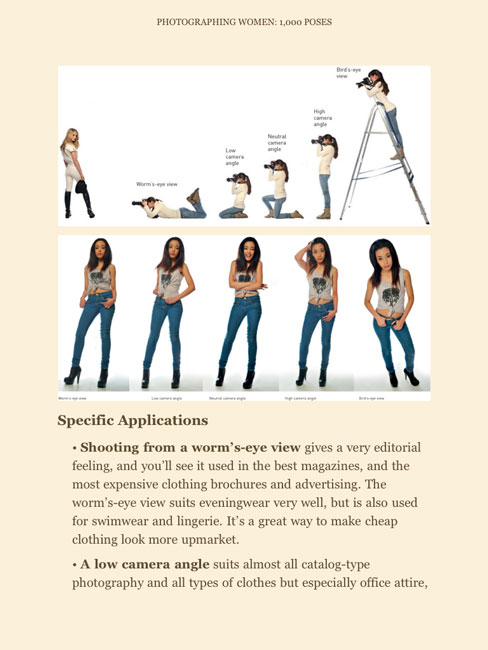
I do a lot of fashion and beauty photography and more often than not the subjects I photograph are women. I was intrigued by the title of this book: “Photographing Women: 1,000 Poses”. I figured it would be a good book to have around to get inspiration and to show a model various poses that I would like them to do. However, the book turned out to be much more than that. What I didn’t expect to find was a couple of very good chapters proceeding the poses that talked about shooting angles and lighting. I was immediately sucked in by not only the concepts but also the great job in providing the visuals. Eliot Siegel did a great job in not only talking about angles, but also showing an example of each one and how it impacts the way your subject looks. Once I got past the great info in the beginning of the book I was quite pleased with the 1,000 poses too. Great color photos showing and explaining the poses.

angles

I initially bought this book as a Kindle book to read on my iPad, but I liked it so much that I bought a hard cover copy to have in green room of my studio. If you photograph women, you definitely want this book!

You can order your copy here.

How To Get Started with Lightroom 4 – 10 Things Beginners Want To Know

lightroom4

In this episode of the Adobe Creative Suite Podcast Terry White How To Get Started With Lightroom 4 – 10 Things Beginners Want To Know How To Do.

Are you missing out on my Bonus Content?

See more of my Adobe Creative Suite Videos on my Adobe Creative Suite Podcast and get the App here. It features EXCLUSIVE CONTENT that no one else gets to see. This episode has a BONUS CLIP that is available only in the App! My iOS App is a Universal App for iPhone, iPad and iPod touch. I also have an Android version on the Amazon App Store:

Learn Adobe Creative Suite with Terry White - Wizzard Media

Review: Shooting Wirelessly with the Nikon D600 and WU-1b Module

WU-1b

I’ve been a fan of shooting wirelessly to my iPad since the early days when I got my Nikon D7000 using an Eye-Fi Pro X2 card. After that I configured my Nikon D4 and WT-5a module to shoot either wirelessly to my MacBook Pro or my iPad and now that I have a Nikon D600 (and loving it!) I was interested in seeing how the new Nikon WU-1b module works. The idea in all of these scenarios is to use the iPad or iPhone for review of what I’m shooting with my DSLR and sharing with email or social media of quick event photos.

The Nikon WU-1b is a narrowly focused solution

WirelessMobileAdapterUtility

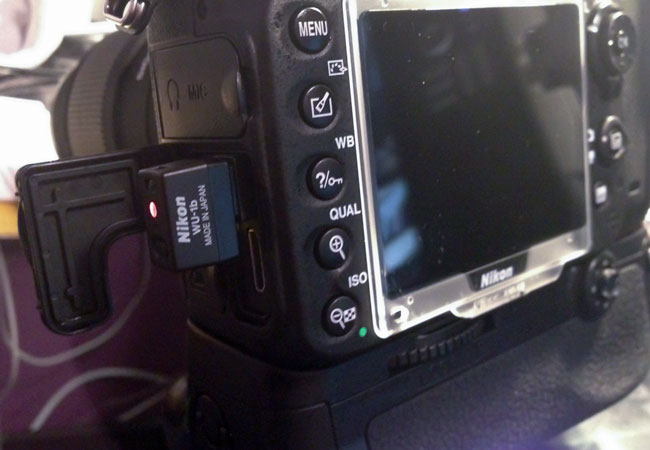
With the Eye-Fi and WT-5a module for the D4 you can wirelessly transmit your photos to a variety of Apps. However, the WU-1b seems to be narrowly focused by Nikon to shooting wirelessly to your iPhone or Android Smartphone. They provide a Free App (Wireless Mobile Adapter Utility) for both platforms (see my review of the iPhone version here). Once you download the App it’s pretty easy to get started. Just plug in the module into your D600’s USB port and turn your camera on. The WU-1b will start broadcasting its own WiFi hotspot. Connect to that hotspot via your smartphone and launch the App. Once you’re in the App you can either set it to wirelessly fire the shutter (with Live View on your smartphone) of your D600 and then transmit the image to your smartphone or you can switch the App to the mode that allows you to shoot normally with the camera and the images will be transferred to your smartphone as you take them. Whether you shoot in RAW or JPG the module will send JPGs to your smartphone. I normally shoot RAW to the 1st card and Basic JPG to the 2nd card (my Eye-Fi) card. When I’m in this RAW+JPG mode the WU-1b seems to send the smaller basic JPG. However, when I’m in just RAW mode it sends a larger full-sized JPG and of course that takes a lot longer. Speaking of time, the smaller JPG (about 500kb) takes about 5 seconds to show up on my iPhone. The larger JPG (about 1.6-2MB) takes about 10-15 seconds to show up on my iPhone.

Wireless Mobile Adapter Utility - Nikon Corporation

It works as advertised, but…

WirelessMobileAdapterUtility-transfer

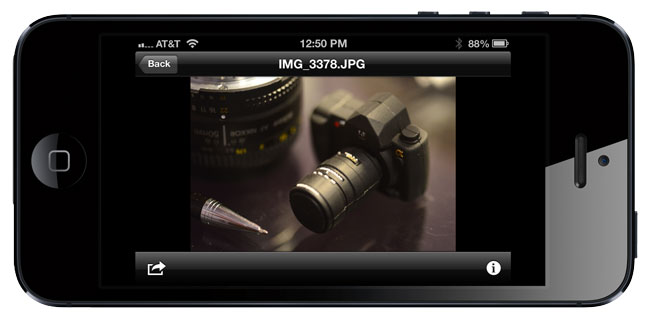
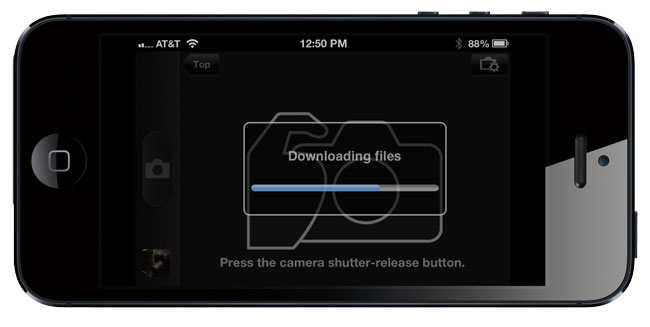
While the WU-1b works as intended it really falls short in the review department. Unlike other tethering solutions you don’t actually see the images as they come in to their App. Instead you see a progress bar and once the images are there you tap to review them. Also while the camera settings are displayed, there is no way to change them in the App. Look at this is merely a transfer utility and remote shutter. Also there is no native iPad support. Yes the app works on an iPad, but in the smaller phone size.

Shuttersnitch saves the day AGAIN!

shuttersnitch-WU-1b_iPad

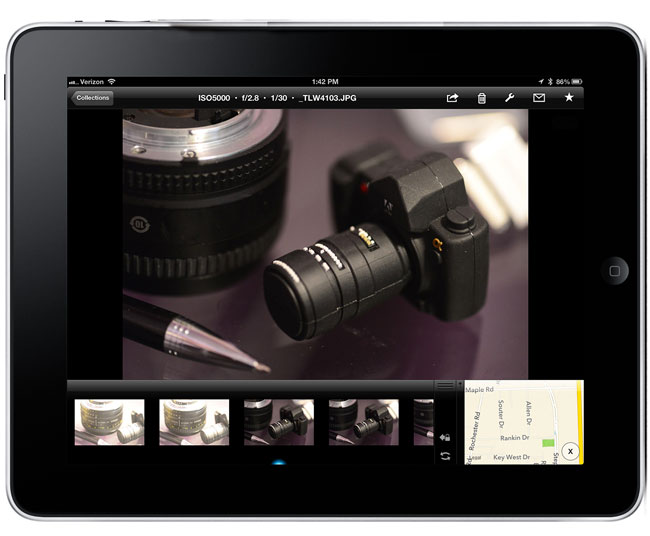
Shuttersnitch is the App I use for All my wireless tethering to iPad needs. It works with the Eye-Fi cards and it works with the Nikon WT-5a module. The good news is that it also works with the WU-1b module. Unlike the bear bones Nikon Utility, Shuttersnitch gives you a great way to review your images as you take them, star rate them, geotag them and share them via email, social media and cloud storage such as Dropbox or any FTP/WebDAV location. It’s a professional App! I remembered that a recent update of the App mentioned support of the WU-1b module and sure nuff it works great! I had to simply turn on support for the module in the settings and just start shooting. The images came in as usual.

Shuttersnitch for iPhone and iPad

ShutterSnitch - 2ndNature


The Bottom Line

For the price, there’s really no reason not to get the WU-1b module if you have a Nikon D600. It provides a pretty painless way to get images from your Nikon D600 wirelessly to your smartphone and it can work anywhere since it creates its own ad-hoc network. Add the Shuttersnitch App and you’ll be even happier with it. Oh yeah, one more thing: Nikon can you please explain why the Nikon WT-5a (for the Nikon D4) costs $500 more than the WU-1b (for the Nikon D600)? Is there really $500 more technology in the WT-5a? I’m thinking not! Yes I see the price is coming down on it from the outrageous $877 that I originally paid, but really? c-mon!