iPhone App of the Week – Air Mouse Pro

airmouselogo

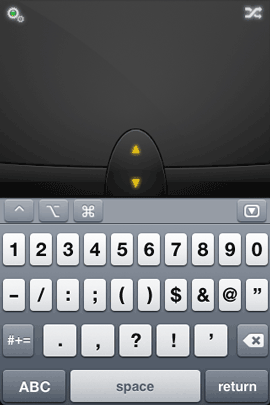
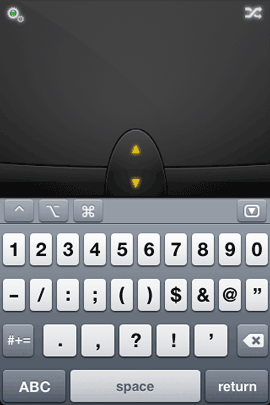
I use a lot of different iPhone apps and some come and go from my phone. It’s not that often that I find an iPhone app that does EVERYTHING I’d want it to and works exactly the way I’d want it to. However, Air Mouse Pro is just such an app! I had a need for an app that would allow me to control my Mac mini. I would have been happy with a simple trackpad and keyboard. However, Air Mouse Pro does things I wouldn’t have even thought of. For one, you get access to more than one keyboard. There’s the basic keyboard that allows you type the alphabet.

airmouse31

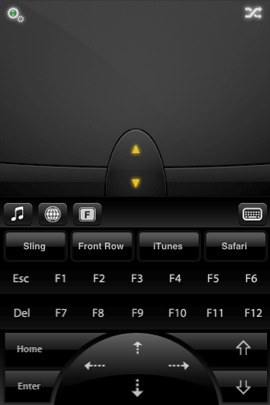
They were also smart enough to include a keyboard with all the function and special keys that we take for granted.

airmouse11

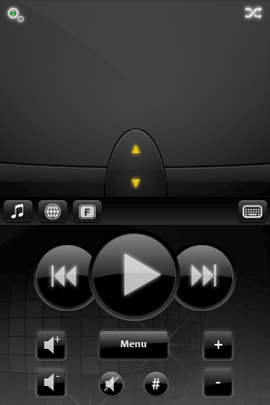
The also included a media keyboard with play, rewind, forward, volume, etc. keys. This is great for control Front Row on the Mac or a Media Center PC.

airmouse2

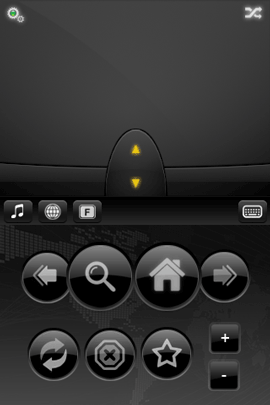
Lastly they included a web browser friendly keyboard that has nice big browser navigation buttons. 

airmouse4

The trackpad is full featured too, completely configurable and tappable. Even when the keyboard is up you can still use the entire screen as the trackpad. There are onscreen left and right buttons for clicking and even a scroll wheel in the middle. These guys really thought of everything. 

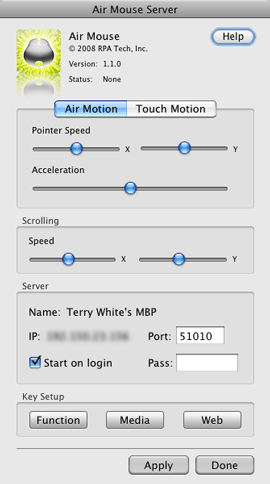
The app works via Wi-Fi. So you have to install the desktop version of Air Mouse on your Mac or PC. You also use this app the set up the special media keys. For example, I set up a key to launch SlingPlayer, Front Row, iTunes and Safari.

airmouseserver

Air Mouse Pro also takes advantage of the built-in accelerometer. so when you rotate the iPhone on the side the trackpad/keyboard goes wide. Also if you shake the iPhone up the keyboard goes away or down to bring it back. 

Air Mouse Pro is $5.99, works on the iPhone or iPod touch and available from the App Store here.


Check out this GREAT video on how the app works:

[flv:http://www.mobileairmouse.com/newsite/Demo.flv 470 320]

Continuing the theme of low cost entertainment – 99¢ iTunes Movie Rentals

99centmovierentals

Seems like you guys enjoy posts about ways of cutting costs on your entertainment bills and in this tough economy I can certainly understand why. Well there’s yet another way to save some $$ and that is to take advantage of the 99¢ iTunes movie rentals. Apple typically charges $2.99 and up for movie rentals via iTunes. However, each week they have 99¢ movie specials. If you weren’t paying close attention you would never know these bargains existed as they aren’t always prominently displayed on the iTunes store. However, there is a website (www.99rental.com) complete with an RSS feed that will alert you each week as to which movies are being showcased. Granted, these movies are not new releases and in many cases they are probably movies you’ve already seen, but hey they’re only 99¢ and if they were classics that you liked or movies you hadn’t seen yet it’s a win win situation. 

You can also go to the top secret 99¢ movie rental page on iTunes here.

My streaming problem has been solved by YOU!

mm-minimount

Last week I put my blog readers to the task of giving me a way to stream content from my DVR to another TV wirelessly. It didn’t take long for the responses to start streaming in. I’m happy to report that not only did you solve my problem, but you blew past my expectations with the stuff you guys came up with. It was actually the second response by “Ivan” that really turned the tables. Ivan suggested something that I hadn’t even considered. He suggested replacing my Apple TV with a Mac mini.

“I’d suggest replacing the AppleTV with a MacMini :).

Has WiFi and could technically stream whatever you want, at least I think. Add Boxee to the mix, and you’ve got ABC, Hulu, Joost, local movies, local tv shows and so on on your TV.” – Ivan

I was so stuck on adding another box to the mix to do the one thing that I was missing, that I never considered replacing the existing box I was using with one that was more capable! At first glance at Ivan’s comment, I dismissed it. I thought that Ivan was missing the point. He talked about streaming shows from the internet. Well that wasn’t the problem. The TV already has a CableCARD in it and I get live TV all day long. However, when I gave it a second thought the lightbulb came on! I already have a Slingbox Pro connected to one of my DVRs (the Comcast box in my office). I use the SlingPlayer on my MacBook Pro when I’m on the road to watch stuff recorded to my DVR. It was at that moment that I realized that if I used a Mac mini instead of an Apple TV, I’d be able to install the SlingPlayer app on it and stream content from my DVR to the other TV out in my pool/workout area. That was it! That was the missing piece of the puzzle. It was so simple and the beauty of it was that it wasn’t going to cost me a dime! That’s right, I already had a Mac mini just sitting in my home theater going to waste. 


Mac mini vs. Apple TV – Smackdown!

It’s no secret that I’m a fan of Apple TV! I like the concept of a box that allows me to wireless stream my content (photos, movies, music, podcasts, etc.) from my Mac to my TV with a very slick interface and simple remote. Also now that it has movie rentals, it’s even more useful. However, the downside of Apple TV is that that’s all it does. If you want other content, you’re pretty much out of luck. Now I can take shows recorded on my TiVo HD, transfer them to my Mac (thanks to Toast) and convert them into an Apple TV/iPod format and watch them on my Apple TV. The problem is that the process takes 4-6 weeks to complete. OK, I’m exaggerating. However, it does take a long time depending on the length of the show and whether or not it’s in HD or not. This means that you really have to plan ahead. If I recorded 30 Rock on my TiVo HD and plan to watch it later/the next day out in the other room, I’d have to remember to start the transfer before I go to bed that night. Then when I wake up, I’d have to start the conversion process. For a 30 minute HD show, this could easily take a couple of hours in total. Once it’s converted, then I’d still have to transfer it to iTunes so that it would be available to watch on the Apple TV. It’s certainly doable, but that’s a lot of planning ahead. 

Since the Mac mini is a computer, that eliminates a lot of these steps. For one, I could just install the Toast/TiVo Transfer apps right on the Mac mini and after the show is transfered I could just watch it! No conversions necessary. However, that’s still going to take time as the TiVo transfers take longer than real-time to happen. So a 30 minute show could easily take an hour or longer to transfer. That’s where Slingbox and the SlingPlayer come in. With the Slingbox connected to my office DVR (the one that’s used the least), I can record all my favorite shows and then run the SlingPlayer app on the Mac mini to stream those recordings wirelessly and full screen.


My original Mac mini

I bought the first Mac mini, which came out in 2005 (wow time flies!). I originally bought it for much of what we’re talking about today. I bought it put in my home theater so that I could watch my iTunes content (there was no Apple TV back then). I also wanted the ability to run Delicious Library (my DVD cataloging app) on the big screen. This Mac mini is a 1.25 GHz G4 (a dinosaur by today’s standards). It was the base model and I upgraded it to 1GB of RAM. Once the Apple TV came out in 2007, the Mac mini just sat there for the most part. Most times I would forget it was even there until happened to look over and see. In my home theater, the Apple TV does everything I need. I already have all the other boxes I need in that room doing everything else. So the Apple TV was a perfect fit. 

mm-frontrow

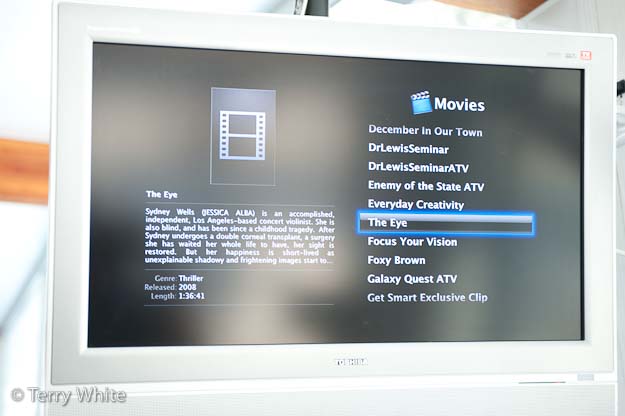
So when Ivan proposed using a Mac mini, I thought – “well gee, I already have one of those. Let’s give it a shot!” My initial concern was that it was going to be too slow to stream. I was concerned that it only had 802.11g wireless AND after I hooked it up I realized that this model didn’t have support for the Apple Remote. This meant that Front Row (Apple’s original Apple TV like interface that is built-in to the Mac OS) was going to be a problem. I then remembered that Apple included Front Row in Leopard. The first thing I did once I hooked it up was install Mac OS X 10.5 Leopard (with all the current updates). I remembered that even if you don’t have an Apple Remote you can still get into Front Row by hitting Command-ESC. It worked, but now that meant that I’d need a keyboard handy. I do have the newest Apple Wireless keyboard which is nice and small. I also still had my Bluetooth Trackball. While this was all fine, I really wanted ONE controller. A keyboard with an integrated pointing device.
airmouse1    airmouse3  

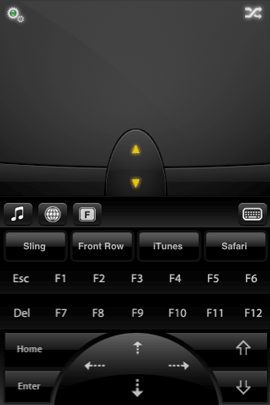
That’s when I remembered “Matt’s” comment about an iPhone/iPod touch app called Air Mouse Pro. PERFECT! This app was even better than I had hoped. It’s a trackpad and keyboard all in one and it even has a Front Row friendly mode with one button access to Front Row. This eliminates the need for the Apple Remote, separate keyboard and mouse. Air Mouse Pro totally rocks! It will definitely be my iPhone App of the Week! 🙂


What about TV resolution?

This is one advantage the Apple TV has over using a Mac mini. Out of the box the Apple TV already has all the right ports on the back. It has HDMI, Component, Optical and RCA audio jacks. Not only does it have the right connections, but it’s also geared to be connected to a TV at the various TV resolutions including 720p, 1080i and 1080p. Luckily I already had the right cables. I have a DVI to HDMI cable. I also had the necessary 3.5mm to stereo RCA cable for audio. When I connected the Mac mini to the TV and booted it, it detected the resolution and came right up. The problem was that the menu bar and dock were cut off. This is due to “overscan”! The Apple TV doesn’t suffer this problem because Apple was very careful to design the menus and interface so that they don’t go to the edge of the screen. On the Mac minis that came out later (like all the intel models), Apple added an Overscan option in the display preferences. This will slightly shrink the screen so that you can see the edges, but it will also potentially introduce black bars all the way around. No real way around this.
mm-fullscreen 

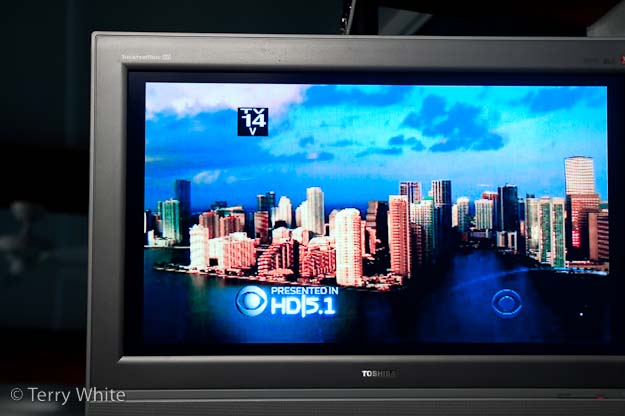
CSI Miami streaming from my DVR in the SlingPlayer running full screen at 720p


Since I don’t have the new Mac mini, I used a shareware app called SwitchResX. This app allows you to have custom resolutions and more importantly for me it also offers the overscan correction I needed. Once I turned that option on, I could see everything.


I shall call him Mini mount

mm_minimount2

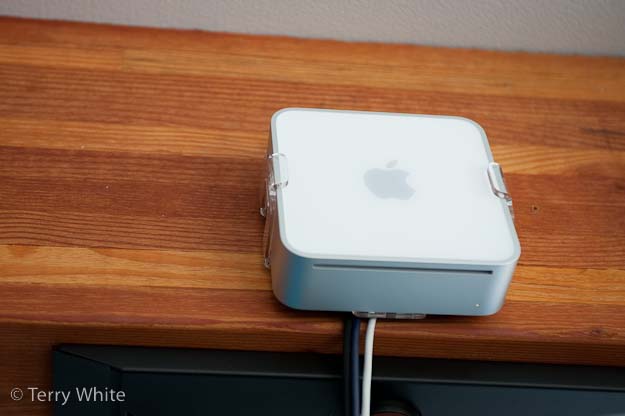
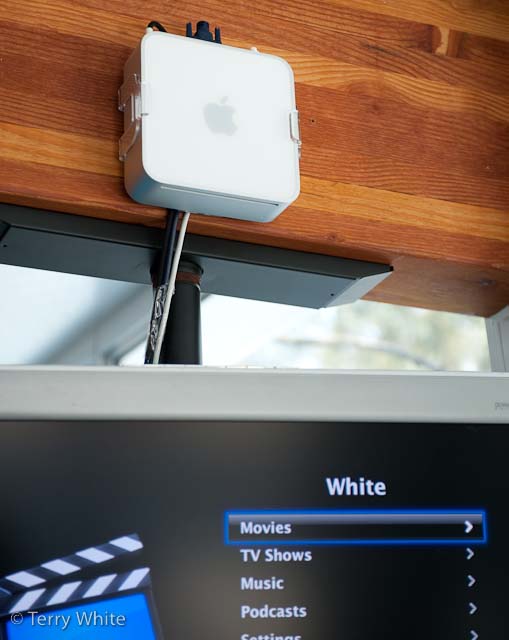
The good folks over at H-squared wanted to help out so they sent me their Mini mount which allows you to mount your Mac mini on the wall. This was perfect for my set up as my TV is suspended from the ceiling and there is no where for the Mac mini to sit. In case you were wondering what became of my Apple TV? I moved it to my office and used H-squared’s tvTray to mount it on the wall as well. I love the LED glow (now standard on the tvTray and optional for the Mini mount).
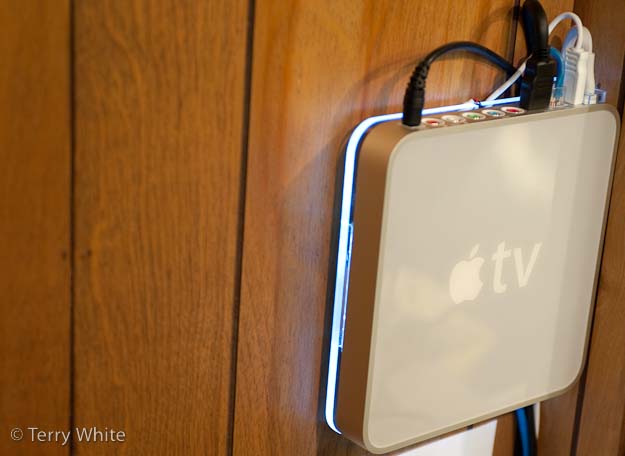
mm-appletv

I even used the very cool MultiLevel iPhone app to make sure the mounts were level on the wall 🙂 Not only was H-squared very very helpful to my cause, they even want to offer all of you a discount on their products. You have from now to the end of February to save 15% off their stuff. Just use the code, wait for it………… “TERRYROCKS” at checkout.


My Gear

One of the comments I got requested that I post the actual components of my final solution. So here they are:

  • Toshiba 27″ LCD HDTV with built-in DVD player and CableCARD slot – this TV was discontinued ages ago. I bought mine on eBay because it was only model I could find at the time that had both a CableCARD slot and built-in DVD player.
  • Mac mini – I have the original model which is 4  years old. The new ones are faster and have an Apple Remote.
  • Apple Wireless Keyboard – it’s small and bluetooth wireless.
  • Bluetooth Trackball – I’m not crazy about this as it takes several click to get it to reconnect after a reboot
  • Air Mouse Pro – Freakin’ AWESOME iPhone app to control it all!
  • Slingbox Pro – connected to the crappy Comcast DVR in my office (see my review here). Wait? Why is my Slingbox connected to your Comcast DVR (which sucks) instead of my TiVo HD? Good question! I connected it to least used DVR in the house because when you’re watching your DVR via the Slingbox, you’re actually controlling that DVR, changing channels, etc. I didn’t want to interrupt any other family member’s viewing. So the Comcast Motorola DVR is the one that gets the least use 🙂
  • SlingPlayer  for Mac – a free download
  • Mini mount – Mounts the Mac mini neatly on the wall (get 15% off with the code “TERRYROCKS”)
  • SwitchResX – because I have the original Mac mini I need this to correct for overscan issues on the TV’s resolution
  • DVI to HDMI Cable – The Mac mini has a built-in DVI port. Most newer TV’s have HDMI. So you’ll need a cable or adapter
  • Audio Cable – Although I used a Monster cable, any old Radio Shack cable will work just fine and will be much cheaper.


The Bottom Line

mm-comcastremote

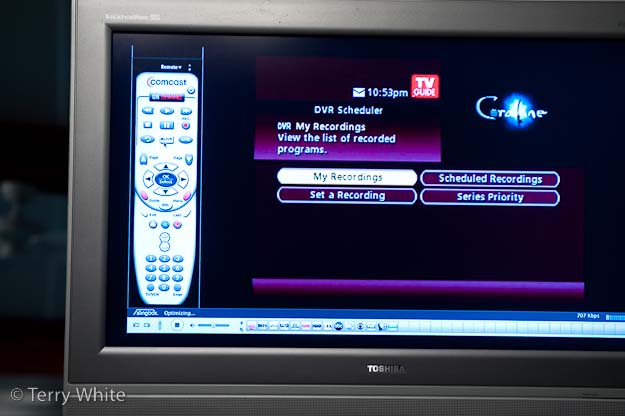
SlingPlayer running on the Mac mini with an onscreen remote that looks just like the physical Comcast remote for my DVR.


The Mac mini was a perfect fit for my needs in this situation! Granted it costs twice as much as an Apple TV, but it has more than twice the capabilities. If Apple were to ever build-in a Blu-ray player, it would be the ultimate set top box/computer. Now I’m only scratching the surface here because I really only needed it to do the one thing and that is allow me to stream my DVR content over to another TV. However, because the Mac mini is a computer, it can do so much more. At a minimum you could also surf the net as needed. You can also stream TV content from sites like hulu.com and although I haven’t yet played with Boxee, it looks very promising. It doesn’t stop there! Remember Netflix streaming is now on the Mac. So you could stream anyone of up to 12,000 movies. You could also turn it into a DVR as well with products like EyeTV. Although it doesn’t have a built-in Blu-ray player, it does have a DVD drive in it. This means that it can playback all your standard DVDs and Netflix rentals too. So the Mac mini can just about do it all.

Once again, THANK YOU to all my blog readers and especially those that offered up the very cool solutions that made this a reality!

Can you get by without Cable/Satellite TV?

abc

Well of course the answer is YES! I grew up with a father who thought paying for TV was the most ridiculous thing he had ever heard of. So needless to say, if it wasn’t on the major networks and on at a time I could watch it, I didn’t see it. Maybe that explains my addiction to cable now. Although it seems that I still (for the most part) only watch the shows that are on the major networks, I couldn’t dream of giving up my cable TV (ie “the pipe”). I don’t even think about it anymore. My TiVo HD is all set with Season Passes to my favorite shows and I watch them when I have time to without missing a beat. But what about the costs?


How much do you spend each month on Cable/Satellite TV?

My Comcast Cable bill is nothing to sneeze at! I have the digital/HD package with HBO and I would swear that I could probably have another small car for what I pay them each month. It’s worse! I also have DirecTV in my kid’s rooms. I can certainly consolidate and give up DirecTV, but I just haven’t gotten around to it. That’s another, albeit smaller bill.


What about the internet?

With almost everything being streamed over the internet these days, do we really need to “pay” for TV? If you live in a relatively large metro area, chances are you can pick up your HD signals through the air. So the only thing you’d be paying for are the premium channels. Isn’t a lot of that content being streamed these days anyway? For example, check out Hulu.com. It also seems like the major networks are also broadcasting their shows for free via their websites. If all else fails, you might be better off just buying a season of your favorite show on iTunes. Two of my favorite shows are 24 and LOST. To buy both seasons in HD on iTunes would cost $118.00 (keep in mind that these shows are streamed for free on their respective websites with commercials). That’s cheaper than one month’s cable bill for me.

This ABC news report shows how a family completely cut their cable bill ($100/month) and went to just broadcast and internet only TV. There are also several computer gadgets out there that will let you record shows and watch them later just like your physical DVR. I’ve experimented with EyeTV and it works as advertised. I plugged in a basic cable line (it can work with an antenna too) and after it was setup, I had it record a show that came on later that day. Once the show was there, I was even able to do basic editing like removing the commercials and from there I was able to either watch it on my computer or move it over to my iPod or Apple TV to watch on the big screen. Sure there is extra work involved when you don’t want to watch it on your computer or when you don’t have a computer connected to your TV, but it’s a lot cheaper to do it this way.


Let’s not forget Netflix

I had never seen an episode of the Sopranos while it was on TV. However, I did watch the first 5 seasons on DVD. I loved the show, just never got into when it was airing. With Netflix I was able to watch all of them as quickly as I wanted with no commercials of course. Since Netflix charges a flat rate, all you can eat subscription price, you can watch as many TV shows on DVD as you have time for. The cost will be the same. Same goes for Farscape. I had never watched a single episode of this show when it was on the air. A friend loaned me the complete series on DVD. So even if you like a show that’s on TV, that doesn’t mean you have to watch it on broadcast TV. There are several advantages to renting your favorite shows on DVD once the season is over on TV. The biggest advantages are you don’t have to worry about commercials and you don’t have to wait week to week to see what happens next?


This is all good, but I need the big screen

While this cost cutting stuff is all good, let’s face it, we want it all on the big screen in HD! Sitting in front of my computer watching a TV show is not my idea of a good time. I do it when on the road, but that’s about it. I have a sizable investment in large screens around here and I want to see my favorite content in all of its HD glory. So what’s the answer? Apple has the right idea for the most part with Apple TV. However, it’s just not enough! I couldn’t get by with just Apple TV alone. There is no streaming from the websites and it’s a pay per view model (when will you go to a subscription option Apple? When?). So a better option is to have it all is to probably hook up a computer directly to your large screen TV. There are several caveats to this, not the least being the size of the computer, connections, etc. I’ll be covering my switch to the Mac mini soon.


The Bottom Line

I’m not quite ready to cut my cable line just yet, but if you’re constantly being frustrated by the ever increasing cable and satellite TV costs, this may be a way out. I could at a minimum give up HBO. There’s just nothing left on that network that I watch. Well there is “Big Love”, but I could live without that 🙂

Explore your options! There are plenty of them in this competitive world we live in.

iPhone App of the Week – iShoot

ishoot

I’ve been playing with more and more cool apps lately. However, this week’s choice is iShoot because I’m addicted to it. iShoot is a tank battle game. It’s certainly not my first tank battle game. Before this I was playing CannonGame. What I really like about iShoot is that there is more strategy that has to go into the game play. You start off with a budget of $15,000. With this money, you buy the ammunition for your tank for the battle. You can either buy expensive weapons that do more damage, but run out quickly or less expensive weapons that don’t do as much damage, but cost less so you’ll have more of them. Nothing feels worse than blowing your entire budget on the Vulcan Cannon only to miss the target completely. The more games you win, the more money you will have to buy weapons. Also if you don’t use a weapon during a round, you get to keep it for the next round.

ishoot00

You can play against the computer with one or more computer opponents or against other users (passing the iPhone back and forth). The game play takes place against photo realistic backgrounds. While you do have the ability to move your tank back and forwards, it gets difficult or impossible if you’re on a hill. One of my favorite tactics is the use the Dirt Ball or Dirt Wall to completely bury an opponent. This way they have to continue to use up their own ammunition to blast their way out sometimes doing themselves in in the process.

ishoot2


ishoot4

iShoot goes for $2.99 and is compatible with the iPhone or iPod touch. There is also a FREE iShoot Lite version. The free version of iShoot has fewer weapons (6 out of 25), no photorealistic landscapes, and no tank driving. It is otherwise fully featured. You can download iShoot or iShoot Lite from the App Store. Here’s to another app to suck up some of your valuable time 🙂

AirCurve, it sounds better than you’d think

aircurve_3


I have to admit that when I saw the AirCurve, I was a little skeptical. I received it as a gift for a class I gave and it took me days to even get motivated to give it a try. I just didn’t believe that simply amplifying the iPhone’s built-in speaker would be good enough. I finally decided to give it a try and I couldn’t believe it. It not only worked as advertised by amplifying the iPhone’s built-in speaker by 10 decibels, but it actually sounded decent. No, it didn’t sound as good as a good pair of speakers, but it definitely sounded good enough for use on the road in a hotel room. 

aircurve

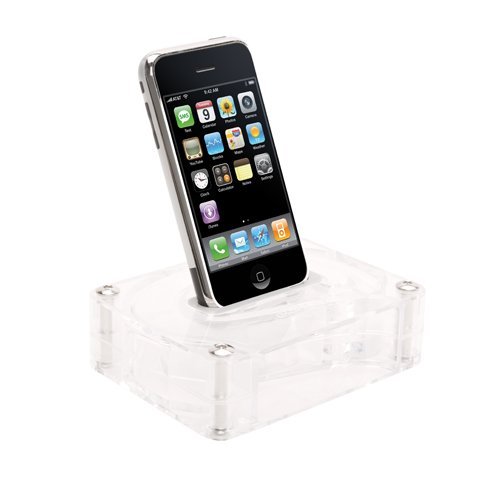
The AirCurve doesn’t have any electrical or moving parts and therefore requires no power. The AirCurve is designed to amplify your iPhone’s built-in speaker acoustically. It works with both the original iPhone and the iPhone 3g (comes with custom inserts for both models). They even designed it so that you can use your existing sync cable for power or docking with your computer while the iPhone sits in the AirCurve. I also like it because it’s well built, stylish and not flimsy. So it should travel well in a suitcase.

I also gave it a try using the iPhone’s speaker phone while it sat in the AirCurve. It worked fine. When I received a call, the music faded. I answered the call and pressed the speaker button. The person on the other end had no problem hearing me and of course I had no problem hearing them either because of the amplification.


The Bottom Line

The AirCurve works as advertised, no question about that. If you’re an audiophile or someone who likes bass, you’ll probably be a little underwhelmed. For everyone else, this is a great low cost solution for amplifying your iPhone’s speaker. Although the second generation iPod touch does come with an external speaker, it’s not as good as the one on the iPhone so it looks like Griffin didn’t bother making an insert for iPod touch users. The AirCurve retails for $19.99. Amazon has it for $13.33. At that price it’s a no-brainer.

V-MODA Vibe Duo vs. Bose in-ear headphones

v-moda

Last week I did a review of the NEW Apple in-ear headphones for the iPod. Today we’re going to move up a little in price and I’m going to compare two $99 in-ear headphones. I have used both of these headsets quite a bit, but in different places. I travel with the V-MODA Vibe Duos. They are my fall back earbuds. I like them because the sound is great, comfort is good and they also have an integrated mic and controls for the iPhone. This is why I travel with them. I use them a lot for handsfree calls in noisy places like airports. The V-MODA Vibe Duos come in 3 colors: Nero (black), Chrome and GumetalRouge (red).

bose

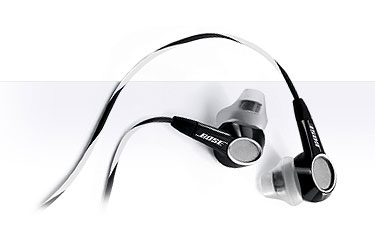
I use the Bose in-ear headphones mostly at home. They also sound good and the small cushions feel good for my ears. Also because they don’t have an integrated mic, I have no use for them with my iPhone. Although these are “Bose” headphones, I don’t really perform any better or worse than the Apple or V-MODAs. Don’t get me wrong, they do sound good, just not better. Because of the bigger ear cushion, they do block out more noise than the V-MODAs. My only real complaint with these is that the ear cushions tend to fall off too easily. As a matter of fact, I lost one because it came off and I couldn’t find it. So I had to order a replacement set. Bose sells the replacements (2 pairs) for $6.99.


The Bottom Line

My buying advice is that can’t go wrong with either of these. Both of these sound good for the $99 price. If you’re going to use them with an iPhone, then the V-MODA Vibe Duo are hands down the best choice. Amazon has the V-MODA Vibe Duo’s for $83.95. Amazon has the Bose in-ear headphones for $99.95.

iPhone App of the Week – WootWatch

wootwatch

Woot.com is a long standing source for some really good deals. The way it works is that they post one deal a day. That’s it! When that item is sold out, it’s over for that day. The next day there will be another deal. Although I love to check and see what’s the “Woot of the day”, I don’t always remember to check. While I can go to a Woot.com bookmark in Safari, it’s even cooler to go to a native Woot app. 


WootWatch works great!

wootwatch1

This app is very well designed and does exactly what you would expect it to do (for the most part). When you launch the app, it checks Woot.com for the latest deal. It displays the deal and detailed information about it. You can also see the deals from sellout.woot, shirt.woot, and wine.woot.

There is one thing I would have expected though. I actually tried to buy something via the WootWatch app and it took me to Safari (web browser) to make the purchase. While there’s nothing actually wrong with that, the Woot.com site asks for your user name and password which I could not remember. By the time I got home, I completely forgot about the deal. So I missed out on this HD camcorder. One thing I like about 3rd party iPhone apps vs websites and web apps is that they CAN save your login info and password. It would have been great if this info could have been stored in the WootWatch app. Other than that, I really like this app and it helps me to not miss out on some good deals.

wootwatch2

The WootWatch app is FREE and works on the iPhone and iPod touch. You can get it here from the App Store.

Apple’s NEW In-Ear Headphones with Remote and Mic

appleinear

Although I’ve never really been a fan of in-ear headphones, I’ve been using them more and more when I travel. So I’ve been experimenting with many different models. Over the next few days, I’ll be reviewing the various ones that I’ve tested. I’m going to start at (believe it or not) the low end of the price range for the ones that I’ve been using. It’s rare that Apple is at the low end of a price range. However, their new $79 In-Ear Headphones are actually the lowest cost ones I’ve tried recently. The others start at $99 and go up from there. 


Why I usually don’t like in-ear headphones

The reason that I haven’t liked in-ear headphones in the past is because quite frankly they hurt my ears. The older models were supposedly one size fits all. Remember the original iPod earbuds? They sucked so badly that I couldn’t stand to have them in my ears for more than a few minutes at a time. Apple has been refining them over the years and the latest ones aren’t as bad. However, the higher end models including their own new in-ear headphones, usually include 3 different sized (small, medium and large) cushions. I usually find either the small or the medium ones to be the most comfortable. With the new Apple ones, the small and medium ones feel about the same. The medium ones are probably best for me to isolate external noise.


What they got right

icon-controlApple spent some time on these and they are probably the best ear-phones they’ve ever produced (not the best I’ve used). They are much more comfortable than any other previous attempt. The sound quality is decent (not stellar). Beyond the basics, you also get an integrated mic and remote control. The remote allows you to control the volume (on the iPod nano (4th generation), iPod classic (120GB), and iPod touch (2nd generation)). You cannot control the volume on previous iPod models or the iPhone. Since I’ll be using these with an iPhone more than an iPod, I was really interested to see what worked and what didn’t. If you’re an iPhone user, these will control everything just like the supplied iPhone earbuds, except for the volume (which the supplied earbuds don’t control either). So you can play, pause advance tracks when the iPod app is running. You can answer calls and use the integrated mic for handsfree communication. So these do make a great replacement for the iPhone earbuds. 


What could be better

I like bass in my music, so I would like to see a little more bass in these. However, they do sound pretty good as is. The other thing I was stunned by was that the volume control didn’t work on the iPhone. After all, it’s not like they are from a different company. It’s Apple. You would think they would be able to make the iPhone/in-ear headphones work together. It’s not the end of the world, just puzzling. 


The Bottom Line

For $79 you get a better, more comfortable set of earbuds than the ones that originally shipped with your iPod or iPhone. If you’re an iPod touch 2nd generation user, you stand to gain the most as you’ll be able to use all the features including the integrated mic for recording into third party apps. The iPod touch doesn’t have a built-in mic, so this headset is a plus. I have other headphones that cost more and sound better. However, I have not tried any other ones in the $79 price range that are better. So for the money, these are the best for iPod and iPhone users. You can get them here for $79.

EOS Multi-room wireless iPod Speaker System


core_black

I had a very specific need to be able to hear the music coming from my iPod in 3 rooms at my photography studio. So I set out to find the best solution without spending a fortune. At home my solution is to use the AirTunes technology built-in to the AirPort Express and Apple TV units. However, that solution was overkill for my studio and more than I wanted to spend there. Plus AirTunes is for your computer/Apple TV and not your iPod. 


A quick Google search lead me to EOS


The EOS system was EXACTLY what I was looking for! EOS is a multi-room wireless speaker system for your iPod. The base unit resembles all the other iPod speaker systems out there where the iPod docks in the middle and you have stereo speakers on the sides. However, the EOS base unit has a built-in antenna that can broadcast the music wirelessly to up to 4 additional stereo speakers (5 rooms total). The base unit ships with one wireless stereo speaker. So out of the box you get a two room system. I wanted three rooms, so I ordered one additional speaker. The system doesn’t rely on wi-fi or any other network. It has it’s on 2.4GHz wireless setup. EOS advertises a range of up to 150′ feet. Think of it as a cordless phone like speaker system. So I’m sure the 150′ is under best case scenarios. Real world range is probably less.


How well does it work?

eos_white_speaker

The EOS system works exactly as advertised! Once you plug in the base unit all you have to do is take the additional speakers to your other rooms, plug them in and turn them on. The first speaker I turned on wasn’t detected automatically. I returned to the base and pressed the scan button and it detected it and paired to it right away. The second speaker paired automatically the minute I turned it on. The next thing of course was to dock the iPod and try it out. I docked my 3rd generation iPod nano, selected a playlist and started playing a song. The music was crystal clear. There was no distinction (to my ears) from the music coming out of the base to the music coming out of the wireless speakers. No static, no drop outs, no lag, no distortion!

speaker_plug_back

The power adapter is integrated into the back of the remote speakers so that they can actually hang right from the wall outlet OR you can separate the adapter and plug it in while the speaker is on a shelf.


The EOS system touts what they call SRS WOW!™ digital sound enhancement technology, which aims to more bass and a 3D surround sound like atmosphere. In all honesty I can’t really tell that this is making all that much of a difference and since there is no way to turn it off I can’t really tell if it makes a difference or not. The system I’m replacing with this was the original Bose SoundDock which sounded really good to begin with. The EOS ships with an IR remote to adjust the sound volume, pause, advance, etc. the tracks. The EOS comes in your choice of Black or White and also ships with various iPod universal dock adapters for the older iPods.

It’s also not just for iPods! Although there is a built-in iPod dock, there is also an auxiliary line-in port on the back of the base unit. So you could plug in just about any audio source including your computer. This would also help iPod shuffle users. They even supply the cable you’d need to plug in another audio device.


The Bottom Line

If you need to hear your iPod in multiple rooms in your home, office, etc. then it’s hard to go wrong with the EOS system. While I was prepared to pay their retail price, I was very happy to see that they offered refurb’d units at much lower prices. I got the base unit (which includes one extra speaker) and a second speaker (3 rooms in total) for only $218 (free ground shipping). That’s less than cost of a new base unit alone (at their retail price of $229). I do have a couple of issues with it though. The first one is that it’s not able to power the latest iPods/iPhones. If you have a 4th generation iPod nano, 2nd generation iPod touch or iPhone 3g, then you’ll see a message that “charging is not supported by this accessory.” You can solve this with the addition of the Scosche passPORT Dock. Hopefully, they’ll come out with a newer model that provides power over the proper pin in the dock connector for the newer iPods. The other issue I have is that while the additional speakers have an on/off/volume knob, I don’t see a way to turn OFF the base. Granted I never turned off my Bose SoundDock either, but the EOS base has blue LED lights on it that stay lit all the time and I don’t want others trying to figure out how to turn it off. So I just unplugged the power when I was ready to leave. I thought it was odd that the wireless speakers had the ability to be turned off, but not the base. To learn more or place an order, check out their site.