Follow up Review of the ScanSnap S510M

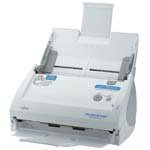
As you may remember I was pretty excited to order the Fujitsu ScanSnap S510M after reading a review from one of my colleagues and talking with another colleague that used one. At the time I didn’t actually have mine yet and I promised a follow up review, so here it is:


The Good

The ScanSnap S510M is an amazing piece of hardware. I’ve never seen a scanner that scans so FAST! Not only does it scan fast, it scans both sides of a page as fast as it scans one side. It’s also more compact than I imagined and since I got mine they’ve even come out with a more compact model (ScanSnap 300M) that would be suitable for travel. I’ve been able to scan even small receipts without having to use the document carrier. It’s just awesome! OK, so that’s the good part!


The Bad

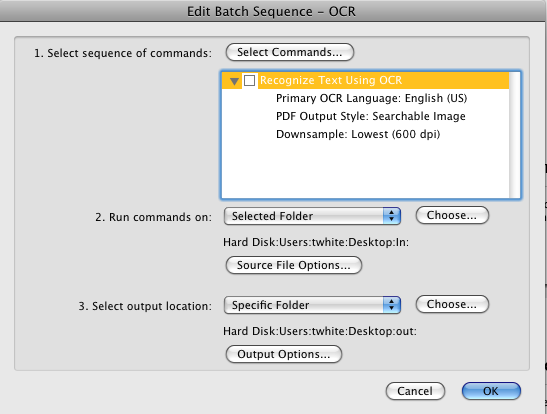
I must say that while the hardware rocks, I was a little disappointed in the software implementation. This scanner includes a FULL version of Acrobat 8 Professional. Wow! I was thinking that they would take advantage of this powerful app and sadly they don’t. There is no tie between the scanner driver and Acrobat at all. The scanner driver simply creates a PDF using the built-in Mac OS X Quartz driver. While I’m OK with that, what I was hoping for was an automated way to have Acrobat then OCR the scanned PDF which would make it searchable. What I want is to be able to walk up to the scanner, stick a document on it, scan it and then walk away. If I later need that document, I want to be able to search on some words that were in the document. Out of the box it won’t do that. Instead, it scans the document, gives it a basic name and either dumps it into a folder as a scanned PDF or opens it in Acrobat and then you’d have to do all the work manually. Sure I can probably setup an Acrobat Batch Sequence, Mac OS X Automator thingy and a watched folder, but I just expected this kind automated solution out of the box.
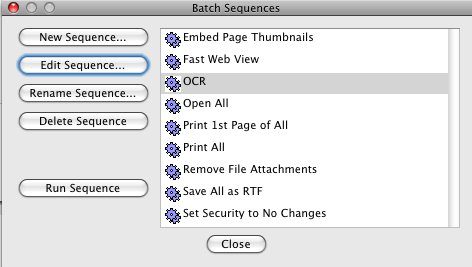


UPDATE: Thanks to blog reader “Vivek” for pointing out that the ScanSnap S510M does actually include a special version of Abbyy Fine Reader for Mac. This app does exactly the one thing I was missing in that it OCRs the PDFs immediately after they are scanned by the ScanSnap (if you set it to do so). It still begs the question of why do they include Acrobat 8 Professional and not tie into it though, especially since Acrobat 8 Professional can OCR directly? 


The Bottom Line

Although the ScanSnap doesn’t do what I want out of the box (see the update above), it is possible to setup with the supplied software. It’s incredibly fast and worth the money! It would be nice if they offered an option for this model to buy just the hardware for those users (like me) who already own Acrobat, but they don’t (yet). Once I have time to sit down and setup my automated workflow, I’ll be one step closer to my paperless office (hey, I can dream can’t I?).  So I’m happy with my purchase!

The Fujitsu ScanSnap S510M (The M is for the Mac version) goes for $430.23 ($510 list) and includes a full version of Adobe Acrobat 8 Professional. It scans in color or B&W and does two sided scanning of stacks of paper. It automatically converts the scans to PDFs and it’s blazing fast!


Shooting tethered: Mac or PC which is fastest?

I had been hearing a nasty rumor from my colleagues and photographer buddies that shooting tethered on a PC running Windows was faster than shooting tethered on a Mac. This was due largely in part to the native USB 2.0 drivers for each operating system. I shoot tethered into Adobe Photoshop Lightroom 99% of the time when I’m in the studio. Having to wait 6-8 seconds for the image to pop up on the display doesn’t sound like a long time until you’re sitting there waiting. The advantage of shooting tethered is that you can see your results on a nice large display and make adjustments along the way.


So I put it to the test

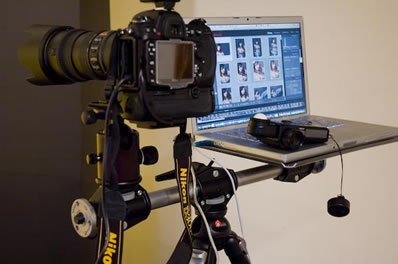
Sorry guys I don’t have a tech lab with guys walking around in lab coats. It’s just me with a stop watch on my iPhone. So if you feel that I’m wrong, that’s ok. Just do your own tests then. My testing setup was simple: I have a MacBook Pro running the latest version of Mac OS X and Windows XP SP2 via Boot Camp. I shoot with a Nikon D300. I use Nikon’s Camera Control Pro 2 to automate the process of bringing the image in from the camera to a folder. Since Camera Control Pro 2 ships with both the Mac and the Windows version on the same disc, I didn’t have to buy anything else. Once the image is in the folder I have Lightroom (LR) setup to Auto Import and display the image in loupe view which means it has to build a preview on the fly as well. I didn’t have any other apps running in either environment. I did each test after a cold boot. I also ran multiple captures to make sure the timing was consistent. I shoot 99.9% of the time in RAW so I didn’t bother testing JPEG shooting. I’m sure the times would be much faster since JPEG files are much smaller. Since I don’t plan on switching to shooting in JPEG, the faster times would be irrelevant to me.


Here are my results, which surprised me!

First I just wanted to see which OS would import the Nikon D300’s 12 megapixel RAW (.NEF) images fastest? So I just ran Camera Control Pro 2 (CCP2) with nothing else open and fired off some exposures. The PC blew away the Mac! This wasn’t looking good at this point. The PC dumped the image into the folder in 3.2 seconds from pressing the shutter, while the Mac took 7.2 seconds. At this point I was starting to think that I’ll be shooting tethered in Windows under Boot Camp from now on. However, it dawned upon me that this is only half the story. The other half of the story is after the image is in the folder, how long it takes the image to get into LR and show on screen. So I continued my test by launching Lightroom 1.4.1 and setting up the auto import. I then ran tests of the complete process from the time I press the shutter until the image is on the screen in loupe view. The results surprised me! When it was all said and done, the PC was faster, but only by .7 seconds! It seems that either LR is either really efficient with Auto Import and building previews on the Mac or sucks really bad at it on the PC (glass half full or empty depending upon how you look at it).

  Windows Mac
CCP2 import 3.2 seconds 7.2 seconds
LR import (complete process) 8.2 seconds 8.9 seconds


The Bottom Line

If all you need to do is shoot tethered and get the images into a folder, then it would seem that Windows would be the way to go. However, if you shoot tethered into LR, then there isn’t enough of a speed advantage to switch from the Mac OS! Canon shooters, you mileage may vary as well. Since Canon provides an app to automatically bring the images from the camera into a folder, you may see different results depending upon how their software is optimized for each platform. Also if you use other apps to shoot tethered and display your images (such as the software by the camera manufacturer), your mileage my vary. I ran the only tests that mattered to my workflow which is Nikon D300 to CCP2 to LR.


Adobe Digital Video Tools Showcase

Didn’t have enough time to explore everything showcased at the NAB? Well, don’t worry because Adobe invites you to an exclusive event that will enable you to check out the latest products from NAB as well as listen to Adobe solutions experts and partners as they demonstrate the many new facets of Adobe’s professional video solutions.

From planning to playback, Adobe® Creative Suite® 3 Production Premium drives video content creation. Combined with a diverse group of Adobe’s partners, including AJA, Blackmagic Design, CalDigit, Creative COW, Digieffects, GenArts, GridIron Flow, Matrox, Maxon, MOTU, Panasonic, and Wacom, Adobe offers solutions and workflows for getting today’s content out to air, tape, disc, or online faster than ever before.

With access to the latest tools to enhance your creativity, efficiency, and workflow and thousands of dollars in prizes, how could you afford not to attend?

Admission is free. Onsite attendees are eligible to win valuable software and other great prizes!


Thursday, May 29, 2008

First Session:
11:00 a.m. – 3:30 p.m.
Second Session:
3:30 p.m. – 8:00 p.m.


New Yorker Hotel
Crystal Ballroom, 2nd Floor
481 8th Avenue at 34th Street
New York, NY 10001


It’s FREE, so register today!

Monster Mash at ADIM 11

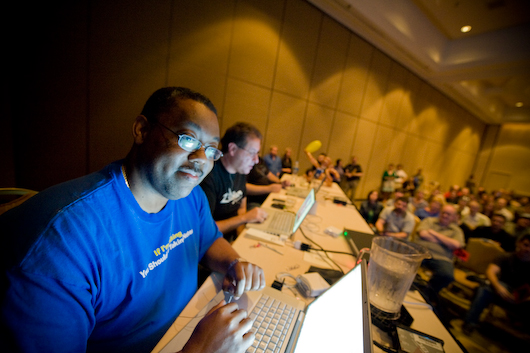
Yesterday we kicked off the ADIM conference here in San Jose California! ADIM is the Art Directors Invitational Masters Class. This annual event brings together some of the most creative minds in the world for 3 days of hands-on instructional courses dealing with photography, illustration, design and more. Each year there is theme and this year it’s Classic Monsters. The master mind behind this event is none other than Adobe’s Creative Director, Russell Preston Brown (pictured above to my right).

I had a great day teaching Acrobat 8 shared reviews, Acrobat Connect and retouching techniques in Photoshop CS3. I also want to thank all the great people I met in my class!

Instructors and attendees really getting into the theme 🙂

Adobe TV is here!

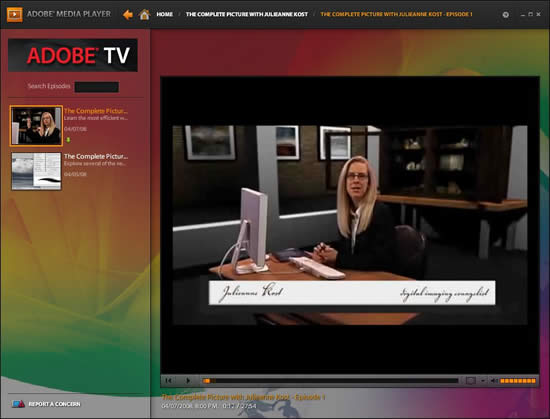
One of my favorite Adobe people, Julieanne Kost has her own show (The Complete Picture) on Adobe TV showing tips in Photoshop and Lightroom.


You may have seen the announcement last week that Adobe has released the FREE Adobe Media Player. This Flash based player allows you to watch all kinds of streaming content from the internet right on your Mac or PC. You can also build your own favorites list. Well that’s cool, but what you may have missed in the announcement is in addition to the Adobe Media Player, Adobe also rolled out Adobe TV. This is content that is produced by Adobe evangelists, solution engineers, product managers, product specialists and partners. This content is PACKED with useful tips on all of Adobe’s creative tools which of course includes the Adobe Creative Suite line. As a mater of fact episodes of my very own (insanely popular) Adobe Creative Suite Podcast are there for your viewing pleasure.


Adobe TV features four channels, each targeting a specific audience: Photographers, Designers, Video Professionals, and Developers. Each channel features programming from Adobe evangelists, leading trainers, subject matter experts, and luminaries who pull in the crowds at industry events around the world. More than 200 videos are currently available on Adobe TV, with programming that mixes how-to information, case studies, personality-driven shows, and workflow deep-dives. The first set of videos offers secrets about Photoshop® software, podcasts and design tips for Creative Suite, techniques for Photoshop Lightroom®, tips on Adobe Flash® Professional software for beginners, approaches to taming the Web, and information about video and audio production.


How do I get the Adobe Media Player?

Well that’s easy, just download it from this link.

How do I get content from Adobe TV?

There are a couple of ways. You can do searches right in the Adobe Media Player (AMP) or you can go right to the Adobe TV page and watch the content in your browser. It is Flash based after all.

Photoshop World ’08 – East – Wrap up!

photo by R.C. Concepcion


I had a blast at this year’s Photoshop World in Orlando! Being a Trekkie and having a Star Trek based theme was also a bonus. I wanted to take a moment here and THANK all the attendees that took time to come up to me and tell me that they appreciated the work that I was doing. I couldn’t believe how many readers of this very blog were at the show. It was great to hear all the feedback.


If you missed the show you’ll definitely want to check out my Creative Suite Podcast today for the special Photoshop World Keynote Episode. For those of you who were at the keynote, you’ll note that I had to leave out the funny spoof videos as they will be shown again at the Vegas show in the fall and I didn’t want to spoil the surprises. However, you will see Adobe’s SVP Johnny L. and Lightroom Product Manager Tom Hogarty show off the latest and greatest Adobe technologies including some sneak peeks at CS4 technologies.


Also whether you were at the show or not, you’ll want to check out the Photoshop World Blog which has several highlights and photos from the event. There are only two shows that I actually "enjoy" working/attending and those shows are Photoshop World and Macworld Expo. So I hope to see you in September at Photoshop World in Las Vegas. As you would expect, I bought some photography gear at the show and I’ll be reviewing it in the coming days. So stay tuned.

Great turnout here at Photoshop World Orlando

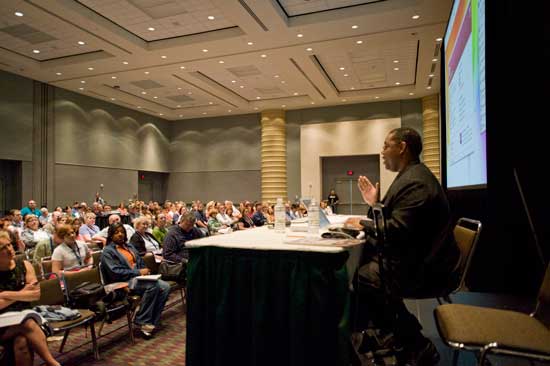
Teaching Intro to InDesign CS3 at Photoshop World in Orlando – Photo by R.C.


I gotta say that I’m having some really good classes here in Orlando at Photoshop World. Yesterday, I had standing room only in the Adobe Theater on the show floor as I was showing the NEW Adobe Photoshop Lightroom 2.0 Public Beta and today I had about 300 people in my InDesign CS3 class.

There are about 2,700 people in attendance at this year’s east coast show. Everyone I have talked to is jazzed about the show and all the things that they are learning. I want to thank all of you who took the time to come up to me and let me know that you enjoy this blog and my Creative Suite Podcast.

Well back to work! I have one more class today and Midnight Madness tonight 🙂

Adobe Photoshop Lightroom 2.0 Public Beta

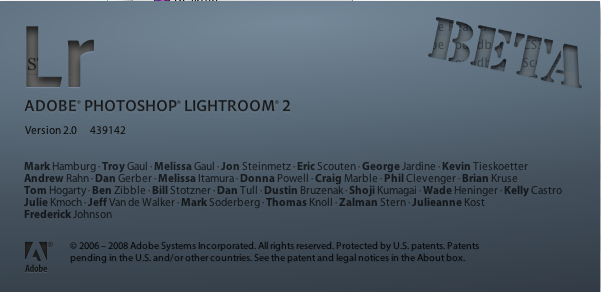
After a wildly successful Lightroom 1.0 public beta and launch, Adobe is back with another one! Adobe Photoshop Lightroom 2.0 is now available in Public Beta (download it here)! That’s right, once again Adobe is looking for feedback from the Photographer community to build the next version of its digital photography workflow tool.

Now keep in mind that this is a BETA! That means that it’s not done yet, nor is it feature complete. You can install the public beta of LR 2 without interfering with your LR 1.x install. The idea is that you’ll keep working in the current version of LR and test 2.0 along side your current version without disruption to your workflow. As a matter of fact the LR 2.0 public beta will NOT open your LR 1.x catalogs. So there’s no chance of your accidentally upgrading your existing catalogs only for them not to work in the current version anymore. Download it, import some images into it, play with it, give us feedback and at the end of the day get back to work with LR 1.x.


New Features

In addition to being a 64bit app here are some of the new features to look forward to:

Library
-Streamlined Library Layout
-Smart Collections
-Powerful Filter Bar to search and refine images
-Suggested Keywords for simplified keywording
10k pixel size limit raised to 30k pixels

Multiple Monitors:
-Four flexible modes for an alternate window: Grid, Loupe, Compare, Survey
(Check out the Live Loupe mode!)

Photoshop CS3 Integration:
-Open files in Photoshop as a Smart Object
-Select multiple images to merge as a Panorama
-Merge multiple exposures into a single Photoshop HDR image
-Load multiple files or virtual copies into Photoshop as separate layers in a single document.

Export Functionality:
-Auto-add exported images to the Lightroom catalog
-Auto Output Sharpening for images on export

Develop Module
-Non-Destructive Localized Correction for dodging and burning specific areas of an image
-Post Crop Vignette
-Basic Panel Keyboard Shortcuts
-Improved Auto Adjustment:  

Print Module
-Picture Package for multi-page layouts
-Print Module output directly to JPEG
-16 bit printing under Mac OS X 10.5 Leopard
-Enhanced Print Sharpening based on PhotoKit Sharpener algorithms


See it in action!

I recorded a special episode of my Adobe Creative Suite Podcast where I show many of the new features of LR 2.0. Also the good folks over at NAPP have put up a LR2 Learning Center with videos. Also check out what Adobe’s Photoshop Product Manager, John Nack has to say.

Also if you’re at Photoshop World this week, I’ll be demoing it after the keynote in the Adobe booth. Come check it out and say hello!

Photoshop Layers Book

With each new version of Adobe Photoshop there are usually lots of new features. However, there is usually one feature that really stands out. Yes, believe it or not there was a time that Photoshop didn’t have Layers. I actually go back that far. I first started using Photoshop (and teaching it) at version 2.5. Photoshop life was pretty tough back then (think about your parents telling you how they had to walk up hill to school for 5 miles – both ways). That’s right, it wasn’t until Photoshop 3.0 was released that we got Layers. It wasn’t until Photoshop 4.0 until we got Adjustment Layers and yes, it wasn’t until Photoshop 5.0 that we got editable text. Photoshop has come a long way! We take Layers for granted now in our Adobe apps. Layers is one of the most powerful features and because we take them for granted, we may not be getting all that we can out them.

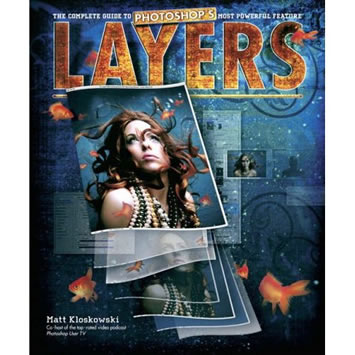
Matt Kloskowski’s New Book: Layers: The Complete Guide To Photoshop’s Most Powerful Feature promises to help you get the most out your use of Layers in Photoshop. I know what you’re thinking and yes I was thinking the same thing, "I already know how to use Layers. I use them all the time." I’ve actually had Matt’s book for a couple of weeks now and it wasn’t until this past weekend that I decided to take a look at it. After getting past the basics of Layers that I already knew, I found some really helpful tips and techniques that I hadn’t considered before. Actually that’s what makes Photoshop so dynamic. It’s not so much about learning the tools and the menu commands as much as it is the infinite possibilities and combinations of using the tools together. Matt gets into some clever tips and techniques on how to use Layers in ways you may not have thought about before.

If you’re a Photoshop user, whether you’re a newbie or a pro, you should give this 248 page book a read. It’s beautifully laid out in color with two steps per page with corresponding screen shots. Matt does a really good job of explaining his techniques in detail without going overboard (and getting all boring on ya).

Amazon has it for $26.39.

Adobe SHARE Public Beta

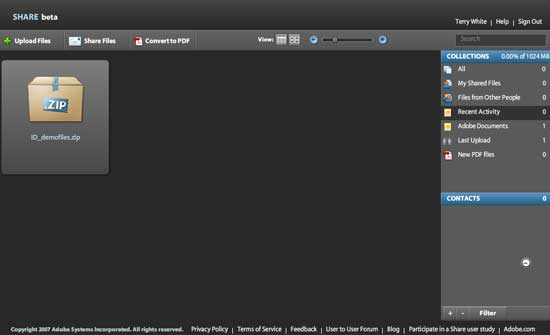
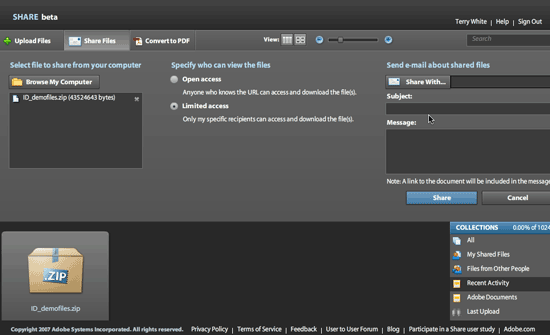
My 43MB Zip file that’s too big to email as an attachment is easily shared with SHARE.


Adobe is on a roll lately with this whole public beta/FREE thing. Here’s one that almost slipped through the cracks until I read about it on John Nack’s blog. While Adobe Photoshop Express got all the buzz recently (that’s so yesterday’s news), Adobe SHARE promises to make it easy for you share large files with friends, colleagues and family – for FREE!


With Share you can:

  • Send documents without email attachments.
  • Access your documents from anywhere.
  • View all the documents you have shared or received in one place.
  • Post a link to your document on a wiki or blog.
  • Embed a Flash® preview of your document on any website.
  • Limit access to a document to a list of recipients.

You get one gigabyte of space and you even get 5 FREE PDF conversions from your Office documents. SHARE is free so there are restrictions. For example, the Share preview is currently limited to documents, and the contents of your files may be restricted by the Share Beta Agreement. You cannot upload and share any music or video files at this time, e.g. mp3, aac, wmv, mov etc.


So if you’ve been looking for a slick, FREE web based service to share your larger files, head over to Adobe Labs and set up your account.