What I’m Teaching At Photoshop World Atlanta Next Week

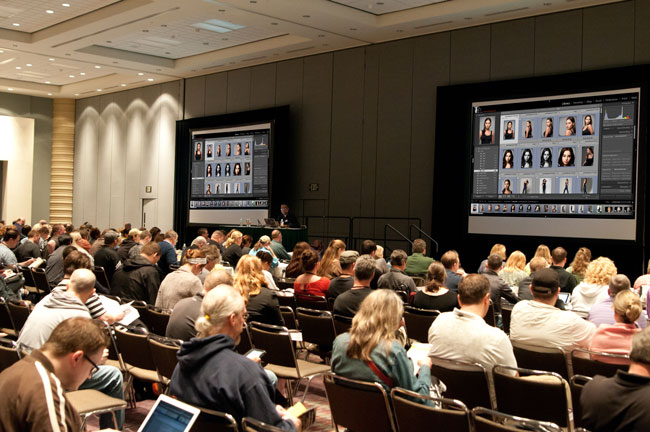
photo by Jason Lykins

It’s almost time for my favorite conference, Photoshop World! This will be the first Photoshop World held in Atlanta and I’m really looking forward to it. Not only do I get to see so many of you, but I’m psyched about teaching some new classes.

Photoshop_World_ATL_classes1

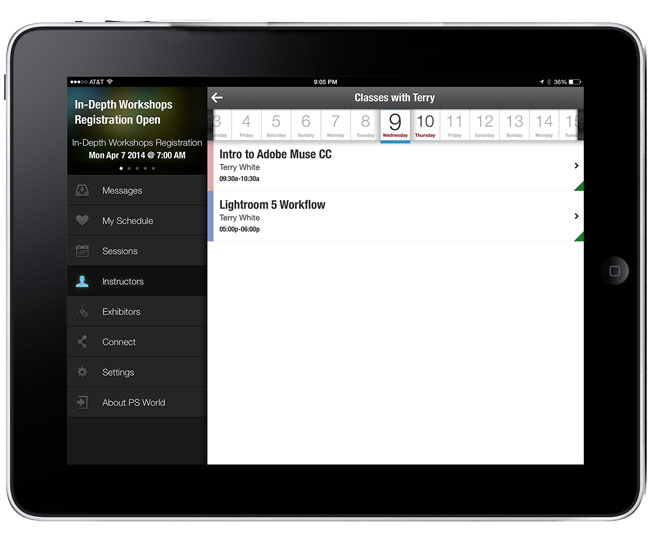
First up I’m teaching a new “Intro to Adobe Muse CC” class. I did a session on the show floor last year for Adobe Muse and it went over great. I’m happy that this class got added to the conference track and that I can go more in-depth.

Photoshop_World_ATL_classes2

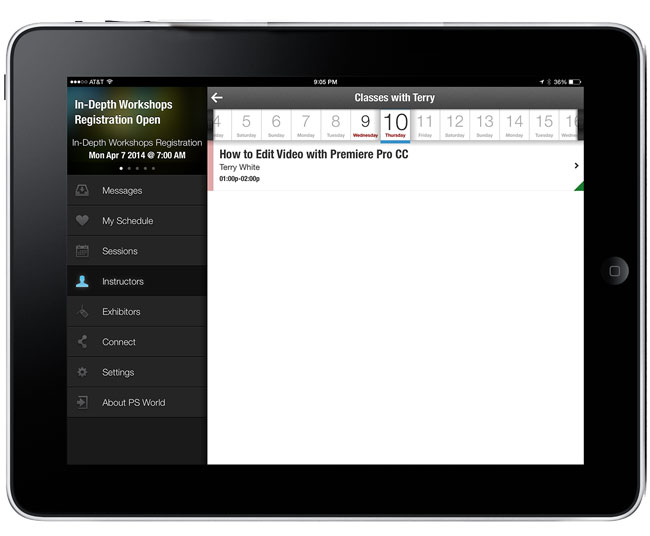
I’m also teaching a brand new “How to Edit Video with Adobe Premiere Pro CC”. This class is aimed at Photographers rather than videographers. I aim to cut through all the jargon and the interface to get right to the basics of how to edit video from your DSLR or other video cameras, smartphones, etc.

I’m also going to be doing short presentations in the Adobe booth on the trade show floor.  I’ll be showing “New Tools for Designers” and “Photoshop CC Tips”.

Be sure to stop by and say hello, you never know what small giveaways I may have in my pocket. 😉

Get the Photoshop World App here:

.

If you haven’t registered for Photoshop World Atlanta yet, you can save $50 by using my discount code: TWHPSW414. Register here.


Why I switched back to Pandora Radio from iTunes Radio

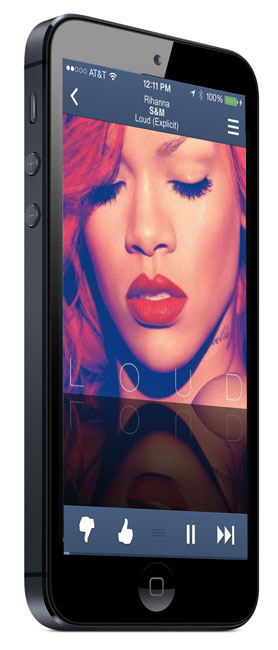
pandora_radio-iPhone5

I really wanted to like iTunes Radio for two simple reasons. The first is that it’s integrated into all my iOS devices and iTunes and that just makes it easier to enjoy and control. The second reason was that since I’m already paying for iTunes Match $25/year (that I absolutely love), iTunes Radio is delivered to me Ad free. Yes I had high hopes that I would be able to drop my Pandora Radio subscription (yes I hate ads), and just use iTunes Radio, however I just resubscribed to Pandora Radio ($3.99/month, which ironically bills through my iTunes account).

Why go back?

I went back for one reason and one reason only. THE MUSIC! As much as I tried to tweak my iTunes Radio stations I just couldn’t seem to get the same variety/favorite mix that I get on Pandora. iTunes Radio seemed to play the same songs over and and over again and yet not play the ones that I wanted to hear. Even if I added specific songs to stations it seems like I would NEVER hear them. I just can’t seem to get iTunes Radio to play the songs I like or new songs that I wouldn’t mind hearing consistently and this problem doesn’t exist for me on Pandora Radio.

I may go back to iTunes Radio from time to time because of the tight integration in iOS, but for now when I just want to hear good music I fire up Pandora Radio.

What’s been your iTunes Radio experience? Also why do many of you prefer Spotify?

Get the Pandora Radio app here:

.

Quick Tip: How To Extend a Background In Photoshop CC – Instagram Style

PS_CC_totem


In this episode of Adobe Creative Cloud TV, I’ll show you a quick tip on how to change the aspect ratio of your portrait image to a square by extending the background in Photoshop CC.

Are you missing out on my Bonus Content?

See more of my Adobe Creative Cloud Videos on my Adobe Creative Cloud TV and get the App below. It features EXCLUSIVE CONTENT that no one else gets to see. This episode has a BONUS CLIP that is available only in the App! My iOS App is a Universal App for iPhone, iPad and iPod touch. I also have an Android version on the Amazon App Store:

.


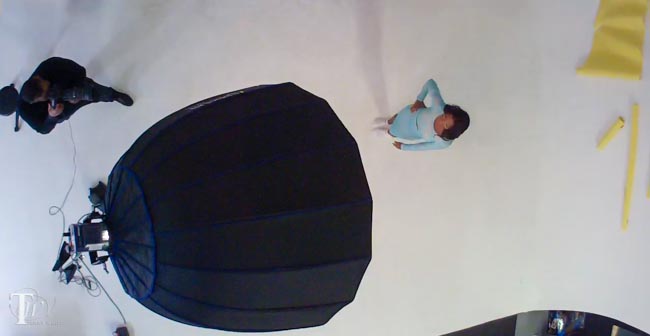
A Big Beautiful Light for Photographers – Westcott Zeppelin Para-59″

wpid13210-Delvis-Zeppelin-1-Edit_sm.jpg

The bigger the light and the closer to your subject, the softer it will be. I’ve always been a fan of BIG softboxes. So when I saw that Westcott had just introduced three new Zeppelin deep parabolic softboxes and the largest one being 59″ I was delighted to take it for a spin. First off, I already had an Elinchrom deep octa softbox, but as you can see below the Westcott Zeppelin dwarfs it!
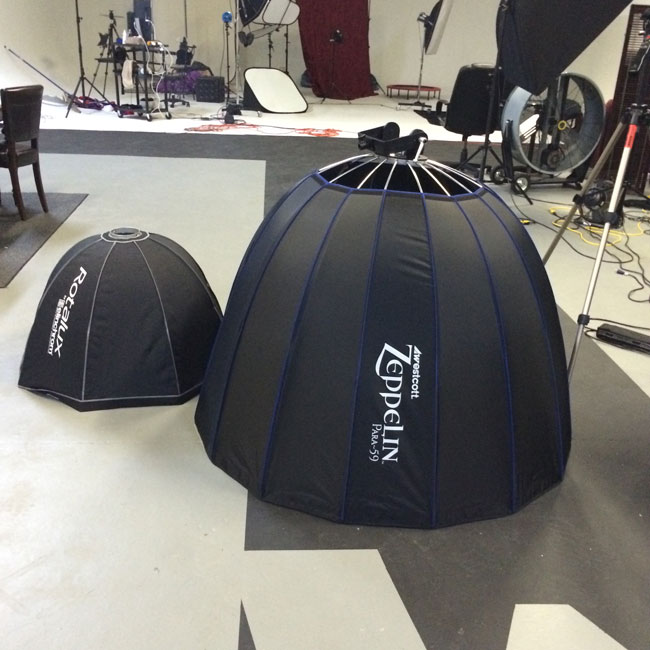
zeppelin-next-to-elinchrom

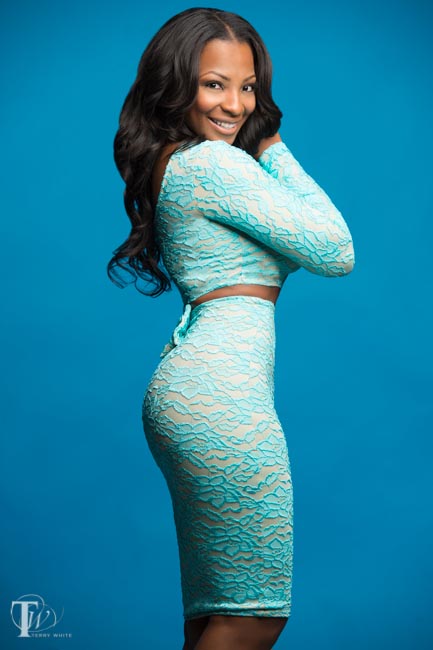
This is a beast and that means big beautiful quality light wrapping around my subject. I do mostly beauty, portrait and fashion work and the nice thing about deep softboxes is that you get a nice fall off of the light.  Having the new larger 59″ size means that I can light more of my subject easily as well as multiple subjects more easily. I took it for a spin and really liked the results:

wpid13208-Delvis-Zeppelin-0053-Edit_sm.jpg

It’s really hard to argue with the results. While you can get these in two smaller sizes, I immediately opted for the largest one because I already have smaller sized modifiers.
 

wpid13206-Delvis-Zeppelin-0318-Edit_sm.jpg

It’s almost a little intimidating when you take this thing out of the box. Luckily the design of the mount/speed ring was well thought out. Since this thing is so big it could easily be a strain on your strobe. So the bracket/mount is designed to hold your strobe instead of the other way around.
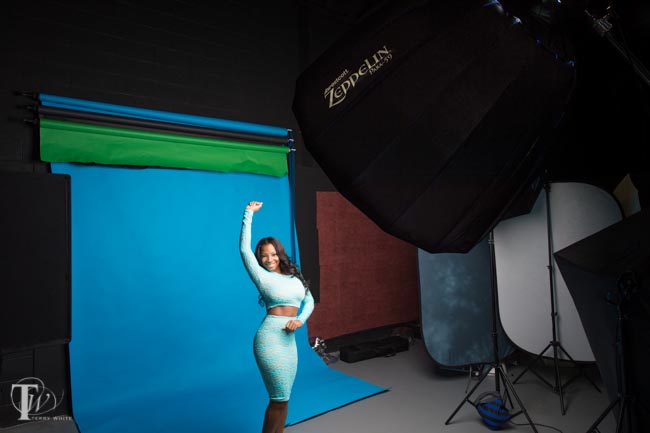
wpid13204-Delvis-Zeppelin-0298-Edit_sm.jpg

This design also helps balance it better on your light stand. Once I got it all set up it was quite easy to mount my Elinchrom strobe to it and put the whole thing on my stand, which I weighted down with sandbags. There is an optional deflector plate that you can get for it and although I had it, I actually forgot to install it. The purpose of it is to deflect the light away from the center point creating a more even lighting pattern and therefore reducing potential hotspots. I’ll be using it from now on for sure. Westcott liked my results so much they requested the use of my images for one of their new ads.
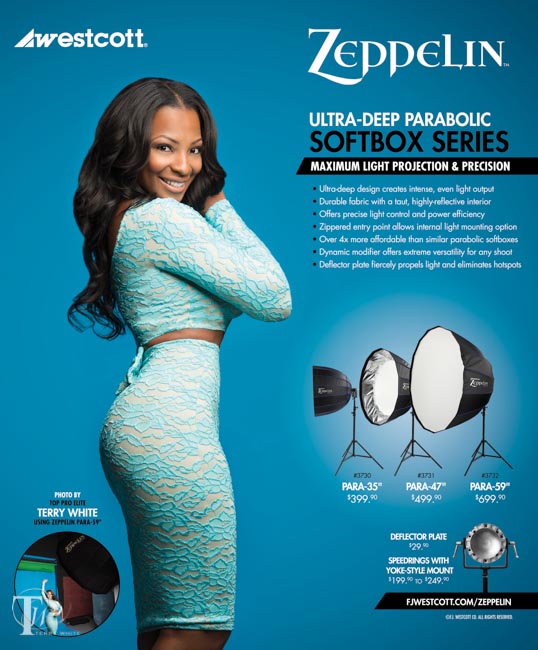
wpid13214-Westcott-Zeppelin-PDN-May2014-Trim-Proof_sm.jpg

The Bottom Line

These new Zeppelins are sure to be a hit! They are well constructed and the light is gorgeous. Having the mount bear all the weight of the Zeppelin AND the strobe makes me feel a lot better about using it as I know there will be no additional stress on my strobes themselves. This will undoubtedly be my new go-to softbox for the majority of my studio work.

You can get the Westcott Zeppelin Deep Parabolic Softboxes here:

Westcott Zeppelin Para-59″

Westcott Zeppelin Para-47″

Westcott Zeppelin Para-35″

Westcott Zeppelin Deflector Plate

You will also need a speed ring & bracket adapter for your brand of strobe. Here are the ones they make:

Adapter/Speed ring for Bowens

Adapter/Speed ring for Elinchrom

Adapter/Speed ring for Profoto

Adapter/Speed ring for Balcar


ExpoDisc 2.0 Review

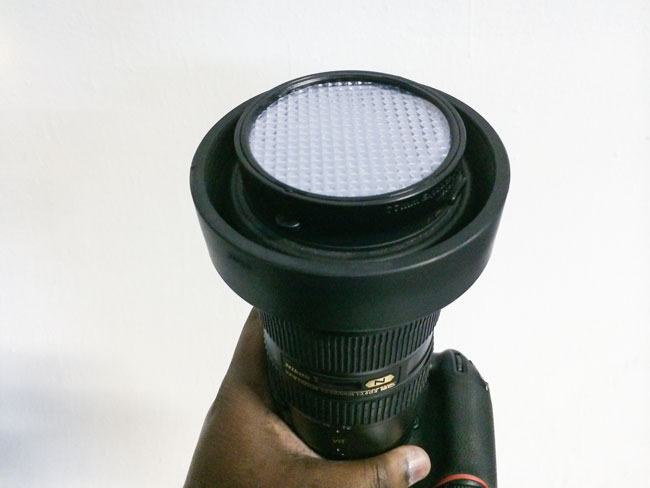
expodisc_2.0_Nikon-70-200mm

Having proper white balance in your photos can help make the difference between a good shot and a great shot. If you’re shooting RAW or in studio with a gray card or color passport, it’s pretty easy to adjust the white balance in post. However, if you’re shooting JPEG or shooting scenes where you can’t place a grey card then it’s probably best to get the proper white balance before you even start shooting. One of the best ways that I know to do this is with an Expoimaging ExpoDisc. I’ve used this product for years. I was pleased to see that they came out with a new version. The ExpoDisc 2.0 has been redesigned to make a good thing even better. The first thing I noticed and fell in love with is that it now clips on to your lens. There are two buttons on the outside that when depressed with your thumb and index finger retract the clips that hold it in place on your lens. This means that it’s very quick to put on and keep in place and take off. The older model didn’t have this feature and I would just lay it on my lens to set the white balance and of course it could fall off very easily. The other nice enhancement is that it comes with a set of warming filters too. This is great if you’re doing portraits. When photographing people you tend to want your subjects a little warmer than “standard/proper” white balance. These filters simply slide right on to the front of the ExpoDisc 2.0.

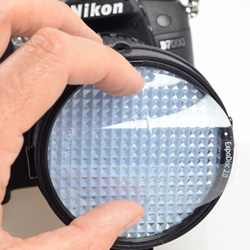
installing_warming_filter
Installing the warming filter

Once you have the ExpoDisc 2.0 in place with or without the included warming filter all you have to do is (depending on your camera model) put it in the mode for capturing a custom white balance. On the Nikon DSLRs you do this by putting the white balance selector on “Pre” and then holding down the white balance button until “Pre” starts blinking. You’ll have a few moments to take a shot. Now aim the camera at the light source and press the shutter. If all is well the display will now flash “Good” if not it will flash “No Good”, which means you’ll need to simply point at a different spot and try again. A couple of nights ago I did a portrait session in studio and used only the ExpoDisc 2.0 for my white balance. No adjustments to white balance in Lightroom. The results are below:

wpid13194-Delvis-Zeppelin-0068-Edit_sm.jpg
The shot above was captured with Auto White Balance and as you can see the skin tone is a little cooler and the wall behind is a little bluer.


wpid13192-Delvis-Zeppelin-0075-Edit_sm.jpg
The shot above was captured after using the ExpoDisc 2.0 and using one of the warming filters. This makes the skin more natural looking.


The Bottom Line

Professional photographers will tell you that it’s usually better to get things right in the camera rather than relying on post processing. I agree! If we are to agree on that then it makes sense to get white balance right in the camera as well. The ExpoDisc 2.0 is one of the best if not the best way of doing this. ExpoDisc 2.0 – Get one below:

ExpoDisc 2.0 77mm – B&H Photo

ExpoDisc 2.0 77mm – Amazon

Yongnuo YN-565EX ETTL Speedlite Flash for Nikon Review

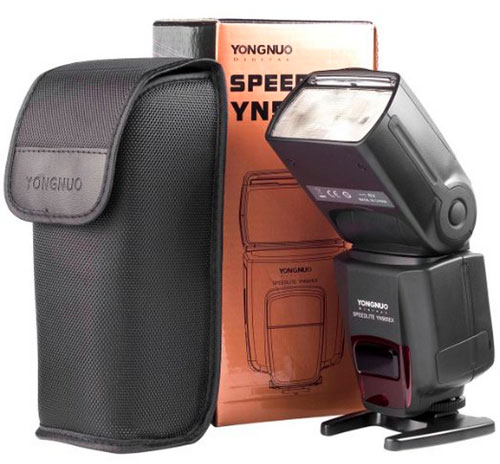
yongnuo-speedlite

If you’re a photographer and you shoot on location chances are you’re going to have the opportunity to use a speedlight flash from time to time. My first speedlight was a Nikon SB600, and then I bought the SB800 and finally an SB 900/910. The latter currently goes for $546.95! That’s a lot of money for a small battery operated flash. As a matter of fact you can get this Elinchrom BRX 250 Studio Strobe for only $524.99. I know that smaller electronics usually cost more than larger ones, but the cost of speedlights has always been a mystery to me. With that said I have a lot of new up and coming photographers following me that are making their first equipment purchases. I really like my Nikon SB 800 (discontinued) and my SB 910. They’ve never failed me. The only problem is they may easily be out of the reach of new photographers because of the cost. So I figured I would give the Yongnuo YN-565EX Speedlite a try as an alternative. I would love to have 3 SB 910s but I can’t justify the expense. Yes both Nikon and Canon make lower cost models, but those models typically have fewer features and lower output. Even with those limitations the lower cost models easily go for $300 or more. The Yongnuo YN-565EX ETTL Speedlite Flash for Nikon goes for a mere $143.99 (Canon version here). So basically I could get almost four of the Yongnuo speedlites for the price of one Nikon SB910. However, let’s keep one thing in mind…you get what you pay for.

Initial Impressions

For almost a quarter of the price of my professional speedlight I really wasn’t expecting very much in terms of quality. I also have read the reviews and heard from others both good and bad experiences with Yongnuo flashes in general. However, I remained optimistic that this unit should at least work, but the question is for how long? It’s too early for me to tell if this flash will last me for the months/years to come, but at least initially I’m pleased. When I took it out of the box my first thought was “low cost plastic”. I don’t like to use the word “cheap”, but it definitely has a “low cost” feel to it. However, it did have all the things on it that I wanted and would expect. It has a diffuser and bounce card in the head just like my SB910. The head swivels just like my SB910. It also has a sync port on it for external triggers just like my SB910 and most importantly this model supports Nikon’s TTL protocols. The controls on the back are very easy to operate and from what I can tell they pretty much copied the button layout from one of the Canon speedlites. I put my four AA batteries in, fired it up, and took some test shots. It worked perfectly. I tried both TTL and Manual modes. I also like the recycle beep (which you can disable). It’s very distinctive. While I’ve only tested this flash for a couple of days now I have had no problems with it. Recycle time is about 5 seconds.

The Bottom Line

My only concerns are those that have been voiced by others that have used Yongnuo speedlites. The main concerns I hear are that they drain the batteries faster than the manufacturer’s models and that eventually they simply die. Only time will tell on the latter and so far I haven’t exhausted a set of batteries yet and don’t feel that, at least at this point, that they drain that much faster than my Nikon SB910 does. Another thing to consider is that these won’t do high speed sync. Now on the plus side there are others that have sworn by these speedlites including Scott Kelby, who uses them on his tours. The other thing I like about them is that I’d be a lot less concerned if something happened to it in the field. For example, if it were stolen it would be a lot easier to swallow a $144 loss than a $547 loss. This is also the case if I were going to use it in less than ideal conditions such as wading out in a lake or the ocean to get a shot. If it fell in the water or off a cliff it would be a lot less traumatic. While they’re not quite disposable, they are a lot less to have to “worry” about.
The question you’re asking right now is, “should I get one?”

The answer to that is probably yes. You have a lot less to lose and if it works for longer than a year then you can probably feel like you got your money’s worth. Also even if you want a better quality more expensive speedlite as your main speedlite then the Yongnuo’s can be used as your second or third speedlite. That’s exactly how I plan to use them.

You can get the Yongnuo YN-565EX ETTL Speedlite Flash here for Nikon and here for Canon.


Need a light modifier?

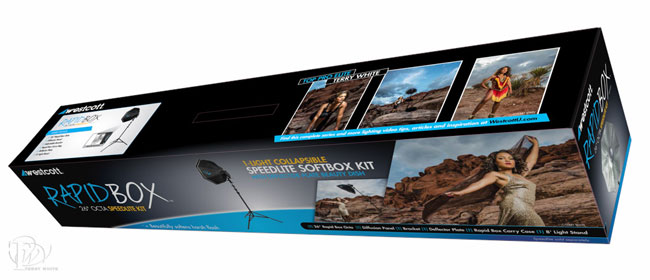
Speedlites are great, but you’ll get much better results using good modifiers. I recommend the Westcott Rapidbox Octa 26″ here and the Impact Quikbox here. Also check out my Westcott Terry White Travel Portrait Kit here.


ExpoImaging RayFlash 2 Review

rayflash2_nikon_d600_sb910

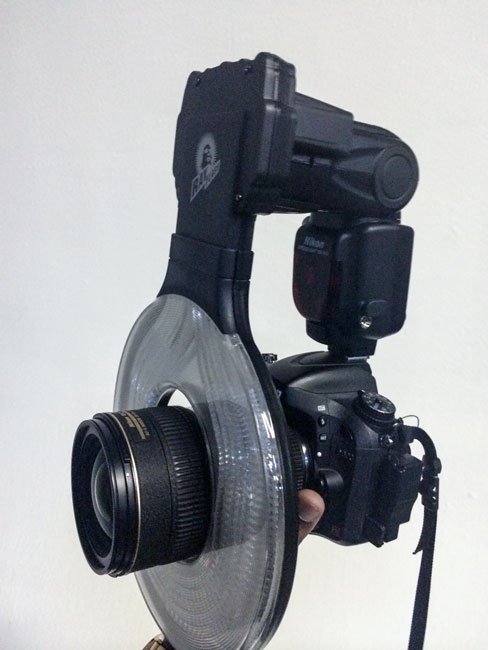
Ring lights are often used in fashion photography. However, unless you plan to use one on a regular basis they can be expensive and cumbersome. The RayFlash 2 is designed to work with your speedlight to provide a more attractive, flatter, shadowless feel to your images as opposed to just the pop-up flash or direct speedlight alone. Traditional ring light configurations come in all sizes and different specifications. Some of the newer LED based ones are lower cost. However, the professional ones tend to cost a few hundred to several hundred dollars. I like the looks of ring light photography, however not enough to invest hundreds of dollars in one. That’s why the RayFlash 2 is very attractive to me. It’s small enough for travel and low cost enough not to break the bank. You can see my original RayFlash review here that I did 5 years ago. Time flies. Since that time ExpoImaging has made some nice improvements on the RayFlash and introduced it as the RayFlash 2. The first enhancement is that it’s now much easier to attach and adjust. The head expands to fit around your speedlight easily. Also the channel slides up and down to accommodate the height of your DSLR and speedlight. Although it’s very adjustable it does come in two sizes. One for larger DSLR bodies like my Nikon D4 and D600 and a smaller model for smaller DSLRs. I wanted to try out the RayFlash 2 and here are my results:

wpid13167-DiorLoveJones2-0156-Edit_sm.jpg
This image of Dior was captured just using the on camera flash. NO RayFlash 2.

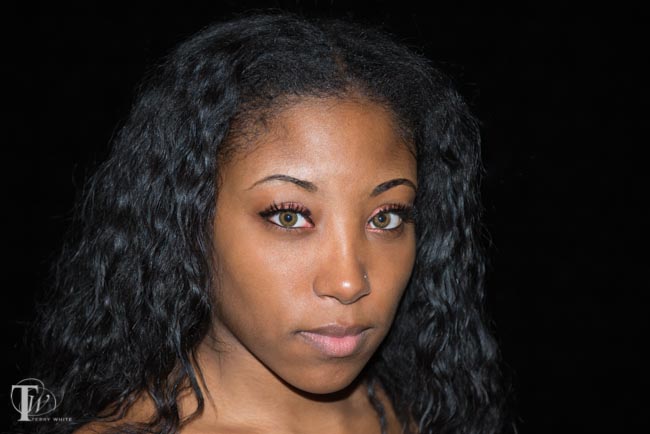
The image above was taken without the RayFlash 2 and just using on camera flash. As you can see there are definitely some distinct hard shadows under the chin. There’s a reason why so many photographers shy away from on camera flash. The results are usually less than desirable.

wpid13169-DiorLoveJones2-0164-Edit_sm.jpg
This image of Dior was captured using the RayFlash 2.

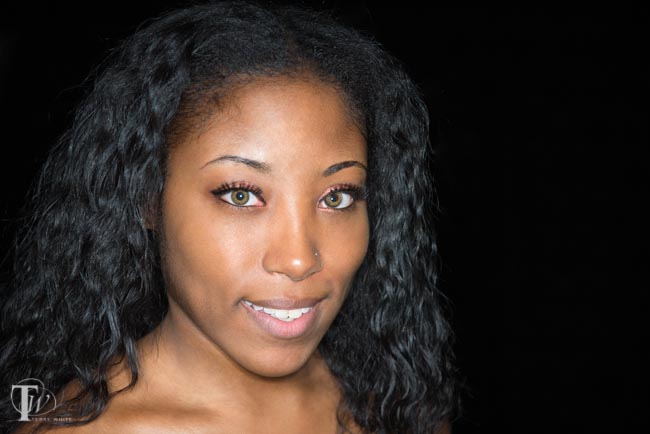
The image above was captured using my Nikon D600, SB 910 and the RayFlash 2. If you compare the shadows you can see that the RayFlash 2 produces a flatter more flattering result with softer shadows.

wpid13165-DiorLoveJones2-0007-Edit_sm-2.jpg
The RayFlash 2 produces a distinctive catch light in the eyes.


The Bottom Line

If you’re looking for the “ring flash look” and you have a speedlight then the RayFlash 2 is definitely worth considering. This is especially true if you don’t need to use a ring flash for every shoot. I also really like how portable the RayFlash 2 is and that it easily fits in either my backpack or regular luggage for travel. I would say the only downside is that it’s not as big as some of the more expensive units out there. It would be nice to have a bigger one that produces an even softer light and bigger catch light. Otherwise, I really really like it.

You can get the large RayFlash 2 here.

You can get the small RayFlash 2 here.


An Evening with Sting and the Sony Alpha NEX-3N

sony_nex3

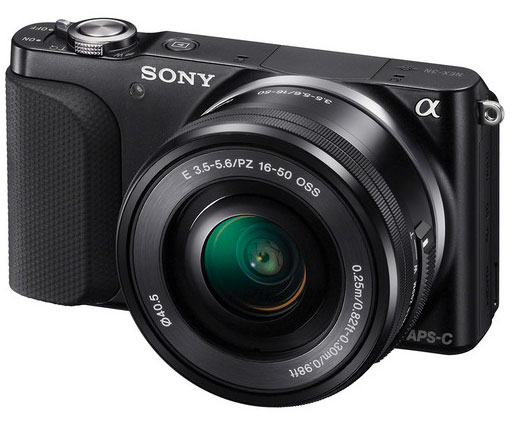
I resisted buying a mirrorless camera until the prices came down on certain models and I could no longer resist. I ended up getting a Sony Alpha NEX-3N. The price was right and it came highly recommended from my colleagues at work. My main use of this camera will be for travel when I’m not traveling specifically to do a photoshoot and for concert photography. By no means do I consider myself a concert photographer, but I do enjoy it.

wpid13155-DSC0135_sm.jpg

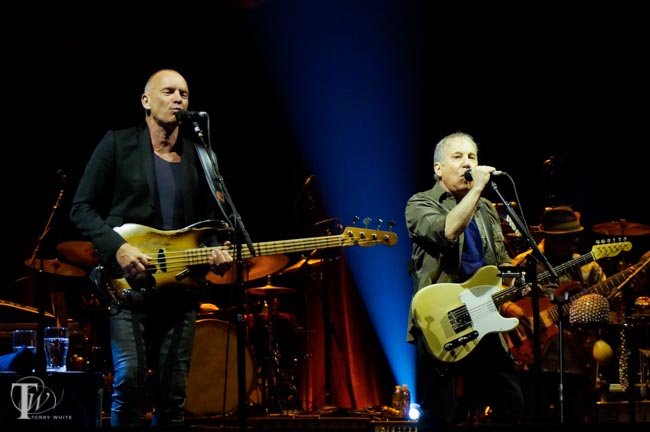
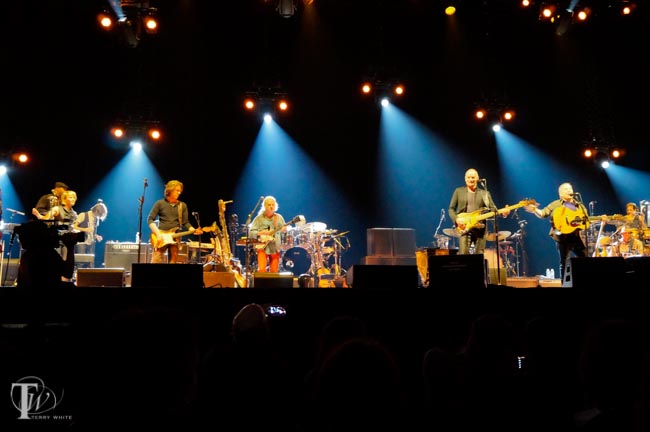
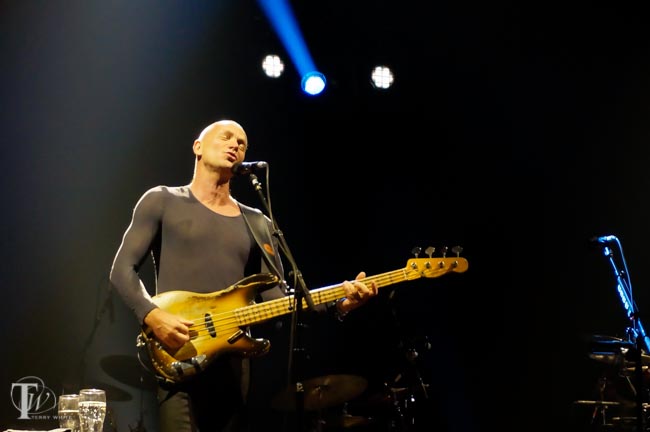
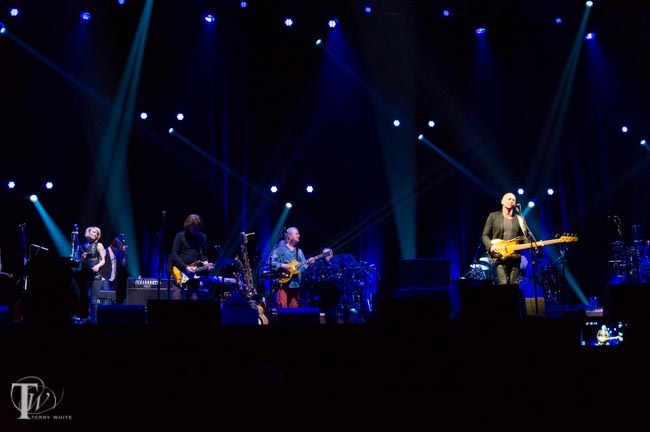
A couple of nights ago I got a chance to shoot Sting and Paul Simon in concert. I decided that this would be a good chance to give the Sony NEX-3N a good workout.

wpid13147-DSC0031_sm.jpg

I love that I have the option of shooting in Manual mode as well as RAW with this camera. However, if you do shoot in JPEG you have the option of using digital zoom. In RAW the digital zoom seems to be disabled. I only took the 16-50mm lens.

wpid13151-DSC0108_sm.jpg

I was very pleased with the results as well as the low light performance at both 800 and 1600 ISO.

wpid13149-DSC0071_sm.jpg

Although I did buy an additional lens, the 55-210mm lens I didn’t want to run the risk of security viewing it as a “professional” camera and stop me from shooting. Maybe I’ll try it next time I go to a concert. In any case I’m really impressed with what this camera can produce especially for the relatively low cost. As far as camera settings go, I shot at f/5.6, 1/80th, 800-1600 ISO for most of the evening. I did start on Aperture Priority, however I wasn’t happy with the results especially in the bright lights.

wpid13153-DSC0111_sm.jpg

The Bottom Line

While I won’t be giving up my Nikon DSLRs anytime soon, I can certainly appreciate the Sony Alpha NEX-3N as my new “walk around with” camera. While the newer models offer built-in WiFi, I was happy using my Eye-Fi Pro X2 card for wireless transfers directly to my iPhone 5s during the concert.

Get the Sony Alpha NEX-3N here, it comes with the 16-50mm lens.

Get the 55-210mm lens here.


4 Hidden Gems in Adobe Photoshop CC

PS_CC_totem


In this episode of Adobe Creative Cloud TV, I’ll show you 4 hidden gems in Adobe Photoshop CC that I bet most of you didn’t know were there.

Are you missing out on my Bonus Content?

See more of my Adobe Creative Cloud Videos on my Adobe Creative Cloud TV and get the App below. It features EXCLUSIVE CONTENT that no one else gets to see. This episode has a BONUS CLIP that is available only in the App! My iOS App is a Universal App for iPhone, iPad and iPod touch. I also have an Android version on the Amazon App Store:

.