5 Things That Got My Attention at Macworld Expo 2011

It's been two years since I attended Macworld Expo. I missed last year due to being out of the country. I also have to admit that I didn't really expect the show to last after Apple pulled out two years ago. However, to my pleasant surprise the show is still strong.  It's hard to gauge the show's actual success because trade shows in general are down. With the economy, internet and live webcasts of press briefings people don't feel the need to go to trade shows as much as they use to. I was asked to speak at this year's conference on "Digital Publishing from InDesign to the iPad." My class was on the last day, Saturday afternoon and while the class wasn't overflowing, there were a good number of attendees that were very interested in the topic. So much so that even though I ran over about 10 minutes, no one moved. Everyone stayed til the very end and many participated in a good Q&A session. I was happy with the class overall and have no complaints.


What about the show floor?

Macworld is both a Conference and an Expo. The show floor was open throughout the entire show. Walking the show floor is always a treat for me because I always find at least one product that I'm very interested in and had no idea it existed. It also gives me a chance to meet with developers/vendors face to face that I've corresponded with over the months/years. I can't compare this year's show to last year's show because I wasn't there last year, but this year's show was definitely up beat. On some days it was actually hard to get through the aisles because of all the people. 


Isn't it just iPhone/iPad Case World now?

There have been many jokes made about Macworld becoming "iPhone Case World". I certainly have felt that way in the past as in years past there were a ton of vendors on the show floor selling nothing but cases for iPhones and iPods. While there were certainly several options to get a case or holder for your iDevice this year too, it didn't feel like one big case tradeshow. There was a good mix of solutions for the Mac and for iDevices too. While most of the big companies don't exhibit anymore, HP was there with a sizable presence showing off their printer line including their AirPrint capable printers


5 Cool Things

Whenever two Macworld attendees meetup the question usually comes up "did you see anything cool?" While there wasn't anything that totally blew me away, there were lots of little things. I look at this show as the show you would goto to get "accessories" for your Apple product or iDevice. In other words without Apple you won't be learning about the NEW Apple ________, but you will see many nice add ons in terms of hardware and software. In no particular order, here are 5 things that I saw that got my attention:


Dolly Drive

There was a lot of buzz online and in person about a new Cloud based backup service called Dolly Drive. What makes Dolly Drive unique is that they have figured out a way to allow you to use Mac OS X's Time Machine backup feature to the cloud. Now you can do your hourly backups offsite. There are of course a lot of questions that come to mind and the company is new. I spoke with them and will be working with them on testing and reviewing the service. Stay tuned for that. However, it does look promising for those looking for a way to be able to backup and restore files while on the road.

Learn more at their site here.


LensPen for your Laptop or Mobile device
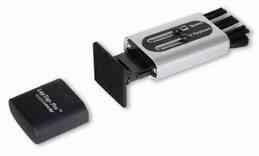
I was already a fan of LensPen for my camera lenses. However, I had no idea that they offered solutions for cleaning my laptop and mobile device displays. I picked up a Laptop Pro and ScreenKlean

See their products here.


iFusion
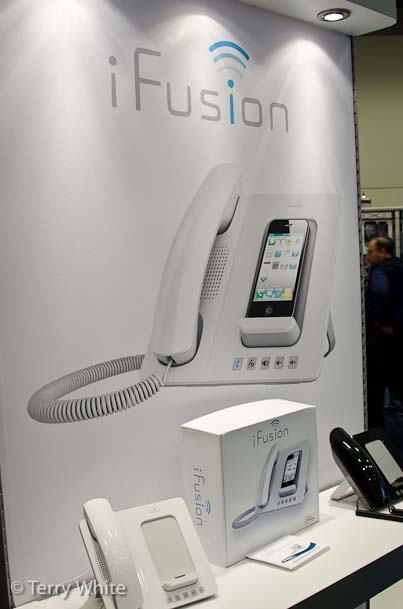
More and more people are giving up their landlines and just using their mobile phones. Certainly this is not the first product of its kind, but I liked the aesthetics of it. iFusion lets you dock your iPhone and use a standard handset while you're at your desk to make/receive calls. It's unclear how well this will work or not work, but It caught my eye. I also pinged them about a multiple handset wireless solution to replace what I have now.

Learn more here.


OWC SSD Solutions
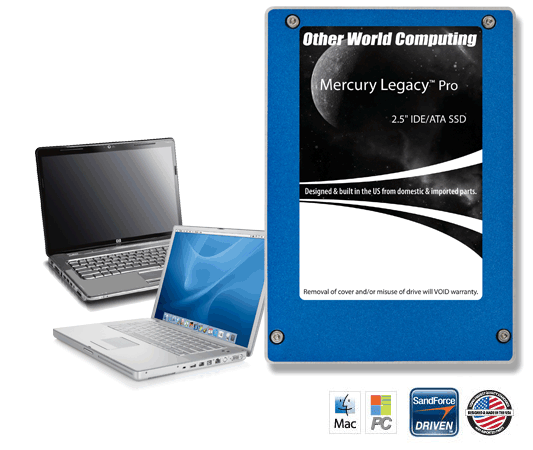
Other World Computing was on hand with a fairly large presence and while they sell a lot of things that I'm already familiar with this was the first time that I got a chance to check out their SSD replacement hard drive solutions. The one that caught my eye is Data Doubler solution that replaces the optical drive in your MacBook Pro with a second hard drive such as an SSD. With a Solid State Drive you could use it to load your operating system and applications while keeping your original drive for the bulk of your data. This would drastically reduce boot times and application start times.

Learn more here.

Check out their shootout here:

httpv://www.youtube.com/watch?v=shVhpKnzfp4


iGrill

Whenever I see devices hooked up to (fake) raw meat I have to stop and look. 🙂 The iGrill aims to provide a temperature monitor for you food that has a bluetooth connection to your iDevice/App to let you know when your meat is done or needs to be turned over. Wow! OK, um  I guess. I have no interest in this product as I don't grill, but I gotta give 'em credit for providing the ultimate geek device for the home. The iPod toilet paper dispenser looks on with envy 🙂

You can learn more about iGrill here.
Bert Monroy’s 750,000 Layer Photoshop File of Times Square is Done!

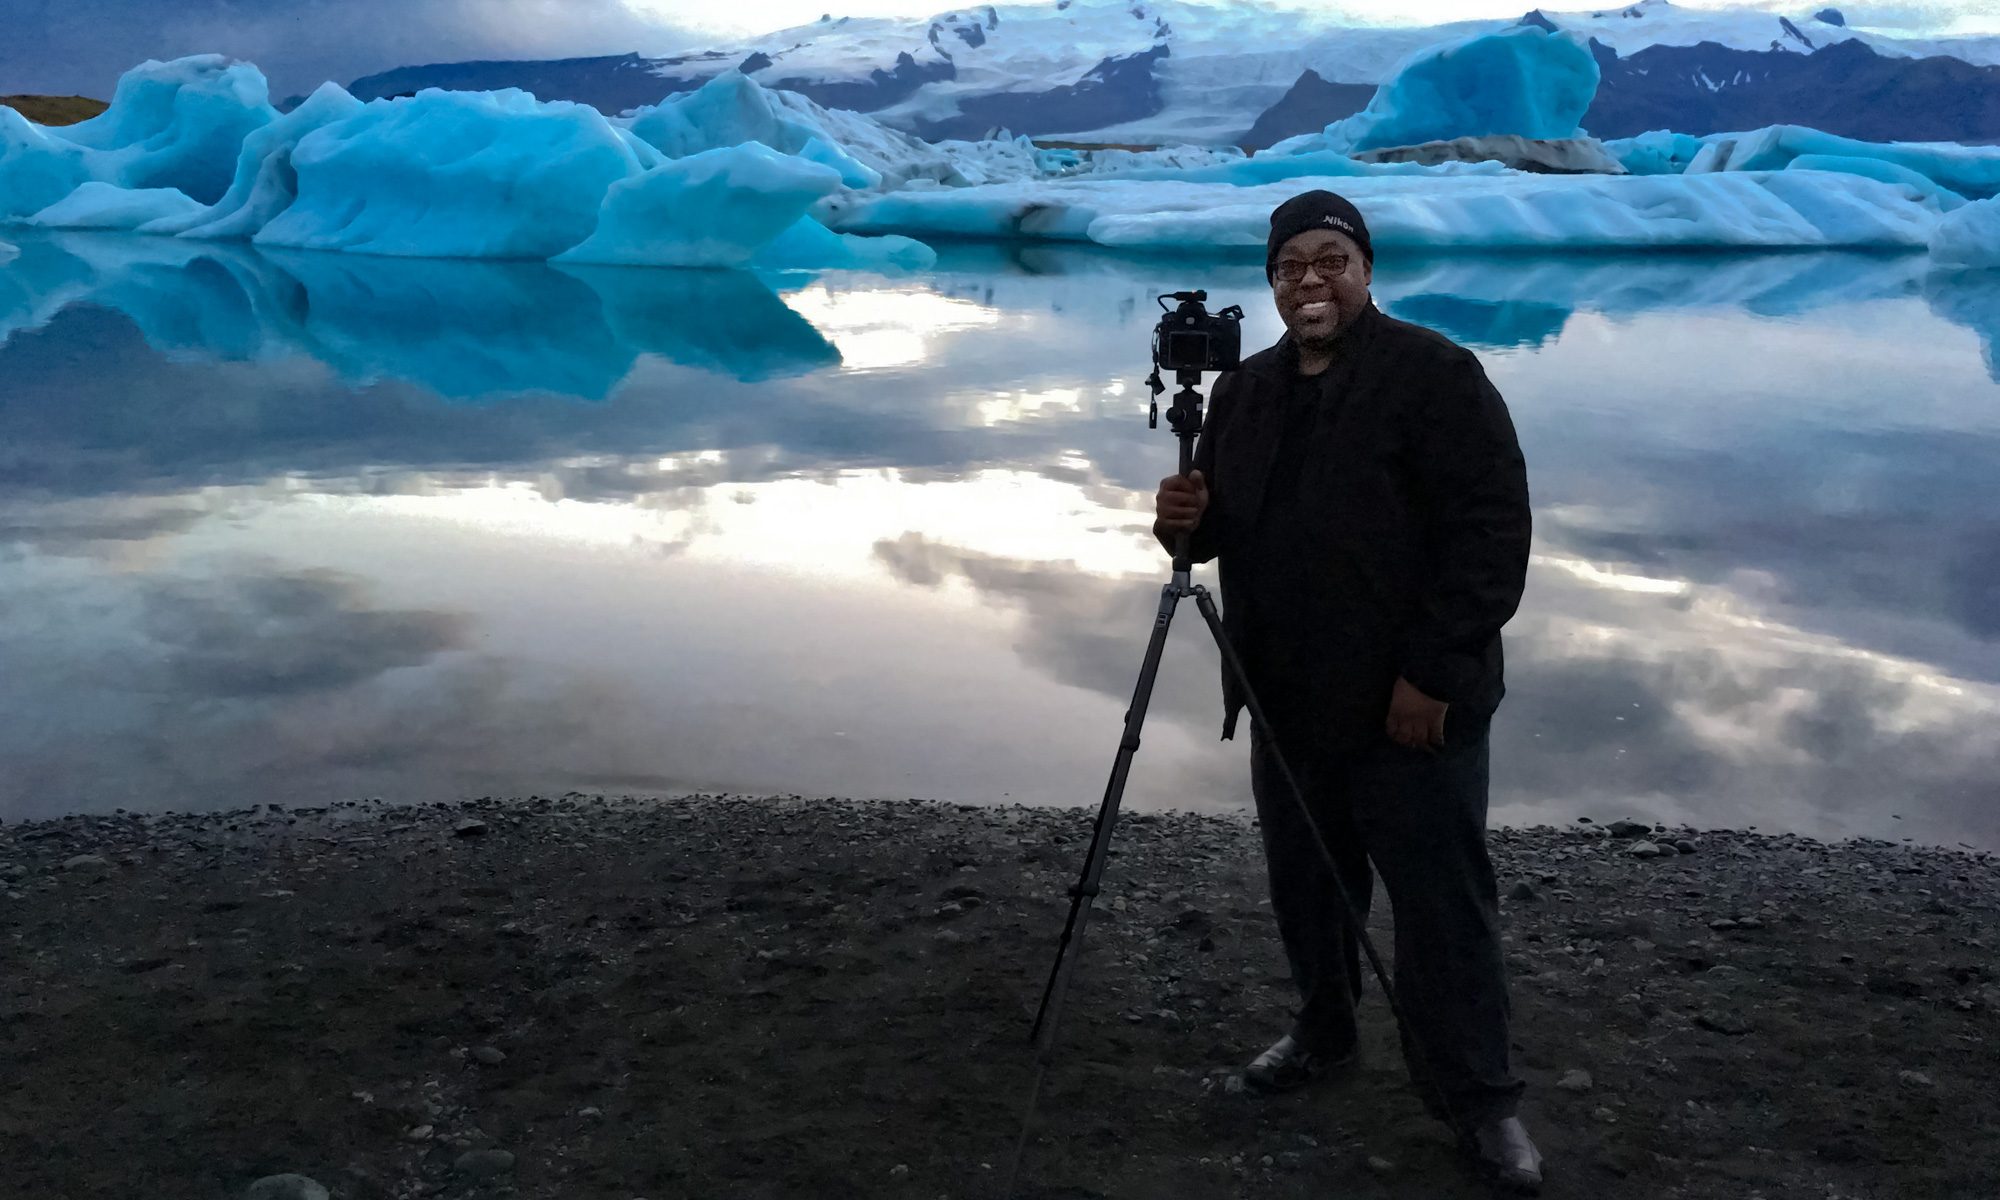
Yes, you read that right! My buddy and Photoshop Artist Bert Monroy (I'm in awe of what this guy can do with a blank Photoshop canvas) has completed his latest project. A 750,000 Layer Photoshop File of Times Square in NYC. Bert wanted to recreate a scene in Times Square using hand drawn art and photos that he has taken over the years. I'm also very proud and totally honored to be featured in it :

Check out Bert's new masterpiece here (using Zoomify technology, you can actually zoom in on it!)  Pan around see who you can recognize.

Very cool Bert! You are amazing!

Review: U-Socket is here!

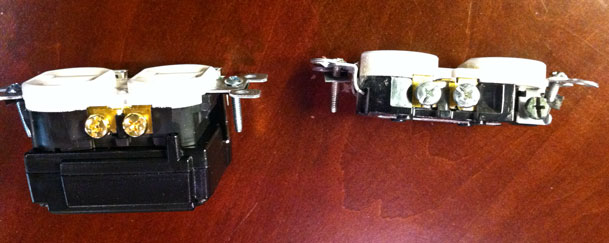
I remember about a year ago when FastMac teased us with this product. I'm sure they wanted to release it sooner, but they went back to the drawing board and redesigned a better product! The U-Socket is designed to replace your standard US 110V outlet with one that also has two powered USB ports. This way you can charge two standard USB devices and still have access to both outlets for other devices. I ordered three of these and while I didn't expect them until February, they surprisingly showed up yesterday. I was like a kid on Christmas day. I don't know why I was so excited to see such a simple product, but I just think these things are cool.


Before you do it yourself

Electricity doesn't really frighten me. Plumbing and Natural Gas on the other hand do. Although this device has standard electrical wiring like most outlets, it is an electrical installation and if you are the least bit squimish please please please hire a licensed Electrician to install yours. I'm not responsible if you, your devices or your house get fried! I warned you! I'm warning you again. Let a professional do it! With that said, I've been installing replacement outlets and light switches in my house for years. So I was not afraid to TURN OFF the circuit at the circuit breaker and then proceed with the installation. Although the wiring is very straight forward it took a little longer than usual. The biggest problem is that outlet is about twice the depth of a standard outlet. Yes it's designed to fit in a standard box, but it will be tight. The one that I replaced had a little plaster around the box that I had to take my time and chip away first. I also had to be more careful about how I ran the wires around the outlet itself as there is very little wiggle room. To this point I went to install the other two in a newer part of my home and the wiring was more complicated. While I could certainly do it, I would rather pay the electrician to do it as I don't feel like playing trial and error with the connections that are already in those boxes.


Success

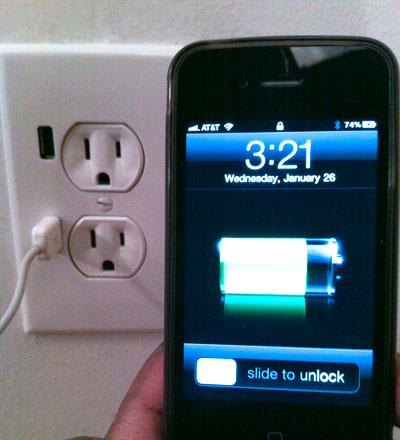
Once I got it installed and restored power to the outlet I couldn't wait to test it. First I tested the regular AC plugs and they worked. Then I plugged in a USB cable and my iPhone 4 and heard the familiar tone the indicated that it was charging. 

What about the iPad? As you may or may not know the iPad wants 10v of USB power instead of the standard 5v required by most USB products. I expected to get the "not enough power" message when I plugged in the iPad, but to my surprise it gave me the same tone that it was charging. This is actually no different than using an older iPhone charger with your iPad. While it works, it will definitely take LONGER to charge it than the 10v power adapter that comes with the iPad So if I had to give it any strikes that would be the only one. I wish that the ports were 10v instead of 5v. Other than that I think these are really cool.

Correction: The iPad wants 10w, not 10v. FastMac notes iPad "compatibility" . So we're good here!

OLDER USB 2.0 ports only supplied 0.5 amp which would only charge an iPad while it's off or very very slowly while it's on.

Newer USB ports can supply the 1.5 amps that the iPad wants. The U-Socket has enough power at:

  • 2.4A-5V USB 3.0 Power Ports @ 2400 mA (total)
  • Charge 4 Devices Simultaneously


You can get the U-Socket here for about $24.

Guest Blog with Jason Lykins Reviewing The PocketWizard Flex units for Nikon

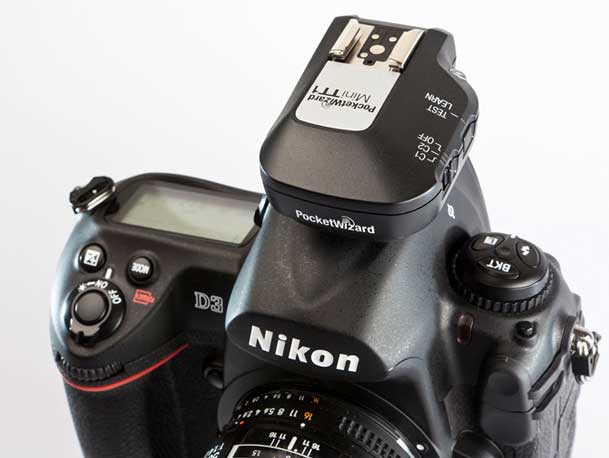
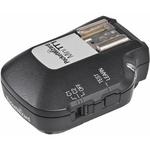
I want to thank Terry for offering up his tech blog to me today. I can’t say enough about Terry, his tutorials, videos, and all around great advice. He’s helped me immensely over the years. Terry asked me to talk to you guys today about my experience with the PocketWizard Flex units for the Nikon CLS system, as I’ve been in the Beta testing program since June. I was first approached by Phil Bradon about a year ago. Phil is the Product Marketing manager of the MAC group which is the distributor for Pocket Wizards in the US. He told me that he had added me on the (short) beta list of photographers to test out the new Flex Units for PocketWizard along with the Likes of David Hobby, Joe McNally, and the guys from the Fstoppers, just to name a few. A bit intimidating list… you had better believe it! Being a Nikon Shooter I couldn’t wait to get my hands on a set of the Flex units. I lusted after them since they were released for the Canon system. I LOVE the Nikon CLS (Creative Lighting System) Flash System. It is the main reason that I chose to go with Nikon over the years. The only thing that I (along with every other Nikon shooter that I know) has really, really hoped to see added was the addition of radio communication for the system instead of IR. With no option from Nikon, Pocket Wizard has answered our prayers with the Flex TT1 transmitter and the Flex TT5 Receiver.
 

Do they live up to the hype?

Long story Short, these things ROCK! Every Nikon shooter that I have talked to wants to know if they work as claimed. Do you really get rock solid construction just like every other PocketWizard Product? Yup. Do you really get 800 feet of TTL control? Yup. Everything that PW claims about these units is true. Anyone that has ever had any experience with PocketWizards in the past knows that when they do something, they do it right. The Flex units are no exception. The build is a solid high impact plastic. Securing them to the hot shoe is done via threaded locking screw on top of the hot shoe connectors. Staying true to form they have ¼ 20 metal threaded input for secure mounting to external sources.
During my time with the Beta Units I pushed them to the limits. I arranged models, at distances of up to and beyond the claimed 800 feet. I placed flashes behind walls, under benches, behind windows, hundreds of feet outside of windows on stands, and more… Each and every time the flashes fired without issue. Pocket Wizard did a stellar job of design and alpha testing. They have really allowed me to be more creative with my small flash lighting, and placement.

When I was looking to add TTL radio capability to my Nikon Flashes I looked at one other brand of transmitters besides the Pocket Wizards, the Radio Poppers. Without talking too bad about the other system, the advantages that I saw in the Pocket Wizards were this: The Pocket Wizards were backwards compatible with the older Plus II units that I was already heavily invested in for triggering my studio strobes. The Flex units had a solid connection with the camera and flash units unlike the Radio Poppers which required some creative field engineering to attach. There were a few other small things that came down to personal taste but it’s safe to say that I prefer the Flex Units over the Radio Poppers.


What I wasn’t expecting

The Flex Units lived up to everything that I expected. They did absolutely everything that I wanted. What surprised me were the things that they did that I wasn’t expecting. PocketWizard has not only made these units backwards compatible with the Plus II’s but they have also made them compatible with the Multimax units as well. Offering 52 channels you never have to worry about being on another shooters channel. One feature that I wasn’t expecting but totally took me by surprise is called Hypersync. High Speed FP mode allows your flash and camera to sync all of the way up to 1/8000th of a second, but with Hypersync you can sync with your studio strobes at 1/500th of a second or faster! This is HUGE! This is the difference between background in focus, and background out of focus while shooting with studio strobes in certain situations. This has to be my favorite feature added to these units. Something else I was hopeful that the system would do, but I wasn’t sure was sync regular Plus II’s with Studio strobes, and Flex units with Speed Lights running TTL seamlessly. The Shot of the girl on the motorcycle was done in this fashion with an Alien Bee for fill and a Sb900 as the main. PocketWizard has added one more thing that should make every Nikon shooter rejoice, the AC3 zone controller. Basically the AC3 is PocketWizard’s version of the SU800. On camera flash control for remote units, but for only $79.00!
 

Should you get them?

Absolutely! I have recommended that every Nikon shooter I know to get on the waiting list for these things. I ordered three more to expand my lighting possibilities myself. If you’re tired of losing CLS distance in bright sunlight, if you want to extend your flash distance and keep TTL, if you want to put flashes out of the line of sight and still be able to trigger them reliably, the PocketWizard Flex units are for you. With the backward compatibility, the introduction of the AC3 Zone controller in February, and PocketWizard’s reputation for solid performance, you can’t go wrong with these units. 

Get the PocketWizard FlexTT5 Transceiver Radio Slave for Nikon i-TTL Flash here for $219.00

Get the PocketWizard MiniTT1 Radio Slave Transmitter for Nikon i-TTL System here for $199.00


See more of Jason's photography here.

Quote of the Week: At lengths less than 4 meters you can just about use silly string…

Last week I wrote a post about Paying too much for cables and while most of the response both privately and publicly was in agreement there were a couple of people who felt that I was wrong or my logic was flawed. So I spent a little more time doing some more research. The surprising thing was that I couldn't find a single article or study that suggested that the more expensive cables were worth it. 

One point of clarification

One of the comments suggested that the length of the cable DOES matter and that you should pay for a better cable for longer runs. On this point I TOTALLY AGREE! If I were building a cable into a wall I would absolutely want a better cable as it wouldn't be easily replaced once the construction was done. However, that doesn't necessarily mean that the $200 30 foot cable is necessarily any better than the $50 30 foot cable. Also when I said "it either works or it doesn't", I meant that for ANY length or type of cable. If I buy a 30 foot cable then I expect it to perform like ANY other 30 foot cable should perform. In other words if the picture is distorted, noisy or has artifacts, doesn't transmit HDCP, etc. then that's my definition of "it doesn't work!" Just so you know, I'm also going to plug in the long cable and test it before building it in 🙂


The quote of the week – "At lengths less than 4 meters you can just about use silly string…"

comes from this extensive study that a guy did comparing cables and although he starts off stating that there is a difference in quality, his final takeaways  actually confirm my suspicions:

Your take-away from all this should be the following:


  • At lengths less than 4 meters you can just about use silly string (OK, not really) and get HDMI to pass at any current resolution. At less than 3 meters you'll even extend that to 12-bit color and possibly the next crazy idea HDMI Licensing decides to throw at consumers. Don't spend a lot on these cables and if you want to save money you won't let anyone at a big box store talk you into buying from them.
  • At long lengths (over 10 meters) you really need to pay attention to the manufacturer if you don't want to risk running into potential problems with 1080p and future formats such as Deep Color. With that said, just about any cable at or under 10 meters will pass 720p/1080i and nearly everyone will pass 1080p at 8-bit color as well.
  • If you have an existing HDMI cable and are running into problems, we'd suggest at least attempting the insertion of an active component at the sink (display) side. This is going to be far cheaper than ripping out your walls and re-running new cables – and likely just as effective.
  • HDMI has proven to be a moving target and there is no telling what crazy (likely unnecessary) format they will try to push down the cable next. Due to this, it's always good to "overbuild" your cable install, especially if it's a longer distance and going to end up behind drywall.
  • If you're not prone to upgraditis and think 1080p will be your maximum resolution for the life of your install, don't sweat it…

See the full report here.

Also see this comparison and this comparison. It would be fun to sit people down in a room with an HDTV, good 1080p source and a quality receiver and do a blind test using different cables. I'd be willing to bet money that the doubters wouldn't be able to tell the difference.


Lastly, Thanks!

Thanks to everyone that suggested monoprice.com as a source for low cost cables. I've placed an order for some even shorter HDMI cables than the 3 foot ones I found locally.

BTW: If you still disagree and feel better about the more expensive cables you bought, that's fine with me. Enjoy! 🙂 Y.M.M.V.

I’m Reminded Once Again: You’re Probably Paying too Much for Cables

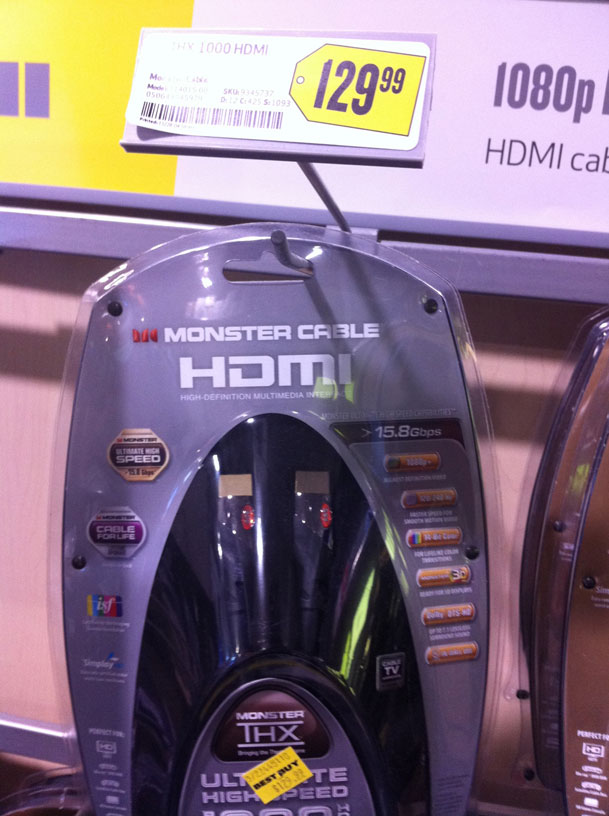
Many of you may remember my post from the summer of 2009 when I found some HDMI cables for as little as 17¢. By the way those cables are still working great! As a matter of fact I made sure to tell my friends and family NOT to be suckered into buying cables during the holiday season from the same retail outlets that they may be buying their holiday tech gifts from. In this price competitive landscape retailers often use things like cables to make up for lost margins on higher ticket items like HDTVs and Bluray players. For example, I laughed out loud when I cruised through my local Best Buy and saw this "great" deal on a Monster HDMI cable:


So Monster, let me get this straight…

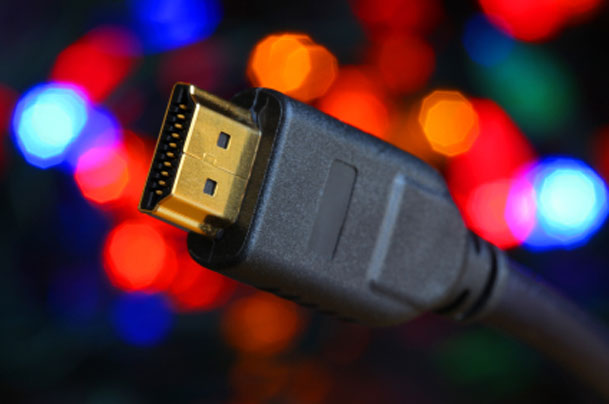
You can get an Apple TV for less than $99. You can now get Bluray Players for less than $90. Yet you would have us believe that there is more expensive technology in your "cable" than the device it's being connected to? The bottom line is with ALL HDMI cables they are digital sending 0's and 1's. They either work or they don't! Here's a great post that explains the rip off even further.

By the way, although the cables I bought back in 2009 (I have a drawer full of them) are no longer 17¢, they are now only going for a few bucks here.


The Cheaper HDMI Cables Even Outperformed the GE Branded HDMI Cables

What? How does an HDMI cable outperform another one if it's all digital? OK, maybe "outperformed" is the wrong word. Let's say "more compatible". Over the holiday break I got the pleasure of setting up a NEW HDTV and receiver with all HDMI connections. I went to my HDMI drawer and grabbed the 4 cables that I needed. I hooked everything up and everything worked great. Although everything worked, there was one slight problem. Three of these components were literally either right next to each other or on top of each other and the 6 foot cables were longer than I wanted them to be. I remembered seeing some 3 foot cables at my local hardware store and they were reasonable priced around $8 each. I headed over and bought 3 of them to replace the longer ones. I plugged them in and everything was working once again. Later that evening I rented a movie via Apple TV in HD. However, when I went to watch it I got a warning I had never seen before:

"This content requires HDCP for playback. HDCP isn't supported by your HDMI connection."

WTF! Basically what this message means is that the HD Copy Protection signal isn't making its way from the Apple TV to the receiver/HDTV. I tried all the usual stuff of rebooting, restarting, etc. etc. and then it dawned on me that the only thing that had changed was the cable. I went and grabbed one of the no name HDMI "cheap" cables and replaced the GE branded cable and the movie rental played fine! It's hard to believe that there would be any cables on the shelves today that don't support HDCP, let alone from a name brand like GE, but there you have it! If you want to read more about this error, see this tech note.


It's not just HDMI Cables either!

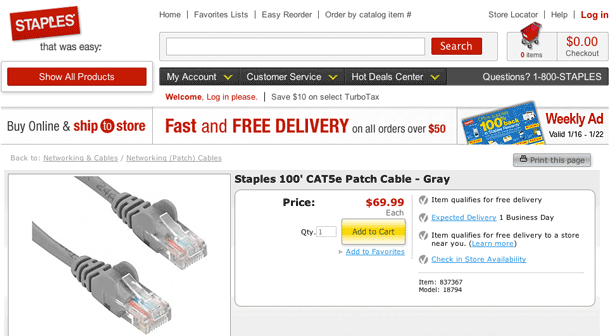
A couple of weeks ago I finally decided to run that 100' Ethernet cable from one end of my house to the other between floors that I have been putting off for years. Of course I needed to buy the Cat6 100 foot cable to do the job. Normally I don't think about the price of Ethernet cables. There's a Staples within walking distance of my house and I typically run over there when I need a network cable. However, since it was going to be such a long cable I wasn't even sure if they carried them in stock in that length. I headed to website and sure enough they do have them, but then I saw the price:

It was $70!


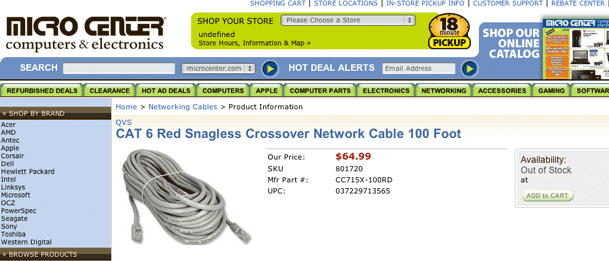
I decided to check with my local Micro Center for a sanity check:

While they were a little cheaper at $65, the cable wasn't even in stock.


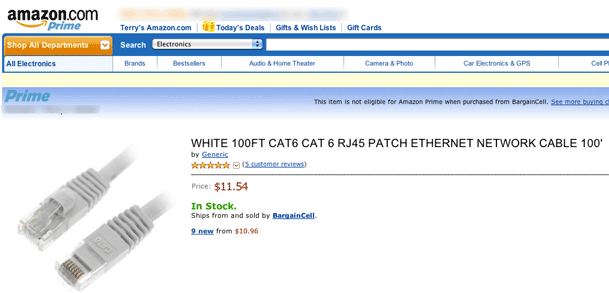
Then I wondered, "are they cheaper elsewhere?"


Sure enough they were. While it would mean ordering online and having to wait for it to be shipped (darn, I'd have to put off that chore a little longer 🙂 ), the savings would be worth it. Yes, this cable that I bought (heck, I ordered two) arrived a couple of days later via Priority Mail and is working fine. By the way, the 7 foot Ethernet cables at Staples go for $19.99!


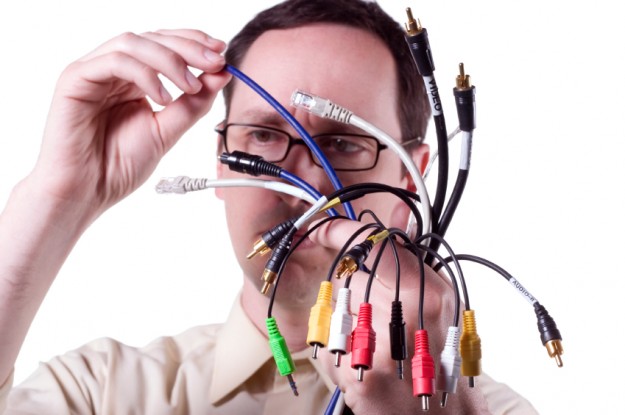
This is just a reminder! More expensive cables don't necessarily work any better or last any longer, especially digital ones. Don't pay too much!


UPDATE from Twitter follower @photoandmac

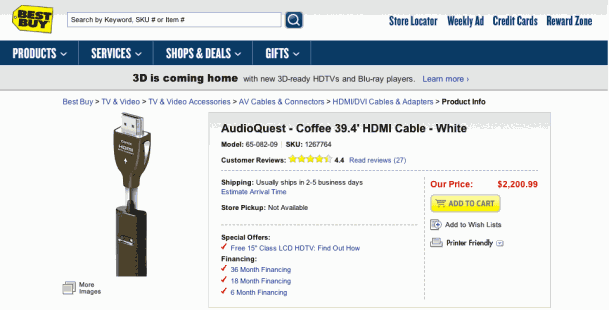
You know you're in trouble when they offer "Financing" for your HDMIcable! 🙂 Ooooooohhh, Ahhhhhhhhh! I'm not making this up! This 39.4 foot HDMI cable goes for $2,200.99. Here's the link.


3 Ways to Show Your Work to your Client

httpv://www.youtube.com/watch?v=SrclPhcIF6Q


For years we've been designing and retouching on our computers and then having to show our work to our clients, colleagues and friends. In this video I show you three ways to do it and I'm willing to bet that two of them are new to most of you. 🙂

See more of my Adobe Creative Suite Videos on my Adobe Creative Suite Podcast and get the App here. It features EXCLUSIVE CONTENT that no one else gets to see:

Learn Adobe Creative Suite with Terry White - Wizzard Media


Review: blueSLR Wireless Camera Control & GPS Geotagging

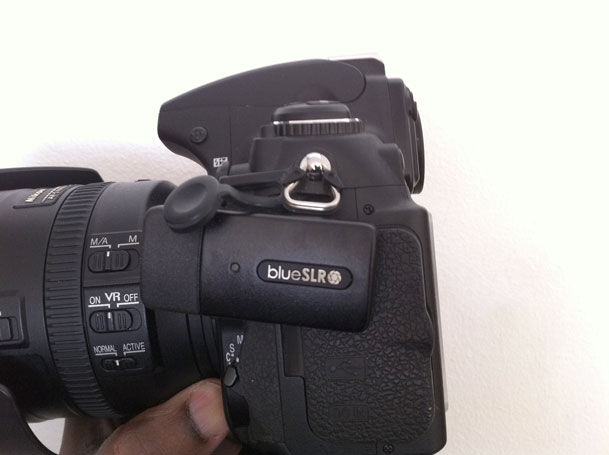
A couple of my favorite gadgets just got married 🙂 I’m a Nikon shooter and an iPhone user. It’s rare that I’m ever anywhere shooting without my iPhone on my belt. So when XEquals Corp sent me a message about their new blueSLR Wireless Camera Control and GPS Encoding solution I was all ears.


Wireless Control for my Nikon DSLRs

Once you plug in the blueSLR into your Nikon D3100, D5000, D90, D3(s), D200, D300(s) or D700, you can then fire up their free iPhone App. With the blueSLR App you can then remote control your shutter release, auto focus and even time lapse or bracketed exposure from up to 300 feet away via bluetooth. This is the feature that most of the initial announcements were touting and reviewers were so excited about. While I definitely think this is cool, it’s not what excites me most about this solution…


GPS Geotagging is where it’s at – Literally

Click the above shot to see where it was taken – Nikon D700, Nikon 28-300mm lens, blueSLR and iPhone 4


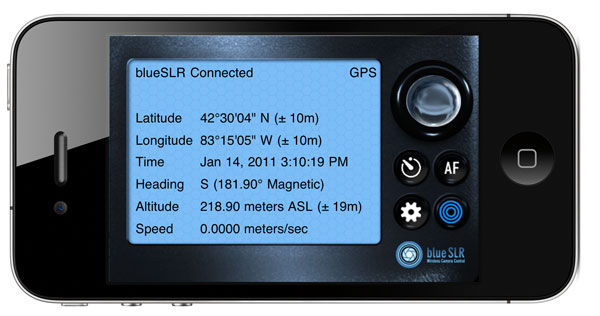
I’ve reviewed many Nikon compatible GPS attachements here over the years and while they have all worked well, they all have one thing in common. They attach to your camera via a cable and have to either sit in the hot shoe or on your strap. They also have to acquire a signal from the global positioning satellites in the sky. Yep that means you’ve got to be outside to grab a signal before you can go inside with the newer units and continue shooting. However, the iPhone’s “Location” feature works off not only GPS satellites but also cell towers and WiFi hotspot locations.

Click the above shot to see where it was taken – Nikon D700, Nikon 28-300mm lens, blueSLR and iPhone 4

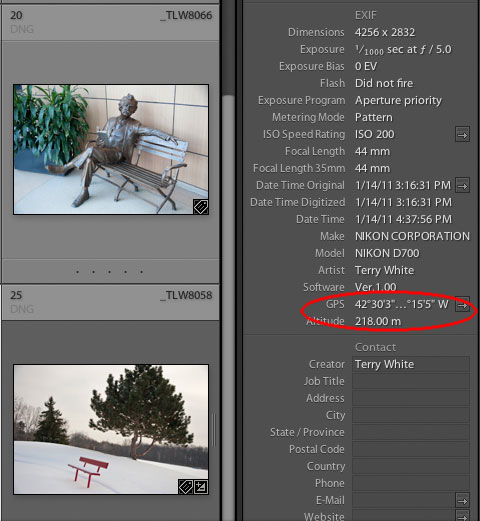
This means that your iPhone (iPad or iPod touch) knows where you are even if you’re inside a building. The blueSLR solution can use this Location information and input the info right into (the EXIF data) your shots as you take them with your Nikon compatible camera! Woohoo! Finally! Also unlike all the other solutions out there XEquals prides themselves on their “flush with the camera” design. They’ve gone out their way to make the attachement as unobtrusive as possible. I applaud this effort!


How well does it work?

images displayed in Adobe Photoshop Lightroom 3 with clickable GPS button that takes you to Google Maps


I’m very happy with the way this gadget works. The first thing you’ll want to do is (it’s in the instruction card that comes with the device) change the default metering timeout on your camera from 6 seconds to something like 30 minutes. Otherwise you’ll be quickly frustrated by the device constantly timing out before you get to pair it with your iDevice or use it with the App. Once you make that adjustment in your camera, it looks and acts like any other GPS/Remote Shutter Release on your camera.

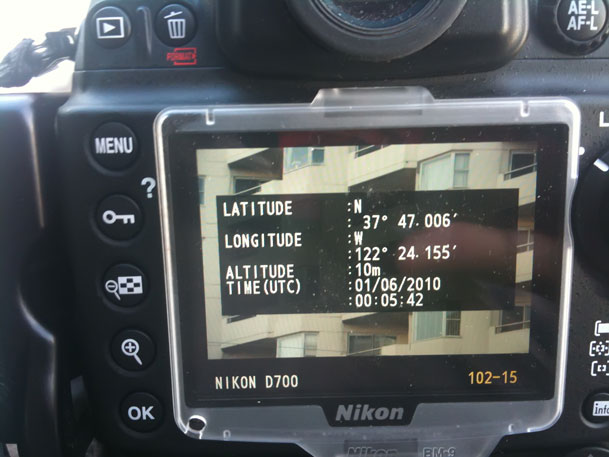
My Nikon D700 has GPS support built-in with a menu to display the status of the attached module. This is one of the reasons I use Nikon over Canon and others. With that said, it’s 2011 and I still can’t believe that ALL camera manufacturers don’t offer a built-in option! More power to XEquals!

Since I don’t have to wait for a satellite signal to be acquired I can start shooting right away! Both the remote features and the GPS features work as advertised. The iPhone app also takes avantage of the iPhone’s built-in compass for heading info. Sweet!

What about battery life? To be honest I haven’t had it/used it long enough to judge the impact on battery life over other GPS units. I know that Nikon has done a lot of work in their latest firmware to reduce the battery drain from GPS devices so I’m not really worried about it.

How’s the GPS accuracy? Keep in mind that it’s only as accurate as your iOS device. iPhones and iPad WiFi+3G devices are going to be the most accurate because they actually have GPS chips built-in. iPod touch and WiFi only iPads will have to rely on Wi-Fi triangulation which could be an issue in the boonies. In my limited testing the shots were geotagged very accurately using my iPhone 4.


How would I redesign it?

my Kirk L-Bracket has to come off to use the blueSLR

There really isn’t anything that is majorly wrong with this device. I do like it A LOT! However, with the “flush” (a blessing and a curse) design, this means that the port door on my D700 is covered while I’m using it. It also meant that I had to remove my L-bracket for my tripod head since it covers that part of the camera. Since it is a remote trigger, most likely I’d want to use it while it’s on my tripod. This would mean having to go back to the standard tripod mount instead of my L-bracket . Not the end of the world, but  I would like to see the next version offer a “swivel” feature with a lock. If I could swivel it up or out then it would be out of the way of everything that I wanted to attach. For a moment I was going to complain that it didn’t offer a 10 pin passthrough on my D700. Then I realized that the only time I’ve needed a passthrough on my other GPS units was to attach a shutter release. Duh! This is already a “wireless” remote shutter release too. However, if you have some other accessory that uses the 10 pin terminal, then you’re going to have to decide which one you want to use.


The Bottom Line

Kudos to XEquals for making a killer device/App combo! I know that there were some manufacturing issues with the Nikon D7000 model and as soon as that one is available It will undoubtedly become my default travel camera GPS unit. If you’re not waiting on the D7000 model, then I wouldn’t hesitate in getting one of these TODAY!

You can learn more about blueSLR and order directly from their site here.

Get the App for your iPhone, iPad or iPod touch for free here from the iTunes

See my blueSLR App review here.

Don’t Copy and Paste or Rebuild, Place those InDesign Documents Instead

httpv://www.youtube.com/watch?v=oqfJMjXKbbM


Adobe InDesign can place a lot of different graphic formats. However, one that users usually forget about is Placing other InDesign Documents in your main document. This gives you the advantage of reusing or taking advantage of work that's already been done. It also allows you to more easily collaborate with others on a larger project by placing the InDesign documents done by your colleagues in a master InDesign document. This is also great for Ads that were created as single page documents to go in a larger publication.

See more of my Adobe Creative Suite Videos on my Adobe Creative Suite Podcast and get the App here. It features EXCLUSIVE CONTENT that no one else gets to see:

Learn Adobe Creative Suite with Terry White - Wizzard Media