In this episode of Adobe Creative Cloud TV, I’ll show you how to take advantage of linked smart objects in Photoshop CC. Not only can we place files as links in Photoshop now, but they can even be RAW files. See a workflow from Lightroom to Photoshop to InDesign and Muse.
Are you missing out on my Bonus Content?
See more of my Adobe Creative Cloud Videos on my Adobe Creative Cloud TV and get the App below. It features EXCLUSIVE CONTENT that no one else gets to see. This episode has a BONUS CLIP that is available only in the App! My iOS App is a Universal App for iPhone, iPad and iPod touch. I also have an Android version on the Amazon App Store:
A few days ago one of my readers left a comment on one of my posts and he was basically asking why I convert my camera’s RAW files into DNG (Digital Negative) format? He asked if I had a post that I could refer him to about my reasons. I realized that while I’ve talked about converting RAW files into DNG format for years at seminars, training classes and on my videos, I’ve never really done a blog post on it. So here it is – Why DNG?:
What is DNG?
DNG stands for Digital Negative format. The problem with the RAW files that your camera produces is that they are proprietary. Also since every camera manufacturer makes their own RAW format (Nikon .NEF, Canon .CR2, etc.) there is no real standard. Each camera manufacturer does whatever they feel like in their format. This also means that not all software can read every RAW format because with each camera manufacturer and each new camera the software companies have to update their software to be compatible with the slight changes in each RAW format. Notice how your software never has to be upgraded to read JPEG files. That’s because JPEG is a universal, non-proprietary standard. You never have to worry about a company going out of business and therefore not being able to access your JPEG files. Like JPEG, DNG is an open standard. Although it was created by Adobe, it’s an open standard with a published specification. If Adobe did nothing else with DNG the standard would still live on. Some cameras even shoot natively in DNG format now.
Why I convert my Nikon .NEF files into DNG
I’ve been converting my Nikon, Sony, and Canon RAW files into DNG format for several years now. However, as usual the question comes up – why? Why go through the extra step to convert your files to DNG. Here are a few reasons for me:
My images are my memories and can’t be replaced. I never want to worry about a day when I can’t open them up because of a company going out of business or deciding to stop support of a format. With DNG I have that extra peace of mind.
DNG saves me space. On average my DNG files take up about 1MB less space than my original .NEF files. Since there’s no loss of quality I’ll happily take the storage savings.
No XMP Sidecar Files! Since software programs can’t really edit RAW files (it’s the non-destructive benefit of working in RAW), any changes you make are made to a small text file that accompanies the RAW file. These small text files are called sidecar files and it becomes one more thing you have to keep track of. Now instead of a folder of images, you have a folder of images and sidecar files. With DNG the changes you make are written non-destructively right into the DNG file.
Backwards compatibility. DNG format has been supported since Photoshop 7, so I can hand off a DNG file from a camera that just came out to someone with an older version of Adobe Camera RAW or Lightroom and they’d be able to open it up and work on it.
How To Convert Your RAW files to DNG format
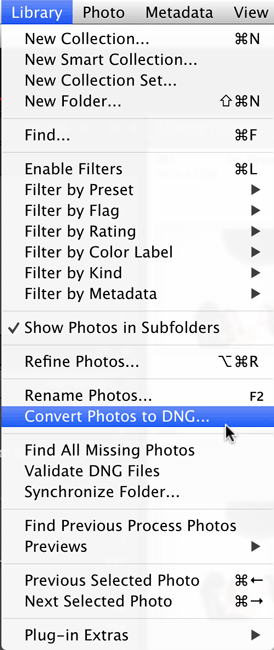
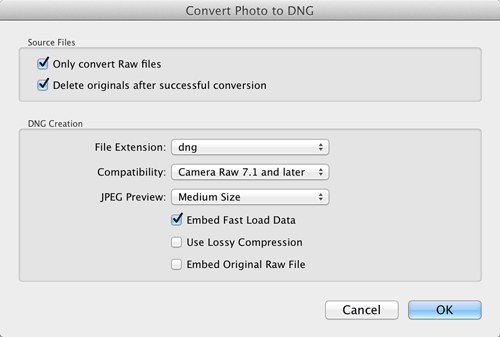
Like I said, I’ve been converting my RAW files into DNG for years now. I do it upon import into Adobe Lightroom. However, if you’ve already got images in Lightroom that are in your camera’s RAW format, you can convert them after the fact by selecting the ones you want to convert and choosing “Convert Photos to DNG” from the Library menu.
If you’re not using Lightroom, Adobe actually makes a FREE stand alone DNG converter. It’s always updated anytime there is a new version of Adobe Camera RAW or Lightroom so that it has support for the latest digital cameras and their RAW formats. You can learn more about DNG and grab the FREE DNG converter for Mac or Win here.
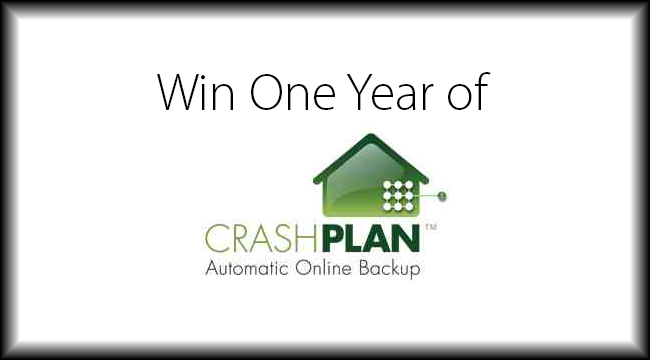
Last week I started a contest to give away a FREE Year of CrashPlan.com Family Plan for offsite cloud backups. Last night I picked a winner at random from the comments left on the original post.
That winner is:
Cynthia Blanton
Congratulations to Cynthia!
Get the iPhone/iPad app that I used to pick the random number here:
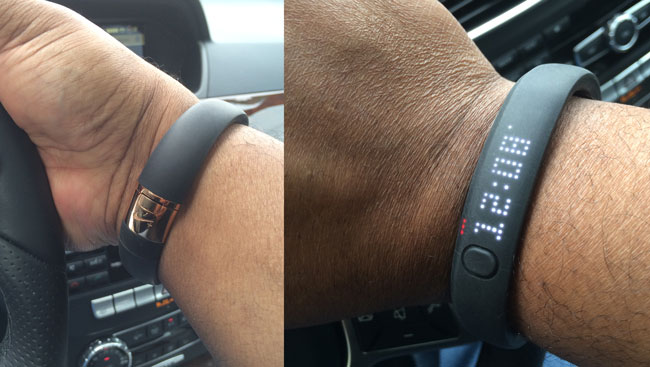
The older I get the more reminded I am about the importance of taking better care of myself. As with most things, the easier the task the more likely you are to do it. That’s why I use these three devices on a very regular basis to keep me in check. The first one is the Nike+ Fuelband. I originally got one as a gift, but have since upgraded to the current model
The Nike+ Fuelband SE Rose Gold Edition
I can not only see the time at a glance, but also the dots going across the top show me where I stand towards my daily goal
The Fuelband is my choice for wearable “motivator”. The idea behind the Fuelband is that you wear it throughout the day or 24/7 and it monitors your “activity” such as walking, running, and sleeping. It can track the number of steps you take and convert them into Nike Fuel Points. It will also show you calories burned. Not to mention that the built-in display can also show you the time, making it a watch as well. The reason I like the Fuelband over other such gadgets like the Jawbone UP and Fitbit is that besides having a better display to show you information even if you don’t sync with your smartphone, it simply has a more stylish, less cheap look to it. If the idea is to wear it all day everyday, then I want something that looks as good as it functions. When Nike introduced the SE versions and added a “Silver” and “Rose Gold” model I was sold! Although the Rose Gold version was $20 more than the standard Fuelband SE colors, I wanted it because it matched my other gold accessories. The SE is also a huge improvement over the original model when it comes to battery life. With the old one I used to get about 2-3 days of battery life before needing to charge it. Now I easily go a week without thinking about it. It also incorporates Bluetooth 4.0 which means that it can stay connected continuously to your smartphone while using less juice. The iPhone App is also updated on a regular basis with new features and now you can even track your sleep.
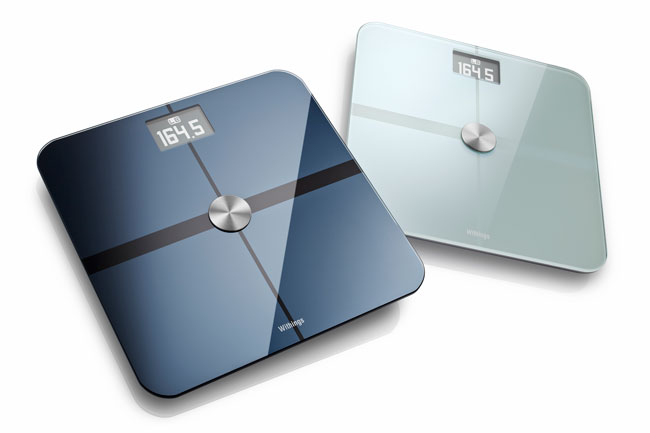
This is the device that I love some mornings and hate on other mornings. In any case it gives me a weight measurement that is automatically and wirelessly sync’d to my Withings.com account. I can either track my progress from their website or easily from their free iPhone/Android App. I also love this device because it’s supported by my favorite health app, “LoseIt”. The scale monitors your weight, fat mass, and BMI.
You can get the Withings WS-50 Smart Body Analyzer here
They also sell a less expensive model that only tracks Weight and BMI here.
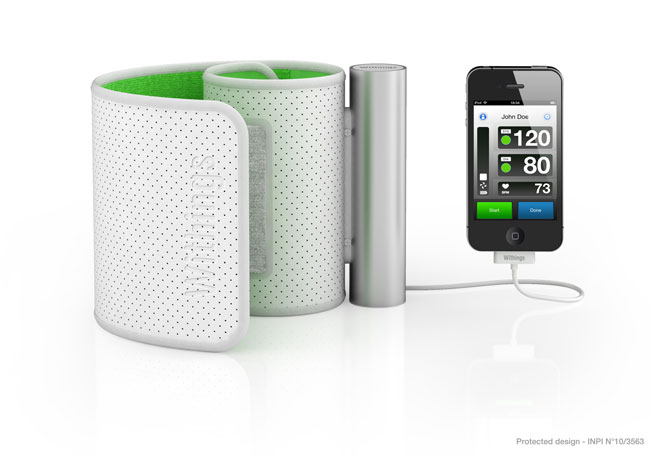
Lastly I use the Withings Blood Pressure Monitor
This one is cool because the device is completely controlled by the Withings App running on your smartphone. Wrap the cuff around your arm, fire up the app and tap the start button. Once you get your reading you can even email it to your doctor right from within the app. I have the older model pictured above and it works fine with the Apple Lightning Adapter. However, if you get the current model you don’t have to worry about the cable because the new model uses Bluetooth and is therefore wireless.
You can get the Withings Wireless Blood Pressure Monitor here.
The Bottom Line
I can certainly use non-connected devices and enter everything into my apps manually and still keep track of my progress. However, because these devices are connected and wireless it’s a no-brainer. I step on the scale in the morning, step off and go on about my day and getting ready. I fire up the the Lose It app over breakfast and see how I’m doing. My Fuelband alerts me when I need to MOVE MORE because I’ve been sitting too long and lets me chart my progress as well as see how I’m doing compared to my other Nike+ friends. I’ve lost 35lbs since January 6, 2014. So something is working! More to lose and these devices will help me with my goals. Also see the “3 Apps That Monitor My Health“
In this episode of Adobe Creative Cloud TV, I’ll show you How to Get Started With Adobe Premiere Pro CC – 10 Things Beginners Want To Know How To Do. Video editing is actually fun and with Premiere Pro CC it’s not as hard as it may look. Almost every new camera and mobile device can shoot video today. You might as well put that video to good use and edit it to be more compelling!
Are you missing out on my Bonus Content?
See more of my Adobe Creative Cloud Videos on my Adobe Creative Cloud TV and get the App below. It features EXCLUSIVE CONTENT that no one else gets to see. This episode has a BONUS CLIP that is available only in the App! My iOS App is a Universal App for iPhone, iPad and iPod touch. I also have an Android version on the Amazon App Store:
There’s nothing like showing up to do a session at a conference and seeing 400+ empty chairs. Your first thought is “Oh my God, I hope people attend this thing!” Well I must say that not only did have close to 400 people in my session yesterday at HOW Design Live, but it was the right 400 people. Like most presenters I draw my energy from the crowd. The better the crowd responds the more it will help me to do a better presentation. I had an hour to show: “Create Cutting Edge Websites. No Code. No Kidding”. Of course this session was all about Adobe Muse CC.
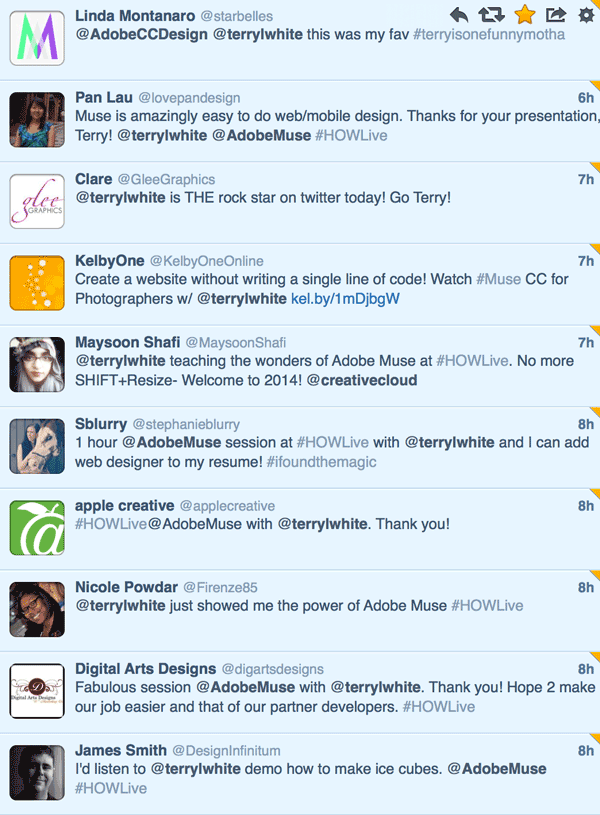
Judging by the number of mentions on Twitter, the crowd LOVED IT!
Thanks again to all who attended and I’ll see you again today same time for “Adobe Creative Cloud Time Saving Tips and Tricks.” If you didn’t get a chance to attend my session here at HOW Design Live 2014 in Boston, you can check out my getting started video on Adobe Muse CC here:
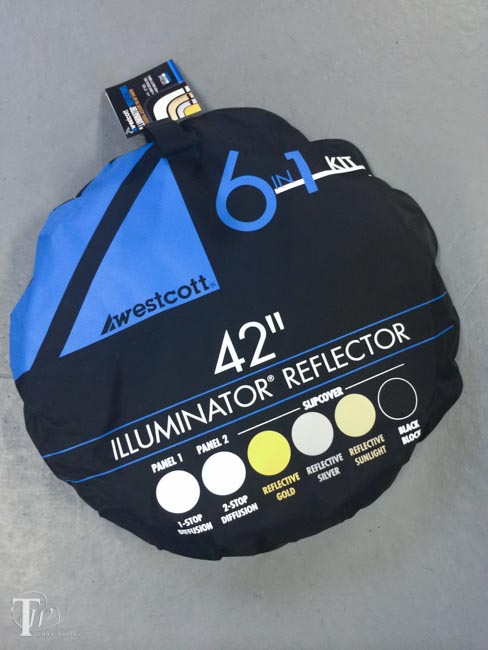
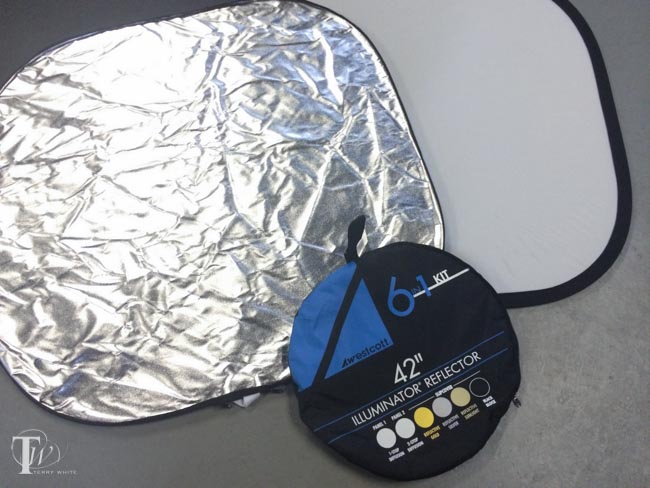
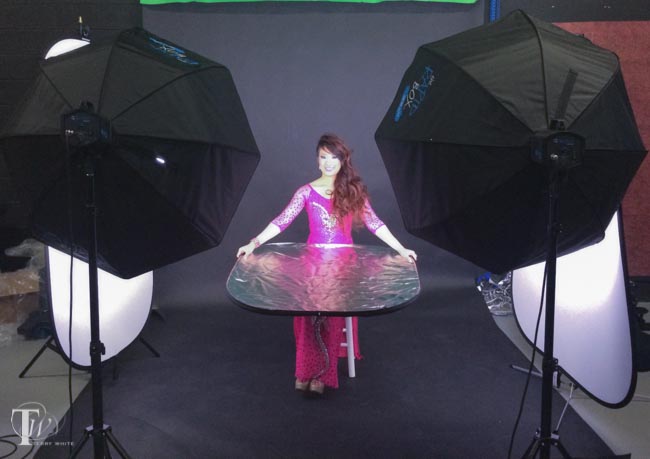
Photographers use reflectors to add light and defusers to soften light all the time. I was in need of a new reflector kit that I could take on the road. There are lots of reflector kits out there that come with reversible covers. Usually you’ll get white, silver, gold and perhaps black. The one thing that intrigued me the most about the Westcott Illuminator Reflector 6-in-1 Kit is that unlike most kits, they actually include TWO collapsible diffusers. One is a full-stop of diffusion and the other one is a two-stop diffuser. They include a reversible cover that has silver, gold, sunlight and black.
With this one kit you can either have two separate diffusers or one diffuser and one reflector or one diffuser and one black/flag. That pretty much gives you everything you could want in the field.
The nice big 42″ size is also a bonus because it can either diffuse a large area or bounce a larger amount of light therefore make it softer.
You can get the Westcott Illuminator Reflector 6-in-1 Kit 42″ size here.
As many of you know I’ve been a fan of CrashPlan.com for a few years now. It’s a major part of my backup strategy and gives me an offsite backup in addition to my onsite Time Machine backups. Recently I had Code 42 (the company behind CrashPlan) speak at my local user’s group and I learned even more about how cool their services are. Thanks to the good folks at Code 42 I’m able to give away a full year of the CrashPlan Family Plan (up to 10 computers) to one of my lucky readers.
It’s easy to enter this contest. All you have to do is write a comment below about why you think backups and offsite backups are important to you. The deadline for comments is Sunday, May 18, 2014 at 9PM ET.
I’ll select a winner from the comments below at random and announce the winner one week from today (Monday, May 19th, 2014).
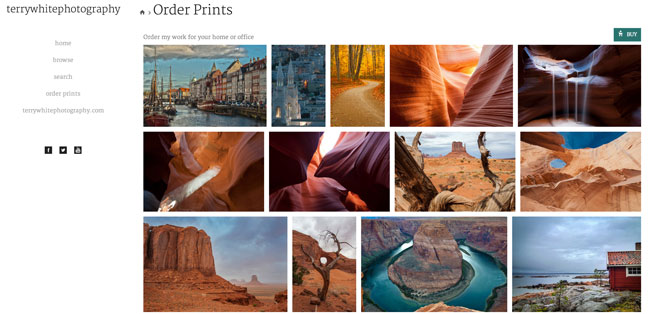
I’ve been shooting seriously/professionally since late 2006. Throughout the years people have occasionally asked me if they could buy particular images that I have captured. I never really had an answer to that question because I was never really set up to make it happen. Although I’ve owned Epson photo printers in the past, I’ve always found that the maintenance and upkeep of the printer was not worth it. It seemed that every time I wanted to make a print it would take more time than it was worth to get the printer “going again”. This meant unclogging the heads or discovering that I had run out of a particular color right at that crucial moment. Because of this and simply not having the time to deal with it, I have avoided making my work available for sale. Well, that was until recently. The question came up again and during Photoshop World, I was inspired by the various works being displayed by many of my fellow instructors. That fueled my passion once again and I decided that it was time to figure out a way to do this. I settled on smugmug.com for now to be the back end for my print sales. As a pro member they allowed me to easily set up a gallery and make my prints available in the sizes that I wanted to sell them at as well as the prices I wanted to sell them for. The beauty of it is that they do the printing and shipping.
In this episode of Adobe Creative Cloud TV, I’ll show you 5 or more hidden gems in Adobe Illustrator CC. See these little known features and tips and tricks that will speed up your Illustrator workflow.
Are you missing out on my Bonus Content?
See more of my Adobe Creative Cloud Videos on my Adobe Creative Cloud TV and get the App below. It features EXCLUSIVE CONTENT that no one else gets to see. This episode has a BONUS CLIP that is available only in the App! My iOS App is a Universal App for iPhone, iPad and iPod touch. I also have an Android version on the Amazon App Store: