Photographers: iMac or Mac Pro?

macpro-imac

Rather than just do a review of the new Mac Pro and tell you how fast it is vs. any other Mac that Apple has made, I decided to approach this review from a different angle. There was a time when I bought Mac Pro towers because I wanted the fastest Mac available. However, I soon realized that as much as I didn’t want to admit it, the Mac Pro is “overkill” for what I do on a day-to-day basis. Sure, faster is always nicer than slower when it comes to waiting for a process to complete, but honestly I’m rarely waiting for a process to complete these days. Sure, I render video on a weekly basis and it would always be nicer to have those videos render faster, but is the faster render worth the money for a Mac Pro? The answer will of course depend on how much you find yourself waiting on your computer and not being able to do anything else while you’re waiting.

Let’s get some ground rules out of the way first

If you don’t like Macs or don’t want a Mac for whatever your reasons are, you can pretty much stop here and find something else to do with your time. I find it entertaining when people feel compelled to tell you/me how much they don’t want the thing you’re reviewing or writing about because they use something else. This is not a Mac vs. _______ post. If you’re happy with a Windows PC or Linux, or anything else, I’m happy for you. If you’re reading the rest of this post then I’ll assume that you’re a Mac user or thinking of becoming one.

The next thing I’d like to get out of the way is that if you’re looking for a Mac Pro review that tells you this new Mac Pro is better than the previous Mac Pro with all the benchmarks to back it up, then you’d probably be better served by other reviewers who have targeted the performance of the new model vs. the older model. I’m doing this review/comparison simply to answer the question, “as a photographer would I be better off spending my money on an iMac/MacBook Pro or a Mac Pro?” If you’re a videographer and you’re a Mac user then you probably already have the new Mac Pro because you demanded the fastest Mac you could get to render your videos.


Introduction

When I saw the rumors that Apple was going to release a radically different design for the Mac Pro, to be quite honest I was only mildly interested. As I stated above, I realized with my last Mac Pro that I wasn’t really a Mac Pro customer. Sure I appreciate the faster performance, but I found myself only using my Mac Pro when I knew a process was going to take a long time to complete. Otherwise I was quite happy just using my MacBook Pro simply because I could use it in any room at any time. I could take it with me on the road. However, I said to myself perhaps if the performance (for what I do) is significantly better and the price point for an entry model was $2,500 or less, I’d consider getting one. Well we know the latter didn’t happen, so now it was time to test the performance. I got the opportunity to test a Mac Pro standard configuration in my studio for a few weeks. I loaded the latest version of my Adobe Creative Cloud applications on it as well as a few utilities that I use such as ScreenFlow. Next, I began running side-by-side tests of the things that I do daily that take more than a few seconds. My assumption was that the Mac Pro would certainly be at least twice as fast at everything I threw at it than my 2012 MacBook Pro Retina Display Mac. Actually I was wrong!
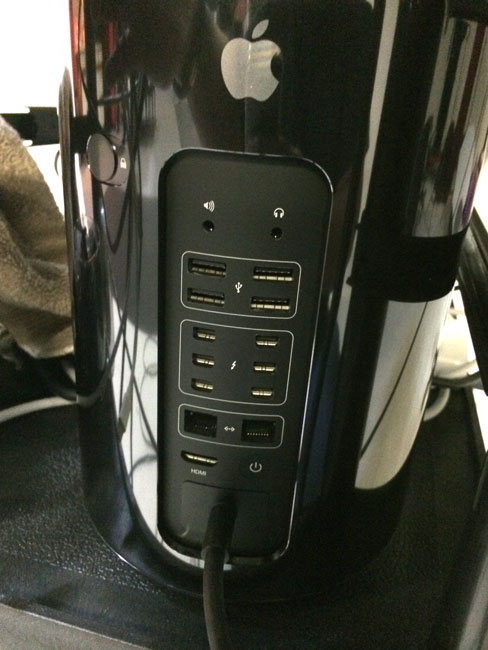
MacPro-back

When will a Mac Pro significantly outperform any other Mac?

As I said above, I was wrong in my assumption that the Mac Pro would be at least twice as fast at everything. Actually it is faster at everything! Just not by a margin of two. On every test I threw at it the Mac Pro outperformed my now two-year-old MacBook Pro, but in some cases it was only slightly faster. This is when I realized that in order to see significant speed improvements the software you’re testing not only needs to be optimized for the faster processors, but also it would need to take advantage of the multiple cores. Even then, the MacBook Pro is no slouch. It’s got multiple cores too. Where I saw the biggest differences was in (no surprise) video rendering and processes that take longer than a minute or so anyway.


What I do as a photographer

As a photographer I spend most of my time in Adobe Lightroom 5 and Adobe Photoshop CC. Photoshop CC definitely takes advantage of multiple cores and now has Open CL support. So filters will run faster on the new Mac Pro. All of these applications are 64bit native and that means that they’ll take advantage of additional RAM.

My first test was one of the things I do after every shoot. I convert my RAW files into .DNG (Digital Negative) format. This is one of the few times that I see a progress bar in Lightroom because it does take time to do it. I converted 435 16MP Nikon .NEF RAW files into DNG format.

First on the MacBook Pro it took 14 minutes 35 seconds

On the Mac Pro the same conversion took 12 minutes 12 seconds.

Yes it was faster! However, it was only about 2 minutes faster. I must say that I was a little disappointed. However, I moved on to the next test.

The next test was using the Web module in Lightroom to export a web gallery using the Client Response Gallery Template from The Turning Gate.

MBP-7

On the MacBook Pro this export took 7 minutes 41 seconds

MP-4

On the NEW Mac Pro it took 4 minutes 9 seconds.

Ahhhh, much better. Almost half the time.

The next test was a simple HDR (High Dynamic Range) conversion in Photoshop CC using three RAW files. This is a two-part process. The first part is simply combining the three (or more) images together and aligning them. Then the second part of the process is applying whatever settings you want to control how your HDR looks.

The first part on the MacBook Pro took 12.70 seconds and on the Mac Pro it took 9.10 seconds

The second part on the MacBook Pro took 13.00 seconds and on the Mac Pro it took 11.13 seconds.

The next test was stitching a Panorama together using Photoshop CC and 10 RAW files

On the MacBook Pro this process took 1 minute 12 seconds

On the Mac Pro this process took 51 seconds.

I could have gone on running other tests and other filters, but these are the things I do on a regular basis. If it was faster at something that I rarely do, then I really don’t care as much. As you can see from the results above, the Mac Pro wins on every test as you would expect it to, but the results (even if it was twice as fast in every case) may not justify the difference in cost. We’ll get to that at the end.

Next it was time to look at what I do as a Photographer when it comes to video

I use video in a couple of different ways. The first as a photographer is to tell my story. This means capturing video with my DLSR, GoPro, iPhone, etc. I use Adobe Premiere Pro CC to assemble those videos and then output them to share (usually on YouTube). The next way that I use video and probably the way that I use video the most often is to record my Creative Cloud TV video podcasts. These screen recordings are done with ScreenFlow and since the editing I do is pretty simple I can edit these right in ScreenFlow. Of course I need to export those videos out and this can take a while depending on the length of the video. I had no doubts that this is where the Mac Pro would really shine. After all these are the kind of processor and resource intensive tasks that the Mac Pro was built for. I was not disappointed.

The first test I ran was an export of an hour-long edited video out of ScreenFlow.

On the MacBook Pro this export took 60 minutes

On the Mac Pro this export took 33 minutes.

It gets better in Adobe Premiere Pro CC and the Adobe Media Encoder CC. I needed to convert this video into a different format using the Adobe Media Encoder CC.

MBP-34

On the MacBook Pro this conversion/export took 34 minutes 36 seconds

MP-12

On the Mac Pro this conversion/export took only 12 minutes 36 seconds


The Bottom Line

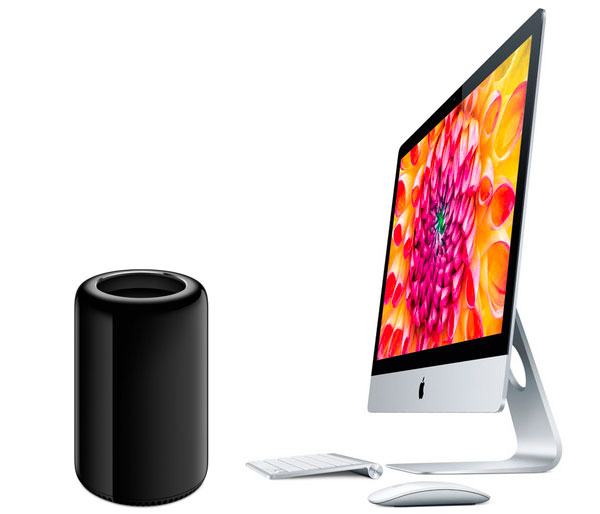
The NEW Mac Pro is the fastest Mac that Apple has ever created. The question you have to ask yourself is, “Is the speed difference worth the difference in price?” For me the answer is no. Sure if I spent my days rendering video all day every day, I’d already have the Mac Pro. There would be no question. However, as a photographer I can’t justify the difference in price. Hey! Wait a minute, you said in the title of this post “iMac or Mac Pro?”, yet all you’ve talked about is the MacBook Pro vs. the Mac Pro. This is true. I didn’t have a new iMac to compare it with. However, if you’re looking for a “desktop” Mac as a photographer, I’d seriously consider the current iMac. The current iMac will be as fast or faster than my 2012 MacBook Pro in every case. So here are some prices and specs to look at:

The Mac Pro model and configuration that I tested above is here. (Now keep in mind that if I was going to buy one I’d start with this configuration and I’d go with a bigger internal drive and more RAM)

The base configuration 4th gen 21.5″ iMac is here. However, this model is not a fair comparison. It’s probably a little slower than my MacBook Pro as it has a slower processor, less RAM, and no Flash Drive.

This would be the configuration that I would recommend and would be more of a fair comparison: 27″ iMac here.

If you’re interested in a similar configuration (using the current model) to my MacBook Pro 15″ Retina, it would be this one.

Why an iMac? Although I don’t use one, an iMac makes sense because you’re getting a fast Mac with a nice big 27″ display all in one.
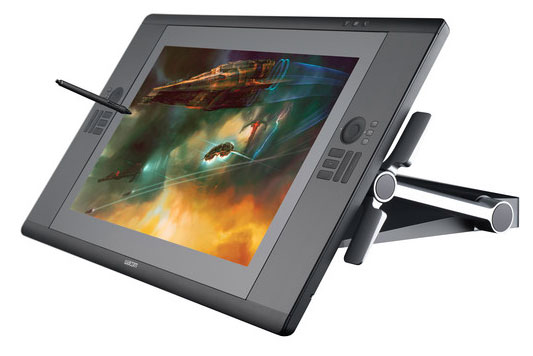
Wacom_cintiq-24hd

Why a MacBook Pro? For me the MacBook Pro makes the most sense because when I’m at my desk I have connected to a nice 24″ HD Wacom Cintiq display/tablet. When i get ready to go I disconnect it and go. I have a computer with a nice 15″ Retina display when I’m on the road. If I didn’t travel for a living then I’d probably have an iMac. Since I travel a lot, a MacBook Pro makes more sense.

If you want the fastest Mac and you don’t mind spending $3,000-$4,000 (or more) on it, then definitely go with a Mac Pro. Everything you do will likely be faster than the Mac you’re currently using. Keep in mind that you’ll also need to buy a display, keyboard and mouse/tablet to go with it. At the end of the day I realize that computers have become “fast enough” and that I don’t spend a lot of time waiting these days. Even when a process such as a video render/export is going to take a few minutes I can toss it to the background and work on other things in the foreground. My last Mac Pro once configured set me back over $5,000 and while it was a beast, I found that I wasn’t really using it as much as I had hoped I would, so I sold it. The new Mac Pro is faster, but is it $4,000 faster? For me it’s not.


UPDATE: Now that the iMac Retina 5K is out I got my hands on one and did a comparison here.


Quick Tip: How To Extend a Background In Photoshop CC – Instagram Style

PS_CC_totem


In this episode of Adobe Creative Cloud TV, I’ll show you a quick tip on how to change the aspect ratio of your portrait image to a square by extending the background in Photoshop CC.

Are you missing out on my Bonus Content?

See more of my Adobe Creative Cloud Videos on my Adobe Creative Cloud TV and get the App below. It features EXCLUSIVE CONTENT that no one else gets to see. This episode has a BONUS CLIP that is available only in the App! My iOS App is a Universal App for iPhone, iPad and iPod touch. I also have an Android version on the Amazon App Store:

.


4 Hidden Gems in Adobe Photoshop CC

PS_CC_totem


In this episode of Adobe Creative Cloud TV, I’ll show you 4 hidden gems in Adobe Photoshop CC that I bet most of you didn’t know were there.

Are you missing out on my Bonus Content?

See more of my Adobe Creative Cloud Videos on my Adobe Creative Cloud TV and get the App below. It features EXCLUSIVE CONTENT that no one else gets to see. This episode has a BONUS CLIP that is available only in the App! My iOS App is a Universal App for iPhone, iPad and iPod touch. I also have an Android version on the Amazon App Store:

.


NAPP and Kelby Online Training become KelbyOne

kelbyone-design

I know that many of you are Photoshop users and chances are you were part of the National Association of Photoshop Professionals (NAPP). I also know that many of you love online training and chances are you part of Kelby Online Training. If you were part of either of these two programs it just got a lot better for you as they just merged into one, actually KelbyOne. I’m thrilled about this change because it could be confusing at times as to which one to become a part of, especially if you were a graphic designer. It also means that they will focus on more than just Photoshop and photography. As a matter of fact I recorded three NEW classes for KelbyOne that should be released soon!

Scott Kelby, a good friend of mine has posted this video to tell you more about it:

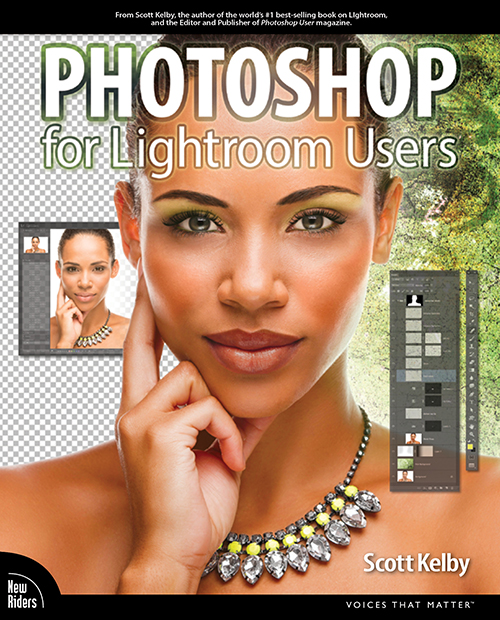
Also be sure to check out his latest book, Photoshop for Lightroom Users:

PS_forLR_Users_Covers_FrontAndSpine


How To Get Started With Lightroom 5 – 10 Things Beginners Want To Know How To Do

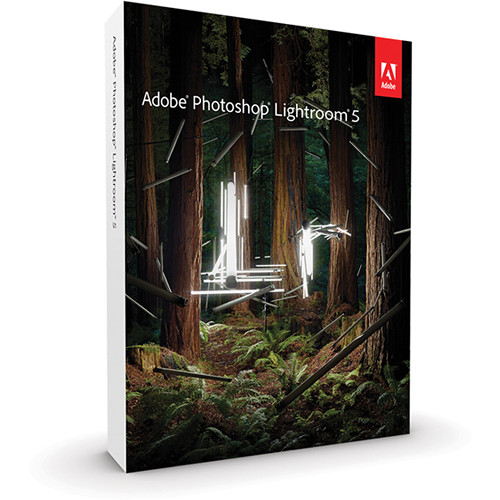
Lightroom_5_box

One of my most popular videos right now is my How To Get Started with Lightroom 4 video. I figured it was time to make the Lightroom 5 version and here it is. In this episode of Adobe Creative Cloud TV I’ll show you how to get started using Lightroom 5. This is for beginners, first time Lightroom users, and folks who are self-taught and may be missing things. We’ll cover the 10 things beginners ask about the most. Definitely check out the last thing which is how to move your photos from one drive to another.

Are you missing out on my Bonus Content?

See more of my Adobe Creative Cloud Videos on my Adobe Creative Cloud TV and get the App below. It features EXCLUSIVE CONTENT that no one else gets to see. This episode has a BONUS CLIP that is available only in the App! My iOS App is a Universal App for iPhone, iPad and iPod touch. I also have an Android version on the Amazon App Store:

.


Adobe Lightroom 5.3 and Camera RAW 8.3 are Here!

Lightroom_5_box

Lightroom 5.3 is now available as a final release on Adobe.com and through the update mechanism in Lightroom 5.  The goal of this release is to provide additional camera raw support, lens profile support and address bugs that were introduced in previous releases of Lightroom.

Release Notes

Newly added support for Tethered Capture in Lightroom 5.3

  • Canon EOS Rebel T4i / EOS 650D / EOS Kiss X6i

New Camera Support in Lightroom 5.3

  • Canon EOS M2
  • Canon PowerShot S120
  • Casio EX-10
  • Fujifilm XQ1
  • Fujifilm X-E2
  • Nikon 1 AW1
  • Nikon Coolpix P7800
  • Nikon Df
  • Nikon D610
  • Nikon D5300
  • Nokia Lumia 1020
  • Olympus OM-D E-M1
  • Olympus STYLUS 1
  • Panasonic DMC-GM1
  • Pentax K-3
  • Phase One IQ260
  • Phase One IQ280
  • Sony A7 (ILCE-7)
  • Sony A7R (ILCE-7R)
  • Sony DSC-RX10

New Lens Profile Support in Lightroom 5.3

Mount Name
Apple   Apple iPhone 5s
Canon   Canon EF-M 11-22mm f/4-5.6 IS STM
Canon   Canon EF-S 55-250mm f/4-5.6 IS STM
Canon   TAMRON SP 150-600mm F/5-6.3 Di VC USD A011E
DJI   Phantom Vision FC200
Nikon   Nikon 1 NIKKOR AW 11-27.5mm f/3.5-5.6
Nikon   Nikon 1 NIKKOR AW 10mm f/2.8
Nikon   Nikon AF-S NIKKOR 58mm f/1.4G
Nikon   Nikon AF-S DX NIKKOR 18-140mm f/3.5-5.6G ED VR
Nikon, Sigma   Sigma 18-35mm F1.8 DC HSM A013
Sony   Sony 16-35mm F2.8 ZA SSM
Sony   Sony 24-70mm F2.8 ZA SSM
Sony   Sony 70-200mm F2.8 G SSM II
Sony   Sony E 16-70mm F4 ZA OSS
Sony   Sony E PZ 18-105mm F4 G OSS
Sony   Sony E 20mm F2.8
Sony   Sony FE 28-70mm F3.5-5.6 OSS
Sony   Sony FE 35mm F2.8 ZA
Sony   Sony FE 55mm F1.8 ZA

Bugs Corrected in Lightroom 5.3

  • Issues when upgrading catalog from previous versions of Lightroom.
  • Incorrect photos are displayed after switching away from a Publish Collection.
  • Catalog optimization did not finish, and was not optimizing the catalog
  • Feather of clone spots is set to 0 after upgrading catalog to Lightroom 5.
  • Auto White Balance settings are not saved to Snapshots.
  • Sony 18-55mm lens is detected as the Hasselblad 18-55mm lens for lens correction.
  • Increased Update Spot Removal history steps when in Before and After view.
  • Slideshows start playing automatically even when the Manual Slideshow option is enabled.
  • On certain images, red eye removal behaved incorrectly
  • Incorrect White Balance settings applied when synching Auto WB from source to targets
  • Video playback stops when dragging on the scrubber.
  • Errors when publishing photos to Flickr through the Publish Service.
  • Option + drag on Edit Pin behavior is functioning incorrectly.
  • Black border appears around the exported slideshow video.
  • Catalog containing images processed with PV2003 were adding a post-crop vignette when catalog upgraded to Lightroom 5.
  • Pressing the “Reset” button while holding down the Shift key caused Lightroom to exit abruptly.
  • Output Sharpening and Noise Reduction were not applied to exported images that were resized to less than 1/3 of the original image size.
  • The Esc key did not exit the slideshow after right clicking screen with mouse during slideshow playing.
  • Import dialog remained blank for folders that contain PNG files with XMP sidecars.
  • Metadata panel displayed incorrect information after modifying published photo.  Please note that this only occurred when metadata was changed after the photo was published.
  • In the metadata of exported files, the application is listed as 5.0 instead of the actual Lightroom version (such as 5.2, etc.).
  • An Error Occurs When Playing a slideshow having an image Flipped Horizontally or Vertically.
  • Added Camera Matching color profiles (Natural, Muted, Portrait, Vivid) for the following Olympus cameras:
    • Olympus E-5
    • Olympus E-M1
    • Olympus E-M5
    • Olympus E-P1
    • Olympus E-P2
    • Olympus E-P3
    • Olympus E-P5
    • Olympus E-PL1
    • Olympus E-PL1s
    • Olympus E-PL2
    • Olympus E-PL3
    • Olympus E-PL5
    • Olympus E-PL6
    • Olympus E-PM1
    • Olympus E-PM2
    • Olympus STYLUS 1
    • Olympus XZ-1
    • Olympus XZ-2
    • Olympus XZ-10

Download Links:

Lightroom 5.3: Windows | Mac

Continue reading “Adobe Lightroom 5.3 and Camera RAW 8.3 are Here!”

How To Edit Video in Photoshop CC

PS_CC_totem

In this episode of Adobe Creative Cloud TV I show just how easy it is to edit video in Photoshop CC even if you’ve never edited video before. Adobe Premiere Pro CC is Adobe’s award-winning, industry standard video editor. However, there are many Photoshop users out there who aren’t professional video editors, but know how to use Photoshop. That’s why Photoshop has a very capable video editor built right in that takes advantage of all your Photoshop skills.

Are you missing out on my Bonus Content?

See more of my Adobe Creative Cloud Videos on my Adobe Creative Cloud TV and get the App below. It features EXCLUSIVE CONTENT that no one else gets to see. This episode has a BONUS CLIP that is available only in the App! My iOS App is a Universal App for iPhone, iPad and iPod touch. I also have an Android version on the Amazon App Store:

.


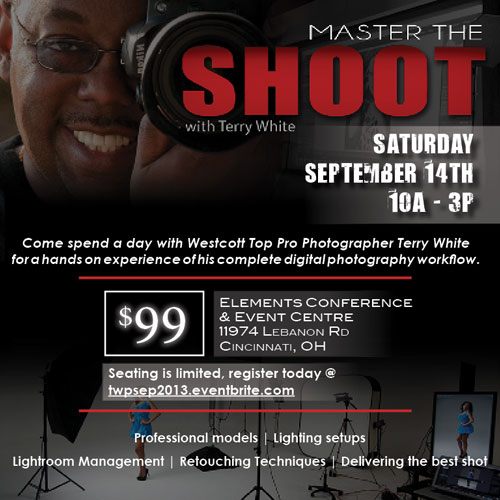
My “Master The Shoot” Photography Workflow Workshop Heads to Cincinnati this Saturday

TWPworkshop_OH_SQUARE

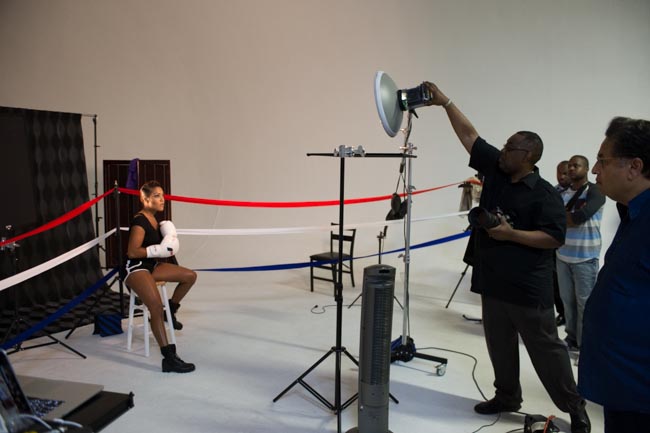
That’s right! You can join me in Cincinnati for an end-to-end digital photography workflow workshop. We’ll light, we’ll shoot, and then we’ll go through my entire digital photography workflow from memory card, through Lightroom and Photoshop ,and out to the final images.

wpid12703-DSC_3355_sm.jpg

We had a blast a couple of weeks ago in Michigan and now it’s time to do it again, but in Cincinnati, Ohio. There are still seats left, but it is filling up fast. Don’t miss this opportunity to learn how to streamline your workflow. You can register here.

wpid12701-DSC_3354_sm.jpg

New Photoshop CC Generator Creates Web Optimized Graphics Automatically

PS_CC_totem

In this episode of Adobe Creative Cloud TV, I’ll show you how to use the “Generator” feature in Photoshop CC (14.1 update). With Generator, Photoshop CC can automatically generate web optimized graphics from your layered Photoshop Files.

Are you missing out on my Bonus Content?

See more of my Adobe Creative Suite Videos on my Adobe Creative Cloud TV and get the App below. It features EXCLUSIVE CONTENT that no one else gets to see. This episode has a BONUS CLIP that is available only in the App! My iOS App is a Universal App for iPhone, iPad and iPod touch. I also have an Android version on the Amazon App Store:

.


TWPworkshop_OH_SQUARE


Join me for my “Master The Shoot” Digital Photography Workflow Workshop

TWPworkshopSQUARE

By popular demand I’m doing a digital photography workflow workshop. The 1st one will take place Saturday, August 24th, 2013 from 10 AM – 3 PM in my Troy Michigan photography studio. After that I’ll head to Cincinnati Ohio for another one on September 14th.

I’ll walk you through my complete end-to-end digital photography workflow. You’ll get a chance to see how to work with models, how to light for beauty and fashion photography as well as the secrets to my workflow for bringing images into Lightroom 5, organizing, picking the best shots, delivering client galleries and retouching the final selections in Adobe Photoshop.

Seating is LIMITED! So Register Today!

Register for August 24th, Troy MI

Register for September 14th, Cincinnati OH

Why attend this Master the Shoot workshop?

There are several great workshops that concentrate on lighting or photography techniques, what makes this workshop different is that I will take you through the entire process from start to finish. You’ll learn tips and tricks to speed up your entire workflow including image management and retouching techniques that will help you deliver the best shot.

What should I bring?

If you want to participate in the portrait shoot bring your camera.

If you want to follow along with the workflow bring your laptop with Adobe Photoshop Lightroom 4 or 5 and Photoshop CS6 or higher. While this will be mostly a lecture on the workflow and retouching techniques that  I use, you should be able to follow along with many of the tips and best practices. Please note: Everyone is going to have different configurations and shoot slightly different images and therefore it will NOT be a hands on class step-by-step session. If you bring your laptop you’re bringing it as a convenience to you, as there will not be time for me to work with everyone one on one. With that said, you will walk away with my notes/workbook so that you can go back and practice the main points of the day.