OWC Creates a Better Thunderbolt Dock

OWC-thunderbolt-2-dock

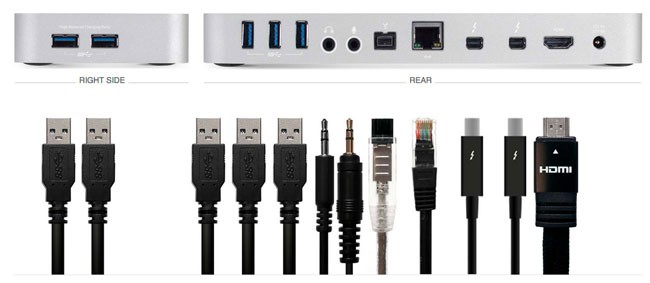
In 2013 I got the Belkin Thunderbolt Dock and I’ve been quite happy with it. So what could change in two years? Well, a lot. The basic principle is the same. A Thunderbolt dock allows you to plug in a single Thunderbolt cable into your Mac and expand the ports giving you more USB 3 ports, Firewire 800, audio line in/line out, etc. The NEW OWC Thunderbolt 2 Dock does what you would expect but offers 5 USB 3.0 ports instead of 3. It offers 2 Thunderbolt 2 ports, and HDMI (with 4K support) in addition to Firewire 800, Gigabit Ethernet, Audio in/out. Two of the five USB 3.0 ports are also high powered for charging your bigger devices such as iPads. With they addition of HDMI this means that now I only have to plug ONE Thunderbolt 2 cable and one display port cable to my Cintiq 24HD into my MacBook Pro and ALL of my devices and displays are connected.

wpid14281-IMG_3522_sm.jpg

For those of us who use our MacBook Pros like a desktop computer when we’re at our desks, these Thunderbolt docks are indispensable. It makes coming home or back to the office so much easier by just having to plug in one or two cables to have all of your devices connected. Now if it could only cut down on the amount of clutter on my desk, I’d be even happier! 🙂

You can get/pre-order the OWC Thunderbolt 2 Dock here. Initial supplies are limited. I ordered mine the minute they announced it and was happy when it shipped.


Guest Review: If All Hardware Installs Were This Effortless…


By Jason Levine


16.0GB (8GBx2) PC3-10600 DDR3 1333MHz SO-DIMM 204 Pin CL9 SO-DIM


You know, having built more PC machines than I care to remember, I think my 'fear' in doing RAM upgrades stems from those fateful salad days, when a RAM upgrade meant a number of things:


1) Is this really the proper RAM for this particular (OEM, non-OEM, generic/custom) motherboard;

2) Will I have to go into the BIOS and make changes?

3) Will the machine recognize this memory at all;

4) Will I have perpetual BSOD and wind up re-installing the old RAM again, wasting money and time. 


I'm sure many of you have been there, and despite the fact that we're now in 2012, I still get those same vibes every time I prepare for the inevitable 'upgrade'.


Well, I'm happy to say that the current offering from OWC gives your 2011 series MacBookPro an unbelievable boost in speed and power, one that you're likely to notice almost instantly…especially if you've got an internal SSD drive and, even moreso, if you work across multiple 64-bit Creative Suite applications (like Lightroom, Photoshop, Premiere Pro, After Effects and Adobe Media Encoder).


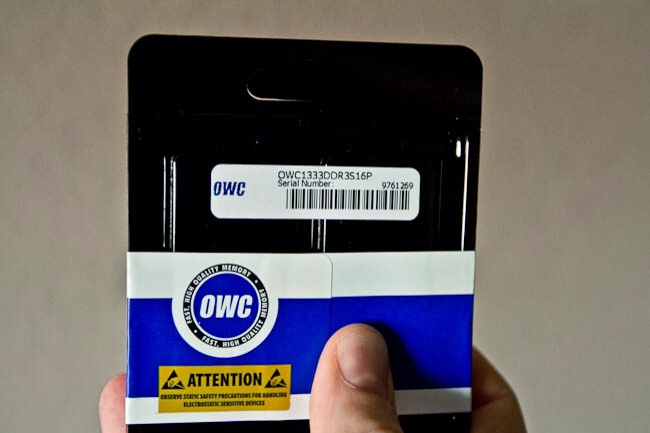
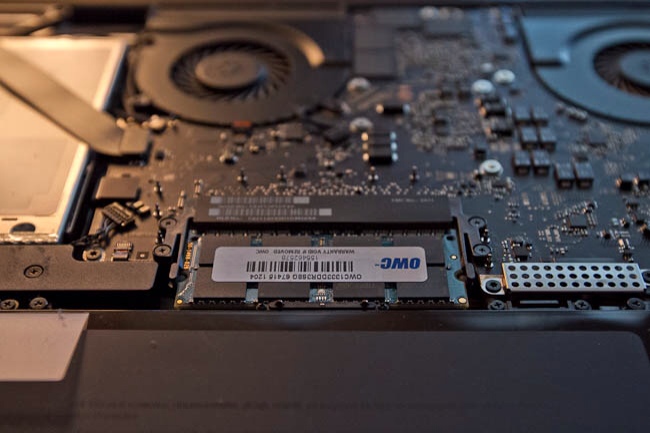
The two, 8GB sticks arrived in small, simple packaging in less than 24 hours. I placed the order around 4pm Central Time on Thursday, and literally had it in my hand before 1pm on Friday. Gotta love that.  Crack open the seal, and there, atop some pink foam, were the keys to my new editing bliss… <insert pics however you see fit>


Curiously, or perhaps not-so-curiously absent were any kind of installation instructions. Again, I've done this for every MBP I've ever purchased, so I wasn't too concerned. A simple Google search yielded exactly what I needed, and just as I remembered…9 simple screws (for my 'early 2011 17" MBP) was all it took to reveal the RAM slots; pop it in, pop it out, you're done. Even as I began to remove the back cover, I thought to myself, "Do I have to ease it out? Any special tricks?" But again, it literally pops off, easily, and you just apply  a little pressure (so that the edges are flush) when you're replacing the screws. 


The key to doing this quickly is lining up those screws! I always place them, visually on the table, in their exact layout. Apple uses different size screws, so it's key that you return them where they belong. Not doing this, however, will lead to enormous frustration. I don't even want to go there!


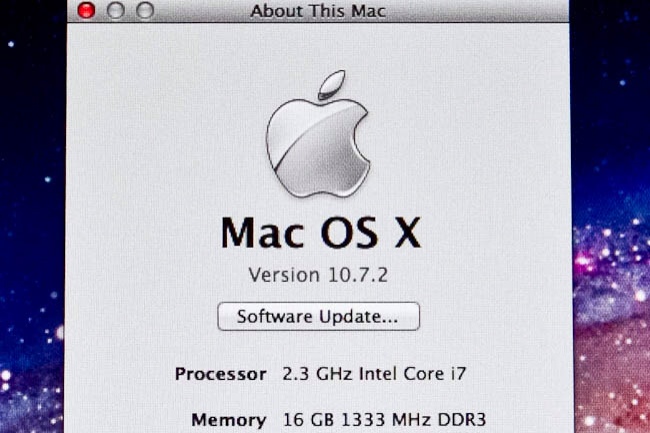
Within seconds of closing the back cover, I powered on the machine and literally, in about 5.5 seconds, I was greeted with the LogIn screen; a happy place to be! I logged in, quickly went to "About This Mac" and lo and behold, there it was….  I ran the machine for about 9 hours following the install, and everything seemed great. Fast, responsive, and ultimately, stable.  Today I'll be diving into some deep editing/rendering, so that'll be the more definitive comparison test (having spent the better part of the year working with 8GB).


Now, I wanted to share this little tidbit. I had ordered this RAM when it was first made available (or rather, 'announced') sometime last March.  In fact, it was my dear friend and fellow road-warrior Terry White that sent me the OWC link in the first place.  At the time, the 16GB RAM upgrade was selling for $1600 . Steep indeed…but for mobile video editing, it would be a game-changer and a no-brainer on my part. I quickly made my purchase and awaited the goods.  


Well, tragedy struck Japan, and the industry was immediately impacted by this unprecedented natural disaster. As such, I was immediately made aware by OWC that the part was 'on backorder' and would be shipping in approximately '6 days'.  A second email, about two weeks later indicated "20 days"; I received two more emails and one final communication at the end of April indicating, "Backordered Indefinitely".  Understandable, clearly…and I just assumed it wasn't meant to be. 


Now, my only complaint in this whole process was that OWC never contacted me again to let me know it was back in stock! And moreover, it was nearly 1/6 the cost! (with shipping, the total was approximately $266 USD). I found out, via several Twitter friends, that they were already using the 16GB upgrade and I had no idea it was even readily available.  Since it was OWC who ultimately cancelled my order, I would have thought they would have contacted me to let me know it was once again available. They didn't. So really, this is just a little 'wrist slap' to say, "Hey…I wanted to give you my money…and you could have had it sooner!" 


All in all, this was the best (and most smile-inducing) RAM upgrade I've ever done (this being my sixth or seventh MBP). Time will indeed tell, but from where I'm sitting, it's all looking up…and with 16GB of fast RAM…in my laptop. 


Review: OWC Mercury On-The-Go SSD External Drives

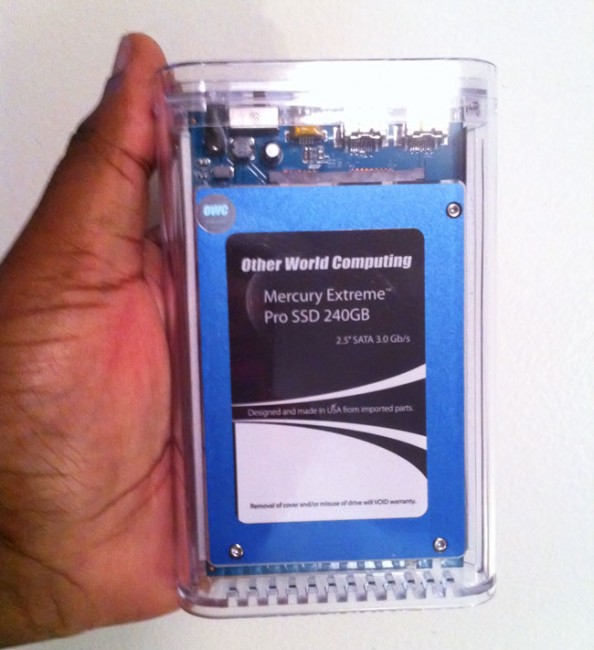
Yes I'm a speed freak. I spent much of the money I made as a youth paying for speeding tickets. This means I also like my computers to go as fast as possible. I moved to SSD (solid state drive) drives with my latest notebooks and while the cost is high, I do like the boot times, application launch times and of course the data copy times (see my original boot time comparison video here). Speaking of data copy this made me think about the drives that I'm copying that data to and from. While it's great having a fast internal drive, I started to look at the external drives I carry around too. This is when I decided to test the OWC Mercury On-The-Go SSD External Portable Drives. The good folks over at OWC sent me a review unit (a 240GB Mercury Extreme Pro). The first thing I wanted to test was copy speeds. The drive comes with a 1.73GB disk image of shareware on it. I figured I'd start my test copying this file back and forth and between drives. 


Copy Times (shorter is better)

To copy 1.73GB disc image from the OTG 240GB SSD Drive

To copy 1.73GB disc image to the OTG 240GB SSD Drive


To copy 1.73GB disc image from the LaCie


To copy 1.73GB disc image to the LaCie


Next up a folder of RAW photos

To copy 3.87GB folder of photos from the OTG 240GB SSD Drive


To copy 3.87GB folder of photos to the OTG 240GB SSD Drive


To copy 3.87GB folder of photos from the LaCie Drive

To copy 3.87GB folder of photos to the LaCie Drive

The OWC SSD drive won in every test and I imagine with larger copies such as backups and clones the time savings would be realized even more.


A Startling Realization – Firewire 800 is not fast enough

After doing just a couple of tests with the new SSD drive and my existing LaCie Rugged Drive I realized that while the OWC SSD drive was faster (see the numbers above), it wasn't night and day faster. I have a theory that the bottleneck is the Firewire 800 bus itself. In other words the data can only go as fast as Firewire 800 will transfer it. 


The Bottom Line

The OWC Mercury On-The-Go with an Extreme Pro SSD drive is Fast, Silent and Portable! It's also likely to be more reliable as there are no moving parts to fail like in traditional hard drives. SSD drives can slow down over time and that has yet to be seen with this model as I haven't had it long enough to know if that will happen or not. The one thing that isn't an advantage right now is speed over traditional drives with FW800. With that said they do offer a USB 3.0 version that will likely yield faster results over FW800 if you happen to have a USB 3.0 equipped computer. However, until we see Thunderbolt based portable drives I don't think we'll see the real speed potential of these SSD drives. With that said, you'd have to weigh the cost of going SSD vs. traditional hard drives for your portable data needs. Having a drive with no moving parts/peace of mind comes at a premium price.

The OWC Mercury On-The-Go 240GB SSD goes for $479.99

Their 320GB 7200 RPM Drive in the same case goes for $104.99.

5 Things That Got My Attention at Macworld Expo 2011

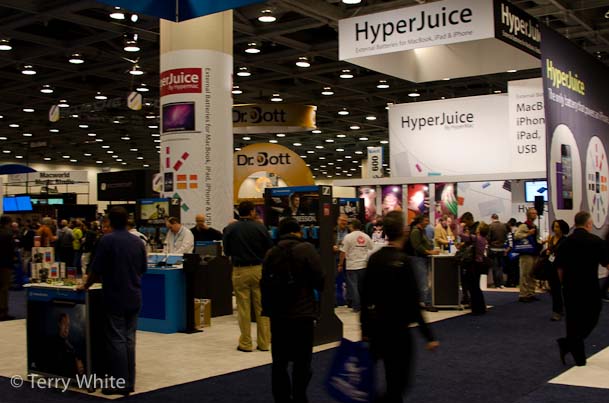
It's been two years since I attended Macworld Expo. I missed last year due to being out of the country. I also have to admit that I didn't really expect the show to last after Apple pulled out two years ago. However, to my pleasant surprise the show is still strong.  It's hard to gauge the show's actual success because trade shows in general are down. With the economy, internet and live webcasts of press briefings people don't feel the need to go to trade shows as much as they use to. I was asked to speak at this year's conference on "Digital Publishing from InDesign to the iPad." My class was on the last day, Saturday afternoon and while the class wasn't overflowing, there were a good number of attendees that were very interested in the topic. So much so that even though I ran over about 10 minutes, no one moved. Everyone stayed til the very end and many participated in a good Q&A session. I was happy with the class overall and have no complaints.


What about the show floor?

Macworld is both a Conference and an Expo. The show floor was open throughout the entire show. Walking the show floor is always a treat for me because I always find at least one product that I'm very interested in and had no idea it existed. It also gives me a chance to meet with developers/vendors face to face that I've corresponded with over the months/years. I can't compare this year's show to last year's show because I wasn't there last year, but this year's show was definitely up beat. On some days it was actually hard to get through the aisles because of all the people. 


Isn't it just iPhone/iPad Case World now?

There have been many jokes made about Macworld becoming "iPhone Case World". I certainly have felt that way in the past as in years past there were a ton of vendors on the show floor selling nothing but cases for iPhones and iPods. While there were certainly several options to get a case or holder for your iDevice this year too, it didn't feel like one big case tradeshow. There was a good mix of solutions for the Mac and for iDevices too. While most of the big companies don't exhibit anymore, HP was there with a sizable presence showing off their printer line including their AirPrint capable printers


5 Cool Things

Whenever two Macworld attendees meetup the question usually comes up "did you see anything cool?" While there wasn't anything that totally blew me away, there were lots of little things. I look at this show as the show you would goto to get "accessories" for your Apple product or iDevice. In other words without Apple you won't be learning about the NEW Apple ________, but you will see many nice add ons in terms of hardware and software. In no particular order, here are 5 things that I saw that got my attention:


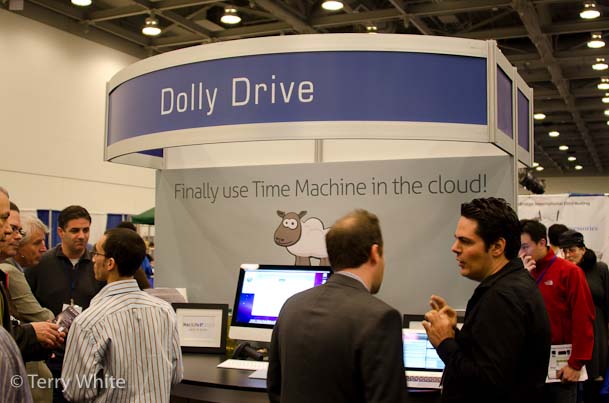
Dolly Drive

There was a lot of buzz online and in person about a new Cloud based backup service called Dolly Drive. What makes Dolly Drive unique is that they have figured out a way to allow you to use Mac OS X's Time Machine backup feature to the cloud. Now you can do your hourly backups offsite. There are of course a lot of questions that come to mind and the company is new. I spoke with them and will be working with them on testing and reviewing the service. Stay tuned for that. However, it does look promising for those looking for a way to be able to backup and restore files while on the road.

Learn more at their site here.


LensPen for your Laptop or Mobile device

I was already a fan of LensPen for my camera lenses. However, I had no idea that they offered solutions for cleaning my laptop and mobile device displays. I picked up a Laptop Pro and ScreenKlean

See their products here.


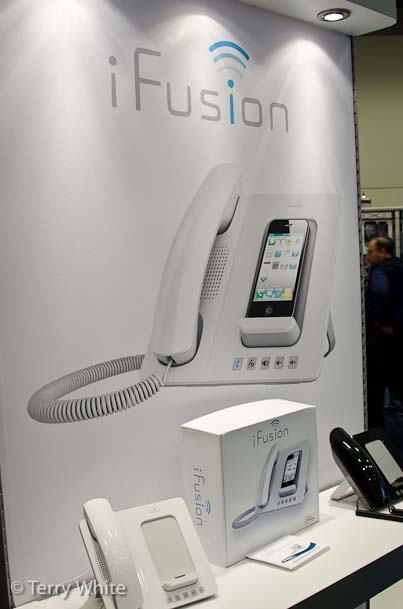
iFusion

More and more people are giving up their landlines and just using their mobile phones. Certainly this is not the first product of its kind, but I liked the aesthetics of it. iFusion lets you dock your iPhone and use a standard handset while you're at your desk to make/receive calls. It's unclear how well this will work or not work, but It caught my eye. I also pinged them about a multiple handset wireless solution to replace what I have now.

Learn more here.


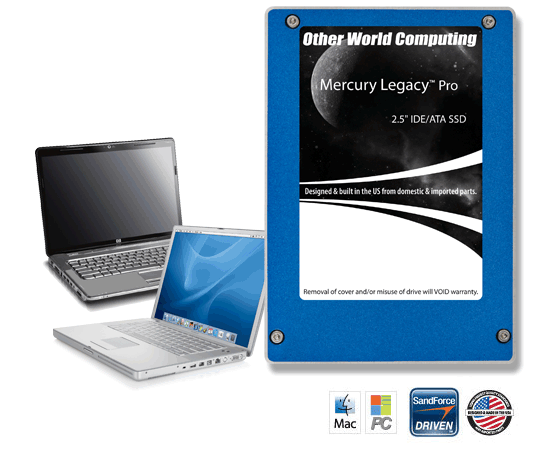
OWC SSD Solutions

Other World Computing was on hand with a fairly large presence and while they sell a lot of things that I'm already familiar with this was the first time that I got a chance to check out their SSD replacement hard drive solutions. The one that caught my eye is Data Doubler solution that replaces the optical drive in your MacBook Pro with a second hard drive such as an SSD. With a Solid State Drive you could use it to load your operating system and applications while keeping your original drive for the bulk of your data. This would drastically reduce boot times and application start times.

Learn more here.

Check out their shootout here:

httpv://www.youtube.com/watch?v=shVhpKnzfp4


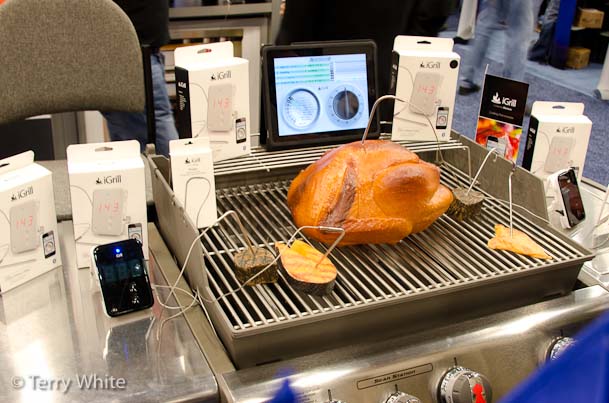
iGrill

Whenever I see devices hooked up to (fake) raw meat I have to stop and look. 🙂 The iGrill aims to provide a temperature monitor for you food that has a bluetooth connection to your iDevice/App to let you know when your meat is done or needs to be turned over. Wow! OK, um  I guess. I have no interest in this product as I don't grill, but I gotta give 'em credit for providing the ultimate geek device for the home. The iPod toilet paper dispenser looks on with envy 🙂

You can learn more about iGrill here.

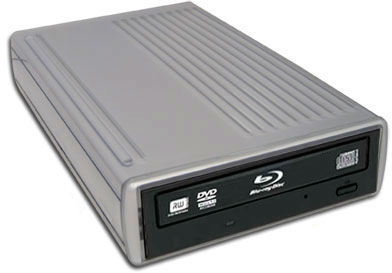
OWC Mercury Pro Blu-ray Burner: Rip/Burn Blu-rays on a Mac

It's pretty clear to me at this point that Apple has no plans of offering a Blu-ray drive built-in to the Mac. Sure I could be wrong, but they have made no mention of Blu-rays in quite a while. After all, they sell and rent movies on iTunes and in a way Blu-ray movies are competition to that download/streaming model. Although there aren't many options to watch a Blu-ray movie on a Mac, there are still some reasons why you might want a Blu-ray drive on a Mac. First off, having a Blu-ray burner means that you could burn your own Blu-ray movie and data discs. Blu-ray discs hold up to 25 GBs of data per disc. That's a lot when it comes to archiving and transferring lots of information. Also since just about every digital camcorder being produced today has the option of recording in HD, it gives you a way to make High Def home movie blu-ray discs. I just got a brand new 12 core Mac Pro and I started looking at Blu-ray options for it.


OWC Does both External and Internal Blu-ray Drives

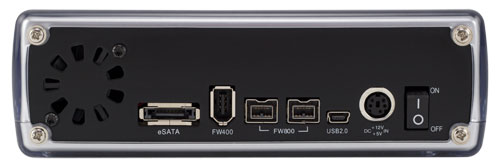
I'm starting off with a Mercury Pro External Blu-ray Quad-interface Drive review unit. This drive can connect via Firewire 800, 400, USB 2 and eSATA.

That pretty much covers all the connectivity options that I would care about.  The drive was very simple to setup. Take it out of the box, plug in the power and an interface cable and turn it on. That's it! Although the Mac OS doesn't provide the necessary support to play a Blu-ray movie, it does provide the necessary support to see the drive as a standard storage device for both reading discs and burning them. I popped in my copy of Avatar on Blu-ray and it showed up on the Desktop like any other disc. 


Ripping Blu-rays


The next question many will have is what does it take to rip a Blu-ray disc? First off, you need to read up on copyright and know that I'm not a lawyer and nor am I'm sanctioning violation of any copyright laws. However, as far as I can tell (my interpretation) you are within your right to "backup" a movie disc that you PURCHASED (not rented) for your OWN PERSONAL USE.  With that said, I wanted the option of Ripping a Blu-ray disc to take with me on the go or to watch via Apple TV if I choose to. Avatar is a perfect example! While this movie is available on iTunes and even includes a Digital Copy with the Blu-ray disc, both the iTunes version and Digital Copy are NOT high def. If I want to watch this movie via high definition without having to load the disc, the only way to do so is to Rip it. In the past I've used Handbrake to rip my entire DVD collection. Handbrake doesn't yet Rip Blu-ray movies, so I had to find another solution. The first application I came across is a commercial one called Pavtube Blu-Ray Ripper. There may be free ones or even better ones out there, but this one seems to do everything I want and has an interface that I like. 

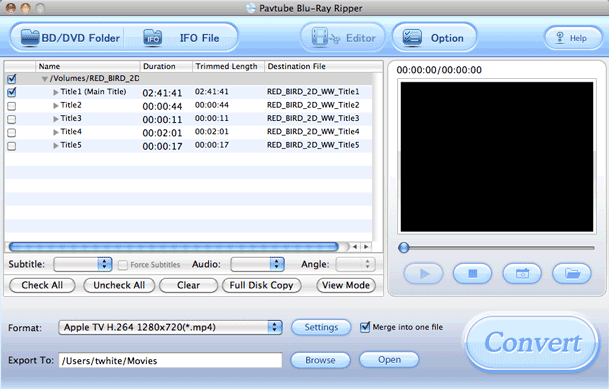
It's easy. Just put your Blu-ray disc in the drive and fire up Pavtube. Choose the Blu-ray disc using the BD/DVD Folder button and then choose your output destination and preset. All the usual suspects are there including iPhone/iPod, Apple TV HD and even iPad HD. Yep, Android is there too along with several other presets.

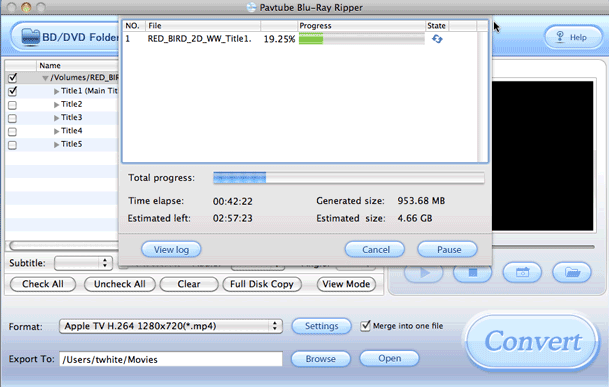
Then you just click the Convert button and be prepared to wait! Ripping a Blu-ray is no trivial task in terms of system resources. Even on my 12 core Mac, the 2 hour 42 minute movie is going to take over 3 hours to rip in Apple TV H.264 1280×720 resolution. Also the estimated file size for this movie is going to be a 4.66GB .MP4 file. Of course depending on the length of the movie, the preset you choose and the speed of your system, your mileage will vary. 

Continue reading “OWC Mercury Pro Blu-ray Burner: Rip/Burn Blu-rays on a Mac”

Is That 1TB in Your Pocket or Are You Just Happy To See Me?

I recently got the OWC Mercury On-The-Go Pro 1TB (one terabyte) drive to test. Before this drive I was carrying TWO external hard drives with me when I traveled. One was a clone backup of my internal drive. I swear by having a clone backup because I want the ability to "boot" from the external if my drive dies right before or during a presentation. Mac OS X's Time Machine is great, but since it's not bootable, there's no time to do a restore if something happens while on stage. The other drive contains files and videos that I may use from time to time during a presentation, but don't need to tie up my internal drive with. I also use that other drive to backup photos onto from a photo shoot in my studio until I get home. 


The 1TB OWC Drive Replaces 2 of My External Drives

My goal for this drive was to use it to replace the two drives I'm currently carrying. I got the drive and partitioned it to 2 500GB partitions. The first partition I use to backup (clone) my internal drive via SuperDuper! The second 500GB partition is for those other misc files and temporary backups I travel with. Although I knew from a size perspective that the 1TB capacity would be exactly what I needed, I was concerned about the relatively slow speed of this drive. Most laptop 2.5" drives spin at either 7200 rpms or 5400 rpms. This drive spins at only 5200 rpms. Back in the day, some 2.5" drives were as slow as 4200 rpms. So while it's not the slowest drive on the planet, it is slower than the speeds regularly available in other capacities today. So for the choice was either carry two fast drives or one big slower drive. 

After I did my clone backup and loaded on all the files I wanted to carry via the other partition, I did a boot test from this drive while it was connected via Firewire 800. It worked. While I could tell that it was slower than my internal 7200 rpm drive, it was tolerable. Keeping in mind that I would only be booting from this drive in an emergency anyway, I can live with the speed if it means carrying one less drive 100% of the time. 


The Mercury On-The-Go Pro  3 in 1 enclosure

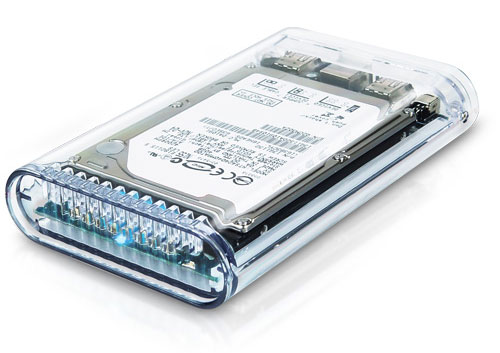
I've been a fan of this enclosure for years. Although there are certainly smaller, sleeker 2.5" drive enclosures out there, this enclosure has never failed me. I can connect via Firewire 800, 400 or USB 2. It's bus powered on all 3 ports and at a glance I can "see" exactly which drive is inside (make, model and capacity). I've had smaller enclosures overheat before and that's never been a problem for me with the Mercury On-The-Go Pro. The drive comes with all the cables you need, a carrying case and an Firewire 800-400 cable. 

The 1TB Mercury On-The-Go Pro drive goes for $260 and you can get it here.

I recommend this particular model for someone who needs to carry around a lot of data and speed is not the most important factor. If you want a faster drive, look at their other models here. The folks over at OWC are GREAT to deal with and I also buy my RAM from them too. Never had any issues buying from them. They stand behind what they sell.