Review: Meike Nikon D600 Battery Grip

nikon_d600_meike

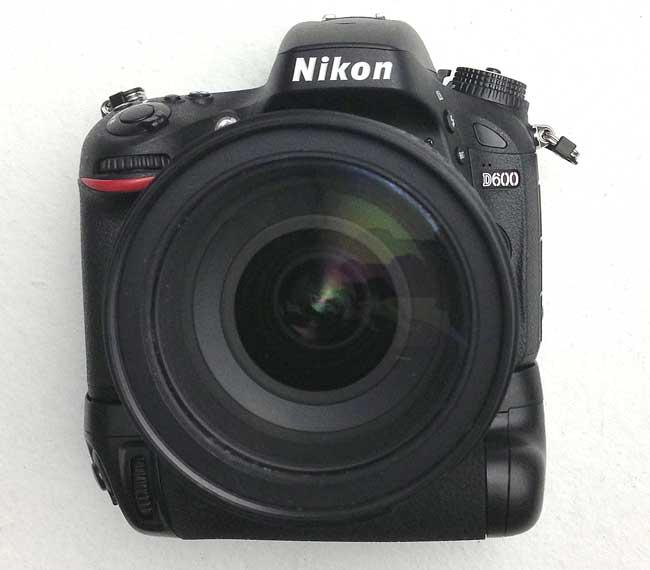
Back when I bought my Nikon D7000 I never really thought about buying the Nikon branded battery grip due to my use of that body as a travel body and the cost of the Nikon grip. However, the 1st time that I had to use it as a backup body when my D700 went into the shop for repair, I really wanted a battery grip for shooting portraits. Then I ran across this Meike 3rd party battery grip and decided to give it a try. It worked perfectly the entire time I had it. I sold it with my D7000 before upgrading to the D600. Once again I was in the same boat. I wanted a battery grip for the D600, but didn’t want to spend the money for the Nikon branded one.

What does it do?

meike_d600_batterygrip

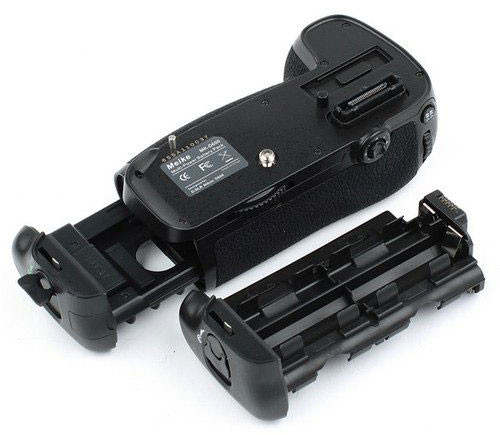
Basically a battery grip does three things. 1) It gives you a way to grip your camera easily in portrait mode. 2) It allows you controls and shutter button access on the grip and lastly 3) it doubles your shooting time by allowing you to put in a second battery. In my opinion a battery grip either works or it doesn’t. Therefore, I have no problem buying a less expensive one as long as it works! Since I had good luck with the Meike knockoff for a fraction of the price, I tried one for my new Nikon D600 and it even works better than the 1st one! Better? Terry you just said “it either works or it doesn’t.” How can this one work better? There was one minor issue with the one for the D7000. The dials on the grip worked backwards. For example, if you wanted to go back one image during review you would have to dial to the right instead of the left. Weird, but I got used to it. I’m happy to report that this one works with the dials turning the right direction as you would expect them to work.

The Bottom Line

With any 3rd party accessory that accesses your camera’s electronics you are at some risk of it doing some damage. However, having used the previous one for over a year with no problems, I feel reasonably safe with this one on my D600. It comes with both trays for either a standard EN EL-15 battery or AA’s. You can get one here for about $68 or the Nikon branded one here for $273.

The Nikon D800/D800E is Official and I Stand By My D4 Decision

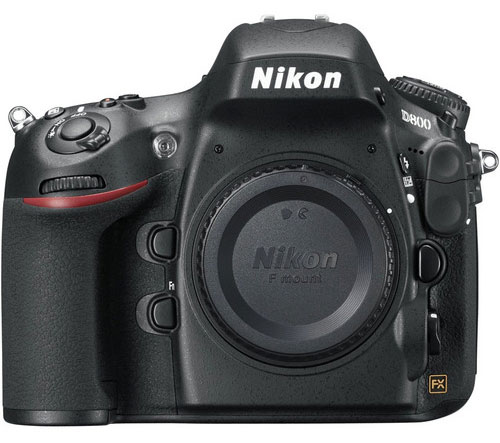
Yesterday Nikon made the long awaited D800 announcement and for the most part the rumors were true in terms of the specs. It's a 36MP camera! Wow! That's awesome for studio photographers, people that do weddings and commercial photographers. It's Nikon's highest megapixel DSLR to date. If you think about it, it's approaching the resolution of a medium format camera at a fraction of the price! While I can certainly understand the benefits for the intended market, (In my Obi-Wan Kenobi voice) this is not the D700 upgrade that I was looking for. Nope, this is a brand new camera aimed at a very specific set of customers. I get it! It's not for me. As I stated when I pre-ordered my D4, that while I don't need a D4 for the type of work/photography I do, I'd rather have the lower megapixel count for my portrait photography.

While I can certainly understand the desire to have more megapixels in terms of potential image quality, enlargements and being able to crop and still have a ton of data, I just don't want every frame I take to produce a file that large. On a positive note (according to the specs) the image size does appear to be selectable. If I'm reading this right you'll be able to choose between (L) 7,360 x 4,912, (M) 5,520 x 3,680 and (S) 3,680 x 2,456. That sounds great! In theory you would be able to dial up or down the MP count as needed. However, for me that would mean having it dialed down to "M" the majority (99%) of the time as I can't think of too many occasions where I would ever dial it up. The "M" setting would be a 20MP image, which is still larger than I need and "S" would be around 9MP, which is less than I'm used to now. Also knowing the way things work, I'd have that one magical shot at the lower setting and wished I had had it dialed up for that shot. While this is all theoretical for me at this point, I stand behind my decision to go with the D4. Once the D800 is out in the wild and the reviews (and sample images are in at the various sizes) are in perhaps my opinion will change. If that did happen I could always sell my D700 and go up to a D800 as a second/backup body to my D4. For now I'll be watching the D800 from the sidelines. Cheers to those who have been waiting for and dreaming of a 36MP DSLR!

One more thing… I should also point out that the D800 has two card slots (something I really wanted). CF and SD. That means that having an Eye-Fi card in the SD slot for wireless transfers to your computer, iPad, Android or iPhone while you're shooting is a possibility. I would shoot RAW to the CF and basic JPEG to the Eye-Fi card. The client could be reviewing shots off to the side as I take them. Sweet!

You can pre-order a Nikon D800 here or here You can pre-order a Nikon D800 (low pass fiter with anti-aliasing removed!) here or here.


How I Broke My D700 By Tethering

If you've been reading my posts for the past few days you've probably noticed a theme: Wireless Tethering/Shooting. Now I'll disclose the reason that increased my interest in wireless solutions for shooting to my iPad or laptop. A couple of weeks ago I taught a workflow workshop in Texas for Precision Camera and Westcott. An important part of my workflow is shooting tethered into Adobe Photoshop Lightroom 3. On the 3rd day of this 3 day workshop I just couldn't get the tethering to work. Nothing really changed on my end that I could see and it had worked flawlessly for two straight days, but for some reason I couldn't get past the 1st shot. I tried the usual troubleshooting things, but nothing would get this working again so I moved on. I shot to the card and just took breaks to import the shots via my Firewire 800 CF card reader and showed the class. I got home and didn't think about it again until my next studio shoot. This is when I knew something was really wrong. I tried different cables and nothing would work. Again I had to move on and shoot to the card to get through the session. When I got home that evening I decided to do some additional testing. I tried different cables and again nothing would work until I realized that the cable attaching to the camera seemed slightly more loose than usual. Nothing crazy, but noticeable. I applied a little more finger pressure to the cable end pressing leaning it one way and Lightroom saw the camera. I tried holding it this way as best I could, but the slightest movement would cause a disconnect again. 


It was time for a repair

On my way out the door to Photoshop World I stopped by my local authorized Nikon Repair Facility – Midwest Camera Repair (these guys are great) and dropped off the D700. They said that it was probably an issue with the port being broken off from the circuit board or the board itself had gone bad. If it was just the port then the repair would be around $125. If it was a bad board – oh oh – "we'll call you." Needless to say I was praying for a "disconnected port." Luckily that's all it was and I was happy to pay for this versus a whole new board. 


I don't want this to happen again

I shoot tethered 99.9% of the time in studio. I can't imagine going back to just looking at a 3 inch LCD. My colleague Tom Hogarty (Lightroom Product Manager) pointed me a device called TetherLock.

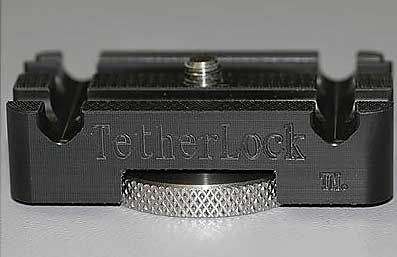
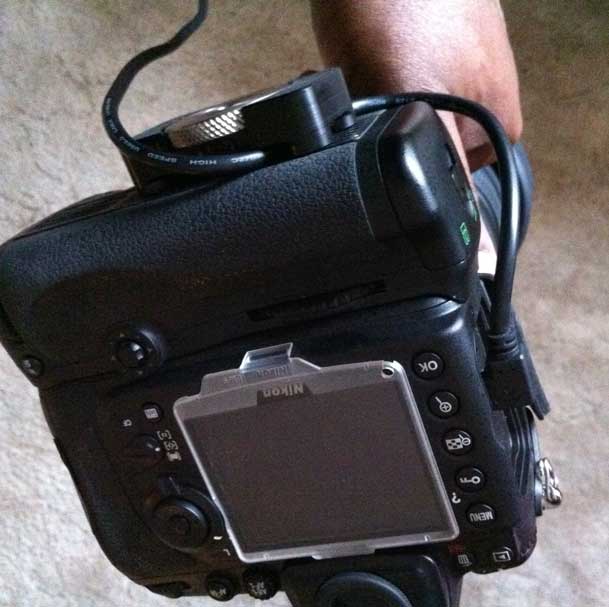
The concept is simple. You attach this device to your tripod hole/port (there is a pass-through so that you can still use a tripod) and run your cable through it. When you tighten it it not only keeps the cable in place, but if you accidentally step on or otherwise tug the cable while shooting there will be zero pressure/tension applied to the USB port on the camera. Like I said, the concept is simple. I ordered one here and it works fine. It's crazy expensive for what it is and YES there are several do-it-yourself options (I don't need you to list them for me, I get it 🙂 ), but as I've said before I'm not a D.I.Y. kinda guy. Clearly I'm not the only one with big feet tripping over tethering cables while shooting or this product wouldn't exist. 

The other thing I would recommend whether you go with TetherLock or your own solution, is a USB cable that has a L-Left head on it. This allows the cable to run down flush along the body as opposed to sticking straight out. Here's the one I use.


The Bottom Line

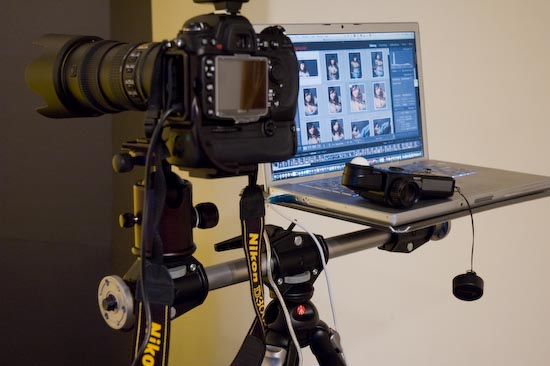
Above setup Bogen-Manfrotto Double Head Accessory Arm and Gitzo Laptop tray that sits right on my tripod.

Built-in WiFi on all cameras can't get here fast enough for me. Until that day happens I'll continue to shoot tethered via a USB cable for my studio shoots. Not ripping the cable out during future shoots is going to be nice and better yet not damaging the camera/USB port is even going to be better.

Review: blueSLR Wireless Camera Control & GPS Geotagging

A couple of my favorite gadgets just got married 🙂 I’m a Nikon shooter and an iPhone user. It’s rare that I’m ever anywhere shooting without my iPhone on my belt. So when XEquals Corp sent me a message about their new blueSLR Wireless Camera Control and GPS Encoding solution I was all ears.


Wireless Control for my Nikon DSLRs
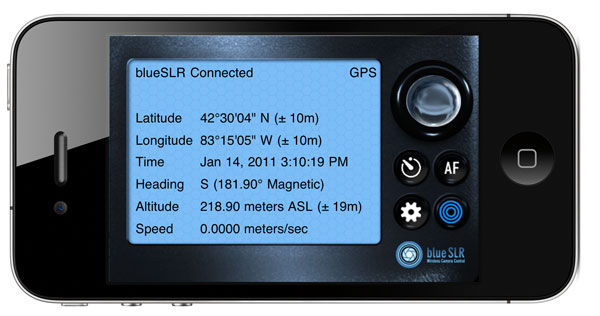
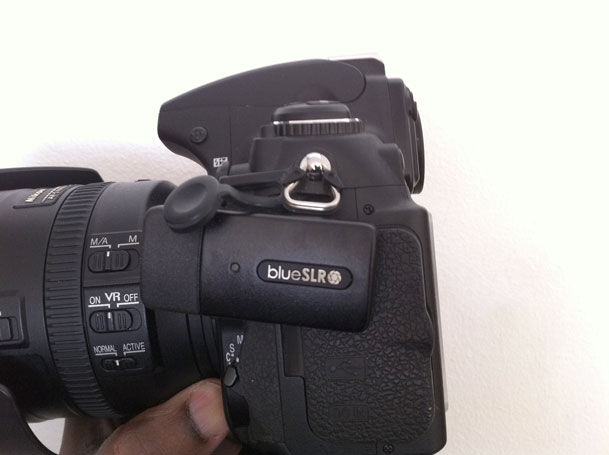
Once you plug in the blueSLR into your Nikon D3100, D5000, D90, D3(s), D200, D300(s) or D700, you can then fire up their free iPhone App. With the blueSLR App you can then remote control your shutter release, auto focus and even time lapse or bracketed exposure from up to 300 feet away via bluetooth. This is the feature that most of the initial announcements were touting and reviewers were so excited about. While I definitely think this is cool, it’s not what excites me most about this solution…


GPS Geotagging is where it’s at – Literally

Click the above shot to see where it was taken – Nikon D700, Nikon 28-300mm lens, blueSLR and iPhone 4


I’ve reviewed many Nikon compatible GPS attachements here over the years and while they have all worked well, they all have one thing in common. They attach to your camera via a cable and have to either sit in the hot shoe or on your strap. They also have to acquire a signal from the global positioning satellites in the sky. Yep that means you’ve got to be outside to grab a signal before you can go inside with the newer units and continue shooting. However, the iPhone’s “Location” feature works off not only GPS satellites but also cell towers and WiFi hotspot locations.

Click the above shot to see where it was taken – Nikon D700, Nikon 28-300mm lens, blueSLR and iPhone 4

This means that your iPhone (iPad or iPod touch) knows where you are even if you’re inside a building. The blueSLR solution can use this Location information and input the info right into (the EXIF data) your shots as you take them with your Nikon compatible camera! Woohoo! Finally! Also unlike all the other solutions out there XEquals prides themselves on their “flush with the camera” design. They’ve gone out their way to make the attachement as unobtrusive as possible. I applaud this effort!


How well does it work?
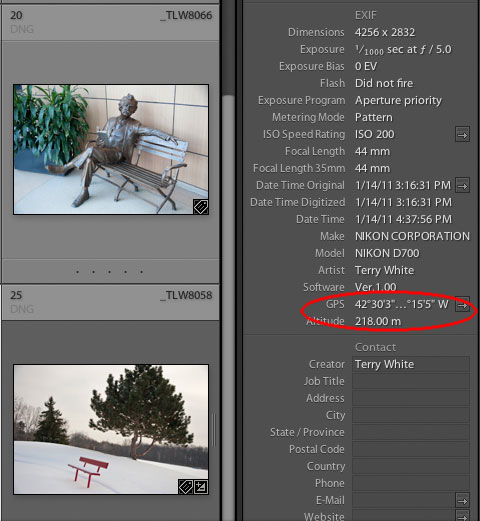
images displayed in Adobe Photoshop Lightroom 3 with clickable GPS button that takes you to Google Maps


I’m very happy with the way this gadget works. The first thing you’ll want to do is (it’s in the instruction card that comes with the device) change the default metering timeout on your camera from 6 seconds to something like 30 minutes. Otherwise you’ll be quickly frustrated by the device constantly timing out before you get to pair it with your iDevice or use it with the App. Once you make that adjustment in your camera, it looks and acts like any other GPS/Remote Shutter Release on your camera.
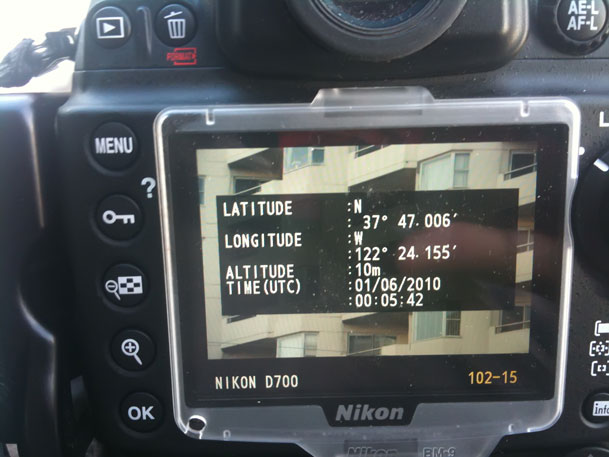
My Nikon D700 has GPS support built-in with a menu to display the status of the attached module. This is one of the reasons I use Nikon over Canon and others. With that said, it’s 2011 and I still can’t believe that ALL camera manufacturers don’t offer a built-in option! More power to XEquals!

Since I don’t have to wait for a satellite signal to be acquired I can start shooting right away! Both the remote features and the GPS features work as advertised. The iPhone app also takes avantage of the iPhone’s built-in compass for heading info. Sweet!

What about battery life? To be honest I haven’t had it/used it long enough to judge the impact on battery life over other GPS units. I know that Nikon has done a lot of work in their latest firmware to reduce the battery drain from GPS devices so I’m not really worried about it.

How’s the GPS accuracy? Keep in mind that it’s only as accurate as your iOS device. iPhones and iPad WiFi+3G devices are going to be the most accurate because they actually have GPS chips built-in. iPod touch and WiFi only iPads will have to rely on Wi-Fi triangulation which could be an issue in the boonies. In my limited testing the shots were geotagged very accurately using my iPhone 4.


How would I redesign it?

my Kirk L-Bracket has to come off to use the blueSLR

There really isn’t anything that is majorly wrong with this device. I do like it A LOT! However, with the “flush” (a blessing and a curse) design, this means that the port door on my D700 is covered while I’m using it. It also meant that I had to remove my L-bracket for my tripod head since it covers that part of the camera. Since it is a remote trigger, most likely I’d want to use it while it’s on my tripod. This would mean having to go back to the standard tripod mount instead of my L-bracket . Not the end of the world, but  I would like to see the next version offer a “swivel” feature with a lock. If I could swivel it up or out then it would be out of the way of everything that I wanted to attach. For a moment I was going to complain that it didn’t offer a 10 pin passthrough on my D700. Then I realized that the only time I’ve needed a passthrough on my other GPS units was to attach a shutter release. Duh! This is already a “wireless” remote shutter release too. However, if you have some other accessory that uses the 10 pin terminal, then you’re going to have to decide which one you want to use.


The Bottom Line

Kudos to XEquals for making a killer device/App combo! I know that there were some manufacturing issues with the Nikon D7000 model and as soon as that one is available It will undoubtedly become my default travel camera GPS unit. If you’re not waiting on the D7000 model, then I wouldn’t hesitate in getting one of these TODAY!

You can learn more about blueSLR and order directly from their site here.

Get the App for your iPhone, iPad or iPod touch for free here from the iTunes

See my blueSLR App review here.

Nikon 70-200mm f/2.8 VRII Lens

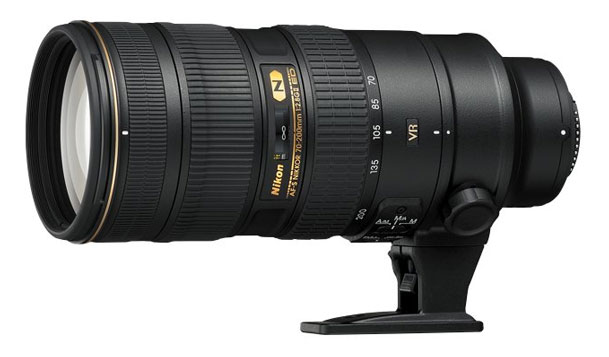
I'm often having to balance my "hobby" with reality. That reality is that although I LOVE photography it's not my day job. It's not even my night job. I shoot for the sheer joy of shooting. So when I think about spending $2,400 for a lens I have to really really really think about it. When the NEW Nikon 70-200mm f/2.8 VRII Lens came out last fall I put it on my "that would be nice to have if the opportunity comes up" list. After all I already owned the Nikon 70-200mm f/2.8 VR Lens. This was lens was an "update." It was also much more than the original lens that I bought. I think the original 70-200 was around $1,800 or so and this one was coming in at $500 MORE! Like anyone I wanted to know what would I get for spending MORE than the original costs?


The New Lens Promised 3 Things

The first and most obvious is that the NEW 70-200mm lens offers VRII. This is Nikon's updated image stabilization. This update promises to give you better hand held shots. OK great, but still not enough. The second thing that this new lens promised was to fix an issue with using the original lens on Full Frame cameras like my Nikon D700. The original 70-200mm would cause some veinetting at certain focal lengths when attached to a full frame camera. Yep, that is something I wanted, but still not enough. Lastly, the new lens promised to have better autofocus than the original. Now I'm interested! With my original 70-200mm the autofocus was "good", but depending on the available light it could be tricky getting it to lock on to your subject and since I do a lot of portrait work it was sometimes frustrating. While no one thing that I've mentioned above was motivating enough to get me to upgrade, the three things together made it tempting. 

Continue reading “Nikon 70-200mm f/2.8 VRII Lens”