If you've been reading my posts for the past few days you've probably noticed a theme: Wireless Tethering/Shooting. Now I'll disclose the reason that increased my interest in wireless solutions for shooting to my iPad or laptop. A couple of weeks ago I taught a workflow workshop in Texas for Precision Camera and Westcott. An important part of my workflow is shooting tethered into Adobe Photoshop Lightroom 3. On the 3rd day of this 3 day workshop I just couldn't get the tethering to work. Nothing really changed on my end that I could see and it had worked flawlessly for two straight days, but for some reason I couldn't get past the 1st shot. I tried the usual troubleshooting things, but nothing would get this working again so I moved on. I shot to the card and just took breaks to import the shots via my Firewire 800 CF card reader and showed the class. I got home and didn't think about it again until my next studio shoot. This is when I knew something was really wrong. I tried different cables and nothing would work. Again I had to move on and shoot to the card to get through the session. When I got home that evening I decided to do some additional testing. I tried different cables and again nothing would work until I realized that the cable attaching to the camera seemed slightly more loose than usual. Nothing crazy, but noticeable. I applied a little more finger pressure to the cable end pressing leaning it one way and Lightroom saw the camera. I tried holding it this way as best I could, but the slightest movement would cause a disconnect again.
It was time for a repair
On my way out the door to Photoshop World I stopped by my local authorized Nikon Repair Facility – Midwest Camera Repair (these guys are great) and dropped off the D700. They said that it was probably an issue with the port being broken off from the circuit board or the board itself had gone bad. If it was just the port then the repair would be around $125. If it was a bad board – oh oh – "we'll call you." Needless to say I was praying for a "disconnected port." Luckily that's all it was and I was happy to pay for this versus a whole new board.
I don't want this to happen again
I shoot tethered 99.9% of the time in studio. I can't imagine going back to just looking at a 3 inch LCD. My colleague Tom Hogarty (Lightroom Product Manager) pointed me a device called TetherLock.
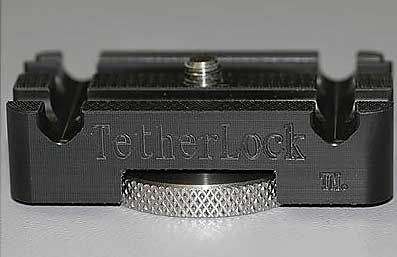
The concept is simple. You attach this device to your tripod hole/port (there is a pass-through so that you can still use a tripod) and run your cable through it. When you tighten it it not only keeps the cable in place, but if you accidentally step on or otherwise tug the cable while shooting there will be zero pressure/tension applied to the USB port on the camera. Like I said, the concept is simple. I ordered one here and it works fine. It's crazy expensive for what it is and YES there are several do-it-yourself options (I don't need you to list them for me, I get it 🙂 ), but as I've said before I'm not a D.I.Y. kinda guy. Clearly I'm not the only one with big feet tripping over tethering cables while shooting or this product wouldn't exist.
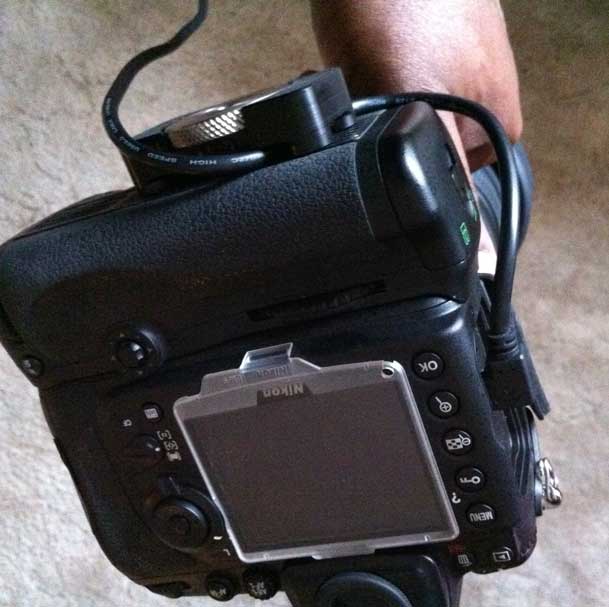
The other thing I would recommend whether you go with TetherLock or your own solution, is a USB cable that has a L-Left head on it. This allows the cable to run down flush along the body as opposed to sticking straight out. Here's the one I use.
The Bottom Line
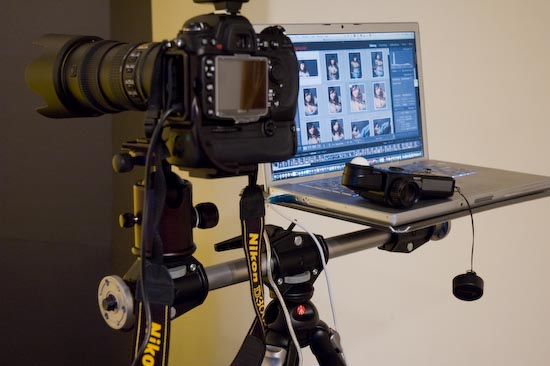
Above setup Bogen-Manfrotto Double Head Accessory Arm and Gitzo Laptop tray that sits right on my tripod.
Built-in WiFi on all cameras can't get here fast enough for me. Until that day happens I'll continue to shoot tethered via a USB cable for my studio shoots. Not ripping the cable out during future shoots is going to be nice and better yet not damaging the camera/USB port is even going to be better.
