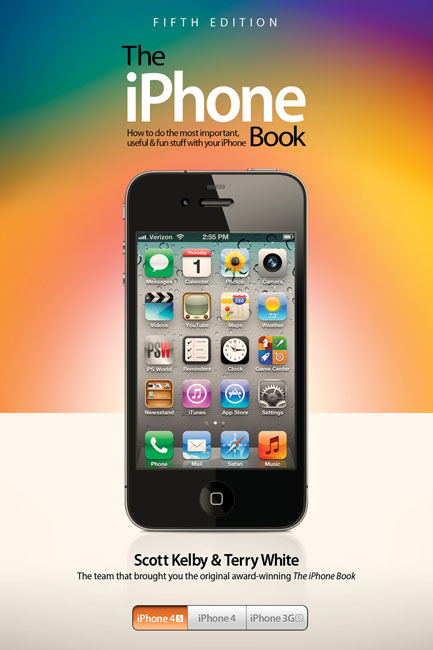
The iPhone Book 5th Edition is Now Available for Pre-Order! It has gone to press and should be shipping shortly. It covers the latest enhancements in iOS 5 as well as the new iPhone 4s. Tons of tips and tricks and how to's. You can pre-order your copy here.
Yes, I pre-ordered a Nikon D4!
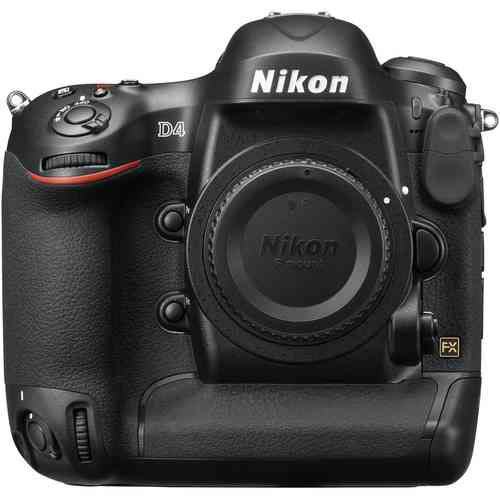
Usually when something big in tech or photography happens my friends start asking me "did you order one?" This time the big news is the newly announced Nikon D4 DSLR camera. Let me start by saying that I've always had Nikon D3 envy, but just couldn't justify the price. I don't need the high speed because I don't shoot sports. My D700 has served me quite well and I really have no complaints with it. My desire to replace it only stems from the desire of having a full-frame camera that also does video. I have a Nikon D7000 for travel and currently a D5100 in studio for doing video. However, I find that I don't shoot much video with it because what I realized is that the times I want to shoot video is usually while I'm shooting stills. This would mean putting down my D700 and walking over to my D5100 and shooting video. In reality the moment would then be lost that I wanted to capture on video. What I want is one camera that does both. I've been waiting for the D700 replacement (the rumored D800). However, there's one problem with the D800 and that is according to ALL the rumors it will be a 38MP camera! While I'm assuming that Nikon will allow you to "turn down" the megapixel setting to a lesser resolution, it would mean that for me 99.9% of the time I would be shooting at that lower resolution as I have no desire/need to process or house 38MP RAW files. Since the D4 is here (shipping in February) I started looking at it as the answer to my quest.
I don't need a $6,000 body!
Let me be the first to say/admit that I DON'T NEED A $6,000 CAMERA BODY! Nope, not on any level. It won't in any way positively affect my photography enough to offset the cost. The rumored D800 will likely be half the price and more in line with the D700 pricing that I'm used to. With that said, I'm going through with it and have ordered a D4 anyway. Another thing besides all the D4 goodness and video capabilities that intrigues me is the New Nikon WT5 Wireless Transmitter. Not only do I have a desire for a full-frame Nikon 1080p video capable DSLR, but I definitely have a strong desire for getting fast wireless tethered shooting! This video really got my attention and it's probably what pushed me over the edge:
httpv://www.youtube.com/watch?v=d0DnEoqm-wc
I'm doing it anyway! – FAQ
Q. Couldn't you just wait and see what the D800 really has to offer and make your decision then?
A. Asking me that question shows you don't really know me. I rarely wait to see what's coming if there is something in front of me that does everything I want.
Q. Will the D4 make you better photographer?
A. Nope
Q. Is video really that important to you?
A. Hmmm… yep.
Q. Are you going to sell your D700
A. Normally that would be the plan, but I've decided at least for now to keep the D700 as my backup body in studio. I may change my mind down the road. However, since I won't have any need for the D5100 anymore my buddy has already called dibs on it.
Q. Don't you get all your gear for free anyway?
A. LOL, you don't really think that do you? Um no! I wish!
Q. You're not even a full-time photographer. Isn't this overkill.
A. Yep and your point?
Q. I thought photography was just your hobby and you do it for fun.
A. It is and I like to have a LOT of fun.
Q. Couldn't you find a better use for that money?
A. Yep. Life is short, might as well get what you want when you can.
Q. I don't really see how you can justify a D4 given that you don't make your living as a photographer.
A. I know, right?
Q. If you couldn't justify a D3 then how can you justify a D4?
A. Good question. The D3 never offered enough features over the D700 that I would use to justify the difference in price. The D4 does against the not yet announced D800.
Q. There's no reasoning with you on this purchase is there?
A. Not really.
Q. Where did you pre-order it from?
A Look Back At My First “Solo” Portrait Shoot in 2007
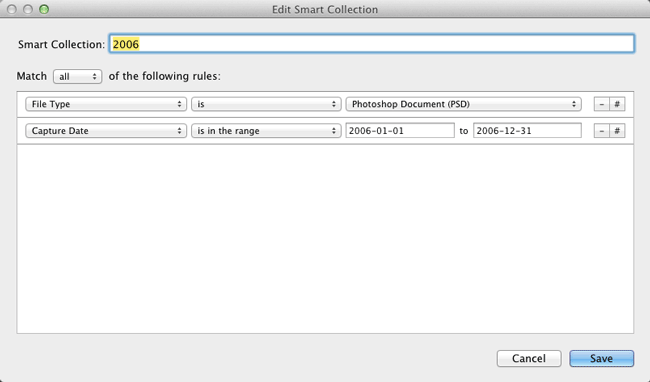
I get asked the question "how long have I been doing photography?" all the time. Even though I get this question regularly I have to pause and think about it for a minute because it depends on what the person is referring to. I've always had an interest in taking pictures ever since I was a kid. So do I count my Kodak Instamatic experience complete with flash cubes? Probably not what the person is thinking. I then answer for about 5 to 6 years. Last night I spent some time in Adobe Lightroom 4 Beta and while I don't organize my folders by year, I can certainly see why someone would want to use that method. Instead I organize by the folder for a particular shoot. If I do a shoot with Jane Doe, then that shoot goes into the Jane Doe folder. If I do another shoot with Jane Doe then it goes into the "Jane Doe 2" folder. That has worked well for me as I'm usually looking for a picture of a person, not necessarily a year that I took it. With that said, I was curious to see what photos I took when and since I have one catalog for my "Model" Shoots containing every "edited" picture I've done, I decided to create "Smart" Collections to separate them out by years:
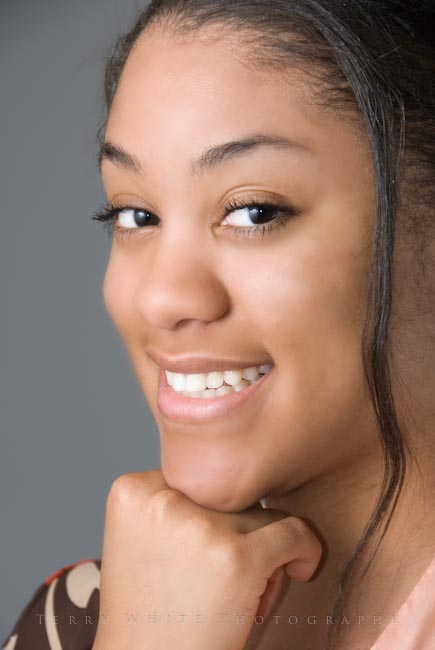
It was really fun taking a trip down memory lane! Some of the photos I looked at and cringed and others I said, "hey that wasn't bad for a beginner." The photo above of Mya was my first "solo" shoot. I say it that way because it wasn't my first shoot ever. I had actually started shooting portraits in 2006, but back then I was merely tagging along on other photographer's shoots. My first shoot ever was along side Scott Kelby. Scott visited me back in 2006 and he had set up a shoot for his upcoming iPod Book at the time (I was technical editor). We rented Andy Greenwell's studio here in Michigan and Andy setup the lights, Scott found the model and I just basically observed and got a shot here and there. The reason that I don't really count that as my first shoot is because I didn't do any of the work. I just pointed my camera and fired after I asked "hey what settings are you using?"
Going Solo
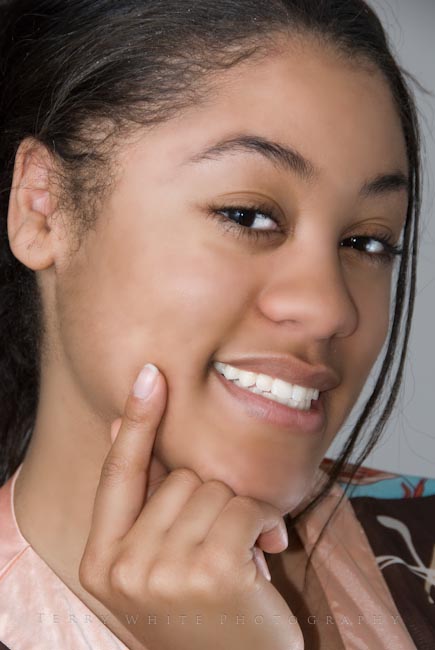
I finally got up enough nerve to try my own portrait session in 2007. My sister recommended that i use Mya (friend of the family) and Mya agreed to let me photograph (experiment with) her. I had no studio, no professional lighting and a consumer grade DSLR. The shoot took place in my living room. I had a Nikon D80, 18-200mm Nikon lens and an SB 600 speedlight. I also used a Westcott pop up background. My SB 600 speedlight was mounted on a stand and shooting through a diffuser. Quite honestly I had no idea of what I was really doing from a settings stand point. I just kept adjusting things until I got a half way decent image. That session showed me that I had a LOT to learn!
Renting a Studio in 2008

In 2008 I decided that I needed a larger space than my living room. So I did a timeshare with other photographers. I also started buying more gear including lighting. According to Lightroom I shot more portraits in 2008 than any other year. This probably due more to being less selective about the number of images I kept vs. doing more shooting.
2009-2011
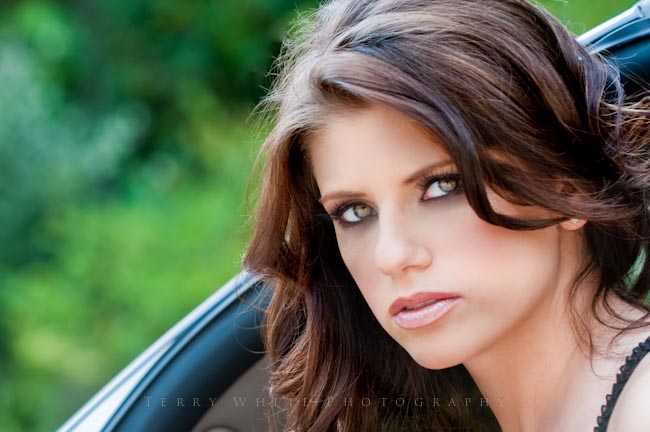
Between the years of 2009 and 2011 I would say was the timeframe that I learned most of what I know.
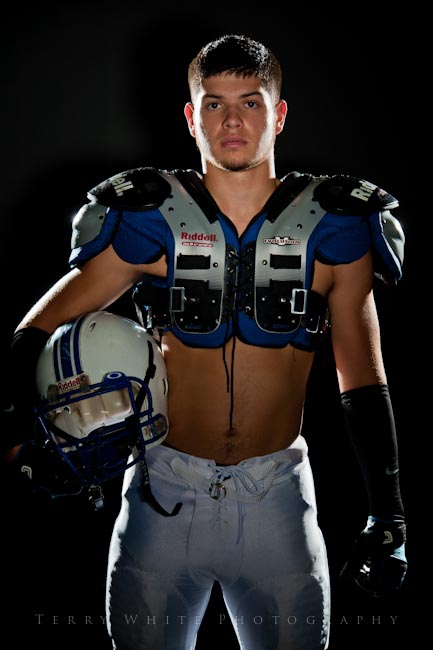
Not only did I improve my photography skills and lighting skills, but I also improved my editing skills in post.
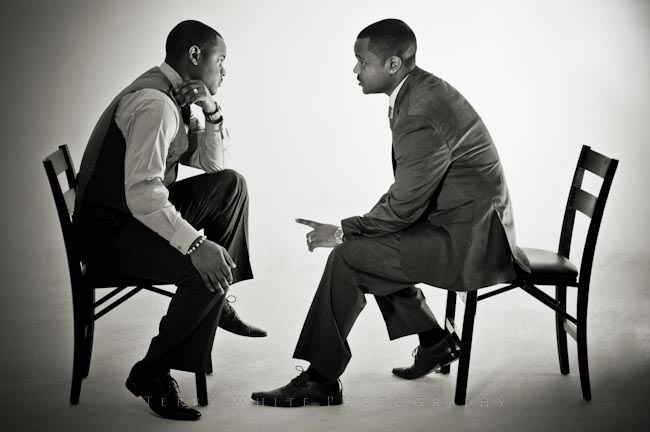
I'm always learning from the photographers that I admire. Videos, seminars, books and group shoots are ways that I learn the fastest.
The number one lesson that I can say that I've learned and constantly remind myself of is "Less is more – Only show your best work." This is one that I have to credit Scott Kelby for. He basically beat it into to me and I finally got it. I now limit my galleries to 24 images. If there is a new image that I want to put in, then it has to be better than one of the ones that's already there and it replaces it.
Today
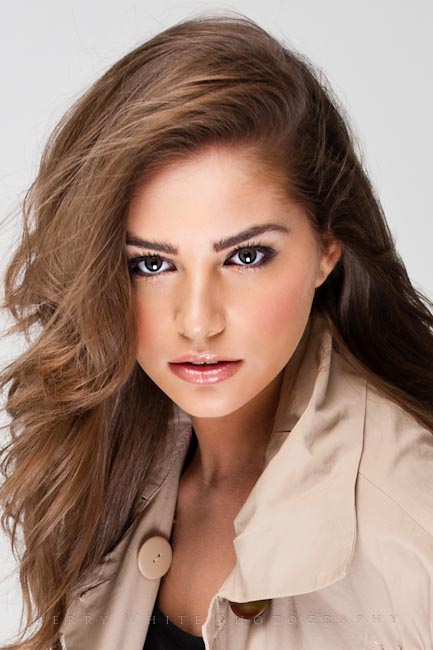
Although I have my own studio now and a few years of shooting under my belt, I'm always learning something new just about every time I pick up my camera. I invite you to go back through your work and feel free to share some links in the comments below. Tell us your experiences over the years and perhaps some of the things you've learned.
Adobe CS3 & CS4 Customers Will Have an Upgrade Path To CS6
There has been a lot of confusion out there in the market about Adobe's plans to move to the cloud "Creative Cloud." The 1st question that I get practically every day is "Will I have to run my Apps in the Cloud or can I just download them and install them as I do today?" The answer is that CS6 will be available as a stand alone installable App just like CS5 and CS5.5 are today. You will NOT have to use Creative Cloud or buy a subscription if you don't want to! Subscription is an alternative method to having a big cash outlay to buy Creative Suite. It's an OPTION (like leasing a car vs. buying one). Even with Subscription you're downloading the Apps and running them on your local machine and not in the cloud. The choice is yours. Now with that out of the way, here is a link to the recent policy changes that spell out upgrade paths for CS3 and CS4 users.
Yes, CS5 and CS5.5 users can upgrade too. It was never an issue for current users to go to CS6.
What’s New in Lightroom 4 (Public Beta)?
httpv://www.youtube.com/watch?v=P0F_5oG1euA
In this episode of the Adobe Creative Suite Podcast I'll give you a walkthrough of the top new features of Lightroom 4 Public Beta!
Here are some of the top level features of Lightroom 4:

• Robust Video Support
• Manage images by location with the Map Module
• Simplified Basic Adjustments
• Powerful new Shadow & Highlight controls
• Additional local adjustments including Noise Reduction and White Balance
• Soft Proofing Reinvented
• Elegant Photo Book creation
• Email from directly within Lightroom
• Publish videos directly to Facebook or Flickr
• Enhanced DNG workflows
• Adobe Revel (Carousel) export workflow
Download the Public Beta of Lightroom 4 here.
More in-depth info here.
Join Lightroom Product Manager Tom Hogarty for some LIVE Webcasts over at Kelby Training – Schedule Here.
Also check out the Kelby Training Lightroom 4 Learning Center for more videos and Matt's Lightroom Killer Tips Blog.
Get Geotag Photos Pro to take Advantage of the Lightroom 4 Map Module with Any Camera
During my Video above I show the NEW Map Module. While it's great to have a GPS attached/built-in directly to your camera or occasionally take smartphone pics to use as reference, it may be more convenient to use GPS Data Logger and then merge the GPX Log File in Lightroom after your shoot. Here's a cool one for iOS:
Are you missing out on my Bonus Content?
See more of my Adobe Creative Suite Videos on my Adobe Creative Suite Podcast and get the App here. It features EXCLUSIVE CONTENT that no one else gets to see. This episode has a BONUS CLIP that is available only in the App! My iOS App is a Universal App for iPhone, iPad and iPod touch. I also have an Android version:

Solmeta Outs a New N3 GPS for Nikon DSLRs
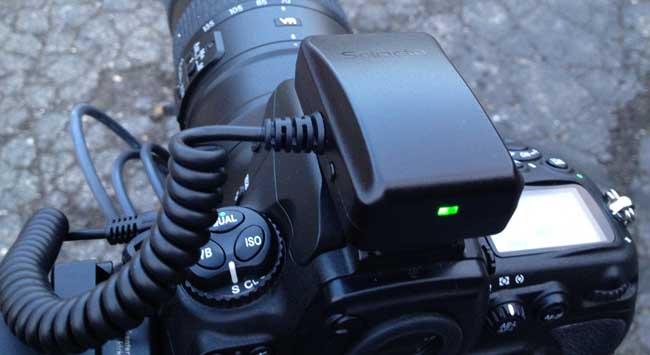
It's been a while since I did my Nikon GPS Smack Down. Back then I chose the Solmeta N2 as the winner for overall best GPS for Nikon DSLRs. Since that time Solemta has come out with another new model, the N3 and I got a chance to try one out. Like previous model the Solmeta N3 plugs right into your compatible Nikon DSLR and geotags (adds longitude/latitude and heading) your photos as you take them (both JPG and RAW support). However, unlike the previous model you now have to choose between the one for professional DSLRs like the D700, D3, D4, etc. and the prosumer models like the D5100, D7000, etc. The reason you have to choose is because the interface cable is now hardwired in. This has it's advantages and disadvantages. The advantage is that the connection is perfectly secure. The N2 allows you to plug in a cable to match your camera, but the connection could easily get damaged if you bumped/hit it the wrong way. The new connection is very well designed. The disadvantage (at least for me) is that if you have multiple camera bodies of different types you'll now need one of each type to go with your camera as opposed to just ordering the additional cable. This will only affect a small percentage of people, but it is a slight step down in convenience for me. Another small but notable cable improvement is that the cable is now coiled instead of being too long or too short. It will be just right for however you attach your GPS (in the hotshoe or on the strap).
Faster and more accurate
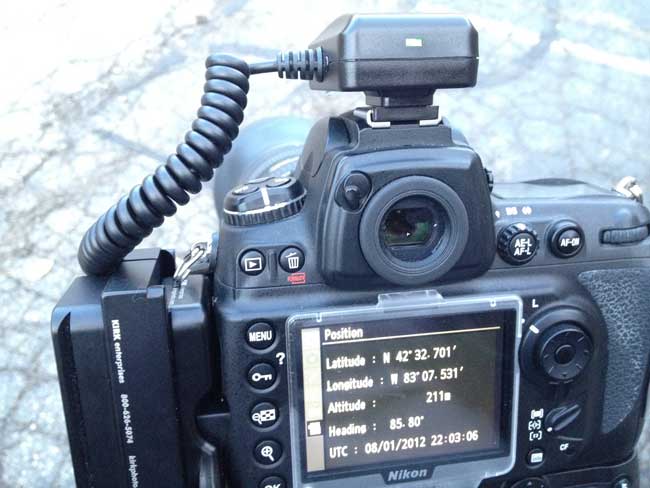
This model uses a 3-axis electronic compass like their top of the line model the Geotagger Pro. The N2 uses a 2 axis compass. The first thing that impressed me was how fast it was ready to go. By the time I tuned the camera on and was ready to snap the 1st picture it had already locked on to a satellite and was providing the location info to my Nikon D700. The other big difference is that this model gets its power directly from the camera. The other models have internal batteries that you charge and then only after they run down will it get power from the camera. While having a built-in battery does provide for potentially longer shooting, the N3 is designed to use less power, sleep and take advantage of the Nikon GPS power saving features. I haven't had it long enough to compare battery life, but I did notice that it went to sleep a few seconds after I turned the camera off and was ready almost instantly when I turned the camera back on.
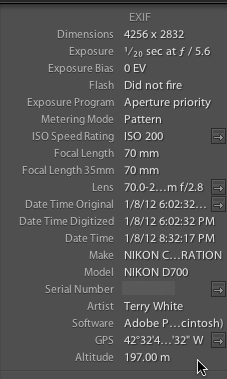
The GPS data shows in Lightroom 3 and allows you to click the arrow/button to take you to that spot on Google Maps.
New Indoor Fixed Mode
GPS units work best when used outside, but if you are going in and out of buildings a GPS that only works outside isn't much use to you. The N3 has an Indoor Fixed Mode that will use you last known location to continue tagging photos as you take them inside.
Built-in Remote Trigger Support
One of the usual concerns pro photographers have is that the model for the pro cameras use the 10 pin terminal port. That port is also often used for cable releases (remotes). While Solmeta does sell a Y splitter cable so that you can use your existing cable release, the also have a port on the side for use with a basic remote too.
The Bottom Line
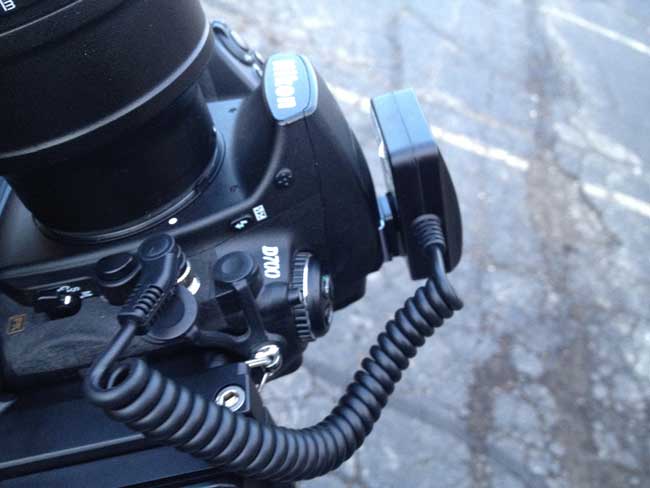
I have mixed feelings about this model. I'm happy with the speed and accuracy, but I'm less happy about needing a specific model for your camera. Luckily the N2 and Geotagger Pro are still available as options. Solmeta has positioned the N3 right between the Pro and N2 and it's priced at $189. You can't go wrong with any of these models as they are all solid performers.
Create Colors in Harmony with Ease in Illustrator CS5
httpv://www.youtube.com/watch?v=8ZxHjuFkbsc
In this episode of the Adobe Creative Suite Podcast I'll show you how to create colors that look good together using Illustrator's Color Guide feature.
See more of my Adobe Creative Suite Videos on my Adobe Creative Suite Podcast and get the App here. It features EXCLUSIVE CONTENT that no one else gets to see. This episode has a BONUS CLIP that is available only in the App:

Review: SplashID Key Safe
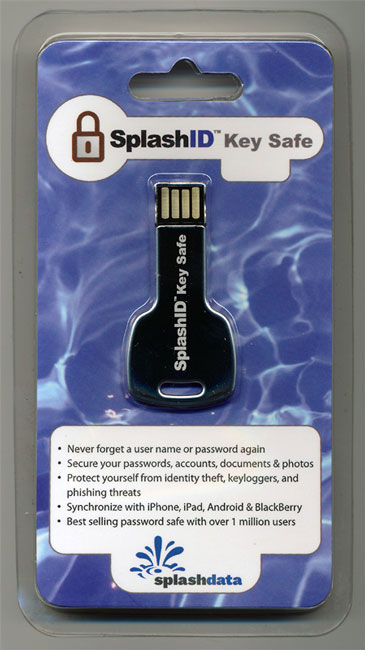
Lately I've become a bit of a password security freak. I've been proactively changing passwords and PINs to be more secure and to make sure that I'm not using the same password in multiple places. My goto App for managing all my passwords is 1Password. I love this Application on both Mac OS and iOS. Recently I became aware of SplashID Key Safe. SplashID Key Safe is a hardware based 4GB thumb drive that offers an "unbreakable" AES and 256-bit Blowfish encryption, which provides proven protection for safe password management. The Key Safe is both Mac and Windows compatible.
Set it up
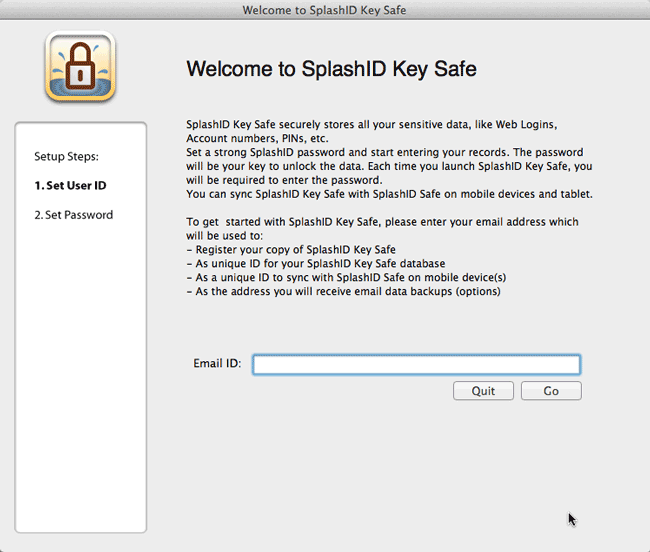
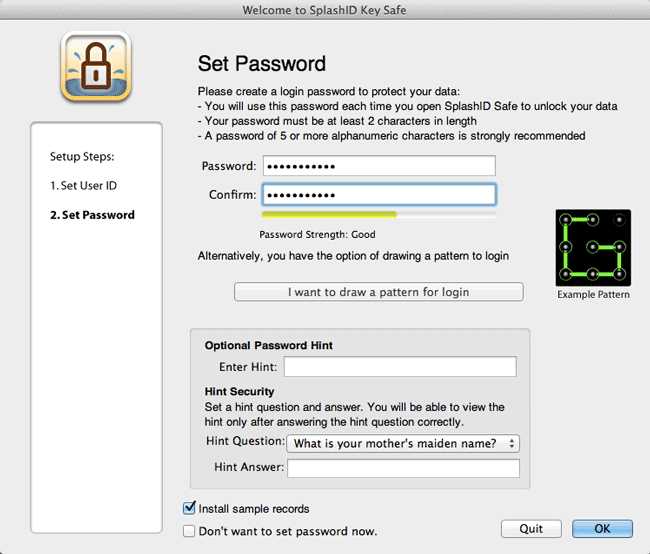
Once you plug it into your computer you run the appropriate setup app for your platform. You then create a secure password so that you can access your data going forward. It even offers an optional cool Pattern based password where you use your mouse to draw a pattern that you've created to connect the dots and unlock the key. This definitely beats having to remember a long complicated password and keying it in each time. Once you've set up your credentials you can then begin the process of entering all your sensitive data. Enter it all. Anything from website logins to credit card numbers and bank accounts to software serial numbers to frequent flyer info. Since it is a thumb drive you can also securely attach files to any record from your computer.
Regular Use
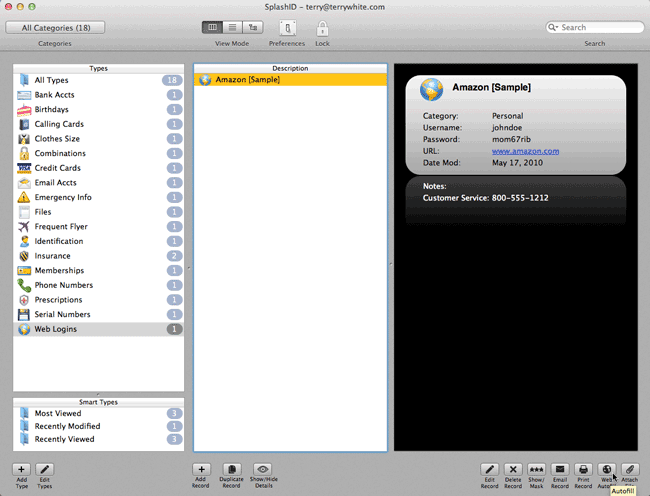
Once you've got it all setup you can plug it into to any Mac or Windows PC and bring up your passwords and files. If you want to log onto a secure website using a saved password you can bring up that Web login and go right to the URL. From there you can copy and paste in the user name and password when prompted. You can also use the built-in Autofill feature so that it fills in this info for you. As a 1Password user the 1st thing I looked for was a way to import my 1Password data in and low and behold there's a 1Password Import right in the File Menu.
Sync with your Mobile Device
Spashdata also makes mobile versions of their App for iOS, Android, Blackberry, Windows Mobile and WebOS. That pretty much covers every major mobile device being sold today. I downloaded the iOS Version. See my review here.
The Bottom Line
If you're looking for a hardware solution to manage your passwords and take them with you where ever you go this is it. If you're already a 1Password user then there probably isn't a big reason to switch other than having the ability to carry your passwords and files on a 4GB thumb drive. Either way, you need to think more about securing your personal information in these times of hackers and identity thieves. You can get the SplashID Key Safe for $29.95 here from their site.
The Making Of My “Queen Nefertari” Egyptian Themed Shoot
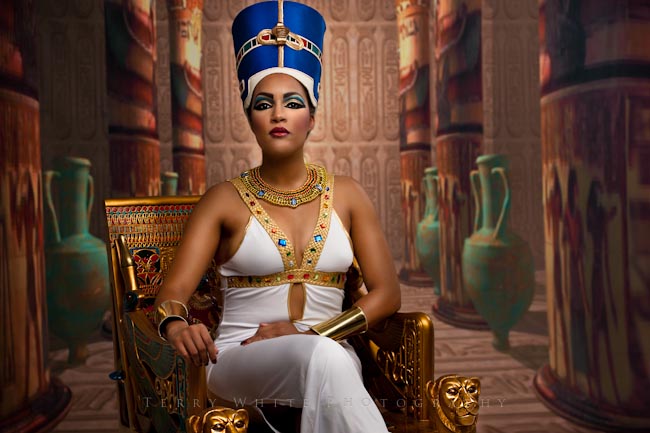
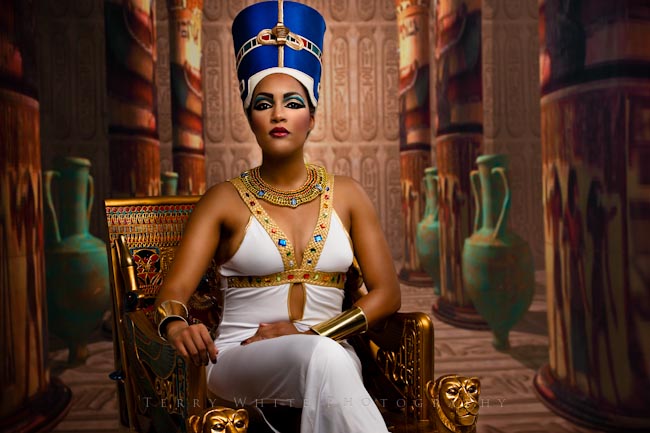
While I don’t consider myself to be an artist, I can certainly relate to having a vision or concept in my head that just won’t go away until I try to execute it. That’s been the case for the last two years. I had this concept of doing an Egyptian Queen “Nefertari” themed shoot. I’ve always had a fascination with Ancient Egyptian culture. I first toured Egypt in 1990 and it left a lasting impression on me. I also went back for a short business trip last year while on the Adobe CS5 Tour. Now that you know how long I’ve been thinking about this, let’s start putting the pieces together.

I saw the first piece of this puzzle in a Skymall catalog. It was an authentic looking King Tutankhamun throne. I ripped the page out of the catalog and kept looking back at it saying “one day.”
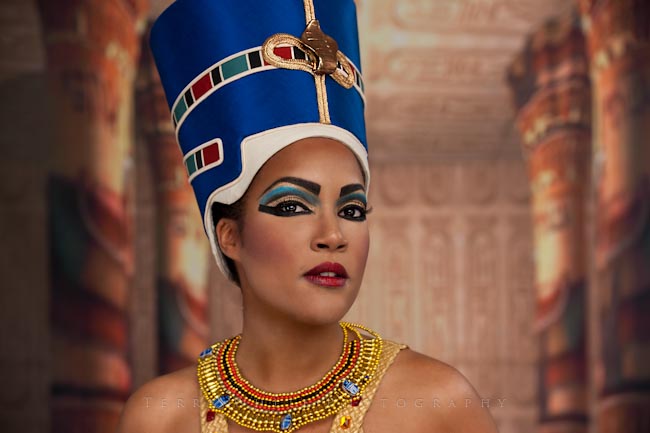
I decided that this was the year to try to pull this off so that meant finding the right model. I immediately turned to my favorite model Kandice Lynn and asked if she would be up for and of course being the superstar that she is, she agreed. She immediately began working on the wardrobe selection and jewelry.
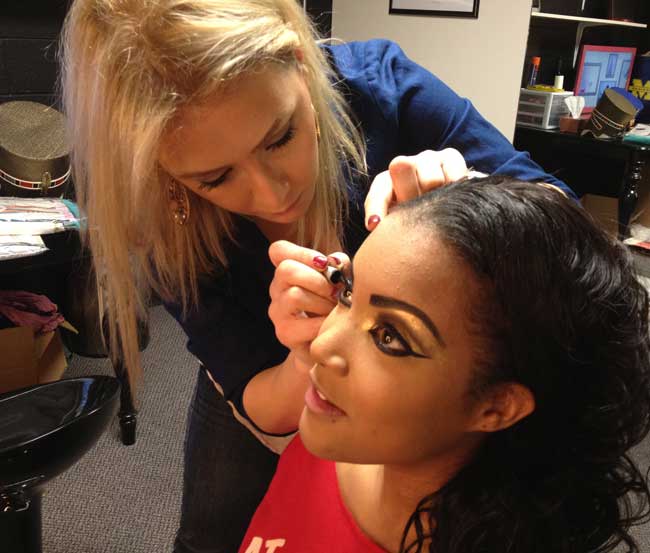
The next piece of the puzzle was having a good makeup artist. For this project we turned to Special Effects Makeup Artist Houda Bazzi. She was just as excited about the concept as I was and her wheels started spinning. We were shooting pictures back and forth via picture messaging for the next few days.
Continue reading “The Making Of My “Queen Nefertari” Egyptian Themed Shoot”
Best of 2011: My Top 10 Gadget Picks

Happy New Year Everyone! 2011 was a great year for me and I look forward to 2012. While I did have a great year, I didn't really get a ton of memorable gadgets. As I sit here thinking about my Top 10 Picks and I look back at the last two years of picks, many are still the same or simply updated versions of ones before. However, I did get a couple of cool things this year that are new and do stand out. Here are My Favorite Gadgets of 2011:
The iPhone 4s
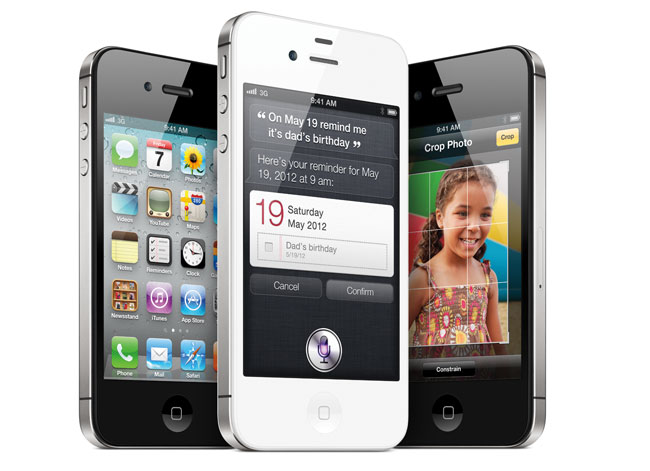
This is probably my most used gadget and while the iPhone 4 didn't make my list last year, the iPhone 4s has been a blast. I can't believe how much I use Siri day to day as well as the much improved camera. What really makes this all sing is iOS 5 and the faster A5 processor.
Get the iPhone 4s here.
Also see my "25 Fun Things To Ask Siri" post.
Rouge Flashbenders
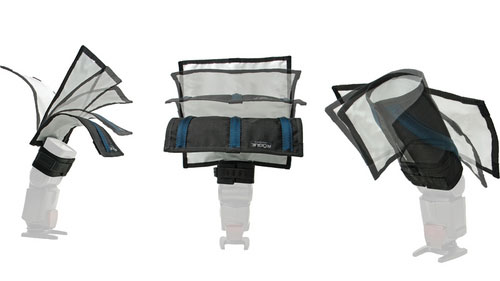
I'm surprised by how much I've been using these little gems all year. While I certainly love having a nice softbox to shoot with, when I travel I often just don't have the room to pack a ton of gear. That's why the Rouge Flashbenders are in my Top 10. They're inexpensive, easy to travel with and produce great results for speedlight photography.
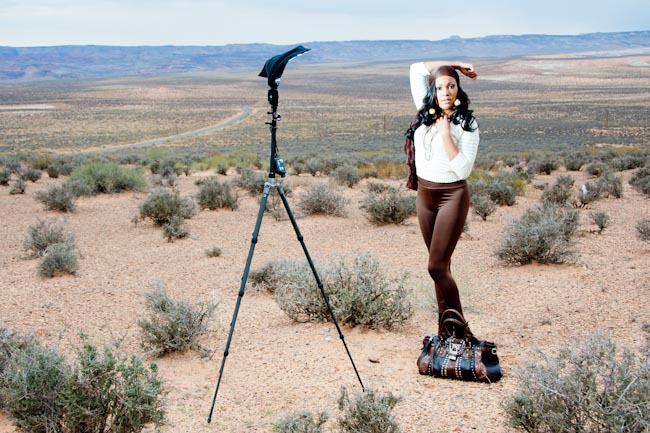
See my original review here.
You can get the Rogue FlashBenders (3 in a set) here from B&H or individually Large, Small, or Bounce Card/Flag. My favorites are the Large and Bounce Card/Flag.
Scottevest
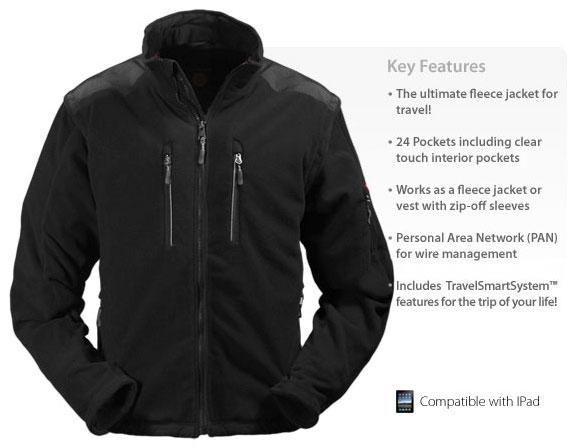
The Scottevest is my jacket of choice when I travel. It allows me to have all kinds of mobile gadgets in my pockets and easily serves as my 3rd carry-on on the plane. 🙂
See my original review here.
See the Scottevest line of apparel here.
