When it comes to tutorial videos, which to you prefer?…

Yesterday on my Facebook fan page I posed the question about my tutorial videos: “When a new feature update comes out to an Adobe application such as Photoshop CC, which do you prefer from me: 1. A single video that covers the new features (could be long 20-40 minutes) OR 2. multiple smaller videos that cover each feature individually (example, “New Camera Shake Reduction in PS CC”, “New Live Corners in Illustrator CC”, etc.)?” and I got a ton of great responses. This prompted me to want to ask my broader readership here. As you might expect, the feedback I got on Facebook was mostly do “shorter” feature specific videos. Some said, they wanted BOTH, the longer overview video and the shorter videos. There were a good number of folks that said they actually prefer the longer videos. However, if I went by just the feedback I got on Facebook it would be just do the shorter videos.

Here’s the irony of it. While everyone says they want shorter videos, when I look at my actual YouTube stats that show my Top 10 Most Viewed Videos over the last 30 days, they are all the longer ones. None of my shorter videos ever make the top 10 list:

Video Views Minutes Watched
85,391 (20%)
794,692 (23%)
41,463 (9.7%)
455,321 (13%)
22,234 (5.2%)
221,416 (6.5%)
19,031 (4.5%)
247,635 (7.3%)
18,205 (4.3%)
158,675 (4.7%)
14,244 (3.3%)
135,710 (4.0%)
13,762 (3.2%)
146,995 (4.3%)
9,941 (2.3%)
102,132 (3.0%)
9,906 (2.3%)
58,687 (1.7%)
8,998 (2.1%)
75,116 (2.2%)

I know when someone sends me a video link, if it’s only  a minute or two I’m liable to watch it right then and there. If it’s several minutes long then I’ll probably say “I don’t have time for this now, I’ll watch it later and later may never happen. However, I’d still like to hear from you. Which do you prefer? (yes both is great and I could do the longer one and chop it up to make the shorter ones, but is that worth it?)

Adobe Camera RAW 8.5 for CC and CS6 Release Candidate is Now Available

acr_8.5

The Camera Raw team would like the community to help verify the quality of the plug-in through normal usage as this will ensure that the plug-in is tested on a diversity of hardware and software configurations not available internally at Adobe. If you do experience an issue with this release candidate please report it within the Camera Raw discussion forum.

Download from here.

Adobe Camera RAW 8.5 Features for CC Users

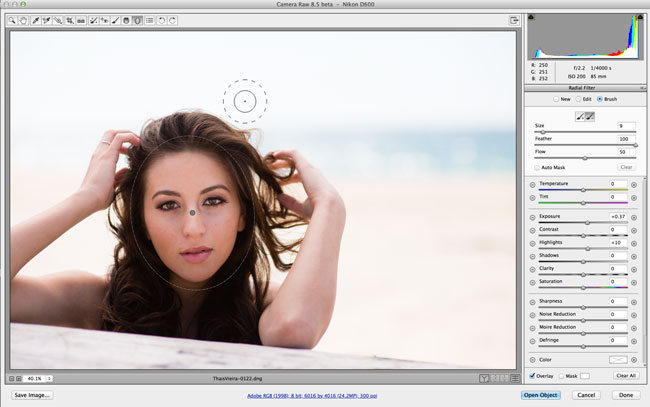
  • Modify Graduated and Radial Filter masks with a brush:
    • After adding or selecting a Graduated or Radial Filter instance, click the new ‘Brush’ mode (next to existing ‘New’ and ‘Edit’ mode buttons) to reveal brush controls that allow you to modify the selected mask.
    • Use the ‘Brush +’ and ‘Brush -’ icon buttons in the brush controls pane to add to or erase from the selected mask.
    • Press the ‘Clear’ button to remove all brush modifications from the currently selected mask.
    • When a Graduated or Radial Filter instance is selected, Shift-K can be used to enter and leave brush modification mode.
  • Mask visualization is now available for the Graduated and Radial Filters. Use the Mask checkbox at the bottom of the Local Corrections pane or press ‘Y’ to toggle the mask overlay.
  • Added new Per-Panel Preview default toggle
    • If the current panel’s settings are not the ACR defaults, clicking the new Per-panel Toggle Button will reset the panel to the ACR defaults.
    • Clicking the button again will restore the previous settings.
    • This is a standalone feature, separate from the new Preview controls
    • The changes are applied to the main view; if you have both the Before and After panes visible, changes will appear in the After pane.

Bug Fixes

  • Fixed issue with Fujifilm X-T1 raw images appearing too bright at high ISO settings when using Dynamic Range 200% and 400%. Unfortunately, this fix may affect the appearance of existing images captured with this combination of settings. It is recommended that you (1) purge the Camera Raw cache via the Camera Raw Preferences dialog, and (2) review images shot at ISO settings higher than 1600 for unexpected brightness changes.
  • Fixed image quality issue (noisy result) when applying spot healing to floating-point (HDR) images.
  • Fixed issue with reading lossless compressed Nikon raw files (NEF files) from the camera models listed below. Previously, some images could be read but would appear as random noise, whereas attempting to open others would result in an error dialog. You will need to purge your Camera Raw cache via the Camera Raw Preferences dialog.
    • Nikon D1
    • Nikon D1H
    • Nikon D1X
    • Nikon D2H
    • Nikon D2Hs
    • Nikon D2X
    • Nikon D2Xs
    • Nikon D100
    • Nikon D200

New Camera Support

  • Canon PowerShot G1 X Mark II
  • Fuji FinePix S1
  • Nikon 1 J4
  • Nikon 1 V3
  • Olympus OM-D E-M10
  • Panasonic LUMIX DMC-GH4 (*)

(*) denotes preliminary support

Adobe Camera RAW 8.5 Features for CS6 Users

Download the RC build here.

New Camera Support

The following new cameras are now supported:

  • Canon PowerShot G1 X Mark II
  • Fuji FinePix S1
  • Nikon 1 J4
  • Nikon 1 V3
  • Olympus OM-D E-M10
  • Panasonic LUMIX DMC-GH4 (*)

Join me on the Adobe Create Now 2014 World Tour!

CreateNow2014-TourBus-Terry-Jason-Paul

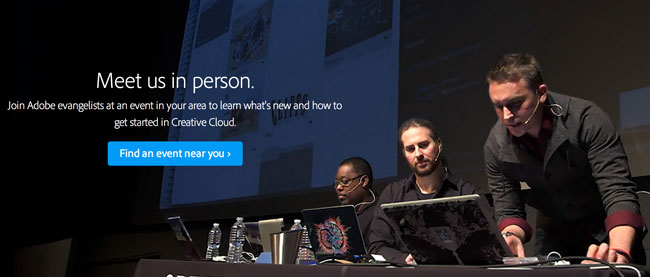
We put the band back together and we’re headed out on tour! Jason Levine, Paul Trani, myself and several other Adobe Evangelists are headed out on the ALL NEW Adobe Create Now 2014 World Tour. We’ll kick things off with a LIVE event in New York that will be webcast worldwide. and then immediately after we’ll be heading to a city (hopefully) near you.

Tune in Wednesday, June 18th, 2014 at 1PM ET to see “What’s Next in Creative Cloud” You can sign up right here.

meet_us_in_person_create_now

Then starting on Thursday, June 19th we’ll hit the road and visit several cities around the globe. This will give us the chance to go deeper in the products and show you even more. You can find out where we’re going and register for the one closest to you right here. If by chance you’re not near any of those major events, we’ll also be doing several more tour stops here. As usual you can see my upcoming events right here on the right sidebar of my blog (or at the bottom of this post if you’re looking at this on a smartphone.

2013-CreateNow-Chicago-2
Paul Trani and myself on stage during the Create Now 2013 Tour in Chicago

I look forward to see you all! This should be a lot of fun (saying that now of course before all the travel. 😉 )

Get a full year of Adobe Creative Cloud on sale here!


5 Things You Need To Know About Your Lightroom 5 Catalog

Lightroom_totem


In this episode of Adobe Creative Cloud TV, I’ll cover 5 important things you need to know about your Lightroom 5 catalog.

Are you missing out on my Bonus Content?

See more of my Adobe Creative Cloud Videos on my Adobe Creative Cloud TV and get the App below. It features EXCLUSIVE CONTENT that no one else gets to see. This episode has a BONUS CLIP that is available only in the App! My iOS App is a Universal App for iPhone, iPad and iPod touch. I also have an Android version on the Amazon App Store:

.


Shooting in bad light doesn’t have to suck!

wpid13463-ChristineJennax-0005_sm.jpg
No matter how good your subject is, bad light can be distracting.

Any good landscape photographer will tell you that you’ll get the best results if you’re up, out, and ready to shoot as the sun is coming up or as the sun is going down. Middle of the day is probably the absolute worst time to be outside shooting. However, if you’re shooting a wedding or other gig you may not have the luxury of having everyone on set before the sun comes up. Sometimes you’re going to be out in bad light. I hate it, you hate it, and we try to avoid it at all costs, but it may happen some day. Luckily if you’ve got the right gear, it doesn’t have to suck.

wpid13461-ChristineJennax-0266-Edit_sm.jpg
As you can see from the harsh mid-morning sun we have hard shadows and unflattering light.

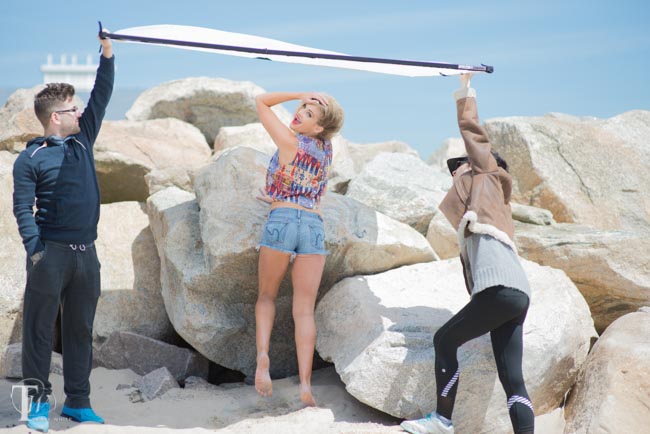
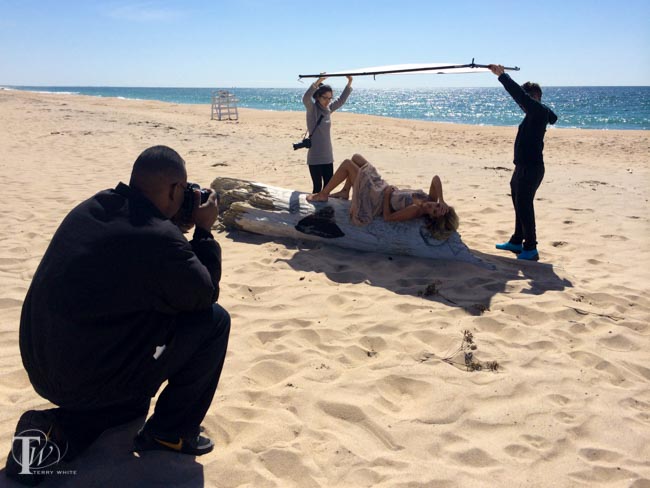
I recently did a beach shoot and I purposely waited until after 9AM to arrive on location. Yep, that’s right I purposely sabotaged my own shoot. I wanted to see if I could still get good results if I used a Scrim Jim Kit. The sun was up and the light was HARSH!

wpid13459-ChristineJennax-0263-Edit_sm.jpg

Any other time I would have turned around and headed back home. Even though it wasn’t noon, it looked like it was. Not only was the light harsh on the subjects, but it was a clear sunny day with no clouds and that meant a lot of squinting on the part of my models. It was just bad all the way around.


wpid13465-IMG_1679_sm.jpg

I set up the Westscott Scrim Jim Large Reflector Kit and I had two people to hold it for me over my subject to block the sun. Now instead of the sun being my enemy, the sun turned the Scrim Jim into a giant softbox with nice even light. The only problem was the wind. It was a windy cool morning and it was a challenge for my assistants to keep the large Scrim Jim in place. It was like holding a sail at times. However, they did a masterful job with it and I was able to shoot with sun being my ally instead of an enemy.

wpid13455-ChristineJennax-0075-Edit_sm.jpg
Shot with the Nikon D600, 85mm f/1.4 lens, ISO 200, f/1.8, 1/4000 sec.


The Bottom Line

wpid13457-ChristineJennax-0247-Edit_sm.jpg
Now with the Westcott Scrim Jim Large Reflector Kit in place the light is much much better.

I still highly recommend that you shoot in good beautiful natural light. However, if the situation is out of your control and you need to be out in harsh lighting conditions, then I definitely recommend the Westcott Scrim Jim Large Reflector Kit.

wpid13453-ThaisVieira-0221-Edit_sm.jpg

Even when you’re not out in bad light you can use it as a reflector. It comes with both a 3/4 stop white diffusion fabric sheet and white/silver reflector fabric sheet and you can quickly attach either one as needed with the built-in Velcro. The frame is quick to assemble and disassemble and it comes in a nice carrying case. If the wind isn’t bad you can also get a stand to hold it for those times when you don’t have an assistant.

wpid13451-ThaisVieira-0102-Edit_sm.jpg

Shooting in bad light doesn’t have to suck! You can get the Westcott Scrim Jim Large Reflector Kit here.


Brookstone 3-in-1 USB Tablet Stylus

brookstone-3-in-1-stylus

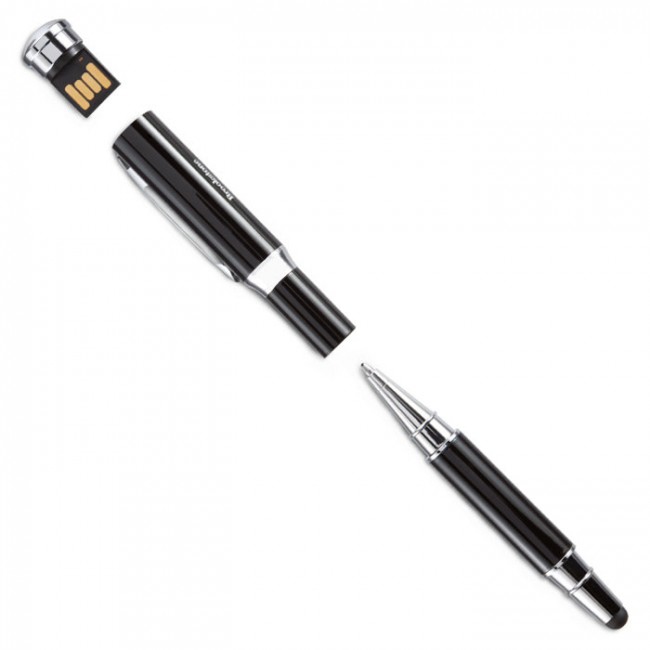
I usually carry my Wacom Bamboo Duo Stylus or Wacom Creative Stylus when I travel for business. The Wacom Bamboo Duo Stylus is a great general purpose stylus for touch screens and the Wacom Creative Stylus takes it up a notch by adding pressure sensitivity with supported apps such as Adobe Ideas. However, on a recent trip to Boston I forgot to pack my usual gear and decided to pick one up from Brookstone in the airport. I really was looking for something basic, but I couldn’t resist the Brookstone 3-in-1 USB Tablet Stylus. Like the Wacom Bamboo Duo it serves both as a stylus for touch screens AND a regular ink pen, but they added a 4GB USB flash drive on the end. I don’t use flash drives much these days, but it’s nice to know I have one for a quick file transfer to a client/colleague.

The Brookstone 3-in-1 USB Tablet Stylus feels good in my hand and definitely allows me to draw and sign more accurately on my iPad/iPhone. I guess my only small nitpick is that if you’re going to including a USB flash drive, it’s probably best to make it at least 8GB these days. 4GB seems so small. Otherwise this was a great emergency buy and I will continue to use it along side my other ones.

You can get the Brookstone 3-in-1 USB Table Stylus here.

Mophie Power Reserve – More smartphone juice in your pocket

wpid13432-IMG_1628_sm.jpg

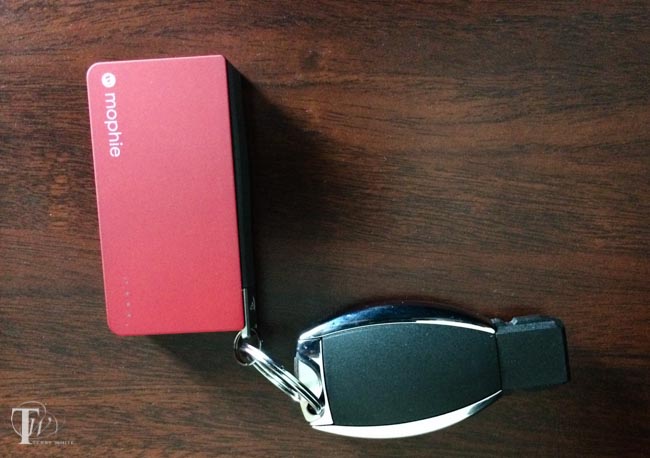
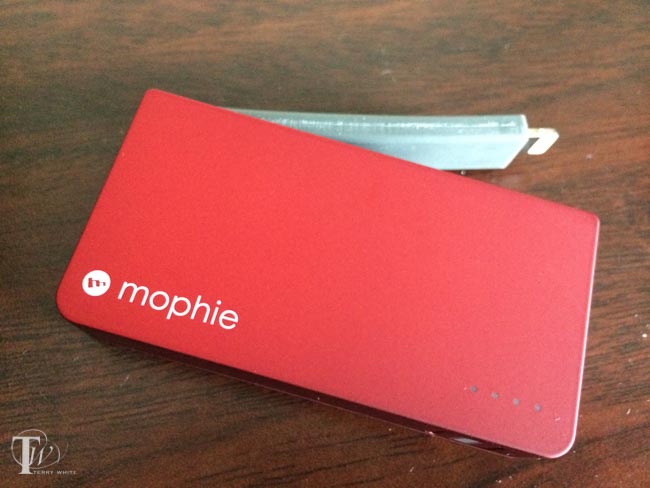
Since more and more people are using power hungry smartphones more and more each day it’s not uncommon to think about portable batteries to charge your smartphone on the go. If you’re always at your desk or in your car, this is probably less of a concern. However, if you’re a frequent traveler or simply spend several hours a day away from an outlet you can start to get nervous around 3pm as you see that you have less than 30-40% battery remaining. I seem to be amassing a collection of these batteries in all shapes and sizes. Recently the Mophie Power Reserve caught my attention. What stood out to me was the relatively small size, the fact that it attaches to your keys with a supplied keyring and it has a built-in Lightning (or Micro USB) connector. All my other batteries with the exception of the Mophie Juice Air require that I also carry a charging cable. However, the Power Reserve has the cable built right onto the side of it.

What I like about it

wpid13430-IMG_1629_sm.jpg

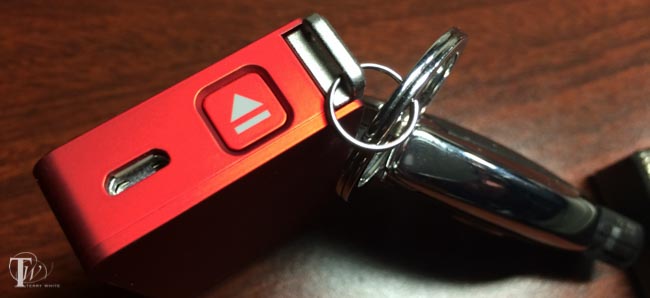
I’ve already pretty much covered  the things I like about it above, but a couple more things make this a nice battery to have. Although it attaches to my keys with a built-in keyring, they were smart enough to build in a “quick release” button. Just press and hold down the button and the battery detaches from the keyring and exposes the charging cable. Very nice design. Also it’s nice having the small LED (not too bright) status lights to let you know how much juice you have left. Lastly it’s really light weight. My car key weighs more than this battery. It’s also nice to have a choice of colors: black, Product RED and white. It charges via a Micro USB port and comes with a charging cable. You have to supply the charger though (like the one you use for your phone).

wpid13435-IMG_1632_sm.jpg

What I’m not too crazy about

Like I said, I’ve got a collection of different batteries now and even my smallest one is 3,000 mAh. That means that it has enough battery in it to charge my iPhone 5s all the way up to 100% from dead/near dead. The Mophie Power Reserve only has a 1350 mAh battery in it which they claim will get you about 60% more battery. This is fine in those emergency situations where you need a charge just to get you through the rest of the day or to make that call home or emergency Facebook status update ;-). However, Mophie is charging top dollar for this battery! It’s $49.95. That’s a LOT for a battery this small (in capacity). At first I thought well maybe they have to charge more for the Lightning connector. That was until I checked and saw that the Micro USB version is the exact same price. I normally don’t complain about price in my reviews, but when I look at batteries like this one and this one, that give you a lot more juice for less than/almost half the price, I realize that with the Power Reserve you’re paying a premium for the “design” and integrated cable. The other thing is that the Power Reserve only has a 5V 1 Amp output, which means that it’s really only good for your smartphone and not your tablet. Again, not a big deal since it’s designed to be a smartphone charger, except for when you look at the price.


The Bottom Line

Overall I really like this product. I normally just carry my car key in my pocket, but now it’s a car key plus Mophie Power Reserve. I would love to see Mophie upgrade this product with a higher capacity battery even if it means adding a little more weight to it. I would want 3000 mAh minimum. If not an upgrade then simply cut the price to $24.95 and they won’t be able to make enough of them.

You can get the Power Reserve from Mophie here.

Memorial Day 2014 – A Day We Pay Tribute

I would like to take this opportunity to thank the men and women that currently serve or have served in our US Military Service! Your continued sacrifices to protect our freedoms are greatly appreciated. We are able to spend this day with our friends and families because of what you do!

As we observe this solemn day, we must remember all the brave men and women in uniform who gave their lives in the service of our great country.

Again, Thank You!

Terry White