Travel Routers: Cradlepoint CTR500 vs. AirPort Express

Sometimes it’s easier just to show you rather than to try to explain it in print. So check out my video review of the Cradlepoint CTR500 3G EVDO Travel Router vs the Apple AirPort Express:

…yes the video shot in HD and was edited in Adobe Premiere Pro CS4 (of course!)

A couple of additional features not shown in the video

The CTR500 not only shipped with an AC adapter (cigarette lighter) and multiple international plugs, but it also shipped with an Auto DC adapter. So in theory you could take that long car trip with the family and your passengers could have Wi-Fi internet access for their laptops, iPod touch’s, etc. while barreling down the highway. UPDATED INFO: Also the guys at the 3Gstore just alerted me to the fact that the latest Cradlepoint firmware now supports true Load Balancing. So if you do have the luxury of having two cards, you can use them together for increased bandwidth. They had me at “now supports”.

The Bottom Line

I’m always setting up ad-hoc Wi-Fi networks when I’m on the road. I love the convenience of coming back to my hotel room and just opening my laptop and being on the internet (just like at home). It’s also great to be able to share the same internet connection with colleagues in the next room or family that I’m traveling with and to have Wi-Fi access on multiple devices like my laptop, iPhone and Vonage VoIP Wi-Fi phone (great for calling home from overseas). Although the AirPort Express is GREAT (and I still use them extensively at home because of their AirTunes abilities), the Cradlepoint CTR500 gives me the ability to not only share an Ethernet connection over Wi-Fi, but also either of my 3G (EVDO/HSDPA) cards. It even works with some 3G cellphones via USB tethering. There was no software to install. Like most routers you configure it via your web browser. I’ve also never seen a router (let alone a travel router) with so many options to configure it just the way you like. Even my home D-Link router doesn’t have that many options. Speaking of configuring, there was one annoying default. After I set the router up with WPA password security, I noticed that I was still being routed to a web page, which required entering an additional password before being allowed access to the internet. I couldn’t find that way to turn this off fast enough! Once I turned off “Require User Login“(apparently one of the most frequently asked questions), I was totally happy with the setup. The CTR500 only came with a quickstart guide to get you setup with a basic setup. I wanted to dig a little deeper with the settings and therefore had to go to the website to get the complete user guide.

The Cradlepoint CTR500 goes for $179.95 (retail list price $199.99).  There are less expensive models (one of which even has a built-in LI-ION battery) if you don’t need both an ExpressCard slot AND USB. If that’s the case you might want to go with the USB model CTR350 at $129.38. The CTR500 has direct support for over 100 3G cards and cellphones. See the list and specs here. If all you need is to share a high speed internet connection via Ethernet then the AirPort Express ($94.61) is the way to go. If you’re in the market for a 3G data card/service, router etc., the guys at the 3G Store rock!.

I can’t wait to go on my next trip!

iPhone App of the Week – Zillow

zillowlogo

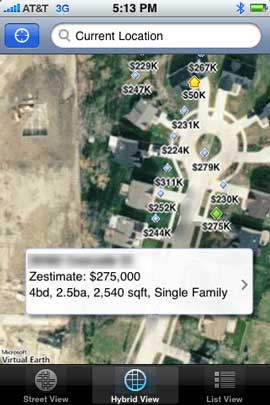
Have you ever said, “gee, I wonder how much the houses cost in this area?” Well if you have, you will LOVE this app. Zillow is a real estate data app that simply blew me away. It’s location based, so you don’t have to enter addresses. Simply fire it up, wait a few seconds for it to acquire your location and you will start to see the houses in your immediate vicinity appear on the map with little price tags above them. Now of course this data is only as good as the real estate databases out there and don’t take into account for any recent modifications, renovations or disasters. However, it will definitely give you a feel for whether or not the houses you’re eying are in your price range or not.

zillow1

WARNING: Depression Alert!

I live in Michigan, which has one of if not the worst economies in the country. So I don’t recommend running this app on your own house/neighborhood if you live in this area (or a similar area) or you just may wind up on the floor in the fetal position or reaching for your gun. Houses all around me are going for a fraction of what they cost a year or two ago. It’s definitely a buyers market. Sigh…

How well does it work?

zillow2a

Since I’m on an iPhone 3G with an actually GPS in it, my location was very accurate. In most cases it put me on the map exactly where I was in my car. I drove to a relatively new development (built in the last 4 years) and I was really curious to see what those homes were now going for. Again, not pretty, but good info.

The Zillow app has both standard Map and Hybrid (satellite) views. There’s also a handy List view for viewing the properties by address. As you might expect the app will also tell you if a house is for sale or not (aren’t just about all houses for sale if you offer enough money?). Once you find a house that you want to drill down on you simply tap right on it and you’ll see the address and basic specs like number of bedrooms and baths as well as the estimated value. Tap again and you’ll get a more detailed listing including charts and price range that that house has fluctuated in. You can also see when the house was built, square footage of the lot and the house, and the property taxes. I was also impressed by how the map scrolled as I drove and the GPS updated my position. Pretty neat.

You can also simply enter an address in the search field. I’m surprised that there is no tie to the Contacts app for a quick look up of your friend’s…….never mind.

zillow3a zillow4

The Bottom Line

This is simply a cool app! Even if you’re not in the market for a house (I’m not), it’s still fun to play with. Who knows, if the right deal were to come along it may change your mind about staying where you are? Although this app works both on the iPhone and the iPod touch, I can’t see it being as useful on the touch in situations when you wouldn’t have a wi-fi connection to look up the data.

zillow5

You can download Zillow for FREE from the App Store here.

I have to give credit to my Twitter follower @TareqAlrashid for turning me on to this app. Follow me on Twitter and tell me which Apps you love!

Replace that stranger with a stick

xshotarm

We’ve all been there at some point. You’re out and about either alone or with that special someone or family member and you want to be in a picture with. The problem is that if you didn’t bring a tripod, you’d have to rely on a stranger to take your camera and take the picture. While this seems like a relatively simple task, I’m always floored by the way people act as if they’ve never even seen a camera before. Let’s face it, the shutter release has been in the same spot for the last thirty years. Yet we always hear “what do I press?” Next there’s the whole auto focus, press the shutter down half way thing. I don’t even want to go there with that one.

You might want to get an XShot

xhotsample

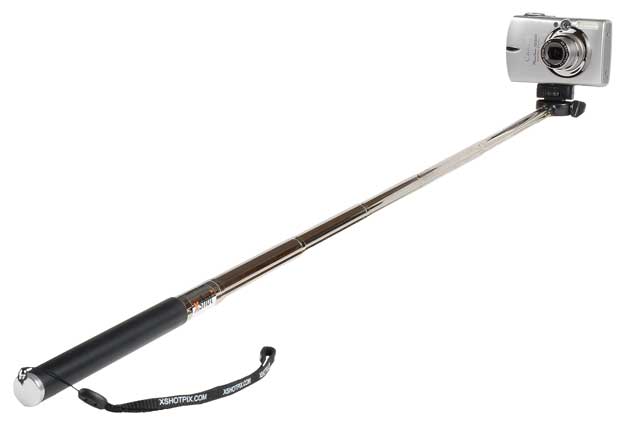
I was at my Mac User Group meeting a couple weeks back and one of the members (Wanda) came up to me and she was showing off her XShot. The concept is so simple, it makes me think “now why didn’t I think of that?” Basically the XShot is a telescoping arm with a tripod mount on the end that can swivel. The idea is that you set your camera to use the built-in timer feature, extend the XShot arm and press the shutter. You have a few seconds to pose or look natural while you hold the arm of the XShot out of sight. Being a gadget junkie, I had to order one of these and try it out.

How well does it work?

takenwithxshot

The XShot works as advertised. I mean there’s not much to it. I was taking pictures with it within minutes of taking it out of the packaging. It took me longer to figure out how to set the timer on my Canon Powershot 850IS than to actually get the XShot ready. Although the XShot does exactly what it’s designed to do, there are a couple of things you might want to think about. The first thing is that whole framing issue. Since you can’t see the LCD screen, you’re totally guessing on how to frame the shot. However, you’ll probably still do a better job blindly than the average stranger you were using before. The next thing is the auto focus feature. My Canon has Face Detection, but when I reach out to press the shutter and start the timer, I’m not quite in the frame when the camera focuses. In my testing with two people this wasn’t an issue, however, taking a picture of yourself might require you to bring the camera in closer to get the proper auto focus.

The Bottom Line

xshotanim

For the $19.95 ($29.99 list price) price, it’s not bad. It’s cheaper and smaller than most other solutions I’ve seen. It’s also can offer a huge improvement over the typical Myspace/Facebook profile pictures that I see out there so much (you know the ones where you see the person’s arm in the shot as they try to take their own pictures? Or worse the ones taken in a mirror in the bathroom?). The XShot folds down to 9″ and extends up to 37″. It weighs only 5 oz. Amazon has it for only $19.95.

Another great evening! Thanks!

click to enlarge

astart

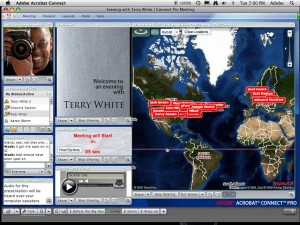
Once again I want to thank all of you who attended my "Evening with Terry White – My Photoshop Lightroom Workflow"! I’m very pleased with the turn out and the enthusiasm that you all expressed. We also had people attending from Europe and it was after midnight their time. So thanks for hanging in there.


The recording

If you couldn’t attend live, I did record the session and you can watch it here.

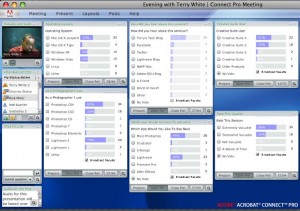
Polling questions/answers. Click to enlarge


Some follow up Q&A

Q. How can I learn more about DNG?

A. Check it out here on Adobe.com.

Q. Are there any good deals on Lightroom 2?

A. Yes, here for the full version and here for the upgrade.

Q. You mentioned a 3rd party web gallery that you use for showing client proofs. Which one is it.

A. I use The Turning Gate Client Response Gallery. Check it out here.

Q. You showed how to upload pictures form Lightroom to Flickr, Facebook, etc. How is that done?

A. I use third party plugins. Here are a few: Flickr, Facebook, Smugmug, iStockPhoto.

Q. Which GPS do you use with your camera?

A. I geotag my photos with the di-GPS Pro for Nikon cameras.

Q. Where can we see the Arizona shots you took?

A. Right here.

Q. Where can I see more of your videos, presentations, etc.?

A. Check out my Adobe Creative Suite Video Podcast.

Q. When you were retouching the photo, you said you were using a Wacom tablet. Which one was it?

A. It was the New Wacom Intuos 4 Medium Tablet. See all my gadget and gear recommendations here


Retouched shot from the seminar[

TweetDeck is slick!

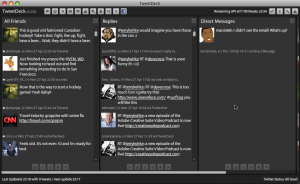
TweetDeck window - Click to enlarge

Twitter is gaining in popularity and experiencing explosive growth. It’s not uncomon to see people Twittering on their phones and laptops throughout the day. When you use Twitter on your computer, it’s usually through a web browser. However, there is a full featured stand alone app called TweetDeck, which is free to download.

TweetDeck Twitter Dashboard – Twitter in real-time!

TweetDeck not only takes advantage of all of the Twitter features, but it even displays a small notification window in the upper right corner of your screen when new Tweets arrive. It also has Facebook integration, which is nice! One app to update both your Twitter and Facebook status. TweetDeck also lets you share pictures with Twitpic. TweetDeck is actually an Adobe AIR app (yeah that makes me happy!) That means that it’s cross platform for both Mac and Windows users. If you’re a Twitter user you should really check out TweetDeck.

Download TweetDeck here. Also follow me on Twitter.

USB ports too close together?

usbports

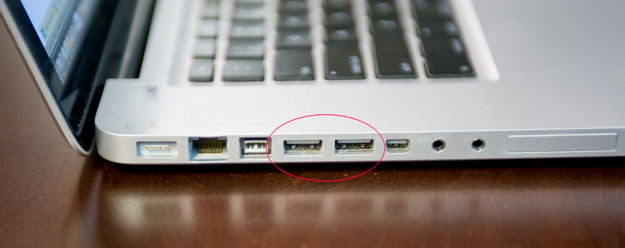
Two USB ports on the MacBook Pro

usbadapter_0008

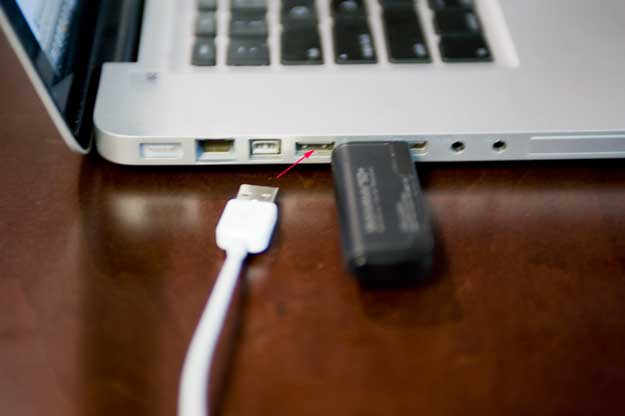
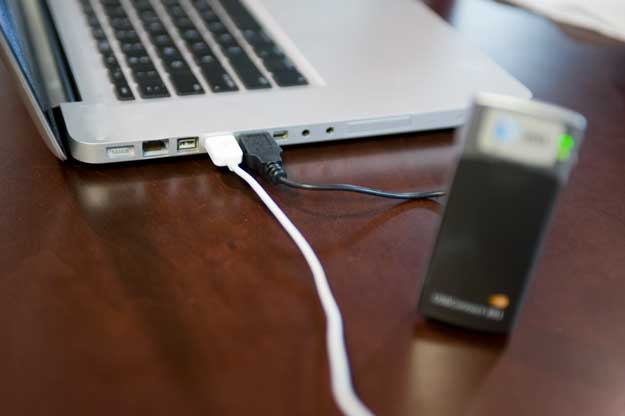
Here’s my SanDisk SDHC USB card reader and as you can see it’s just wide enough to block the second port a bit.

One of the things I’ve had to adjust to on the New MacBook Pro is the fact that the two USB ports on the 15″ model are right next to each ohter. They are not only right next to each other, they are insanely close together. So close in fact that it makes it impossible to plug in some devices and still acess the second port. On the previous MacBook Pro the two ports were located one on each side of the computer. So even if you had a device that was wider than it should be, you still had access to the second port because it was all the way on the other side of the computer.

usbadapter_0013

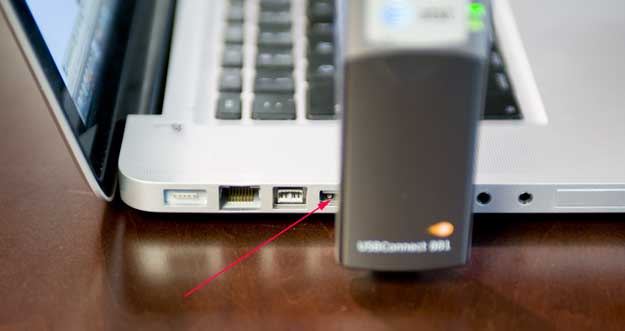
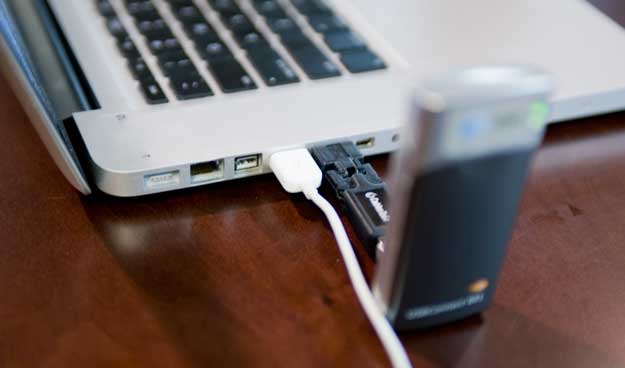
As you can see, with the USBconnect in place the second USB port is blocked.

I use my AT&T 3G USBconnect card when I travel. I have one of the older models that has a USB plug that flips down. It’s designed so that when its inserted into your laptop the antenna/card sticks up. This is fine provided that you don’t need to use the port next to it because it almost completely blocks. While I have on occasion wedged another USB cable into the second port, this is not advised and causes the USB cables not to sit properly.

usbadapter_0030

Although the Synchrotech cable certainly solves the problem with my USBconnect 3G modem it’s a little long for this.

I decided that enough was enough and started looking for USB extenion cables that would solve this issue. I wanted the shortest cable I could get. The first one I tried (thanks to the guys at Sychrotech) was the AirQueue, which was initially designed for the MacBook Air. The MacBook Air’s USB port can also be cramped if you are plugging in a large accessory. The AirQueue is a simple Male on one end Female on the other end 19cm cable. It’s a short extension cable. Simple as that. While the AirQueue certainly solves the problem for most connections, I was looking for something even shorter and more rigid.

That leads me to the Cables-to-Go FlexUSB adapter

flexusb

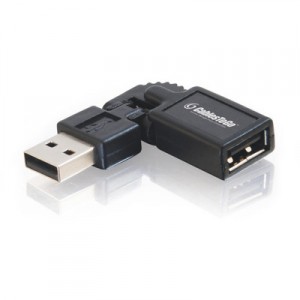
The Cables-To-Go (great company for all kinds of cable/hub solutions) FlexUSB adapter is much shorter than the Synchrotech model and although not as riged as I would like, it’s good enough for what I want to do. This adapter is great because you can angle it and turn it in the direction you need depending on the accessory you’re plugging in. Again, there’s not much to say here. It’s a USB extension that helps overcome (what I consider to be) a design flaw in the new MacBook Pros.

usbadapter_0015

The Bottom Line

usbadapter_0021

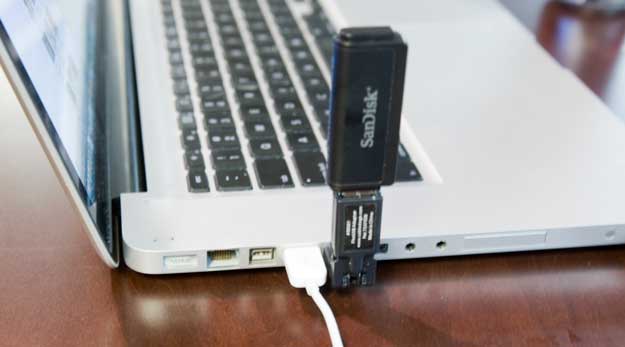
Here’s the FlexUSB connector angled up holding a SanDisk SDHC card reader

If your USB ports are too close together, you certainly can’t go wrong with either one of these extension adapters. Either one does the trick. However, if you going to want the device (like a 3G card ) to stand up on its own when plugged in or if you want the device to be a little closer to your laptop then I would go with the Cables-T0-Go FlexUSB adapter.

Synchrotech AirQueue $6.00

Cables-To-Go FlexUSB $4.64. (look on the right side of the page for this price)

iPhone App of the Week – Mobile Fotos

mobilefotos

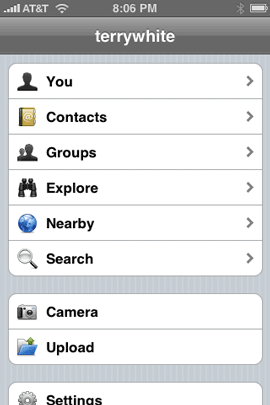
If you use Flickr.com and you have an iPhone/iPod touch, then you’re going to want this app! It is by far the best app I’ve seen to date to browse and upload to Flickr.

mf1

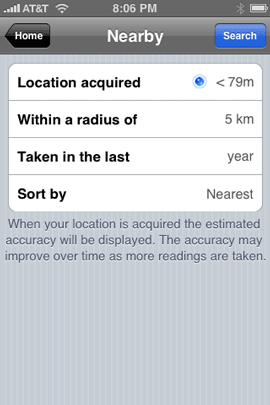
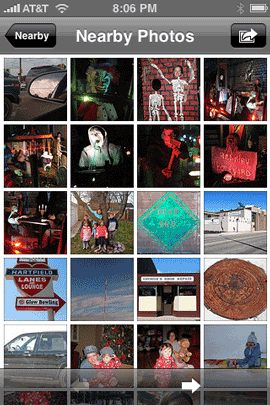
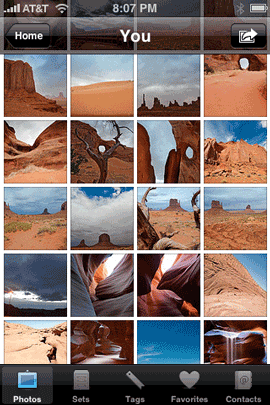
Not only does it let you bowse your own photos, it can use your current location to show you photos that were taken nearby by others.

mf7 mf2

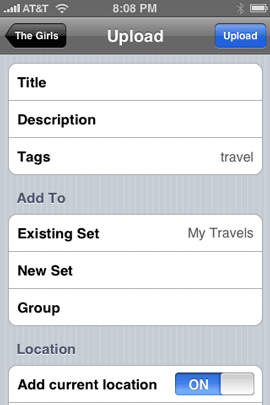
I’ve used other apps that let me upload to various services. However, this one is great in that it lets you properly tag the photo and pick the photo set you want it uploaded to before you actually upload it. You can also use Mobile Fotos to view videos on Flickr. I haven’t played with this as I don’t have any videos on Flickr yet, nor do any of my friends. Currently videos are limited to 90 seconds and 500MB on Flickr. So for now I’ll stick with YouTube.

Uploading

mf3 mf4

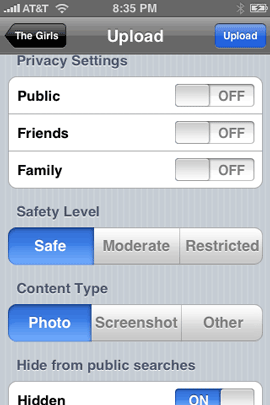
One of the main reasons I use Mobile Fotos is to upload snapshots I’ve taken with my iPhone. The upload feature is the most full featured uploader I’ve ever seen in any iPhone app. It let’s you use every option available for Flickr just as if you were uploading from your computer. You can choose a Title Description, Tags, Set (including creating a new Set on the fly), Group, Location, Privacy settings, Safety Level, Content Type, whether or not the photos hould be Hidden and Resolution. Yep, it’s full featured and this should be the model for all apps that let you upload to a photo service. Even Apple’s built-in upload to MobileMe could learn a few tricks here and seems anemic by comparison.

It Geotags too

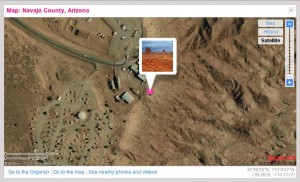
Monument Valley shot

One of my favorite features of Flickr is that it automatically adds your photos to the Yahoo map if they contain location information (longitude & latitude). Of course when you take a picture with your iPhone’s camera you have the option of including location information. Mobile Fotos uses that location information and includes it in the upload.

Not always about you

mf5 mf6

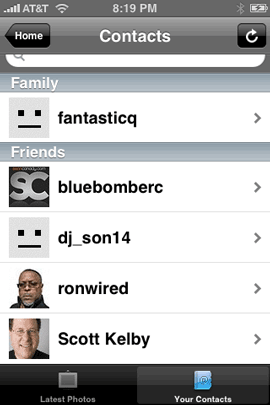
You can also tap the Contacts icon to see the latest and greatest shots of your Flickr Friends. This really allows you to not only share your photos quickly and easily as they happen, but also to see what’s going on with your friends and family that also use Flickr. You also browse your Flickr groups!

The Bottom Line

There’s not much else I can say! This app totally rocks and does exactly what it’s supposed to do. It’s easy to use, full featured and works great. If you use Flickr, this is your app! Mobile Fotos is $2.99 and available at the App Store here.

AT&T FamilyMap lets you get all big brotherish with family members

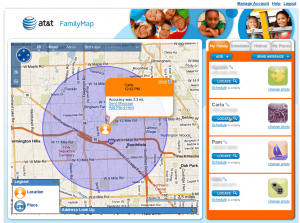
attfamilymap21 Click map for a larger view

Sure there have been those times when I’ve walked in the house and wondered, “where is everybody?” Well now I could just go to my computer and find out. AT&T recently launched a new service called “FamilyMap”. If you have an AT&T Wireless Family Plan, then you can sign up for the service and track any of the phones on that plan.

The way it works

Just like we see on modern day TV shows and Movies, your cell phone is constantly broadcasting your whereabouts via the cell towers (that must be why I see perfectly good cellphones lying by the side of the road). There have been apps like Loopt that allowed you to find friends (for free). Seems like AT&T wants to monetize this by offering it as a paid service (big surprise right?). Right now I’m doing the free 30 day trial. Not sure if I’ll continue it or not. We’ll see. Back to the way it works. You log onto the familymap.wireless.att.com site and once you’ve set up your account you can simply click the Locate button and within 2 minutes that person (actually their cellphone) will be pinpointed on the map.

You can name and save the locations so that they will show up with more meaningful names like “school”, “work”, “the gym”, etc. The accuracy of the location will also be displayed. I imagine phones with GPS’s in them might be a little more accurate, but not necessary if AT&T is only relying on the cell towers. The service works as advertised and it’s been fun to play with. I have a couple of teenagers and well, you know.

There’s also a mobile version of the site for your mobile phone’s web browser (http://attfamilymap.com/m). Looks great on the iPhone/iPod touch.

The Bottom Line

AT&T is offering FamilyMap for $9.99/month to locate up to two family members and $14.99/month to locate up to 5 family members. Like I said, you can try it for free for 30 days and see if it’s worth it to you. Not all phones work with FamilyMap such as the Pay as you Go ones. Sadly it doesn’t help you find a lost phone that’s in your house (still looking for one here). However, it will help you locate a lost or stolen phone that is elsewhere. If you’re interested in AT&T’s Family Map. Check out the website here.

An Evening with Terry White – My Lightroom 2 Workflow

eveningwithterry

Last month I did my first: “An Evening With Terry White!” I was happy with the turnout and the way things worked out so I’m back to do it again. Last month I did Photoshop CS4 Essentials (see the recording here). This month by popular demand I’m back to do another session. Here’s how it works: I will pick an evening and a topic and do a one hour live session on that topic over the internet. There will be no cost to the attendees, It’s on me (well actually it’s on Adobe).

The Next Topic

This second evening will be on “My Adobe Photoshop Lightroom 2 Workflow.” I will take you through my Lightroom workflow from start to finish. We’ll even detour over to Photoshop for a quick portrait retouch. You’ll see how I bring my photos in, organize them in catalogs, pick my favorite ones, bouce over to Photoshop as needed and deliver proofs and the final images to the client.

Although I’ll be using Lighroom 2, you’re not required to have Lightroom 2 to benefit from this session. Many of the techniques I plan to cover will be applicable to users of the older version. However, if you just want to be up-to-date and all, feel free head over to the Adobe Store. You can buy your upgrade and download it on the spot 🙂

When and where? R.S.V.P.?

This second evening will be Tuesday, April 28th @ 7PM E.T. and it will take place via Adobe Acrobat Connect Pro. Here’s the URL: http://my.adobe.acrobat.com/eveningwithterry

Sign on as a GUEST with your real name. While there is no pre-registration required, this session will be limited to 100 attendees. So it’s first come, first served. I advise you to log in 15 minutes before the 7PM start time as I plan to start on time.

Will you be able to ask questions?

There will be a Q&A session at the end. You will be able to submit your questions throughout the presentation in the Q&A pod. I will address as many of the submitted questions as I can at the end. Although I plan to end the presentation part within one hour, I will probably be able hang out a bit afterwards to continue answering questions. This will give people that only have an hour the chance to see the entire presentation before having to leave.

What you will need to participate

If you’re reading this blog, you probably have the necessary equipment to watch this session. You will need a computer (Mac or PC) with a web browser, a high speed internet connection and the Flash Player. The audio will come through your computer’s speakers. That’s pretty much it! There is no software that you need to install. If you want to make sure that your computer and internet connection are up to par, you can run this test. Although the last part of the test checks to see if you have the “add-in”, it’s not necessary to have it for this session. Go ahead and run the test now so that you’ll be ready in time for Tuesday. Also keep in mind that if for whatever reason your connection is not up to par or it’s not going well for you, there’s nothing I can do about it on my end and please accept my apology now.

What if you can’t make it or you’re 101st person?

If all goes well, this session will be recorded and I will post the link to it the next day on my blog. So if you can’t attend or if you don’t make it into the session due to a large turnout, you will be able to enjoy it afterwards at your leisure.

Why am I doing this and what’s next?

Although I can post videos anytime I want on my Adobe Creative Suite Video Podcast, nothing beats live interaction. I like talking with customers and this will give me real-time feedback. If this continues to work well I will do it again with different topics. If not, well we can’t say that I didn’t try. 🙂 See you on Tuesday!

Charge your iPod or iPhone with a couple of AA’s

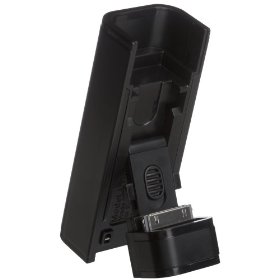
energi2go

If you’re an iPhone user you can probably always use some more juice. Especially if you’re a traveler. Although I have a fantastic iPhone backup battery, the one I have requires charging. If I forget to charge it or if it runs out of power then I have to find a plug to plug it in and wait a couple of hours for it charge up.

You can find AA batteries just about anywhere

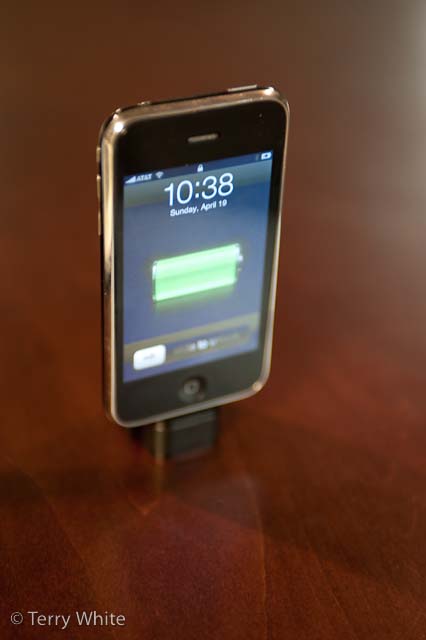
That brings me to the Energizer Energi To Go portable power for iPod. This was the Woot special of the day a couple weeks back and I ordered a few of them to try and give out to friends and family. Of course since it doesn’t say that it works with the iPhone or the iPhone 3G, I really wanted to give it a try and see how it would work. The iPhone 3G and all current model dockable iPods get their power over the USB pins. So only the most recent chargers tend to work with them.

_tlw7997

The Energi To Go is a simple device that you pop 2 AA batteries (included) into it and flip out the 30 pin dock connector and sit your iPod or iPhone on it to begin charging. You should be able to get at least 1-2 full charges from an almost dead iPhone battery out of AA’s.

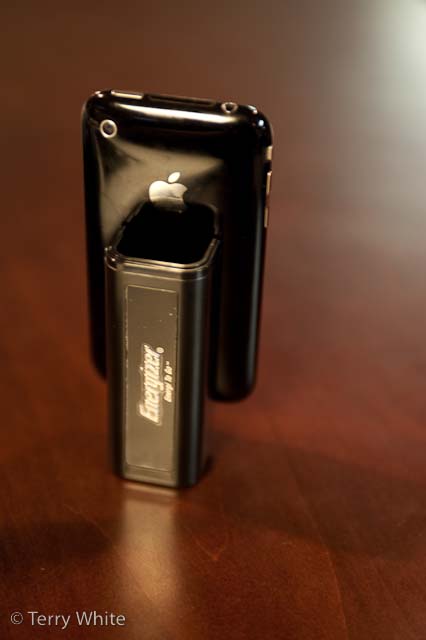
_tlw7998

The Bottom Line

My FastMac charger is definitely more feature rich and is designed specifically for the iPhone. However, it’s also 3 times the price of the Energi To Go. The Energi To Go has a cheap feel to it. It feels as if it would break easily. However, as long as you don’t abuse it, it should last. Although I have not had any problems with it on my iPhone 3G, it does NOT specifically state that it is iPhone compatible. I also like the way it docks behind the iPod/iPhone instead of on the bottom like some other batteries. The 30 pin dock connector is also adjustable for the thickness of your iPod or iPhone for a good fit. The Energi To Go is $29.99 at Amazon.com.