TiVo Mini does the job but could be better

TiVo-Mini

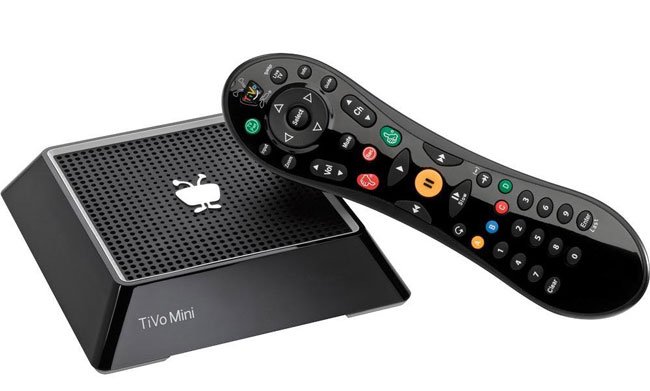
If you’ve followed my blog for a while, you’ll know that I’m a fan of TiVo DVRs. Not long ago I relocated and it was time to rethink my multi-room viewing experience. In the past I had DVRs in each room. This of course is redundant and costs more than other options. Since I was starting over in a new location I decided that I only needed ONE TiVo DVR and I would explore options for viewing that content in other rooms. In the past I used this setup from Actiontec and while it worked OK, I wanted to see if there was something better? My search led me to the TiVo Mini. TiVo Mini is a smaller box designed to be used on another HDTV in your home. It connects to your HDTV via HDMI and not only streams live TV from your existing TiVo DVR, but it also can stream any recorded content from your TiVo DVR. The big advantage here is that unlike the Actiontec or other solutions, each HDTV can view something different. In other words if someone is watching a recording or live TV in the living room, another viewer can be viewing something totally different in the den, office or bedroom.

The Good

wpid13953-IMG_3379_sm.jpg

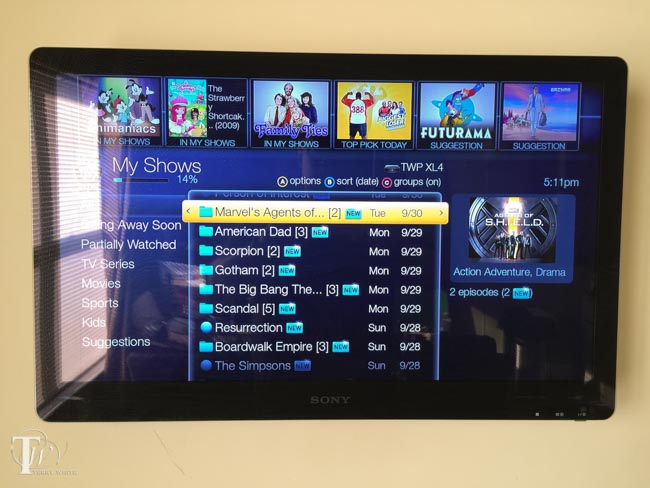
It works GREAT! The setup was pretty straight forward and once setup I’m able to enjoy my TiVo in another room as if I was sitting right in front of it. The quality of the stream is as good to my eyes as watching the content on the main TV. There is a small lag that would only be noticed if you had the same live broadcast showing in both rooms at the same time. It does exactly what I needed it to do. It comes with an additional TiVo remote that allows you to control the TiVo mini as well as the TV.


It could be a lot Better

TiVo_Mini_back

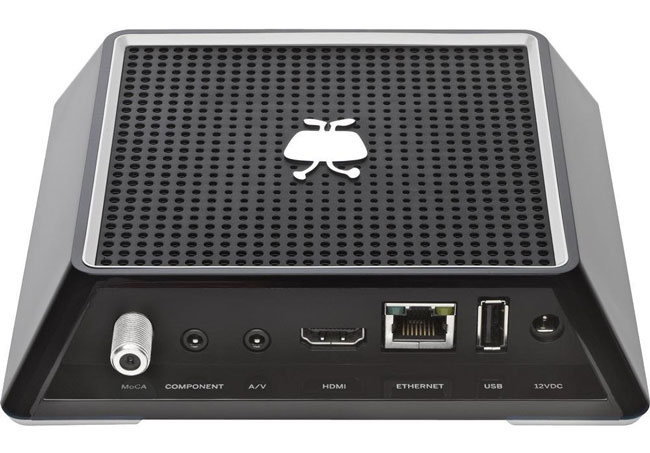
In order to use a TiVo Mini you have to have all the right stuff in place or you simply can’t use it. First off it requires the later generation 4 Tuner TiVo Premiere or Roamio. Luckily I got a TiVo Premiere 4XL on close out and little did I know at the time that going with the 4 tuner model would pay off now. The 4 tuners are necessary so that the main TiVo can still record while the other tuners are being shared with the the TiVo Mini(s) in your home. The next requirement is that it can only work over Ethernet! That’s right it has to be hard wired and there is currently no built-in wireless option. In my opinion in 2014 this is dumb! Most people will not have a wired ethernet connection in bedrooms, family rooms, etc. If my Apple TV can stream HD quality content from the internet via WiFi, there should be no reason that TiVo Mini shouldn’t be able to stream content wirelessly from another room in the same home! There is another option that works via a coax connection if you happen to have the other rooms wired for cable. You can use a set of MoCA adapters to do ethernet over coax or if you have a TiVo Roamio Plus or TiVo Roamio Pro those models have MoCA support built-in.  This is probably the best way to go if you can’t run ethernet AND you have the coax cable connections in each room. Luckily I could run “flat” ethernet cables and hide them from room to room. Aside from the connection hurdles, the one and probably biggest problem that people will have with this solution is that TiVo charges a monthly charge to use TiVo Mini. Wow! I can see paying for TiVo service for the DVR, but why on earth is there a need to pay for TiVo service on the TiVo Mini? The TiVo Mini technically is just a bridge to the main TiVo DVR. You can opt to pay a one-time Lifetime Service fee and be done with it, but I can’t see why there is a need to charge for a service for this box at all?


The Bottom Line

Despite the problems, it was the best and most elegant solution to allow me to have my TiVo in 3 rooms and only having one TiVo DVR. The fact that each room can view something different is great and the product has worked perfectly for me so far. Rumor has it that TiVo is working on a newer model of the Mini with wireless capabilities. There’s no formal announcement at this point. TiVo if you’re listening, this product screams to be connected wirelessly and you should ditch the service fees for it even if it means charging a little more for the box itself. Keep in mind that it can’t do anything without a TiVo DVR, so paying a fee for the Mini seems a bit much.

You can get the TiVo Mini here.

Harmony Smart Control Review

harmony_smart_control

It has been a while since I’ve looked at smart universal remotes. I’ve been happily using my Harmony One for years. However, it was time to setup a new room with HDTV, Apple TV and TiVo Mini. This means either using 2-3 remotes or just ONE! However, I didn’t want to go with another high-end Harmony, yet I wanted something that was still very good. This lead me to check out the Harmony Smart Control. This setup offers the best of both worlds. You get a regular remote control with physical buttons as well as a “hub” that allows you to control everything with your iOS or Android based smartphone or tablet. While I’ve used this hub before, I like the option of having a physical remote for those times when my iPhone is in use or not handy.


How to set it up

The setup was pretty straight forward. You plug in the hub to AC power and then download the Harmony Control app. Since there are no controls on the hub you first have to get it on your WiFi network either via your computer via a USB connection to the Hub or wirelessly to your smartphone via bluetooth. I opted to set it up via my iPhone 5s. The App found the hub and allowed me to key in the password to my WiFi network. Once it was setup on the network the App continued to allow me to set it up. The setup was very typical to Harmony remotes. You simply enter the brand and model names/numbers of the devices you wish to control. Believe it or not, that’s the hard part. Who remembers the model number of their TV? Once I tracked down the info I needed to enter, it was easily able to control each device. Then I setup “Activities” such as “Watch TV” and “Watch Apple TV”. Activities allow you one button options to turn on all the appropriate devices and switch to the appropriate inputs on your TV or receiver. Lastly I added my “Favorite” channels.


How does it work?

harmony_smart_hub

Once I set up the Harmony Smart Control, I now have the option of controlling my TV and components via the supplied physical remote OR via my iPhone or iPad using the Harmony Control App. It definitely beats having to have the TiVo remote, TV remote (to properly switch inputs) and the Apple TV remote. Either the App on my iPhone or Harmony remote can control it all. The App is pretty slick too. Not only do you have multiple screens for various controls, you even have a “gesture” screen that allows you to swipe up or down to control TV volume or left or right to change channels. I also like the one touch access to my favorite channels.


The Bottom Line

Logitech has hit the right combination of hardware and software with this combo. You have a physical remote that anyone can use AND the ability to use your mobile device to control it via WiFi from any room. I’m happy with this setup and I’m considering getting another one for another room of gear.

You can get the Harmony Smart Control here

You can also just go with the Harmony Ultimate Hub if you just want to use your mobile device.


Dropcam HD Review

DropcamHD_front_turned_HI-RES

I’ve been using Panasonic IP webcams for years to keep an eye on things at home and at my studio. However, Panasonic has gotten out of this business and therefore it was time to look at newer cams to recommend to people that ask. I was intrigued by the Dropcam HD and finally got a chance to try one out. Dropcam HD is a 720p HD WiFi enabled video monitoring camera. It also broadcasts sound. Unlike the Panasonic cameras, Dropcam is both a hardware solution and service. During the setup process you configure a Dropcam.com account along with setting up the hardware. You have a choice of a “free” live viewing only account or a paid Plus or Pro account that not only allows you to view your Dropcam live, but also see either 7 or 30 days of recorded video respectively. The idea is that if you’re using it as a security camera that you’re not going to be watching it 24 hours a day. Therefore Dropcam will automatically record and keep the last 7 or 30 days of video so that you can review it if need. However, even with the Free account you can setup motion detection that can alert you that something is moving in front of your camera so that you can tune in immediately and watch.


The initial setup

drocam_setup

The initial setup couldn’t have been easier. Dropcam HD comes with a stand/mount, 10 foot long USB cable and USB power adapter. You plug the Dropcam HD into your Mac or PC initially and it mounts on your desktop as a volume containing the setup utility. No need to even download anything. During the setup you join the Dropcam HD to your existing WiFi network including password protected ones. You also setup your account on Dropcam.com during this process. Once you’ve got it setup, unplug it from your computer and place it where you want to monitor (indoor use only) and plug it into a AC wall plug. Once the camera powers up and connects to your network the setup completes. The mount can be either used on a desk, bookcase, etc. or you can wall/ceiling mount it. It even comes with the screws and anchors. Also the camera can easily be removed from the mount. It just pops in and out. Also the indicator light can be disabled for more discretion.


Image quality

dropcam_HD_studioview

I was really impressed with the image quality. Definitely much better than the standard def/low def Panasonic cameras I’ve been using. You can watch the image in a Flash enabled web browser on your Mac or PC or you can download their mobile App and watch the stream live on your iOS or Android devices. See my review of the iPhone/iPad App here.


Works in the dark too

dropcam_hd_dark

Unfortunately the room you’re monitoring may not always have the lights on especially if you’re not home. I was happy to see that Dropcam HD uses infrared technology to show you what’s going on even in the dark. It automatically switches to night vision when the lights go off and off again when the lights come back on.

dropcam_HD_rates

The Bottom Line

Dropcam HD is a very well thought out process and the company doesn’t rely on any other company or software to make their solution work. This is a good thing as many other solutions lack things like mobile apps or online recording. The image quality is exceptional and exceeded my expectations. You can setup multiple Dropcam HD units. You can do two way audio and it has digital zoom. While this hardware/service solution works as advertised there are a couple of things that would make it better. First off there’s no way to rotate/swivel the Dropcam. It’s a fixed camera and therefore can only cover the range that the built-in lens covers. With that said, the lens covers up to 107° field of view, so this may not be an issue for most. The next thing is that while it comes with a USB power adapter, it’s unnecessarily wide and you may have an issue plugging it in to an multiple plug outlet next to another plug. There’s no reason why it couldn’t be skinnier. The only other thing you might consider is that Dropcam uses about 60GB of bandwidth a month. Depending upon your ISP/plan this may be an issue. Comcast for example thinks anything over 300gb a month is excessive! As you can see I can’t find a whole lot wrong with Dropcam HD. I’m impressed and will look to replace my older Panasonic units with Dropcam HDs.

You can get Dropcam HD here.

You can also check out Dropcam on Facebook here.

DropcamHD_parts

Homeworks Internet Controllable Radio Thermostat

Programmable thermostats are certainly not a new thing. I’ve had one in my home for several years. They allow you to lower your energy costs by turning the temperature up/down automatically at times throughout the day/night where you’re either not home or wouldn’t notice as much because you’re asleep. You can set these times and days of the week to match your daily routine/schedule. While that’s all well and good, it doesn’t help much in a situation where you don’t have a daily routine. For example, in my studio I’m not there on any kind of regular schedule. Some days I could be there every day for several days in a row and other times I could be gone for weeks at a time. In the past I would simply put the thermostat on the lowest setting before I leave and turn it back up when I arrive. There have also been times where I’ve forgotten to turn it down and the heat was going for no reason for a day or two with no one there. I started looking for a better solution.

The Homeworks Radio Thermostat was the answer

This thermostat is programmable like all the others, but it also allows you to control it via an App on your smartphone or tablet over the internet or locally via WiFi! With the App I can see the current temperature of the studio AND adjust the thermostat remotely at any time. If I forget to adjust it when I leave, no problem as I can now adjust it from anywhere in the world. If I want to turn the air conditioning on to cool it down before I arrive, I just pull out my iPhone and adjust the thermostat on my way in. So far this device and App have worked really well.

Installation – While I have installed thermostats myself in the past, I decided to let my electrician do it since I had him out working on other things anyway. It didn’t take him long to wire it up. Once It was installed all I had to do was set it up via the iOS App (works on Android too) and connect it to my WiFi network and pair to my account. From that point I could control it from my iPhone or iPad inside the building or via the internet from anywhere. The only thing that I can’t seem to figure out how to do is to switch it from Heat to Cool or to Auto from the App. I can do this from the panel itself, but not remotely. Otherwise, I have the control I need from the App.

You can get the Homeworks Radio Thermostat here for about $107.

You can get the App for free here from the iTunes

Logitech Harmony Link Turns Your Mobile Device Into A Universal Remote

I've been a fan of the Harmony One for some time now. It's actually my favorite off the shelf universal remote. While it's not perfect, it offers the best universal, multiple device experience I've seen to date (aside from the Bose Lifestyle T20 RF remote). Recently I stumbled upon the Harmony Link. This small module connects to your WiFi network and basically serves as an wireless IR repeater to send commands from the Harmony Link App running on your iPhone, iPad, iPod touch or Android device to your audio and video equipment. In essence with the Harmony Link, your mobile device because your touch screen universal remote that does NOT require line of sight.


Straightforward setup

The Harmony Link comes with an AC adapter and USB cable. Dont' worry about the USB cable being short because you only need it for the initial setup and you can plug in the Harmony Link to any AC plug near your computer long enough to set it up and then relocate it near your TV when you're done. Since Harmony prides themselves on having a large database of remote codes, you merely need to collect all the Make and Model Numbers of your gear. Then you simply download the Harmony Link setup app on your Mac or PC. The 1st step is to join the Harmony Link to your WiFi network. Then walk through the setup by entering plain English to identify each device you want to control. If there is a device that you have that Logitech doesn't know about, it will prompt you to get the original remote so that you can teach the Harmony Link the commands it needs to know. 


The Harmony Link App for iOS

The next step is to grab the App for your mobile platform. I downloaded the Harmony Link App for iOS (see my review here). Once you have the App and your mobile device is on the same network as the Harmony Link module it will see it. Then just log in with the same user name and password that you used during the initial setup.

iTunes


How does it work?

Once I got the device setup and the App installed on my iPhone 4s and iPad 2 I took the Harmony Link for a spin. I configured three "activities", "Watch TV", "Watch DVD/BD" and "Watch Apple TV" my only challenge is that my Sony Google TV has the worst input switching implementation ever. Unlike most TVs that either have a direct Input button (ie. HDMI 2) or the ones that simply go "Input Next", mine brings up an on screen menu and while that's not the end of the world, after choosing the Input you have to click "OK". This isn't a standard thing and therefore it threw my Harmony One and of course the Harmony Link for a loop. To make matters worse each time the menu comes up on screen it doesn't highlight the current input, instead it starts at the top. I was able to get it to kinda work but I need to put a call into their tech support to get the best setting.  Outside of my weird Input problem on this one TV, everything else worked perfectly. I was able to easily control my Sony Google TV, TiVo Premiere XL, Sony Blu-ray player and Apple TV. When I done watching tapping a single button on my iPad or iPhone turns everything off. Since this is working via WiFi you don't have to worry about pointing your phone or tablet at your screen (great for turning off the stuff that was left on upstairs or downstairs without having to make the trip. There goes that little bit of exercise you were getting 🙂 ). Also the Harmony Link works in cabinets and has two ports for IR blasters to get to hard to see IR ports. 


What could be better?

While the Harmony Link does work as advertised, there is room for improvement. The first thing is that if you have more than one mobile device or other Harmony remotes, those other remotes/mobile devices don't know that your gear is on if you started with a different remote. For example, let's say I turn everything on with my iPhone 4s and then later pick up my iPad. The iPad doesn't know what activity I'm using or which gear is on or off. It would great if each remote/device could read from the Harmony Link to see the current status/activity. Also if you've got any AV gear that uses RF instead of IR you're out of luck. Another drawback in general is that since it's using your phone or tablet this means that it's 100% touch screen and that's not a good thing because it means always having to look at your display to see the button you want to use. On the Harmony one, there are physical buttons that you can use without looking. Lastly can we kill the green LED that's always on?


The Bottom Line

I'm one step closer to having the perfect universal remote. I would actually like to see an upgraded Harmony One that allows for the button customizations of the Harmony Link App and offer WiFi connectivity. If you're in Remote Control Hell and you have a smartphone or tablet, then you should take at the Harmony Link.

You can get the Harmony Link for $99.89 here.

A Robot Cleans My Pool

It's not quite the Jetsons, but close enough for me. Yesterday, I did a post about my generator, so I thought I'd finish off the week with another piece on home automation and that's my iRobot Verro 300 pool cleaning robot. This is definitely one of my other favorite pieces of gear. Drop it in, let it sink to the bottom and turn it on. Walk away and in about two hours your pool is cleaned! It's a robotic pool vacuum and it works GREAT! I was amazed the first time I saw it climb the walls. I've had mine for about two years now and this is one of those things that if it died today, I'd be ordering a new one immediately. It's easy to use and maintain and takes one more chore out of my life.

Here's a short video of it in action (though it's not very exciting to watch 🙂 )

httpv://www.youtube.com/watch?v=Q5-YzK7EauQ


You can get the iRobot Verro 300 here

Being on backup generator power for over 24 hours

Back in the spring of 2007 I had a whole house natural gas backup generator installed. After the big black out of 2003 that took out the whole East Coast, I knew that I never wanted to be without power for an extended period of time again. Like many preventative measures, you sometimes never have the problem you're trying to prevent. I used to joke all the time that buying that generator was the best (and most expensive) insurance I've ever bought. Since I had the generator installed the power never went off for more than 5 minutes in 3 years. Well that was until last week. I had gone out to run a couple of errands and just as I was wrapping up my last stop the sky had turned very dark (should have taken a picture) and I could tell that it was about to pour down raining any minute. I made it to the car right before the big rain hit and drove home. I noticed that it seemed a little darker than usual, but just figured it was the very heavy rain. When I got home I noticed a huge tree had fallen on my lawn. Although I knew that I was going to have to pay someone to clear that thing, I was very thankful that it didn't hit anything like the house or a car.


I hit the button for the garage door and pulled into my garage. As soon as I stepped out of the car I could hear the generator running on the opposite side of the rear wall. I walked into the house and all was fine. The house was cool, the lights were on and it was like any other time. However, the entire street was without power. That's when I said, "I'm finally getting some use out of that generator!" The beauty of it is, if the power is out more than a few seconds, it fires up and switches over automatically. When the power returns, the generator switches back and turns off. I love this type of automation. Most of my important gear is on UPS backups (see below), so for the most part the batteries in those units handle the switch overs quite nicely.

The next day, the generator was still running. As a matter of fact the power wasn't restored until that next evening. Although I don't wish for power outages because as a gadget junkie, they suck big time, I gotta say this was the first one that I actually enjoyed 🙂

My generator was installed by these guys.


For minor power disruptions I still highly recommend APC Battery Backup Units. These are not designed to power your electronics for extended periods of time. However, for your computers they will generally give you time to properly save your work and shut down. For other gadgets in your world (DVRs, Cable Modems, Routers, etc.), they'll preserve your settings and continue recording if the power is restored before the APC's battery dies. 

Guest Blog Spot: Benefits of Home Automation


remote
 
by Richard Moyle
 
Making your home into a smart home can mean a lot of things depending on how far you decide to take it. Some just implement home automation for their lighting; others may utilize it for security. Still others may automate their home entertainment systems or their heating, ventilation and air conditioning (HVAC) systems. But, regardless of what you decide to automate in your house, there are definitely some big advantages.
 
Convenience is probably the most obvious advantage of automating your home. Having your home automatically perform routine functions saves you time and effort. Just push one button and you can shut off all of your lights, set the thermostat to economy mode and arm your security system for the night. You can automate your home theater system and push one button to have the lights dim, curtains close, TV and DVD player turn on, phone mute and popcorn popper start making a snack for you to enjoy during the movie.