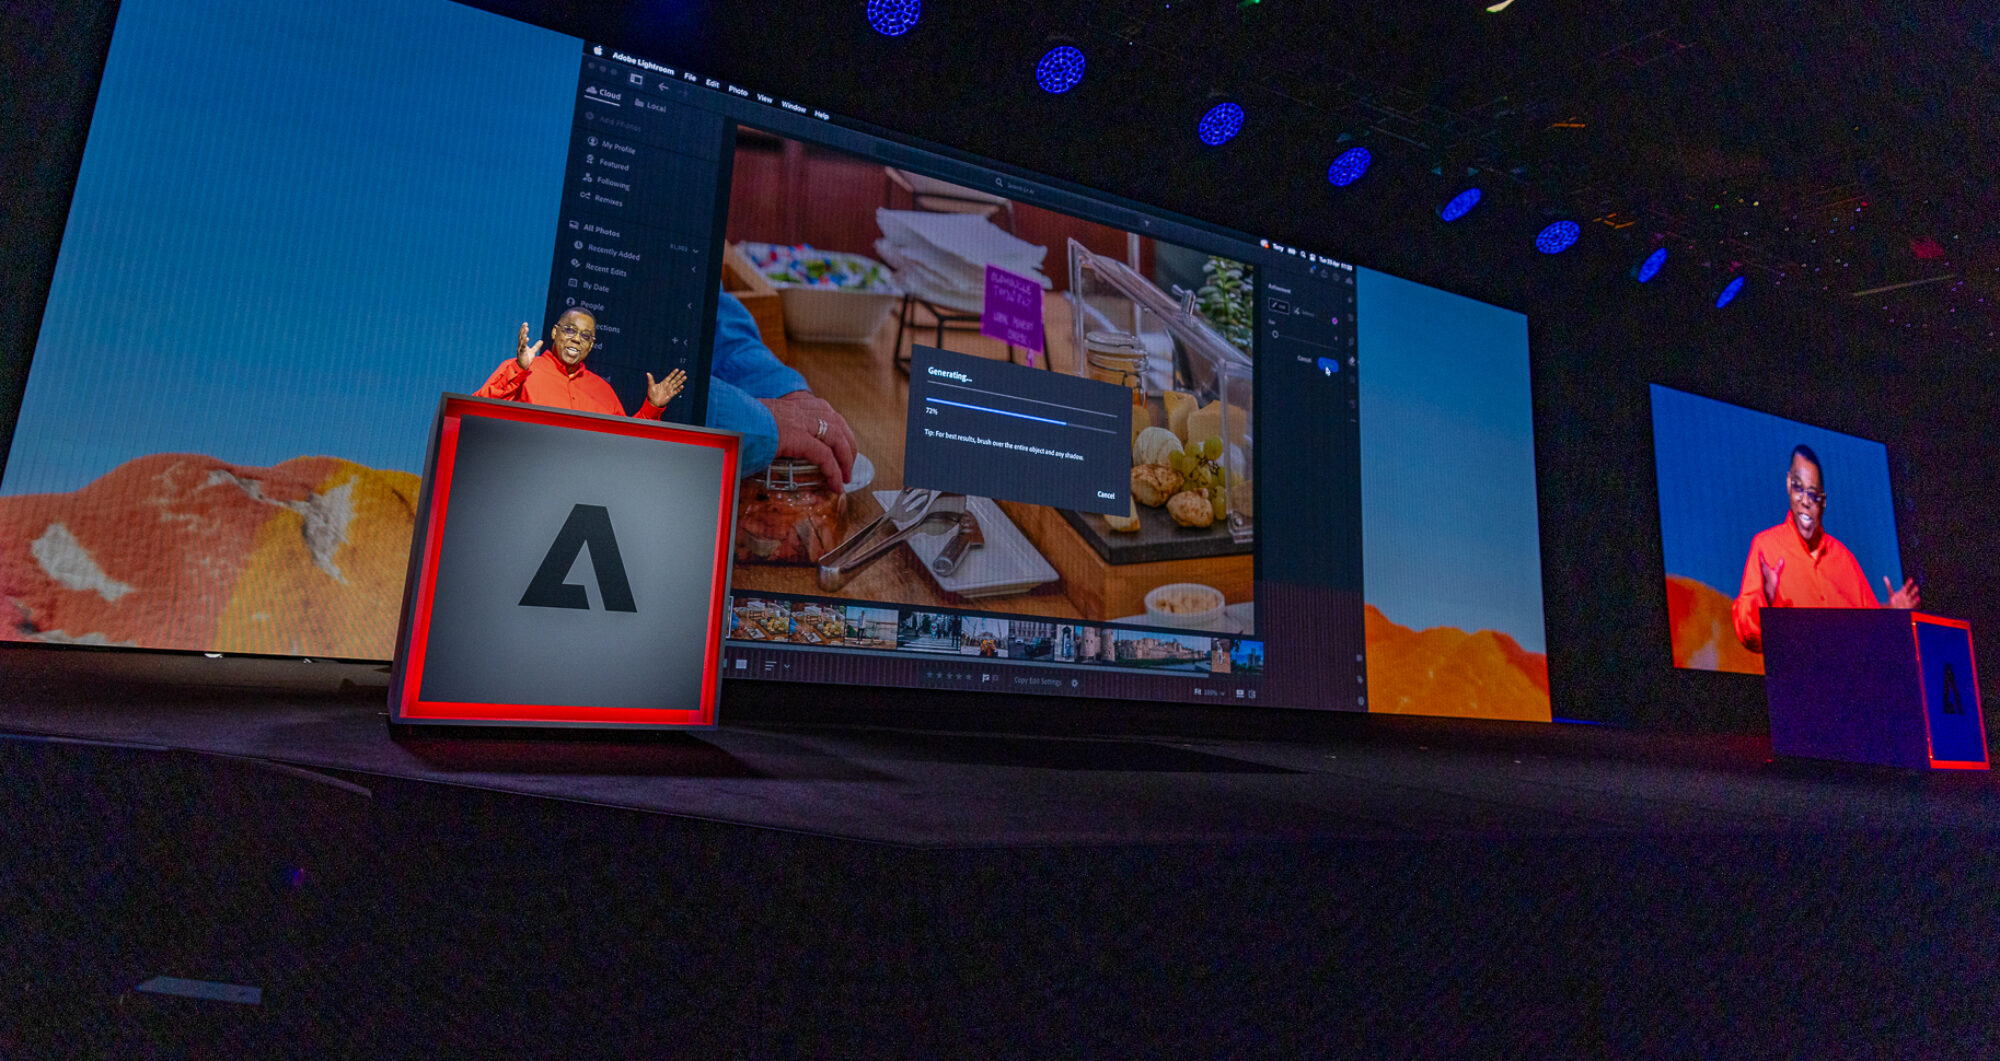
Being a gadget guy, I’m always buying new gear, toys, gadgets, etc. This means that I usually always have something for sale. However, most times the stuff just sits here because of the effort it takes to sell it. For example, this week I’m selling my Nikon D300 DSLR Camera Body on eBay. I’ve learned over the years that when I get something new that I’m not going to keep it forever, therefore I try to keep the original box, cables, manuals, etc. intact so that when that day comes that I want to sell it I have everything ready to go. Even with that effort it’s not as easy as it should be.
You’re probably paying too much for cables
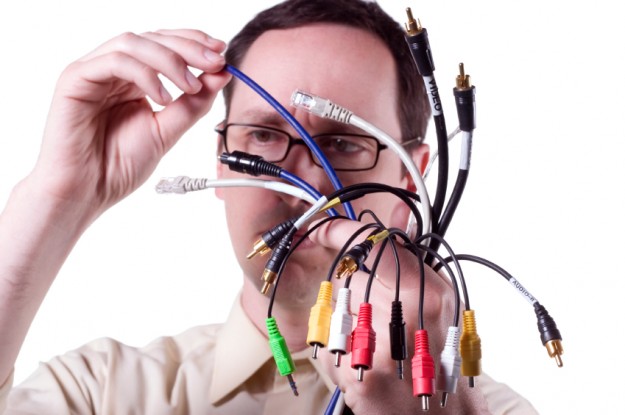
It would be kinda hard to exist in this tech world without needing an additional cable here and there. I recently did some upgrading around the house to my TV’s and needed a couple more HDMI cables. When I did some quick price checks the prices varied from around $15-$99 for a standard 6 foot HDMI cable. That’s when it hit me that the average person probably pays way too much for cables. Retail chains like Best Buy sell cables right there next to the consumer electronics and computers that you’re going to buy. Chances are those cables prices are NOT the “best buy.” Cables are a way for retail stores to recoup some of that money/profit margin that they used to discount the prices on those other big ticket items. Consumers are constantly comparing prices for the TV’s, computers, Blu-ray players, etc., but rarely bat and eye when the cables that are needed to run those gadgets are thrown on the bill for some ridiculous prices.
–
My buying advice
Think about the device you’re getting ready to go buy or order and how you’re going to connect it up. Most electronics these days rarely come with the cables you’re going to need. So since you’re going to need to buy some you might as well plan ahead. No matter how much the sales person tries to pressure you into buying cables in the store, DON’T! You’ll almost always pay more! Also don’t get suckered into buying the “premium” cables or the “gold” cables. Yes, you should buy quality cables, but studies have shown that these premium cables in most cases are no better than the cheaper “non-premium” cables that are sitting right next to them.
–
Terry, where do you buy your cables from?
I knew you were gonna ask me that. My answer is, “it depends!” My primary source for cables is Cables-to-Go. However, I don’t deal with them exclusively, because depending on the kind of cable I’m looking for they may not have the best price. So here are the latest cable deals I have for you for the most common cables I’ve used recently:
6 foot HDMI Cable – Only $14.99 from Octava, Inc. I discovered these guys when I bought my HDMI switcher. The Cables-To-Go price was $19.99. The Best Buy price was….wait for it….$35.99! More than twice the price I paid! I’ve used the Octava HDMI cables for YEARS and haven’t had a single issue yet. I usually keep a couple on hand for future upgrades/toys.
5 meter USB Cable – for shooting Tethered from my Camera into my Laptop. Only $26.99 from Cables To Go!
7 foot Cat5e Ethernet Cable – Cat5e cables will work in most situations over the more expensive Cat6 cables. Staples has this Belkin 7′ cable for only $5.99. The Cables To Go price is $9.99. Best Buy has them for $21.99 (Cat6 was all they carry in this length, but interestingly enough if you want a 50′ Cat5e cable, they (Best Buy) have one for only $19.99 – go figure.).
6 foot Firewire 800 Cable – lastly, I can’t forget about Amazon. Always check Amazon prices because they change all the time. This 6 foot Firewire 800 Cable is only $12.99. The Apple Store will gladly sell you this Belkin one for $39.95.
–
The Bottom Line
You may even find better deals than I did! Great! Keep in mind though that if it’s too cheap, it may not be worth the effort. For example, if you find a $3 Firewire cable and everyone else is selling it for $12 or more, then that $3 cable may not be worth it to intrust your valuable data to it. Also consider how much handling the cable will get. For example, if the cable is going to be plugged in and unplugged frequently (such as a drive cable), then you probably want a better one with better quality connectors. The main point I’m trying to make here is shop around and do your homework ahead of time. Buy your cables before you need them and you’ll save.
When I don’t have a photographic assistant

There are times like the shot above, where the sun is cooperating and I can get beautiful light coming in the window. However, there are those other times when the light is too harsh and needs to be diffused. I LOVE natural light!
Ask any photographer who has ever worked with an assistant on set and they will tell you that it’s absolutely fantastic to have some one to hold that reflector or move that light or change that setting. However, most times I’m flying solo when I’m in the studio. Although I get lots of offers from friends that want to volunteer to help me out, I just usually work alone. So the more equipment and gadgets that I can get to help me out the better.
One of my frustrations when shooting natural light coming through the windows is that sometimes I need to diffuse the light. This is where an assistant would come in to hold the diffuser at just the right angle. You won’t believe some of the ways that I’ve propped up diffusers in the past.
–
Lastolite to the rescue, again!
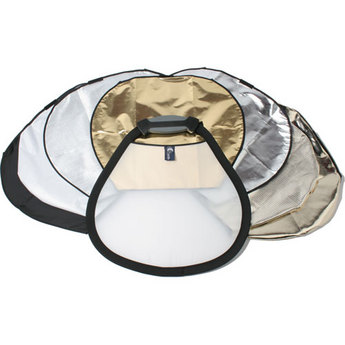
The first item in my bag of tricks is the Lastolite Mini TriFlip 8-in-1 Collapsible Reflector kit. This one does it all. It’s a reflector or a two stop diffuser. If you use it as a reflector you have a choice of white, silver sunfire, sunlite, or gold. You can also use it as a flag because you get black as well. Like I said, having an assistant to hold this up when needed is great, but when you’re flying solo then you’re going to want the next item.
–
The TriGrip Bracket
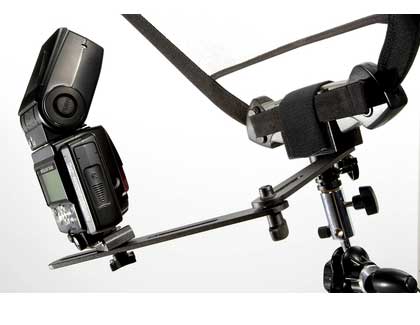
This handy gadget is an adjustable arm that holds your TriFlip Reflector at just about any angle you want by simply putting it on a light stand and adjusting it the way you want. It gets better, not only can it hold your TriFlip/TriGrip reflector/diffuser/flag, but it can also hold your speedlight. This is great for when you want to shoot through the diffuser to diffuse the light. Now you can do it all from just one light stand and you can keep your hands free to actually take the shot.
The Bottom Line
If you have an assistant GREAT! Then you’ve got someone to hold stuff up for you. However, if you work alone sometimes or if your assistant can’t be in two places at once holding stuff up, then you’ll definitely want to check out both the TriFlip and TriGrip Bracket from Lastolite. I highly recommend them both. The Lastolite TriFlip kit goes for $75.95 at B&H Photo. The Lastolite TriGrip Bracket (not yet on B&H’s site – hint hint) goes for $117.90 here.
Kensington LiquidAux in-car iPod solution: Review
Ever since I got the first iPod, I’ve been interested in having iPod integration in my car. With my newer car it’s easy. I open the little compartment under the arm rest and son of a gun there’s an iPod 30 pin cable just sitting there. I plug in my iPod, close the compartment and control everything from the in dash stereo and steering wheel controls. Apple has done a great job getting car manufacturers to offer iPod and now iPhone integration as factory options. This is great if you have a late model car or you’re in the market for a new car. However, what if you have an older car or a newer car that doesn’t offer an integrated iPod solution?
–
Do you have an auxiliary-in jack?
Most late model cars were starting to offer auxiliary-in jacks before they were offering iPod integration. My older car fits this category. There is no iPod connector available for this car. However, there is an AUX-in jack right in the glove compartment. As a matter of fact even the car I had before that one had the same thing and I went a full year without even knowing it was in there. The day I discovered it I almost passed out.
Having an AUX-in is half the battle! This means that at least your car stereo can accept a source other than what’s built-in. You could just simply connect a cable between your iPod or iPhone’s headphone jack and your AUX-in jack and play your music. If that’s all you want, then you can stop reading here and have a nice day. However, that wasn’t enough for me. I wanted a little more control than having to reach for the iPod to change tracks and playlists AND I wanted to be able to charge it too. Since my AUX-in jack is in my glove compartment, that presents an even more challenging scenario with cable management. I don’t want to drive around with cables coming out of the side of the glove compartment door. As a matter of fact, I don’t want to see any cables at all!
–
Getting Power!
The first thing I knew that I was going to have to do to be happy was to have a cigarette lighter adapter installed right in my glove compartment. This way I could plug in a charger for the iPod and close the door. Don’t even think of going to dealer with this non-standard request or they will just look at you funny. The good thing is that now many new cars that have AUX-in are doing it under the arm rest and they’re putting a “power port” there too! In my case I wasn’t that lucky. So I went to my local car stereo shop and had them install one for me. They still looked at me strange, but they did it. So now I have AUX-in and Power right next to each other.
–
I want CONTROL!
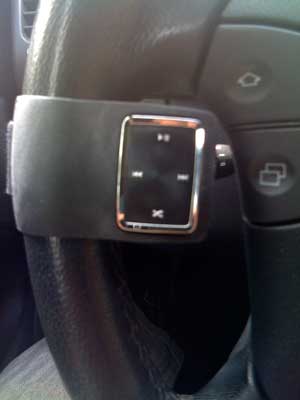
Having power and sound isn’t enough. I don’t want to have to reach across the car every time I want to change a song or pause it. There were all kinds of remote controls out for the iPod when I first started looking at this problem, but almost all of them required line-of-sight. Keep in mind this thing was going to be behind a closed door. I wanted something with RF or Bluetooth. When I first started with this problem I solved it with two things. I used a Griffin Techologies AirClick remote for my iPod mini and a Belkin iPod Charger that also offered line out audio. This solution has worked for me for the last 4 years. There’s just one problem. My iPod mini finally died! “It’s dead Jim!” I know, just get a new iPod right? I’ve even got older iPods just lying around. However, the problem is that the AirClick Remote model that I have (which isn’t even made anymore) only fits the iPod mini. Sure I can probably go to eBay and get another mini, but this problem is going to continue as mini’s just continue to get older and older. So I needed a new solution!
–
Kensington LiquidAux
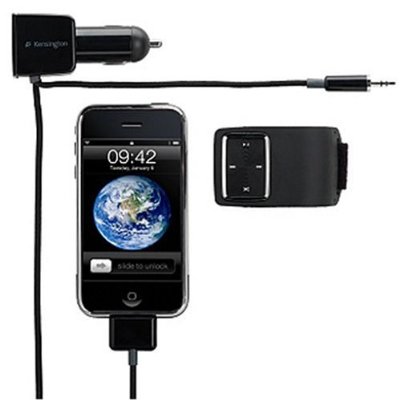
My buddy Jack Beckman turned me on to the Kensington LiquidAux. I didn’t need it at the time he told me about it, but I bookmarked it because I knew that the iPod mini would eventually die someday. Well someday came sooner than I thought it would. The LiquidAux me everything I need in one package. The LiquidAux plugs into the dock connector of any dockable iPod including the latest and greatest iPods and iPhones. The other end of the cable is both Power and Line Out! Lastly it comes with an RF remote. It’s like they were anticipating my needs and designed a product to do exactly what I needed.
–
How well does it work?
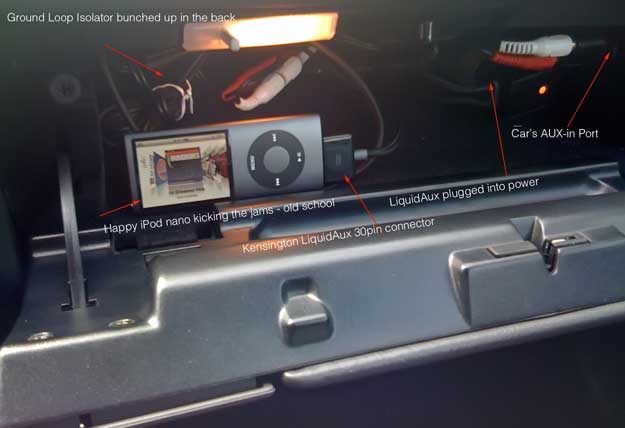
The LiquidAux does exactly what it claims to do. It allows me to charge and control my iPod from my steering wheel while pumping the jams through my car stereo. Now of course there are a couple of caveats. The first one is that you have to choose the playlist on the iPod itself. The remote for the LiquidAux only does Play/Pause, Previous Song, Next Song and Shuffle. Once you choose the playlist on the iPod, you don’t have to touch the iPod again unless you want to change the playlist again. If you hold down the Play/Pause button on the remote it will put the iPod to sleep. They also built-in a nice feature that senses when the iPod is fullly charged and then turns off the charger. This can help prevent a dead car battery if your cigarette lighter is constantly powered even when the car is off. The only other issue (actually two issues) revolves around sound level and engine interference. With my old Belkin Charger there was a volume control for the line level right on the charger itself. So I had it turned all the way up and the sound level coming from the iPod was great. The LiquidAux has no such control so the sound volume was much lower than I expected. Sure you can simply turn up your car stereo, which I did and that leads me to the other issue. With my old solution I could hear a distinct “hum” between tracks and while the iPod was paused. This hum drove me nuts at first. I solved it by getting a Ground Loop Isolator (don’t ask me how I knew that’s what I needed) from Radio Shack. Plugged it in between the iPod and the AUX-in jack (using the appropriate RCA to mini adapter cables) and problem solved. Because I have to turn the stereo volume up so much with the LiquidAux, I can hear a similar hum. So I plugged in the Ground Loop Isolator and it took care of the issue once again. I’m back in business with a New (actually refurbished) 4th generation iPod nano.
–
No Integrated iPod support OR AUX-in jack?
If your car doesn’t have either an integrated iPod connector or an AUX-in jack, then your choices are going to be very limited. If you have a cassette deck, then you could go with a cassette adapter that offers a line in cable. If you don’t have a cassette deck either, then your only other choice is going to be an FM transmitter. In my opinion FM transmitters in general SUCK! I haven’t seen one yet, that I would want to have to use on a regular basis. As a matter of fact, I’d get a new stereo put in that did have an AUX-in or iPod connection first before having to deal with an FM transmitter on a daily basis. I dislike them that much!
–
The Bottom Line
If you have an iPod or iPhone (either the original or iPhone 3g) and your car has an AUX-in jack this is about the only thing out there that does it all. They make two models. I bought the basic model because I didn’t need the iPod/iPhone holder since mine is stuffed neatly (or not so neatly) away in my glove compartment. The Kensington LiquidAux goes for $43.78. The Kensington LiquidAux Deluxe goes for $57.45.
Of course the other option is to just buy a new car with built-in iPod support! The auto industry would really appreciate that right about now.
Replace that stranger with a stick
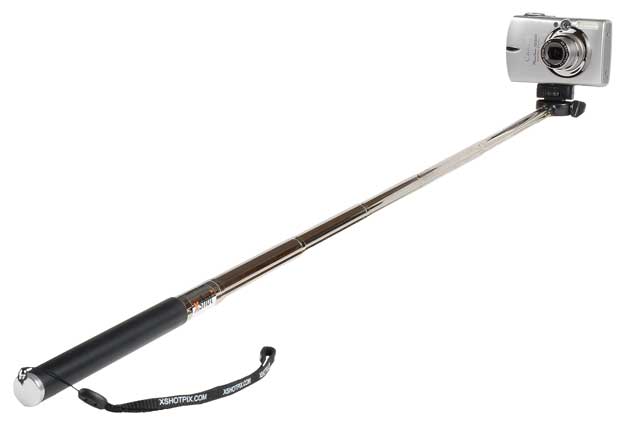
We’ve all been there at some point. You’re out and about either alone or with that special someone or family member and you want to be in a picture with. The problem is that if you didn’t bring a tripod, you’d have to rely on a stranger to take your camera and take the picture. While this seems like a relatively simple task, I’m always floored by the way people act as if they’ve never even seen a camera before. Let’s face it, the shutter release has been in the same spot for the last thirty years. Yet we always hear “what do I press?” Next there’s the whole auto focus, press the shutter down half way thing. I don’t even want to go there with that one.
You might want to get an XShot

I was at my Mac User Group meeting a couple weeks back and one of the members (Wanda) came up to me and she was showing off her XShot. The concept is so simple, it makes me think “now why didn’t I think of that?” Basically the XShot is a telescoping arm with a tripod mount on the end that can swivel. The idea is that you set your camera to use the built-in timer feature, extend the XShot arm and press the shutter. You have a few seconds to pose or look natural while you hold the arm of the XShot out of sight. Being a gadget junkie, I had to order one of these and try it out.
How well does it work?

The XShot works as advertised. I mean there’s not much to it. I was taking pictures with it within minutes of taking it out of the packaging. It took me longer to figure out how to set the timer on my Canon Powershot 850IS than to actually get the XShot ready. Although the XShot does exactly what it’s designed to do, there are a couple of things you might want to think about. The first thing is that whole framing issue. Since you can’t see the LCD screen, you’re totally guessing on how to frame the shot. However, you’ll probably still do a better job blindly than the average stranger you were using before. The next thing is the auto focus feature. My Canon has Face Detection, but when I reach out to press the shutter and start the timer, I’m not quite in the frame when the camera focuses. In my testing with two people this wasn’t an issue, however, taking a picture of yourself might require you to bring the camera in closer to get the proper auto focus.
The Bottom Line

For the $19.95 ($29.99 list price) price, it’s not bad. It’s cheaper and smaller than most other solutions I’ve seen. It’s also can offer a huge improvement over the typical Myspace/Facebook profile pictures that I see out there so much (you know the ones where you see the person’s arm in the shot as they try to take their own pictures? Or worse the ones taken in a mirror in the bathroom?). The XShot folds down to 9″ and extends up to 37″. It weighs only 5 oz. Amazon has it for only $19.95.
Joby’s Gorillapod Focus for the Big Jobs
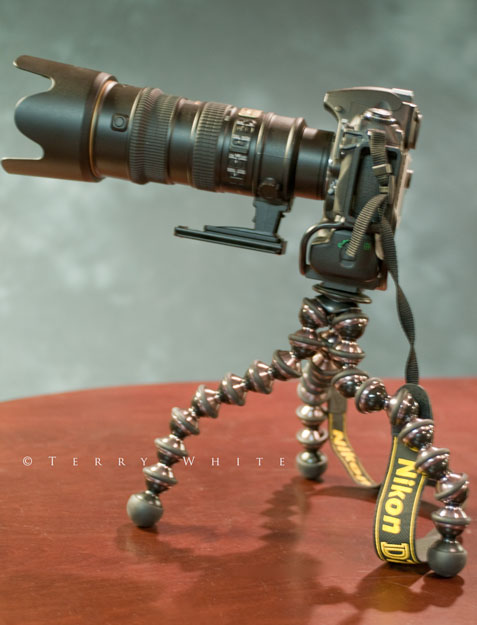
I’ve been taking my Nikon D700 or D300 with me on all my recent trips. I’ve also started traveling with more lenses and bigger lenses. One of my favorite lenses to shoot with is the Nikkor 70-200mm f/2.8 VR lens. As you know I’m a fan of the Gitzo Traveler Tripod. Although as small and lightweight as it is, I don’t always have room for it in my luggage. This is what led me to using my Gorillapods more. Although I have the Gorillapod SLR, which is a great tripod for travel, it’s just not quite sturdy enough or strong enough for my bigger lenses as it only supports up to 1.75 pounds.
The Gorillapod Focus to the rescue
The Gorillapod Focus is the top of the line Gorillapod. It’s their professional model. It’s geared specifically for large cameras with large lenses. It’s rated at supporting up to 11 pounds. This puppy is solid! I could tell a difference right away when I took it out of the box and started adjusting the legs. As you can see in the above picture it has no problem supporting my Nikon D700 with the battery grip, Kirk L-Bracket and Nikkor 70-200mm lens. I’ve found it to be quite flexible in adjusting positions as long as you keep the feet pointing down. I took that shot with the Focus on my conference table and when the feet were at an angle they tended to slide on the slick surface of the table.
Although the Focus is not as small as the Gorillapod SLR, it’s smaller than the Gitzo. This means that it’s more likely to make its way into my carry on bag than any other tripod I own.
The Bottom Line
The Joby Gorillapod Focus is a nice blend between size, versatility and support. Although it is more costly than the other Gorillapod models, it’s much cheaper than the more expensive carbon fiber tripods by other manufacturers. It’s also great for video cameras. The Gorillapod Focus goes for $109.95 on the Joby site. Amazon has the Gorillapod Focus for $92.14.
Also be sure to check out my video interview with the Gorillapod product manager back at Macworld Expo.
Terry White Recommends…
I have fun reviewing technology and gadgets. Now that I’ve been running my blog for a few years, it occurs to me that new readers may not have seen some of my earlier posts. I also get asked by friends and relatives all the time to recommend my top choice in any given category. I do this formally once a year in my Holiday Gadget Gift Guide, but that doesn’t really help you much when you want recommendations throughout the rest of the year. So I’ve put together my own Terry White Recommends aStore. I will constantly update this site with any new recommendations that I have. These are products that I either have first hand knowledge of or use on a very regular basis. I have no paid sponsors, so these are products that I simply feel are great!
My streaming problem has been solved by YOU!
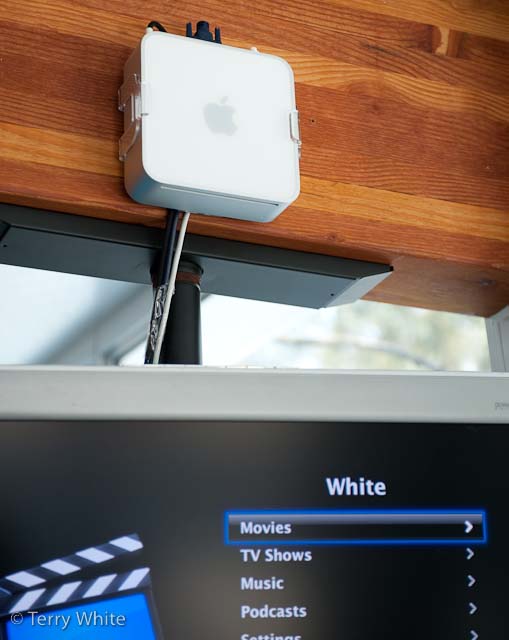
Last week I put my blog readers to the task of giving me a way to stream content from my DVR to another TV wirelessly. It didn’t take long for the responses to start streaming in. I’m happy to report that not only did you solve my problem, but you blew past my expectations with the stuff you guys came up with. It was actually the second response by “Ivan” that really turned the tables. Ivan suggested something that I hadn’t even considered. He suggested replacing my Apple TV with a Mac mini.
“I’d suggest replacing the AppleTV with a MacMini :).
Has WiFi and could technically stream whatever you want, at least I think. Add Boxee to the mix, and you’ve got ABC, Hulu, Joost, local movies, local tv shows and so on on your TV.” – Ivan
I was so stuck on adding another box to the mix to do the one thing that I was missing, that I never considered replacing the existing box I was using with one that was more capable! At first glance at Ivan’s comment, I dismissed it. I thought that Ivan was missing the point. He talked about streaming shows from the internet. Well that wasn’t the problem. The TV already has a CableCARD in it and I get live TV all day long. However, when I gave it a second thought the lightbulb came on! I already have a Slingbox Pro connected to one of my DVRs (the Comcast box in my office). I use the SlingPlayer on my MacBook Pro when I’m on the road to watch stuff recorded to my DVR. It was at that moment that I realized that if I used a Mac mini instead of an Apple TV, I’d be able to install the SlingPlayer app on it and stream content from my DVR to the other TV out in my pool/workout area. That was it! That was the missing piece of the puzzle. It was so simple and the beauty of it was that it wasn’t going to cost me a dime! That’s right, I already had a Mac mini just sitting in my home theater going to waste.Â
Â
Mac mini vs. Apple TV – Smackdown!
It’s no secret that I’m a fan of Apple TV! I like the concept of a box that allows me to wireless stream my content (photos, movies, music, podcasts, etc.) from my Mac to my TV with a very slick interface and simple remote. Also now that it has movie rentals, it’s even more useful. However, the downside of Apple TV is that that’s all it does. If you want other content, you’re pretty much out of luck. Now I can take shows recorded on my TiVo HD, transfer them to my Mac (thanks to Toast) and convert them into an Apple TV/iPod format and watch them on my Apple TV. The problem is that the process takes 4-6 weeks to complete. OK, I’m exaggerating. However, it does take a long time depending on the length of the show and whether or not it’s in HD or not. This means that you really have to plan ahead. If I recorded 30 Rock on my TiVo HD and plan to watch it later/the next day out in the other room, I’d have to remember to start the transfer before I go to bed that night. Then when I wake up, I’d have to start the conversion process. For a 30 minute HD show, this could easily take a couple of hours in total. Once it’s converted, then I’d still have to transfer it to iTunes so that it would be available to watch on the Apple TV. It’s certainly doable, but that’s a lot of planning ahead.Â
Since the Mac mini is a computer, that eliminates a lot of these steps. For one, I could just install the Toast/TiVo Transfer apps right on the Mac mini and after the show is transfered I could just watch it! No conversions necessary. However, that’s still going to take time as the TiVo transfers take longer than real-time to happen. So a 30 minute show could easily take an hour or longer to transfer. That’s where Slingbox and the SlingPlayer come in. With the Slingbox connected to my office DVR (the one that’s used the least), I can record all my favorite shows and then run the SlingPlayer app on the Mac mini to stream those recordings wirelessly and full screen.
Â
My original Mac mini
I bought the first Mac mini, which came out in 2005 (wow time flies!). I originally bought it for much of what we’re talking about today. I bought it put in my home theater so that I could watch my iTunes content (there was no Apple TV back then). I also wanted the ability to run Delicious Library (my DVD cataloging app) on the big screen. This Mac mini is a 1.25 GHz G4 (a dinosaur by today’s standards). It was the base model and I upgraded it to 1GB of RAM. Once the Apple TV came out in 2007, the Mac mini just sat there for the most part. Most times I would forget it was even there until happened to look over and see. In my home theater, the Apple TV does everything I need. I already have all the other boxes I need in that room doing everything else. So the Apple TV was a perfect fit.Â
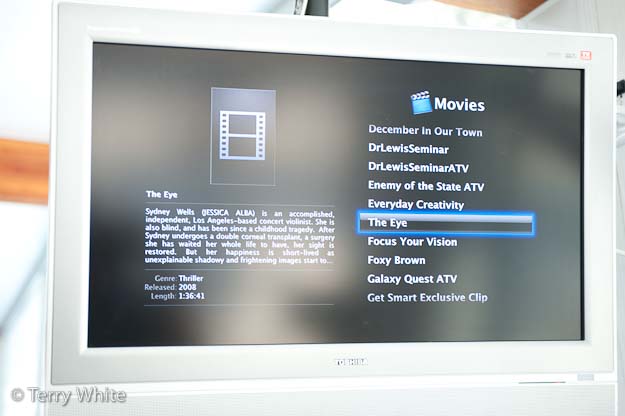
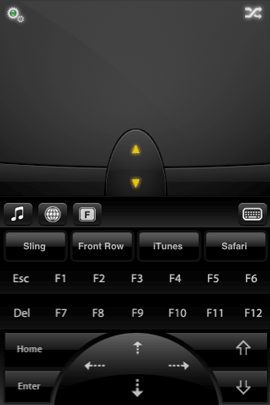
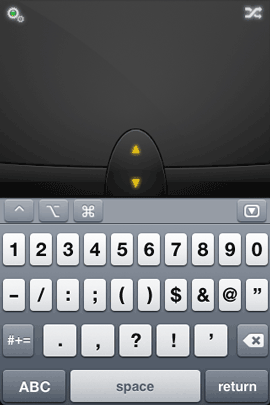
So when Ivan proposed using a Mac mini, I thought – “well gee, I already have one of those. Let’s give it a shot!” My initial concern was that it was going to be too slow to stream. I was concerned that it only had 802.11g wireless AND after I hooked it up I realized that this model didn’t have support for the Apple Remote. This meant that Front Row (Apple’s original Apple TV like interface that is built-in to the Mac OS) was going to be a problem. I then remembered that Apple included Front Row in Leopard. The first thing I did once I hooked it up was install Mac OS X 10.5 Leopard (with all the current updates). I remembered that even if you don’t have an Apple Remote you can still get into Front Row by hitting Command-ESC. It worked, but now that meant that I’d need a keyboard handy. I do have the newest Apple Wireless keyboard which is nice and small. I also still had my Bluetooth Trackball. While this was all fine, I really wanted ONE controller. A keyboard with an integrated pointing device.
 Â Â Â
     Â
 Â
That’s when I remembered “Matt’s” comment about an iPhone/iPod touch app called Air Mouse Pro. PERFECT! This app was even better than I had hoped. It’s a trackpad and keyboard all in one and it even has a Front Row friendly mode with one button access to Front Row. This eliminates the need for the Apple Remote, separate keyboard and mouse. Air Mouse Pro totally rocks! It will definitely be my iPhone App of the Week! 🙂
Â
What about TV resolution?
This is one advantage the Apple TV has over using a Mac mini. Out of the box the Apple TV already has all the right ports on the back. It has HDMI, Component, Optical and RCA audio jacks. Not only does it have the right connections, but it’s also geared to be connected to a TV at the various TV resolutions including 720p, 1080i and 1080p. Luckily I already had the right cables. I have a DVI to HDMI cable. I also had the necessary 3.5mm to stereo RCA cable for audio. When I connected the Mac mini to the TV and booted it, it detected the resolution and came right up. The problem was that the menu bar and dock were cut off. This is due to “overscan”! The Apple TV doesn’t suffer this problem because Apple was very careful to design the menus and interface so that they don’t go to the edge of the screen. On the Mac minis that came out later (like all the intel models), Apple added an Overscan option in the display preferences. This will slightly shrink the screen so that you can see the edges, but it will also potentially introduce black bars all the way around. No real way around this.
 Â
Â
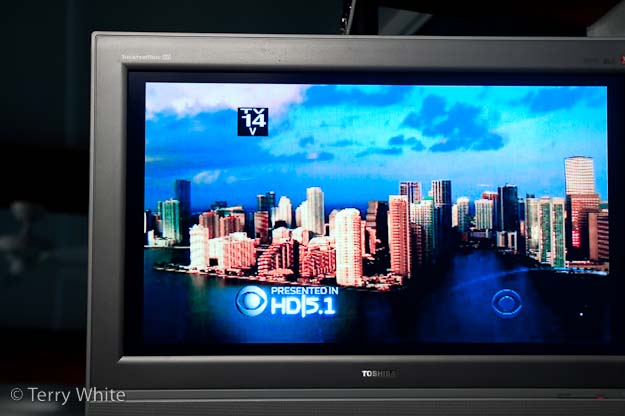
CSI Miami streaming from my DVR in the SlingPlayer running full screen at 720p
Â
Since I don’t have the new Mac mini, I used a shareware app called SwitchResX. This app allows you to have custom resolutions and more importantly for me it also offers the overscan correction I needed. Once I turned that option on, I could see everything.
Â
I shall call him Mini mount
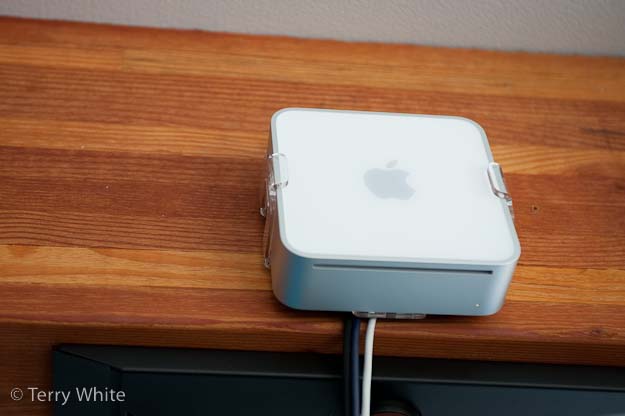
The good folks over at H-squared wanted to help out so they sent me their Mini mount which allows you to mount your Mac mini on the wall. This was perfect for my set up as my TV is suspended from the ceiling and there is no where for the Mac mini to sit. In case you were wondering what became of my Apple TV? I moved it to my office and used H-squared’s tvTray to mount it on the wall as well. I love the LED glow (now standard on the tvTray and optional for the Mini mount).
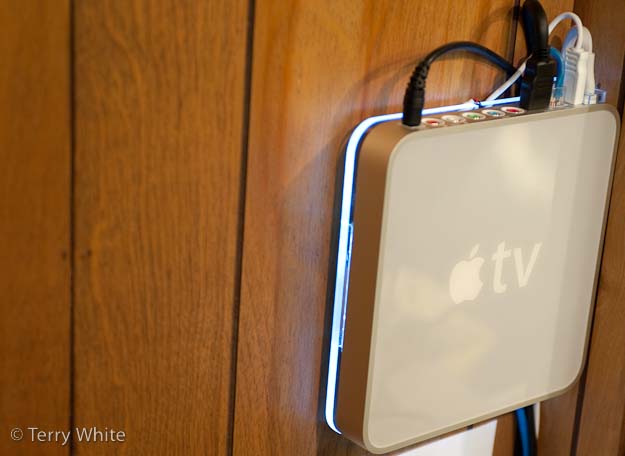
I even used the very cool MultiLevel iPhone app to make sure the mounts were level on the wall 🙂 Not only was H-squared very very helpful to my cause, they even want to offer all of you a discount on their products. You have from now to the end of February to save 15% off their stuff. Just use the code, wait for it…………Â “TERRYROCKS” at checkout.
Â
My Gear
One of the comments I got requested that I post the actual components of my final solution. So here they are:
- Toshiba 27″ LCD HDTV with built-in DVD player and CableCARD slot – this TV was discontinued ages ago. I bought mine on eBay because it was only model I could find at the time that had both a CableCARD slot and built-in DVD player.
- Mac mini – I have the original model which is 4 Â years old. The new ones are faster and have an Apple Remote.
- Apple Wireless Keyboard – it’s small and bluetooth wireless.
- Bluetooth Trackball – I’m not crazy about this as it takes several click to get it to reconnect after a reboot
- Air Mouse Pro – Freakin’ AWESOME iPhone app to control it all!
- Slingbox Pro – connected to the crappy Comcast DVR in my office (see my review here). Wait? Why is my Slingbox connected to your Comcast DVR (which sucks) instead of my TiVo HD? Good question! I connected it to least used DVR in the house because when you’re watching your DVR via the Slingbox, you’re actually controlling that DVR, changing channels, etc. I didn’t want to interrupt any other family member’s viewing. So the Comcast Motorola DVR is the one that gets the least use 🙂
- SlingPlayer  for Mac – a free download
- Mini mount – Mounts the Mac mini neatly on the wall (get 15% off with the code “TERRYROCKS”)
- SwitchResX – because I have the original Mac mini I need this to correct for overscan issues on the TV’s resolution
- DVI to HDMI Cable – The Mac mini has a built-in DVI port. Most newer TV’s have HDMI. So you’ll need a cable or adapter
- Audio Cable – Although I used a Monster cable, any old Radio Shack cable will work just fine and will be much cheaper.
Â
The Bottom Line
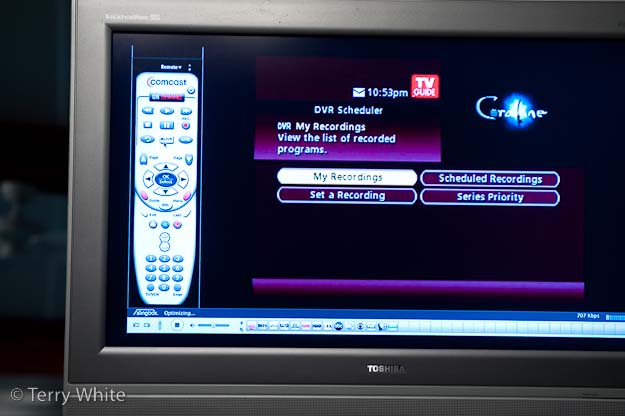
SlingPlayer running on the Mac mini with an onscreen remote that looks just like the physical Comcast remote for my DVR.
Â
The Mac mini was a perfect fit for my needs in this situation! Granted it costs twice as much as an Apple TV, but it has more than twice the capabilities. If Apple were to ever build-in a Blu-ray player, it would be the ultimate set top box/computer. Now I’m only scratching the surface here because I really only needed it to do the one thing and that is allow me to stream my DVR content over to another TV. However, because the Mac mini is a computer, it can do so much more. At a minimum you could also surf the net as needed. You can also stream TV content from sites like hulu.com and although I haven’t yet played with Boxee, it looks very promising. It doesn’t stop there! Remember Netflix streaming is now on the Mac. So you could stream anyone of up to 12,000 movies. You could also turn it into a DVR as well with products like EyeTV. Although it doesn’t have a built-in Blu-ray player, it does have a DVD drive in it. This means that it can playback all your standard DVDs and Netflix rentals too. So the Mac mini can just about do it all.
Once again, THANK YOU to all my blog readers and especially those that offered up the very cool solutions that made this a reality!
AirCurve, it sounds better than you’d think
Â
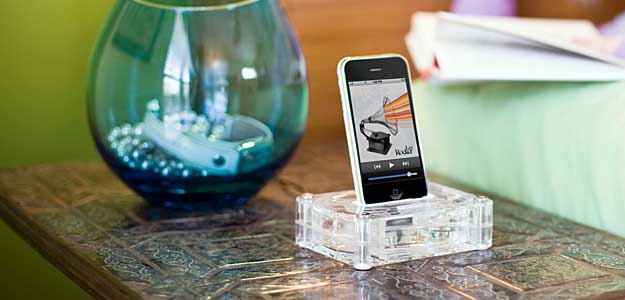
I have to admit that when I saw the AirCurve, I was a little skeptical. I received it as a gift for a class I gave and it took me days to even get motivated to give it a try. I just didn’t believe that simply amplifying the iPhone’s built-in speaker would be good enough. I finally decided to give it a try and I couldn’t believe it. It not only worked as advertised by amplifying the iPhone’s built-in speaker by 10 decibels, but it actually sounded decent. No, it didn’t sound as good as a good pair of speakers, but it definitely sounded good enough for use on the road in a hotel room.Â
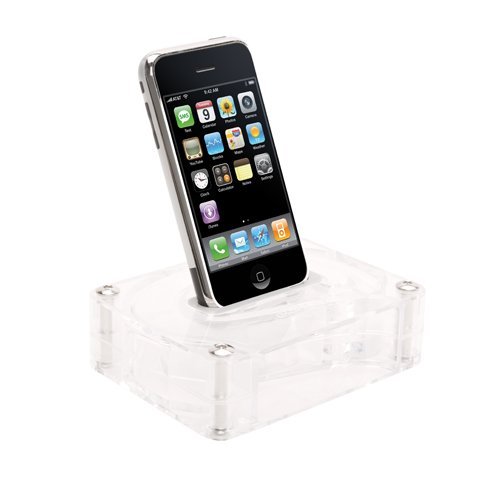
The AirCurve doesn’t have any electrical or moving parts and therefore requires no power. The AirCurve is designed to amplify your iPhone’s built-in speaker acoustically. It works with both the original iPhone and the iPhone 3g (comes with custom inserts for both models). They even designed it so that you can use your existing sync cable for power or docking with your computer while the iPhone sits in the AirCurve. I also like it because it’s well built, stylish and not flimsy. So it should travel well in a suitcase.
I also gave it a try using the iPhone’s speaker phone while it sat in the AirCurve. It worked fine. When I received a call, the music faded. I answered the call and pressed the speaker button. The person on the other end had no problem hearing me and of course I had no problem hearing them either because of the amplification.
Â
The Bottom Line
The AirCurve works as advertised, no question about that. If you’re an audiophile or someone who likes bass, you’ll probably be a little underwhelmed. For everyone else, this is a great low cost solution for amplifying your iPhone’s speaker. Although the second generation iPod touch does come with an external speaker, it’s not as good as the one on the iPhone so it looks like Griffin didn’t bother making an insert for iPod touch users. The AirCurve retails for $19.99. Amazon has it for $13.33. At that price it’s a no-brainer.
Your mission, should you choose to accept it…

Although I consider myself pretty tech and gadget savvy, I can’t know about every gadget out there. Many of the readers of this blog have helped me over the years by suggesting products that were in some cases better than the ones I’ve reviewed or complimentary to them. So I decided to really put your knowledge (geekiness) to the test. I’m looking for a solution to a problem and need your help!
Â
Wireless broadcasting from my DVR to another HDTV
OK, here’s what I’m looking for: I have a 27″ Toshiba HDTV out in my recreation area that is suspended from the ceiling. It has a built in DVD player and CableCARD so that I can pick up all my digital Comcast channels including HD content. I went out of my way to find this particular set because it was the most self contained HDTV I could find. My goal was to have as few cables/boxes connected to it as possible. Having a built-in DVD player on the side, meant not having to connect an external one. Having a built-in CableCARD slot meant that I could pick up all my Comcast channels without the need for a box from Comcast. Â The only box I have connected to it is an Apple TVÂ ,which is great for seeing my movies (ripped DVD collection), music videos, renting movies and iTunes purchased content. I’m just missing ONE thing! There are times that I’ve recorded shows on my TiVo HD that I would LOVE to watch out there. However, I don’t want to connect a big box (DVR). I love the fact that this set is basically boxless. I allowed the Apple TV because it mounts neatly on the wall (thanks to the tvTray). So what I would love is a wireless solution that would stream video from my TiVo HD to this set.Â
I’ve looked at the new Slingcatcher, which would be ideal here except that it doesn’t stream HD (which I could live without) AND requires and Ethernet connection or yet another box to be wireless. I’ve also looked at the Belkin Flywire, but I’m not willing to give up my first born to pay for it (they must be totally kidding with that price right? C’mon, seriously?). So what am I missing out there?
Â
Requirements:
The ability to stream video from either my TiVo HD or Comcast DVR wirelessly to another HDTV.
Willing to have ONEÂ SMALL box attached if need be.
Can’t cost more than the HDTV, Apple TV and all the furniture in the room (are you listening Belkin?).
Icing on the cake (actually this is almost a must) would be that I would be able to use a remote to control the TiVo HD from the other room.
Â
So let’s see how good you really are?! What say you tech community? This post will self destruct in 5..4..3..2……..
