LED Light Panel for Video

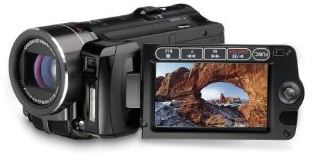
 I find myself using my Canon VIXIA HF10 more and more. My friend Bruce turned me on to this "cool" LED light panel for video.

R-50

The R-50 LED Video Light Panel

This thing is perfect for my camera. It runs off 4 AA batteries. It’s small enough for travel and EXTREMELY BRIGHT! I was blown away by the amount of light this thing puts out. You get everything you need to make it work except the batteries. The kit includes:

Continue reading “LED Light Panel for Video”

Westcott uLite 2 Light Green Screen Kit Review

 uLite

I’ve been wanting to experiment with Green Screen video and photography for a long time now. However, I just never felt comfortable buying a green screen system because I didn’t want to get the wrong thing. Also I didn’t want to invest hundreds if not thousands of dollars in getting the professional lighting that I figured you would need to get good results. Never in my wildest imagination did I think I would be able to get professional results (yes your opinion will vary) for only $199!


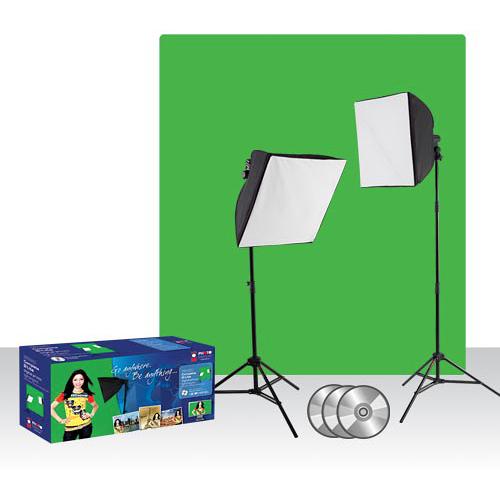
The Westcott uLite 2 Light Photo Kit

Although Westcott targets this kit at enthusiasts, I think they are selling themselves a little short. Sure the digital video pros would probably argue with me and well that’s OK, I’m used to it, but with what you get in this kit, you CAN produce some pretty decent quality projects.

The Westcott uLite kit includes:

  • 2 500W Photo Flood Lights
  • 2 Small 20" Softboxes
  • 2 Light Stands
  • 1 9’x10′ Green Screen
  • 1 instructional DVD to learn to setup the system and post production tips/techniques
  • 1 disc of royalty free backgrounds


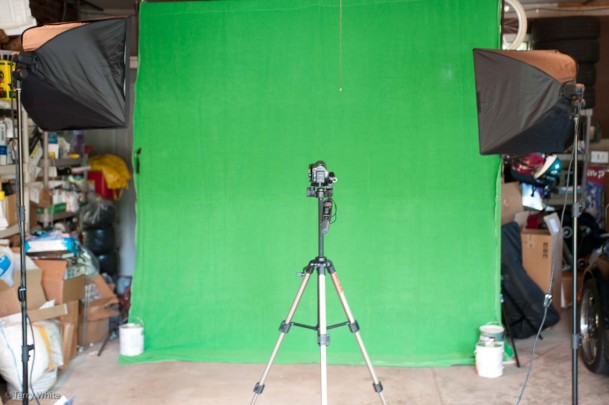
I’m glad I watched the DVD first to get some pointers on light placement. Setup on took a few minutes and I was ready to shoot. I did run into one problem though. One of the bulbs in my kit may have been damaged in shipping. I screwed it in and fired up the light and it came on for about 10 seconds before going out. I confirmed that it was the bulb and not the light. While I’m sure the good folks at Westcott would gladly send me a new bulb, I wanted to proceed with my demo. So I used one of the bulbs from my TD5 Spiderlite. The only problem here is that the bulb I used was only 50W and no where near as bright as the other bulb. The purpose of having TWO lights is so that the subject is lit evenly on both sides and to eliminate shadows. I played around with light placement and did the best I could. However, you’ll notice that I’m brighter on the left side than I am on the right side.

uLightProductionShot

Here’s my first attempt at using the kit (editing was done in Adobe Premiere Pro CS4 and the keying was done in Adobe After Effects CS4 using Keylight via Dynamic Link):


The Bottom Line

If you’ve been wanting to experiment with Green Screen video or photography, this is a great starter kit! For the price you just can’t beat it! I was a little disappointed that there was no support system included for the green screen, however for $199 I think you’re getting a great value. While the screen can be hung easily from a wall, clothes line, etc. I still recommend a support stand. Although your bulbs will probably work right out of the box, I did notice that the bulbs are only rated for 60 hours. So I would recommend ordering some extra ones right off the bat.

B&H Photo sells the Westcott uLite 2 Light Kit for $199.95.

I would also recommend getting this free standing support system for it and a few extra bulbs.

If you’re a NAPP member, check out Dave Cross’ tutorial on automating the process of extracting still images from a green screen background. 


Create an Animated Slideshow on the Web with Animoto

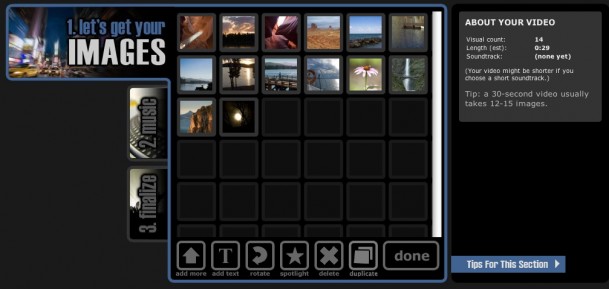
 The next time you want to show your pictures with a little pizzaz, you might want to create an animated slideshow complete with soundtrack over at Animoto.com. The process is very simple and requires zero knowledge of video editing or animation apps.


Upload your photos

After you create a free account, you can immediately get started on your first animated slideshow. Your show will be limited to 12-15 images if you go with the free option.

ImportImages

  Continue reading “Create an Animated Slideshow on the Web with Animoto”

The making of my last video

Yesterday, I did a video review of the HyperMac external battery and some of you have been asking me what software did I use to produce it? So I thought I would give you a quick run down on my workflow for that particular video. So here goes:


The Animated Intro

AE4

The Animated Intro was done using Adobe After Effects CS4. While I’d like to take credit for all that creativity, I took the easy route and bought a template. The template was delivered as an After Effects CS4 project that I was able to modify (as I do actually know how to use After Effects) and craft to my liking. The template was already in HD format.

Continue reading “The making of my last video”

Nikon D5000 – A different kind of review

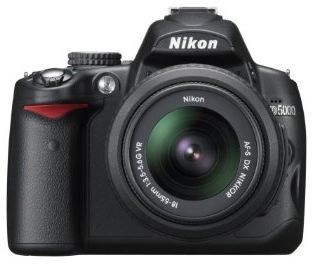
 Let me start off by warning you up front. If you’re looking for a review of the Nikon D5000 that concentrates on how good of a still camera it is, you can stop reading now. I already have a great Nikon DSLR for stills. It’s the Nikon D700! I love it. Before that I was using the Nikon D300. Loved that one too. So my interest in the Nikon D5000 has very little to do with how good of a picture it can take. Don’t get me wrong, I will use it for taking pictures too and good picture quality is very important to me. However, the video features are what brought me to the D5000. The D5000 is so small it may become my travel camera too (more on that later).


Just yesterday…

I was talking about my experience with eBay and how I was selling my D300. Some of the readers here, Nikon Rumors and on Twitter started trying to read between the lines and find conspiracy where there wasn’t any (Why are both Scott Kelby and Terry White selling their D300’s?  hmmmm) . First off the Nikon D300 served me quite well. I upgraded to it from the D80 and it was night and day. It’s a great DSLR. Never had any problems with it and I’ve taken some stunning shots with it. Although the D300 is great, I wanted even lower noise at higher ISO settings. So when the D700 came out I was sold. It was full frame (still is) and gave me the higher ISO:low noise ratio that I was looking for. Although I could have sold my D300 then (see no conspiracy here about it being a bad camera), I decided to keep it as a backup! That’s how much I liked it. At first I was even using it more than the D300 because I was just more used to it. Slowly as time went by I continued to transition to the D700 until I was using it most of the time. So the D300 was just sitting there. When the D90 came out the only feature that got me the least bit interested was the HD Video capability. However, I wasn’t willing to spend over $1,000 to play. Since I wasn’t ready to part with my D300. I waited. Then the D5000 came out and I got more interested. It seemed to have the same video capabilities as the D90 for less than $750 (Body only).

I tried to do some research regarding the D5000’s video capabilities and I was really coming up short. It seemed like every D5000 review I could find focused about 95% of the review on it’s still capabilities and 5% (if that) on the video capabilities. Even this recent Macworld review only mentions the video features in the Cons section saying that it doesn’t auto focus! Wow, that’s it? They all pretty much said the same things. "It shoots up to 720p video at 24fps, the clips are limited to 5 minutes each and there is no auto focus." Even when I tried to find sample clips, most really weren’t showing off the flexibility of using different lenses. They were mostly shaky videos that complained about the lack of auto focus. So let’s get to the video capabilities of the D5000…

nikond5000

Continue reading “Nikon D5000 – A different kind of review”

Adobe updates Premiere Pro CS4 to 4.1

If you’re into video editing you should check out the latest enhancements in Adobe Premiere Pro CS4 4.1. One of the main things that I love about Premiere Pro CS4 (PR) is that it can edit the AVCHD footage from my Canon VIXIA HF10 camcorder natively! That’s right! No transcoding (converting to another format first). As far as I can tell, Premiere Pro CS4 is the only native AVCHD editor on the Mac and one of only a couple on Windows. The whole advantage of going tapeless with your camera is so that you can have immediate access to the footage. Well if you have to convert the footage first (sometimes taking longer than real-time) then you’ve lost the advantage of the tapeless workflow. Now not only can you edit all the most popular video formats out there, you can even edit footage right off a video DVD with the new .VOB file support! If you’re a Final Cut Pro or AVID user, no worries. You can bring your projects right into Premiere Pro CS4.

A good thing just got better

Adobe just released updates to Premiere Pro CS4 4.1 (Mac | Win), After Effects CS4 9.0.2 (Mac | Win)and the Adobe Media Encoder CS4 4.1 (the direct update link wasn’t available yet, but this update should install via your Adobe Updater app):

  • Additional support for REDCODE (please visit RED support for additional details).
  • Performance improvements to project load time.
  • Improvements to AVCHD support.
  • Performance enhancements for DV/HDV playback.
  • Support for Avid captured DV or IMX footage. (Please see www.adobe.com/go/kb409079 for additional information).
  • Export media to a still format now bypasses the AME render queue.
  • Enabled .VOB extension support. (yes this means editing the footage right off a Video DVD!)
  • Third-party support

The New Adobe Media Encoder CS4 4.1 – once you’re done editing your master piece, you’ll be happy to know that the update to the Adobe Media Encoder renders out your final video about twice as fast (in my testing) than the 4.0.2 version did. Also there are new presets for YouTube HD Widescreen for sharing your video on social networking sites.

See it Live! If you’re in Michigan, see me demo the new enhancements to the Adobe Production Premium CS4 suite at the next MIVA meeting on June 3rd.

Can’t make it to my demo? If you’re not going to be in the Michigan area on June 3rd, my buddy Dave Helmly recorded an extensive video showing the new features off. You can view it here now or you can grab it from my Adobe Creative Suite Video Podcast to view it later:
[flv:http://media.libsyn.com/media/cspodcast/podcast-PR-Premiere4.1.mp4 625 353]

Buy or Upgrade to Adobe Premiere Pro CS4 Today!

Premiere Pro CS4 for Mac | Premiere Pro CS4 for Windows

Premiere Pro CS4 Upgrade for Mac | Premiere Pro CS4 Upgrade for Windows

Adobe Creative Suite 4 Production Premium for Mac | Adobe Creative Suite 4 Production Premium for Windows

Adobe CS4 Production Premium for Mac Upgrade | Adobe CS4 Production Premium for Windows Upgrade

Which video sharing site is best?

A couple of weeks ago I started the discussion about which site(s) are best to do photo sharing and you guys responded loud and clear with your favorites and why they were your favorites, but in the end it was as I suspected that no single site had it all. The two favorites among you guys were Smugmug and Flickr. Well now it’s time to ask the same question, but this time about video sharing sites and I imagine that the answer is going to be the same. What’s “best” will greatly depend on what you’re looking for.

What you might want in a video sharing site

I’m finding that I’m really enjoying shooting small clips and sharing them on the web with friends, family and colleagues. I used to cringe looking at YouTube clips because the quality was just so bad. I imagine that back when YouTube first started, they were encoding the video using lower quality settings to keep the file sizes down and therefore the bandwidth costs down. However, now that YouTube isn’t the only game in town, they’ve had to step up their game to stay competitive. I asked on Twitter which sites were people using and why and the four sites that kept coming up over and over again were YouTube, Vimeo, Smugmug and Blip.TV. So I decided to give them all a spin.

Here are some things you might want to consider when picking a video sharing site:

  • Quality of the video playback
  • Allowable length of the video
  • Ability to make a video private or secure with a password
  • Embeddable player
  • Customizable Player
  • Advertising
  • Time it takes the video to start playback
  • Tools and ease of use for uploading the video
  • HD support
  • Full Screen Options
  • Ability to turn off embedding for others
  • How easy can your video be found by others
  • Upload video from your cellphone directly
  • Ability to turn on/off video downloading by others
  • Playable on an iPhone or iPod touch

In my testing I found that each of the sites had many of these options, but no one had it all. I tested all 4 sites by uploading the same HD video to them (my Wacom Intuos 4 video review). Then I embedded the video from each site onto the same page so that we could see a side-by-side comparison. Check out that page here and see for yourself. Also check the page on your iPhone/iPod touch.

YouTube

youtubelogo

www.youtube.com

Pros: very easy to get started. It’s free. Probably the largest of all the sites and therefore the most likely site to have your video found on. Support for embedding HD video at no additional cost. Videos can be played back on an iPhone or iPod touch even if they are embedded on your webpage using the Flash player.

Cons: Not as many options to make your video private. Videos are limited to 10 minutes/1GB each.

Final thoughts: For most of the videos I’ll be putting up I’m likely to use YouTube. Although they don’t have as many player options or privacy options as the other sites, YouTube seems to offer the best balance of features and playback options.

Vimeo

vimeologo

www.vimeo.com

Pros: Excellent video quality. Free to use the basic features. Great stats on your video plays. HD Support. You can password protect your video or simply mark it that only Contacts or people that you choose can watch it. You can turn on/off the ability for others to download the source video. You can also turn on/off commenting.

Cons: HD video requires that either upgrade to Vimeo Plus orĀ  your viewer will have to see it on the Vimeo website. Doesn’t playback on an iPhone/iPod touch. The free service is limited to 1 HD video/500MBs per week.

Final thoughts: I like the features of Vimeo, although I’m not as crazy about their player. They definitely have the nicest stats page. It’s a little thing, but I also love the fact that you can replace the video with a corrected one without losing your stats and comments. I’ve run into this on YouTube at least a couple of times where there was a minor change to the video and I could only delete the one that was posted and upload a new one. Vimeo Plus is $59.95/year and allows 5GB of uploads per week, unlimited number of HD videos, ability to Embed your HD videos, higher quality video, priority uploading, player custimization, advanced privacy options, and no banner ads.

SmugMug

smugmuglogo

www.smugmug.com

Pros: Probably the BEST video quality. Support of HD video up to 1080p.

Cons: No free options. In order to upload HD video you have to pay for the Pro service at $149.95/year. Even if you pay, you’re still limited to 10 minutes per movie. If you embed a higher quality video on your page, the playback could take several seconds before it starts. Limited embedding/player options.

Final thoughts: SmugMug would be the site I’d use if I were mostly concerned by the quality of the video. In other words If I were trying to impress you with gorgeous HD video, this is the site I’d use. This would be keeping in mind that the video is not playable on an iPhone/iPod touch and that highest quality settings may mean a delay before the video starts.

Blip.TV

bliptvlogo

www.blip.tv

Pros: the most options for customizing the player! You can allow for advertising or not and if you do, they will pay you for it! Web, Mobile, FTP and Desktop Client for uploading.

Cons: Although there was an option to make the video iPhone/iPod touch compatible, it didn’t work in my testing. Have to upgrade to a Pro account ($8/month) to make your videos private.

Final thoughts: Blip.TV is awesome when you want to customize the look and feel of your player/video. Also it’s the only one that I’ve seen that is willing to share the revenue from the OPTIONAL advertising generated by your video.

The Bottom Line

I’m finding myself producing fewer and fewer DVDs as a means of sharing video with friends and family. Sure there are some older members of my family that aren’t online and never will be, but that is a very small percentage of folks I know and share with. Shorter clips shared over the internet for free is the key. You can’t really go wrong with any of these sites and like I figured going into this, there is no one site that is significantly better than all the rest. Each one has something to offer depending upon your needs. For example, YouTube is great for the video reviews I do on my blog. However, if I wanted to post a family video and keep it kinda private, then I’d use Vimeo. If I were trying to put video on my website and match the look and feel perfectly, then I’d lean towards Blip.TV. Lastly if I were trying to impress a client with the highest quality HD video the first site that would come to my mind would be SmugMug.

There you have it!

Good quality memory card that doesn’t break the bank

transcend

I’ve really been getting into using my Canon VIXIA HF10 HD camcorder more and more lately. I only had one SDHC card which was 8GB in capacity. I wanted to be able to at least record up to two hours on one card at the highest quality setting. So that meant upgrading to a 16GB card. I usually buy name brand memory cards for my digital photography work. My usual brand of choice is SanDisk. I use other name brands too, but the SanDisk cards have all served me well with no failures to date.

hf10

I was pricing the Class 6 (the speed I wanted for HD video work) SanDisk cards when I realized that the 8GB card I had been using all along was NOT a name brand card. That got me thinking, do I really need to spend the extra $$ on a memory card to get quality? Usually I don’t chance it. However, the proof was in my hand that I might be able to break tradition this time. So I did a little comparison shopping and opted to get a Transcend 16GB SDHC Class 6 card. It was literally half the price of the SanDisk card! It was also getting decent reviews on Amazon.com (a site where people can be brutally honest and not hold anything back when writing reviews). So I took a chance!

The results so far

It’s still early in this game. I’ve only been using the new Transcend cards for about 2 weeks now. However, they’ve performed perfectly. Again, it’s early and ANY card can die at any time. However, that’s the point! Any card can die at any time! So if you have a decent not so known brand that works and is compatible and seems to have a low failure rate as far as the reviews go, why not save the money? I did just that! I bought TWO of the 16GB SDHC class 6 cards for the price of ONE SanDisk card. So far so good! If the card ever dies I will report back here.

Once I record my video footage, I simply pop the memory card out of the Canon HF10 and pop it into my SanDisk 12-in-1 card reader on my Mac Pro. From there I fire up Premiere Pro CS4 and edit right off the card in the native AVCHD format. I will never go back to tape again! This workflow totally rocks! See it in action here:

[flv:http://media.libsyn.com/media/cspodcast/podcast-PR-AVCHD.mp4 625 353]

Here’s what I can record at with a 16GB SDHC card on the VIXIA HF10:

17FPs FXP (highest quality setting) 2 hours 6 minutes

12FPs XP+ 2 hours 53 minutes

7FPs SP 4 hours 48 minutes

5FPs LP 6 hours 8 minutes

Check out all of my latest gear recommendations here.

Digital Video: Moving to Tapeless Workflows

Last year I wrote a post out of frustration called “Just say no to HDD and MiniDVD camcorders.” The industry seemed hell bent on moving away from the the MiniDV standard that we had all come to know and love and instead turn the world of video into the wild wild west. Every manufacturer started doing their own thing and moving away from standards that were tried and true. The rush was on to try to become the leader in High Def digital video. It was extremely frustrating at the time because unknowing consumers were becoming the “beta test bed” for these manufacturers who were throwing everything they could out there to see what would stick. The biggest frustration was getting a camera that recorded in a format that wasn’t easily edited.

I did nibble at the HD bait and I purchased a Sony HDV camera. This camera could record in both DV and HDV. It was still taped based and still had Firewire (i-Link). However, after my first experience of the long rendering time to get HDV down to DV for burning to a DVD, I said “what’s the point?” I might as well be shooting in DV.” So I sold my Sony on eBay and continued to shoot in DV on my older gear. Don’t get me wrong, I’m a fan of technology and nothing would please me more than to move off of tape. However, the problem was that there were no real tapeless standards back then. So my answer was to continue to shoot in DV and use an external hard drive attached right to my camera to have the best of both worlds (standard DV for editing and tapeless forƂĀ convenience). I absolutely LOVE the Focus Enhancements Firestore FS-4 DTE Drives. These drives let you record your DV or HDV footage right to a external hard drive attached to your camera’s Firewire port and then you can attach the drive right to your computer and copy the file(s) over. It’s MUCH FASTER than the time it would take to download form tape in real-time.
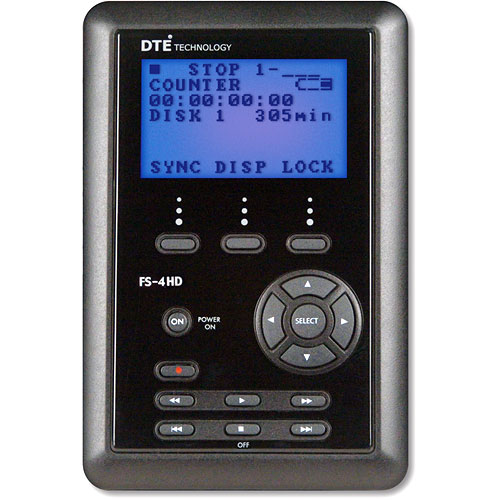
These drives rock! However, they’re add weight and a certain amount of bulkiness to your camera setup, especially if you’re using a little handheld camera. I’ve never understood why Sony or Canon didn’t just build a “removable” drive into their camcorders. Life would have been so much simpler.

So let’s fast forward to today

The dust has settled a little. The industry seems to have settled on AVCHD as the format of choice in the consumer space (at least for now). My new camera is the Canon VIXIA HF10. This camcorder can record HD (1920×1080) video to either its built-in 16GB of flash memory or to an SD/SDHC card.
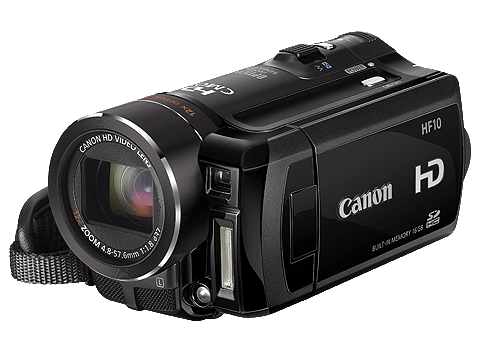
I tried it out for the first time during Photoshop World Vegas. This was the camcorder I used to shoot the Keynote video. I wasn’t concerned about shooting in HD. I was really interested in seeing how this camera would perform in post production. I was actually shocked at how well it “just worked.” I got back to my hotel room that day and just connected the HF10 to my MacBook Pro via the supplied USB cable. I transferred the footage over and just started editing it. Speaking of editing…

The editing software has caught up

Another frustration I had last year was that none of my editing apps would edit the footage from these tapeless cameras. Now all of my apps have caught up. My editing app of choice is Adobe Premiere Pro. The New Premiere Pro CS4 now edits natively in AVCHD.
The CS3 version was leading the pack in the pro arena with native support for XDCAM EX, Panasonic’s P2 cameras and the hot new RED One. Now that Premiere Pro CS4 supports editing files from the latest tapeless formats, includingĀ RED, AVCHD, P2, XDCAM EX and HD, natively, without transcoding or rewrappingƂĀ plus all of the legacy formats (DV, HDV, etc.), there is no better choice for tapeless workflows IMHO.

Everyone is up in arms about the New MacBook – missing Firewire – KIA!

There have been many many heated posts over Apple’s decision to remove Firewire from the New MacBook. We’re talking about the consumer version, not the MacBook Pro which still includes a single FW 800 port. While I’m a fan of Firewire and would NOT want to lose it on any of my Macs, I can actually see why Apple removed it from the MacBook. If you look at where the industry is going in the consumer space, it’s moving AWAY from Firewire, not towards it. All of the new tapeless camcorders use USB, not Firewire. Firewire had been used in the consumer space mostly for working with video. So if the new consumer cameras don’t do Firewire, then why should the new consumer MacBook? Before you start with the hate-mail/comments, I get it (I’m on your side, I know, I know)! I know that Firewire has other IMPORTANT uses such as Target Disk Mode, fast Migration Assistant transfers, fast portable drives, working with audio gear, etc. and again these are the reasons why I would NOT want to lose my Firewire port on my MacBook Pro. However, if you’re NEW to the Mac (which according to Apple, 50% of the people buying Macs in Apple stores are), then you’re not going to miss these things, because you wouldn’t have known they were there in the first place. So I can see it from their perspective, which doesn’t mean I like it, it just means I understand it. Breathe! It will be OK. I remember when the first MacBook Pro didn’t come with Firewire 800! Pros screamed LOUDLY and the next thing you know, Firewire 800 made a come back on the next rev. So if enough people scream and more importantly don’t buy the new MacBook, then Apple may reconsider. It will be interesting to watch.

The Bottom Line – Is the water safe?

While the Canon HF10 worked as advertised (it is my camcorder of choice for travel) and I now have a great editing app to support it, I’m still not quite ready to make an investment in swapping out my pro-sumer gear. I’m still happy with the results I’m getting from my DV based Sony VX2000. The VX2000 coupled with the Firestore drive gives me everything I need. If I were to move up to HD for my event video work, the problem would be that I would still be delivering the final video on DVD, since most people have not moved up to Blu-ray yet. If that’s the case, then I might as well stick to widescreen standard def. Once Blu-ray becomes more mainstream (players down to the $100 or less range). I’ll take another look and see what the market is like then.

Should you buy a tapeless camera? Well that depends on your needs. If you already have a video solution that’s working, I would caution you to pause and take a look at what you hope to gain? In the consumer space these new AVCHD cameras are pretty sweet. Manufacturers are bypassing hard drives altogether and using flash memory instead. No moving parts and because they don’t use tapes (or hard drives), they are getting to be quite small. That’s a big plus for travelers. Also now that the newer ones support removable cards like SD cards, they are much more feasible to take on a trip because you won’t be totally relying on the built-in memory, which could fill up before you got back home. I still say STAY AWAY FROM CAMERAS THAT RECORD DIRECTLY TO A DVD or BLU-RAY DISC! These cameras SUCK when it comes to needing to edit your footage. They were designed for the person who wants to shoot and playback the footage. If that’s all you want to do, then go for it. However, if you want the ability to edit in your computer, then avoid these models like the plague.Ƃ

If you’re a video pro, then you’ll have more choices to make! Should you go RED, should you go P2 or should you go XDCAM? Will you be locked into some proprietary workflow? If you’re not using Premiere Pro (and you should be šŸ™‚ ), will your software edit this footage natively? So my bottom line advice is the water is safer, but proceed with caution. You can also decide to just sit this one out. It will only continue to get better.

Check out this video from my DV guru, Dave Helmly on editing AVCHD footage in the New Premiere Pro CS4. He takes it from beginning to the end and even spits out a Blu-ray and other formats!

[flv:http://media.libsyn.com/media/cspodcast/podcast-PR-AVCHD.mp4 628 353]

You can see more CS4 how-to videos on my Creative Suite Video Podcast or on Adobe TV.
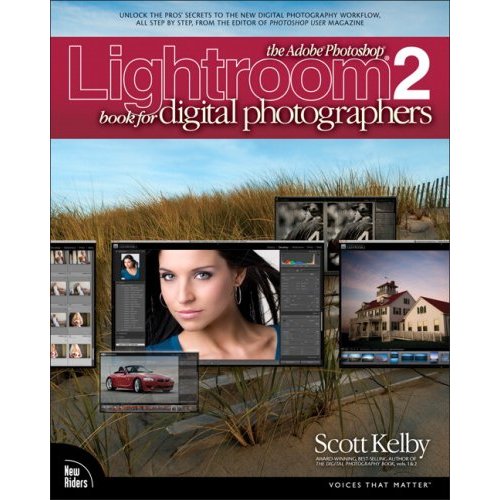
Lightroom 2 book for Digital Photographers


People always ask me, "where do you find the time to do all that you do?" The truth of the matter is that there are only so many hours in the day. While I do love technology, have a full-time job and a family, there really isn’t enough time to do all the things that I want to do. So that means that I do have to give some things up. One of the things that I almost never have time to do is to read books. I write them, but rarely have time (make that, never have time ) to read any. So when I do read a book, it better be good and I better learn something.

That leads me to my buddy Scott Kelby’s latest Lightroom 2 book for Digital Photographers. While I do work for Adobe and use Adobe Photoshop Lightroom 2 almost daily, that doesn’t mean that I know (or remember) everything there is to know about it. I got a chance to spend some time with Scott’s book this past weekend. Scott’s new book is a complete rewrite of his first book. Lightroom has changed in so many ways and Scott wanted to make this edition even better than the first, so he pretty much started from scratch.

The step-by-step instructions are clear and to the point. The photography is great too. However, the one thing that really stands out for me in this book is that he ends each chapter with a page or two of "Quick Tips." Like I said, I already know how to use Lightroom. I use it all the time. So these tips are the little things that are often missed when you’re self-taught.

For example, here’s a Grayscale Conversion Tip from page 288:

If you click the word "Grayscale" in the HSL/Color/Grayscale panel, it converts your photo to grayscale, and it’s kind of a flat-looking conversion, but the idea is that you’ll use the color sliders to move when the photo is now in black and white? Try this: once you’ve done your conversion and it’s time to tweak those color sliders, press Shift-Y to enter the Before & After split-screen view (if it shows a side-by-side view instead, just press Shift-Y again). Now you can see the color image on the left side of the screen and the black and white (grayscale) on the right, which makes it much easier to see which color does what.

It’s little tips like this that I love and this book is full of them.


The Bottom Line

If you’re using Lightroom 2 and you want to learn more about it, this is your book. Amazon has it for $29.69.